

@Jan--Wow! That 'tone down' made quite a difference. Subtle, but noticeable. And it appears to have 'blended' the edges a wee bit more. As always, looking forward to what's next.
Keith
Hosted by Darren Baker
Dragon Panther D (#7494)

woltersk

Joined: May 27, 2003
KitMaker: 1,026 posts
Armorama: 654 posts
Posted: Sunday, January 20, 2013 - 02:05 AM UTC

tread_geek

Joined: March 23, 2008
KitMaker: 2,847 posts
Armorama: 2,667 posts
Posted: Monday, January 21, 2013 - 09:37 AM UTC
@PedroA - Pedro,
Thanks for dropping in and for the advice. This is the first time that I have tried this with an airbrush and while I am pleased with the potential results I also know that I made a few mistakes that will need correcting
@woltersk - Keith,
Thanks and I'm glad that you think it looks okay. I originally tried something similar using an old model with a somewhat similar colour scheme. That test involved using the base colour (Dark Yellow) as the "filter" in a 50:50 mix of paint and thinner and spraying from a fair distance so that the mixture sort of dusted over the camo areas. While not perfect the test confirmed the potential.
--------------------------------Update---------------------------
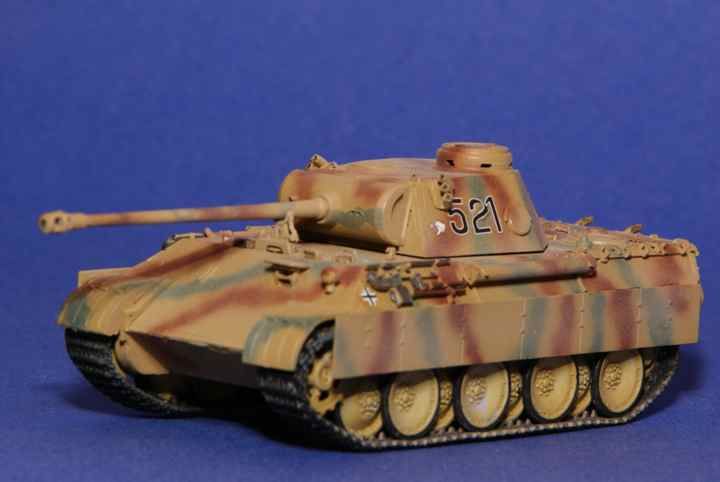
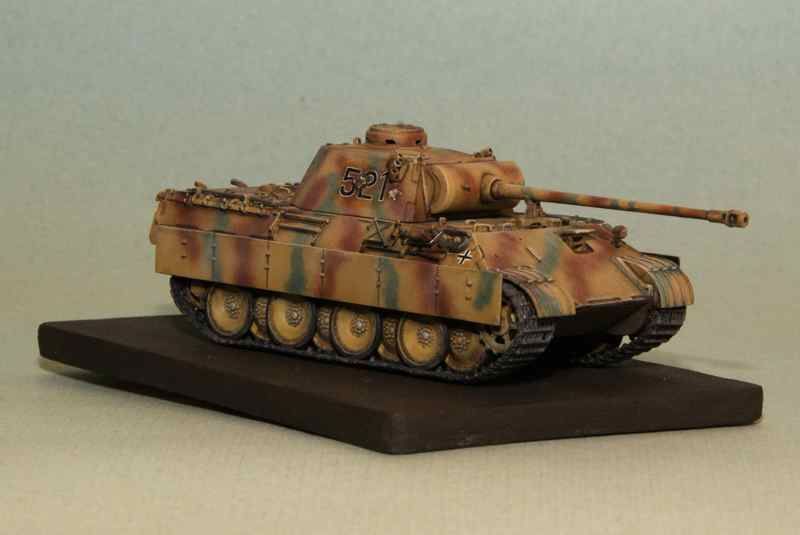
At this point there is only one part remaining to add to the Panther and that is the jack operating handle. All other parts (towing shackles, jack, rear night driving light...) are now in place.
I tidied up a few areas that needed some attention and coated areas with a mixture of Future with Tamiya X-21 Flat Base that would receive decals. I've used this mixture before and it creates a semi-gloss base for the decals while making them invisible after a second coat is applied. Decals are now all on and I should now be able to proceed to detailing and weathering.
Just one note of warning to prospective builders. If you choose a marking scheme that uses the large turret numbers, be prepared to take some time and a lot of coats of MicroSet to get them to snuggle down around the side pistol ports.
Cheers,
Jan
Thanks for dropping in and for the advice.
This is the first time that I have tried this with an airbrush and while I am pleased with the potential results I also know that I made a few mistakes that will need correcting@woltersk - Keith,
Thanks and I'm glad that you think it looks okay. I originally tried something similar using an old model with a somewhat similar colour scheme. That test involved using the base colour (Dark Yellow) as the "filter" in a 50:50 mix of paint and thinner and spraying from a fair distance so that the mixture sort of dusted over the camo areas. While not perfect the test confirmed the potential.
--------------------------------Update---------------------------
At this point there is only one part remaining to add to the Panther and that is the jack operating handle. All other parts (towing shackles, jack, rear night driving light...) are now in place.
I tidied up a few areas that needed some attention and coated areas with a mixture of Future with Tamiya X-21 Flat Base that would receive decals. I've used this mixture before and it creates a semi-gloss base for the decals while making them invisible after a second coat is applied. Decals are now all on and I should now be able to proceed to detailing and weathering.
Just one note of warning to prospective builders. If you choose a marking scheme that uses the large turret numbers, be prepared to take some time and a lot of coats of MicroSet to get them to snuggle down around the side pistol ports.
Cheers,
Jan
PanzerAlexander

Joined: February 17, 2010
KitMaker: 625 posts
Armorama: 608 posts
Posted: Thursday, January 24, 2013 - 08:30 AM UTC
Great guide. I'll certainly look it up when I decide to build a similar Panther variant.
I used to apply buff to tone down the contrast of the camo scheme too and I remember that the buff color could trick the eye because after drying it became more ''whiter'' and if you dont know this it could lead you to overapplying the effect.
Pedro is right about giving many light coats and stopping just a step before beeing satisfied.
P.A.
tread_geek
Joined: March 23, 2008
KitMaker: 2,847 posts
Armorama: 2,667 posts
Posted: Thursday, January 24, 2013 - 08:59 AM UTC
Quoted Text
...remember that the buff color could trick the eye because after drying it became more ''whiter'' and if you dont know this it could lead you to overapplying the effect.
Pedro is right about giving many light coats and stopping just a step before beeing satisfied.
Thanks for the kind words,Alexander. As I mention earlier, this was my first attempt at doing this and I made a few mistakes both on practice cardboard and on parts of the Panther (where I had to start from the beginning to correct them). I take what Pedro and you say quite seriously and have tried to refine the technique. This is a case where definitely many very light coats must be applied over time. I believe that wing_nut also mentioned the same during his earlier Tiger II build and that's where I got the original idea (I think!).
Cheers,
Jan
tread_geek
Joined: March 23, 2008
KitMaker: 2,847 posts
Armorama: 2,667 posts
Posted: Monday, January 28, 2013 - 09:27 AM UTC
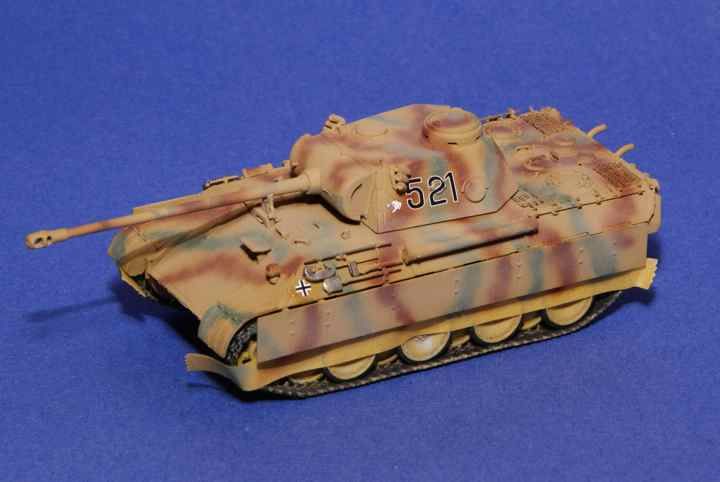
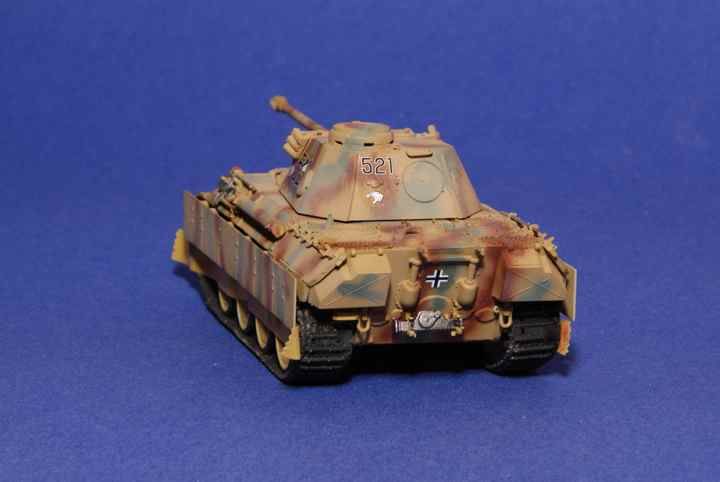
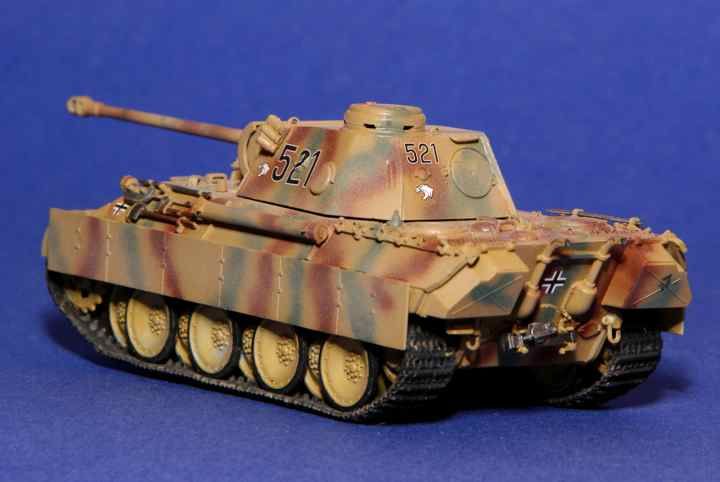
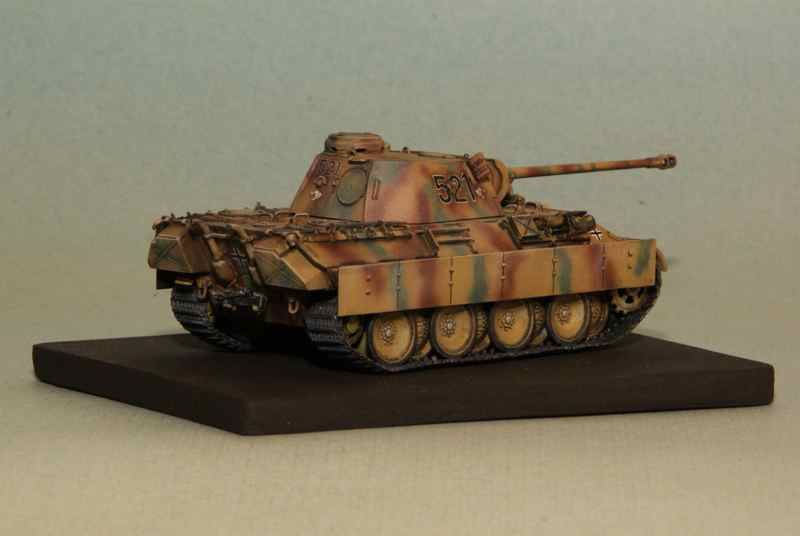
The last part(s) and all decals are on (and sealed) and the actual build part is over, as far as I'm concerned. I've applied a couple of initial matt varnish coats, completed painting all the tools and started accenting (highlights, shadows) on a number of parts. Obviously there is still more weathering to do and toning down of the decals. After that, one more matt coating at least.
Cheers,
Jan
Cheers,
Jan

weathering_one
Joined: April 04, 2009
KitMaker: 458 posts
Armorama: 456 posts

Posted: Monday, January 28, 2013 - 03:43 PM UTC
Jan,
I love the way this one is turning out and especially the SBS on the camo! I didn't think the kit was that great at first but your additions really added to it. It's quite something that you used an airbrush for all the camo. Could you comment on paint dilution, air pressure, airbrush make and any other pariculars about the process?
Regards,
AJ
tread_geek
Joined: March 23, 2008
KitMaker: 2,847 posts
Armorama: 2,667 posts
Posted: Tuesday, January 29, 2013 - 06:18 AM UTC
@weathering_one - AJ,
Thanks for taking the time to comment and the kudos on this build. The further that I progressed on this build, the more I started to see its potential.
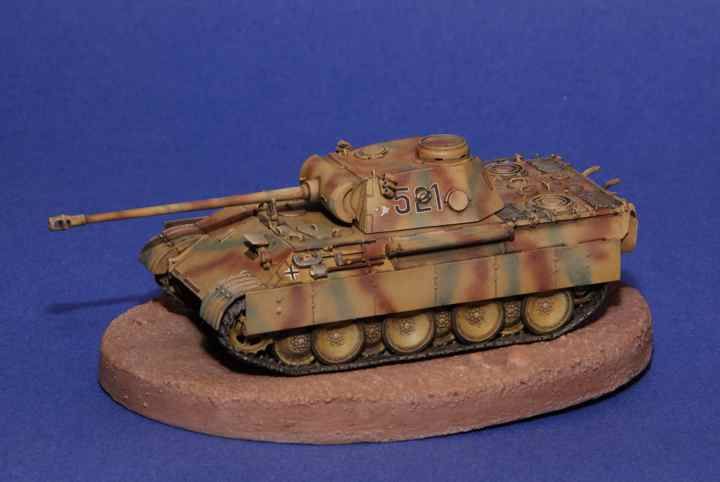
As to your question(s), I presume you mean about the vertical stripes! I used an Iwata Eclipse HP-CS airbrush that comes with a .3 mm needle. All the camo colours were done with Tamiya acylics, the "Dark Yellow" was sprayed as the base colour with no particular preparation other than adding a bit of thinner. The red-brown and green stripes paint was thinned to the consistency of milk but the proportions vary depending on the age and thereby thickness of the paint. I mix the paint in a small receptacle until when you slosh it up the container's sides, the paint doesn't "stick" to the sides too opaquely. It's very much a trial and error thing. This was the first time I attempted this type of camo with the airbrush so it involved a lot of practice on both cardboard and an old model.
The Iwata is a dual action airbrush and the needle seating allows for a degree of adjustment as to how it sits against the nozzle. Normally it should sit tight up against the nozzle (no paint flow without pulling back on the activating lever) but in this case I set the point back a bit to allow paint to flow without the lever being pulled back. Spray range from nozzle to subject was about .5-.75 inches (12-18 mm) and air pressure was set to about 18 psi. Hope this helps!
Cheers,
Jan
Thanks for taking the time to comment and the kudos on this build.
The further that I progressed on this build, the more I started to see its potential. As to your question(s), I presume you mean about the vertical stripes! I used an Iwata Eclipse HP-CS airbrush that comes with a .3 mm needle. All the camo colours were done with Tamiya acylics, the "Dark Yellow" was sprayed as the base colour with no particular preparation other than adding a bit of thinner. The red-brown and green stripes paint was thinned to the consistency of milk but the proportions vary depending on the age and thereby thickness of the paint. I mix the paint in a small receptacle until when you slosh it up the container's sides, the paint doesn't "stick" to the sides too opaquely. It's very much a trial and error thing. This was the first time I attempted this type of camo with the airbrush so it involved a lot of practice on both cardboard and an old model.
The Iwata is a dual action airbrush and the needle seating allows for a degree of adjustment as to how it sits against the nozzle. Normally it should sit tight up against the nozzle (no paint flow without pulling back on the activating lever) but in this case I set the point back a bit to allow paint to flow without the lever being pulled back. Spray range from nozzle to subject was about .5-.75 inches (12-18 mm) and air pressure was set to about 18 psi. Hope this helps!
Cheers,
Jan
tread_geek
Joined: March 23, 2008
KitMaker: 2,847 posts
Armorama: 2,667 posts
Posted: Thursday, January 31, 2013 - 07:45 AM UTC
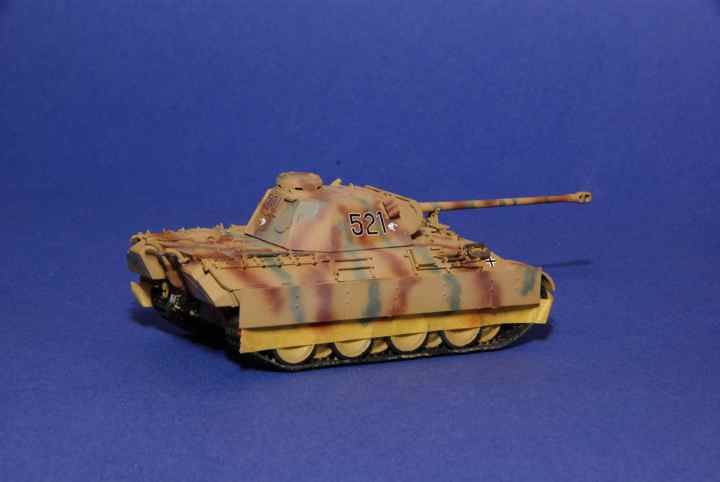
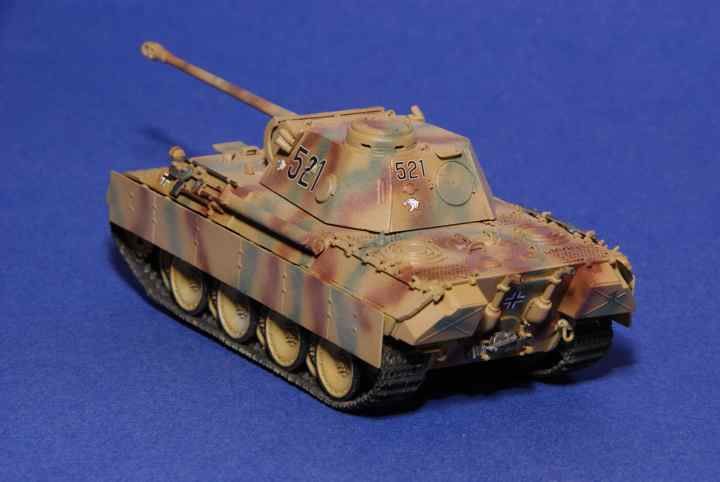
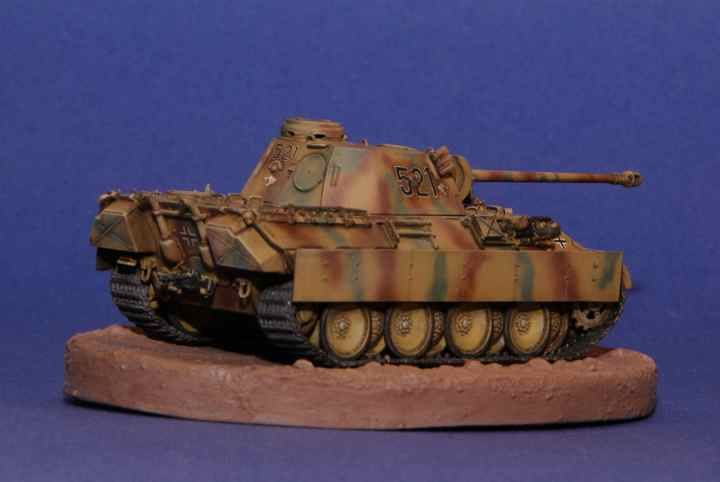
With this update I have progressed on the detailing and some weathering. This is a slow process and I'm trying to use what was learnt with the Neubau-Fahrzeug build. I will still need to create a suitable ground cover on the base. Once that is done, I'll see about touching up a few points in the future.
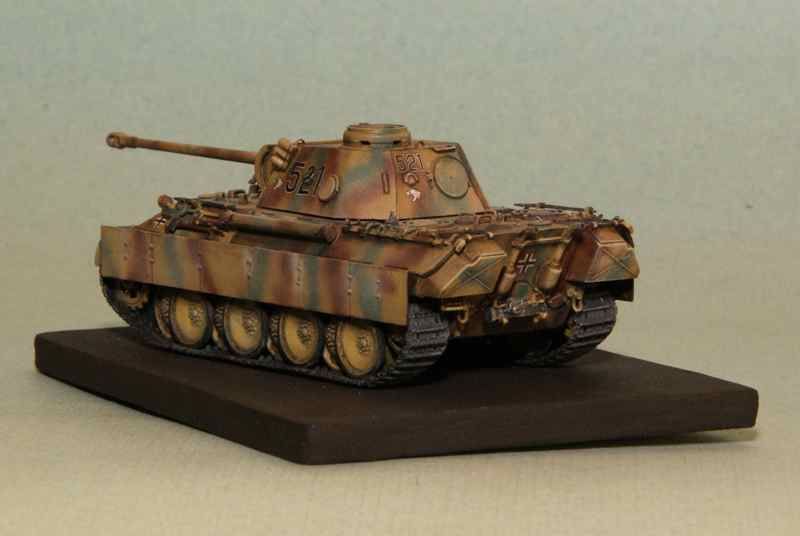
Progress on this build will slow down a bit as I try to rotate through my other outstanding ones.
Cheers,
Jan 
Progress on this build will slow down a bit as I try to rotate through my other outstanding ones.
Cheers,
Jan

ParanoAndroid

Joined: July 10, 2008
KitMaker: 44 posts
Armorama: 43 posts
Posted: Monday, February 04, 2013 - 08:27 AM UTC
Nice work!
Accurate a subtle! I like it a lot! Keep up the good work!
Alex!
http://alexbenvenuti.blogspot.fr/
Accurate a subtle! I like it a lot! Keep up the good work!
Alex!
http://alexbenvenuti.blogspot.fr/

tread_geek
Joined: March 23, 2008
KitMaker: 2,847 posts
Armorama: 2,667 posts
Posted: Tuesday, February 05, 2013 - 07:03 AM UTC
@ParanoAndroid - Alex,
Thank you for taking the time to comment and I am glad that you found this build interesting. If you have any questions, please feel free to ask.
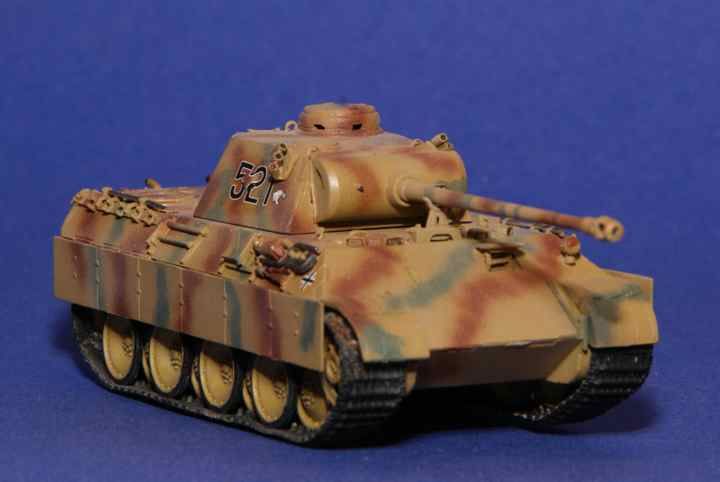
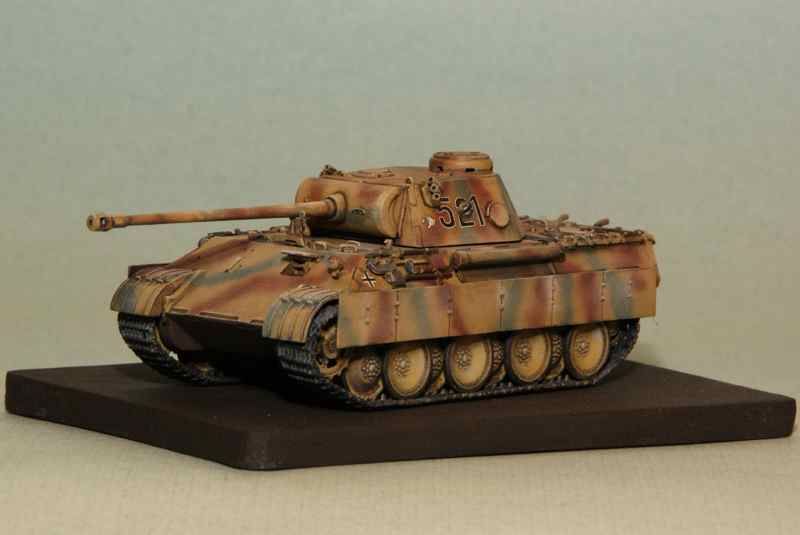
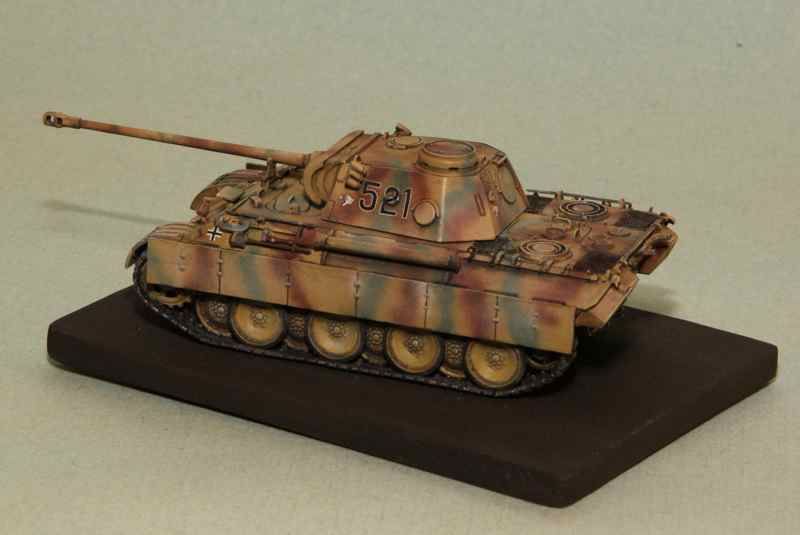
I have done a bit more finishing on the Panther, primarily trying to tone down the markings but also have been tinkering with bases for it and other of my builds. As with almost everything that I do, the base is an experiment. It's actually the top from an inexpensive small gift box from a "Dollar Store." It is a quite heavy cardboard and I have used DecoArt "Stucco" texture medium to coat the upper surface and sides. Before applying the medium I coated the entire base in a flat polyurethane sealer.
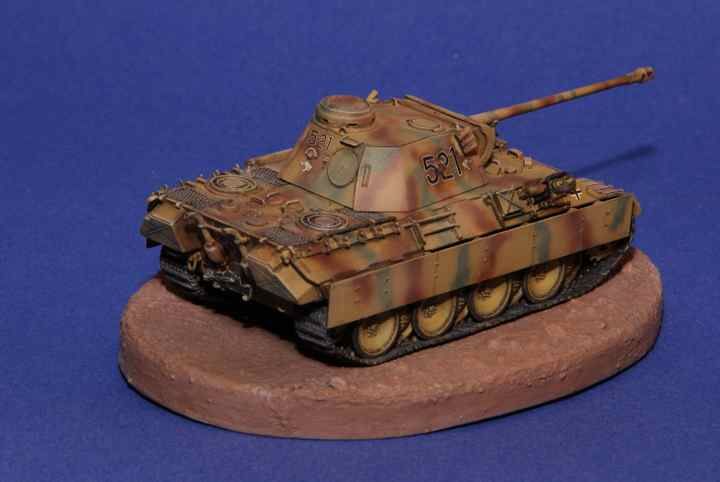
The texture medium on the base was also coated with acrylic paint and is by no means done.
Cheers,
Jan
Thank you for taking the time to comment and I am glad that you found this build interesting.
If you have any questions, please feel free to ask. I have done a bit more finishing on the Panther, primarily trying to tone down the markings but also have been tinkering with bases for it and other of my builds. As with almost everything that I do, the base is an experiment.
It's actually the top from an inexpensive small gift box from a "Dollar Store." It is a quite heavy cardboard and I have used DecoArt "Stucco" texture medium to coat the upper surface and sides. Before applying the medium I coated the entire base in a flat polyurethane sealer.The texture medium on the base was also coated with acrylic paint and is by no means done.
Cheers,
Jan
madmax5510

Joined: May 06, 2008
KitMaker: 354 posts
Armorama: 343 posts
Posted: Monday, March 11, 2013 - 02:45 PM UTC
Jan,
Like i see,you have been a very busy man:Pak 40,Sdkfz 260,Neubau farzeug,Panzer III N,and this Panther D...a lot of wonderfull work.
Like i see,you have been a very busy man:Pak 40,Sdkfz 260,Neubau farzeug,Panzer III N,and this Panther D...a lot of wonderfull work.
tread_geek
Joined: March 23, 2008
KitMaker: 2,847 posts
Armorama: 2,667 posts
Posted: Tuesday, March 12, 2013 - 03:26 AM UTC
@madmax5510 - Dani,
Thanks for the compliment(s) and I really appreciate you having a look. It has been a busy time for me with trying to prepare models for this years model shows. Unfortunately, this Panther just isn't ready as there is something that it still needs that I can't quite identify at this time.
Cheers,
Jan
Thanks for the compliment(s) and I really appreciate you having a look.
It has been a busy time for me with trying to prepare models for this years model shows. Unfortunately, this Panther just isn't ready as there is something that it still needs that I can't quite identify at this time.Cheers,
Jan
 |

WEB HOSTING BY


Copyright ©2021 Armorama and Kitmaker Network, a subsidiary of Silver Star Enterprises
All Rights Reserved. Please read our Conditions of Use and Privacy Policy.
All Rights Reserved. Please read our Conditions of Use and Privacy Policy.