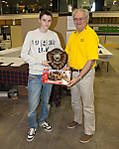
_GOTOBOTTOM
Dioramas: Small Scale
Dioramas of subjects smallers than 1/32 scale.
Hosted by Darren Baker
War in Chechnya - A 1/72nd scale Diorama
vertigo
Visit this Community
Dublin, Ireland
Joined: November 11, 2004
KitMaker: 388 posts
Armorama: 113 posts
Posted: Friday, September 07, 2012 - 06:26 AM UTC
Thanks the links Euan but I think I'll let it go this time.

Stowage Option I

Although most pictures of Russian tanks in action would indicate a distinct lack of external stowage I may have found two pictures that are the exception to the rule.

# Picture One
# Picture Two

Now the second picture is a real interesting one. In fact if you had the room it might make for an interesting diorama. I think I’ll save a copy of it actually.

Anyway, as you can see from the picture both the tank and the BMP in the middle of the road are kitted out with extra stowage, mostly crates from the look of them. It also looks like the tank has a canvas tarp on the back of the turret too. I haven’t been able to figure out what that vehicle is on the left hand side of the picture, anyone have any ideas?

Besides the diorama potential that picture provides it is also a boon because I do want to add some stowage to the T-80. One side of the turret is still pretty bare and a couple of bags will help fill up the space. The Legend set also came with a couple of crates so now I have an excuse to use one.


So here is what I’m thinking of adding; just two bags and a crate. One of the bags is a rucksack and the other looks like a bundled up tarp. I’m also adding a wooden crate to the back of the turret. Of course I’m still committed to adding a homemade tarp over the snorkel. The one in the picture is just another experiment; this time I didn’t use as many layers as before and now more shape is showing through which is nice. The stowage is all attached temporarily with PVA glue so that I can remove it easily.

The area between the baggage and the smoke dischargers will have a three digit decal fitted as will the large stowage box on the other side of the turret. Unsurprisingly the kit decals have yellowed with age but as they used to be white they wouldn’t be much use. White decals don’t blend well with white camouflage. I do have some black decals left over from an AH-1 kit that I think should work perfectly.

So, what does everyone think of the stowage layout?
DOntos
Visit this Community
England - South East, United Kingdom
Joined: July 26, 2012
KitMaker: 89 posts
Armorama: 72 posts
Posted: Friday, September 07, 2012 - 09:59 AM UTC
Hi Alcatraz,

This is looking brilliant, you've really done a number on this kit since i last checked!

Il try and post a pic of my two attempts at this kit, as it didn't come out very well the 1st time i used it only as painting practise the 2nd.

Looks like it turns into a amazing model with all your additions and fixes though, the stowage looks awesome too!

Ive heard Revell's M-60 is a easier build than the T-80 though!

Keep up the good work!
Dan
vertigo
Visit this Community
Dublin, Ireland
Joined: November 11, 2004
KitMaker: 388 posts
Armorama: 113 posts
Posted: Friday, September 07, 2012 - 09:52 PM UTC
The stowage is nice, a very good set considering I only paid €7 for it. They've even managed to get a wood grain effect onto the crates.
vertigo
Visit this Community
Dublin, Ireland
Joined: November 11, 2004
KitMaker: 388 posts
Armorama: 113 posts
Posted: Saturday, September 08, 2012 - 08:45 PM UTC
Prime Details

Another small update from myself and this time there is some paint involved.


Halfords Grey is my primer of choice at the moment. It’s a nice clear shade of grey and the can is very generous in size. I’ve used Humbrol primer in the past but the can is very small for the price locally and just runs out to fast. I’ve also used Games Workshop primer in the past but I’ve found it to be very fumy and my apartment isn’t greatly ventilated.

After attaching the wire which, as it turns out, is not actually wire but tinsel I was afraid the turret and hull would come out looking messy and in need of sanding. I’m happy to say that everything came out looking pretty well and it shouldn’t need extra work.

Before I primed the T-80 I gently popped off the drivers hatch and repositioned it so that I could place one of the Armory figures there. I decided that since it may be possible to see the interior past the figures that I should at least put down an interior colour. This, of course, required some research but I finally came across these pictures which show the interior as being a greyish blue colour.


For the interior colour I brushed on Vallejo Intermediate Blue which pretty much does the trick. Vallejo paints are great for hand painting, they brush on very smooth.


When I had finished with the interior I noticed I hadn’t finished with the gunners vision block. I thought about squaring off even more but I decided against it. The files I have are just too large for such a small job; I really need to invest in a mini-file set. Instead I turned the turret over and put down a drop of super glue into the impression for the vision block. I left that to dry and afterwards flipped the turret back over, standing it with the cannon pointing straight into the air.

Taking a paintbrush I covered it in Revell Contacta Clear and dropped a dollop right into the hole for the vision block on top of the dried super glue. I left it to dry and did it again to build up the glue. Revell Contacta Clear dries clear and so I was left with a pretty decent lens effect. It actually looks much better in person than in the picture.


Finally I’ve taken some time to paint the stowage up a little. I’ve started with the one above which is either a big bag full of stuff or a bundled up tarp. Either way I decided to go for a light greyish blue colour so I painted it with Vallejo Blue Grey Pale and followed that up with a wash using Citadel Shade Nuln Oil. Some of you might be using Citadel Wash Badab Black, well in their new paint system it has been replaced by Nuln Oil. Despite having an unpronounceable name, so much so that I’ve taken to calling in Nun Oil, it’s actually better than Babab Black. It’s thinner and has much better flow characteristics. The price hasn’t changed either.

I’m still not fully decided on the colour of this piece. I’ll have to wait until the tank is camouflaged to see if the looks right.


Next up is the crate for the back of the turret. I painted this with Citadel Snakebite Leather and again have given it a wash with Nuln Oil. Games Workshop makes a great range of paints that are rich in colour as well as a great range of washes. Snakebite Leather is no longer available but has been replaced by Balor Brown in the new paint system.

I have to say that I really like the crate. Although it is slight there is some wood grain effect engraved into the resin which is a nice touch from Legend. I’m very happy with the stowage set although I find the resin has a funky smell to it that bothers me if I’m working with it for too long.

Anyway, next up I’m going to start painting the T-80 using a forced contrast technique from the Braille Scale Modelling book. Hopefully it works out.
SovietBoy22
Visit this Community
Scotland, United Kingdom
Joined: September 04, 2011
KitMaker: 461 posts
Armorama: 452 posts
Posted: Tuesday, September 11, 2012 - 04:47 AM UTC
Looking Great So Far. Keep It Up.
Thanks
Euan
vertigo
Visit this Community
Dublin, Ireland
Joined: November 11, 2004
KitMaker: 388 posts
Armorama: 113 posts
Posted: Tuesday, September 11, 2012 - 08:29 AM UTC
Thanks, I'm working on the camouflage scheme at the moment which should be a two-part update but I'm going to be travelling down to the IPMS Ireland Nationals on Friday so my mind is in two places.
vertigo
Visit this Community
Dublin, Ireland
Joined: November 11, 2004
KitMaker: 388 posts
Armorama: 113 posts
Posted: Wednesday, September 12, 2012 - 09:57 AM UTC
Forced Contrast

In painting the T-80 I’m trying to follow the techniques layed out in the Braille Scale Modelling eBook and the first one on the list is Forced Contrast.

Forced Contrast is a little like pre-shading on an aircraft. The idea is to put down a dark basecoat before your main colour. When you begin putting down the main colour you work from the centre of panels, or other logical areas, and slowly airbrush out to the edges. If all goes right you should be left with dark edges which provide a semblance of depth, shadow and contrast.

Before I continue I should mention this isn’t the first attempt at painting the T-80. Yesterday I tried out Forced Contrast and moved onto the Hairspray Technique. Then I camouflaged the tank with white and afterwards began chipping which quickly went overboard...

Basically I learned three things from using hairspray:

1. Hairspray really darkens down colours. The Olive Green paint coat I had originally given the T-80 went very dark very fast.
2. It’s very easy to go overboard with chipping. By the time I was done the T-80 looked like it had spent a year going through one long continuous bramble bush.
3. Beware using your partners hair products, they may just be overpoweringly scented...

Anyway, back to the task at hand. Obviously blacks and greys are pretty good as a basecoat for forced contrast but you’re not restricted there. If you’re doing a green tank you could try a dark green basecoat for example. You always have options.

I could’ve used the technique off of the Halfords Grey primer I had put down previously but I find that some greys tend to pull towards blue. It could just be my eyes playing tricks on me mind you. The Halfords Grey definitely seems to have a blue tinge to my eyes so I decided to go for a much darker grey.


The dark grey that I chose for the basecoat is Revell Aqua Color Tank Grey which is the darkest grey that I have. It’s gone on quite well considering the previous paint scheme that is underneath it, including hairspray.


Yesterday when I painted the tank I chose Revell Olive Green for the green coat but once the hairspray went on it went very dark and I didn’t like it very much. Today I mixed together Olive Green and Revell White to produce a much lighter green. In fact it’s quite a pale green I’ve put down but I’m hoping once the hairspray goes onto the model it’ll darken down and it’ll look proper.

The Forced Contrast didn't quite work though. As you can see from the pictures the shadows that are supposed to be there aren't. I'm going to put that down to two things:

1. My airbrushing skills need a bit of work.
2. My airbrush probably isn't suitable for subtle and fine paint work.

Still, you don't get anywhere without trying first and I might be able to improve on the technique in future builds.

The next step will be to put down a matt coat of varnish. Underneath these two layers of paint is hairspray from the previous painting attempt and I want to seal it off before I put down fresh hairspray and try chipping again. If I don’t put down the matt varnish I’m afraid once I begin chipping I might wear it down to far to the old paint coat which would not be desirable in the slightest.

However I probably won’t get another update up until next week as I’m travelling down to the IPMS Ireland Nationals on Friday and it’ll be a busy weekend.
vertigo
Visit this Community
Dublin, Ireland
Joined: November 11, 2004
KitMaker: 388 posts
Armorama: 113 posts
Posted: Wednesday, September 19, 2012 - 09:48 PM UTC
Hairspray Technique

I’m back and with another update although I wasn’t sure I’d make it this week. I spent a busy weekend at the IPMS Ireland Nationals and was quite chuffed to win a medal in the competition. Unfortunately I also contracted a pretty build cold that built up over the weekend so that by Sunday evening I was feeling terrible. I’m still trying to shake the cough.


During my last update I said that I was going to apply a matt coat to the T-80 before proceeding. I wanted to do this in order to seal in my previous attempt at using hairspray. I used Vallejo Matt Varnish straight from the bottle and applied it lightly with a brush.

In the picture above you may notice that around the engine deck, the drivers hatch and other areas of the tank that the grey is showing through. That’s forced contrast at work, providing a sense of shadow and depth to the model. Although in this case it is very slight and it won’t last long once the white goes on.


The hairspray that I’m using is Wella Silvikrin, apparently it produces a natural hold for... I really don’t care. I’m using it because it was already sitting in my bathroom. Otherwise I would have bought the cheapest possible brand I could find, possibly one without Parfum as an ingredient. Once I applied this I was engulfed in a sickly-sweet cloud that set my cough off something fierce.


I applied the hairspray in two quick passes and at a distance, not because of scented clouds of death but rather to ensure I did not build up a thick coat on the tank. It seems to me to be all too easy to coat a model very thickly with hairspray and lose detail in the process. It goes without saying that you do not touch the model just after application unless you fancy a nicely detailed and ridged fingerprint marring your work. Hairspray is effectively a form of glue used the combat the wind and the 1980’s so caution all round. Thankfully it does dry very fast but I’d still leave it for a couple of hours just to be sure.

The hairspray also goes down very glossy, as you can see, and one might be persuaded to try it out as an alternative to gloss varnish or Future. Do not be fooled though as the entire purpose behind the hairspray is that it reacts to heat. With a little hot water the hairspray comes right off taking the overlaying coat of paint with it. Many decal softening and setting solutions get hot as part of their process and would undoubtedly affect the hairspray resulting in a mess.


I gave the hairspray about an hour and thirty minutes to dry out before I gingerly poked it with a toothpick just to be sure it wasn’t still tacky. The camouflage scheme that I intend to use, which may well by fictional as that is a picture of an RC model, has most of the tank in white with green ribbons snaking across the vehicle. So, I broke out the Blu Tack and spend quite a while laying down the ribbons, just taking my time as I went. I pulled the Blu Tack out into long thin sections and then used a toothpick to flatten the edges to ensure I wouldn’t get any overspray or bleeding.


I used Revell Aqua Color White for the white and I misted in over the model in successive coats as I didn’t really want a bright white or a full looking white. The way I envisage this camouflage scheme is that the tank started out solid green with the white added later, possibly in a field depot, and as such is more easily damaged. I also didn’t bother painting the bottom of the tank in white as I presume the crew wouldn’t either for the same reason; no-one is going to see it.


Next came the fun part of slowing removing the Blu Tack and checking out the results. Of course some time has passed in order to let the white cure properly. The results, I think, are fantastic. There are only one or two small cases of overspray and because of what I’ll be doing next that is easily fixed. This is only my second time painting camouflage using the airbrush and I’m becoming more grateful for it with each successful use.

The Revell acrylics airbrush very well but they do need to be thinned a bit before use. A mixture of water and their own of brand thinner will sort that out. A little Vallejo Drying Retarder can be added to the mix to ensure it the paint doesn’t dry out as it passes through the airbrush.

For the next step, chipping of the hairspray, you’ll need three things:

1. A tub or bottle of warm water but nothing too hot either. This process needs to be conducted delicately, at least in 1/72nd scale, or you’ll quickly go too far.
2. A brush with short, sharp, stiff bristles in order to chip the paint. The best idea is to take one of your older banjaxed brushes and clip the bristles down close to the handle.
3. Patience. Think about where you want to do the chipping and how you want the tank to look at the end and then carefully proceed.


I decided to go for some generally large paint flaking across the tank with more worn down wear and tear around the hatches, storage boxes and side skirts. I had a lot of fun doing this although I realise I could’ve gone for a more subtle approach. I like to think it works though.

Basically what you do is take your paintbrush and dip it in the water and then dip it onto some paper towel to take away the excess water because what you don’t want is water running all over the model. Next pick an area you want the chipping to appear and either begin gently stabbing it with the brush or rubbing it. It really depends on the effect you’re going for. Either way the warm water causes the hairspray to melt taking the overlaying coat of paint with it. The reason I stated patience above is because it is very easy to go on a chipping frenzy and suddenly you’re left with Tankenstein or Aerozilla. The beauty of using this technique though is you can be as subtle as you like and just produce some scratches here and there if you wish; it’s all down to personal choice really.

There are a few alternatives to using the hairspray technique. You can use salt weathering to produce a more random look of paint flecking. Alternatively you can brush down small areas of liquid mask and then remove them when required to produce the desired effect. I imagine any liquid mask would work but I know that AK interactive brought out something recently especially for doing just this.

My next update will involve detail painting various parts of the T-80 so that is where it will start coming to life. However first I think I’ll put down another matt coat and seal the hairspray in again just for safety.

Thanks for watching.
vertigo
Visit this Community
Dublin, Ireland
Joined: November 11, 2004
KitMaker: 388 posts
Armorama: 113 posts
Posted: Monday, September 24, 2012 - 08:51 PM UTC
I wonder, would anyone have tips on painting realistic tank tracks? I'm fairly certain the T-80 has metal tracks and I want to pull off the right look with them.
vertigo
Visit this Community
Dublin, Ireland
Joined: November 11, 2004
KitMaker: 388 posts
Armorama: 113 posts
Posted: Wednesday, September 26, 2012 - 10:08 PM UTC
Detail Painting – Part I

In between some other commitments which have been keeping me busy I’ve been doing a little detail painting. It’s been slow going as I’ve mostly been hung up on painting the tracks and the rubber rims on the road wheels. Thanks to the tips and suggestions offered up to me across a couple of forums I’m now back on track... no pun intended.

When detail painting I like to use Vallejo Model Color and Vallejo Panzer Aces as they’re both very brush friendly and rich in colour too. Of course Revell Aqua Color and Games Workshop paints stand by to fill in where necessary.


I started off with the tow cable on the front hull plate of the T-80. It was painted with Vallejo Oily Steel and the bracket blocks that hold it to the hull were painted with Vallejo Natural Steel, though you couldn’t tell. I followed that up by giving it a wash with Citadel Shade: Nuln Oil to darken and dirty up the metal. I can’t recommend Citadel Shades enough, they’re great washes with a nice range of colours and the flow characteristics are great too. If you can get them locally you should give them a try.


Next I started on the headlights. Revell recommended a silver colour and as both of my Vallejo steel paints are a little on the dark side I decided to use Revell Aluminium. Now I wanted to create a lens effect so I took a brush and coated it with a small dollop of Revell Contacta Clear. I carefully placed the dollop onto the headlight after standing the T-80 upright. The pictures may not do it justice but it looks good in person.


The periscopes were painted with two coats of Vallejo Intense Blue and then I coated all three periscopes with Revell Contacta Clear for the glass effect again.


Finally I painted the rear lights with Vallejo Flat Red and again used Contacta Clear for the lens effect. For the exhaust I painted the each little square black and then gave it a wash with Nuln Oil. After it had dried a short while I took the same brush I used for chipping the hairspray and rubbed it back and forth to wear the paint back down. Later on I’ll be adding some weathering around the exhaust, soot stains and so forth.

At the moment I’m working on the tracks and the wheels and then I’ll start on the turret. October is going to be a bit busy for me so the updates will be slow in coming but they will keep coming.
 _GOTOTOP