Scotland, United Kingdom
Joined: October 04, 2010
KitMaker: 275 posts
Armorama: 260 posts
Posted: Saturday, September 01, 2012 - 09:03 AM UTC
England - East Anglia, United Kingdom
Joined: August 09, 2009
KitMaker: 187 posts
Armorama: 181 posts
Posted: Saturday, September 01, 2012 - 11:08 AM UTC
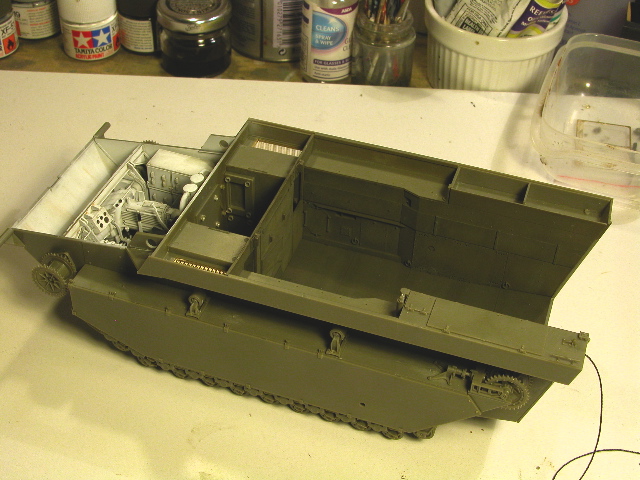
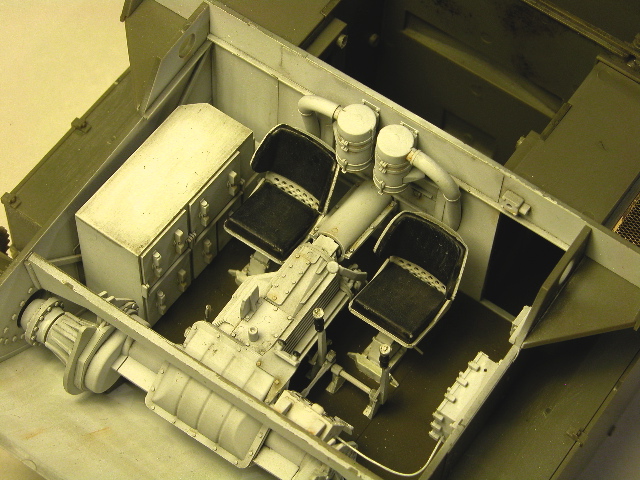
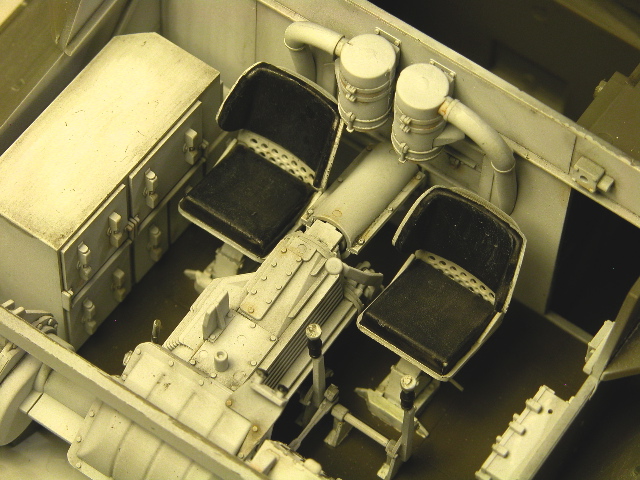
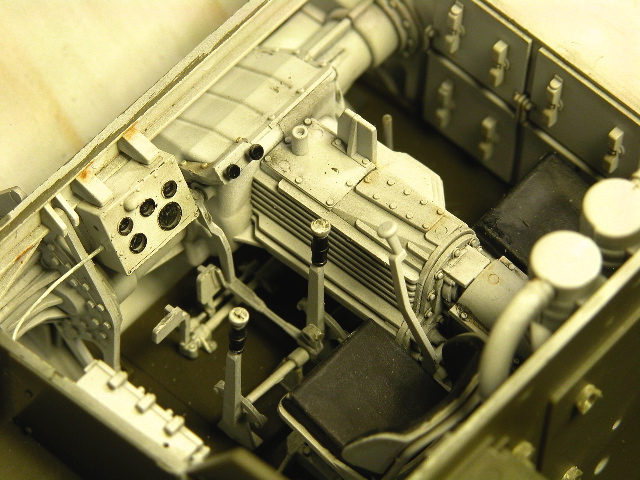
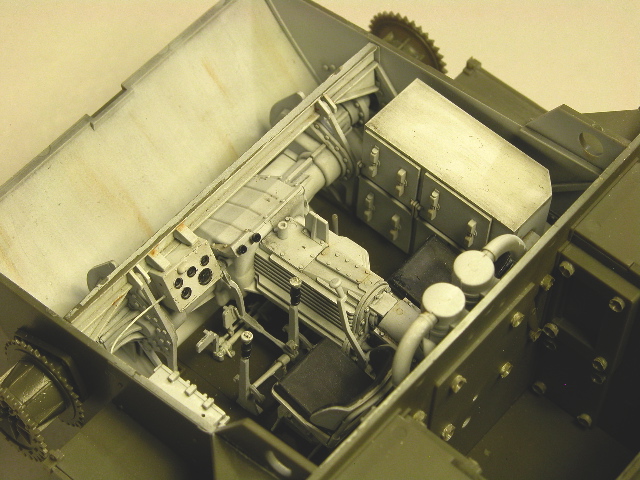
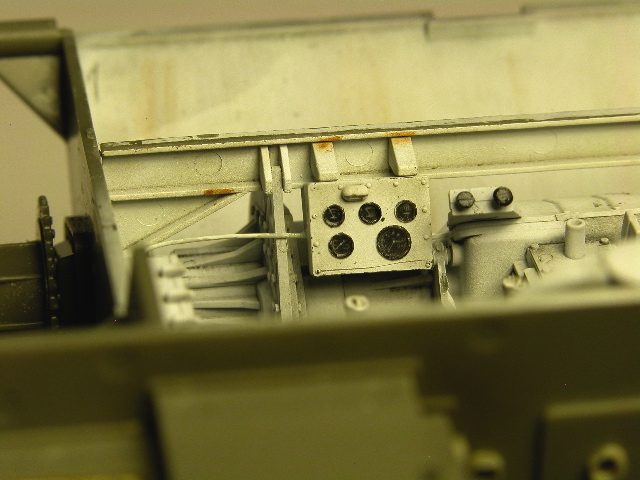
Your not trying to tell me this is all in the kit!
Scotland, United Kingdom
Joined: October 04, 2010
KitMaker: 275 posts
Armorama: 260 posts
Posted: Sunday, September 02, 2012 - 01:25 AM UTC
Yes, straight out the box apart from a couple of cables.
England - East Anglia, United Kingdom
Joined: August 09, 2009
KitMaker: 187 posts
Armorama: 181 posts
Posted: Sunday, September 02, 2012 - 02:52 AM UTC
Texas, United States
Joined: September 02, 2006
KitMaker: 785 posts
Armorama: 44 posts
Posted: Sunday, September 02, 2012 - 03:11 AM UTC
Seriously That's only 1/72? fantastic!
It doesn't take much to be better than nothing.
Scotland, United Kingdom
Joined: October 04, 2010
KitMaker: 275 posts
Armorama: 260 posts
Posted: Sunday, September 02, 2012 - 04:48 AM UTC
Wish I was that good! No this is the AFV club 1/35 model
England - East Anglia, United Kingdom
Joined: August 12, 2005
KitMaker: 14,499 posts
Armorama: 11,675 posts
Posted: Sunday, September 02, 2012 - 05:31 AM UTC
Hi Paul,
Looks like a cracking kit, nice work.
Al

'Action this Day'
Winston Spencer Churchill
Quebec, Canada
Joined: November 15, 2002
KitMaker: 3,960 posts
Armorama: 3,579 posts
Posted: Sunday, September 02, 2012 - 07:51 AM UTC
Great job so far Paul ..I got this kit on the shelf so I;ll be following along closely
Rick

#003
Donegal, Ireland
Joined: May 14, 2002
KitMaker: 9,763 posts
Armorama: 7,444 posts
Posted: Sunday, September 02, 2012 - 08:55 AM UTC
Nice build so far Paul. Have this to build also ... but not the AFV kit ... planning on doing it the hard way .. Italeri, Eduard, Verlinden, etc. Saved these piucs for placement help later. Hopefully it looks as good.

IPMS Stockholm
"The problem with common sense, is that it is not that common"
Scotland, United Kingdom
Joined: October 04, 2010
KitMaker: 275 posts
Armorama: 260 posts
Posted: Monday, September 03, 2012 - 07:30 AM UTC
Thanks for your reply's. Well thats the roof on, will leave hatches open so at least some of the interior can still be seen, I'm a sucker for interiors.
Horns of the Buffallo
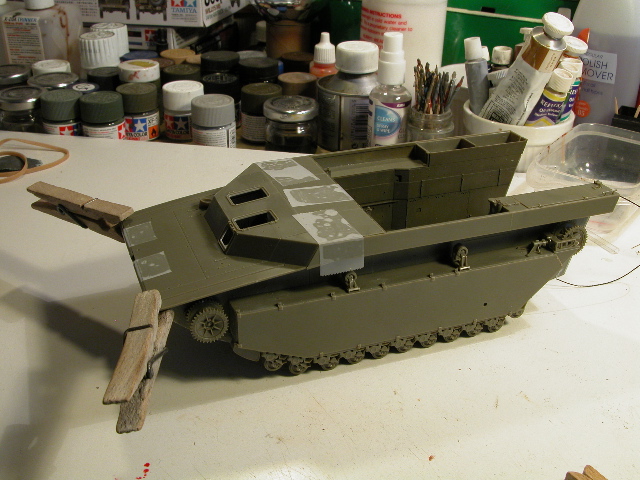
Like I said it's critical to get alignment right or you end up making a lot of extra work for yourself. The front and roof will now need a bit of work to to pass QA. This is not a reflection on the quality of the kit rather my limited skills.
Frank, on reading some stuff before starting this one, it seems the Italerie version of the LTV4 was designed off of a French post war vehicle serving in Indochina and there are apparently some differences, perhaps you're already aware of this.
Scotland, United Kingdom
Joined: October 04, 2010
KitMaker: 275 posts
Armorama: 260 posts
Posted: Wednesday, September 05, 2012 - 11:01 AM UTC
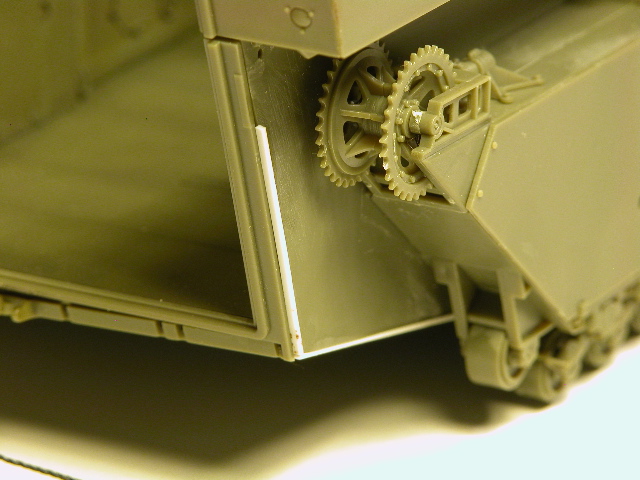
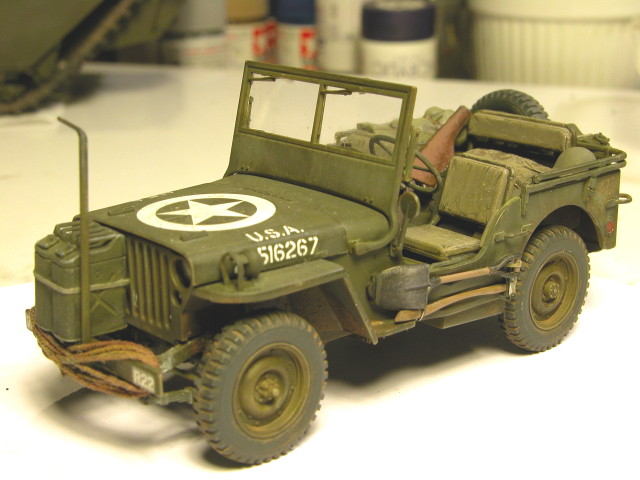
Here's another wee update; the rear ramp. I have a Tamiya jeep still to be built as cargo for this and couldn't decide whether to have the ramp up or down, kind of vaguely liked the idea of the jeep being driven up inside as one of the many photos I've seen. Or maybe buttoned up ready to go? Looking over the instructions it became clear AFV Club have designed the ramp to be moveable, so I gave it a shot and...... lo and behold I got it to work.
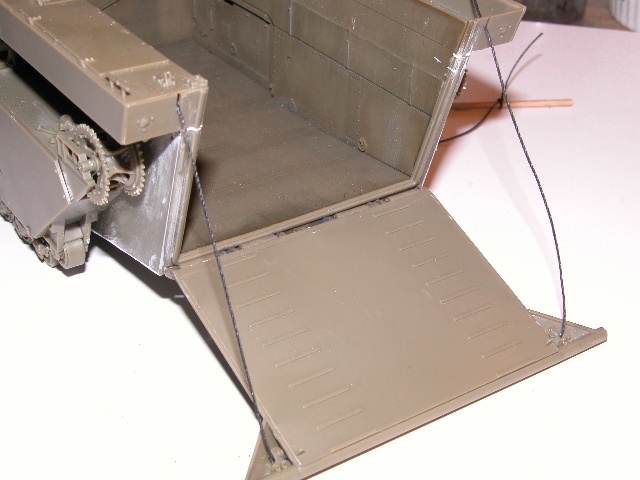
The cable/thread runs from one of the rear pontons to a tiny pulley block, through the inside of the ramp to a second pulley and up to the other ponton. the pulley blocks are made of two pieces with the cable running between the two half's. This was tricky.
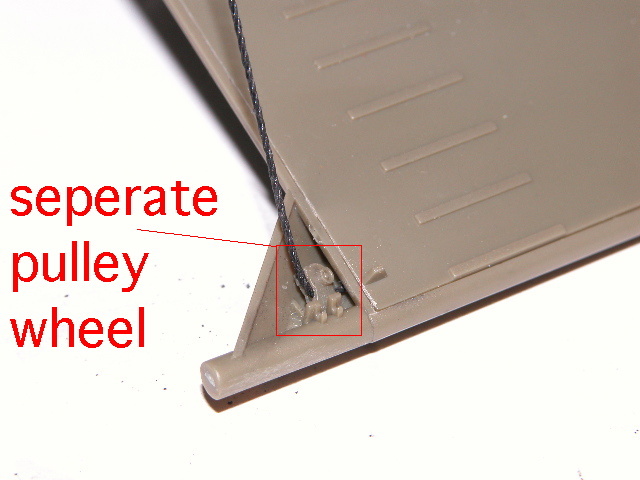
For the ramp to be able to hinge properly the cable/thread has to be able to run through the inside of the ramp and round the two pulley's, on the full size vehicle these pulley blocks would pivot depending on the position of the ramp.
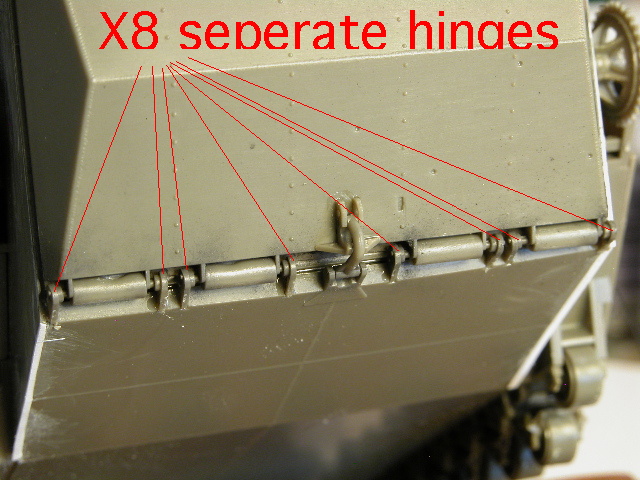
Once the cable was done it was time to do the hinges. One of the reviews I had read stated this was the most difficult part of the whole thing so I was fearing the worst. However it went ok, I glued on the two very outside hinges and left it to set with the model vertical so as not to put any strain on, then carefully wormed the remaining six hinges into position without any problems. I have put powdered graphite onto all the moving parts and ran it over the thread and think this helps to keep it free running. Think that's all the difficult area's done with and it should now all be fun....... till the nerve wracking painting, but that'll be another story.
Scotland, United Kingdom
Joined: October 04, 2010
KitMaker: 275 posts
Armorama: 260 posts
Posted: Wednesday, September 12, 2012 - 02:57 AM UTC
Lots of fiddly wee bits on this model, have lost a couple to the "monster that lies beneath", will no doubt find them when doing the final touches. Have had to make up a grab rail and lashing ring from wire. Here are the MG mounts each made up from six parts! Now going to stare at the far away hills to let my eyes readjust.

Scotland, United Kingdom
Joined: October 04, 2010
KitMaker: 275 posts
Armorama: 260 posts
Posted: Tuesday, September 18, 2012 - 05:46 AM UTC
Florida, United States
Joined: December 27, 2001
KitMaker: 4,268 posts
Armorama: 2,804 posts
Posted: Tuesday, September 18, 2012 - 07:57 AM UTC
Looking terrific as is the subject.
I will not grease the monkey bars. I will not grease the monkey bars. ...
Bart's chalkboard amercement
Sao Paulo, Brazil
Joined: January 24, 2012
KitMaker: 1,054 posts
Armorama: 1,050 posts
Posted: Tuesday, September 18, 2012 - 08:38 AM UTC
Hi Paul !
Fantastic, I loved the interior. And I love amphibians to!
Cheers !
Marco

#023
Zurich, Switzerland
Joined: March 13, 2009
KitMaker: 2,058 posts
Armorama: 1,656 posts
Posted: Tuesday, September 18, 2012 - 07:04 PM UTC
Paul, impressive build! I don't think I've ever seen any of the AFV club LVT being built.
Cheers!
Stefan
Too many models - too little time...
Utah, United States
Joined: February 15, 2008
KitMaker: 199 posts
Armorama: 136 posts
Posted: Wednesday, September 19, 2012 - 11:45 AM UTC
Great detail straight out of the box! Looks beautiful, I cannot wait to see it with the cargo in place. Very nice work sir.
Minnesota, United States
Joined: October 19, 2008
KitMaker: 91 posts
Armorama: 80 posts
Posted: Wednesday, September 19, 2012 - 03:14 PM UTC
Paul,
You did a fine job with this kit. I built the late version and found that it;s important to get things lined up right as you said. If anyone is interested in another report on this kit I have a build article at
http://usarmymodels.com/MANUFACTURERS/AFVClub/afvclub35198/afvclub35198.html.Tim
Tim Streeter
www.usarmymodels.com
Scotland, United Kingdom
Joined: October 04, 2010
KitMaker: 275 posts
Armorama: 260 posts
Posted: Wednesday, September 19, 2012 - 11:21 PM UTC
Thanks very much for all the reply's, it's really encouraging. As I said there is still work to do so it's not finished yet.
Tim, as usual before starting a model I have a good poke about the net to find references both for the kit and the actual subject. I tried the link you posted and found it didn't work however I think I have been looking at your work for weeks on this page;
linkname .
Please correct me if I'm wrong.
There is also a review of the kit here;
linkname (hope these work, first time posting link)
Thanks to everyone who have blazed the trail, it makes for better and more enjoyable modeling. I'll post more pics when I have got some of the cargo done.
cheers Paul.
England - East Anglia, United Kingdom
Joined: August 12, 2005
KitMaker: 14,499 posts
Armorama: 11,675 posts
Posted: Wednesday, September 19, 2012 - 11:58 PM UTC
Hi Paul,
Excellent work, love the interior. I have the old Italeri kits, but was waiting on decent affordable track with the thought of doing a couple of British versions for the Rhine Crossing. Might try and shift them on and go down the AFV Club route.
Cheers and look forward to the finished article.
Al


'Action this Day'
Winston Spencer Churchill
Scotland, United Kingdom
Joined: October 04, 2010
KitMaker: 275 posts
Armorama: 260 posts
Posted: Tuesday, October 30, 2012 - 08:53 AM UTC
Louisiana, United States
Joined: August 25, 2002
KitMaker: 252 posts
Armorama: 201 posts
Posted: Tuesday, October 30, 2012 - 09:24 AM UTC
Mac, Resicast has a set with shields and Polston gun that fantastic. There's a pic around of one of these beasts in Italy with a 2 pounder mounted on a platform where the .50s would normally be. Lots of cool things to do with the LVT-4.
Louisiana, United States
Joined: August 25, 2002
KitMaker: 252 posts
Armorama: 201 posts
Posted: Tuesday, October 30, 2012 - 09:27 AM UTC
Looks like the 77th Division ,who,by the way,used their LVTs in what I believe is the longest overwater motor march. It was at Ormac in the Phillipines .
I could be off, but then I'm old ;-)
Removed by original poster on 11/20/12 - 13:29:32 (GMT).
Removed by original poster on 11/20/12 - 14:13:23 (GMT).
