M966 HMMWV TOW Missile Carrier
Virginia, United States
Joined: May 07, 2003
KitMaker: 1,174 posts
Armorama: 772 posts
Posted: Sunday, September 30, 2012 - 04:32 PM UTC
Brent:
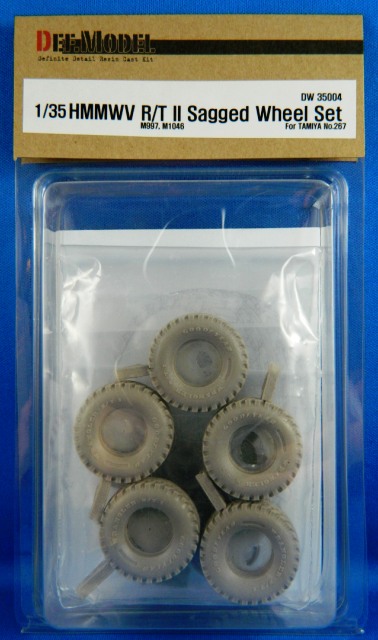
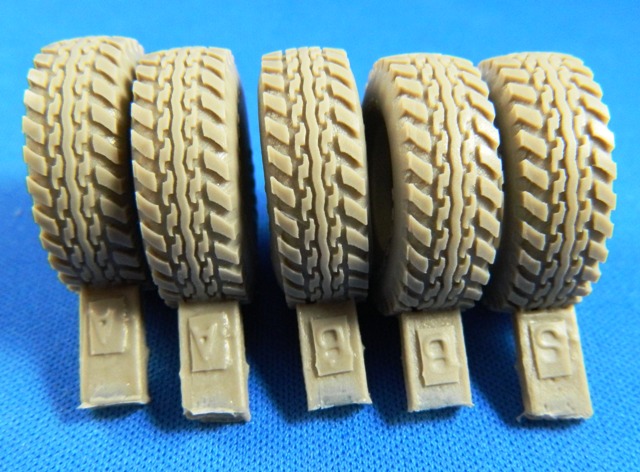
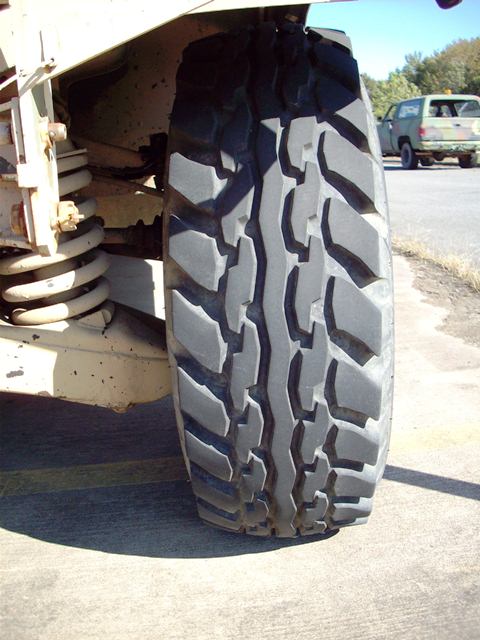
F.Y.I. I hope you are aware that hummers have 2 diff.
tire sizes. 35x10.50 & 37x12.50. For your hummer it would
not have the larger.They are for the heavy variants. IE
M1046 M1037/M1097 M1113/ M1114 M1151/M1152
The Goodyear wrangler XT/MT II is the 37" tire
"HAAA YOU THINK THIS CAR IS BAD,,MY OTHER ONE ONLY HAS TWO WHEELS'
In War...., Everybody Loses something!!
WHEN DOES A HOBBY Become A SICKNESS
Virginia, United States
Joined: April 03, 2006
KitMaker: 1,158 posts
Armorama: 950 posts
Posted: Sunday, September 30, 2012 - 10:57 PM UTC
Great build so far! Are you going to load up the interior, too?
Wojewodztwo Slaskie, Poland
Joined: February 18, 2007
KitMaker: 978 posts
Armorama: 977 posts
Posted: Sunday, September 30, 2012 - 11:20 PM UTC
I'm following this thread with a lot of pleasure

I like the look of the tires. I've got a Gunze "Tire Black" paint, but i think Lifecolor's one looks better, a little bit "rubberish". I shall try it when my Gunze is empty.

#065
Missouri, United States
Joined: March 30, 2002
KitMaker: 2,605 posts
Armorama: 1,814 posts
Posted: Saturday, October 06, 2012 - 04:59 AM UTC
Quoted Text
Brent:
F.Y.I. I hope you are aware that hummers have 2 diff.
tire sizes. 35x10.50 & 37x12.50. For your hummer it would
not have the larger.They are for the heavy variants. IE
M1046 M1037/M1097 M1113/ M1114 M1151/M1152
The Goodyear wrangler XT/MT II is the 37" tire
Thanks for the tire information. I don't know much about HMMWV tires. I picked the tires based on the tread pattern and them matching what is shown in other photos.

IPMS # 41155
Current Campaigns:
Indiana, United States
Joined: July 31, 2003
KitMaker: 1,523 posts
Armorama: 710 posts
Posted: Saturday, October 06, 2012 - 05:02 AM UTC
How about some update photo's? I know you have been working on it.

J

#065
Missouri, United States
Joined: March 30, 2002
KitMaker: 2,605 posts
Armorama: 1,814 posts
Posted: Saturday, October 06, 2012 - 05:03 AM UTC
IPMS # 41155
Current Campaigns:
California, United States
Joined: November 19, 2010
KitMaker: 798 posts
Armorama: 797 posts
Posted: Saturday, October 06, 2012 - 05:42 AM UTC
very nice PE work
jay

Wojewodztwo Slaskie, Poland
Joined: February 18, 2007
KitMaker: 978 posts
Armorama: 977 posts
Posted: Saturday, October 06, 2012 - 06:48 AM UTC
The pleasure of watching this nice, clean work is still going on


Indiana, United States
Joined: July 31, 2003
KitMaker: 1,523 posts
Armorama: 710 posts
Posted: Saturday, October 06, 2012 - 07:23 AM UTC
I knew I could get you to post some. Looking good, keep going Brent.
J

#065
Missouri, United States
Joined: March 30, 2002
KitMaker: 2,605 posts
Armorama: 1,814 posts
Posted: Monday, October 08, 2012 - 12:10 PM UTC
IPMS # 41155
Current Campaigns:
Indiana, United States
Joined: July 31, 2003
KitMaker: 1,523 posts
Armorama: 710 posts
Posted: Monday, October 08, 2012 - 01:20 PM UTC
Looking good my friend. Keep it going bro!
J

#065
Missouri, United States
Joined: March 30, 2002
KitMaker: 2,605 posts
Armorama: 1,814 posts
Posted: Saturday, October 13, 2012 - 01:40 PM UTC
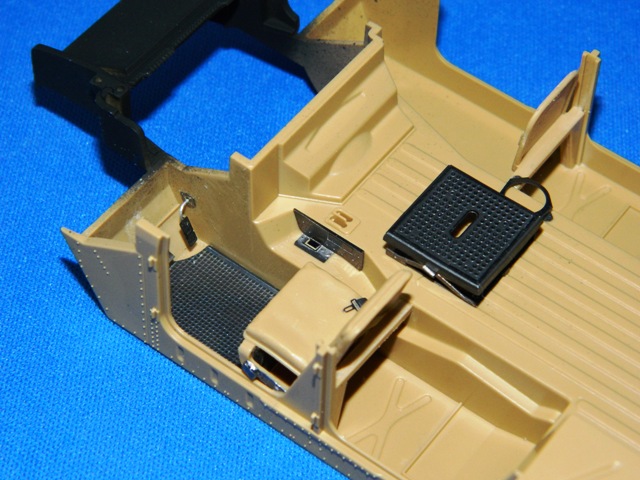
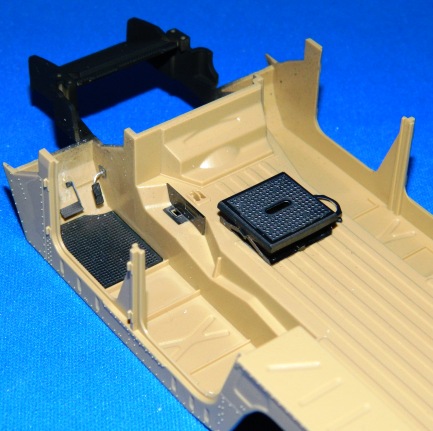
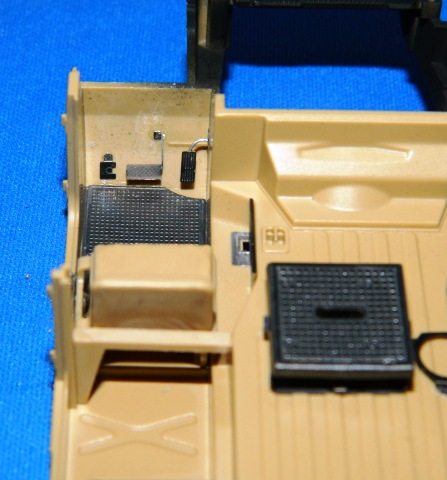
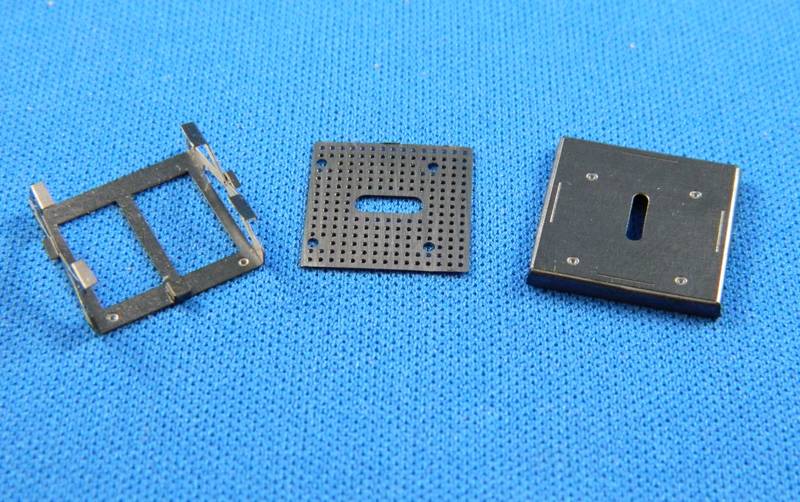
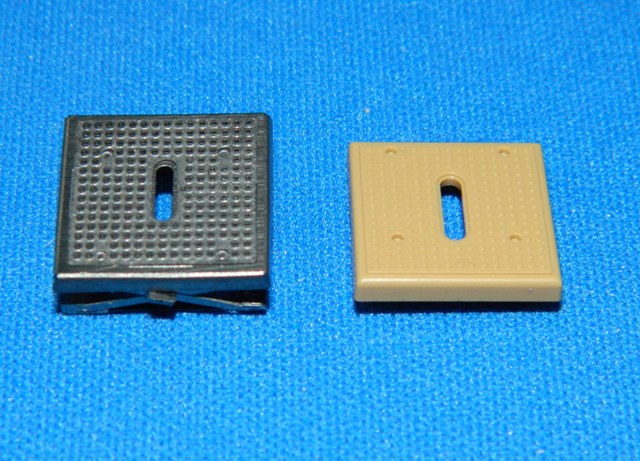
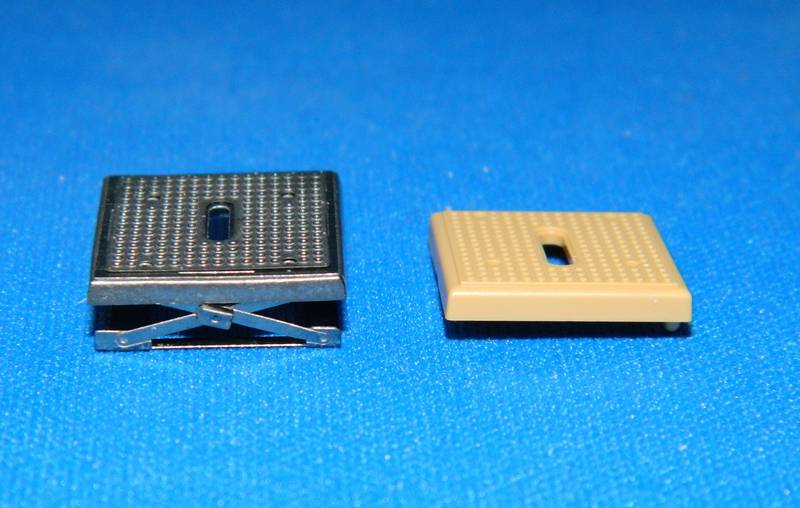
I have a brief moment tonight and wanted to post a couple of photos of the construction of the PE gunners platform. The gunner platform in the kit is one piece. The Eduard photo-etch set has a 3 piece gunner platform.
Here are the parts for the Eduard gunner platform.
Here are a couple of pictures of the Eduard gunner platform next to the kit part.
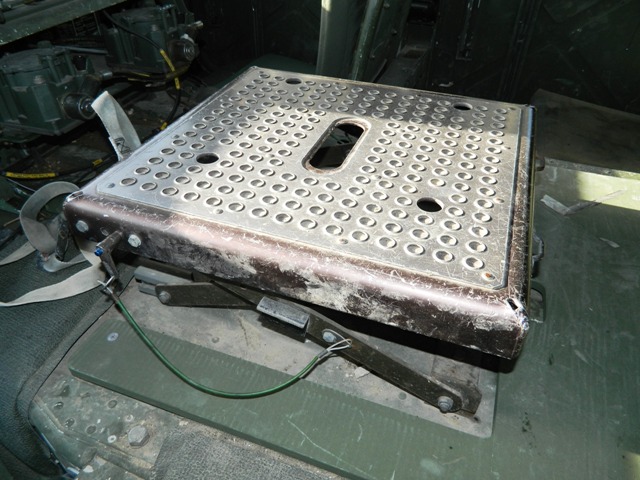
Here is a picture of a real gunner platform.
IPMS # 41155
Current Campaigns:

#065
Missouri, United States
Joined: March 30, 2002
KitMaker: 2,605 posts
Armorama: 1,814 posts
Posted: Sunday, October 14, 2012 - 04:37 PM UTC
A little more progress and kit part comparison.
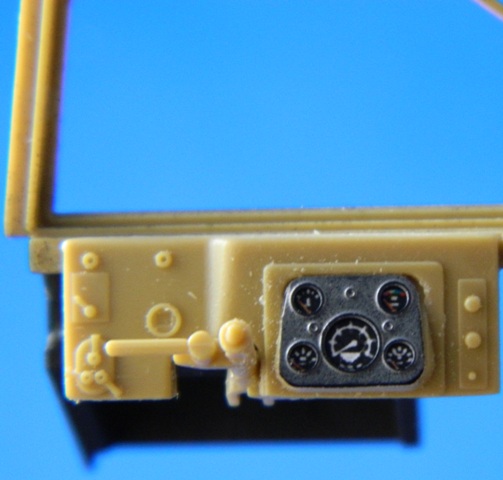
Here is the kit part for the dash.
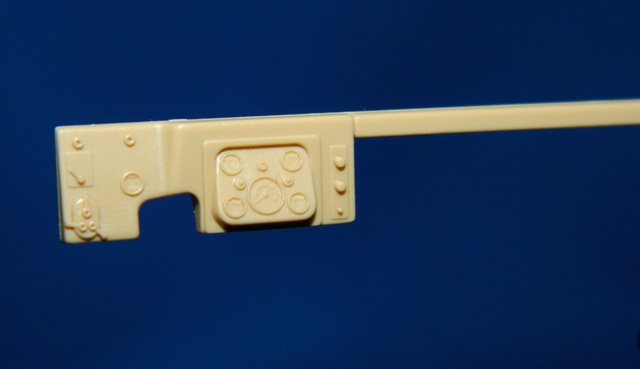
Here is the kit part after I have removed the raised dial faces with a hobby knife and glued down the Eduard PE set dial face with Elmers white glue.
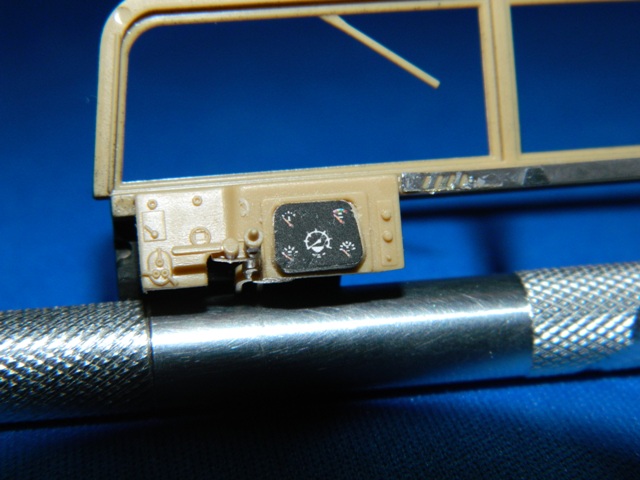
Here is the kit part with the dial face glued in place with Elmers white glue and the Eduard PE dial face frame glued in place with CA glue.
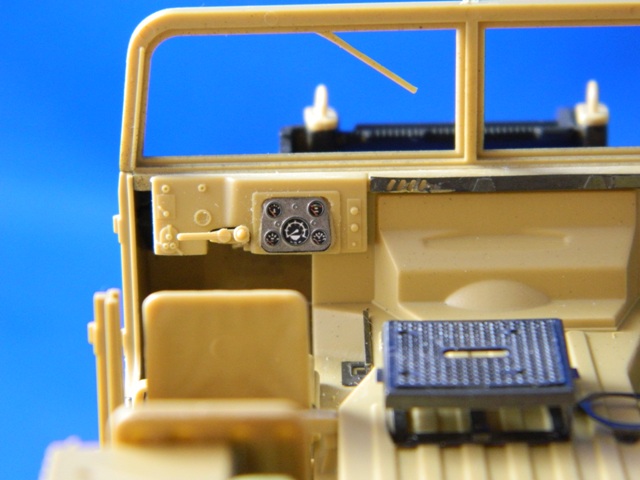
Here is the windshield frame and dash installed on the vehicle body.
IPMS # 41155
Current Campaigns:
Wojewodztwo Slaskie, Poland
Joined: February 18, 2007
KitMaker: 978 posts
Armorama: 977 posts
Posted: Sunday, October 14, 2012 - 05:54 PM UTC
Nice and clean job - nothing has changed. And it's not an usual workshop thread. It's a step-by-step instructions, how to make a decent model. Thanks a lot for such way of presentation

Gauteng, South Africa
Joined: March 03, 2011
KitMaker: 234 posts
Armorama: 200 posts
Posted: Monday, October 15, 2012 - 07:18 PM UTC
She is looking beautiful sgtsauer!
I am watching this one closely. The PE parts make such a huge difference to the model.
Can't wait for more pictures!

#065
Missouri, United States
Joined: March 30, 2002
KitMaker: 2,605 posts
Armorama: 1,814 posts
Posted: Saturday, October 20, 2012 - 09:24 AM UTC
I'm back with a small update.
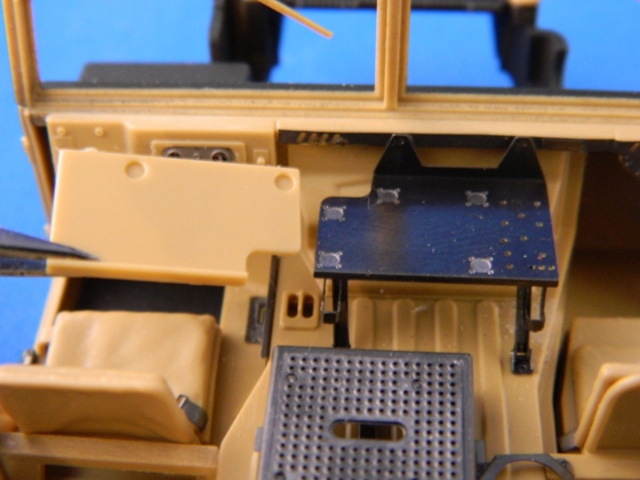
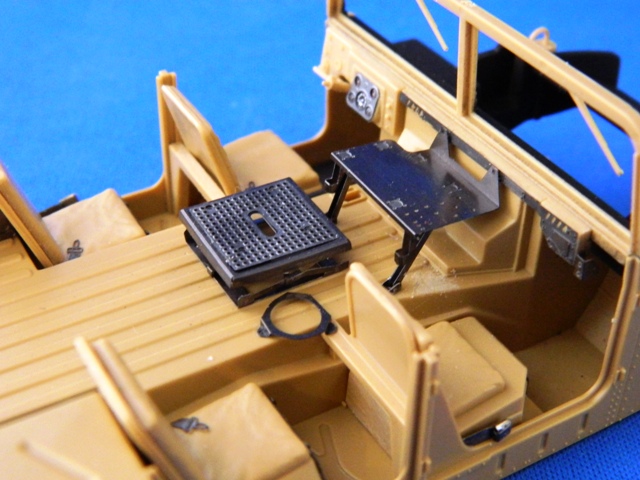
I have assembled the Eduard PE set replacement radio mount. It consists of 6 parts. The instructions for the Eduard set show you using 1 ea of part #32.
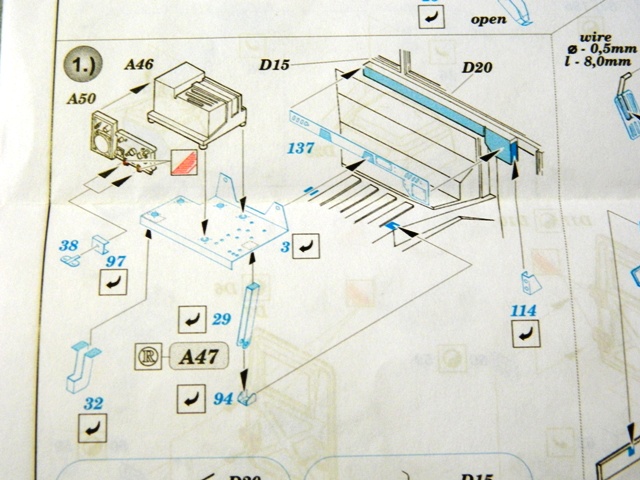
The set only comes with 1 ea part #32.
However, the interior pictures that I have of a real M966 TOW Carrier shows that the radio tray should have 2 ea of part #32.
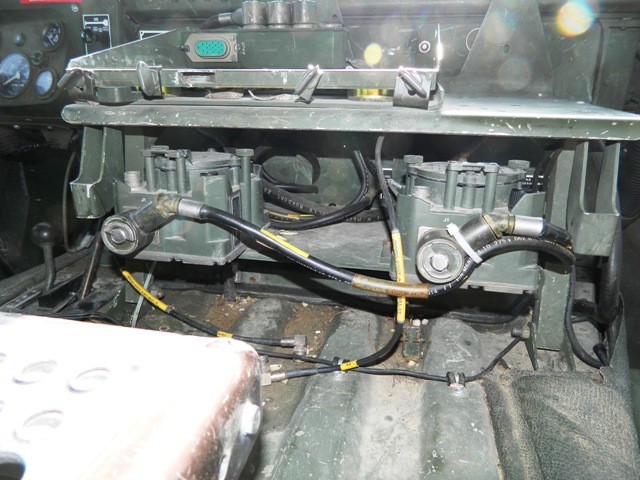
I ended up opening up another Eduard PE set for a Tamiya M1025 and I used the part #32 out of it.
The assembly was pretty difficult for me to put together. Probably due to my inexperience with photo-etch.
This picture shows the Tamiya kit radio tray (being held by tweezers)next to the installed Eduard replacement assembly.
Another view of the installed Eduard radio tray assembly.
IPMS # 41155
Current Campaigns:
Indiana, United States
Joined: July 31, 2003
KitMaker: 1,523 posts
Armorama: 710 posts
Posted: Saturday, October 20, 2012 - 10:21 AM UTC
Nice very nice.
Keep going my brother!
J

#065
Missouri, United States
Joined: March 30, 2002
KitMaker: 2,605 posts
Armorama: 1,814 posts
Posted: Thursday, October 25, 2012 - 01:04 PM UTC
Did a little bit of work today while recovering from my sinus surgery.
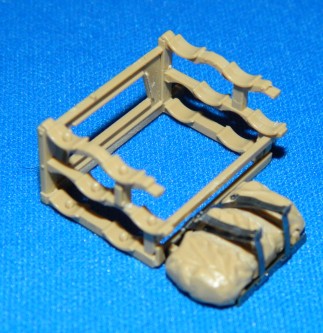
In this update, I have modified the kit TOW missile rack with the Eduard pe parts.
Here is the unmodified kit assembly.
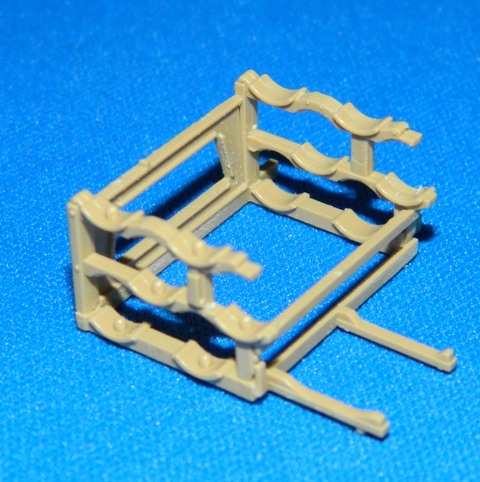
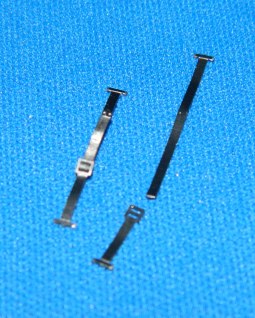
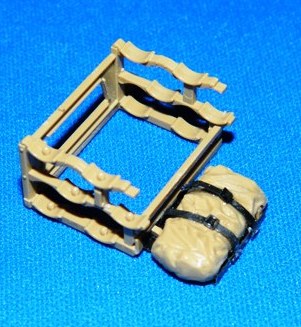
The Eduard pe parts make a more detailed storage rack for camouflage netting bag. The modification consists of 7 pe parts. 3 parts are additional frame work and 4 parts are more detailed tie-down straps than those parts molded on the kit supplied bag.
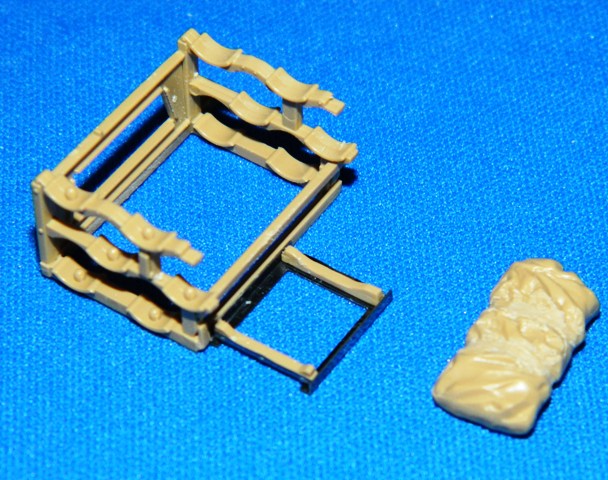
This photo shows the tie-down straps from the pe set. Each tie-down is two parts. You must interconnect them just like the real strap. In this photo, one set is interconnected.
In this photo, the straps are loosely in place.
In this photo, the straps are tightened up. The overall assembly is ready for priming and painting.
IPMS # 41155
Current Campaigns:
New Jersey, United States
Joined: March 12, 2002
KitMaker: 1,437 posts
Armorama: 1,303 posts
Posted: Friday, October 26, 2012 - 12:36 AM UTC
This is real nice Brent. One day...
Bob
Pennsylvania, United States
Joined: April 10, 2011
KitMaker: 7,941 posts
Armorama: 7,934 posts
Posted: Friday, October 26, 2012 - 01:19 AM UTC
I love following this build as I was a Platoon Sergeant of a Tow platoon at Ft Bragg and I had 4 of these vehicles,a cargo hummer and a command hummer in my platoon.
Pretty cool to see your build. We carried our cammo net on the back of the tailgate though. If it's inside it gets in the way of the loader
J

#065
Missouri, United States
Joined: March 30, 2002
KitMaker: 2,605 posts
Armorama: 1,814 posts
Posted: Friday, October 26, 2012 - 09:43 AM UTC
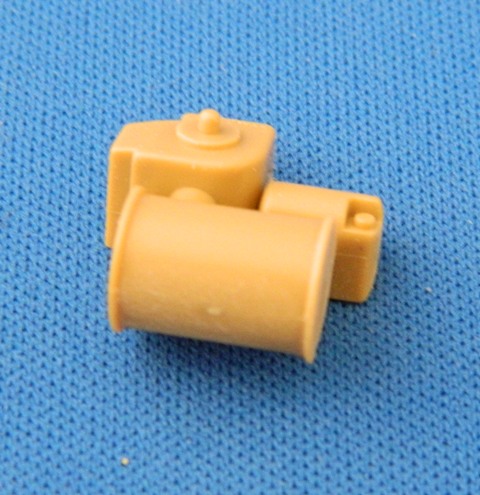
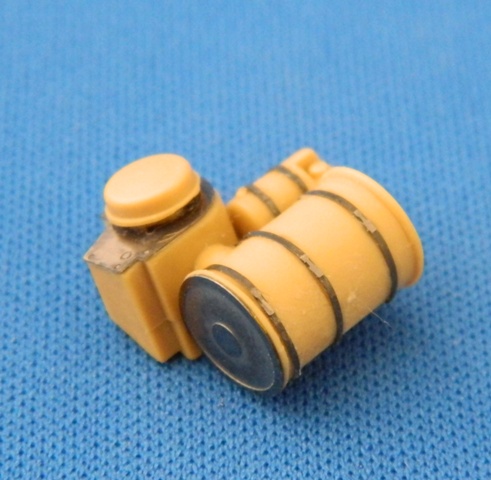
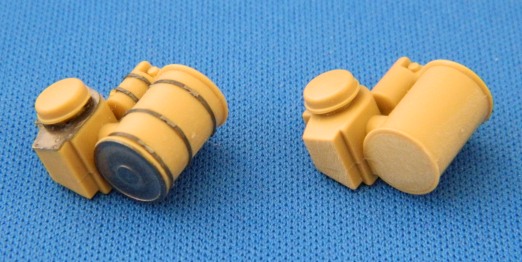
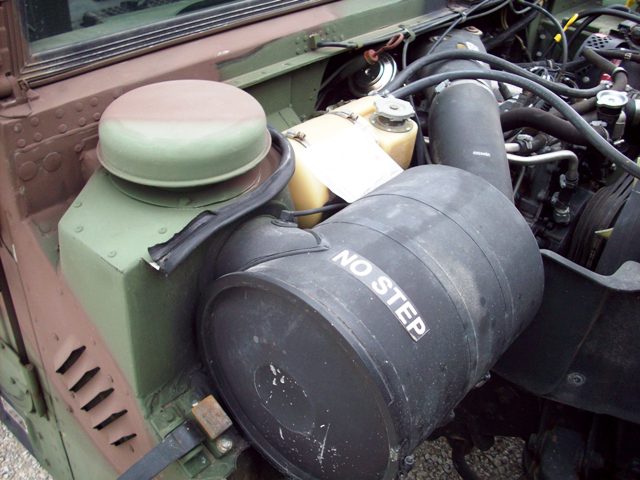
Next up, I tackled the air cleaner and coolant overflow assembly. The basic kit parts consist of just two pieces. Eduard dresses the assembly up with 7 additional PE parts.
Here is the basic kit assembly:
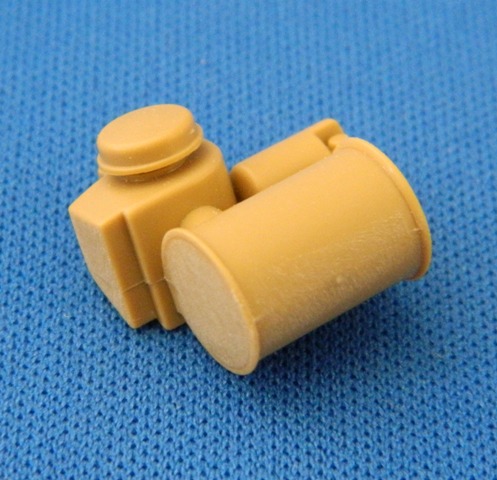
Here is the assembly with the Eduard pe parts installed.
Here is a side-by-side comparison of the basic kit assembly and the kit assembly with pe parts installed.
IPMS # 41155
Current Campaigns:
Texas, United States
Joined: July 16, 2005
KitMaker: 264 posts
Armorama: 263 posts
Posted: Friday, October 26, 2012 - 09:59 AM UTC
Simple old school hummer, I Like

Connecticut, United States
Joined: February 04, 2003
KitMaker: 82 posts
Armorama: 71 posts
Posted: Friday, October 26, 2012 - 11:43 AM UTC
Wow! The old M966! I remember the days I turned-in the M151A2 TOW gun jeeps and received these brand new M966's for the Combat Support Company (CSC) I served during the 80's. We were all in awe of these brand new un-jeep like vehicles. They were monsters compared to the nimble little jeep that turned on a dime and could weave in and out of the thickest forests! The M966 wasn't as nimble...but it could traverse some severe terrain!
I do have to agree with PSG jrutman, the camou net was never stored inside the vehicle. It was always strapped outside the vehicle with the, four (4) I believe, integral vehicle straps located on the tailgate, provided by AM General, for this very purpose.
The after market molded camou pack displayed in your photo is way too small in scale, in my opinion. This was, in reality, a very bulky pack never properly folded and compressed correctly by the average soldier anyhow...and was only attached to the tailgate after great difficulty and great cursing! Any vehicle soldier will tell you how much camou nets were hated!
The relatively small area your kit camou net is being presented was normally used to store MRE cartons for the vehicle crew. They were easily stood upon by the loader along with other items of insignificant personal gear that could stand the rigors of being trampled upon!
Will be watching your build with interest as I have a personal relationship with this vehicle...the gunners pedistal is dead on and the tires are as I remember them initially! Keep up the good work!
I love the smell of enamel thinner in the morning.
The smell, you know that enamel smell ...
the whole scale modeling room.
Smelled like …Victory
Someday those acrylics will prevail ...

#065
Missouri, United States
Joined: March 30, 2002
KitMaker: 2,605 posts
Armorama: 1,814 posts
Posted: Friday, October 26, 2012 - 12:05 PM UTC
I appreciate the comments from you guys who actually served around these. My exposure to the real M966's were very short and ended a few months ago when they were converted to M1121's.
I agree with the observations about the camo bag. The thing is way too small. I'm only using it because it was in the kit and I don't have a suitable replacement. Its not even shaped like the real thing. lol
If you guys have any real humvee pictures, I would love to get copies of them for my website.
IPMS # 41155
Current Campaigns:
Pennsylvania, United States
Joined: April 10, 2011
KitMaker: 7,941 posts
Armorama: 7,934 posts
Posted: Saturday, October 27, 2012 - 02:30 AM UTC
You really know your humvees Richard! Yes,we all hated strapping those POS bags of crap to the back of the vehicles because it wasn't only the bag of crap,it was also the bag of poles!
Brent,you are doing the old vehicle proud. I don't have any pics of them,sorry. I was always too busy in ops and maint and trying to keep a handle on 18 to 20 crazy paratroopers.
An interesting vehicle to model would be my Hmvee during desert storm. It was a cargo vehicle(platoon sergeant) with me driving,the platoon medic in the TC seat and a gunner in the back bed with a angle iron field mod mount for a 50cal MG. We had a piece of plywood over the cab with the cammo net on top of it and later,after the cease fire,the whole back was filled with firewood and extra crap that no one wanted of their gun hmvees. It was the "Sanford and Son" vehicle!
J


