_GOTOBOTTOM
Armor/AFV: Axis - WWII
Armor and ground forces of the Axis forces during World War II.
Hosted by Darren Baker
M13/40 Early Prod.Tamiya-Italeri Kit Bash
SdAufKla
Visit this Community
South Carolina, United States
Joined: May 07, 2010
KitMaker: 2,238 posts
Armorama: 2,158 posts
Posted: Tuesday, October 02, 2012 - 08:06 AM UTC
It's been a long time since I've posted any build photos or other stuff from my work bench, so, I thought that I'd put up a couple of happy snaps of my current project.

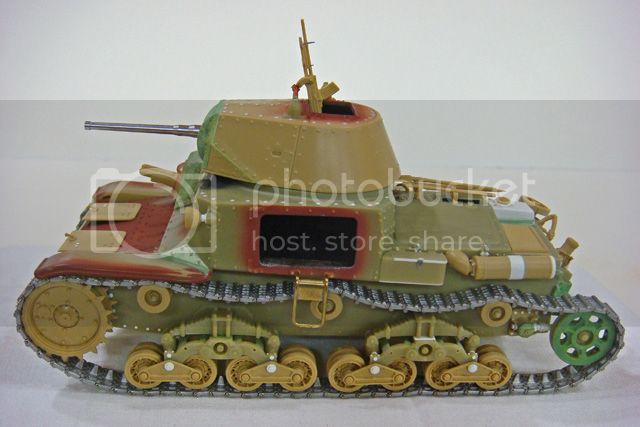
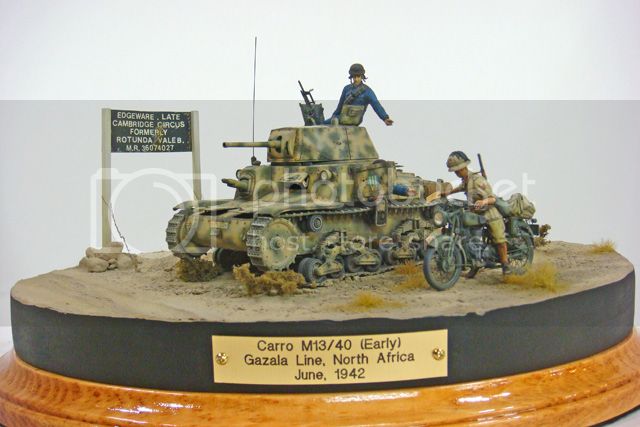
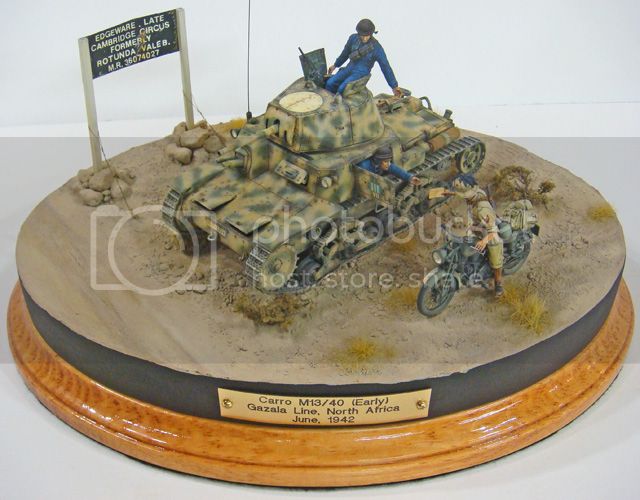
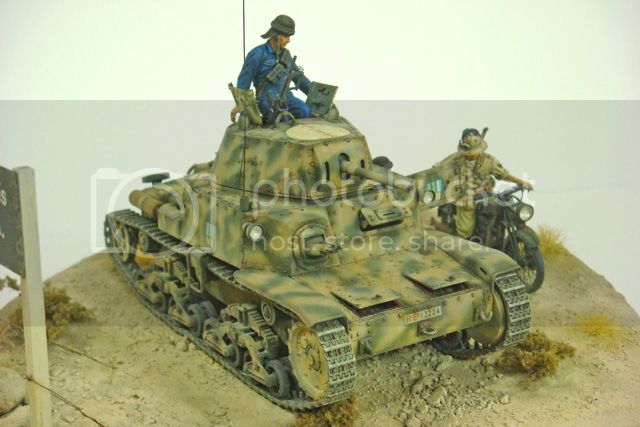
This is the Italian M13/40 from an early production series. The M13/40, like many tanks, received numerous modifications over its production run, from prototypes to a final series that was indistinguishable (externally) from the initial M14/41, thus creating several distinctive, but unofficial "production series". My model is representative of the first regular production series after the short-run initial series which followed the prototypes.

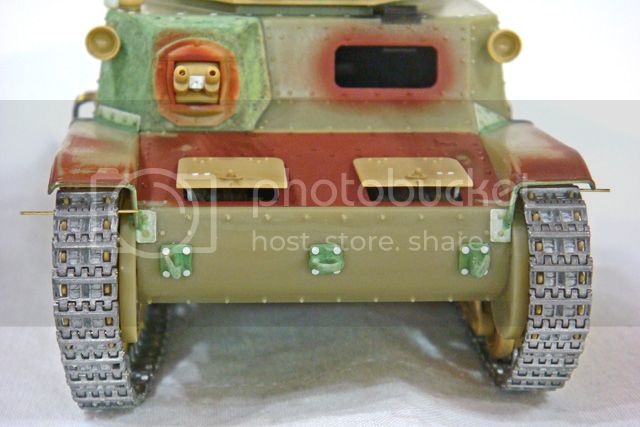
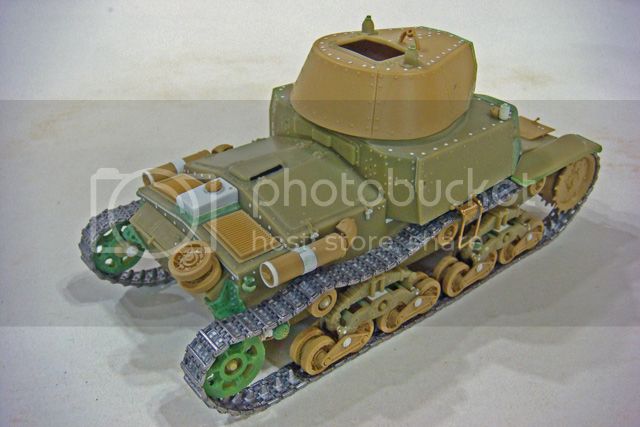
The main characteristics are the longitudinal cooling grates, the radiator box without ventilation, the early simple muffler mounts, the absence of the turret roof main gun "super depression" hump, short fenders, single spare road wheel, and repositioned jack.

I've long had a soft-spot in my heart for the lowly and un-loved M13/40 and had hoped for years that a really decent kit would be released one day. Unfortunately, this has not been the case, and so I was left with either the Italeri or Tamiya kit. Both were released in the 70's, and, dispite the fact that Tamiya "up-dated" their kit, neither kit is up to what's expected today.

Of the two, though, the Italeri kit is the more dimensionally accurate (it's actually a mid-production M14/41, though!), but it suffers from terribly simplified details. Some of these details are hardly more than 2-dimensional etchings!

The Tamiya kit appears to have been originally intended to be released as one of the last of their motorized models (it never actually was motorized, though). So, it suffers from very heavy, toy-like features and is dimensionally too long and too narrow (which throws off and distorts a lot of the kit). As if that's not bad enough, the Tamiya kit is neither a correct M13/40 nor an M14/41, but has features of each, and so it's an "un-natural" little beastie at best.

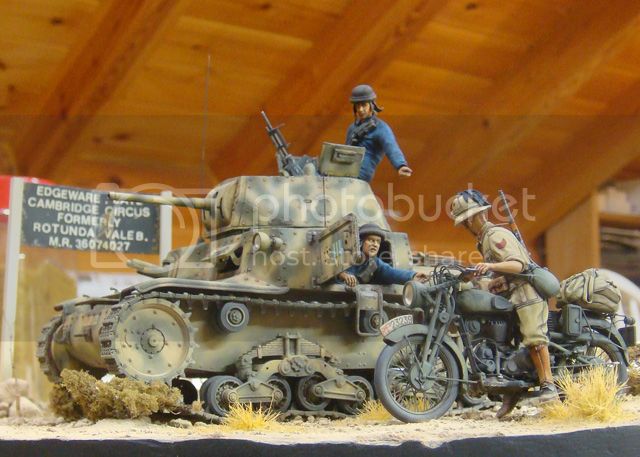
In the end, I decided to resort to an old-school kit-bash and combine the best features of both kits, add new tracks, and scratch-build as necessary to create one of the early M13/40's that played such a crucial role in the battles in North Africa.

Since I was going to have to resort to so much work to create an accurate model, I also had to do quite a lot of research to devine the production history, the sequence of the production changes, and to figure out all of the details. In the end, I've wound up with about 50+ pages of historical notes and detail sketches - quite a bit more than normal for me, but reflective of the lack of good references on this vehicle.

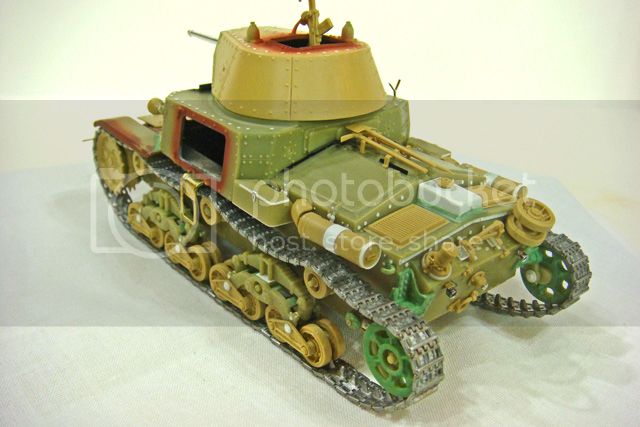
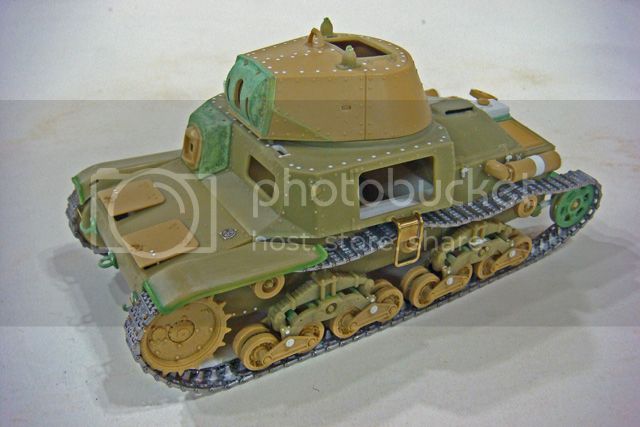
In the photos, the yellow-green colored plastic parts are Italeri. The tannish colored parts are Tamiya. The white parts are, of course, styrene, and the dark green parts have thinned putty stippled on them to create a cast texture. The brass side steps have been scratched-up from K&S rod and sheet.

As you see, I combined the kit parts to articulate the suspension, and the link-to-link tracks are from Spade Ace (after I found that the Fruils that I had bought, cleaned-up, and assembled would not lay in a straight line!).


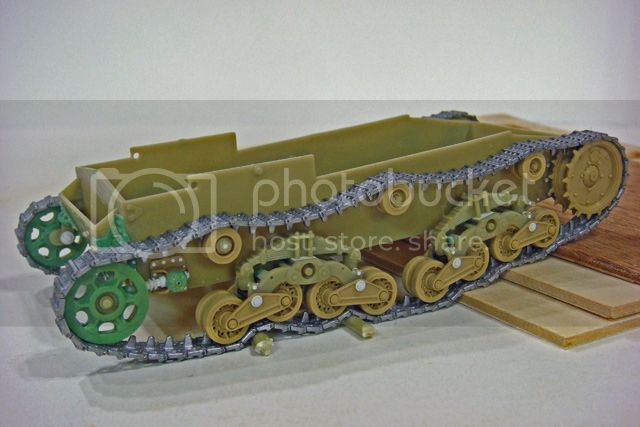
The tracks are assembled here about 1-2 links too long, and will be adjusted for fit after they've been finished. But, I've learned it's better to have to tracks a little too long than have to finish to match and add a link or two later.

The model as shown here is assembled dry-fit for a final test before I start the interior painting and close-up the superstructure and turret halves. You'll note things like the fenders are just hanging loose and still require some additional details (thinning and mounting flanges on the rear and front ends).


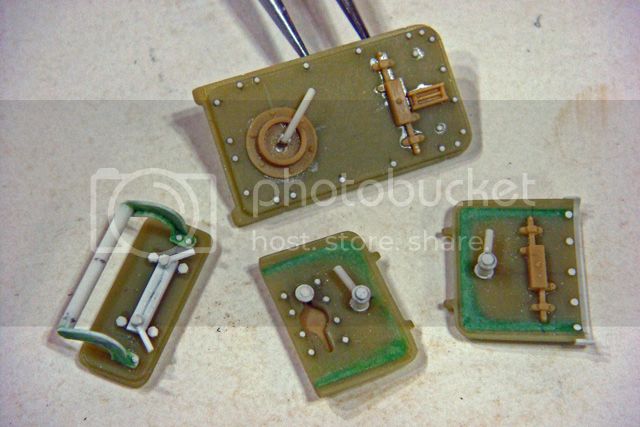
There are lots of small detail parts that have been modified and are not shown here. However, here is a shot of the insides of all of the hatches to show how the Italeri and Tamiya details have been merged together. All of these hatches are the Italeri kit parts, but you can see the dark tan Tamiya details that have been scavenged and added to them (after removing the Italeri details, such as they were).


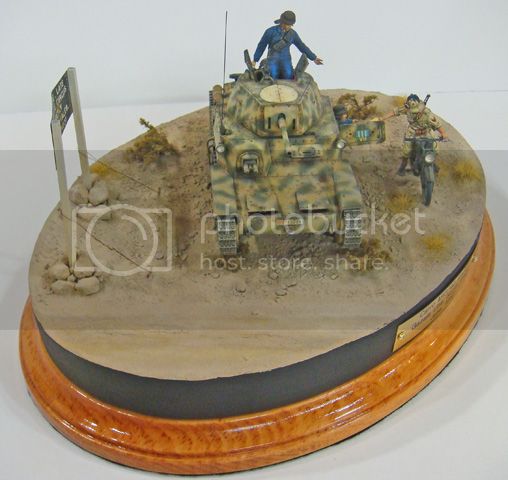
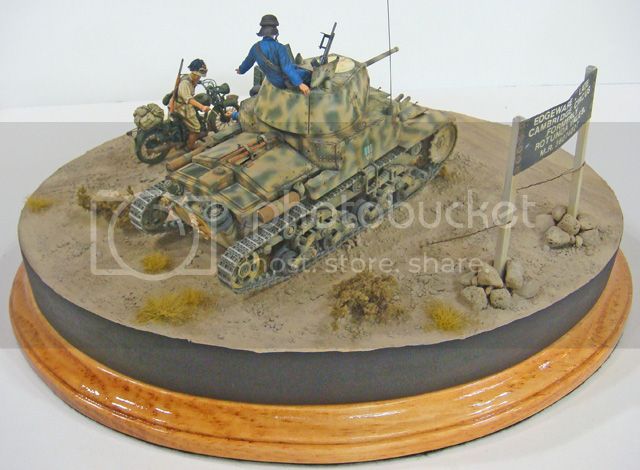
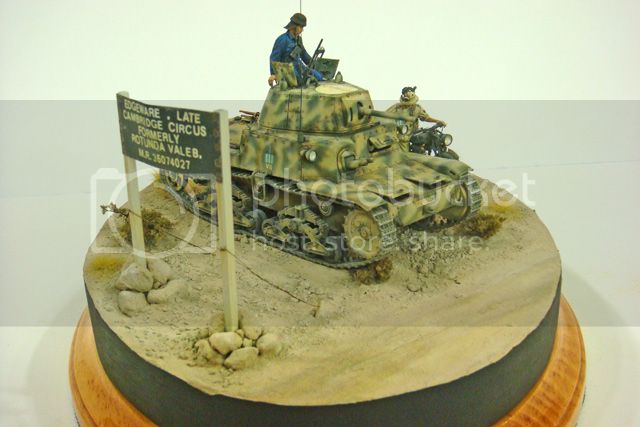
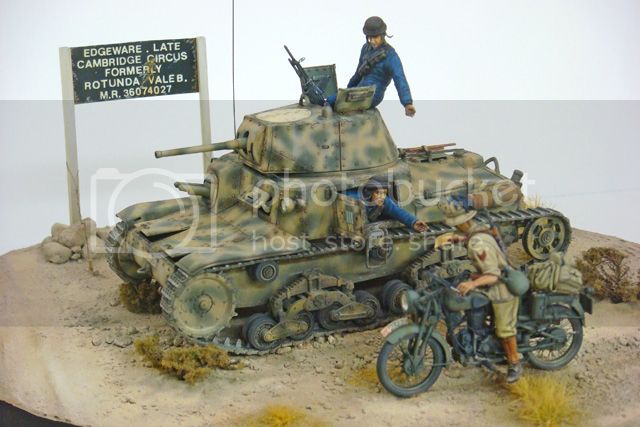
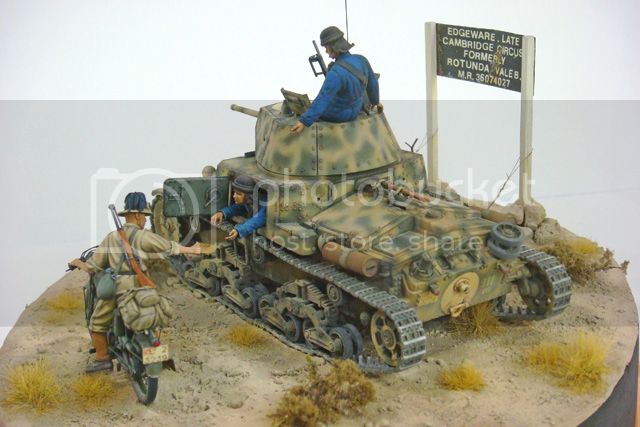
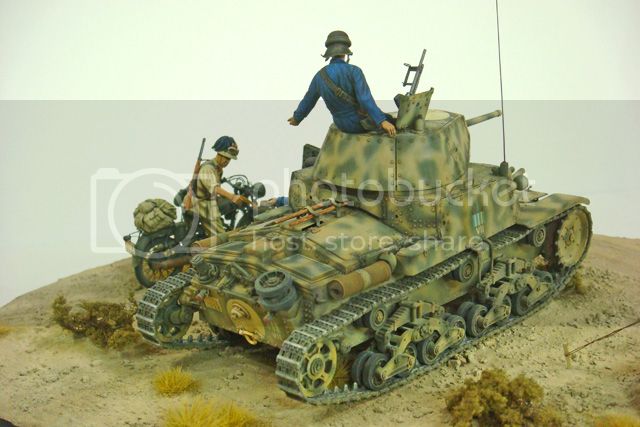
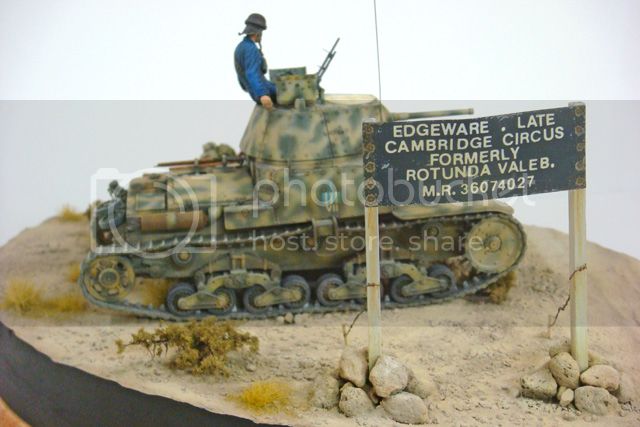
In the end, my intention is to create a model of an "old campaigner" from Ariete during the Gazala line battles.

For anyone interested in more information, I'll be sending a detailed build and research article to the AMPS Boresight for publication.

(I promise, John, I promise!)

So, join AMPS today to make sure that your Boresight subscription is up-to-date tomorrow!

Happy modeling!
panamadan
Visit this Community
Minnesota, United States
Joined: July 20, 2004
KitMaker: 1,513 posts
Armorama: 1,449 posts
Posted: Tuesday, October 02, 2012 - 10:38 AM UTC
Incredable start here Mike! As you said, it's too bad that a newer kit isn't available, but them the breaks.
I'll be watching, Dan
dvarettoni
Visit this Community
South Carolina, United States
Joined: September 28, 2005
KitMaker: 778 posts
Armorama: 763 posts
Posted: Tuesday, October 02, 2012 - 10:14 PM UTC
looking good mike will we get to see this one at the next meating ? wait what am i doing here in the axis forum
dave
majjanelson
Visit this Community
South Carolina, United States
Joined: December 14, 2006
KitMaker: 1,355 posts
Armorama: 979 posts
Posted: Wednesday, October 03, 2012 - 01:38 AM UTC
Looking good, Mike!

Since you've gone to such extent and effort to make the suspension articulate, are you going to place the M13/40 on a "rough" dio to demonstrate it?

I hope to see this next week.
SdAufKla
Visit this Community
South Carolina, United States
Joined: May 07, 2010
KitMaker: 2,238 posts
Armorama: 2,158 posts
Posted: Wednesday, October 03, 2012 - 01:40 AM UTC
@ Dan: Thanks for the props, but if I told you how long I've been tinkering around with this project you wouldn't think I was just getting started!

Still, it's finally looking like a tank and not a bunch of parts rattling 'round the work bench. It's been a really slow build for several reasons, but this kind of work has a "ripple effect" where changes to one kit's parts force changes to the other kit's parts and so on. Making the suspension units articulated required a lot of work to keep everything in alignment, too. Lots and lots of back and forth dry-fitting...

I'm looking forward to making some real progress now that the basic structures are all done.

@ Dave V.: Hey, I know you! Arn't you that guy who does all of that Soviet stuff? What ARE you doing here!?

Yea, I'll have this one at the meeting next week. Hopefully by then I'll have the superstructure closed up so that I can start sculpting the crew figures.

@ Jeff: I'm planning on having enough bumps, etc to show some suspension movement. I'm still working out the details and composition for the vignette, but it probably won't be as "dramatic" as the Panther G display.

See you guys next week.

Happy modeling!
Big-John
Visit this Community
Ohio, United States
Joined: August 12, 2010
KitMaker: 731 posts
Armorama: 711 posts
Posted: Friday, October 05, 2012 - 09:22 PM UTC
Hey Mike, Nice to see another project under way!
SdAufKla
Visit this Community
South Carolina, United States
Joined: May 07, 2010
KitMaker: 2,238 posts
Armorama: 2,158 posts
Posted: Saturday, October 06, 2012 - 12:38 AM UTC

Quoted Text

Hey Mike, Nice to see another project under way!


Thanks, Big John!

I always have something on the bench, but I promised the Boresight editor that I would write this one up for him and not post all the details on-line like usual. But also as usual, I'm so slow that meant that I wouldn't have anything to post up here for a long time, so I cheated just little to post up this "teaser."

Happy modeling!
Keef1648
Visit this Community
South Carolina, United States
Joined: January 23, 2008
KitMaker: 1,240 posts
Armorama: 1,192 posts
Posted: Saturday, October 06, 2012 - 12:45 AM UTC
Well having seen this model up close and personal it is still just as impressive in photographic form.

As always Mike your painfull attention to detail is amazing and shows what patience and perseverence can do to a pair of old models.

To see this sort of work in detail and during the build helps old folk like myself to continue to try and improve our skills (teach old dogs new tricks).

Thanks for sharing and I look forward to drooling over it again next week, and I will stick to building simple models....


Keith.
SdAufKla
Visit this Community
South Carolina, United States
Joined: May 07, 2010
KitMaker: 2,238 posts
Armorama: 2,158 posts
Posted: Saturday, October 06, 2012 - 01:37 AM UTC

Quoted Text

... To see this sort of work in detail and during the build helps old folk like myself to continue to try and improve our skills (teach old dogs new tricks).

... I will stick to building simple models....


Keith.


Hey, I resemble that "old folks" remark!

Keith, as always, you're being too modest as your builds posted here show, and as I can attest having seen many of them in person. Your work's always a joy to look at, and you do your own fair bit when it comes to sharing techniques and methods.

Anyways, all of us "old dogs" need to stick together. At our stage in the game, it's not so much learning "new tricks" from each other as it is reminding each other of all the old tricks we once knew!

We have to keep those young guys in the club on their toes!

PS: Hope that you can get that home improvement issue worked out soon...

See ya later my friend!
Keef1648
Visit this Community
South Carolina, United States
Joined: January 23, 2008
KitMaker: 1,240 posts
Armorama: 1,192 posts
Posted: Saturday, October 06, 2012 - 02:44 AM UTC

Quoted Text


Quoted Text

... To see this sort of work in detail and during the build helps old folk like myself to continue to try and improve our skills (teach old dogs new tricks).

... I will stick to building simple models....


Keith.


Hey, I resemble that "old folks" remark!

Keith, as always, you're being too modest as your builds posted here show, and as I can attest having seen many of them in person. Your work's always a joy to look at, and you do your own fair bit when it comes to sharing techniques and methods.

Anyways, all of us "old dogs" need to stick together. At our stage in the game, it's not so much learning "new tricks" from each other as it is reminding each other of all the old tricks we once knew!

We have to keep those young guys in the club on their toes!

PS: Hope that you can get that home improvement issue worked out soon...

See ya later my friend!


Mike.

My problem is too many irons in the fire and far to many new items in the mailbox from companies North of the English border!

I really should concentrate more on finishing one project at a time and less of rotational building

But I am quite happy to do a little here and a little there and as long as the end result is acceptable that's all that counts in my book.

Doesn't stop me from being in awe of your quality builds and results, 'mastery in motion' so to speak.

A really interesting subject as well.

If Lowes has an operational defect free new dishwasher this time I may be able to finally get to see you at your work desk before Christmas...

Keith.
AlanL
Visit this Community
England - East Anglia, United Kingdom
Joined: August 12, 2005
KitMaker: 14,499 posts
Armorama: 11,675 posts
Posted: Thursday, November 08, 2012 - 05:06 AM UTC
Hi Mike,

excellent work.

Al
SdAufKla
Visit this Community
South Carolina, United States
Joined: May 07, 2010
KitMaker: 2,238 posts
Armorama: 2,158 posts
Posted: Thursday, November 08, 2012 - 10:36 AM UTC
Thanks, Alan!

I've finally completed the construction and am working on the crew figures now, so I hope to be able to complete the vignette in time for the Atlanta AMPS Regional Show in February.

At least that's my goal!

Happy modeling!
SdAufKla
Visit this Community
South Carolina, United States
Joined: May 07, 2010
KitMaker: 2,238 posts
Armorama: 2,158 posts
Posted: Monday, February 25, 2013 - 10:49 AM UTC
Hmmmm... No progress since November... What's up with that?!

Obviously, I did not get this vignette done in time for the Atlanta AMPS Regional Show a week ago.

But the tank's now ready for the paint shop -


Other major elements of the vignette can be found here:

Figures: Armorama::Italian Ariete Tankers North Africa

Motorcycle: Armorama::Model Victoria "Gilera LTE 500"

Hopefully it'll all be finished one day!
SdAufKla
Visit this Community
South Carolina, United States
Joined: May 07, 2010
KitMaker: 2,238 posts
Armorama: 2,158 posts
Posted: Sunday, March 31, 2013 - 09:50 AM UTC
Well, I'm almost done with this project.

Just another few shots of Dull Coat on some glue spots from final assembly, add the name plate, and then glue the terrain module down onto the finished decorative base.

I'll post a couple more shots of the final work, but for now, here's a last WIP pic:


Happy Modeling!
pantherkid
Visit this Community
Florida, United States
Joined: September 18, 2011
KitMaker: 73 posts
Armorama: 35 posts
Posted: Sunday, March 31, 2013 - 01:52 PM UTC
Hey Mike, looking good there.I just found this in my stash and thought a quick build here, shoud have it started and done by the time I type this, but what colors did you use for the tank and camo? Good luck on this and thanks Rick
SdAufKla
Visit this Community
South Carolina, United States
Joined: May 07, 2010
KitMaker: 2,238 posts
Armorama: 2,158 posts
Posted: Monday, April 01, 2013 - 01:42 AM UTC

Quoted Text

... what colors did you use for the tank and camo? ... Rick


Hi Rick,

I thought this was going to be a quick build too, but counting research, I've been working on this project for over 16 months, so good luck to you, too!

In regards to colors:

For the factory base gray green, I started with Tamiya XF-65 Field Gray and pre-shaded the tank. I then used XF-73 JSDF Dark Green for the mid-tone and finally lightened that up, 2:1, with XF-55 Deck Tan for the post-shading highlights.

(BTW: These are the same colors used on the motorcycle.)

The field applied Saharan sand is a mix of 2:1 XF-55 Deck Tan and XF-59 Desert Yellow. I'm sorry to say that I didn't record the mix ratio, but it was probably about 1:1 - very light. I just experimented by adding more Deck Tan to the mix to get the color I wanted.

This yellow cammo color is NOT what you see on the model, though. I knew I was going to use yellow ocher and raw sienna for some of the color modulation on the sides leaving some of the lighter color on the horizontal surfaces looking sun bleached, so I started with a much lighter color (so that I didn't end up with a bright yellow after the modulation).

Note that one of the final things I did was to apply several "dust" glazes over the entire tank (concentrating on the lower hull). This dust glaze was mixed 2:1 Tamiya XF-57 Buff and XF-59 Desert Yellow. This was reduced 9.5:1 thinners to paint and then I added back in 5% by volume of X-22 Clear Gloss.

After this dries, I went back over it with Testors Dull Coat since the X-22 will give the glaze a slight "egg shell" sheen.

NOTE: The average mid-tone color of the terrain matches Tamiya XF-57 Buff, so the "dust" glaze helps tie the model and base together.

Hope this answers your question.

Happy Modeling!
pseudorealityx
Visit this Community
Georgia, United States
Joined: January 31, 2010
KitMaker: 2,191 posts
Armorama: 1,814 posts
Posted: Monday, April 01, 2013 - 01:52 AM UTC
Mike, that's looking really nice. Good to see that you'll have this at the show in a couple weeks so I can see it in person.

If you could just throw that base in the copy machine, that would really help me finish my Grant for the AMPS show.
AFVFan
Visit this Community
North Carolina, United States
Joined: May 17, 2012
KitMaker: 1,980 posts
Armorama: 1,571 posts
Posted: Monday, April 01, 2013 - 02:55 AM UTC
Good job on this one, Mike. I gather from Jesse's comment that you'll have it at Atlanta?
pantherkid
Visit this Community
Florida, United States
Joined: September 18, 2011
KitMaker: 73 posts
Armorama: 35 posts
Posted: Monday, April 01, 2013 - 01:54 PM UTC
Thanks Mike and good luck and have fun in Atlanta. Rick
Tiger_213
Visit this Community
California, United States
Joined: August 10, 2012
KitMaker: 1,510 posts
Armorama: 1,443 posts
Posted: Monday, April 01, 2013 - 02:11 PM UTC
That looks great Mike.
Nahuel19431
Visit this Community
Chubut, Argentina
Joined: August 15, 2010
KitMaker: 593 posts
Armorama: 548 posts
Posted: Monday, April 01, 2013 - 11:43 PM UTC
Excelent job Mike. Congratulations!!!

Omar
Keef1648
Visit this Community
South Carolina, United States
Joined: January 23, 2008
KitMaker: 1,240 posts
Armorama: 1,192 posts
Posted: Tuesday, April 02, 2013 - 12:00 AM UTC
Only Sixteen (16) months? Hmm time flies when you having fun mate...

If you want me to tote it to Atlanta for you I can throw it in the trunk of me car, I know your truck will be full of signs for the show and I have room in my car wash and polishing crate.

Absolutely stunning finish, kit bash, grit and determination Mike.
A lovely model and well done Sir.


Keith.
SdAufKla
Visit this Community
South Carolina, United States
Joined: May 07, 2010
KitMaker: 2,238 posts
Armorama: 2,158 posts
Posted: Tuesday, April 02, 2013 - 01:13 AM UTC
Thanks for all the kind words, guys...

@ Jesse: See ya in a couple of weeks. Hope you get your Grant finished in time. I'm looking forward to getting a chance to see it up-close and first hand.

@ Bob: Are you gonna be able to make down to Atlanta? If not, I hope to see you in Sumter for the IPMS R-12 Convention / AMPS Show in June.

@ Rick: You're welcome - Hope that little bit of info was what you needed. I see that you list your location as Florida. Are you going to get up to Atlanta in a couple of weeks? If you do, hopefully we'll get a chance to meet.

@ Christopher & Omar: Thank you for the props, guys.

@ Keith: Hey, I'd take you up on that offer, but I'm not sure that your car will make there... You keep it in such a poor state of maintenance!

As promised above, here are a few more pics of the completed vignette. First up - some general views:


I'll post some more close-up later.
SdAufKla
Visit this Community
South Carolina, United States
Joined: May 07, 2010
KitMaker: 2,238 posts
Armorama: 2,158 posts
Posted: Tuesday, April 02, 2013 - 01:41 AM UTC
Here are a few more pics of the completed vignette:


There are a few more close-ups of the figures and the bike in those threads (follow the links in earlier posts in this thread).

The sign in this vignette, BTW, is based on a photo of an actual sign just outside of "Knightsbridge Box," one of the Gazala Line positions captured by the Italians and Germans on about 12 June, 1942. This location, "Rotunda Vale B." was a desert track intersection about 2 km southwest of the famous IWM photo of a Matilda passing the "Knightsbridge Box" sign.

Happy modeling!
Keef1648
Visit this Community
South Carolina, United States
Joined: January 23, 2008
KitMaker: 1,240 posts
Armorama: 1,192 posts
Posted: Tuesday, April 02, 2013 - 11:29 AM UTC

Quoted Text

Thanks for all the kind words, guys...

@ Keith: Hey, I'd take you up on that offer, but I'm not sure that your car will make there... You keep it in such a poor state of maintenance!


Hah, just ensure those Brass screw heads are matched top to bottom and left to right

Keith.
 _GOTOTOP