_GOTOBOTTOM
Яusso-Soviэt Forum
Russian or Soviet vehicles/armor modeling forum.
T-72 BI Chechnyan version
SzGergo
Visit this Community
Heves, Hungary
Joined: June 10, 2011
KitMaker: 83 posts
Armorama: 83 posts
Posted: Thursday, November 01, 2012 - 12:22 PM UTC
Hi all,

First of all, i have to tell you guys, it won't be a topic as my T-62's. It will be as a clear build, as far as i could, but it won't be so detailed, couse i spent my last years for too many building and too few painting, so i should find the balance now, and the second reason, that i don't know too much about T-72, so we just flirting with eatch other.

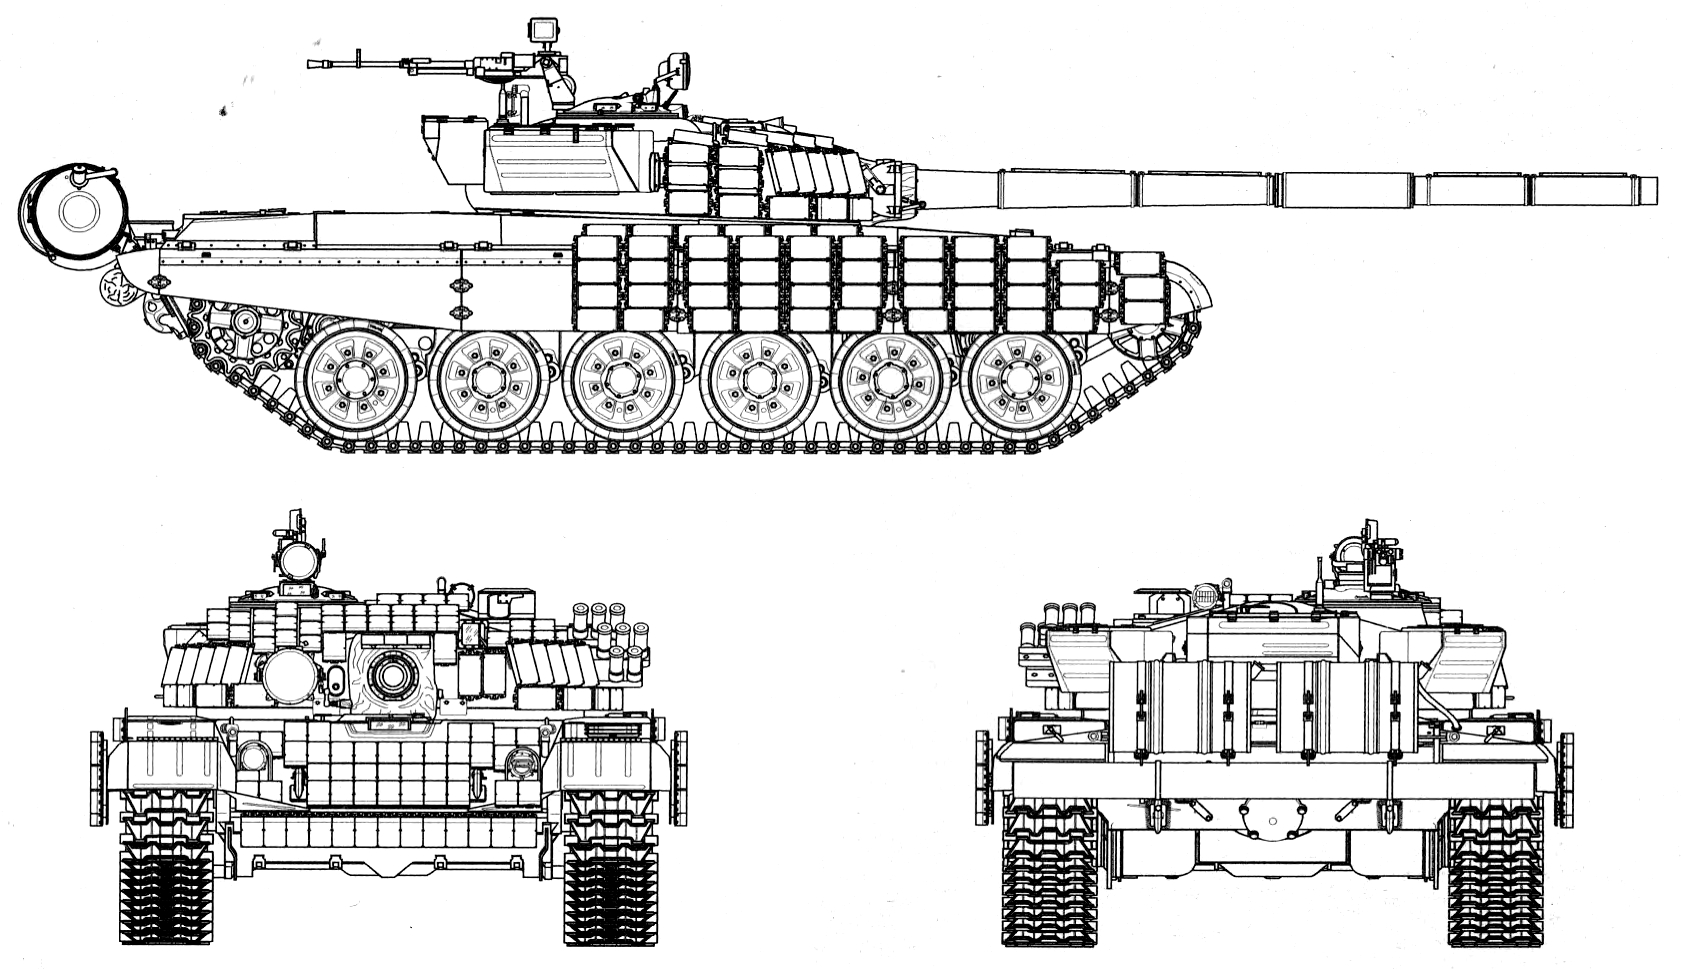
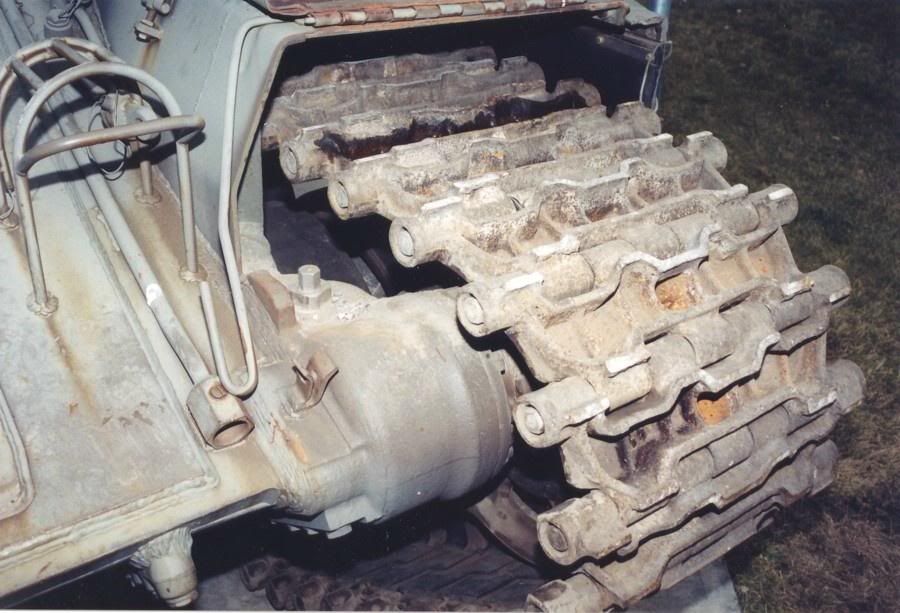
Also have to say what was the way i started to build this version. I wanted to build this:


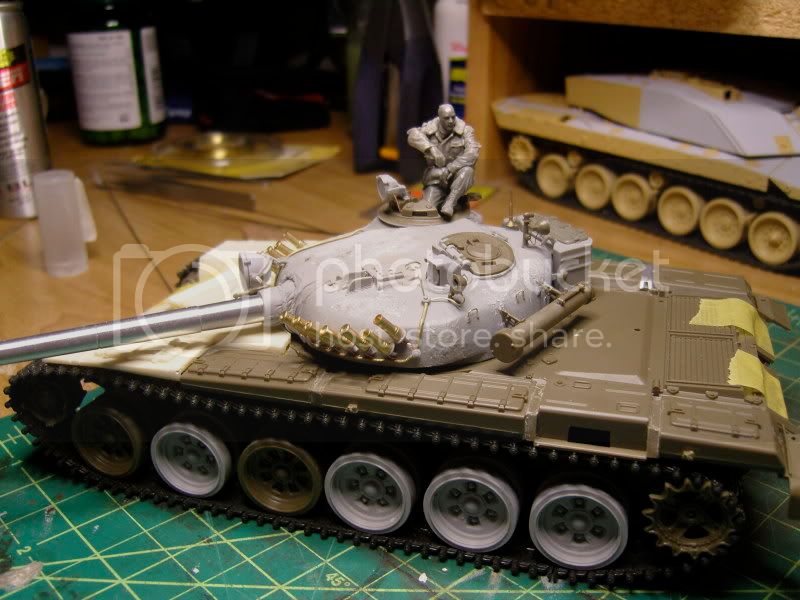
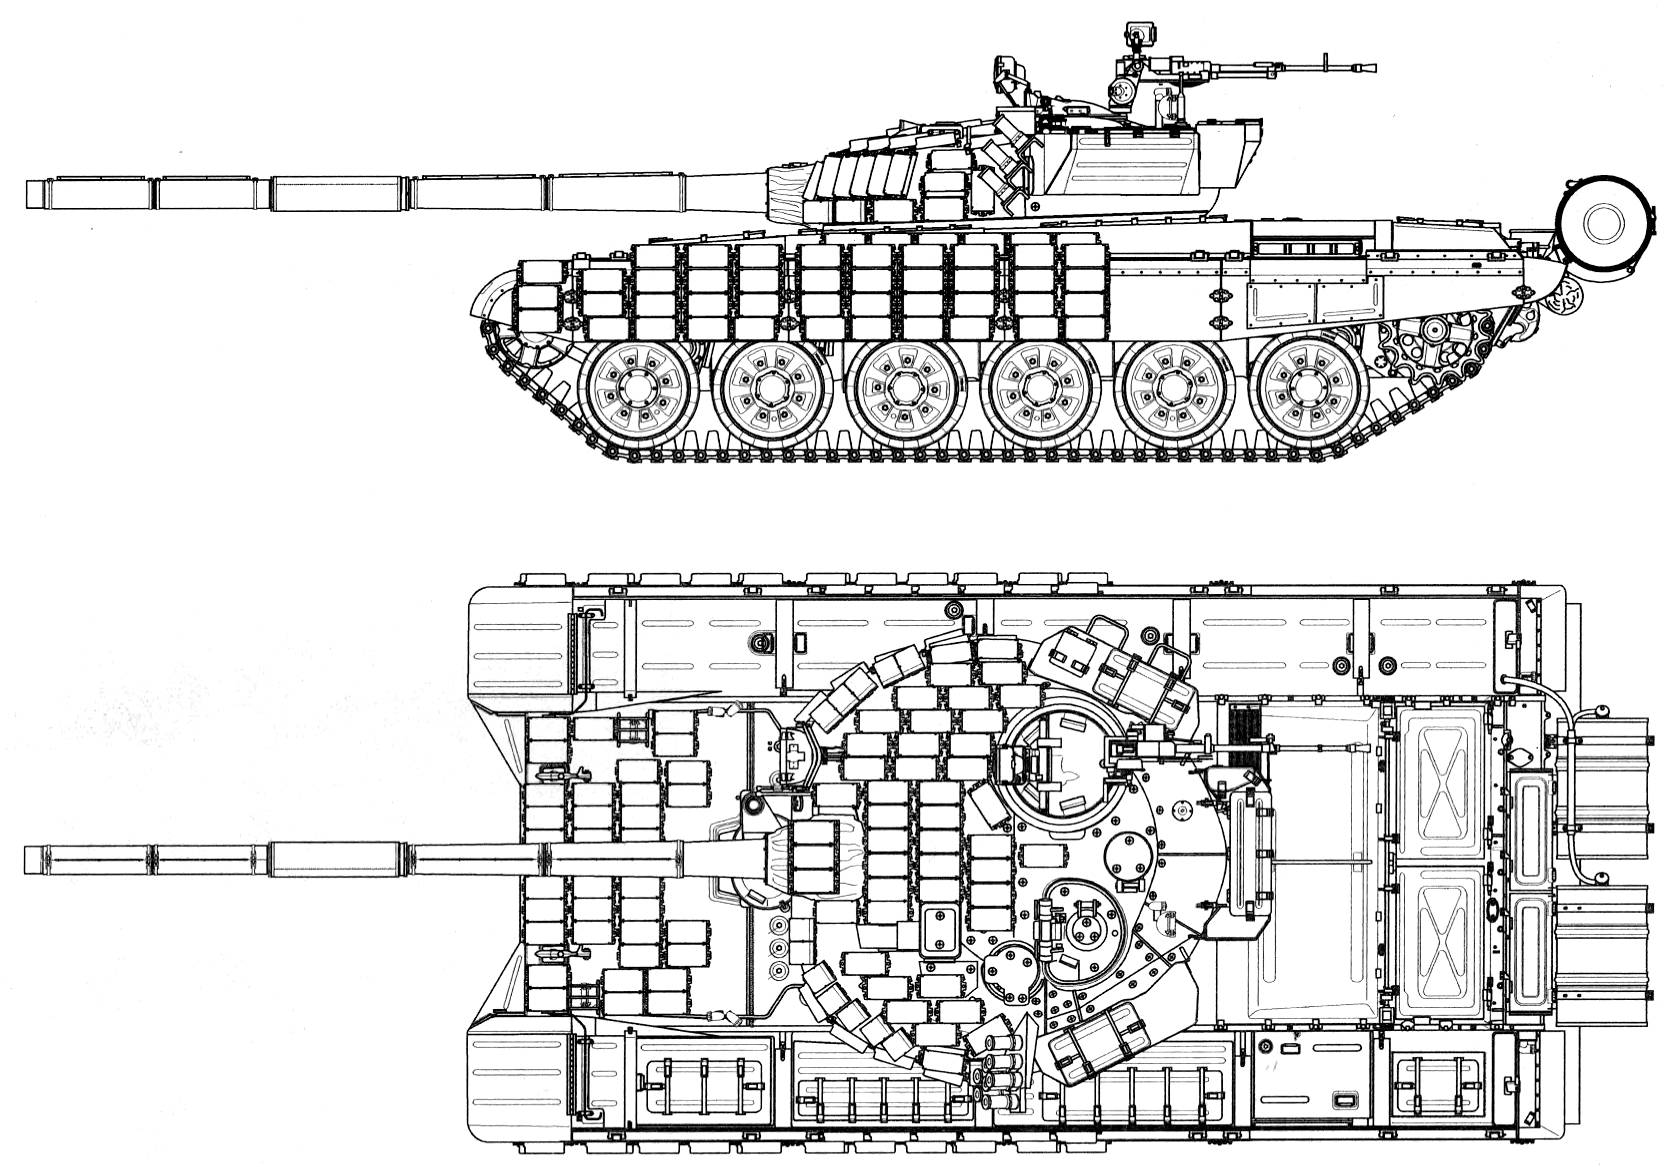
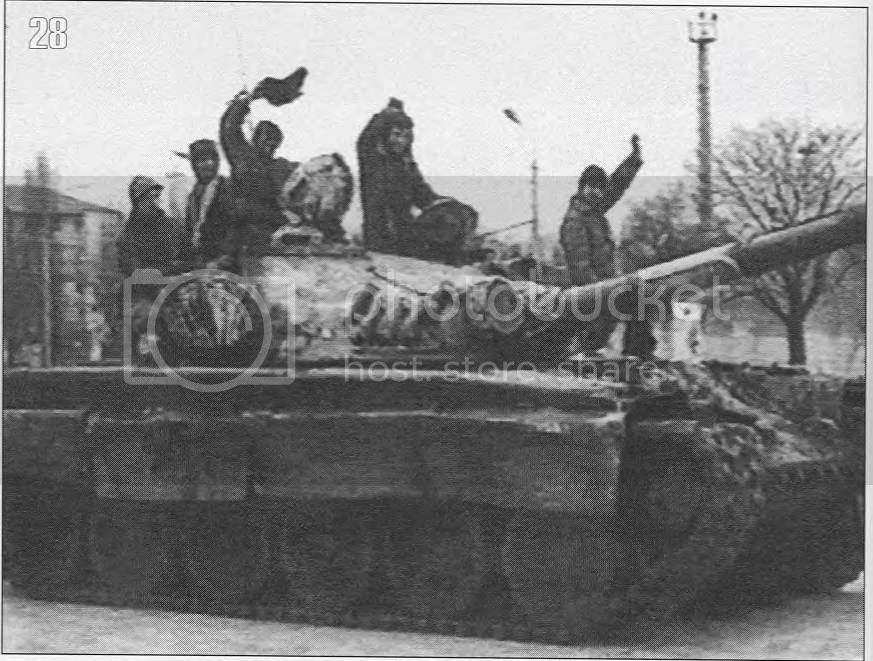
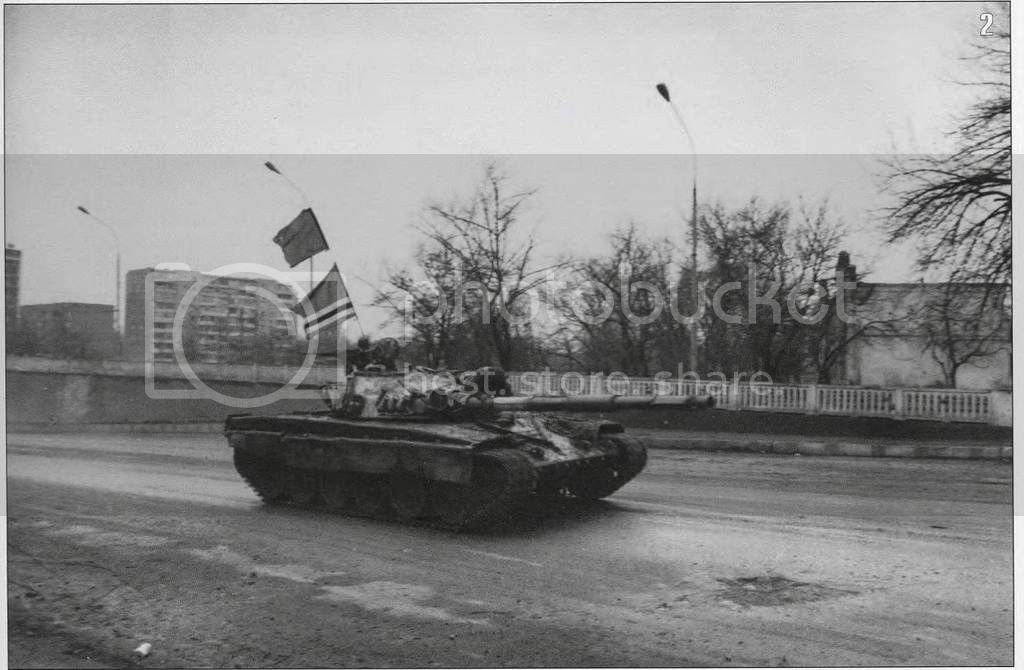
This is a T-72 A (dolly parton) as they call. I ordered from the duck modells a Miniarm turret and a Miniarm lower hull. First, the miniarm call T-72A lower hull (B35045) That is not an A version! But as i said i am not a big expert so i ordered, now i know. So i also ordered the dolly turret (B35035) from dukmodels (never ever again) i paid 100 euros for a smlae package and priority post. They wrote it that it takes 2-4 working days. My package arrived after two weeks. I said it's ok, i will survive, but when i opened the box, and there was a miniarm T-72 B1 (or europien number M2) turret, that was a moment when i decided, never ever dukmodel. So i started to study the photos about chechnyan war and i saw that i have only just this photo what show a Dolly Parton's type T-72. All others was T-72B or B1. I was really happy, but not 100% course, couse i wanted to build a dolly. So i decided to build this photo:


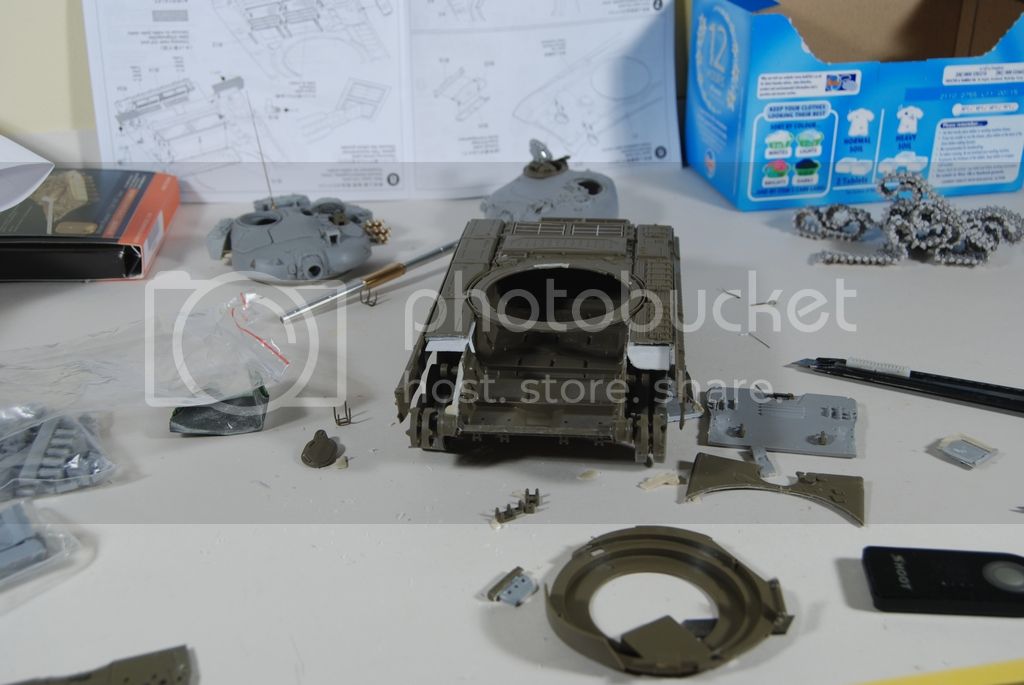
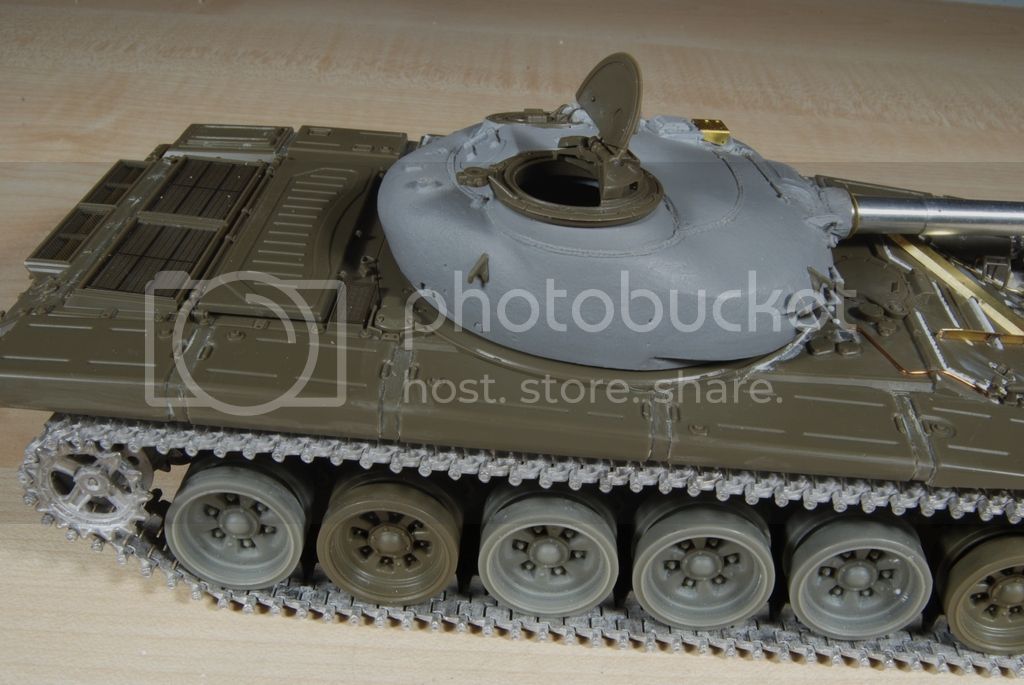
I have a basic set from voyager, a set friul track, and the two miniarm set. Will' see how is working, but i have now some experience with miniarm.
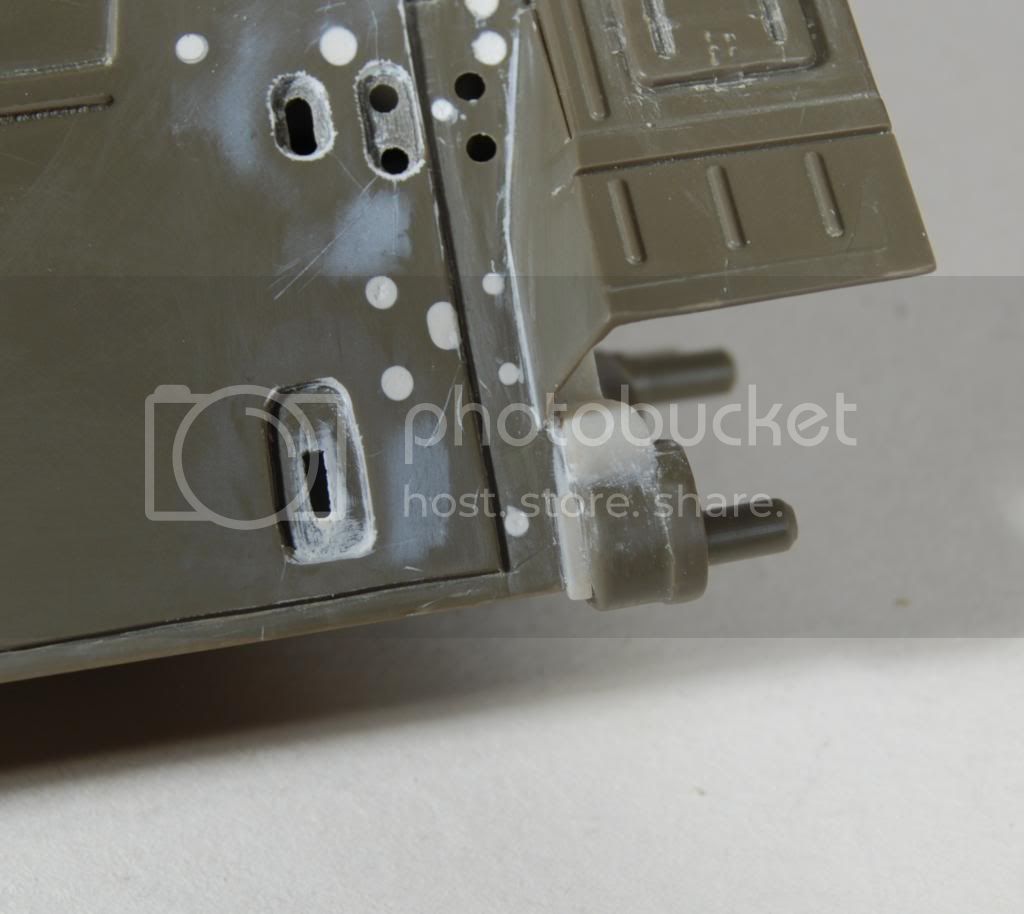
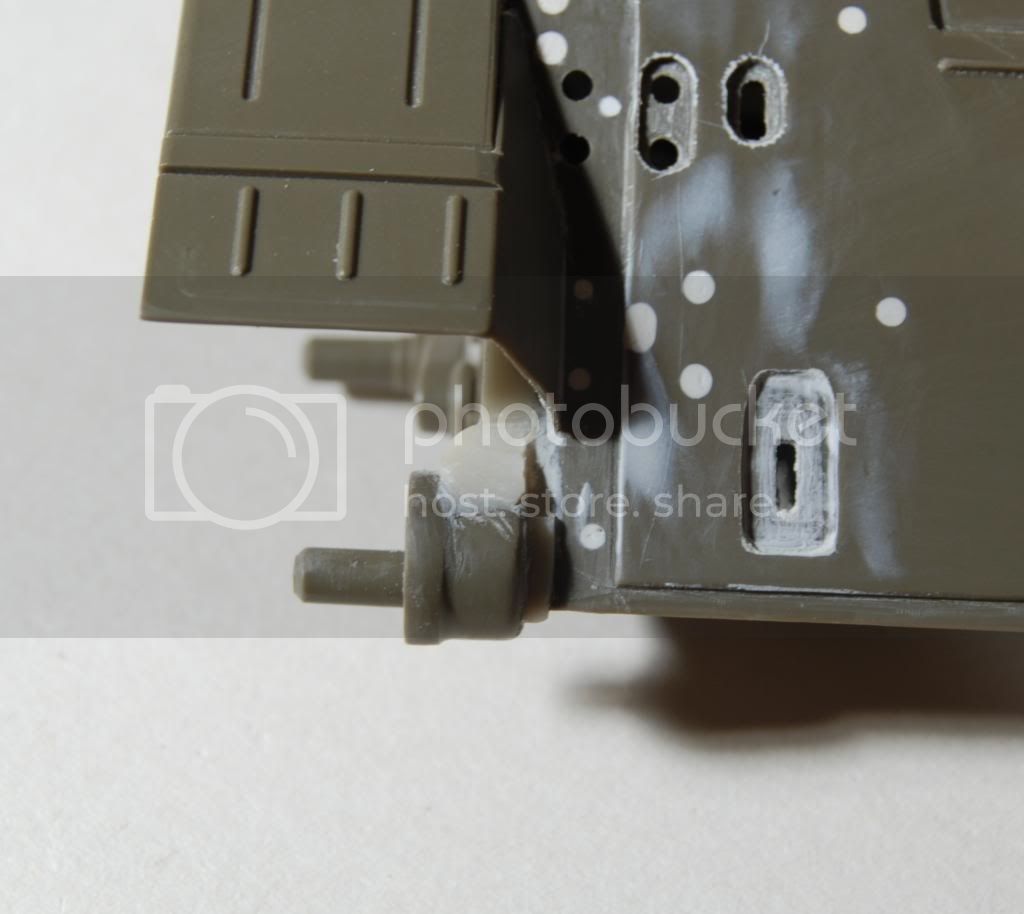
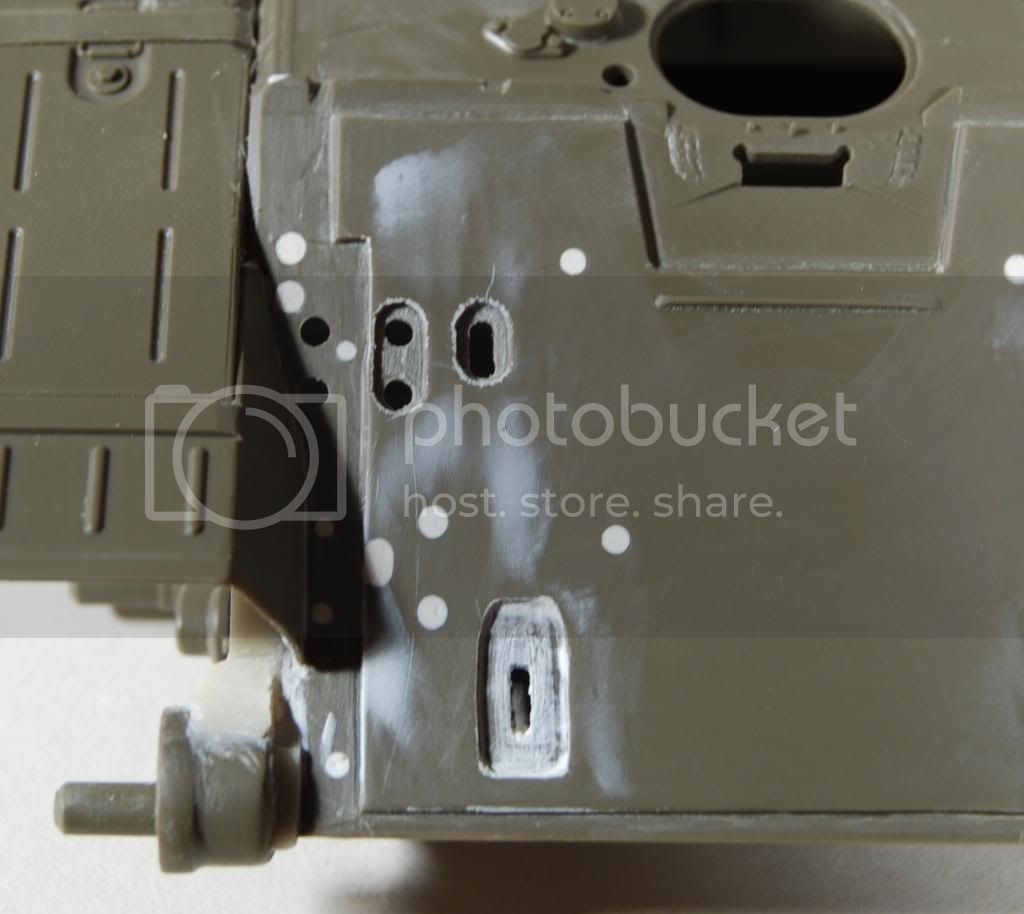
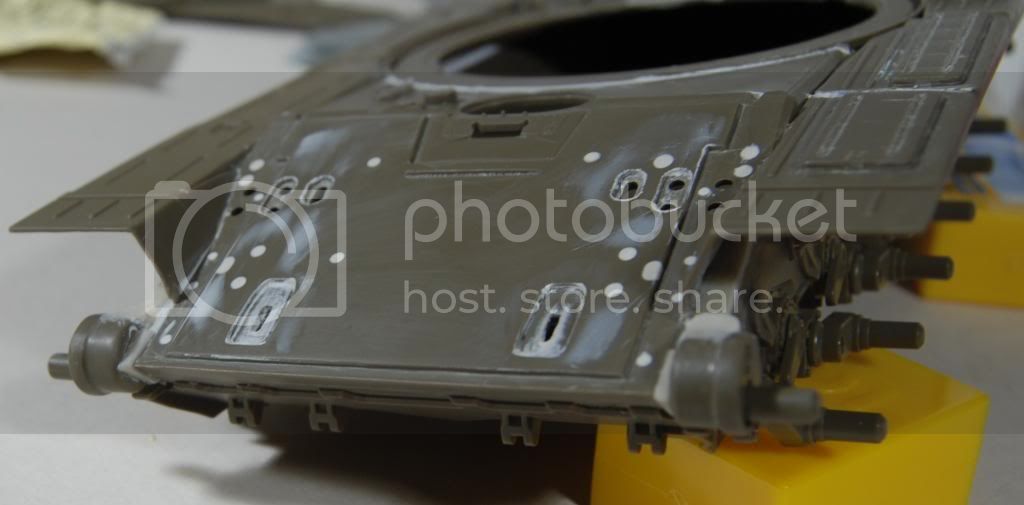
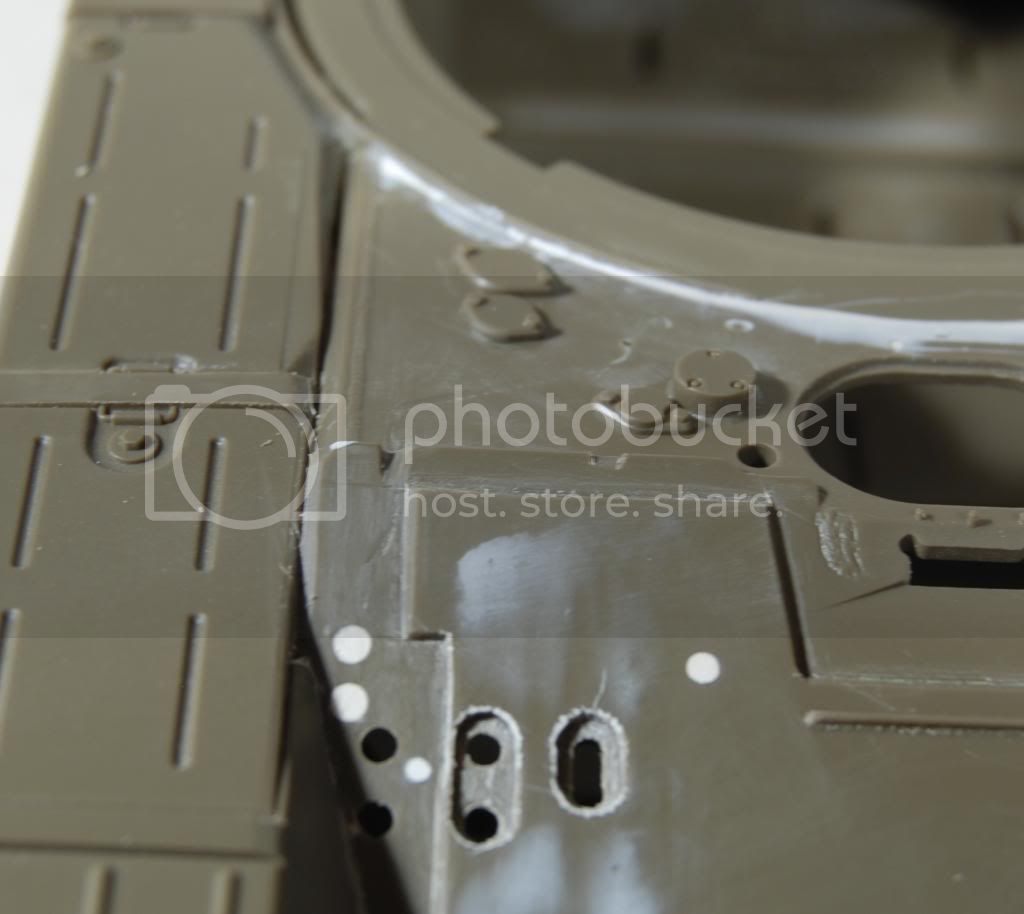
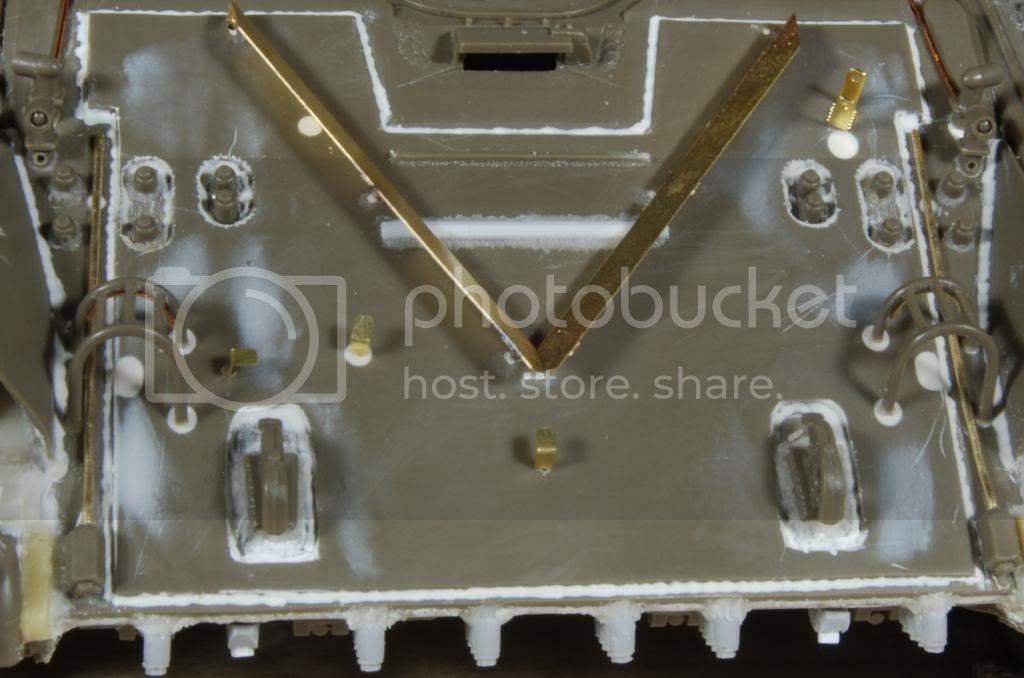
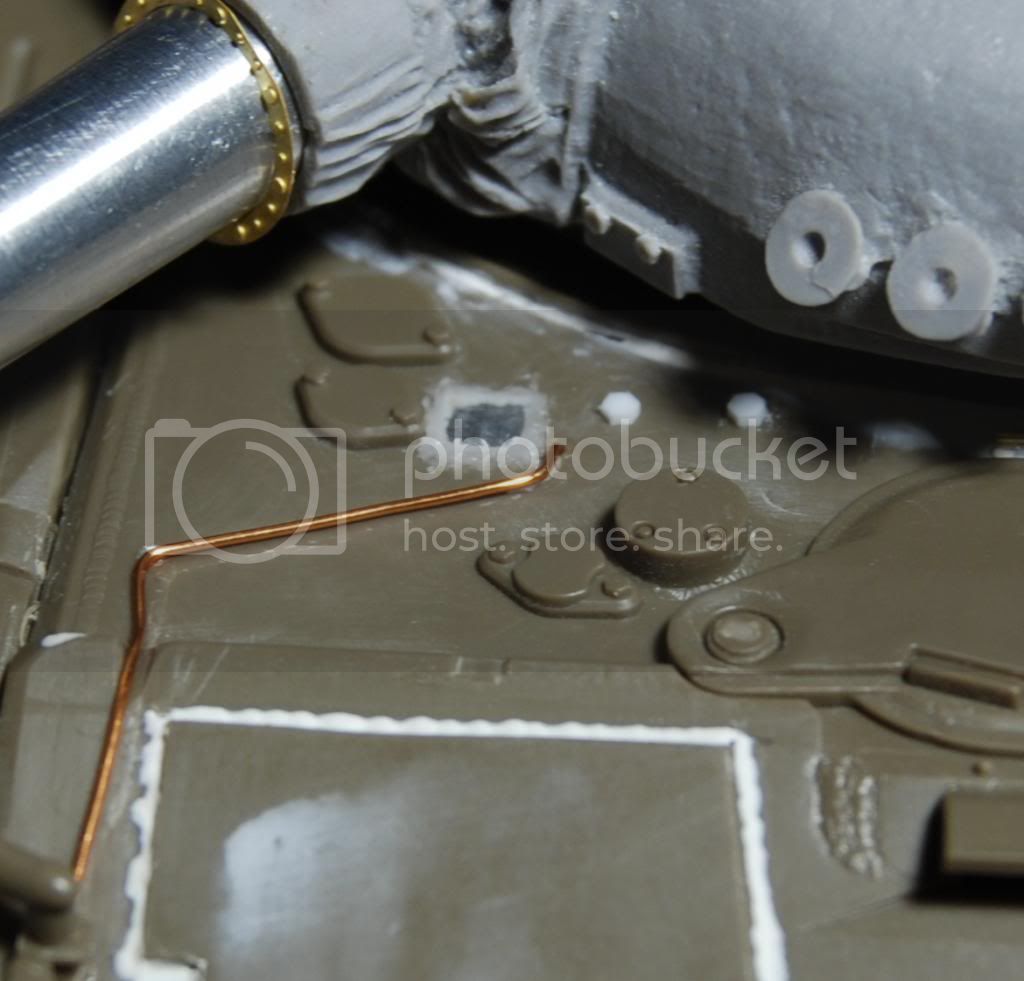
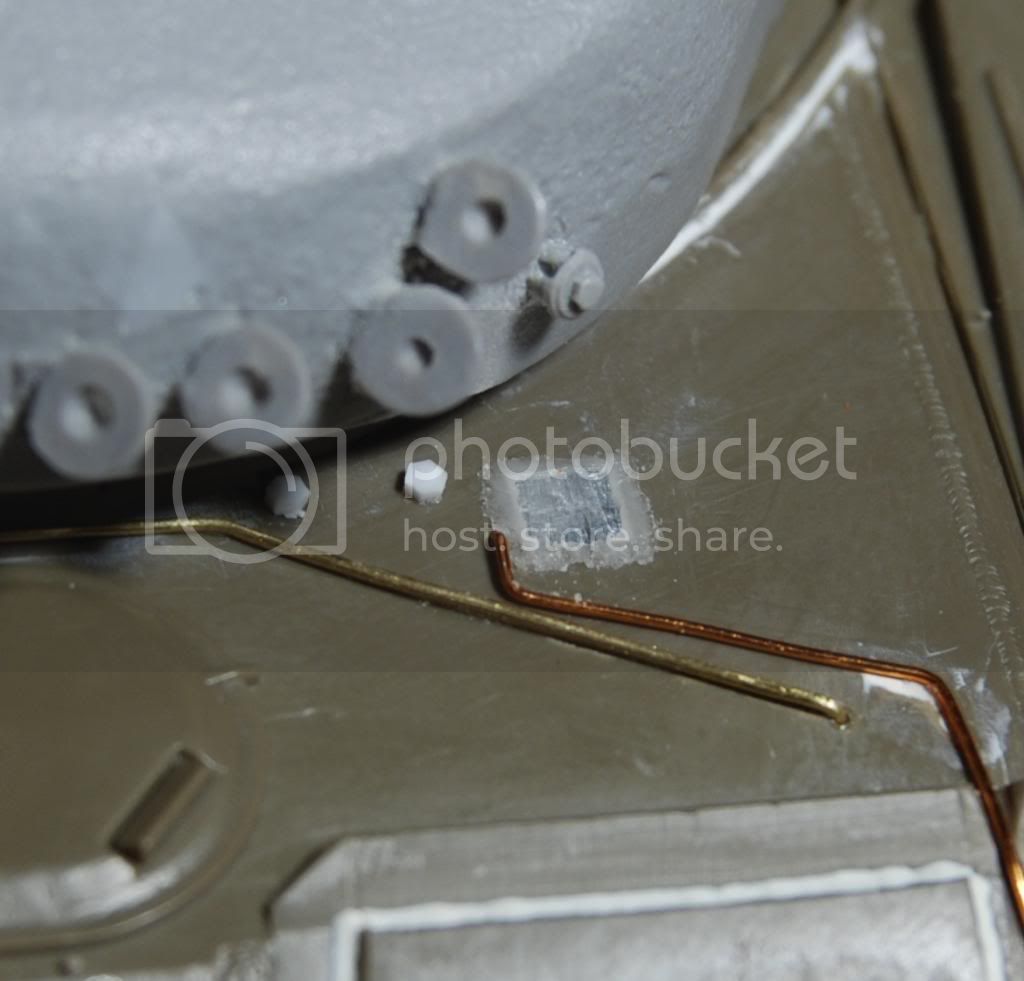
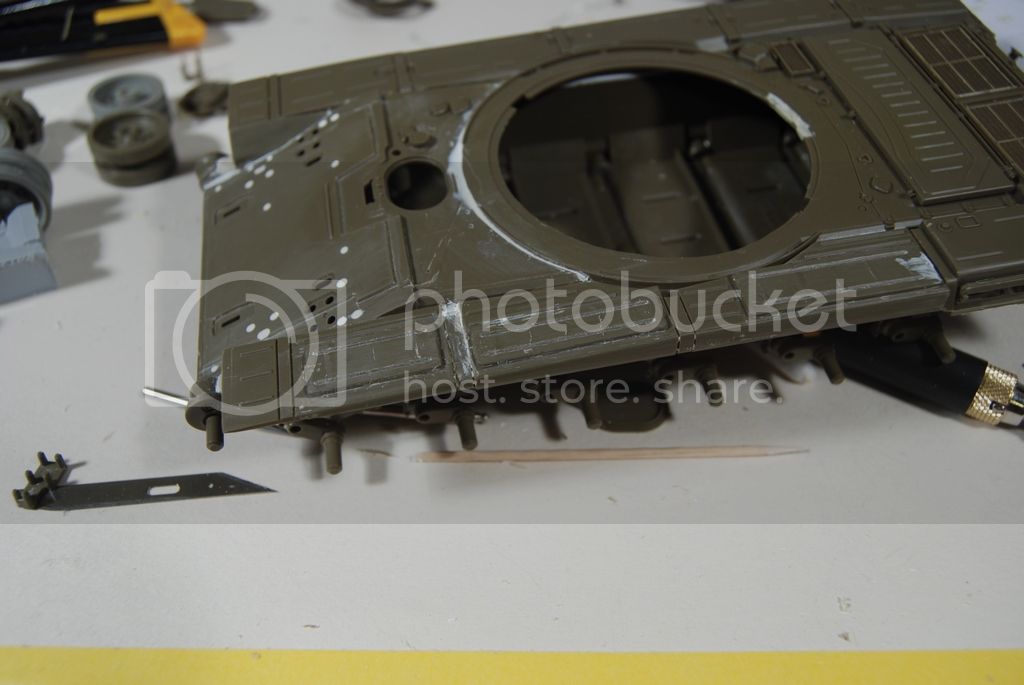
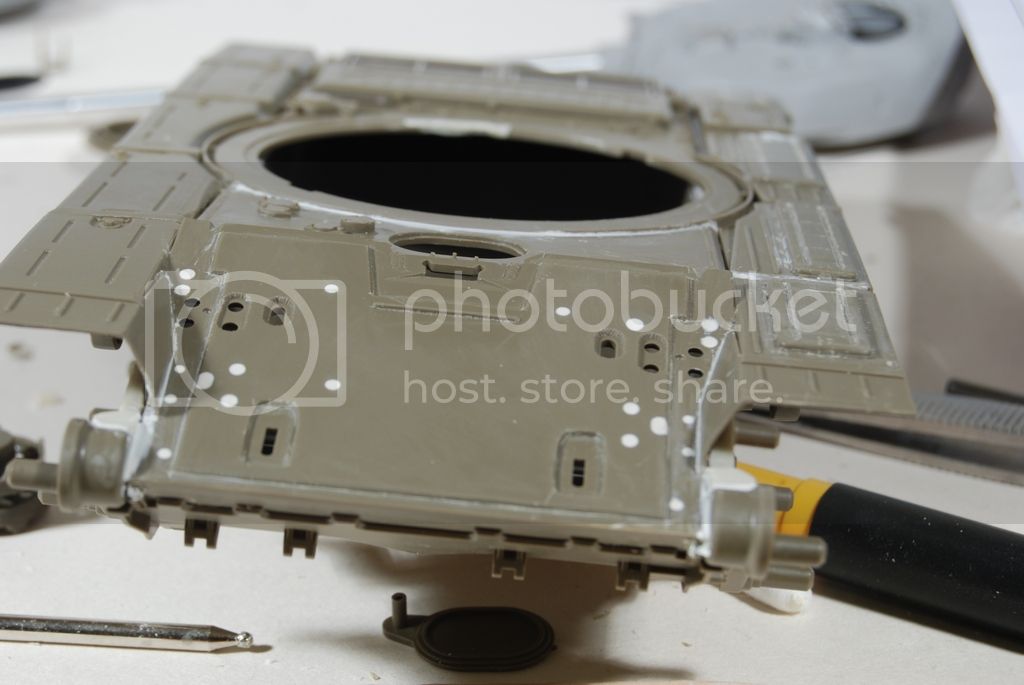
First of all. The turret ring is much smaller, than the normal tamiya, so i cut the tamiya turret ring and cut the miniarm ring as well, and just replaced the tamiya to the buttom side of miniarm. Second the tamiya made as a toy, so the whole lower hull upper of the track is just holey, there are two big stirol line now. I cut and throw away the two first front fender, but because of this there was two big hole on the front armor. There is putty now and the first wheels (return roller)' bracing is ready. Not perfect, but because it will be dirty, i don't mind too much. And finaly one more thing i cut the loader's hatch' lock from tamiya, and replaiced, couse if i want to close the hatch and leave the original miniarm version, there would be a big hole where should to be the stele of lock. That's the way how i made it the building, and now can come the fun (at least for me) the P.E.


Thanks, to watching

Cheers
Gergo
DOntos
Visit this Community
England - South East, United Kingdom
Joined: July 26, 2012
KitMaker: 89 posts
Armorama: 72 posts
Posted: Thursday, November 01, 2012 - 12:42 PM UTC
Wow that is an awesome looking T-72!
I love how tidily done the kit bashed front glacis and fenders are!
And all the other upgrades are just brilliant!
Cant wait to see this painted!
Dan
DerGeist
Visit this Community
Ohio, United States
Joined: January 21, 2008
KitMaker: 735 posts
Armorama: 707 posts
Posted: Thursday, November 01, 2012 - 03:06 PM UTC
Great looking build but aren't both pics you posted A models?


Erik
SzGergo
Visit this Community
Heves, Hungary
Joined: June 10, 2011
KitMaker: 83 posts
Armorama: 83 posts
Posted: Sunday, November 04, 2012 - 10:10 AM UTC
Hi Erik,

As far as i know that is the B1 version turret, couse there are the anti neutron radiation "cover" and the front armor is fatter as the A. But as I wrote before i am not a big expert so, maybe i made a mistake.

cheers
Gergo
Spiderfrommars
Visit this Community
Milano, Italy
Joined: July 13, 2010
KitMaker: 3,845 posts
Armorama: 3,543 posts
Posted: Sunday, November 04, 2012 - 10:25 AM UTC

Quoted Text

Hi Erik,

As far as i know that is the B1 version turret, couse there are the anti neutron radiation "cover" and the front armor is fatter as the A. But as I wrote before i am not a big expert so, maybe i made a mistake.

cheers
Gergo


So, let's check here...

http://dishmodels.ru/wshow.htm?p=253

http://dishmodels.ru/wshow.htm?p=2258

http://www.fotovalkirumodelism.com/page.php?page=359

Joking aside, it seems to me a great start

If you need other references, let me know

Cheers
SDavies
Visit this Community
England - South East, United Kingdom
Joined: January 09, 2010
KitMaker: 979 posts
Armorama: 959 posts
Posted: Sunday, November 04, 2012 - 10:36 AM UTC
Wow great job, I dont know much about the T-72 but I know a impressive model when I see one

Steven
shopkin4
Visit this Community
Illinois, United States
Joined: March 29, 2009
KitMaker: 1,135 posts
Armorama: 1,030 posts
Posted: Sunday, November 04, 2012 - 10:42 AM UTC
I've done some pretty extensive research on this vehicle.

The Chechens only had T-72A. There are some more photos in my build thread:

http://armorama.com/forums/159626#1339608

There are a bunch more photos in there and some good conversation.
SzGergo
Visit this Community
Heves, Hungary
Joined: June 10, 2011
KitMaker: 83 posts
Armorama: 83 posts
Posted: Sunday, November 04, 2012 - 10:45 AM UTC
Mauro!

Thank you so much, do you have B1 without briks?

cheers
Gergo
SzGergo
Visit this Community
Heves, Hungary
Joined: June 10, 2011
KitMaker: 83 posts
Armorama: 83 posts
Posted: Sunday, November 04, 2012 - 11:12 AM UTC
it seems to me that is a B1


or A with anti neutron radiation layer?
afv_rob
Visit this Community
England - East Anglia, United Kingdom
Joined: October 09, 2005
KitMaker: 2,556 posts
Armorama: 2,199 posts
Posted: Sunday, November 04, 2012 - 11:17 AM UTC
Nice build so far Gergo!

However this isn't a T-72B turret, its an A but with the anti-neutron lining. When fitted with the ERA bricks this turret version was designed AV. The Chechen rebels had T-72A's, as shown in your first photos (with the turrets painted white) and also captured some other versions-there are some famous shots of T-72BM covered in Chechen graffiti.

afv_rob
Visit this Community
England - East Anglia, United Kingdom
Joined: October 09, 2005
KitMaker: 2,556 posts
Armorama: 2,199 posts
Posted: Sunday, November 04, 2012 - 11:21 AM UTC
Gergo-that photo of a knocked out T-72 is a T-72A with anti-neurton lining. The easiest way to tell an A from a B is the undercut on the turret armour where the smoke dischargers are-this is a characteristic of A/M turrets, not B.
SzGergo
Visit this Community
Heves, Hungary
Joined: June 10, 2011
KitMaker: 83 posts
Armorama: 83 posts
Posted: Sunday, November 04, 2012 - 11:46 AM UTC
ok, so the question is, can i use my lower hull (body) with the dolly turret? or my body is defenetly a B version?
shopkin4
Visit this Community
Illinois, United States
Joined: March 29, 2009
KitMaker: 1,135 posts
Armorama: 1,030 posts
Posted: Sunday, November 04, 2012 - 12:07 PM UTC

Quoted Text

ok, so the question is, can i use my lower hull (body) with the dolly turret? or my body is defenetly a B version?


The lower hull body is correct. Just get your hands on an A turret and you should be fine

This is where I left mine

SzGergo
Visit this Community
Heves, Hungary
Joined: June 10, 2011
KitMaker: 83 posts
Armorama: 83 posts
Posted: Sunday, November 04, 2012 - 12:26 PM UTC
Sean!

This is the best news ever!!!!! Thanks man. I have an A turret in box, but i didn't see any reference to use my lower hull. Thanks a million, tomorrow i will start my dolly
shopkin4
Visit this Community
Illinois, United States
Joined: March 29, 2009
KitMaker: 1,135 posts
Armorama: 1,030 posts
Posted: Sunday, November 04, 2012 - 01:25 PM UTC
Wait, on closer inspection, I'm afraid its not. Others can chime in and correct me if I'm wrong
SzGergo
Visit this Community
Heves, Hungary
Joined: June 10, 2011
KitMaker: 83 posts
Armorama: 83 posts
Posted: Sunday, November 04, 2012 - 01:40 PM UTC
I'm afraid it's not correct as well. I just started to check my books and referencies. It looks like i have to buy another tamiya for basic, couse i want to make defenetly the dolly. Anyway i will finish this as well, just it won't be Chechnyan
Spiderfrommars
Visit this Community
Milano, Italy
Joined: July 13, 2010
KitMaker: 3,845 posts
Armorama: 3,543 posts
Posted: Sunday, November 04, 2012 - 07:48 PM UTC
To get further information, try looking also here

http://www.army.lv/files/86.pdf

http://army.lv/ru/t-72/foto/631/17#info

http://army.lv/ru/t-72/risunki/631/17#info

http://army.lv/ru/t-72/shemi/631/17#info


(PS Pics have been posted only for discussion purposes)
SzGergo
Visit this Community
Heves, Hungary
Joined: June 10, 2011
KitMaker: 83 posts
Armorama: 83 posts
Posted: Monday, November 05, 2012 - 11:28 AM UTC
Guys!

Thanks so much your helps! I really appreciate it. I started this topic as a "fast project" but I see now it won't be possible. So I decided, that i start again the whole project, and it will be an A version. I don't know shel I renamed the topic, or start a brand new, but now I go for a week time holiday back to hungary, so let me show the final picture, at least for a week time


see you after 13!

Cheers
Gergo
SzGergo
Visit this Community
Heves, Hungary
Joined: June 10, 2011
KitMaker: 83 posts
Armorama: 83 posts
Posted: Friday, November 23, 2012 - 12:47 PM UTC
hi all

thanks god, the photobucket changed something AGAIN, that's why no photos in this topic. I will fix it, but takes time.
So where should i start it? The first is that I realised (with a smale help) that I started to build completly wrong version. As you saw before I cut the front armor and i decided put it back the original Tamiya one. That was imposible, couse I already cut it away. But I was lucky, couse I had one from my T-90 project. I cut, and glued it to my lower hull. But the all tamiya kit is like a toy, so i had to start to remove the welding imitation, what is originaly on the tamiya plus armor's side. I also cut the two fenders, and started to cut the half of the house of the chain tensioner, couse the tamiya is much bigger than the original.


I made behind the chain tensioner a replacement, and also did the replacement of the armor on the side of the fenders both side


And finaly i finished the remaking of the shape the armor see the photo below (sorry for the hungarian subtitle on it)


That's all for today, coming back soon!

Cheers
Gergo
Leopard-2
Visit this Community
Bayern, Germany
Joined: November 10, 2009
KitMaker: 229 posts
Armorama: 220 posts
Posted: Friday, November 23, 2012 - 08:59 PM UTC
Damn what a surgery mess! That's one of those things which make a modeler a GOOD modeler and it's also one of those things i really do not like. Removing some details to replace them with PE-parts is one thing but doing a reconstruction requires some skills. So you got my respects and attention.
SzGergo
Visit this Community
Heves, Hungary
Joined: June 10, 2011
KitMaker: 83 posts
Armorama: 83 posts
Posted: Friday, February 08, 2013 - 02:56 PM UTC
Hi Everyone!

I've been too big quiet since last year, but just in publishing!
I was working on my beast a lot, and I didn't post it, couse it wasn't too spectacular.
I almost finished with the front area, there will be some more progress (lights, and cables) but basicly that is ready now. Almost all the welding imitation is ready, but still in progress!


I finished with the buttom side all the KTM kontact's welding. Unfortunately I have only one light to take photos, but it looks like not the best. I'm gonna get another one and I promise I'll tkae better pictures!


Ready the bases of the hold-down camp of the fuel tanks. I'll get soon good lead foil to prepair them.


Slowly i start to make the hull part as well, there are some details.


I hope you like it!?

Cheers Greg

clay_cliff
Visit this Community
Lima, Peru
Joined: April 07, 2008
KitMaker: 375 posts
Armorama: 371 posts
Posted: Friday, February 08, 2013 - 05:36 PM UTC
Of course I like it! I have a Tamiya T-72 in my stash and need some inspiration. Best regards.

José.
Reiter960
Visit this Community
California, United States
Joined: June 24, 2007
KitMaker: 503 posts
Armorama: 500 posts
Posted: Friday, February 08, 2013 - 06:11 PM UTC

Quoted Text

Great looking build but aren't both pics you posted A models?
Erik


First photo shows an A model, second appears to be Ural with side stowage bin retrofitted from a B.
SzGergo
Visit this Community
Heves, Hungary
Joined: June 10, 2011
KitMaker: 83 posts
Armorama: 83 posts
Posted: Saturday, February 09, 2013 - 01:55 AM UTC
Thanks José, good luck with your beast!

George, those photos are my inspiration pictures, I'd like to create the first version A. The second photo there just see how they were looking at in that time. The project started it as a BI (russian call sign) version, but I realised, that the first photo is an A (dolly parton) version.

Cheers
Gergo
SzGergo
Visit this Community
Heves, Hungary
Joined: June 10, 2011
KitMaker: 83 posts
Armorama: 83 posts
Posted: Saturday, April 27, 2013 - 08:43 AM UTC
Hi Everyone!

I'm still alive I mean I've been disapired for a while, couse I had new job, new city, new home, so couldn't make as much progress as i wanted, but in the last month finaly I could do. Mostly the fron armor, and the turret, and if i had time, i would do the rest. Now the turret is almost 95% ready, and the hull is 40%, But next week i can do more progress, couse i will have some extra days.
So I finished, the front armor, but not everything, the wire and some smale P.E. still missing. I almost finished the turret, the "smoke garnet seed" I don't know is that the right word or not. Finished with the boxes,(bins) on the turret, (the back bin is working)Not all the welding imitation is ready at the moment, but almost. Ready the infra, and it's wiring. The only one thing what is missing from the turret is the telemeter. That is absolutely wrong, from Miniarm! So my friend will give me one correct one, but until that, i'm gona do some progress on the hull. And here are the photos.


 _GOTOTOP