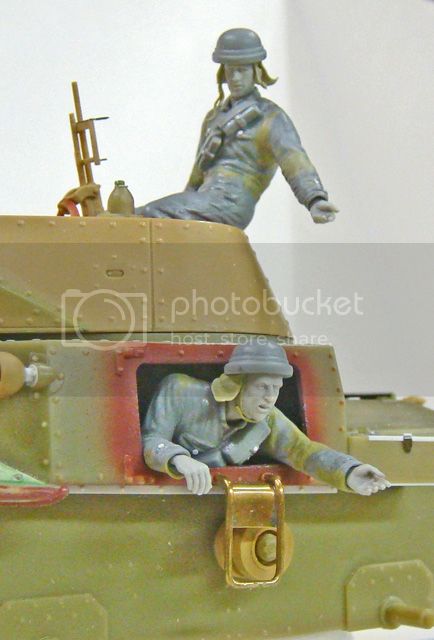
I'm continuing to work on my Italian M13/40 North African vignette.
Armorama::M 13/40 early Kit Bash
Armorama:Gilera LTE 500 Motorcycle
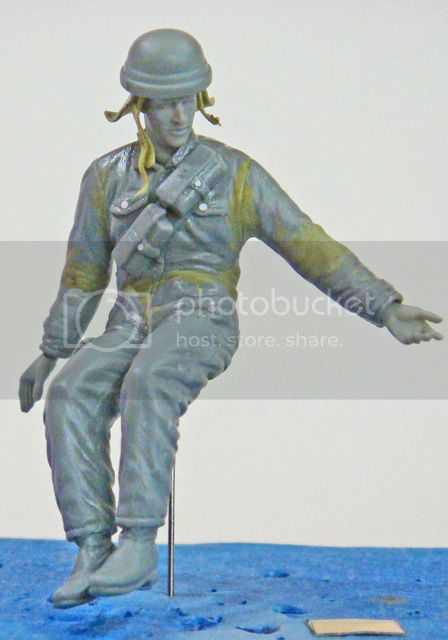
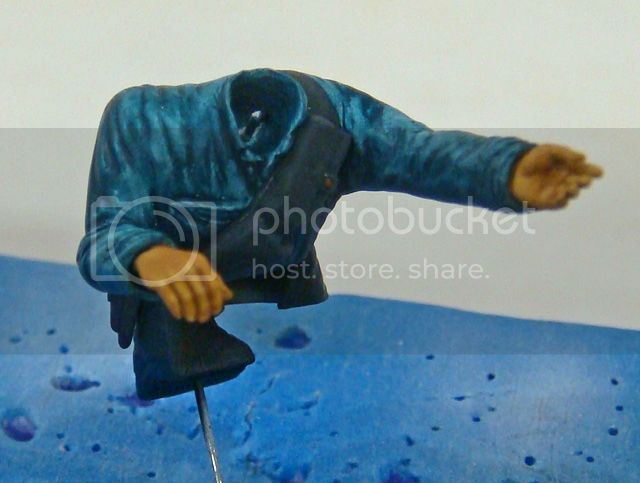
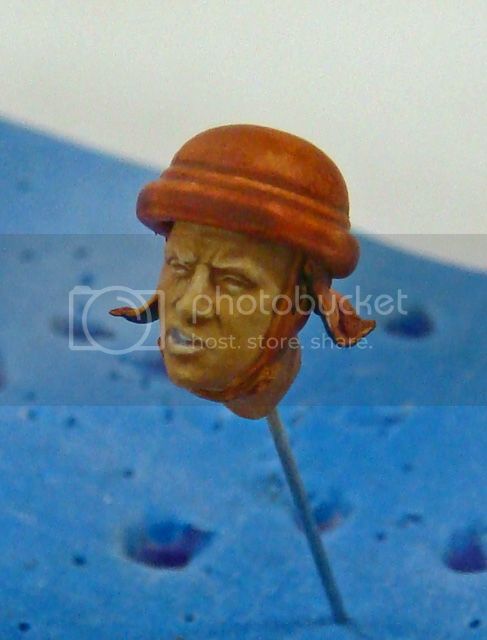
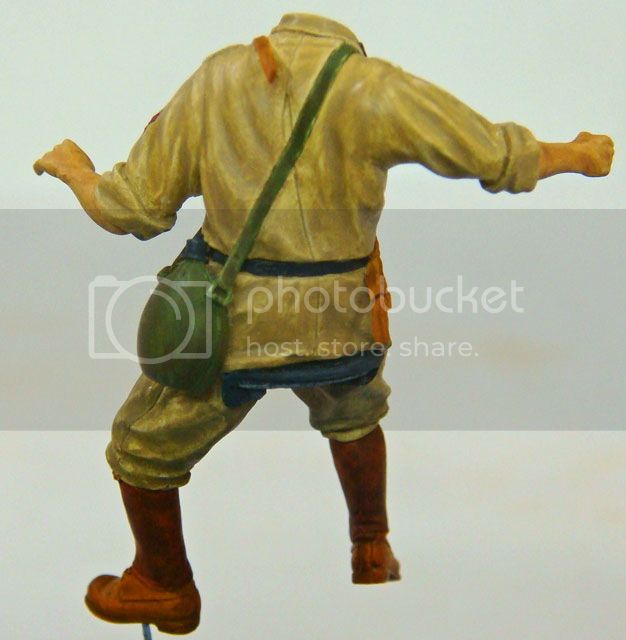
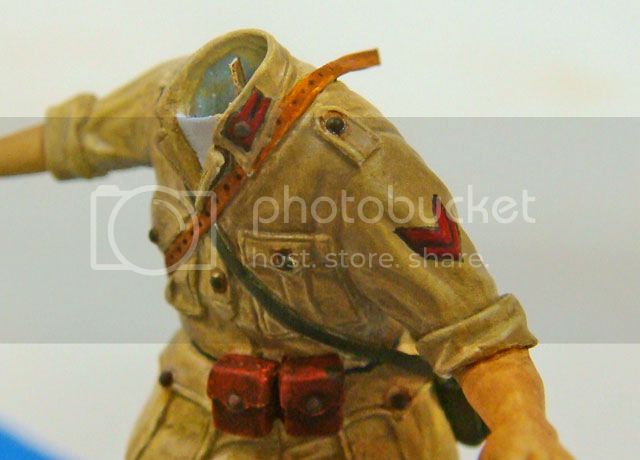
I've finally gotten the figures all ready to prime and paint.
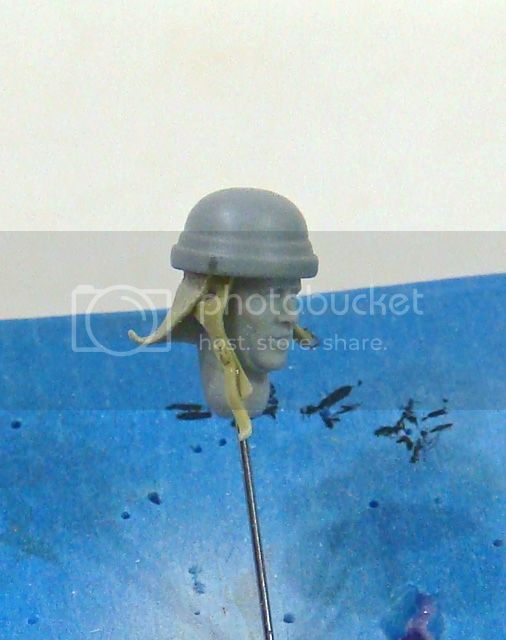
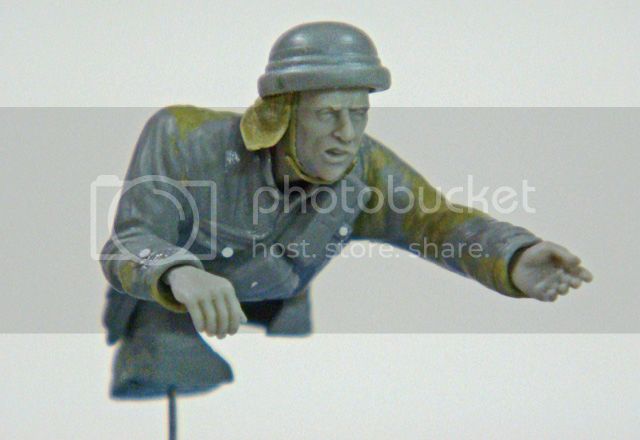
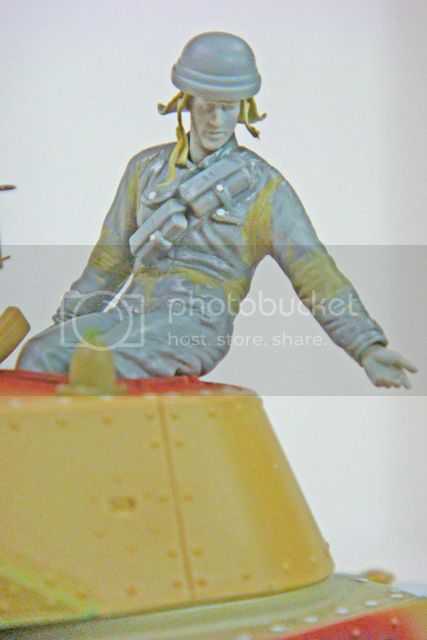
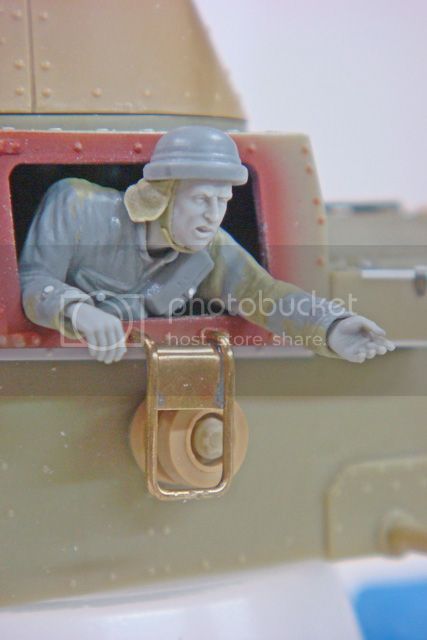
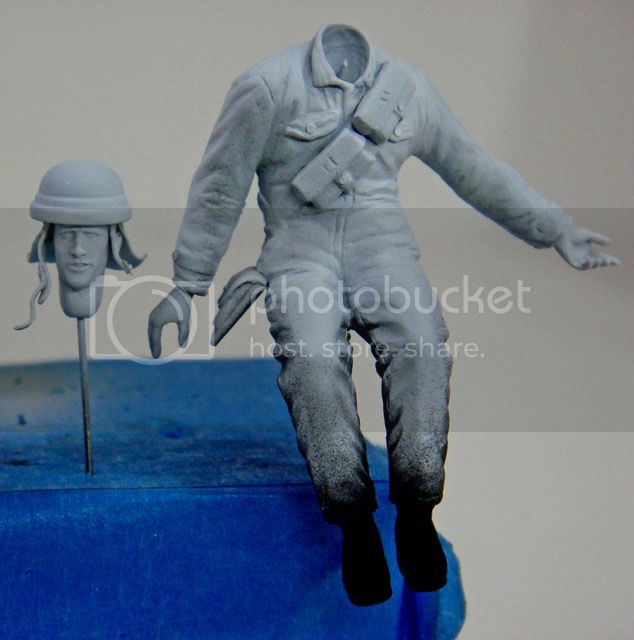
The tank crew are converted MiniArt figures. I've modified their poses and added heads and hands from Hornet. Their helmets are from the MiniArt set with two-part Milliput epoxy putty chin straps and neck flaps.
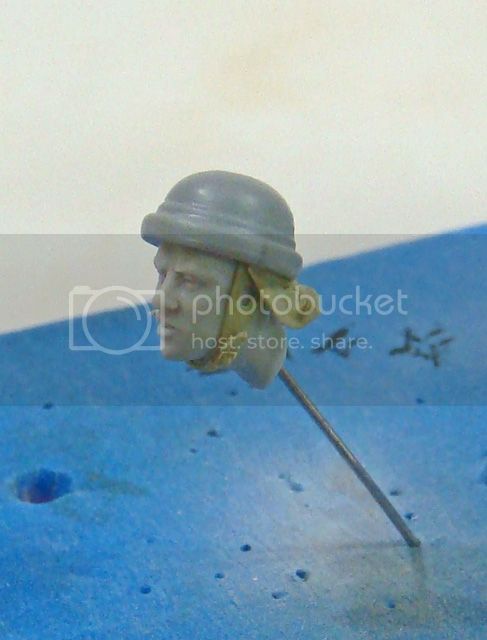
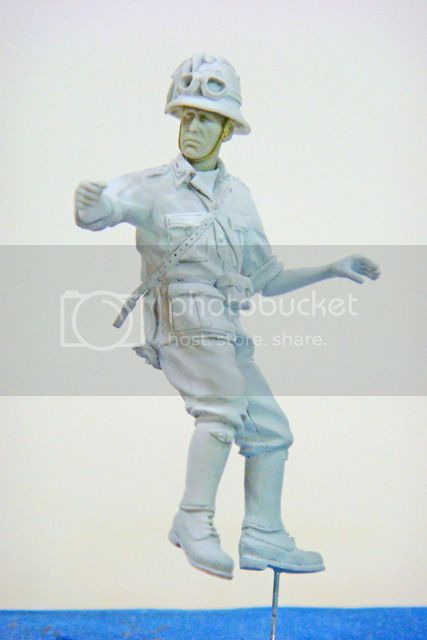
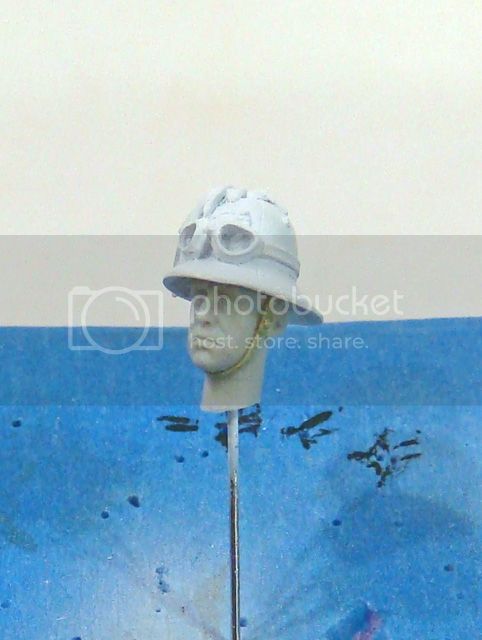
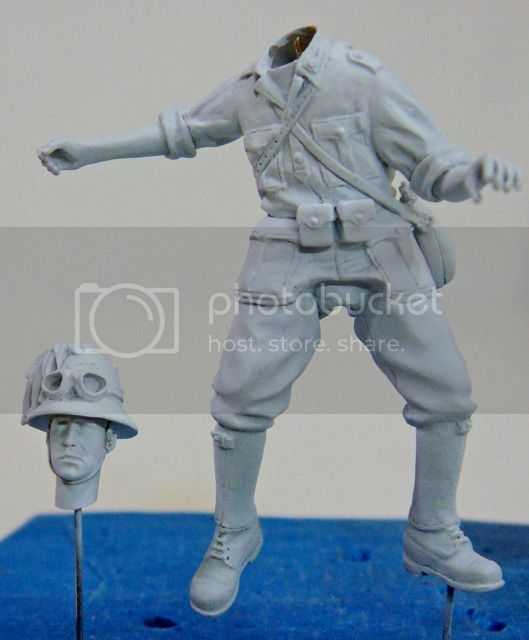
The motorcycle rider is a Model Victoria figure that comes with their Gilera LTE 500 kit. I've modified his pose by moving his right arm and replacing the head and right hand with Hornet parts. The chin strap is, once again, Milliput epoxy.
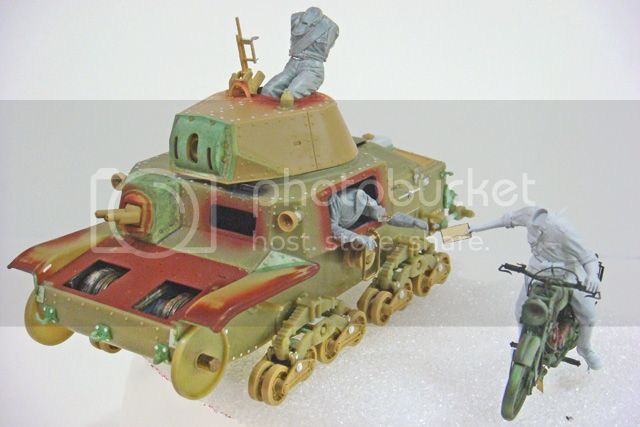
In this first photo you can see my test fit of the anatomy and basic figure and scene composition.
The MiniArt figures are still in their wire-frame / cut-and-paste so that I can make minor adjustments.
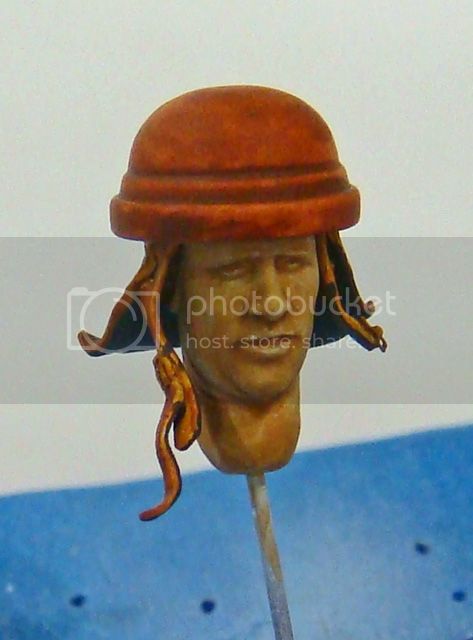
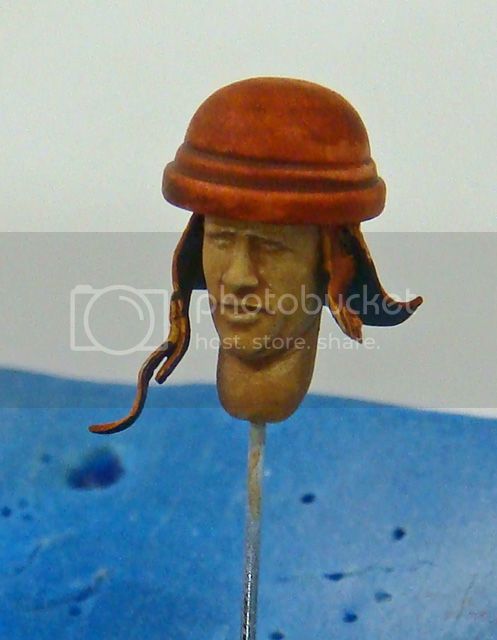
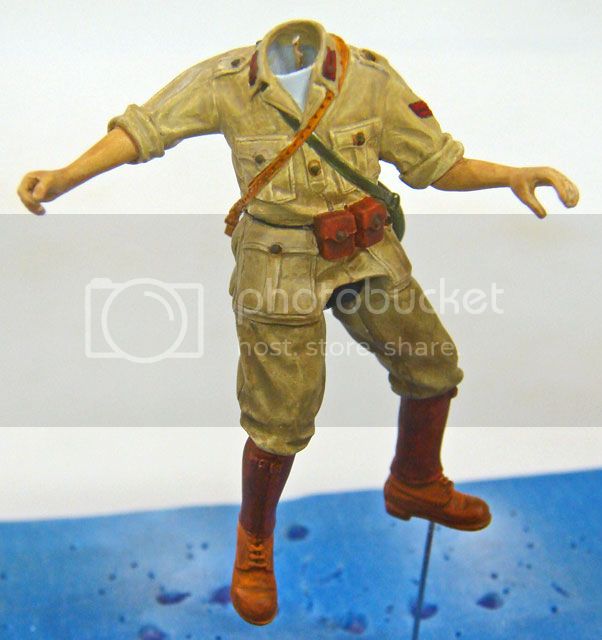
Here's the commander figure in his final pose. His head is not glued on, just held with a wire pin for now so that I can remove and paint it.
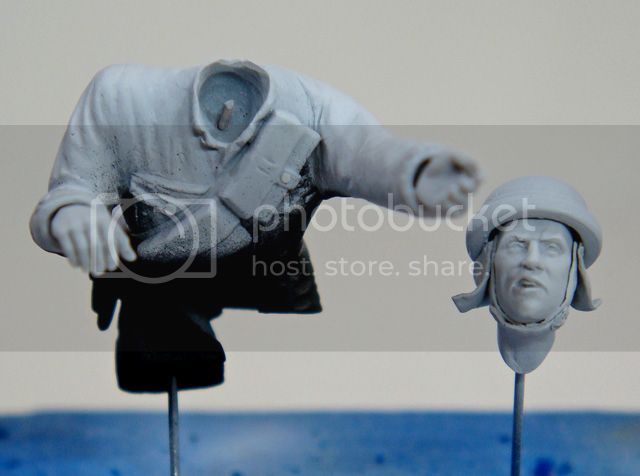
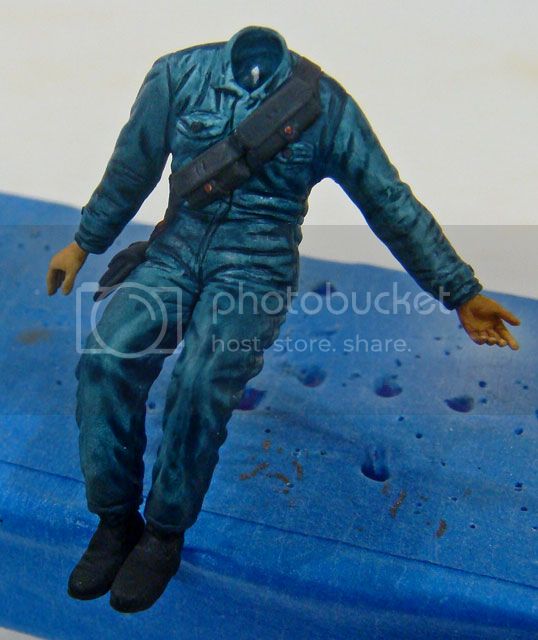
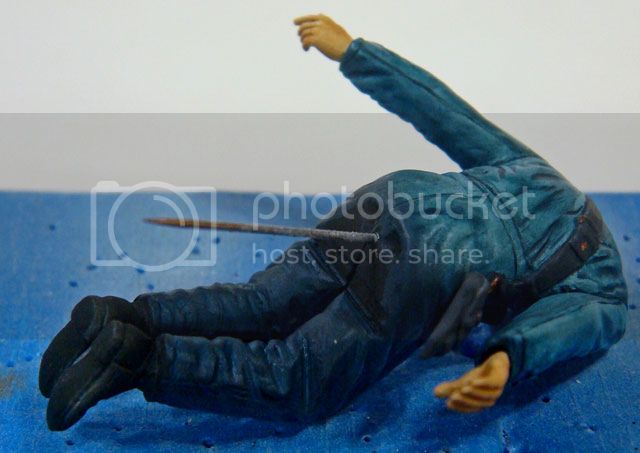
Here's the crew-dog that will hang out of the hull side hatch.
I should have mentioned that the Hornet heads used for these two guys are from the head sets of guys looking up and looking down so that their poses would work like I wanted.
Here's the motorcycle rider. I had thought that I would use the Model Victoria head that came with it, but after priming, it turned out that the skin surface was rather more rough than I could accept, so Hornet to the rescue...
Here're are a couple of final pictures showing the finished tankers test fitted into their hatches.
So, now comes the fun stuff, painting!
Happy modeling,
Figures
Military figures of all shapes and sizes.
Hosted by Darren Baker, Mario Matijasic
Italian Ariete Tankers North Africa
SdAufKla
South Carolina, United States
Joined: May 07, 2010
KitMaker: 2,238 posts
Armorama: 2,158 posts
Joined: May 07, 2010
KitMaker: 2,238 posts
Armorama: 2,158 posts
Posted: Tuesday, November 27, 2012 - 01:56 PM UTC
Keef1648
South Carolina, United States
Joined: January 23, 2008
KitMaker: 1,240 posts
Armorama: 1,192 posts
Joined: January 23, 2008
KitMaker: 1,240 posts
Armorama: 1,192 posts
Posted: Wednesday, November 28, 2012 - 12:32 AM UTC
You never stop amazing me with your free hand sculpting.
First class effort and an inspiration to all of us here.
Thanks for sharing...
Keith.
First class effort and an inspiration to all of us here.
Thanks for sharing...
Keith.
jrutman
Pennsylvania, United States
Joined: April 10, 2011
KitMaker: 7,941 posts
Armorama: 7,934 posts
Joined: April 10, 2011
KitMaker: 7,941 posts
Armorama: 7,934 posts
Posted: Wednesday, November 28, 2012 - 03:15 AM UTC
Very very cool project. The figures are turning out to be spectacular,which is so nice to see. I remember a time back in the day when Mr Roof did not attempt to accent his excellent vehicles with humans. Obviously those days are long gone!!!
J
J
Keef1648
South Carolina, United States
Joined: January 23, 2008
KitMaker: 1,240 posts
Armorama: 1,192 posts
Joined: January 23, 2008
KitMaker: 1,240 posts
Armorama: 1,192 posts
Posted: Wednesday, November 28, 2012 - 03:19 AM UTC
Quoted Text
Very very cool project. The figures are turning out to be spectacular,which is so nice to see. I remember a time back in the day when Mr Roof did not attempt to accent his excellent vehicles with humans. Obviously those days are long gone!!!
J
Cos he is more manur... I mean mature in his work see and stepped up his game plan these days...
Having seen it up close and personal, It just amazes me..
Keith.
stamey
South Carolina, United States
Joined: October 21, 2011
KitMaker: 26 posts
Armorama: 25 posts
Joined: October 21, 2011
KitMaker: 26 posts
Armorama: 25 posts
Posted: Wednesday, November 28, 2012 - 07:37 AM UTC
Great Stuff Mike,
When do we get to see those figures painted? The tank as well? Looking forward to seeing those up close shots.
Scott
When do we get to see those figures painted? The tank as well? Looking forward to seeing those up close shots.
Scott
SdAufKla
South Carolina, United States
Joined: May 07, 2010
KitMaker: 2,238 posts
Armorama: 2,158 posts
Joined: May 07, 2010
KitMaker: 2,238 posts
Armorama: 2,158 posts
Posted: Wednesday, November 28, 2012 - 10:02 AM UTC
Thanks, guys!
All very nice comments and good for my ego until I open up the thread with Teasung Harms' sculpture of Otto Carius as painted by Calvin Tan!
Now that's a humbling and inspirational bit of work there!
@ Jerry: Yea, those were much simpler days, my friend. But then, you were always there for inspiration, and now I'm just trying to catch up to ya!
BTW: I'm digging those castle ruins you whipped up while the power was out!
@ Keith: Hey, I took a bath yesterday before I left the farm to come down to the big city... I think that smell was from the animal you guys keep in the hobby shop now.
(Well, I hope it was from Walter... but then again, maybe that bath was last week! )
@ Scott: Hopefully I'll have some significant painting progress on the figures done by our next meeting. The tank is still in a mostly disassembled state until I'm sure that I won't have to do anymore fitting with the figures. Once they're done, then I'll start painting and assembling the tank. (I do have all of the parts for it finished, though!)
I got the figures primed yesterday and made good progress today in the acrylic under-coating. Once I get the under-coating done, I'll post some up-dated pics here. I'm thinking by next Monday I should be able to start with the oils, so maybe by the next meeting I'll have the faces painted at least.
Happy modeling, guys!
chazman
Joined: October 24, 2005
KitMaker: 88 posts
Armorama: 85 posts
KitMaker: 88 posts
Armorama: 85 posts
Posted: Wednesday, November 28, 2012 - 05:42 PM UTC
Looks great! Really like the putty chinstraps. Any tips on making those?
Posted: Thursday, November 29, 2012 - 12:54 AM UTC
That is some very fine figure converting Mr. Roof! I usually use tape and Aber buckles for chin straps etc so I am blown away by the detail you've managed to get from Milliput for the straps- they are so finely detailed and the placement on the Commander figure gives the nice impression that they are loosely dangling and moving with the movement of the figure. I think you've chosen Hornet heads well too- they all seem to interact naturally. I can't wait to see some paint on these figures!
SdAufKla
South Carolina, United States
Joined: May 07, 2010
KitMaker: 2,238 posts
Armorama: 2,158 posts
Joined: May 07, 2010
KitMaker: 2,238 posts
Armorama: 2,158 posts
Posted: Thursday, November 29, 2012 - 01:45 AM UTC
Quoted Text
Looks great! Really like the putty chinstraps. Any tips on making those?
Well, I'm still trying to develop a technique myself and am learning as I go.
However, here's what I'm doing now.
Mix the Milliput as normal. Then roll it out into a thin sheet.
I do that by first rolling the putty into a small "worm" with my fingers and then using a piece of styrene tube as a "rolling pin." To keep the putty from sticking to the flat surface or the tube, I use ordinary talcum powder. (This is absorbed by the putty and does no harm to it.)
I then let the thin sheet of putty "set up" for a while. This timing just takes some practice and experimenting. What I'm aiming for is still flexible, but not too flexible to work with.
I then cut the strap that I want from this sheet. I generally use more of a chopping motion than a scoring motion to avoid distorting the putty as much as possible.
I attach one end of the soft putty strap to the figure using a small drop of CA glue. I've found that the CA reacts almost instantly with the putty, so I try to use a little as possible.
I then form the the strap and if necessary, attach the other end also using CA glue. I allow the strap to set over night and then use super-thin CA (in the case of the straps under the chins on two of the figures) under the length of the strap to fix its entire length.
I've found that patience is the key to all of this and I get the best results doing only one or two putty parts at a time and then allowing them to set up hard before trying to add to them.
So, for example, the commander's head took four days to do - one for the ear pieces; one for the small strap on the right ear piece; and one for the neck flap and attaching the helmet to the head; and one final session to add the PE buckle and its center putty "bump" to the end of the left ear piece / strap.
Of course, I worked on all three heads at once, so that I was done with all of them at the same time. I also did the putty work on their body part joints concurrently too, so although the set-up / drying time does seem long, you can still get a lot of work done.
I think that next time I do this sort of work, I'll use Green Stuff two-part epoxy instead of the Milliput for any straps and things. The Milliput is brittle once it sets, but the Green Stuff retains some flexibility and so it should be a little more durable.
But as I understand from reading explanations by several (much!) more advanced sculptors, the Green Stuff is better suited for the purpose of making straps, etc, than the Milliput.
Taking my time and not trying to do too much at once seems to be the most important tips, though.
@Karl N. Hoy:
Thanks for the props, Karl.
I've always loved the Hornet heads and my figure modeling has really progressed since I started using them. As my good friend Jerry mentioned above, I was never much of a figure modeler and much of that was because I couldn't find the kind of detail that I want in my models with most figures.
However, with the advent of the internet making shopping for specialized items so much easier, I found a good source for the Hornet figures and parts and have been using them on most of my figures for the last 15-20 years. Although there are now several figure lines that are sculpted as nicely as Hornet (Alpine, for instance), Hornet are still my "go-to guys."
For this project, I really needed figure heads that were looking down and up for the commander and crewman, and once again, Hornet has come through.
Happy modeling!
chazman
Joined: October 24, 2005
KitMaker: 88 posts
Armorama: 85 posts
KitMaker: 88 posts
Armorama: 85 posts
Posted: Thursday, November 29, 2012 - 03:39 AM UTC
Thanks Mike. I've done a few putty chinstraps in the past, and didn't quite get as good results as you did. I think the key is, as you said, to do it in several sittings.
SEDimmick
New Jersey, United States
Joined: March 15, 2002
KitMaker: 1,745 posts
Armorama: 1,483 posts
Joined: March 15, 2002
KitMaker: 1,745 posts
Armorama: 1,483 posts
Posted: Thursday, November 29, 2012 - 06:05 AM UTC
Looks great!
SdAufKla
South Carolina, United States
Joined: May 07, 2010
KitMaker: 2,238 posts
Armorama: 2,158 posts
Joined: May 07, 2010
KitMaker: 2,238 posts
Armorama: 2,158 posts
Posted: Saturday, December 01, 2012 - 07:06 AM UTC
Ok, while it's not sexy and maybe not even very interesting, I think that priming and then undercoating with acrylics are crucial steps in my figure painting process.
So, here're a few happy snaps of my progress so far. First up are the primed figures:
These guys were primed with Tamiya flat white and flat black applied with an airbrush. Normally I don't use any black, but with the commander and crewman, the parts of the figures that will be invisible (or nearly) inside the tank were painted flat black so that they will fade away from the viewer's eye.
The purpose of priming is to give me a consistent color to paint on, to show blemishes, and provide something for later paint coats to adhere to. I use white because the next colors will reproduce "pure" and cover with fewer coats.
Next post: Acrylic Undercoating.
SdAufKla
South Carolina, United States
Joined: May 07, 2010
KitMaker: 2,238 posts
Armorama: 2,158 posts
Joined: May 07, 2010
KitMaker: 2,238 posts
Armorama: 2,158 posts
Posted: Saturday, December 01, 2012 - 07:21 AM UTC
Because I paint in artist oils, I find that to get good coverage without having to use too much paint, it's necessary to undercoat my figures.
I use acrylics (mostly Vallejo, but also some Citadel and Reaper) applied by brush very thinly. Multiple coats are much better than single heavy coats that hide details. Yes, it's tedious, but then the results are in my opinion worth it.
I also paint everything, to include all of the details and any insignia. Often, when doing the actual oil paints, these acrylic details only require oil color highlights, so doing this work carefully can also pay off later.
I also don't always use an acrylic that's the exact final desired color. For instance here, the tanker helmets are undercoated with a burnt sienna (Citadel / Games Workshop "Bestial Brown") which when painted with black oils makes a nice black leather.
So, here're my figgies undercoated:
You can see in the photo of the commander's bottom how the undercoated blue has been carried over the black to form very dark shadows that will (hopefully!) fade away into the black interior of the tank.
Finally, I think that in some of the face shots you can see and appreciate how much detail the Hornet heads have.
So, that's all for now.
Happy modeling!
SdAufKla
South Carolina, United States
Joined: May 07, 2010
KitMaker: 2,238 posts
Armorama: 2,158 posts
Joined: May 07, 2010
KitMaker: 2,238 posts
Armorama: 2,158 posts
Posted: Sunday, December 02, 2012 - 12:26 PM UTC
Painted up my usual practice face today - an Israeli Tanker head by Hornet.
This guy was cleaned up, primed in Tamiya white, and undercoated with Valljeo, Citadel and Reaper acrylics at the same time as the Italian guys.
This lets me get my color mixes right and transition from acrylic brush painting to oils.
Anyways, this guy is still wet and needs to dry for a couple of days, but I guess he's OK. I might still do a little more work on his upper lip area - I'm not quite satisfied with the highlights there.
Oh well... that's why it's practice...
Later,
SdAufKla
South Carolina, United States
Joined: May 07, 2010
KitMaker: 2,238 posts
Armorama: 2,158 posts
Joined: May 07, 2010
KitMaker: 2,238 posts
Armorama: 2,158 posts
Posted: Tuesday, December 04, 2012 - 08:10 AM UTC
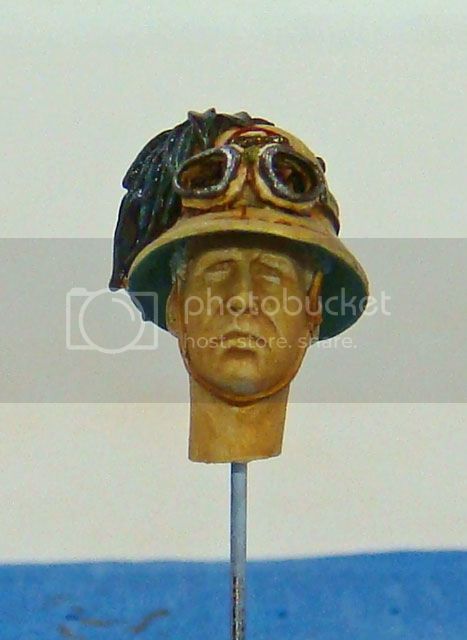
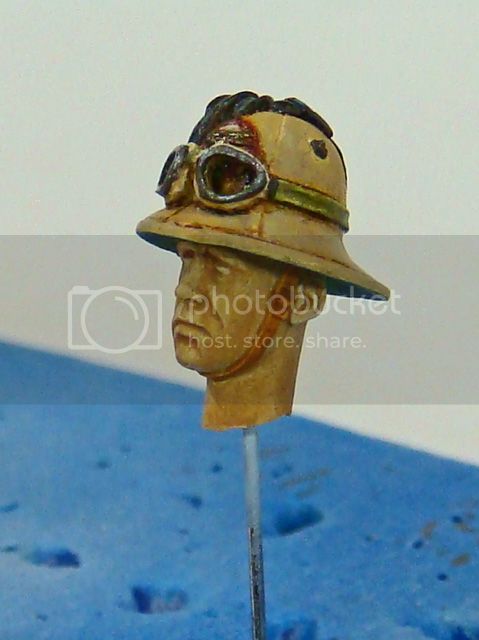
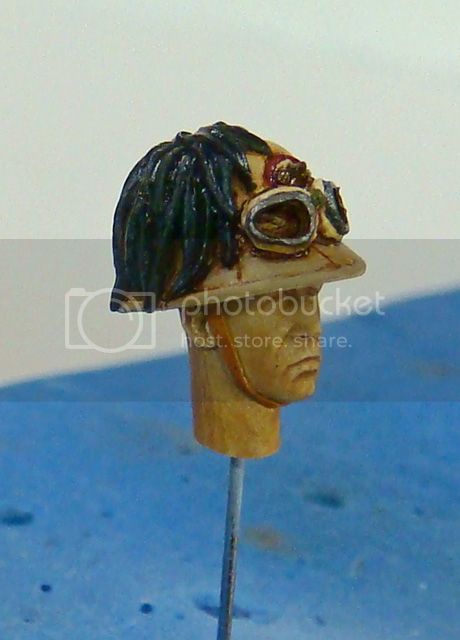
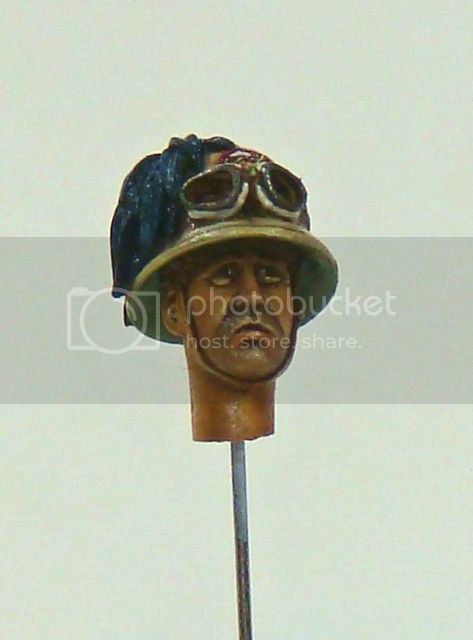
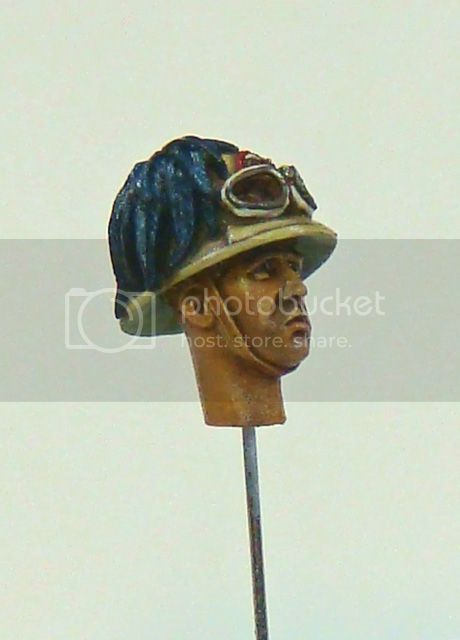
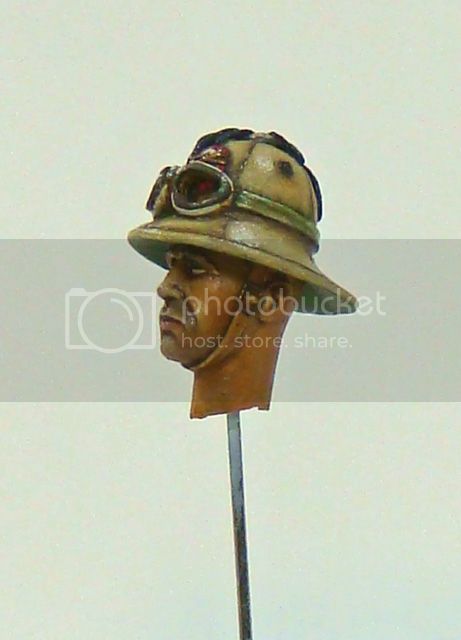
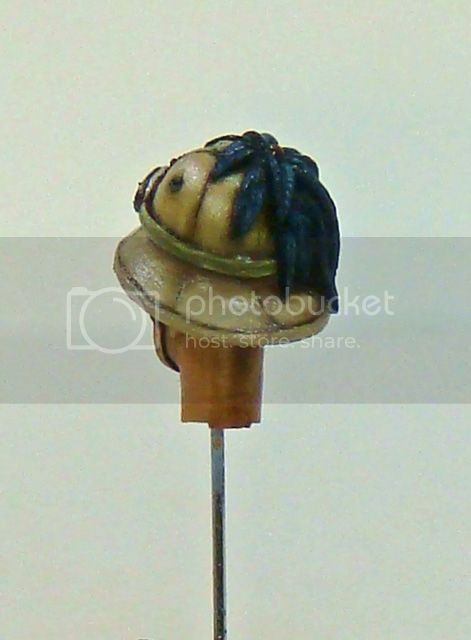
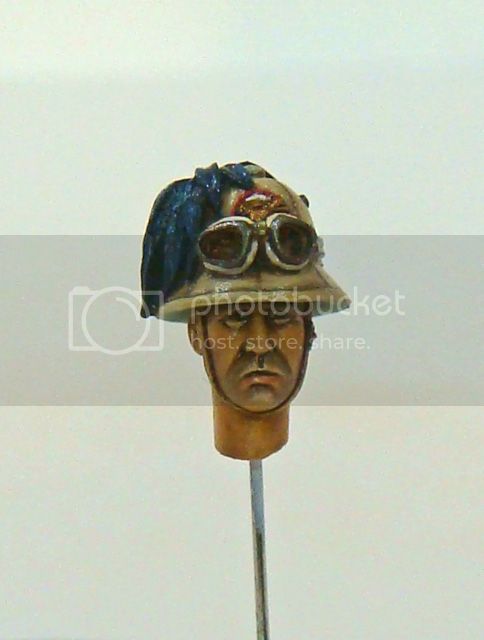
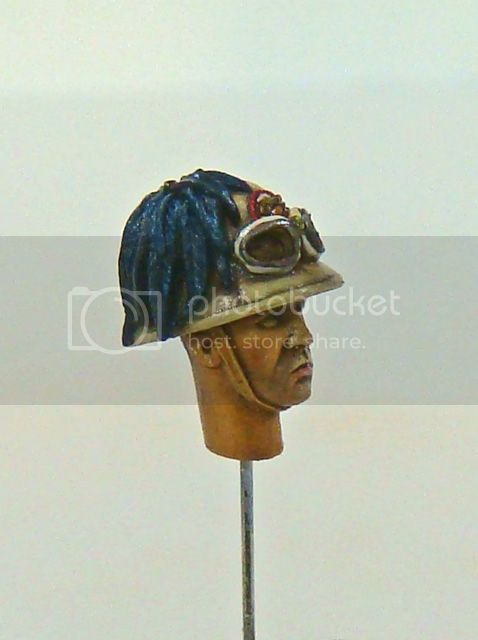
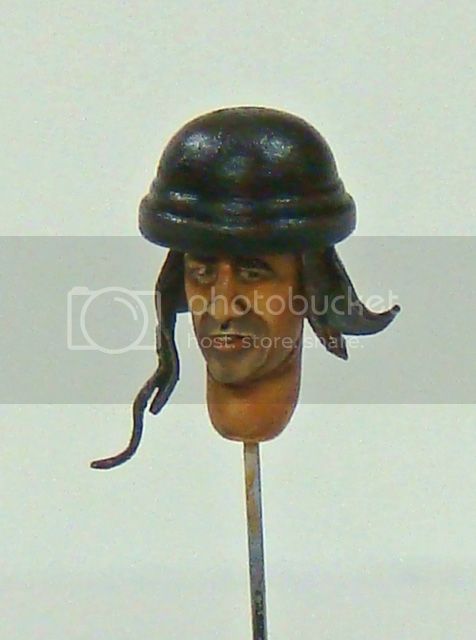
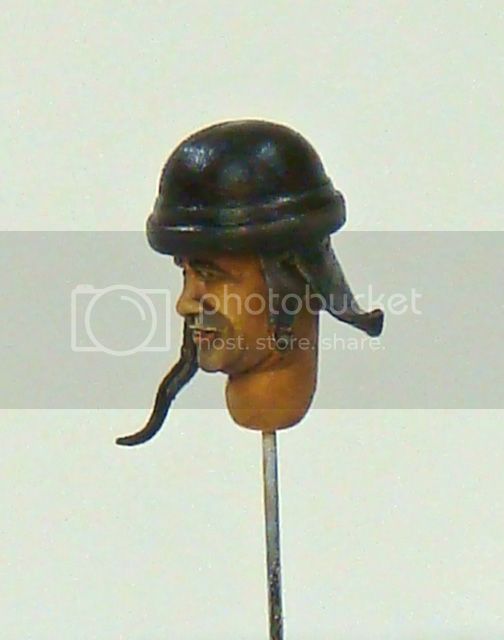
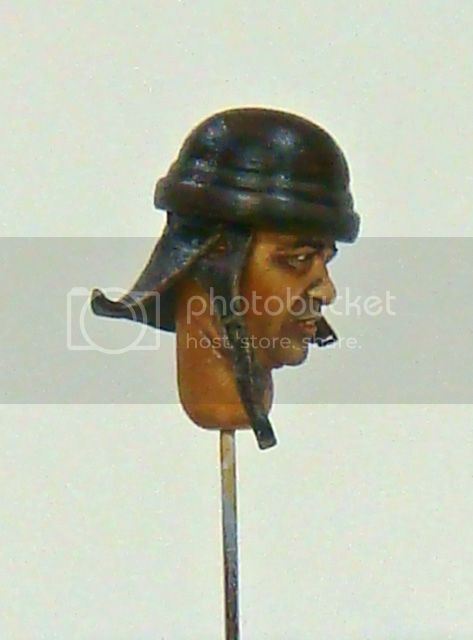
Well, moving along with the actual figures for the vignette, here's the first face - the motorcycle rider.
I've done his artist oil color coats. There is a lot of glare in some of these photos, but that's because the paint is still wet. It'll take a few days before the paint dries out.
Once he's completely assembled (head and rifle to main body), I'll airbrush the entire figure with Testor's Dull Coat (thinned with ordinary lacquer thinners). Once that's done, I'll fill the openings in his goggles with clear acrylic to simulate the glass.
But until then ...
Until next time...
Happy modeling!
jrutman
Pennsylvania, United States
Joined: April 10, 2011
KitMaker: 7,941 posts
Armorama: 7,934 posts
Joined: April 10, 2011
KitMaker: 7,941 posts
Armorama: 7,934 posts
Posted: Wednesday, December 05, 2012 - 04:25 AM UTC
Brilliant paint! I love the way the highlights on the upper lip create more of a sun tanned look overall and the helmet emblem is lookin good as well.
Have you though about adding a small piece of ostrich feather on top of the helmet feathers? They break down into tiny little parts and the smallest parts are in scale. I used them on an Iroquis figure years ago. It was taken from a colored bowa scarf from a costume shop.
Here is the culprit
HTH
Have you though about adding a small piece of ostrich feather on top of the helmet feathers? They break down into tiny little parts and the smallest parts are in scale. I used them on an Iroquis figure years ago. It was taken from a colored bowa scarf from a costume shop.
Here is the culprit
HTH
Posted: Wednesday, December 05, 2012 - 05:31 AM UTC
Mike- that is some sublime face painting. I must say those Italian helmets are nicely adorned, very colorful! I think you have got the hue for the face done brilliantly- the 5 o clock shadow also makes him seem suitably weary for a scene in North Africa. I'm looking forward to seeing the next two figures to go with him!
SdAufKla
South Carolina, United States
Joined: May 07, 2010
KitMaker: 2,238 posts
Armorama: 2,158 posts
Joined: May 07, 2010
KitMaker: 2,238 posts
Armorama: 2,158 posts
Posted: Wednesday, December 05, 2012 - 01:00 PM UTC
Quoted Text
... Have you though about adding a small piece of ostrich feather on top of the helmet feathers? They break down into tiny little parts and the smallest parts are in scale. I used them on an Iroquois figure years ago. It was taken from a colored boa scarf from a costume shop...
@ Jerry: Thanks for props, my friend! That's a great idea about the feather boa. I've actually been kicking myself for not picking up one of the hummingbirds that routinely expire around our place every spring. They have ultra-tiny feathers that look like they would work well in scale.
Oh well... Next spring I'm plucking one of the little buggers.
That Iroquois figure is classic Rutman! Is that guy on display somewhere in a National Park museum? He reminds me of a lot of the dios that you were doing back in Fayetteville.
@ Karl: Thank you for the kind words, too! Yea, those Bersaglieri helmets were quite stylish, to say the least.
Hope to have the next head finished in a day or two.
Happy modeling!
pseudorealityx
Georgia, United States
Joined: January 31, 2010
KitMaker: 2,191 posts
Armorama: 1,814 posts
Joined: January 31, 2010
KitMaker: 2,191 posts
Armorama: 1,814 posts
Posted: Wednesday, December 05, 2012 - 02:41 PM UTC
Looking really good Mike. I hope to see this one in a couple of months. I'll be doing my best to offer some competition this year in the vignette category.
SdAufKla
South Carolina, United States
Joined: May 07, 2010
KitMaker: 2,238 posts
Armorama: 2,158 posts
Joined: May 07, 2010
KitMaker: 2,238 posts
Armorama: 2,158 posts
Posted: Thursday, December 06, 2012 - 02:24 AM UTC
Quoted Text
Looking really good Mike. I hope to see this one in a couple of months. I'll be doing my best to offer some competition this year in the vignette category.
Thanks, Jesse!
I'm shootin' to have it done by the time of the Atlanta February show - at least that's my story and I'm stickin' to it!
Hey, competition is good! It keeps you on your toes. So, the more the merrier, as they say, and I know you have the chops for it, too...
Your Afghan T-55 with the Mujaheddin crew is still one of my all time favorites! It could'v been a photo right out of National Geographic.
I'll be looking forward to seeing what you come up with for this year.
Happy modeling!
jrutman
Pennsylvania, United States
Joined: April 10, 2011
KitMaker: 7,941 posts
Armorama: 7,934 posts
Joined: April 10, 2011
KitMaker: 7,941 posts
Armorama: 7,934 posts
Posted: Thursday, December 06, 2012 - 03:02 AM UTC
Quoted Text
Quoted Text... Have you though about adding a small piece of ostrich feather on top of the helmet feathers? They break down into tiny little parts and the smallest parts are in scale. I used them on an Iroquois figure years ago. It was taken from a colored boa scarf from a costume shop...
@ Jerry: Thanks for props, my friend! That's a great idea about the feather boa. I've actually been kicking myself for not picking up one of the hummingbirds that routinely expire around our place every spring. They have ultra-tiny feathers that look like they would work well in scale.
Oh well... Next spring I'm plucking one of the little buggers.
That Iroquois figure is classic Rutman! Is that guy on display somewhere in a National Park museum? He reminds me of a lot of the dios that you were doing back in Fayetteville.
@ Karl: Thank you for the kind words, too! Yea, those Bersaglieri helmets were quite stylish, to say the least.
Hope to have the next head finished in a day or two.
Happy modeling!
As I use to say to tease my Italian wife... The Italians may not always know what they are doing,but they ALWAYS look good doing it!
J
SdAufKla
South Carolina, United States
Joined: May 07, 2010
KitMaker: 2,238 posts
Armorama: 2,158 posts
Joined: May 07, 2010
KitMaker: 2,238 posts
Armorama: 2,158 posts
Posted: Thursday, December 06, 2012 - 08:13 AM UTC
Quoted Text
... As I use to say to tease my Italian wife... The Italians may not always know what they are doing,but they ALWAYS look good doing it!
J
Well, all kidding aside, the Italian troops, especially the tankers and some of the more elite infantry, have never gotten a fair shake when it comes to the war in North Africa.
I have to say that I have learned a ton while researching this project and gained a new respect for those guys - Iron Hulls and Iron Hearts!
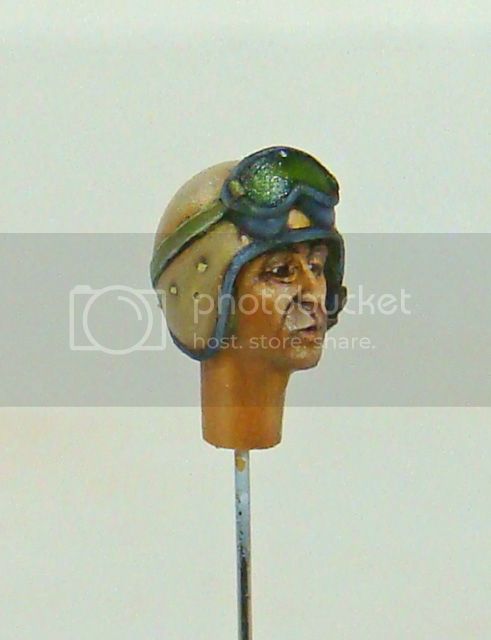
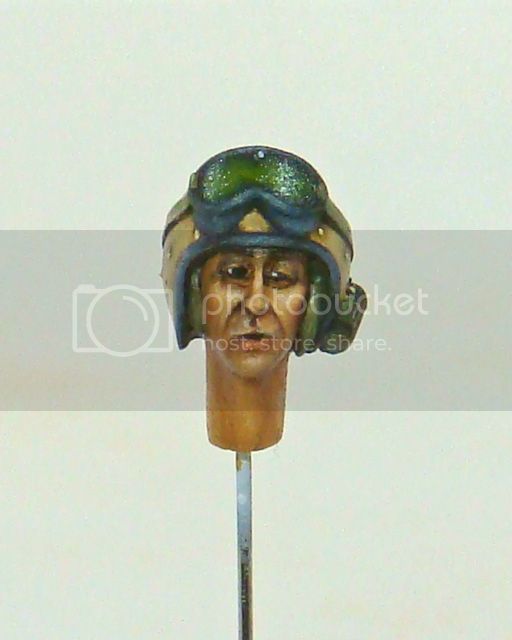
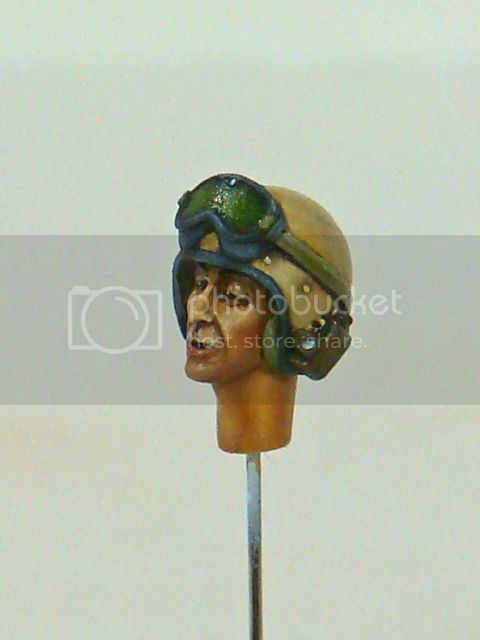
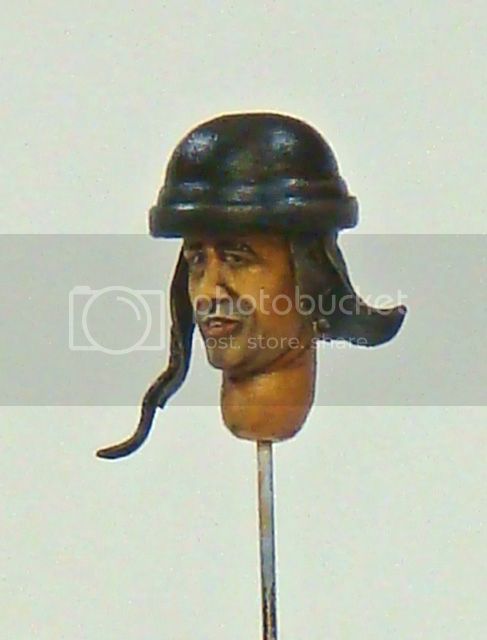
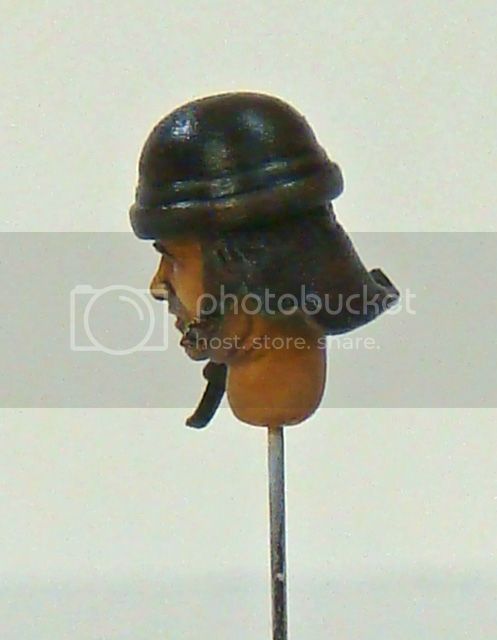
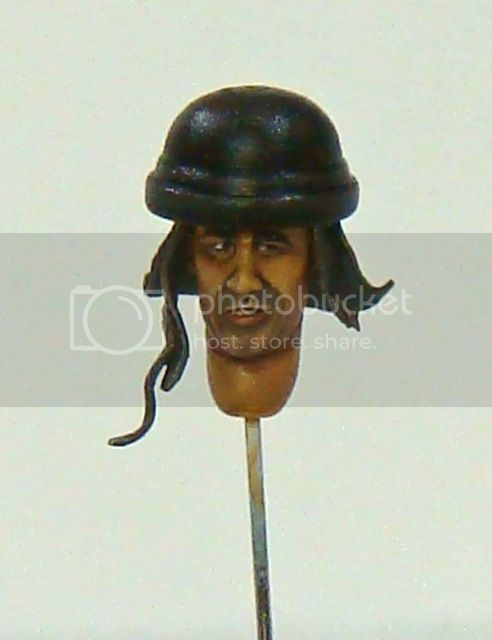
Anyways, here's the second face completed. This is the commander who's sitting in the turret hatch looking down at the motorcycle dispatch rider...
It might seem like a lot of photos of the same thing, but I try to get the face from enough angles that any glare in one spot is eliminated in another angle of the same spot. I do often times go back and re-work something that I missed during the original paint-up after I see it in the photos.
As for the motorcycle rider above, the paint on this guy is also still wet. He'll look a little smoother once dry and with a flat coat.
T.T.F.N.
Keef1648
South Carolina, United States
Joined: January 23, 2008
KitMaker: 1,240 posts
Armorama: 1,192 posts
Joined: January 23, 2008
KitMaker: 1,240 posts
Armorama: 1,192 posts
Posted: Thursday, December 06, 2012 - 08:44 AM UTC
It is a good job Mike indicated that the painted head needed to dry for a few days as he did look a bit 'Greasy' pardon the pun .....
As for the feathers, my brother in laws neighbor has chickens in his back yard if you need a few egg... oops feathers
Or of course any Gamecock worth his salt can dig some up!
On the serious side, looking very good and quite realistic but I expect nothing less from your work table.
Looking forward to seeing it next week Sir.
Keith.
SdAufKla
South Carolina, United States
Joined: May 07, 2010
KitMaker: 2,238 posts
Armorama: 2,158 posts
Joined: May 07, 2010
KitMaker: 2,238 posts
Armorama: 2,158 posts
Posted: Friday, December 07, 2012 - 02:10 AM UTC
Quoted Text
... On the serious side, looking very good and quite realistic but I expect nothing less from your work table.
...
Keith.
Thanks, Keith!
BTW: Those Gamecock references might be "fightin' words" for some of our model-building mates, but as for myself, you ought to know that I'm no big fan of the bird!
You'll note that he's riding the airplane club logo like Slim Pickins rode the bomb in "Dr. Strangelove" - with the same results no doubt!
Later!
jrutman
Pennsylvania, United States
Joined: April 10, 2011
KitMaker: 7,941 posts
Armorama: 7,934 posts
Joined: April 10, 2011
KitMaker: 7,941 posts
Armorama: 7,934 posts
Posted: Friday, December 07, 2012 - 03:06 AM UTC
That painting is awesome man. I can't see that well any more so I can't get that level of precise detail in my face painting. I say again that the high lites on the upper lip really brings out the weather beaten quality of the faces.
I know what you mean about the Italian troops in North Africa. The vast majority fought hard and well often using obsolete vehicles and equipment and being saddled with a few"political" generals. They also took the blame for failing to keep the supplies flowing while we now know that the Allies access to Enigma was the main reason that so much did not reach Panzerarmee Afrika.
No insult meant to my Italian friends,just a harmless joke.
J