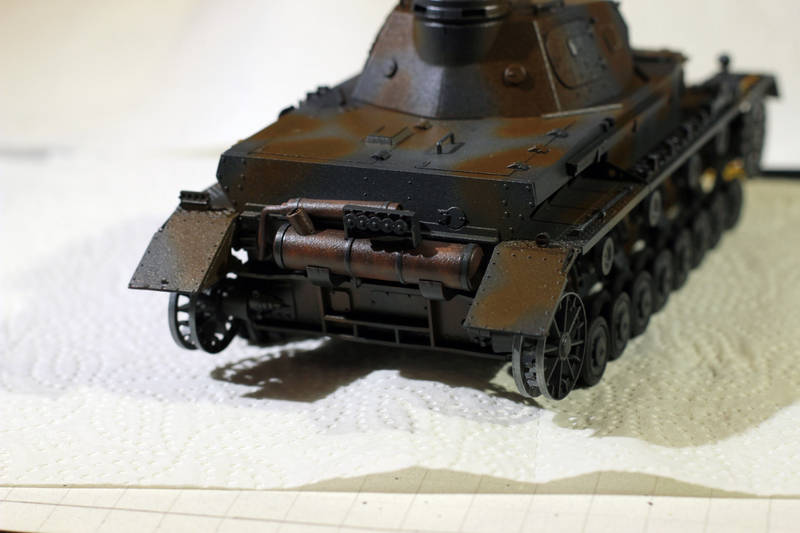
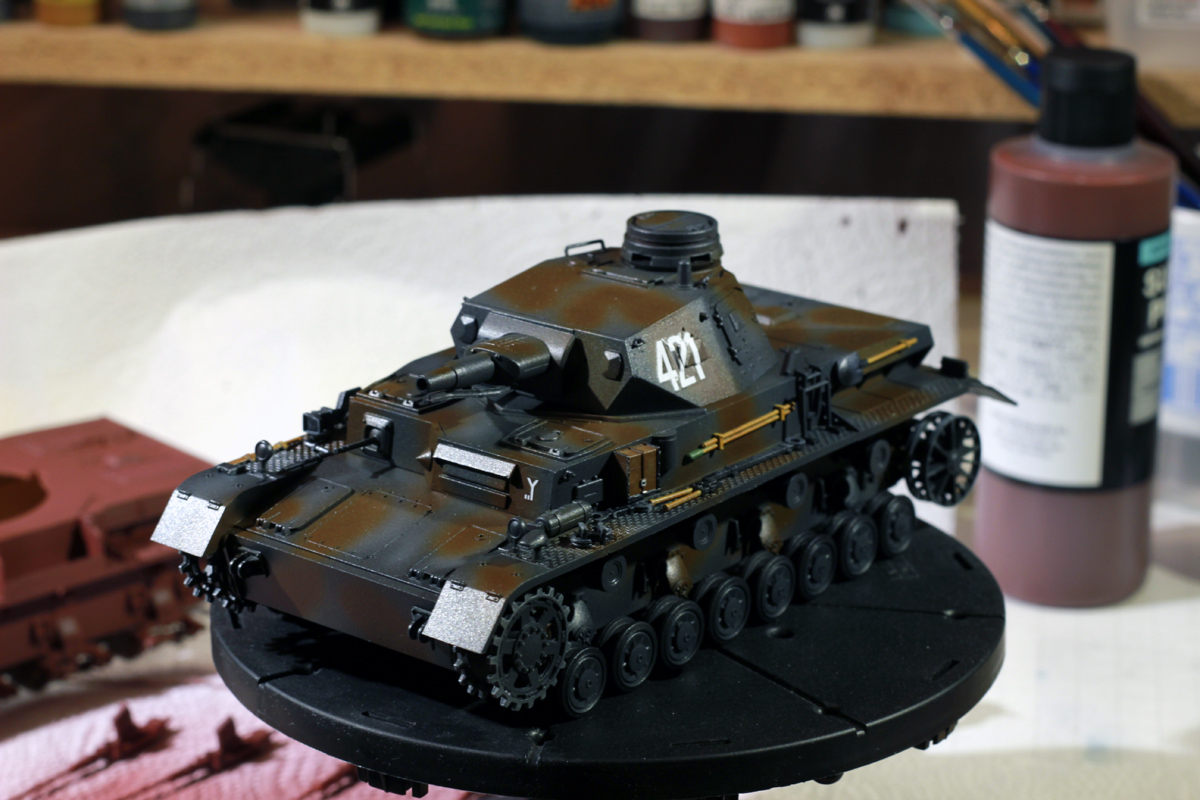
Hi everyone. This my first attempt at using an airbrush to paint a model. I made a model last summer, using brushes to paint it and I did not like the result. I've bought myself a few cheap airbrushes and a compressor along with a variety of Vallejo ModelAir paints. I've also researched various techniques and application of paint through several sources, but using, for the most part, the works of Bill Plunk for inspiration and guidance.
I've bought several kits this fall, among them a few from HobbyBoss, Tamiya, Academy and Great Wall Hobby. I decided to start with a Pz IV-kit since I built the StuG IV last summer, so the decision fell on a cheap kit from Tamiya, the Pzkpfw IV ausf D in 1/35 scale.
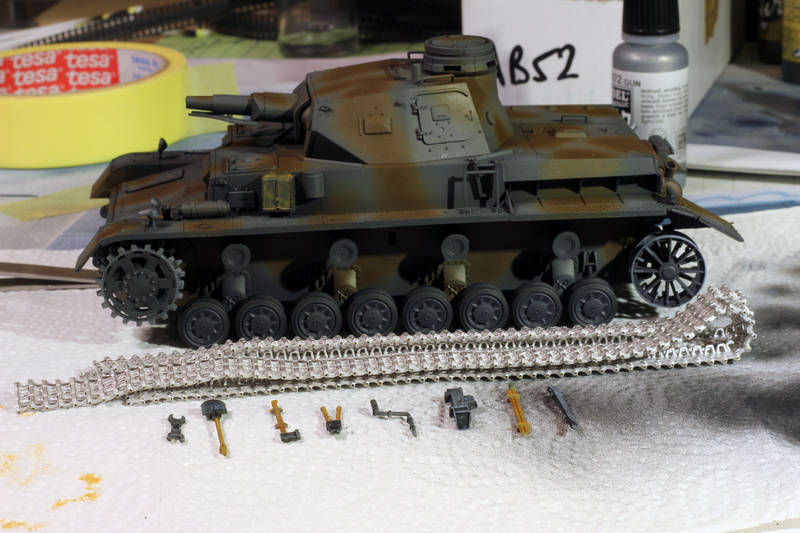
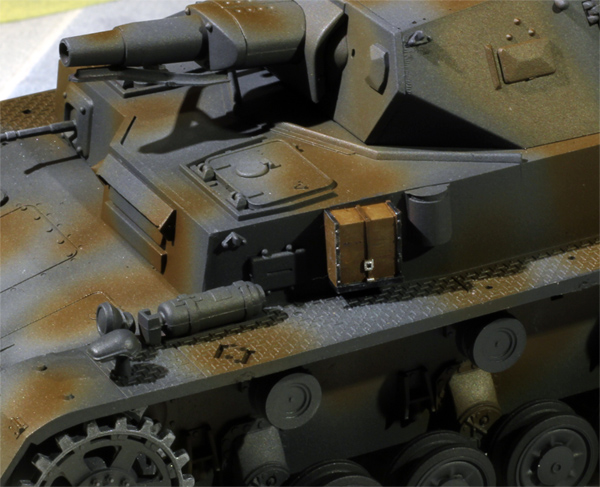
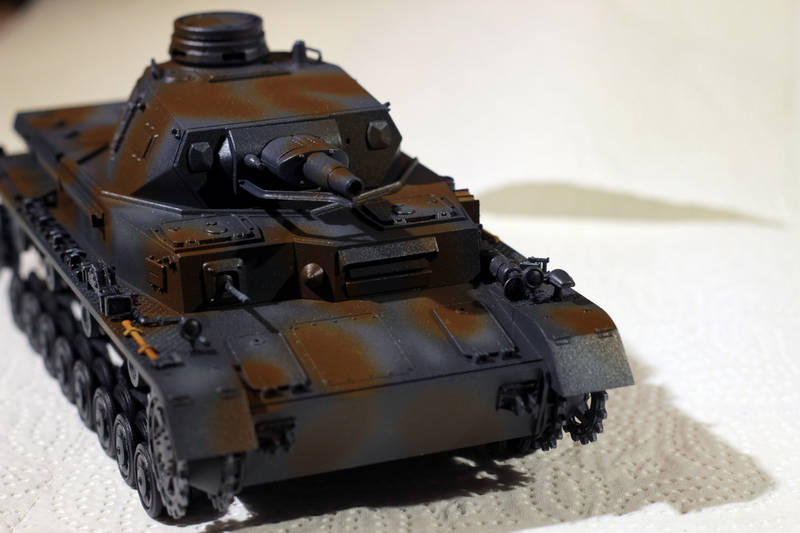
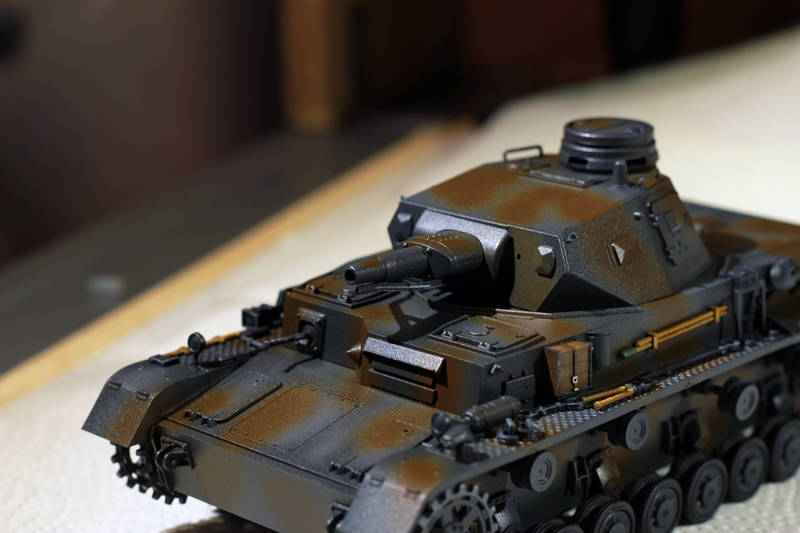
I went through the stages of priming and adding camo with somewhat ease. Not quite satisfied with the camo as I had to use my tertiary airbrush as my primary died and I broke the needle on my secondary. This is the state of the tank as of today:
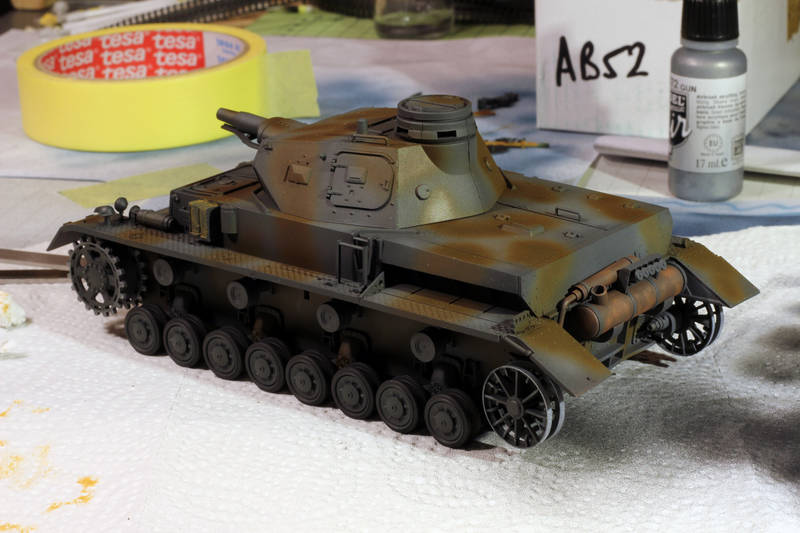
The next step is applying some sort of clear coat, but that bit is completely new to me. I had some Humbrol Gloss Cote in my stash, but could not get it to work with my airbrush. I went on Ebay and ordered a few bottles of Vallejo Gloss, Matte and Satin Varnish and hoping that will do. I would love to know if I should be using something else though.
I've also upgraded the tracks, even though they cost almost twice as the model kit itself. I just hate working with those one-pice tracks. The tracks are from Friul and those are the 40cm equivalent, and yes I know that is the wrong type for an Ausf D, but I can't be bothered to spend more on new drive sprockets for this model.
Constructive Feedback
For in-progress or completed build photos. Give and get contructive feedback!
Hosted by Darren Baker, Dave O'Meara
Tamiya 1/35 Pz. Kpfw IV D -
Pytagoras
Møre og Romsdal, Norway
Joined: December 03, 2012
KitMaker: 300 posts
Armorama: 285 posts
Joined: December 03, 2012
KitMaker: 300 posts
Armorama: 285 posts
Posted: Wednesday, December 26, 2012 - 10:35 AM UTC
ivanhoe6
Wisconsin, United States
Joined: April 05, 2007
KitMaker: 2,023 posts
Armorama: 1,234 posts
Joined: April 05, 2007
KitMaker: 2,023 posts
Armorama: 1,234 posts
Posted: Wednesday, December 26, 2012 - 10:47 AM UTC
A very good first attempt ! Much better than my first one ! Keep practicing and you will figure out what works best for you.
AFVFan
North Carolina, United States
Joined: May 17, 2012
KitMaker: 1,980 posts
Armorama: 1,571 posts
Joined: May 17, 2012
KitMaker: 1,980 posts
Armorama: 1,571 posts
Posted: Wednesday, December 26, 2012 - 05:43 PM UTC
That's looking good so far. The clear that you have may just need to be thinned to use in your AB.
Pytagoras
Møre og Romsdal, Norway
Joined: December 03, 2012
KitMaker: 300 posts
Armorama: 285 posts
Joined: December 03, 2012
KitMaker: 300 posts
Armorama: 285 posts
Posted: Thursday, December 27, 2012 - 09:28 AM UTC
Thank you for the kind words. I'm tempted to apply the clear coat with a brush just to test things out.
I'm just curious though; is the Vallejo Gloss Varnish a suitable clear coat and the proper layer for decals?
retiredyank
Arkansas, United States
Joined: June 29, 2009
KitMaker: 11,610 posts
Armorama: 7,843 posts
Joined: June 29, 2009
KitMaker: 11,610 posts
Armorama: 7,843 posts
Posted: Thursday, December 27, 2012 - 09:36 AM UTC
This was one of my first builds, upon returning to the hobby. And, I have to say I like yours much better. The camo is very nice and a clean assembly. My only suggestion would be to paint some of the stowage the same as the camo. This is just personal preference, but it is likely that not all of the stowage would be new. I'll definitely be following some of your builds.
Pytagoras
Møre og Romsdal, Norway
Joined: December 03, 2012
KitMaker: 300 posts
Armorama: 285 posts
Joined: December 03, 2012
KitMaker: 300 posts
Armorama: 285 posts
Posted: Thursday, December 27, 2012 - 09:46 AM UTC
By "stowage", do you refer to the somewhat brightly painted tools and/or the horrible yellow-ish paint that I added on the part referred to in the manual as "C-56 Jack Base"?
retiredyank
Arkansas, United States
Joined: June 29, 2009
KitMaker: 11,610 posts
Armorama: 7,843 posts
Joined: June 29, 2009
KitMaker: 11,610 posts
Armorama: 7,843 posts
Posted: Thursday, December 27, 2012 - 10:47 AM UTC
Quoted Text
By "stowage", do you refer to the somewhat brightly painted tools and/or the horrible yellow-ish paint that I added on the part referred to in the manual as "C-56 Jack Base"?
Yes. I like to leave the jack base looking new. Like I said, it's just a matter of personal opinion.
AgentG
Nevada, United States
Joined: December 21, 2008
KitMaker: 1,109 posts
Armorama: 1,095 posts
Joined: December 21, 2008
KitMaker: 1,109 posts
Armorama: 1,095 posts
Posted: Thursday, December 27, 2012 - 12:07 PM UTC
The "horrible yellow thing" is in reality a wooden block. Picture several 2x4's stacked upon each other and bound by steel straps. I do not have any pics in my collection but someone else may.
G
G
AgentG
Nevada, United States
Joined: December 21, 2008
KitMaker: 1,109 posts
Armorama: 1,095 posts
Joined: December 21, 2008
KitMaker: 1,109 posts
Armorama: 1,095 posts
Posted: Thursday, December 27, 2012 - 12:09 PM UTC
Pytagoras
Møre og Romsdal, Norway
Joined: December 03, 2012
KitMaker: 300 posts
Armorama: 285 posts
Joined: December 03, 2012
KitMaker: 300 posts
Armorama: 285 posts
Posted: Friday, December 28, 2012 - 03:40 AM UTC
Ahh, I see. I thought it was some sort of leather bag attached to the side. The reason it's yellow is due to a failed attempt at applying the Vallejo ModelAir "Wood" by brush after I had glued the piece in place.
I think I'm going to mask the tank and try to airbrush it instead, using Bill Plunks Pz IV Ausf C as reference.
Tanksami
Victoria, Australia
Joined: August 06, 2011
KitMaker: 1,314 posts
Armorama: 1,217 posts
Joined: August 06, 2011
KitMaker: 1,314 posts
Armorama: 1,217 posts
Posted: Friday, December 28, 2012 - 10:27 AM UTC
Vallejo modelair paints are crap to try & brush with in my humble opinion, but better people than I may have had more luck with them, great for airbrushing just not brush painting.
Keep up the good work, i wish my first kit looked like that
Pytagoras
Møre og Romsdal, Norway
Joined: December 03, 2012
KitMaker: 300 posts
Armorama: 285 posts
Joined: December 03, 2012
KitMaker: 300 posts
Armorama: 285 posts
Posted: Friday, December 28, 2012 - 10:42 AM UTC
Alright, I've repainted the jack base so it looks more like it is new:
@Tanksami: Yes, I know ModelAir is very difficult to brush with, but I was kind of crossing fingers and toes so I wouldn't have to fiddle with masking around the piece. I gave in and redid it properly though. Just FYI, this isn't my first build, it's just my first kit in which I've used an airbrush and done some research beforehand. I've painted a kit once before, during the summer of 2011.
AgentG
Nevada, United States
Joined: December 21, 2008
KitMaker: 1,109 posts
Armorama: 1,095 posts
Joined: December 21, 2008
KitMaker: 1,109 posts
Armorama: 1,095 posts
Posted: Friday, December 28, 2012 - 11:45 AM UTC
Very Nice!
G
G
AFVFan
North Carolina, United States
Joined: May 17, 2012
KitMaker: 1,980 posts
Armorama: 1,571 posts
Joined: May 17, 2012
KitMaker: 1,980 posts
Armorama: 1,571 posts
Posted: Friday, December 28, 2012 - 03:28 PM UTC
That jack block looks a lot better now.
In the close-up of it I did notice something else you may want to think about doing on your future builds. Do you see the mold lines around the extinguisher and bracket? You should really take the time to clean these up where ever they appear on the visible parts. It'll reward you with a cleaner looking build in the end.
Pytagoras
Møre og Romsdal, Norway
Joined: December 03, 2012
KitMaker: 300 posts
Armorama: 285 posts
Joined: December 03, 2012
KitMaker: 300 posts
Armorama: 285 posts
Posted: Saturday, December 29, 2012 - 03:26 AM UTC
Ah, yes. I missed that one. Didn't notice it until I had glued it in place. Making a mental note about thoroughly checking pieces for mold lines before gluing
Thanks for the feedback, everyone! I'll post some new pics when I get the varnish and decals applied.
Pytagoras
Møre og Romsdal, Norway
Joined: December 03, 2012
KitMaker: 300 posts
Armorama: 285 posts
Joined: December 03, 2012
KitMaker: 300 posts
Armorama: 285 posts
Posted: Friday, January 04, 2013 - 03:20 AM UTC
Just a quick question: I've received some Vallejo Satin Varnish in the mail today and I'm wondering if this is a suitable substitute for the gloss coat that is supposed to be applied before and after decals.
I do have some Vallejo Gloss Varnish on its way, but I'd like to continue on this kit this weekend.
AFVFan
North Carolina, United States
Joined: May 17, 2012
KitMaker: 1,980 posts
Armorama: 1,571 posts
Joined: May 17, 2012
KitMaker: 1,980 posts
Armorama: 1,571 posts
Posted: Friday, January 04, 2013 - 04:55 AM UTC
I don't believe the satin is going to be what you're looking for.
Pytagoras
Møre og Romsdal, Norway
Joined: December 03, 2012
KitMaker: 300 posts
Armorama: 285 posts
Joined: December 03, 2012
KitMaker: 300 posts
Armorama: 285 posts
Posted: Friday, January 04, 2013 - 08:26 AM UTC
Thanks. I'll wait for the gloss to arrive then.
Pytagoras
Møre og Romsdal, Norway
Joined: December 03, 2012
KitMaker: 300 posts
Armorama: 285 posts
Joined: December 03, 2012
KitMaker: 300 posts
Armorama: 285 posts
Posted: Tuesday, January 08, 2013 - 07:05 AM UTC
The gloss varnish arrived by mail today and I began applying the varnish to my model. Immediately ran into problems with my airbrush clogging if I didn't thin the varnish enough. It wouldn't flow through the AB until I thinned it 1:1, and that surprised me, given other people who used it with barely or no thinning at all.
I've included some pics of my tank after I somehow applied some varnish to the model:
Is it feasible to get a decent result even if the varnish is thinned 1:1? Let me know what you think!
I've included some pics of my tank after I somehow applied some varnish to the model:
Is it feasible to get a decent result even if the varnish is thinned 1:1? Let me know what you think!
Pytagoras
Møre og Romsdal, Norway
Joined: December 03, 2012
KitMaker: 300 posts
Armorama: 285 posts
Joined: December 03, 2012
KitMaker: 300 posts
Armorama: 285 posts
Posted: Wednesday, January 09, 2013 - 09:48 AM UTC
Let the varnish dry for 24 hours before I added the decals:
Noticed that the decal on the turret needs some tweaking, but that will have to wait until tomorrow.
stoney
British Columbia, Canada
Joined: October 16, 2006
KitMaker: 480 posts
Armorama: 399 posts
Joined: October 16, 2006
KitMaker: 480 posts
Armorama: 399 posts
Posted: Wednesday, January 09, 2013 - 10:04 AM UTC
Looking really good, I as well built this kit as I returned to the hobby and I believe it still awaits new tracks
I really enjoy the Vallejo varnish coats, but for your gloss coat have you looked into Future? It's a great, cheap, multi-purpose product that can be sprayed right out of the bottle. I highly recommend having a bottle at your bench.
Are you going to try your hand at weathering the beast?
Eric.
I really enjoy the Vallejo varnish coats, but for your gloss coat have you looked into Future? It's a great, cheap, multi-purpose product that can be sprayed right out of the bottle. I highly recommend having a bottle at your bench.
Are you going to try your hand at weathering the beast?
Eric.
Pytagoras
Møre og Romsdal, Norway
Joined: December 03, 2012
KitMaker: 300 posts
Armorama: 285 posts
Joined: December 03, 2012
KitMaker: 300 posts
Armorama: 285 posts
Posted: Wednesday, January 09, 2013 - 10:37 AM UTC
I haven't figured out where to get Future here in Norway. Tried looking for it on Ebay, but couldn't find it there either.
Since this is my practice tank, I'll give weathering a go after the second layer of varnish.
PeteDoc
Northern Ireland, United Kingdom
Joined: April 10, 2012
KitMaker: 164 posts
Armorama: 130 posts
Joined: April 10, 2012
KitMaker: 164 posts
Armorama: 130 posts
Posted: Wednesday, January 09, 2013 - 11:06 AM UTC
Hi - it might be called Klear or Clear in Norway. It's Klear in the uk. By Johnson's.
Pete
Pete
retiredyank
Arkansas, United States
Joined: June 29, 2009
KitMaker: 11,610 posts
Armorama: 7,843 posts
Joined: June 29, 2009
KitMaker: 11,610 posts
Armorama: 7,843 posts
Posted: Wednesday, January 09, 2013 - 11:19 AM UTC
Your panzer is shaping up nicely! There are some pros and cons concerning Future. Its biggest negative is that you must let it dry for no less than 24 hours. If you attempt to put a lacquer or enamel clear cote on it, before the Future has dried, it will turn a milky white and you will have to start over. I prefer gloss clear lacquer decanted from a spray can. It requires no thinning and covers beautifully, when applied with an airbrush. Oh, I am very impressed with your jack block. I'm expecting some scale balsa strips to make mine out of actual wood. However, that is a competition build and is becoming a real labor of love.
AFVFan
North Carolina, United States
Joined: May 17, 2012
KitMaker: 1,980 posts
Armorama: 1,571 posts
Joined: May 17, 2012
KitMaker: 1,980 posts
Armorama: 1,571 posts
Posted: Wednesday, January 09, 2013 - 09:54 PM UTC
The tank is looking good with the decals on it.
In a possible answer to your thinning problem I have to bring up the fact that not all airbrushes are alike. You have to take into account whether it's a gravity or siphon feed type, and what size needle it has in it. Those things play a key role in how one performs compared to another. Thinning may cause you to use multiple coats to build it up, but it shouldn't affect the final outcome. Fact is, a lot of people rather use thinned paints because it allows them to build the color up to improve modulation.