England - North East, United Kingdom
Joined: June 22, 2010
KitMaker: 1,224 posts
Armorama: 1,207 posts
Posted: Thursday, January 03, 2013 - 06:13 AM UTC
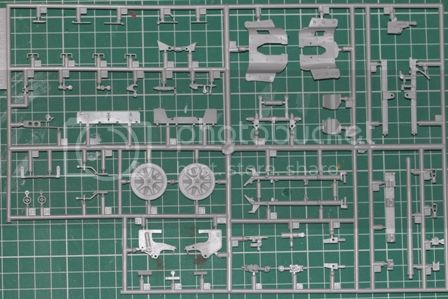
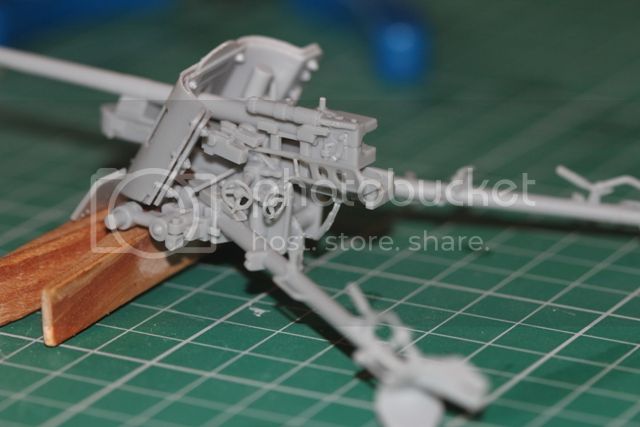
Starting the New Year slowly with the "simple" 5cm PAK 38 from Dragon (comes with Fallschirmjager but they can wait, maybe for a dio later in the year).... HOWEVER _ will complicate things by trying my hand at acrylic paint (Vallejo to start - mind brought the wrong German Field Grey today (got a green not grey version but guess that is for uniforms))....
Anyway, hope this wont take too long then on to bigger &better things (with lots of P/E to keep me interested)....
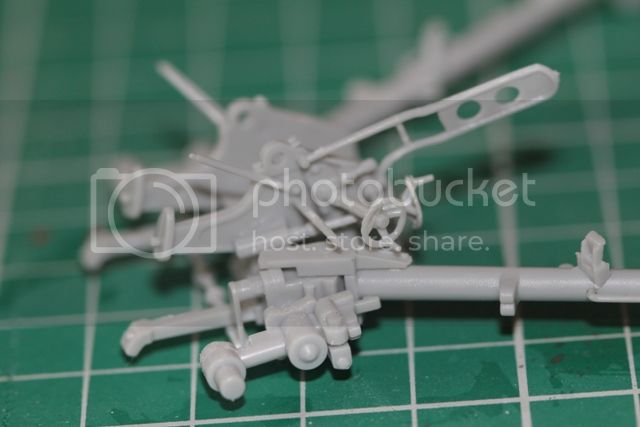
instructions and sprue (just the 1)


#521
Kentucky, United States
Joined: April 13, 2011
KitMaker: 9,465 posts
Armorama: 8,695 posts
Posted: Thursday, January 03, 2013 - 07:55 AM UTC
Excellent model and the figures are quite good as well.
I do wish Dragon had been creative enough to include the third wheel and the fork that allows this gun to be repositioned by the crew without requiring a tow vehicle.
Florida, United States
Joined: February 24, 2012
KitMaker: 38 posts
Armorama: 23 posts
Posted: Thursday, January 03, 2013 - 08:34 AM UTC
This same kit including the third wheel and fork system is available. Same kit but it is the premium edition. Just an idea.
5cm Pak 38 w/crew 1:35 '39-'45 series
Dragon #6444
England - North East, United Kingdom
Joined: June 22, 2010
KitMaker: 1,224 posts
Armorama: 1,207 posts
Posted: Thursday, January 03, 2013 - 10:15 AM UTC
Do youbhave photos of the fork system? Maybe I can scratch build it....
Quoted Text
This same kit including the third wheel and fork system is available. Same kit but it is the premium edition. Just an idea.
5cm Pak 38 w/crew 1:35 '39-'45 series
Dragon #6444
Removed by original poster on 01/04/13 - 08:40:28 (GMT).
Florida, United States
Joined: February 24, 2012
KitMaker: 38 posts
Armorama: 23 posts
Posted: Thursday, January 03, 2013 - 08:42 PM UTC
Quoted Text
Do youbhave photos of the fork system? Maybe I can scratch build it....
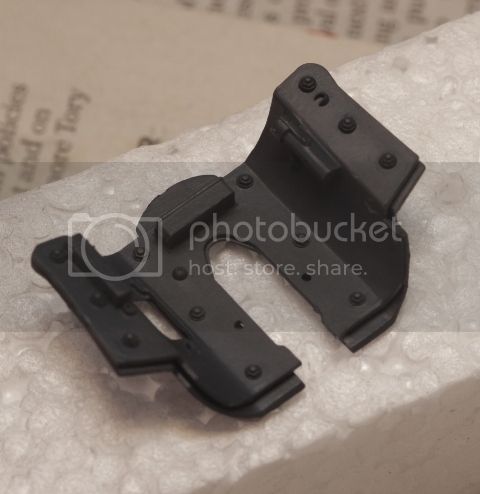
Of course I can send you some photos. They are on a built kit but that should be fine...you can see the whole fork system since it does not wrap around on both sides like a bike fork. Do you want me to email them to you or do you want me to upload them right here?
England - North East, United Kingdom
Joined: June 22, 2010
KitMaker: 1,224 posts
Armorama: 1,207 posts
Posted: Friday, January 04, 2013 - 06:17 AM UTC
Quoted Text
Quoted Text
Do youbhave photos of the fork system? Maybe I can scratch build it....
Of course I can send you some photos. They are on a built kit but that should be fine...you can see the whole fork system since it does not wrap around on both sides like a bike fork. Do you want me to email them to you or do you want me to upload them right here?
uploading them up here is fine - that way if anyone else wants to see them...
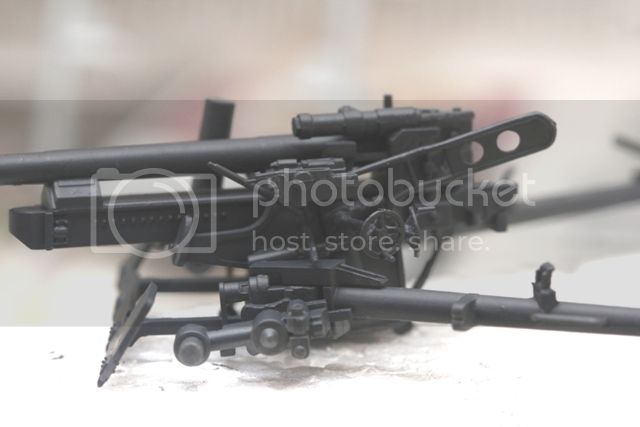
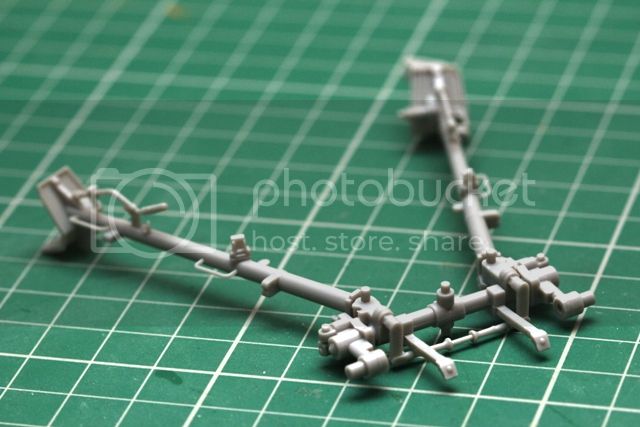
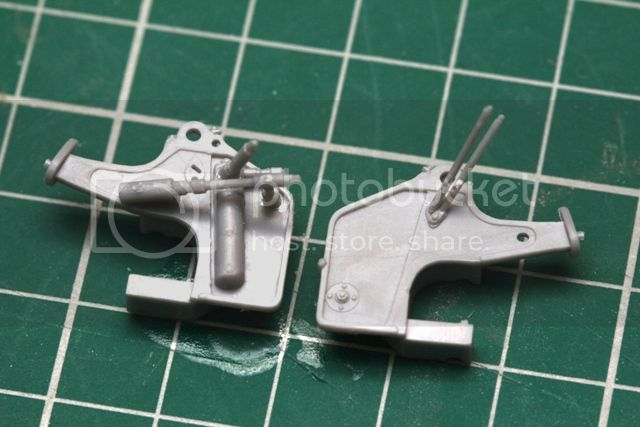
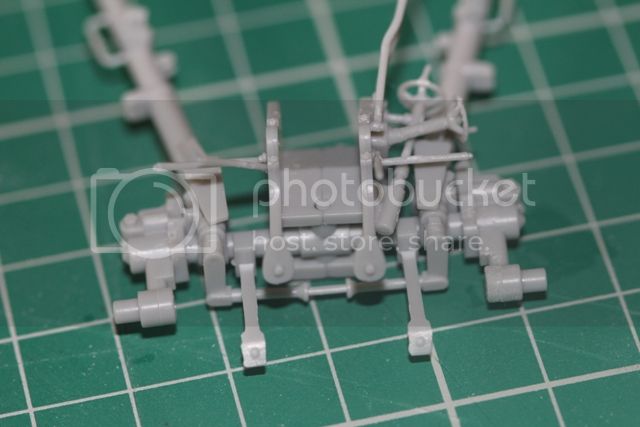
ok - some building today - have the axle and trailing arms done - goes together very nicely. Also started on the gun mount - 2 halves that come together later

Florida, United States
Joined: February 24, 2012
KitMaker: 38 posts
Armorama: 23 posts
Posted: Friday, January 04, 2013 - 02:35 PM UTC
England - North East, United Kingdom
Joined: June 22, 2010
KitMaker: 1,224 posts
Armorama: 1,207 posts
Posted: Friday, January 04, 2013 - 09:08 PM UTC
Thanks Ian. If I had a spare wheel I would probably attempt that, but without I think it would look kind of "odd"...
England - North East, United Kingdom
Joined: June 22, 2010
KitMaker: 1,224 posts
Armorama: 1,207 posts
Posted: Saturday, January 05, 2013 - 03:43 AM UTC
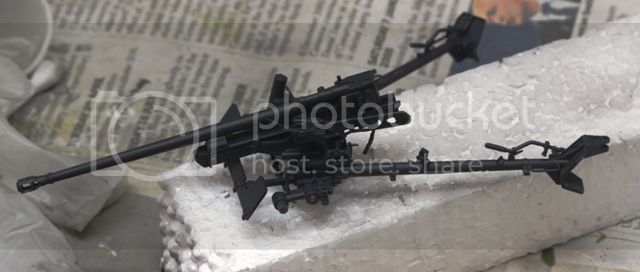
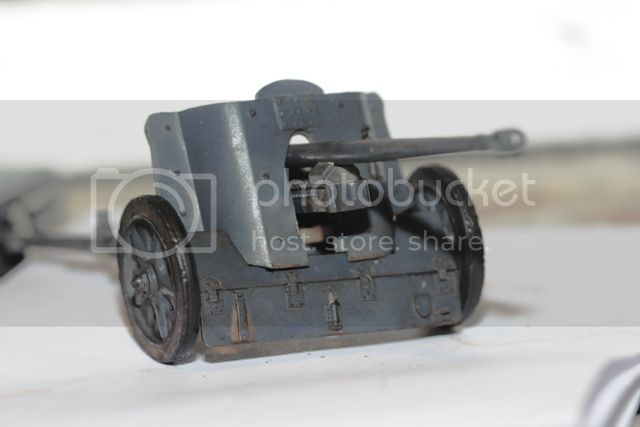
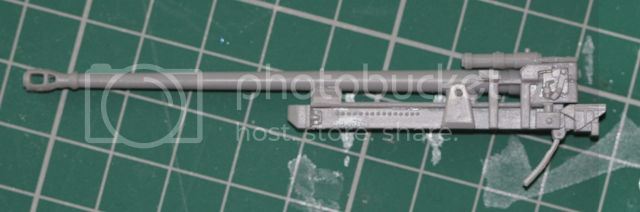
lots of progress - in fact its built and now needs to be painted (need the correct acrylic for Field Grey (bought the green Field Grey (uniform) rather than the grey Field Grey (Val 102 vs 162 I believe))... but I can prime it at least
left the wheels off for ease of access, same with the main armour shield (advised that it is a pain to paint detail once it is in place so will paint all with it off).
Have left the lower armour off as I want to build it in transit (not that I have anything to tow it with yet - that can wait) so that will need to be folded up once the main armour is on
anyway, pictures


England - North East, United Kingdom
Joined: June 22, 2010
KitMaker: 1,224 posts
Armorama: 1,207 posts
Posted: Sunday, January 06, 2013 - 02:47 AM UTC
all primed - went for a neutral grey rather than proper primer - quickly becoming a Vallejo convert - thins nicely with water and with a squeeze of retardant flows well - just need to remember to clean the needle more often while spraying.... hope the correct grey will be delivered soon so I can get that done (will I have problems painting enamel over acrylic (have only got enamel black at the moment)
England - North East, United Kingdom
Joined: June 22, 2010
KitMaker: 1,224 posts
Armorama: 1,207 posts
Posted: Tuesday, January 08, 2013 - 01:19 AM UTC
help needed guys... having done a quick search for PaK 38 images I have found 2 things I might do on mine
1) kill markings (think white bands on the barrel) - for sure will attempt with thin masking
2) writing on the armour shield - now that to me seems odd - there is one (http://www.lexikon-der-wehrmacht.de/Waffen/Bilderseiten/Unterbilder/5-cmPAk38.htm) but that might be some sort of production shot (ie just out of the factory). Has anyone got any more evidence for this practice (if so what font 0- and is there a decal/transfer I could use to make it)?
still waiting on the german grey paint then will start on finishing her off
England - North East, United Kingdom
Joined: June 22, 2010
KitMaker: 1,224 posts
Armorama: 1,207 posts
Posted: Tuesday, January 08, 2013 - 01:23 AM UTC
update - babelfish translated the text accompanying image as "5 cm Pak 38 in an army workshop in France on 24 March 1943" so that answers my question - wont go with writing on the armour plate
England - North East, United Kingdom
Joined: June 22, 2010
KitMaker: 1,224 posts
Armorama: 1,207 posts
Posted: Thursday, January 10, 2013 - 07:09 AM UTC
oohhhh vallejo air - slightly thinned with water - paints nicely... but hmmmmm the 052 "German Grey" seems a bit dark (RAL7012 apparently).... anyway, all painted bar the tyres - will do that tomorrow (probably enamel as that is what I have in) then I can gloss coat it ready for weathering.....
(NOTE think I am not gonna do the kill markings - but maybe tomorrow when I paint the tyres I will get an urge for white)
England - North East, United Kingdom
Joined: June 22, 2010
KitMaker: 1,224 posts
Armorama: 1,207 posts
Posted: Thursday, January 10, 2013 - 08:36 PM UTC
Argh. Went to test fit the front armour this morning, all it achieved was to scrape the paint off the barrel (it is a very tight fit). If I do it after gloss, wash, Matt, weather, Matt will it be a rougher surface or should.I scrape now and getvthe armour on, touch up the weather fully assembeled? Was advised to leave armour off to facilitated easier painting but...
England - North East, United Kingdom
Joined: June 22, 2010
KitMaker: 1,224 posts
Armorama: 1,207 posts
Posted: Thursday, January 10, 2013 - 11:22 PM UTC
Arkansas, United States
Joined: June 29, 2009
KitMaker: 11,610 posts
Armorama: 7,843 posts
Posted: Thursday, January 10, 2013 - 11:36 PM UTC
That really builds into a nice little gun. "Boring grey" just screams "weather me!". I may be wrong, but I believe the 1/72 scale has more parts.
Ideals are peaceful. History is violent.
England - North East, United Kingdom
Joined: June 22, 2010
KitMaker: 1,224 posts
Armorama: 1,207 posts
Posted: Thursday, January 10, 2013 - 11:45 PM UTC
Quoted Text
That really builds into a nice little gun. "Boring grey" just screams "weather me!". I may be wrong, but I believe the 1/72 scale has more parts.
oh it will be - have the list of steps from the painting & weathering forum... next step is clear then wash then matt... then we can see....
#521
Kentucky, United States
Joined: April 13, 2011
KitMaker: 9,465 posts
Armorama: 8,695 posts
Posted: Friday, January 11, 2013 - 08:15 AM UTC
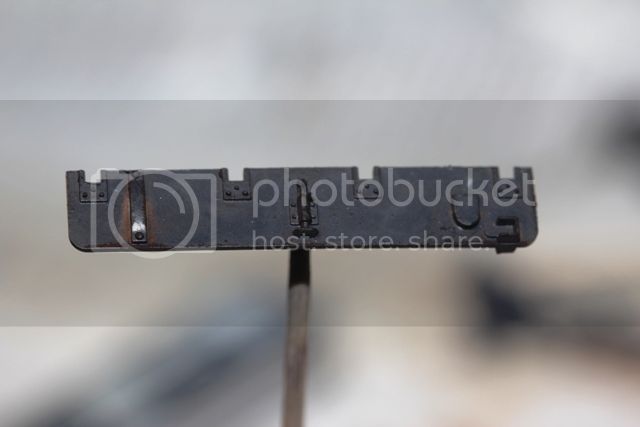
F.Y.I. - The four "L" brackets that stand up on the tops of the trails are there to retain the third wheel and fork when the gun is in towing mode. Will try and upload some photos of the one at the Patton being moved around using the third wheel shortly.
the Chassis Man
England - North East, United Kingdom
Joined: June 22, 2010
KitMaker: 1,224 posts
Armorama: 1,207 posts
Posted: Friday, January 11, 2013 - 10:41 AM UTC
Quoted Text
F.Y.I. - The four "L" brackets that stand up on the tops of the trails are there to retain the third wheel and fork when the gun is in towing mode. Will try and upload some photos of the one at the Patton being moved around using the third wheel shortly.
the Chassis Man
thanks, did see some photos with it....
England - North East, United Kingdom
Joined: June 22, 2010
KitMaker: 1,224 posts
Armorama: 1,207 posts
Posted: Friday, January 11, 2013 - 09:32 PM UTC
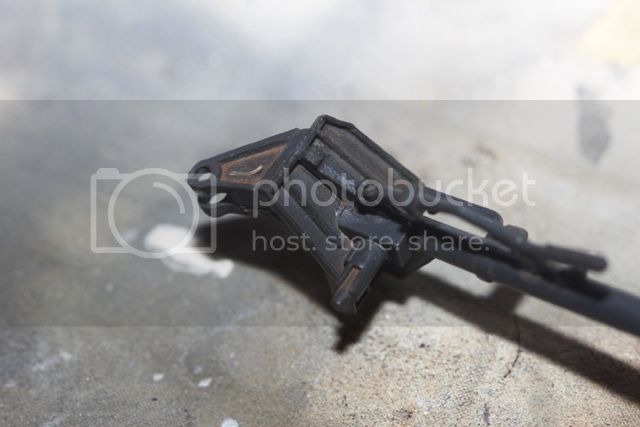
first wash on this morning.... now to let it dry and see if the 80:20 (thinner to oil) gives a coat that you can see... I think in some places it does so maybe 2 or 3 coats to get the desired effect (went dark brown as read in the painting forum that that is a good base for weathering... but lets see)
England - North East, United Kingdom
Joined: June 22, 2010
KitMaker: 1,224 posts
Armorama: 1,207 posts
Posted: Saturday, January 12, 2013 - 08:37 AM UTC
Arkansas, United States
Joined: June 29, 2009
KitMaker: 11,610 posts
Armorama: 7,843 posts
Posted: Saturday, January 12, 2013 - 08:55 AM UTC
That is looking really nice. Just the right amount of weathering to break up the panzer grey.
Ideals are peaceful. History is violent.
England - North East, United Kingdom
Joined: June 22, 2010
KitMaker: 1,224 posts
Armorama: 1,207 posts
Posted: Saturday, January 12, 2013 - 08:57 AM UTC
Quoted Text
That is looking really nice. Just the right amount of weathering to break up the panzer grey.
cheers - its gonna have a bit more (just to practice....)
chipping
bit of fading
who knows....
#521
Kentucky, United States
Joined: April 13, 2011
KitMaker: 9,465 posts
Armorama: 8,695 posts
Posted: Saturday, January 12, 2013 - 09:04 AM UTC
How about adding that third wheel (of course it means buying a second kit.(