Dioramas
Do you love dioramas & vignettes? We sure do.
End of Days - Berlin, April 1945
jointhepit
Visit this Community
Oost-Vlaanderen, Belgium
Joined: May 14, 2006
KitMaker: 3,829 posts
Armorama: 881 posts
Posted: Friday, March 29, 2013 - 10:45 AM UTC
this is boinkers!

great work, the front entrance staircase with blocked window is really wicked stuff, your eye for detail and improvisation is truely amazing !

Barbarossa
Visit this Community
United Kingdom
Joined: August 25, 2005
KitMaker: 216 posts
Armorama: 215 posts
Posted: Thursday, April 25, 2013 - 06:54 AM UTC
Hey everyone

Seems ages since the last time I posted any updates on this, but progress is happening..!!
Finished the lighting for the U-Bahn station, had ordered the glowing red light bulb, but was alittle disappointed with the 'low glow', so added another flickering battery candle in the opposite corner, & now the effect is what I'd hoped for once the roof is on..... 2 of the 3 can be turned on & off from the rear of the model, the other will be accessible from the top underneath a barricade.


Figure painting by far isn't a strongpoint....., the little boy & the old man turned out OK, & now they're painted & can be placed in the cellar, the top can be glued onto the base, & work can begin on the street level. The figures are from Miniart & Masterbox's western civilians


The idea behind the old man is he's hiding the 'life savings' in the hole in the wall....
The 'Hotel' is starting to take shape, with the first floor decorated, need to get some of 'Reality in Scales' rugs for the floors before I can add any rubble & debris. The hole in the corner room is for the switch to the cellars lightbulb to come through, hidden under something......


All the brickwork needs painting & weathering, airbrushed the top front of the Hotel a sand colour & peeled the paint off using the hairspray technique. That then needs filtering with oil paints & a few signs added.....
In the process now of making a Tabak for the street from card, as well as the last floor of the Hotel.....

Thanks for reading..., any comments appreciated

Cheers,
SIMON.
bronzey
Visit this Community
England - South East, United Kingdom
Joined: January 06, 2012
KitMaker: 300 posts
Armorama: 256 posts
Posted: Thursday, April 25, 2013 - 07:06 AM UTC
Since I joined this site just over a year ago there has been 2 builds that have inspired me, they are still being done at the moment but I follow and wait for the email to tell me they have put up a new post. Simon, you are now build number 3 that has me hooked. WOW this is amazing! I love all the little details, its such a well thought out piece, and then to notice your British, well done for flying our flag and showing just how ambitious you really can be. Can't wait to see more, will be following with great interest! Good luck!

Bronzey
Barbarossa
Visit this Community
United Kingdom
Joined: August 25, 2005
KitMaker: 216 posts
Armorama: 215 posts
Posted: Thursday, April 25, 2013 - 07:55 AM UTC
Thanks Alex, that's really nice to hear...

It's nice to know that when doing something we enjoy we can still help others along the way...., quite often you can pick up little ideas here & there from other modellers posts, this model itself was inspired by someone else's as I mentioned at the beginning.
Progress seems to be slow with all the detail, but I've given myself the year+, so there's no rush!! Hopefully now the 2 levels are glued together abit more can start happening
Thanks for following!

SIMON.
YakovPavlov
Visit this Community
England - North East, United Kingdom
Joined: February 08, 2013
KitMaker: 16 posts
Armorama: 16 posts
Posted: Friday, April 26, 2013 - 03:33 AM UTC
Outstanding work, really nice.
Barbarossa
Visit this Community
United Kingdom
Joined: August 25, 2005
KitMaker: 216 posts
Armorama: 215 posts
Posted: Saturday, May 11, 2013 - 07:10 AM UTC
Hello again.....

Afew update shots, have started on the 'Platz' area around the station entrance, used a sheet of thin platic card to use as the paving slabs. Measured it to fit the area, before dividing up & cutting out the individual slabs. The position of the car is where one of the road blocks will be, I gave the Hotel a new sign, and have painted the bricks with various shades....


The view through the 'hole' in the front of the dio, looking through into the cellar at the rear.


The second floor room has been 'decorated' now, still awaiting the rugs before I can start adding bits of furniture & all the rubble & debris.


I was initally going to get Plus Models 'Tabak' to put together, but figured out that it wouldn't be too difficult to build one from scratch from plastic card.


Added a shelf & cabinet inside, then by printing some advertising signs & newspapers from the internet, painting & weathering with oil paints it came together pretty well, although have noticed the gap between the front & the roof may need alittle 'attention'


Cut out & glued down the paving slabs, leaving the 3 holes along the roadside to 'plant' some small trees. Fixed the walls of the station entrance, ready for painting & weathering. The tabak will be where it is, along with some benches. The strip of polysyrene on the opposite side of the street is where the pavement will be, I'd have liked the street to have been wider, but size restrictions....


The slabs need airbrushing now, the station entrance walls plastered, painted & 'advertising' added. Have decided to have a go at using clay to create the cobblestone street, should be adaptable & easy to use..... The street will have craters, a roadblock & afew barricades to keep it 'busy'

Thanks for looking, hope to have some more progress soon....
SIMON.
retiredyank
Visit this Community
Arkansas, United States
Joined: June 29, 2009
KitMaker: 11,610 posts
Armorama: 7,843 posts
Posted: Saturday, May 11, 2013 - 08:05 AM UTC
Wish I had been following this one. The detail, to the base is incredible!
SGTJKJ
#041
Visit this Community
Kobenhavn, Denmark
Joined: July 20, 2006
KitMaker: 10,069 posts
Armorama: 4,677 posts
Posted: Monday, May 13, 2013 - 01:02 PM UTC
Looks great. The several levels of the diorama work very well.

Looking forward to see more.
Barbarossa
Visit this Community
United Kingdom
Joined: August 25, 2005
KitMaker: 216 posts
Armorama: 215 posts
Posted: Friday, May 31, 2013 - 06:56 AM UTC
Hey everyone,
Here's another set of progress pics of the model based on a street scene in the final days of the war in Berlin. Since the last time I've glued the plastic around the edge & sprayed it an initial spray of black to start it off.
The 'Platz' paving has been plastered over & airbrushed & painted with oils. The walls of the staion entrance have been plastered & painted, and recieved advertisements appropriate to the era.
I've finally attached the first building in place, & weathered the front with oil paints to dirty it up alittle. The pavement infront too recieved an initial covering of clay, & the hole in the road was plastered, yet to be painted etc....


The U bahn sign is only temporarily attached to show the final idea. The entrance walls of the station where damage took place need the debris adding, as well as to the stairs and surrounding area.
The hole in the road was filled initially with the type of plaster bandage dipped in water and left to harden to create the shell. This was then covered with coloured plaster & sand. I added 2 pieces of broken tube to create a water pipe, all obviously yet to be painted & weathered.


The rear & side view of the dio, revealing the civilians sheltering downstairs in the cellar...., I'd have wished the cellar light was brighter than it turned out to be though, the on/offf switch is upstairs in the room above & will be covered with removable furniture to access the battery. I can see there's still gaps in places in the brickwork, but with all the rubble still to do there's till time to get round to sorting it all. Next to the Hotel will be Miniarts German Pharmacy Ruin, & next to that their Ruined Building which will be turned into a cafe, a ruined cafe obviously.....


The painted slogan on the wall reads "When you retreat - death marches to Berlin", it was taken from a similar photo of the city I came across & seemed quite good. Unfortunately, I added it before gluing the building in place & with the new street level of the building the writing is quite low down the wall....... My dilema is weather to leave it, or cover it with the predicted mound of rubble & debris & paint it higher up the wall (again).......

Next to do is the road in clay (hopefully if it turns out well), and begin building the barricades, as well as order the remaining 2 buildings.
Thanks again for reading, any comments or remarks or advice always more than welcome,
Cheers for now,
SIMON.
Ascaria
Visit this Community
Wroclaw, Poland
Joined: February 01, 2008
KitMaker: 253 posts
Armorama: 103 posts
Posted: Friday, May 31, 2013 - 09:14 AM UTC
Hi Simon,

you did great job, the entrance to the U-bahn looks great

Cheers

Wojtek
MAKIETARIUM
arnhem
Visit this Community
Utrecht, Netherlands
Joined: October 30, 2004
KitMaker: 19 posts
Armorama: 15 posts
Posted: Saturday, June 01, 2013 - 10:35 AM UTC
Looks great! Very realistic (I have been to Berlin last month....)

Hans
Russian_T-90
Visit this Community
Moscow, Russia
Joined: November 20, 2010
KitMaker: 11 posts
Armorama: 10 posts
Posted: Monday, June 03, 2013 - 09:45 PM UTC
Fantastic work! But... It will be a bad idea to use "Counterattack" from MiniArt. It is not suitable only for 1941.
TimW42
Visit this Community
Virginia, United States
Joined: April 05, 2006
KitMaker: 159 posts
Armorama: 158 posts
Posted: Tuesday, June 04, 2013 - 03:26 AM UTC

Quoted Text

Thanks guys,


Quoted Text

One thing though-The Soviet figures you plan on using - both the Masterbox and the Staligrad ones, are wearing early style uniforms which are different to those worn in 1945. The uniforms changed in 1943 and the gymnastiorka had a different collar and shoulder boards


To be honest Pat & Yuri, I didn't really put too much thought yet into the Soviet figures, I've already got the 'Stalingrad' 2, really thought they'd fit in well & I've never used that company before, but the 'MasterBox' ones perhaps I'll think again, the poses would've been ideal....., but modifying them too much I would struggle with perhaps....the figures though seem still along way off yet, plenty time to shop around....

Thanks again,
SIMON.


You have an excellent idea here, but I'd go with different figures--the uniforms and helmets were just much different by 1945 compared to 1941. And there are a lot of great, late war figures out there. Also, some of the Soviets (depending on which Front they are from) were still wearing the telogrieka quilted winter uniforms--so you could mix and match.

Hope this helps!

Tim W.
Biggles2
Visit this Community
Quebec, Canada
Joined: January 01, 2004
KitMaker: 7,600 posts
Armorama: 6,110 posts
Posted: Tuesday, June 04, 2013 - 03:45 AM UTC
This is really great and if it's not too late, plan to install some tramway tracks for MiniArt's upcoming tram car. This new model will fit in just perfectly with your concept!
Barbarossa
Visit this Community
United Kingdom
Joined: August 25, 2005
KitMaker: 216 posts
Armorama: 215 posts
Posted: Tuesday, June 04, 2013 - 11:16 PM UTC
Hello again,thanks everyone for the feedback

Nikita & Tim - originally when I started planning this, I looked through the main sets I could try to use, not really looking into the finer detail until later on. You're obviously quite right about the Masterbox figures, it even states on the box '1941' which should have been abit of a clue in the first place.... I'm thinking now more along the lines of 'Tamiya's Russian Army Assault Infantry'.....
https://armorama.kitmaker.net/review/4575
I have to admit I'd never have thought I'd go back to Tamiya figures again, but as my figure painting skills aren't upto anywhere near the standards of alot of guys on these pages, and the fact there's 12 in the box wearing various uniforms & I only need 6 or 7 so can create the right poses with all the spare parts, and then use Hornet heads on them, I 'figured' that may be the best bet...???

I like the idea Biggles about incorporating the Miniart tramcar into it, especially as you see so many photo's of Berlin with them being used, but I think space may be an issue, i was planning on using Miniart's 1.5t Cargo truck
https://armorama.kitmaker.net/news/12912
which comes with all the extra barrels, boxs, bottles etc.. which can be used around the dio.

Here are afew pics of the street & barricades I've just started working on. The barricades were simply card & balsa wood, topped off with an inital layer of plaster to set it all off. On top of that will be a layer of rubble, bricks etc.. I was intending on trying to imitate the street with a layer of scribed clay, but that was awful, so opted for the much longer and much more tedious polystyrene bricks which will hopefully once finished & painted look abit more realistic. Pity half of it's gonna be covered over again anyway later on...


The larger barricade on the right will naturally be attached eventually, the smaller left one will be 'removable' to allow access to the light underneath which flickers in the station below.

Cheers for now,
SIMON.
Biggles2
Visit this Community
Quebec, Canada
Joined: January 01, 2004
KitMaker: 7,600 posts
Armorama: 6,110 posts
Posted: Wednesday, June 05, 2013 - 06:32 AM UTC

Quoted Text


I like the idea Biggles about incorporating the Miniart tramcar into it, especially as you see so many photo's of Berlin with them being used, but I think space may be an issue, i was planning on using Miniart's 1.5t Cargo truck


Oh well, you always start over and make your dio bigger!
Barbarossa
Visit this Community
United Kingdom
Joined: August 25, 2005
KitMaker: 216 posts
Armorama: 215 posts
Posted: Thursday, June 27, 2013 - 04:32 AM UTC
[/quote]
Oh well, you always start over and make your dio bigger! [/quote]

I had the hammer & saw ready in hand Biggles, but just couldn't bring myself to do it.....

Here's an update now on the progress of this one. I've finished the road, pavement & curbstones. The 2 Miniart buildings are glued together, & the road block has been painted & furnished.
Was quite pleased with the way the road turned out, 2000 polystyrene bricks later, brushed over with loose brown modelling powder to fill the gaps, sparay glued & then airbrushed. Finished with a little oil paint.


The individual cobbles weren't a sdefined as perhaps I'd have liked, but once all the building debris, vehicles etc.. are on, it should look ok...
The 2 buildings were glued together on a piece of wood to make it easier to paint them etc... I played around with the kits end building pieces, extending the middle wall with card to allow a little more room inside, as well as the end piece making the cafe appear bigger. There will be a new sign for the cafe made from plastic, as well as a canopy (probably )


The barricades were painted, filled with plaster, and then with cafe chairs, wood, bricks & crumbled plaster. The smaller one against the cafe side is removeable to allow access to the U-bahn light underneath. Started on the road debris around them, but still obviously alot more to follow.


I bought a brick mould from www.dioramadebris.co.uk which has proved invaluable to the building of the road block (600), as well as putting the buildings together & general rubble & debris. The plaster takes about an hour outside in the sun to dry out, so it's become quite an obsession making bricks over the past week in varying shades of reds & terracotta. As soon as one batch has dried, another batch goes on.....

Thanks for reading, half way through the year now of the 12 month project, & guess I'm 'roughly' half way through this one...., without though even thinking about starting any figures yet (cept for the civilians downstairs)... Guess I'll need to ease up on the brick production....
Cheers,
SIMON.
roudeleiw
Visit this Community
Luxembourg
Joined: January 19, 2004
KitMaker: 2,406 posts
Armorama: 2,224 posts
Posted: Thursday, June 27, 2013 - 05:11 AM UTC
Hi Simon, send me your module over, I will put it near mine to extend my street a bit! :-)

Well done overall!

Claude
erichvon
Visit this Community
England - East Midlands, United Kingdom
Joined: January 17, 2006
KitMaker: 1,694 posts
Armorama: 1,584 posts
Posted: Thursday, June 27, 2013 - 05:24 AM UTC
This is a truly inspirational piece of work! Love it! I have to admit I do like big dios but the fact that there are so many depths to this and the attention to detail is superb. Fascinating piece of work. I take my hat off to you
Barbarossa
Visit this Community
United Kingdom
Joined: August 25, 2005
KitMaker: 216 posts
Armorama: 215 posts
Posted: Thursday, June 27, 2013 - 06:49 AM UTC
Hi Claude......,cheers bud, praise indeed...., although compared to your exceptionally high standard of work, I fear my street would have to be the 'poor part of town'......

Thanks Karl for your kind words, much appreciated!! Will try to get some more photos up in the future once the building(s) interiors are on the go. Planning on furnishing them as they might have been once, until the allies arrived......
orange_3D
Visit this Community
British Columbia, Canada
Joined: July 28, 2005
KitMaker: 602 posts
Armorama: 469 posts
Posted: Thursday, June 27, 2013 - 11:22 PM UTC
this is wonderful! awesome layout, i love it. Can't wait to see more updates!
Barbarossa
Visit this Community
United Kingdom
Joined: August 25, 2005
KitMaker: 216 posts
Armorama: 215 posts
Posted: Sunday, August 04, 2013 - 02:20 AM UTC
Hello everyone, time for an update.......

Well the 2 buildings are pretty much finished, short of the rubble, debris, furniture & a little more plastering.
Firstly, I made an inner wall to go on the existing outer wall of the Hotel, using plastic card, plaster & then painting to match the rest of the middle building. The interior of this building was then made out into how a Pharmacy made have looked, using balsa wood for the panels & furnishings, floorboards & window sills. The same was done to the Cafe next door, with advertisments, pictures & notices taken from sites on the net. Clear plastic 'glass' was added to the frames & cafe door.


Wallpaper was made using website 'samples' & re-sized to scale. Once everything was in place, the floor boards, brickwork, wallpaper & walls were all brushed in very thinned 'raw umber' oil paint. Any gaps between the floors & wallpaper will easily be hidden with the buildings debris & rubble. The cafe tables & chairs were made from cocktail sticks & lollypop sticks. I've about half a dozen more to add to the cafe debris, but just placed afew for now to create some 'normaility' before the destruction arrives.......


The outer walls were treated in the same way as the insides, the cafe's canopy was simply some plastic off cuts creating the frame, with tissue soaked in watered down glue to make a firm & stable canopy once dry. That's now yet to be painted. On the extreme left will be a short supporting wall to give the illusion that the cafe is longer than the kit actually is. Through that gap will be a large wall collapse out into the street.


The 3 buildings now finally attached to the base....., ready to add rugs, furniture, rubble, debris, & lots of those little red bricks...!!!


Thanks all for looking, any comments or ideas much appreciated....., more photos to follow once the rubbles been added,
Thanks for now..
SIMON.
jrutman
Visit this Community
Pennsylvania, United States
Joined: April 10, 2011
KitMaker: 7,941 posts
Armorama: 7,934 posts
Posted: Sunday, August 04, 2013 - 02:49 AM UTC
Simon,
Very very cool project. I have been following from the start and really love the many tiered effect of this work. I also like the involvement of the civilians as they often get forgotten. Can't wait to see how you handle the rubble. Have you considered a dead horse in the street?
J
Snorri23
Visit this Community
Ontario, Canada
Joined: March 25, 2010
KitMaker: 514 posts
Armorama: 261 posts
Posted: Sunday, August 04, 2013 - 04:00 AM UTC
Your creativity is outstanding and forethought. Having the ability to plan out your dio and make it come to fruition is impressive. Taking notes myself on how to do a few techniques. Thanks for sharing.
Barbarossa
Visit this Community
United Kingdom
Joined: August 25, 2005
KitMaker: 216 posts
Armorama: 215 posts
Posted: Friday, August 09, 2013 - 05:25 AM UTC
Hi everyone, a quick post of some pics from the end building & the start of the rubble. Thanks firstly to Jerry & Trevor for the kind comments, looking forward Jerry to adding the mix of Volkssturm with the regular soldiers, showing how desperate the manpower was finally getting in the closing stages...., I've still got quite afew things to add in & around the street, road block, car, cargo truck (probably), MG nest, rubble, traffic lights (maybe), so the dead horse idea might have to be shelved.....
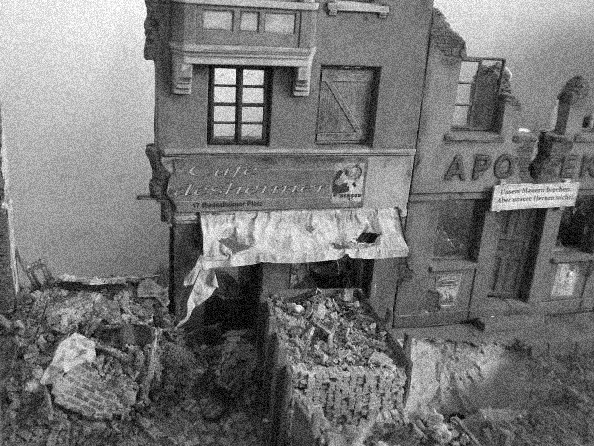
Since I don't need any furniture or fittings to order for the Cafe, I've started here to see how the rubble & debris might look for the rest of the buildings, & then work along the street, picking up any futher ideas or suggestions along the way.
Started off by assembling all the various bits I'd need, broken & crumbled coloured grey plaster, homemade coloured plaster bricks, stained wood pieces, brick wall pieces(made by gluing bricks to a piece of card, painting, plastering between the cracks & weathering), bits of furniture, black powder, window frame & diluted white glue. I divided the area up in half, to do the front of the building first to make sure I was happy with the result, before continuing inside. I glued down a piece of polystyrene to build up the bulk of the debris first.


Was pretty happy with the result, so started on the inside. Firstly covered the polytstyrene with wet plaster to help embed things in, then just randomnly added all the elements, finishing with a coating of crushed bricks & black powder. Used the diulted glue in a spray form to help keep everything in place, once dry repeated the process & also used a little hairspray to also act as an adhesive.


Was happy with the final look, maybe needs afew more bricks since they are the primary component. Noticed that there weren't also many bricks in the rubble in the wooden defences, so will have to add to that alittle more. The sign above the Pharmacy door was taken from a photo of a similar street in Berlin & translates to "Our walls break, but not our hearts".......
Here's how the whole model is now looking so far!!


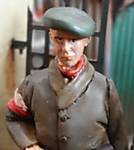
Awaiting the 'plumbers' to install a bathroom in the 1st floor of the Pharmacy now..... , & have begun on the figures from the 'Volkssturm', thanks for reading.....

SIMON.