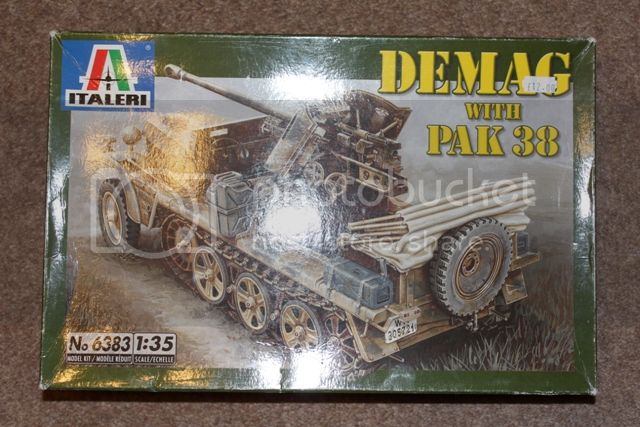
Italeri 1/35 Demag D7 with PaK 38
England - North East, United Kingdom
Joined: June 22, 2010
KitMaker: 1,224 posts
Armorama: 1,207 posts
Posted: Tuesday, January 15, 2013 - 07:50 AM UTC
England - North East, United Kingdom
Joined: June 22, 2010
KitMaker: 1,224 posts
Armorama: 1,207 posts
Posted: Saturday, January 19, 2013 - 03:02 AM UTC
anyway a start, day 1 and yes, attacked PE for the first time (apart from my super glue application - sometimes a little heavy handed... hmmmmmm - as its interior hoping i can improve and that paint will cover it)... curves are a PITA but the RB Model folder seems to work nicely on simple folds....
piccies
the initial piece....

and with PE pedals and gear stick (I assume)


#003
Donegal, Ireland
Joined: May 14, 2002
KitMaker: 9,763 posts
Armorama: 7,444 posts
Posted: Saturday, January 19, 2013 - 05:17 AM UTC
Good start Robert. Id recommend the gel-type super glue as an alternative for certain parts. Doesn´t run like the liquid stuff, grips better onm rougher surfaces and if there is a little excess squeezed out, it can be dabbed clean with a cotton top or tooth pick.

IPMS Stockholm
"The problem with common sense, is that it is not that common"
England - North East, United Kingdom
Joined: June 22, 2010
KitMaker: 1,224 posts
Armorama: 1,207 posts
Posted: Saturday, January 19, 2013 - 05:25 AM UTC
Thanks... did wonder. Will pop to the shops tomorrow

#521
Kentucky, United States
Joined: April 13, 2011
KitMaker: 9,465 posts
Armorama: 8,695 posts
Posted: Saturday, January 19, 2013 - 07:40 AM UTC
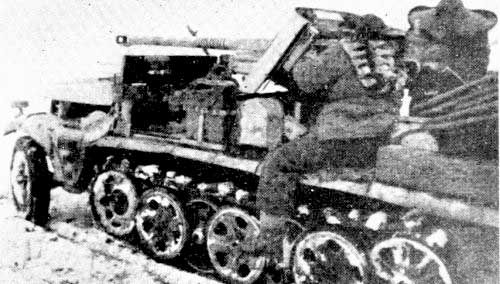
Photos from the Patton Museum Library, Ft. Knox, KY
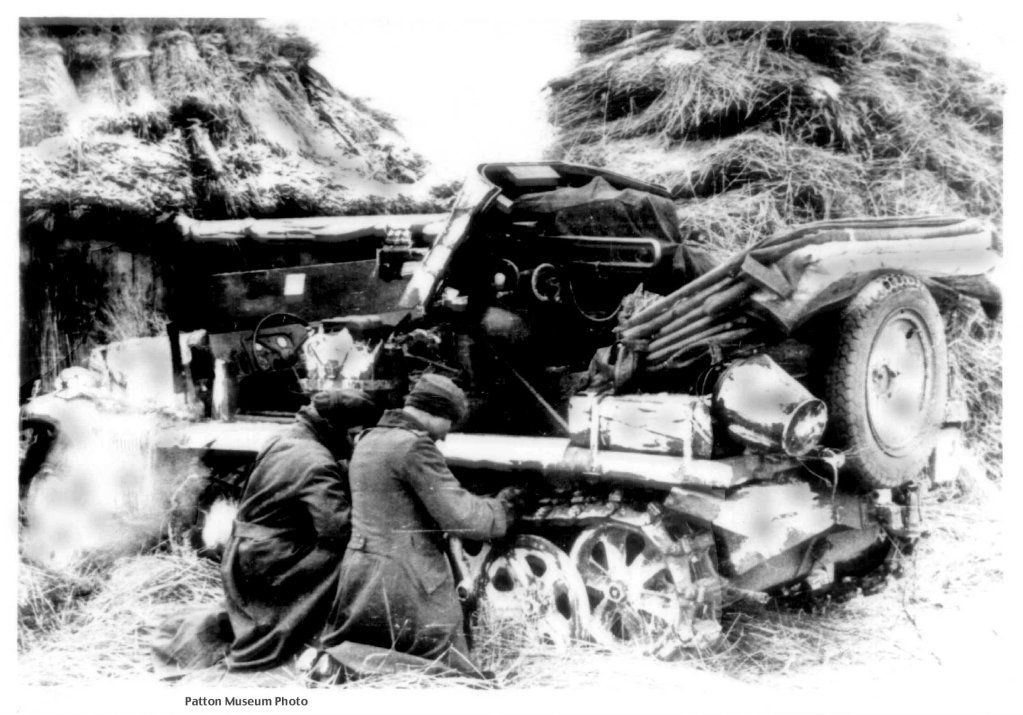


#521
Kentucky, United States
Joined: April 13, 2011
KitMaker: 9,465 posts
Armorama: 8,695 posts
Posted: Saturday, January 19, 2013 - 07:49 AM UTC
Built before Italeri came out with their PAK 38 Demag. The gun is Dragon, the vehicle forward of the firewall ESCI, from the firewall on back Italeri. ESCI had their own molds and some small details are better.
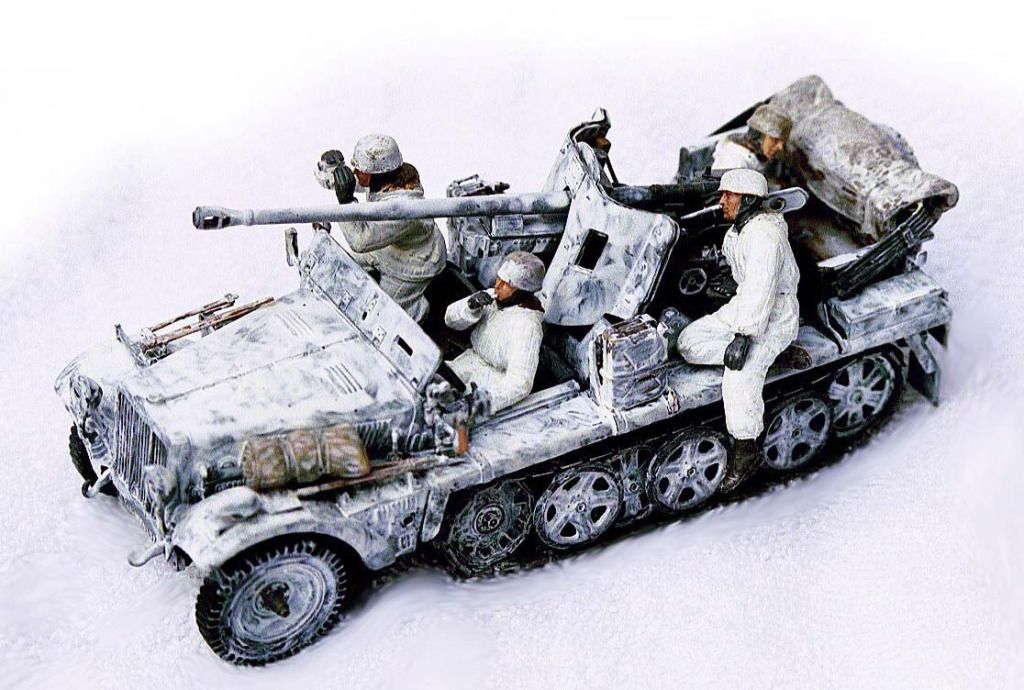
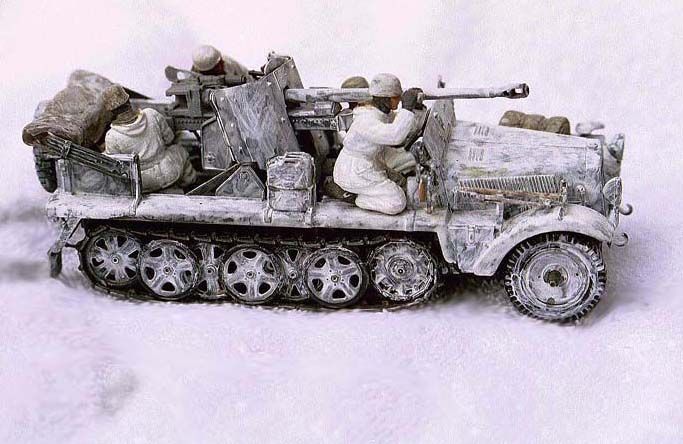

#521
Kentucky, United States
Joined: April 13, 2011
KitMaker: 9,465 posts
Armorama: 8,695 posts
Posted: Saturday, January 19, 2013 - 01:10 PM UTC
One more image from the Patton Library (now relocated to Ft. Benning.)
England - North East, United Kingdom
Joined: June 22, 2010
KitMaker: 1,224 posts
Armorama: 1,207 posts
Posted: Saturday, January 19, 2013 - 09:31 PM UTC
Thanks for the photos. Really like the helmet hanging over the wing mirror... may do that

#003
Donegal, Ireland
Joined: May 14, 2002
KitMaker: 9,763 posts
Armorama: 7,444 posts
Posted: Saturday, January 19, 2013 - 10:39 PM UTC
Hi Robert. You have some nice updates to improve this old kit .... I also have the version towing the nebelwerfer. From memory, the reviews all slated Italeri´s tracks. Considering all the other updates, it might be worth while looking into replacing these as well. I bought the friuls for the Sd.Kfz 250 which also come with white metal drive wheels, but there are cheaper options ... maybe somebody else has updated their Dragon 250 and can send you their plastic tracks?

IPMS Stockholm
"The problem with common sense, is that it is not that common"
England - North East, United Kingdom
Joined: June 22, 2010
KitMaker: 1,224 posts
Armorama: 1,207 posts
Posted: Sunday, January 20, 2013 - 06:55 AM UTC
Quoted Text
Hi Robert. You have some nice updates to improve this old kit .... I also have the version towing the nebelwerfer. From memory, the reviews all slated Italeri´s tracks. Considering all the other updates, it might be worth while looking into replacing these as well. I bought the friuls for the Sd.Kfz 250 which also come with white metal drive wheels, but there are cheaper options ... maybe somebody else has updated their Dragon 250 and can send you their plastic tracks? 
i havent even looked at the tracks, thanks for the tip.... the PE was part of the kit when I bought it (ebay) so it wasn't a conscious effort to add updates.....
todays update - photos to show progress... I think I need to paint the cab work so far or risk not being able to get at it... going black primer then schwarzgrau interior - that way the foot-wells should be nice & shadowed... you cant see too much (obviously the dashboard) but he pedals should be visible so will also dry brush scuff marks on before much else happens. also started removing detail requested by the PE on the main body... getting used to this (mind the 2 levers on the 2nd photo took most of today to fit... any my eyes - think a magnifying lamp is in order.....


England - North East, United Kingdom
Joined: June 22, 2010
KitMaker: 1,224 posts
Armorama: 1,207 posts
Posted: Sunday, January 20, 2013 - 07:00 AM UTC

#003
Donegal, Ireland
Joined: May 14, 2002
KitMaker: 9,763 posts
Armorama: 7,444 posts
Posted: Monday, January 21, 2013 - 05:10 AM UTC
Quoted Text
seems Hobby Boss to a set of plastic individual tracks: ... is the 251 track the same as the 10?
No. they are the same as the Sd.Kfz 250. The 250 and 251 are different.

IPMS Stockholm
"The problem with common sense, is that it is not that common"
England - North East, United Kingdom
Joined: June 22, 2010
KitMaker: 1,224 posts
Armorama: 1,207 posts
Posted: Monday, January 21, 2013 - 07:12 AM UTC
Quoted Text
Quoted Text
seems Hobby Boss to a set of plastic individual tracks: ... is the 251 track the same as the 10?
No. they are the same as the Sd.Kfz 250. The 250 and 251 are different. 
ahhhh that explains other comments on another forum - i misread... thank you
right todays update... Schwarzgrau on in the cab over a black undercoat (definitely loving Vallejo Model Color and Air) and the front steering mechanism built. I was a little late in checking the fit of the resin replacement wheels - had to butcher the locating pins after it was all fixed - hoping copious amounts of CA will keep the new wheels in place

anyway piccies
first off painting


then steering


and finally the nice PE rear flooring...

England - North East, United Kingdom
Joined: June 22, 2010
KitMaker: 1,224 posts
Armorama: 1,207 posts
Posted: Wednesday, January 23, 2013 - 08:21 AM UTC
Wojewodztwo Slaskie, Poland
Joined: October 21, 2003
KitMaker: 529 posts
Armorama: 500 posts
Posted: Thursday, January 24, 2013 - 02:12 AM UTC
Hi,
This newly built model. It is very cool, but time consuming. It has many shortcomings, even though I'm happy with the results I have achieved.
Good luck, you go very well.
Paweł
England - North East, United Kingdom
Joined: June 22, 2010
KitMaker: 1,224 posts
Armorama: 1,207 posts
Posted: Thursday, January 24, 2013 - 02:23 AM UTC
Quoted Text
Hi,
This newly built model. It is very cool, but time consuming. It has many shortcomings, even though I'm happy with the results I have achieved.
Good luck, you go very well.
Paweł
thanks Pawel, lots of "firsts" for me on this - PE, link & length track, stowage and field-mods (have scratchbuilt on 1/72 aircraft so trying some on 1/35 armour) but really really enjoying the build....
England - North East, United Kingdom
Joined: June 22, 2010
KitMaker: 1,224 posts
Armorama: 1,207 posts
Posted: Friday, January 25, 2013 - 06:35 AM UTC
England - North East, United Kingdom
Joined: June 22, 2010
KitMaker: 1,224 posts
Armorama: 1,207 posts
Posted: Saturday, January 26, 2013 - 03:35 AM UTC
England - North East, United Kingdom
Joined: June 22, 2010
KitMaker: 1,224 posts
Armorama: 1,207 posts
Posted: Sunday, January 27, 2013 - 06:27 AM UTC
England - South East, United Kingdom
Joined: November 19, 2008
KitMaker: 2,249 posts
Armorama: 2,007 posts
Posted: Sunday, January 27, 2013 - 11:44 AM UTC
Hi Rob, I've just built the little MPK version of this, and found
Prime Portal has a great walkaround of this which you may find useful.
There's some super shots of the drive sprocket for example; note that it doesn't have plain teeth like a tank, but has rubber padded faces, with a small projecting wheel. The tracks also have rubber pads, and are lubricated, this gives them a rather different appearance from tank tracks, which can be seen nicely in the photos.
Also good shots of the driver area. Note that central housing that the gear selector etc. sticks out of appears to be made of alloy, so has a different finish from the rest of this area, i.e. it isn't painted (at least in this example) which will give a nice variation to the appearance.
One tip on the superglue: it seems it is moisture that it reacts to, which is why it is sometimes so hard to get it to stick something dry, while it will stick your fingers no problem; try breathing on the parts before you apply the glue and join them together; the moisture from your breath is enough to provide the water necessary to trigger the chemical reaction and it sets quicker. I find this seems to work anyway, and is cheaper and easier to apply than CA accelerator...
Anyway, good luck!
England - North East, United Kingdom
Joined: June 22, 2010
KitMaker: 1,224 posts
Armorama: 1,207 posts
Posted: Sunday, January 27, 2013 - 07:24 PM UTC
England - South East, United Kingdom
Joined: November 19, 2008
KitMaker: 2,249 posts
Armorama: 2,007 posts
Posted: Monday, January 28, 2013 - 01:24 AM UTC
In my view it should have a slightly greenish tinge but from your photos it looks as though you have a very light coat of it and over black primer it's making it look darker than it should be. I'd suggest giving it a bit more of a covering of paint before deciding if the colour is somehow wrong.
England - North East, United Kingdom
Joined: June 22, 2010
KitMaker: 1,224 posts
Armorama: 1,207 posts
Posted: Monday, January 28, 2013 - 01:35 AM UTC
Quoted Text
In my view it should have a slightly greenish tinge but from your photos it looks as though you have a very light coat of it and over black primer it's making it look darker than it should be. I'd suggest giving it a bit more of a covering of paint before deciding if the colour is somehow wrong.
ah ok - was trying to keep that light to allow the black to show through (I tend to be too heavy and lose shading)....
EDIT - could also be the photos are a touch under exposed... will try again tonight if I get natural light.....
England - North East, United Kingdom
Joined: June 22, 2010
KitMaker: 1,224 posts
Armorama: 1,207 posts
Posted: Monday, January 28, 2013 - 07:28 PM UTC
just one photo today - got the tyres painted (sort of off black but shows up more black on the photo... also getting happier with the dunkelgelb - after all it will get weathered anyway....

England - North East, United Kingdom
Joined: June 22, 2010
KitMaker: 1,224 posts
Armorama: 1,207 posts
Posted: Tuesday, January 29, 2013 - 07:24 PM UTC
both running gear built..... once tracks finished will add those then weather (if i can get a damn decent weather skill going....)

