_GOTOBOTTOM
Dioramas
Do you love dioramas & vignettes? We sure do.
"Sense of Urgency"
panzerconor
Visit this Community
Massachusetts, United States
Joined: February 08, 2012
KitMaker: 1,271 posts
Armorama: 1,253 posts
Posted: Tuesday, January 29, 2013 - 04:13 PM UTC
At USCG Boot Camp (142 days away), a commonly heard phrase is "sense of urgency." And me being me, that got me to thinking about a diorama. I want to make the scene have that "let's go!" "hurry the #$&@ up!" feel to it. Yanno? Give it that sense of urgency. So enough BS, this is what I got now:

Our grenadier


our grenadier in need of assistance


and our grenadier who's in trouble


And of course, the source of the problems


The figures are all works in progress. They're also my first stab at using Hornet heads, and I think they really give life to the scene. The Italian camo needs to be touched up quite a bit, and a few thing need to be fixed on the other 2 figures as well, besides the fact that they're not finished There should be 2 or three more Germans coming in too.

Might be adding some Russian infantry as well.

So! Comments? Suggestions? I could use 'em.

Thanks for looking

-Conor
War_Machine
Visit this Community
Washington, United States
Joined: February 11, 2003
KitMaker: 702 posts
Armorama: 385 posts
Posted: Wednesday, January 30, 2013 - 10:22 AM UTC
It looks like you're off to a good start on what should be an interesting project. The one comment I have is that the left arm/shoulder joint on the 'in trouble' soldier on his stomach looks pretty funky. I know from plenty of experience converting figures that getting the angles at bodily joints is difficult. I've also developed a bit of a feel for when something looks off from my many, many, many mistakes. It looks to me that you could build up the back of the arm and joint with putty (I'd recommend epoxy) and reshape a bit and it should be okay.
Besides that one guy, things are looking promising from where I sit. Keep at it, and keep us posted.
panzerconor
Visit this Community
Massachusetts, United States
Joined: February 08, 2012
KitMaker: 1,271 posts
Armorama: 1,253 posts
Posted: Wednesday, January 30, 2013 - 05:33 PM UTC
Yup, that was the first thing I noticed looking at the pictures too hahaha. Your suggestion definitely worked, he doesn't look like his shoulder's dislocated anymore.

Well seeing as I found out there was a pond in my backyard...


...I decided I could finish at least one figure (finish, that is unless I spot a mistake on here)


So he still needs a little touching up in a few places. That annoying shine he has only seems to show up in the pictures, so I don't know what to do about that

I think I'll start the base and groundwork. If I finish my figures & tank now, I won't have any motivation to build the base, etc, and this build log will turn into an empty promise So sometime within the week I hope to get an update in.

-Conor
jrutman
Visit this Community
Pennsylvania, United States
Joined: April 10, 2011
KitMaker: 7,941 posts
Armorama: 7,934 posts
Posted: Thursday, January 31, 2013 - 02:50 AM UTC
It's very cool to see your posts as I like the progress that you have made right before our eyes in building and painting figs. Take a look at some of your first attempts and you will see what I mean. Nice to see you made the transition to the Hornet products. They are so good that they do a lot of the work for you! You are getting a better sense of anatomy as well and your figs reflect that. Keep up the good work.
A little tip. Almost all plastic figs have the problem with the hands that are grasping things(weapons,etc) and they never seem to close completely over the object. I have found that the dremel,applied carefully to the palm area,will thin the hand a bit so you can very carefully squeeze it closed a bit and solve that problem. Try it on a spare hand.
J
panzerconor
Visit this Community
Massachusetts, United States
Joined: February 08, 2012
KitMaker: 1,271 posts
Armorama: 1,253 posts
Posted: Saturday, February 02, 2013 - 03:48 PM UTC
Thanks Jerry, I do usually notice progress when looking over the small mountain of figure's on the corner of my desk. I cringe looking at Tamiya panzergrenadiers I made in 5th grade lol.

A tiny update. Nothing's been done, but this is what's lined up:


and this


I had originally planned on putting a park wall up, but that would've been too involved and time consuming for me. I'm not Claude Joachim YET. Anyway's, I plan on making the ruined building as long as possible, in order to have it run along the side of the road through the whole diorama. Right now I'm thinking of throwing my half-built Wirbelwind kit into the building rubble, making it knocked out. We'll see. I might add a figure from Verlinden creeping around on the other side of the wall, but I don't want to crowd the scene.

Coming last will be the cobblestone road. I'm using this Verlinden kit for it:


I'm hoping I have enough sidewalk to go along the road, so I've got my fingers crossed. I ordered two kits of it, so I should be ok.

Might get a bit more done on my figures between now and the time my 2 kits arrive...

-Conor
jrutman
Visit this Community
Pennsylvania, United States
Joined: April 10, 2011
KitMaker: 7,941 posts
Armorama: 7,934 posts
Posted: Sunday, February 03, 2013 - 03:57 AM UTC
All of the missing parts can be easily made from plaster buddy. It's not hard at all and once you try it,you will be amzed at how easy it is. And cheap!!
J
panzerconor
Visit this Community
Massachusetts, United States
Joined: February 08, 2012
KitMaker: 1,271 posts
Armorama: 1,253 posts
Posted: Wednesday, February 06, 2013 - 02:43 PM UTC
I actually think I've got much more than I planned on haha. I might actually have enough sidewalk too. I thought they would be ceramic, not resin:


My room will smell like resin for the next week or so I bet.

I should've known the Verlinden kits would be a bit on the bigger side. Anyways I set up kind of a rough outline of what I want it to look like:


The Wirbelwind is tentative, I dunno if I'm going to use it. But it would look pretty cool, AND clear off my workbench....

And our main little group should look something like this:


I might make our wounded soldier grabbing his comrade's hand. It all depends on where he'll be facing. I want him to have that "thousand yard stare" right at the tank and his friend in the street. We'll see how it works. I've got one more casualty that I forgot to throw in originally. Haven't quite decided where to place him:


This is him up close. He was one of my first real conversions from this summer. I think he'll do just fine after a bit of touching up.


So that's where I'm at. I gotta find the right paints to use for the red brick and cements. Any suggestions? Because I...I have not clue

-Conor
MGunner
Visit this Community
Kentucky, United States
Joined: May 27, 2010
KitMaker: 51 posts
Armorama: 48 posts
Posted: Wednesday, February 06, 2013 - 03:10 PM UTC
I`m no diorama expert but what i do with hydro
coal stuff is spray paint it with any cheap white paint as a primer to prep it then i use cheap terracotta acrylic paint that you can find at walmart and just slop it on there liberally change the bricks a bit by adding white and black for lighter and darker colored bricks, they also have a cheap concrete color also. I then wash it with various colors like black, white and a light green to simulate allege growing in the cracks and what not. But I`m sure someone here has a much better technique that will achieve better results.
panzerconor
Visit this Community
Massachusetts, United States
Joined: February 08, 2012
KitMaker: 1,271 posts
Armorama: 1,253 posts
Posted: Friday, February 08, 2013 - 12:36 PM UTC
Seeing as what everyone's calling "super mega death storm 5" is coming through New England this weekend, I can't exactly go out to get the paints I need for my groundwork. So it's onto more figures! I tore into one from the Blue Division kit and turned his winter coat into an SS smock. No photos just yet though. The figure's pose and the shape of his torso make it really difficult to put an Stg-44 pouch on his belt correctly. Until I saw this photo:


The guy on the far left has his pouches arranged in a really weird way, so I'm going to more or less copy that. (The more I look at the photo, the more I think ti would be a cool project in the future...)

So I'll have a real update either today or tomorrow, if I survive this "mega death storm."

-Conor
jrutman
Visit this Community
Pennsylvania, United States
Joined: April 10, 2011
KitMaker: 7,941 posts
Armorama: 7,934 posts
Posted: Saturday, February 09, 2013 - 03:56 AM UTC
The main reason that guys ammo pouches look strange is that the left one is empty and so"rides" high. There are still some magazines left in the right one and so it pulls down.
The main mistake modelers make with personal equipment like this is the feeling of weight. Try picking some of this stuff up when you go to a reenactment next time. It ain't light!
J
panzerconor
Visit this Community
Massachusetts, United States
Joined: February 08, 2012
KitMaker: 1,271 posts
Armorama: 1,253 posts
Posted: Saturday, February 09, 2013 - 05:30 AM UTC
I actually got to be in one in October 2011, wicked fun stuff. I had a Kar98, and even those pouches really weighed down the belt.

That's a good point though, I never actually thought about how much things weighed.

-Conor
panzerconor
Visit this Community
Massachusetts, United States
Joined: February 08, 2012
KitMaker: 1,271 posts
Armorama: 1,253 posts
Posted: Saturday, February 09, 2013 - 05:55 PM UTC
Okay, progress, more or less. Seeing as this happened Friday into Saturday:

(That's winter storm Nemo, and he was a b****. 3-5 foot snow drifts. )

I had time to do some work, in between shoveling out my house, my neighbors house, and my other neighbors house.

This is the most recent figure. He used to be a member of the "Blue Division" kit, but I managed to sorta turn his winter coat into an SS smock with a spare collar piece, 2 salvaged arms, my knife, and some putty:

That's just another shot of where he'll fit in with our wounded friend. It's tricky working them together, but he'll be grabbing the other guys belt or shirt depending on how the placement works out in the long run.

I'm in the process of trying to make his shirt appear to be opened up, exposing his undershirt and a a few wounds. Work in progress though, as I'm not even sure that suspender piece is correct. Might end up with that AM kit for him.

He's coming along slowly, I still haven't decided what to do with his right arm. But I suppose he's entitled to one...


A quick mock up of how they should appear when all is said and done. I'm not too thrilled with the wounded guy and his buddy...he's kinda facing the wrong way. But whatevs. That's something I'll worry about tomorrow I guess.

And finally, that's the view from down the street. I like it


Next up will hopefully be some work on the building's. But that'll only happen if the DPW finds the time to plow my street.

Thanks for looking

-Conor
panzerconor
Visit this Community
Massachusetts, United States
Joined: February 08, 2012
KitMaker: 1,271 posts
Armorama: 1,253 posts
Posted: Tuesday, February 12, 2013 - 04:24 PM UTC
Basic shaping and construction is basically done for the figures as of twenty minutes ago.

He's got a bumpy chin. Might need to work on that...
This is his backside:

Where I ended up placing the Stg 44 pouch:

This was tricky. I tried to give it the look of an SS smock, with his field tunic's collar at the top. I used the smock from a figure in the "Fighting Elite in the East" as my reference. The collar was a spare I stole from a Gen2 kit from yesteryear

Casualty! He's a bit rough in a few spots and some detail is soft, but the other guy will be hanging on to his suspender or tunic, so there will be more work done there either way.

This guy is part Panzer crewman, part grenadier, part Pioneer, and a few others. Overall, he doesn't suck

-Conor
Removed by original poster on 02/13/13 - 09:13:05 (GMT).
panzerconor
Visit this Community
Massachusetts, United States
Joined: February 08, 2012
KitMaker: 1,271 posts
Armorama: 1,253 posts
Posted: Friday, February 15, 2013 - 04:00 PM UTC
Well I've been scraping away at the figures and spending money that I probably should save for someday, but what the heck.
This came in the mail for me today:

That photo is misleading. It's the cobblestone roads, and they're more detailed than I thought. Also, smaller than I thought. Everything with Verlinden seems to be too big or too small
This figure, on the other hand, seems to match the ones I got:

We'll be stereotypical and call him Fritz. He'll be between the two ruins, scoping out the tank:

Of course he won't be in that exact spot. Closer to our wrecked Wirbelwind I hope. There's going to be rubble about knee-to-waist high in that spot as well.

So tomorrow I'm going out to Rocky's Ace Hardware to get some paints for my buildings. The weathering will be left to my AK paints. Then it's off to the hobby shop for balsa wood to make floors and such. This should start to look like a diorama by next week. But hey, I said that last week...

I'll leave you with a link to a video of goats yelling like humans http://www.youtube.com/watch?feature=player_embedded&v=PpccpglnNf0

-Conor
panzerconor
Visit this Community
Massachusetts, United States
Joined: February 08, 2012
KitMaker: 1,271 posts
Armorama: 1,253 posts
Posted: Thursday, February 28, 2013 - 03:42 PM UTC
Well my Stug for the Sturmgeschutz Brigade Build is finished, for now:


My JS-1 is well on it's way, but these magic tracks are anything but. Every time I get a kit with them I think "I'm used to them by now," yet each time they're more than annoying.


My first buildings have been given all the work they can get for now. Just gotta tone down the colors and weather it. A lot.


This is my first almost successful attempt at Oak Leaf camo. Looks pretty messy now but I might fix it later:


I'm trying to detail the figures enough to make it look like they've been through some sort of battle. Like spent ammo casings, open pouches, heavy weathering etc...

(This actually needs work now that I notice it)


I've got more than enough stuff to throw around...


So that's where I'm at. I'll agonize through my "magic" tracks for the next few days, work on my figures some more, and hopefully get my base going. There's a weathering seminar next weekend that I'm going to, and I'll learn some things and get free stuff So hopefully I can finish this in time for the Wings and Wheels show at the end of March. But I work good under pressure

-Conor
jrutman
Visit this Community
Pennsylvania, United States
Joined: April 10, 2011
KitMaker: 7,941 posts
Armorama: 7,934 posts
Posted: Friday, March 01, 2013 - 02:48 AM UTC
Your cammo paint jobs on the SS uniforms is definetly improving a lot!
You need to get some sandpaper going on the parts that you puttied though liitle brother. They are very rough looking.
Nice looking Stug.
J
panzerconor
Visit this Community
Massachusetts, United States
Joined: February 08, 2012
KitMaker: 1,271 posts
Armorama: 1,253 posts
Posted: Friday, March 01, 2013 - 04:57 AM UTC

Quoted Text

Your cammo paint jobs on the SS uniforms is definetly improving a lot!
You need to get some sandpaper going on the parts that you puttied though liitle brother. They are very rough looking.
Nice looking Stug.
J


Yikes I didn't notice that until just now. Easy fix though.

Thanks
panzerconor
Visit this Community
Massachusetts, United States
Joined: February 08, 2012
KitMaker: 1,271 posts
Armorama: 1,253 posts
Posted: Tuesday, March 05, 2013 - 04:06 PM UTC
Just a quick update

Gotta love those AK products. Hopefully I'll have more to really make this wirbelwind look like hell. Not the "this was built by a 5 year old" kind of hell, but the battle weary disabled kind.


Sorry... That's, that's from something else... Anyways:


Apparently it came apart a bit. But given it's destination in the dio, that won't be an issue.


I used AK's dark mud mixed with some plaster, and flicked it onto this side of the hull. Looks pretty good. But then again, I forgot to finish the road wheels first...


And finally, the magic tracks are done. This tank looks pretty big now, compared to the infantry.

The SS smock was sanded and smoothed out, so that's all fixed.

So yeah. Big weathering/painting/stuff seminar this Saturday, so hopefully I come out of that with twice as much knowledge as I went in with. I'll have another update this weekend

-Conor
lespauljames
Visit this Community
England - South West, United Kingdom
Joined: January 06, 2007
KitMaker: 3,661 posts
Armorama: 2,764 posts
Posted: Tuesday, March 05, 2013 - 11:16 PM UTC
looking good so far. with your figures, do you prime them?
just a grey rattlecan car primer is usually good enough, it would help with paint adhesion allowing for thinner layers.

looking forward to more.

James.
TotemWolf
Visit this Community
Oklahoma, United States
Joined: February 11, 2013
KitMaker: 294 posts
Armorama: 196 posts
Posted: Wednesday, March 06, 2013 - 03:15 AM UTC

Quoted Text

looking good so far. with your figures, do you prime them?
just a grey rattlecan car primer is usually good enough, it would help with paint adhesion allowing for thinner layers.

looking forward to more.

James.


I have to agree. When I use to do figures I would not prime and they look good but they looked, ....well.. painted.
I'm now do the first figs I've done since come back to the hobby. I primed them on the paint glides on thin and easy. It looks much better.

Yours look real good. I hope mine are that good.
panzerconor
Visit this Community
Massachusetts, United States
Joined: February 08, 2012
KitMaker: 1,271 posts
Armorama: 1,253 posts
Posted: Wednesday, March 06, 2013 - 08:09 AM UTC
Thanks guys, I've actually never used primer. Well, I did once, but it was Tamiya's brush-on primer, and that chipped and flaked after a while so I haven't used it since. I'll have to get a can of it next time.

-Conor
Plasticbattle
#003
Visit this Community
Donegal, Ireland
Joined: May 14, 2002
KitMaker: 9,763 posts
Armorama: 7,444 posts
Posted: Friday, March 08, 2013 - 11:39 AM UTC

Hi Conor. What kind of putty are you using? It looks way too dry, and you also need to clean it up better. I was getting results like this from Squadron white putty and threw it away. I use Humbrol putty now, but eventhough its wetter, I usually wet it more. Makes it so much easier to work with.
Try wetting it a little with some acetone-free nail polish remover (AFNPR). Place with a tooth pick in the gaps or mask on each side with some tape. You can also dip some cotton tops into AFNPR and wipe away the excess. This can also be used to push the putty into the gap and help with the bond. Then lift of the tape and sand if necessary. Even when cured/hard a wet cotton top and AFNPR can be sued to smooth out rough finishes and clean up.
Another tip is to cement both pieces before joining. Wait a few minutes and cement again ... the plastic will melt slightly and fill most of the gaps. If the gaps are too big initially, dry fit and sand beforehand. When your built figure looks like this, it doesn´t matter how good your painting is, they will never look good.
I believe in putting the work in when building the figures, then painting is so much easier.
panzerconor
Visit this Community
Massachusetts, United States
Joined: February 08, 2012
KitMaker: 1,271 posts
Armorama: 1,253 posts
Posted: Friday, March 08, 2013 - 03:17 PM UTC

Quoted Text


Hi Conor. What kind of putty are you using? It looks way too dry, and you also need to clean it up better. I was getting results like this from Squadron white putty and threw it away. I use Humbrol putty now, but eventhough its wetter, I usually wet it more. Makes it so much easier to work with.
Try wetting it a little with some acetone-free nail polish remover (AFNPR). Place with a tooth pick in the gaps or mask on each side with some tape. You can also dip some cotton tops into AFNPR and wipe away the excess. This can also be used to push the putty into the gap and help with the bond. Then lift of the tape and sand if necessary. Even when cured/hard a wet cotton top and AFNPR can be sued to smooth out rough finishes and clean up.
Another tip is to cement both pieces before joining. Wait a few minutes and cement again ... the plastic will melt slightly and fill most of the gaps. If the gaps are too big initially, dry fit and sand beforehand. When your built figure looks like this, it doesn´t matter how good your painting is, they will never look good.
I believe in putting the work in when building the figures, then painting is so much easier.


Yeah that guy is indeed messy. I used Tamiya putty for him, and rest assured I haven't used it since. But since that photo was taken I've touched him up a bit, but if I can't get him just right I'm going to scrap him and make a new figure. I love the detail that comes out in the photos, but then again it can show just how messy some of them are hahaha But thanks for the advice, I'll definitely take that on board

Conor
panzerconor
Visit this Community
Massachusetts, United States
Joined: February 08, 2012
KitMaker: 1,271 posts
Armorama: 1,253 posts
Posted: Saturday, March 09, 2013 - 05:54 PM UTC
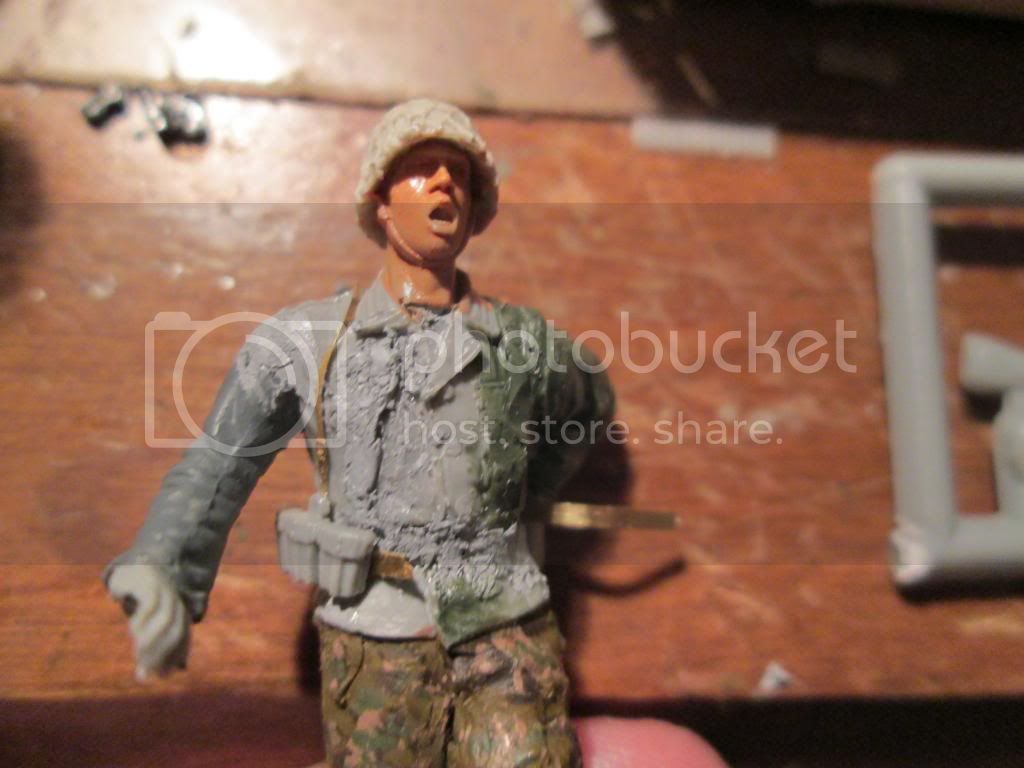
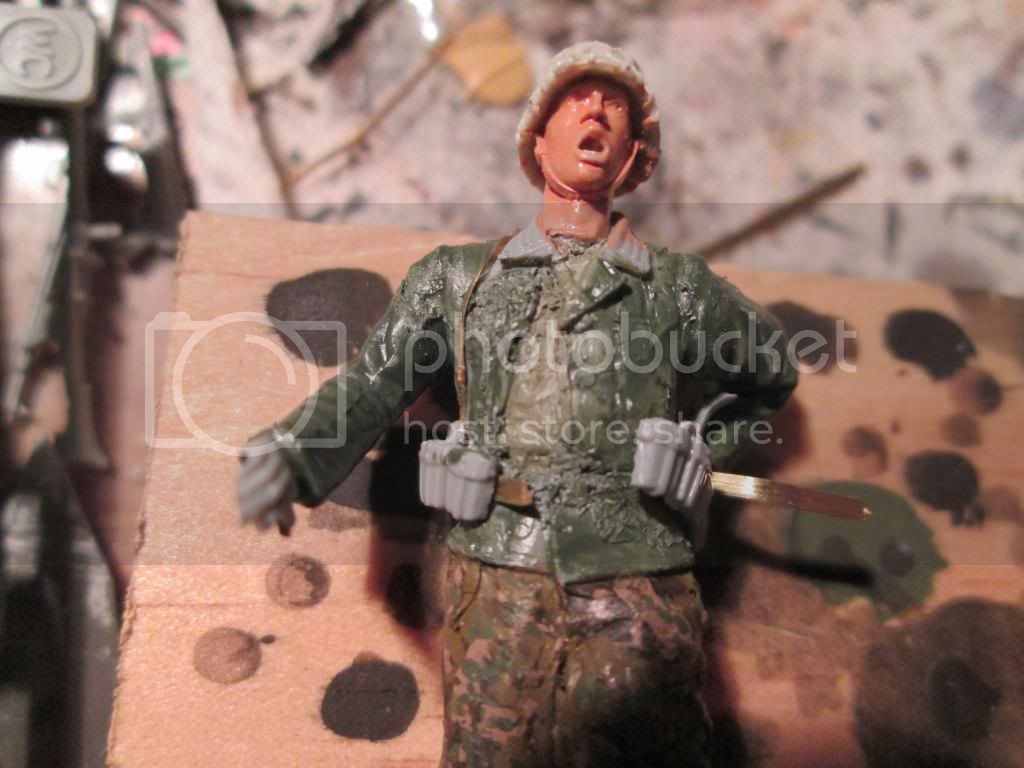
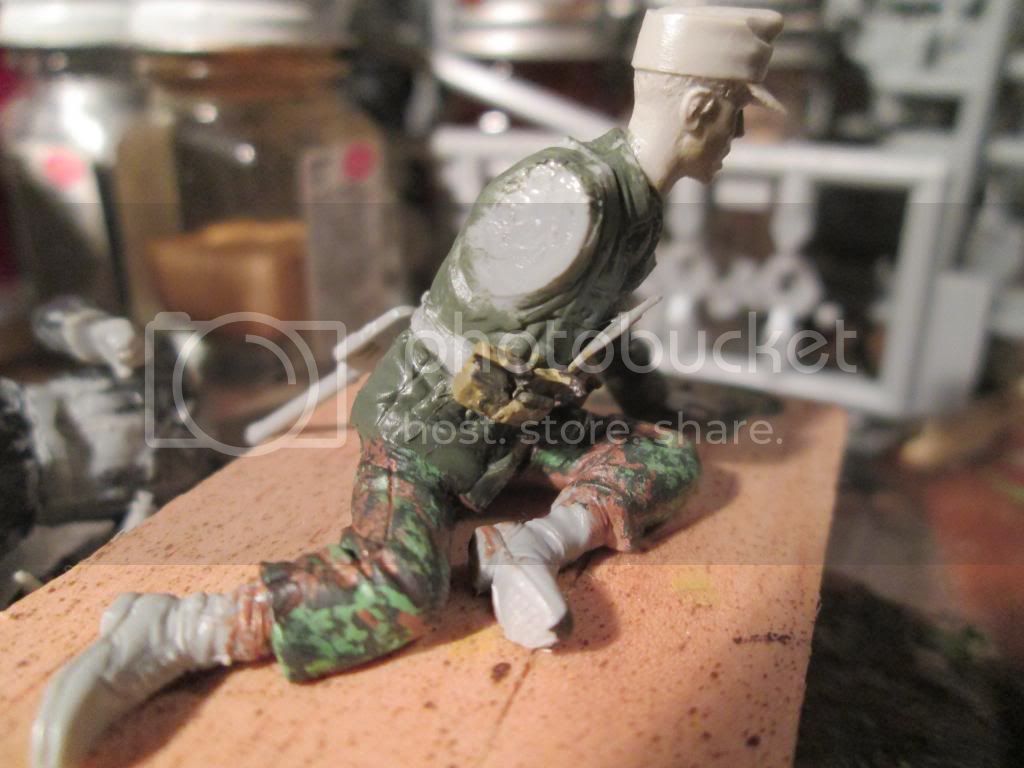
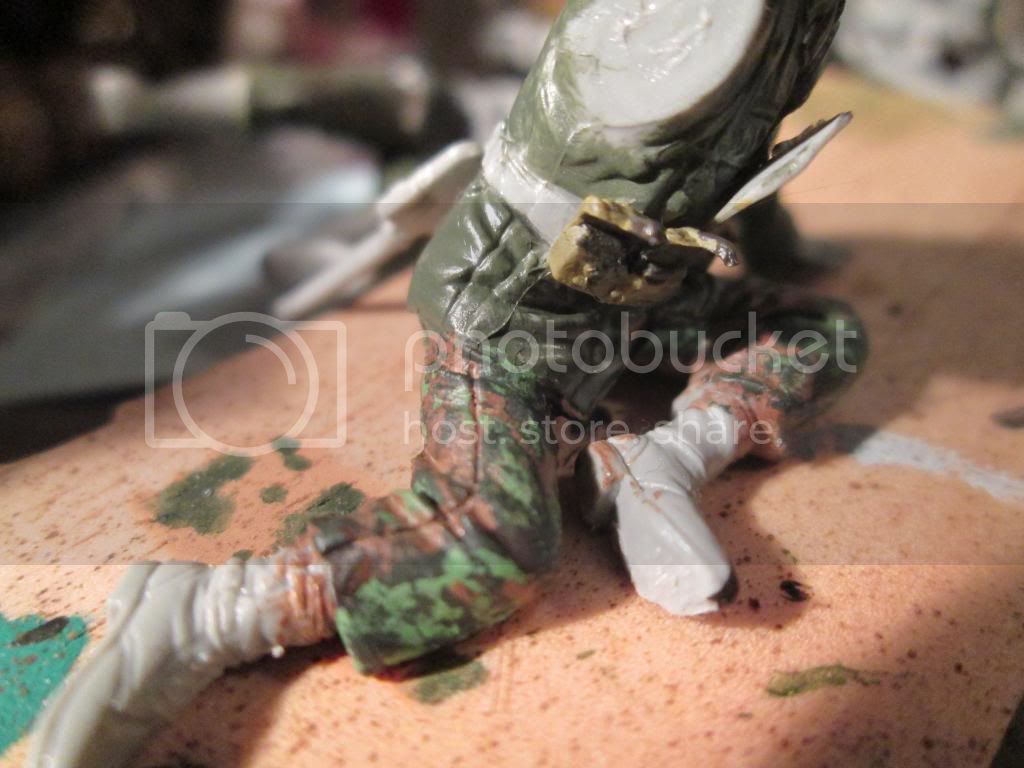
Okay, I did some stuff. First off, I might write off this guy as a failure:


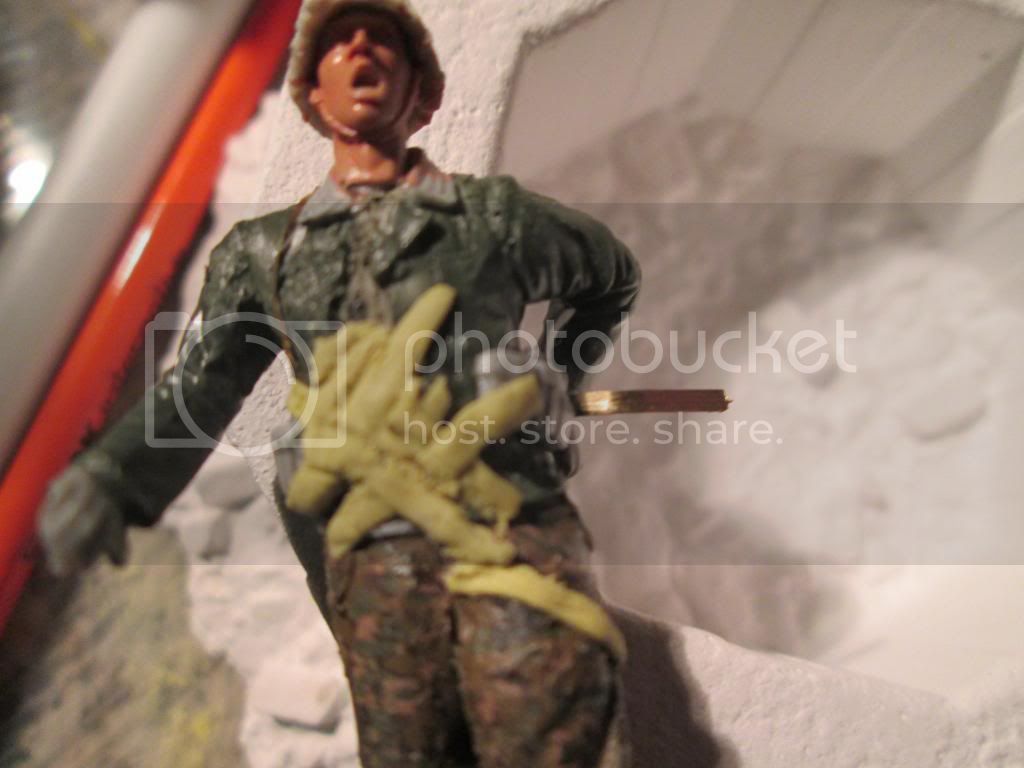
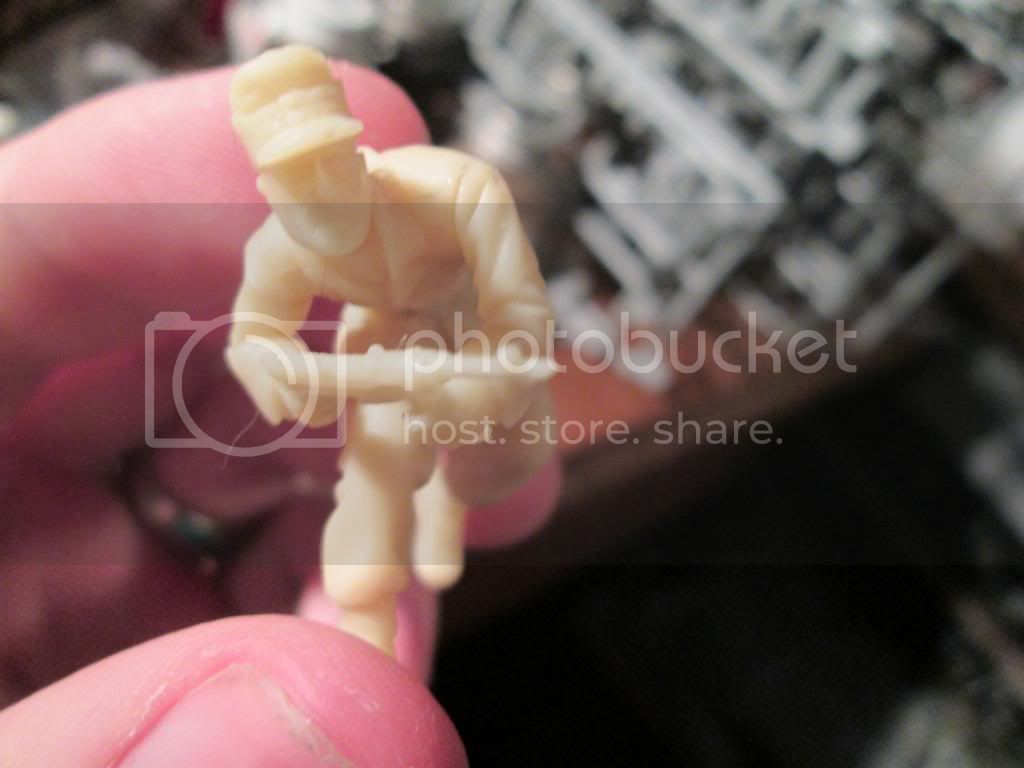
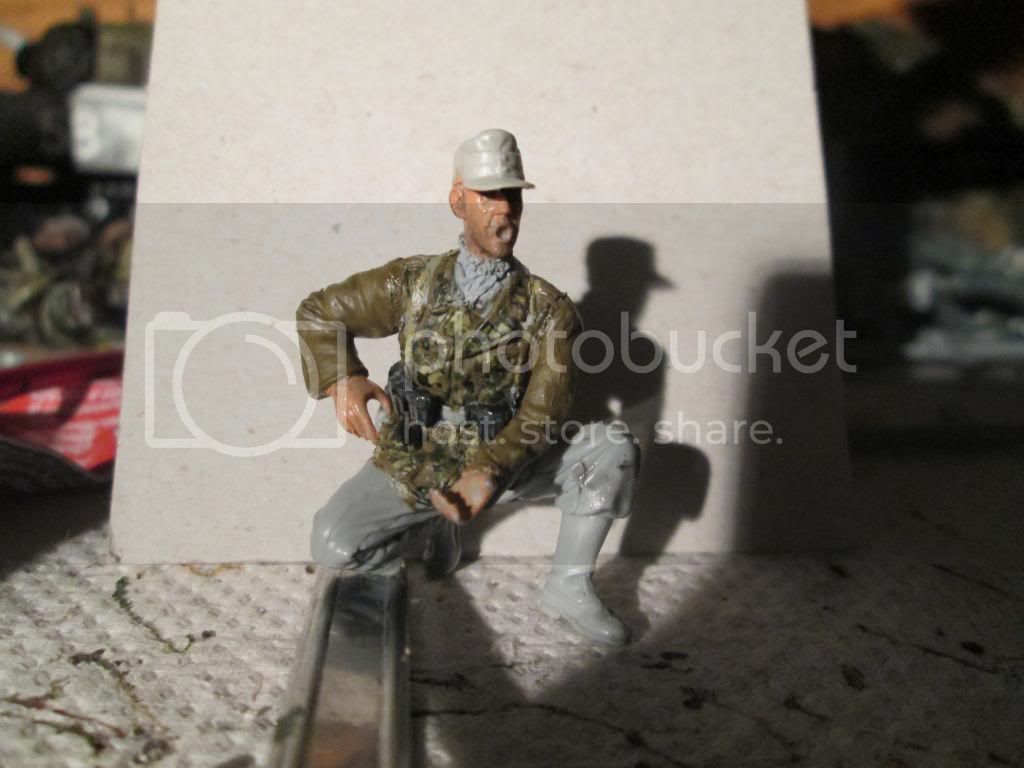
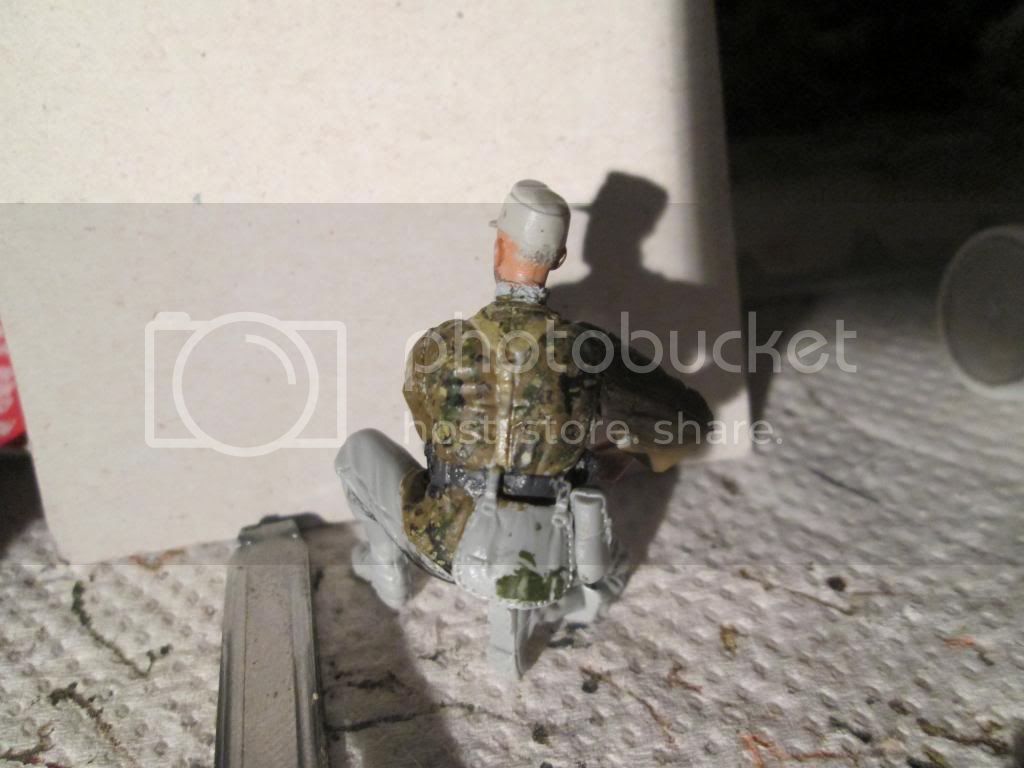
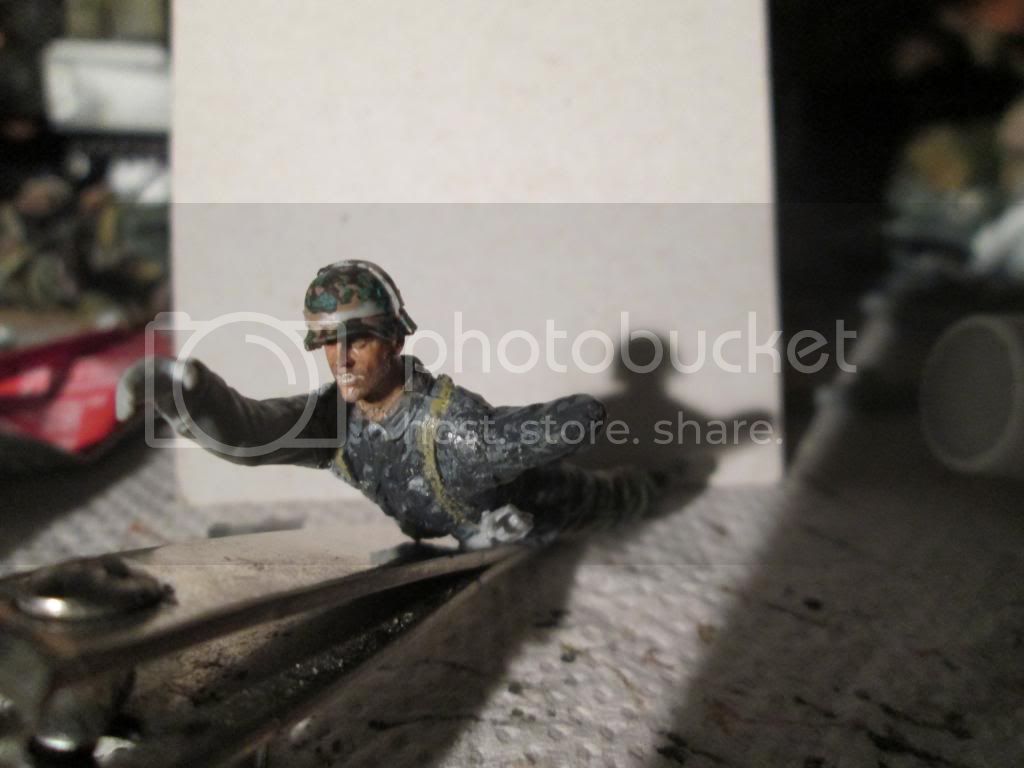
Tried using Milliput as bandaging for his wounds, but that came out too thick and such, so I might replace him with this guy:


I dug him out of the stash of figures, and I think with some work he'll do just fine.

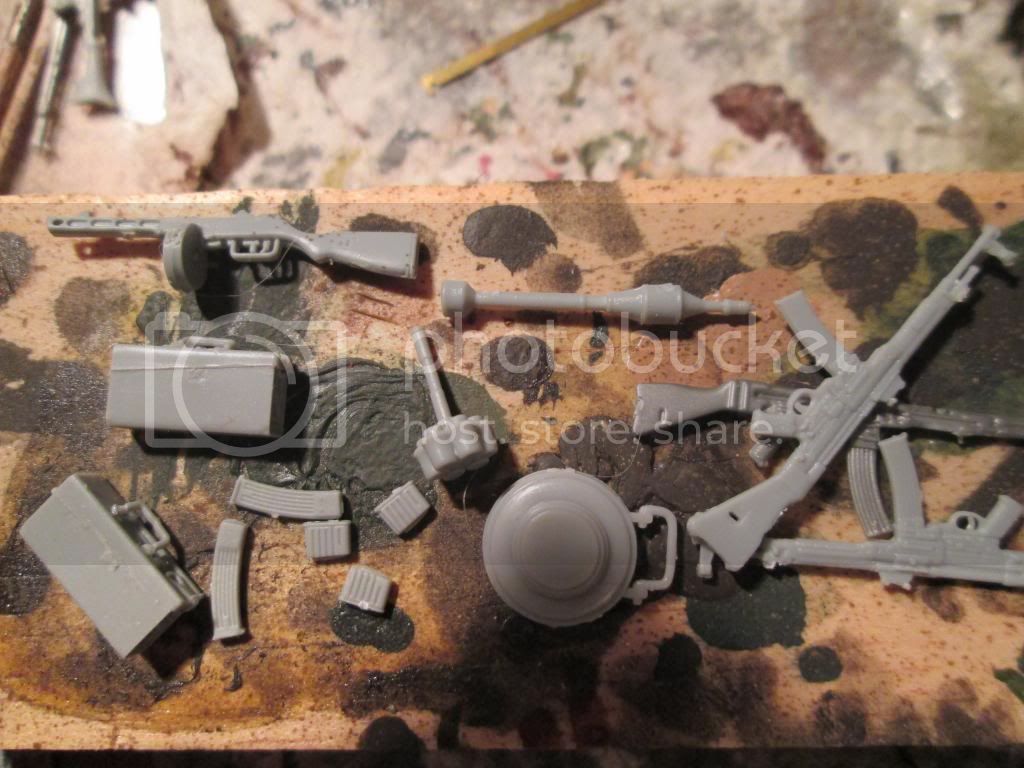
Today was a weathering seminar in Glastonbury CT, I learned stuff, built stuff and got free stuff 
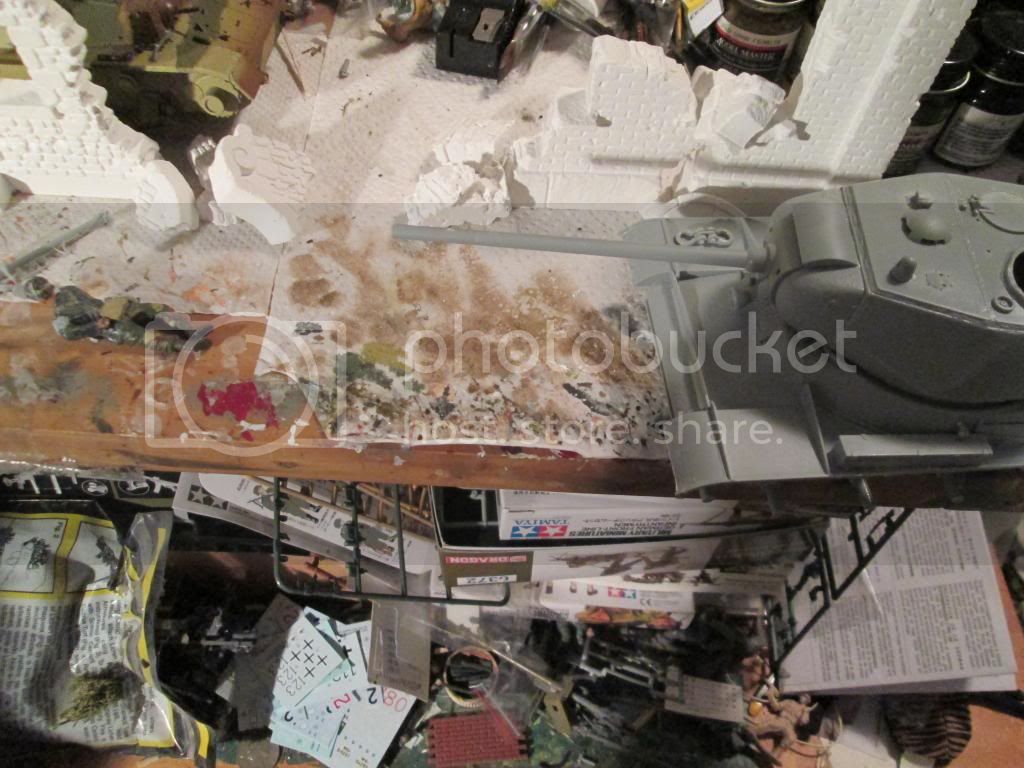
But now my desk is a mess of all sorts of stuff


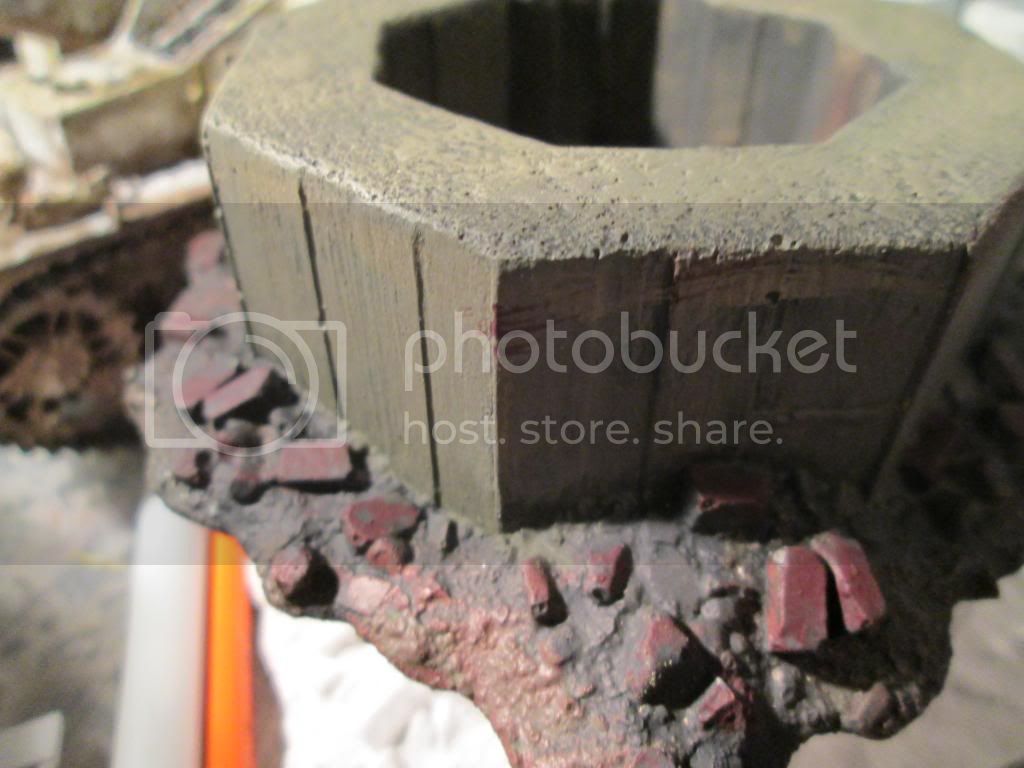
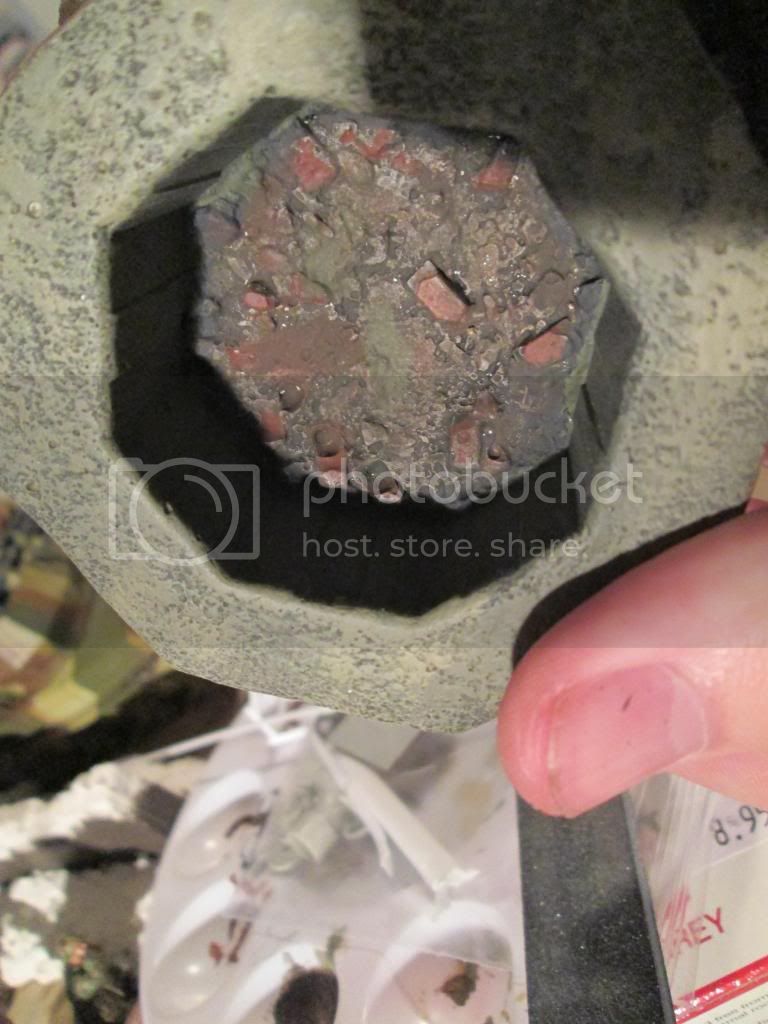
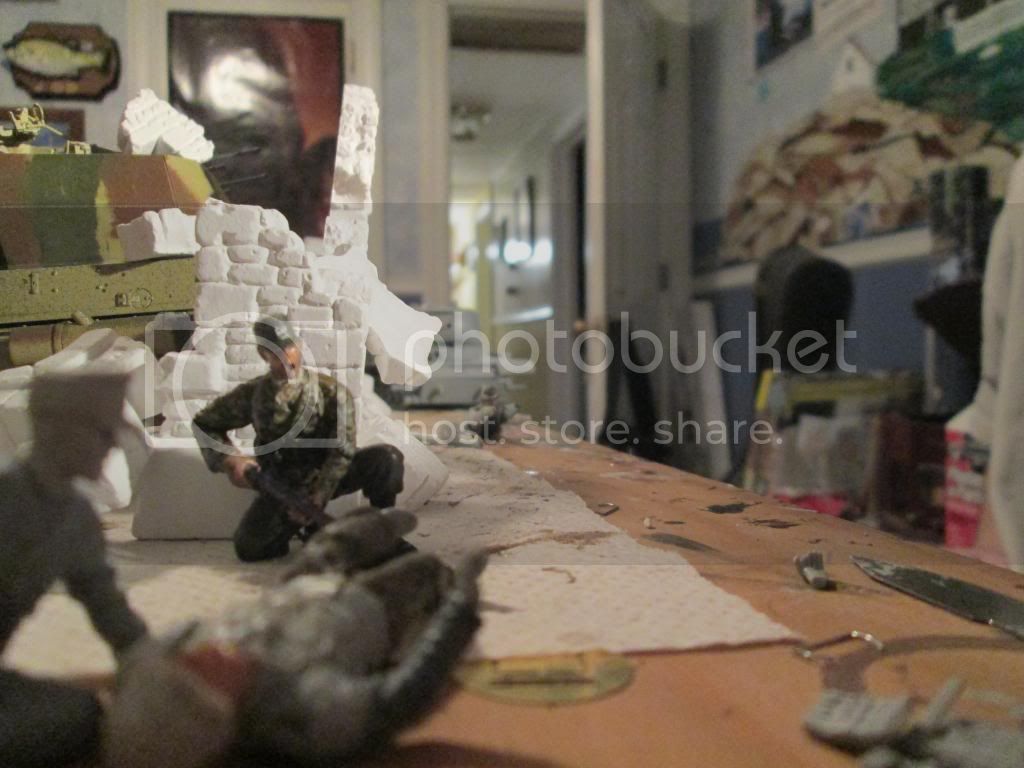
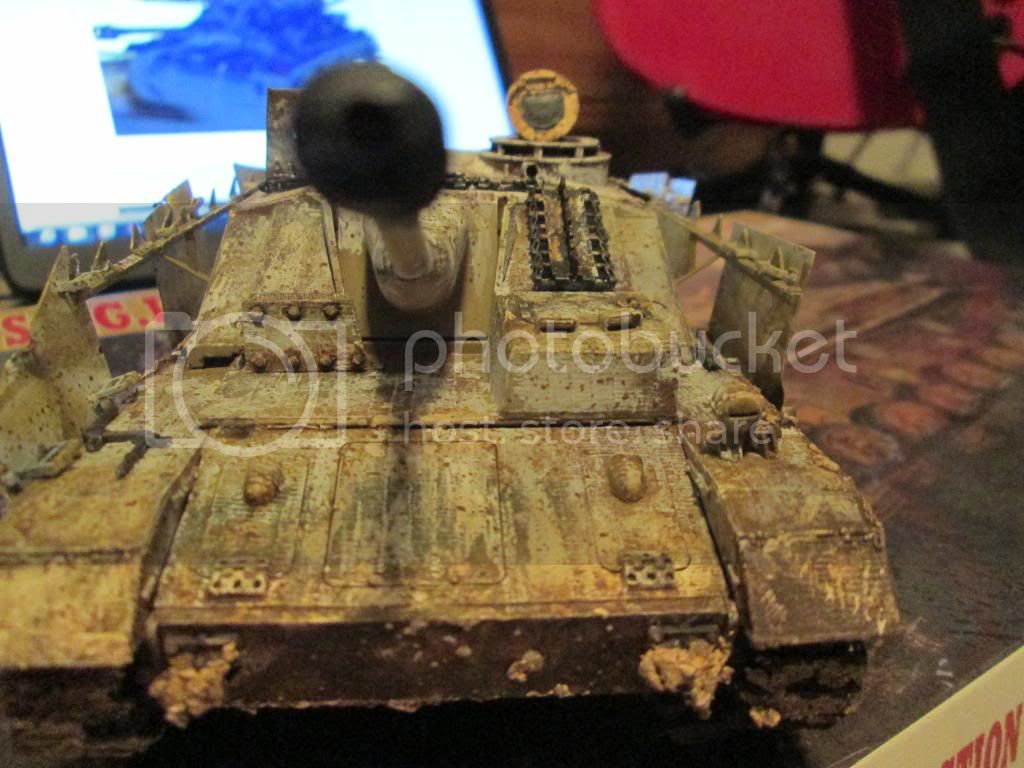
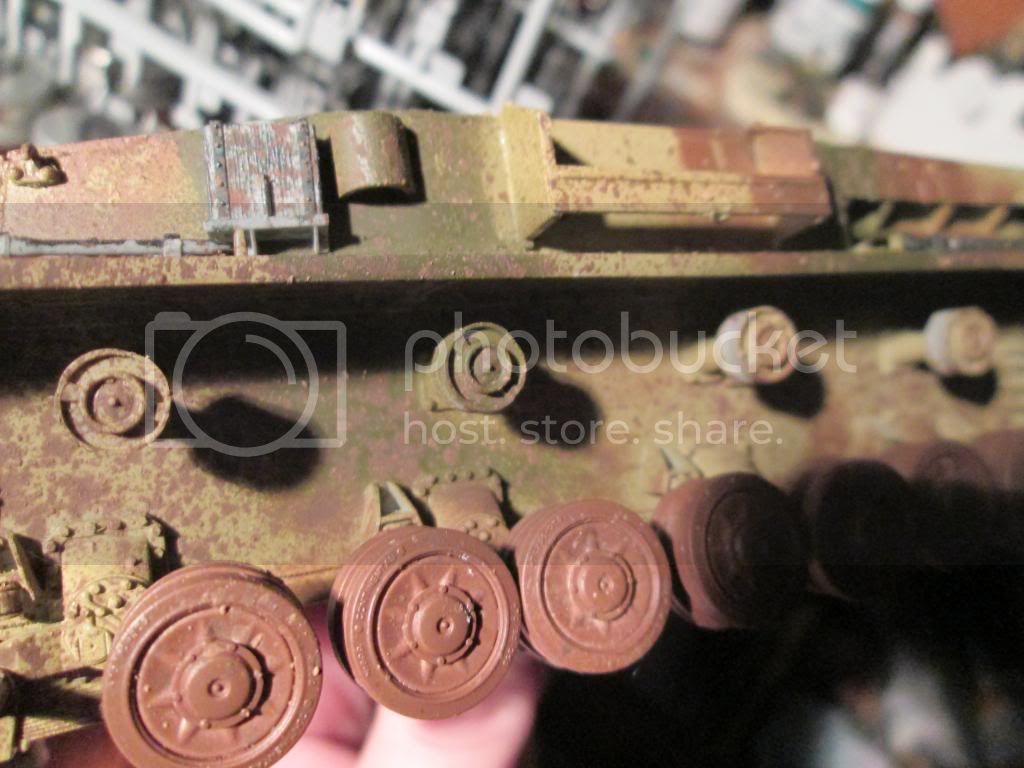
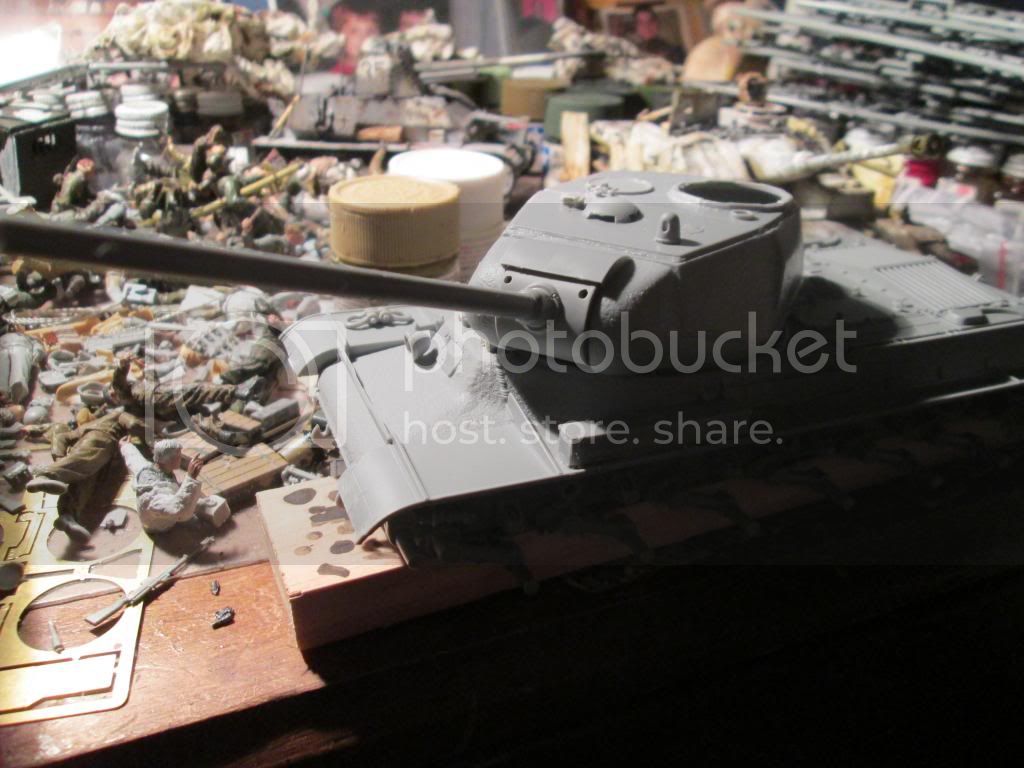
That's today's work, and it'll fit in nicely. It actually changed the whole layout of the project. The JS-1 is going to be crawling over some ruins into the helpless grenadiers. This is where things are:


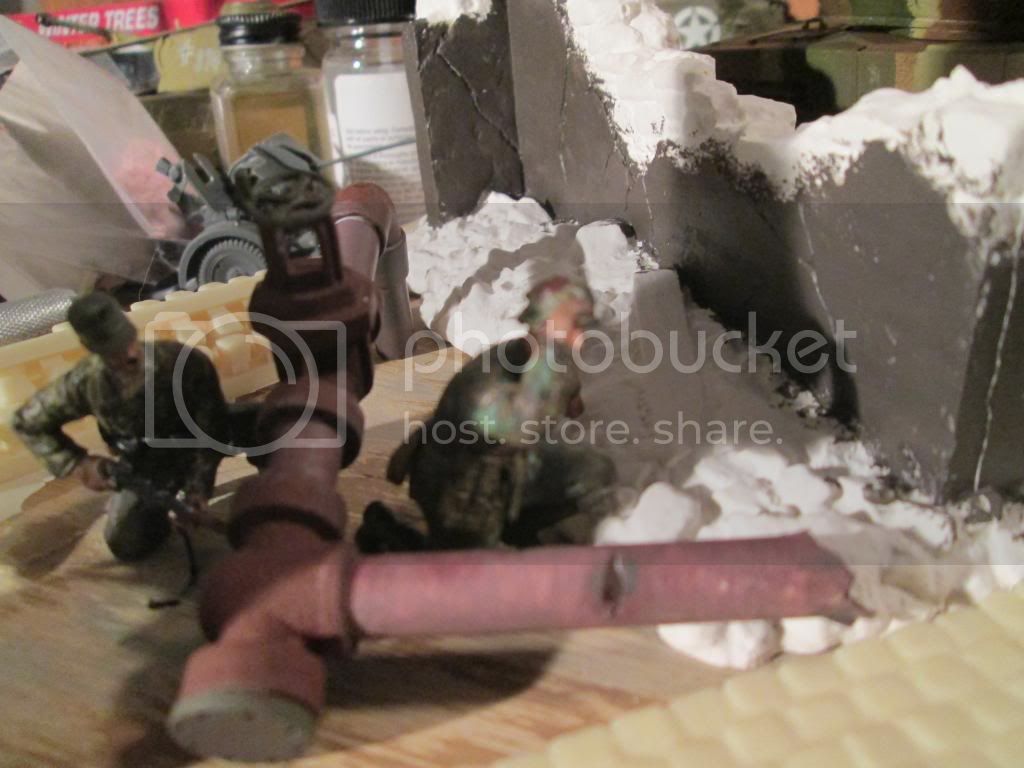
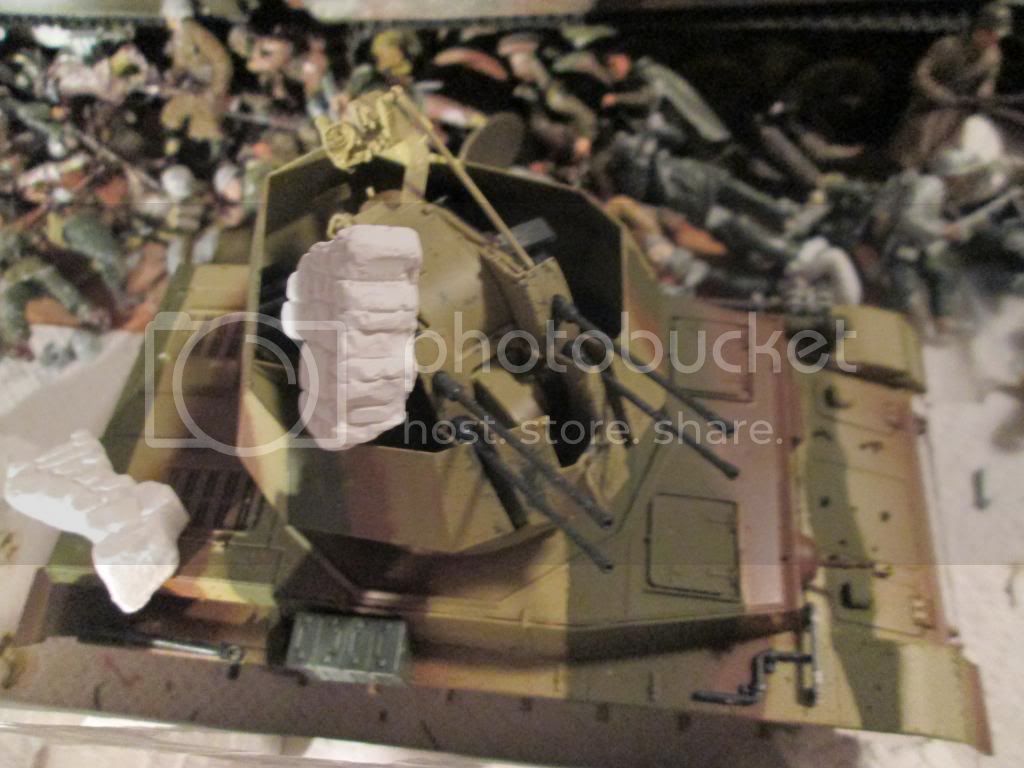
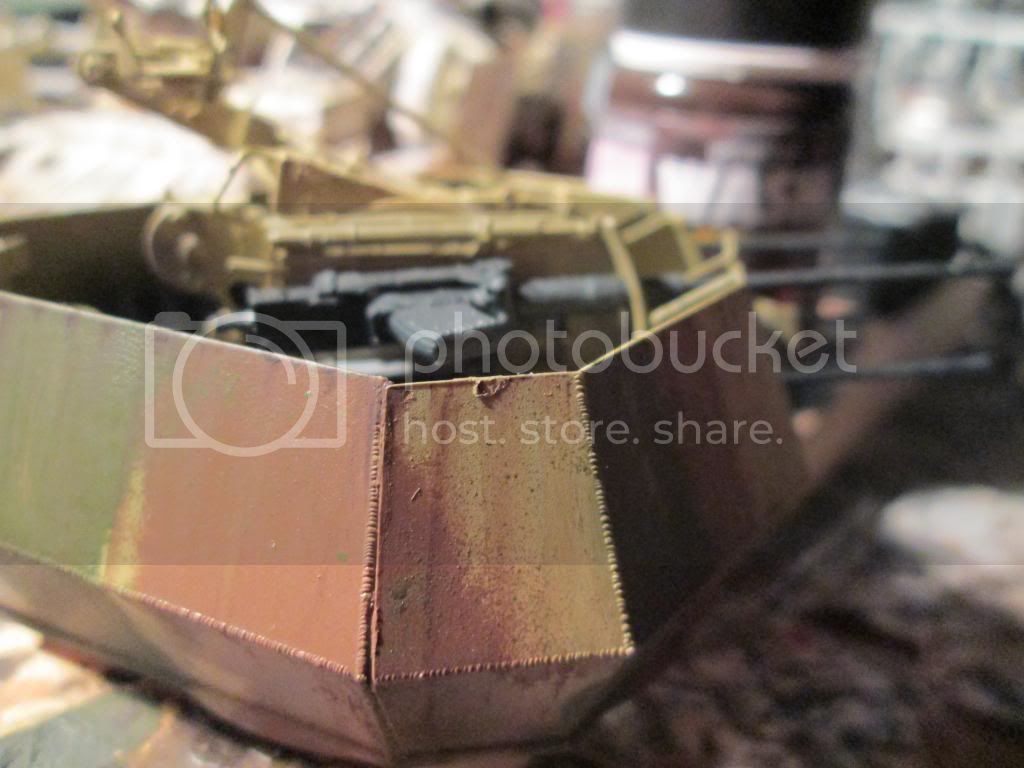
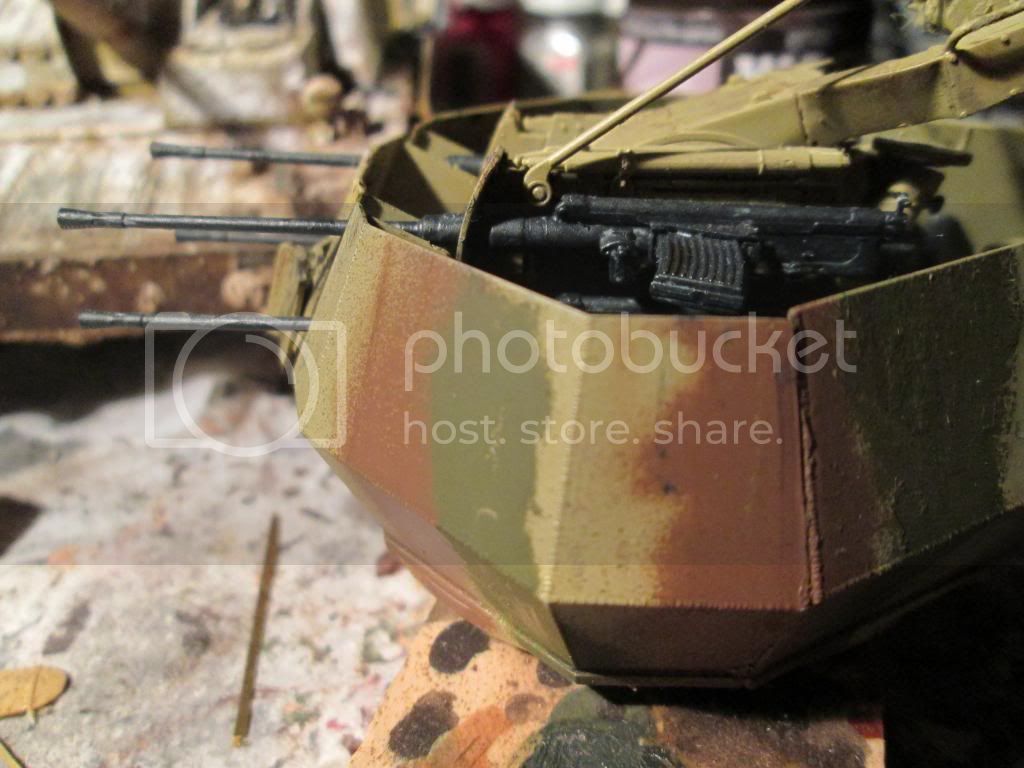
The wirbelwind is very tentative, not sure if I want it to be a part of this fiasco anymore. But that's basically the set up for everything, but a few things may change here or there.

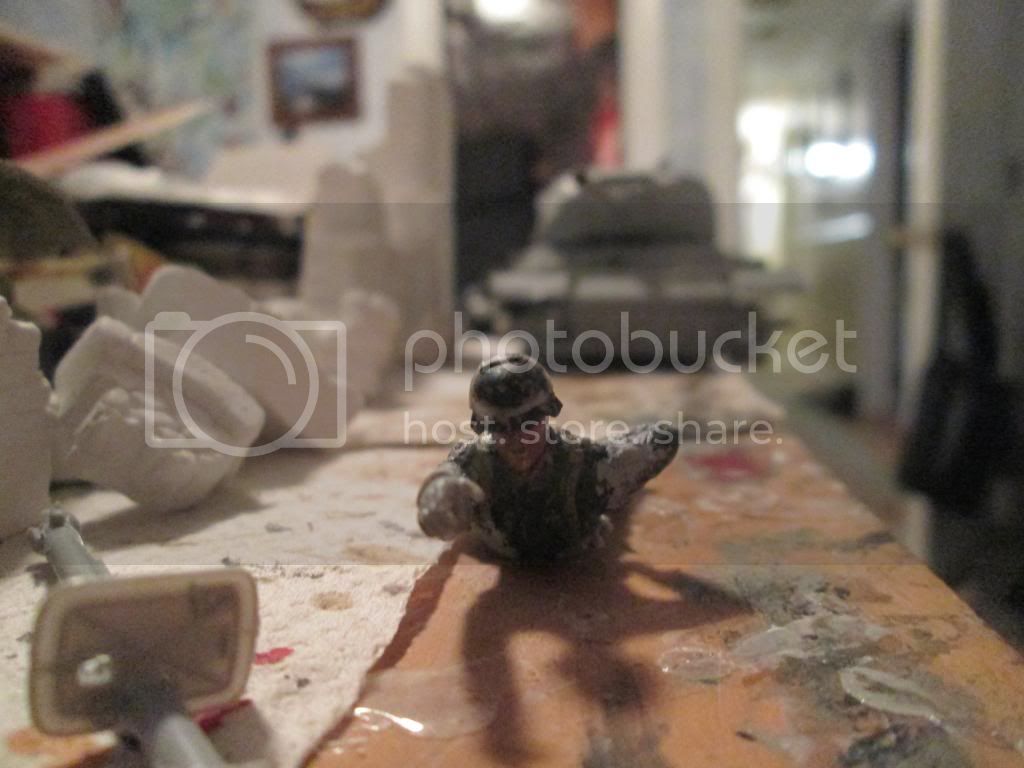
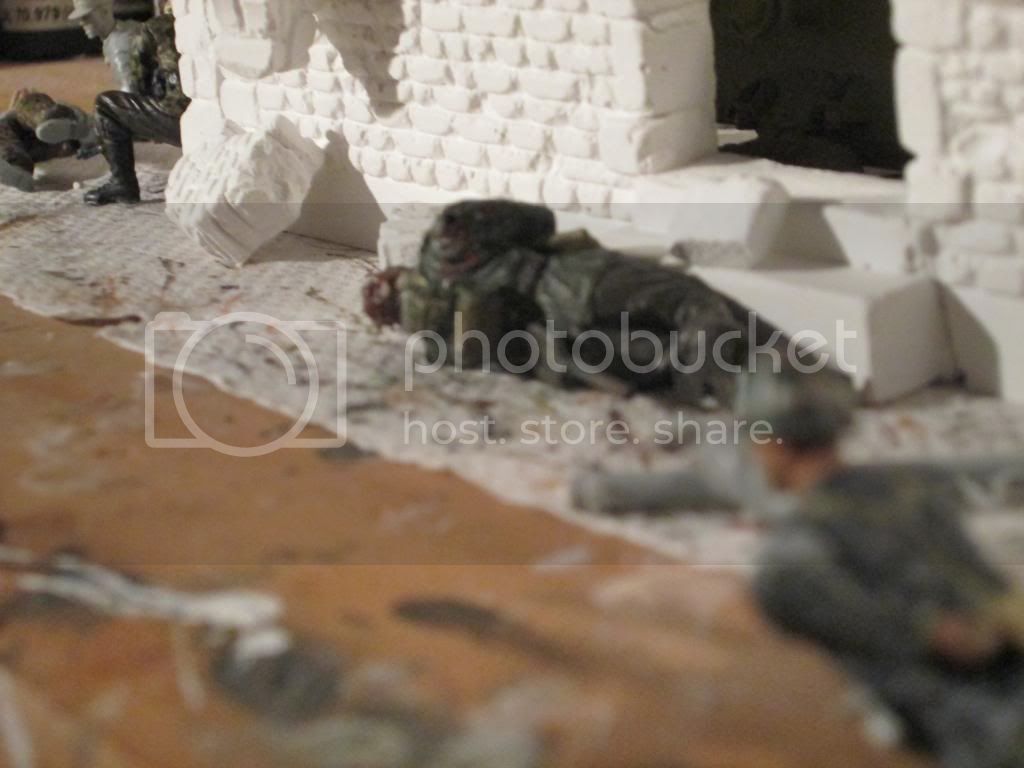
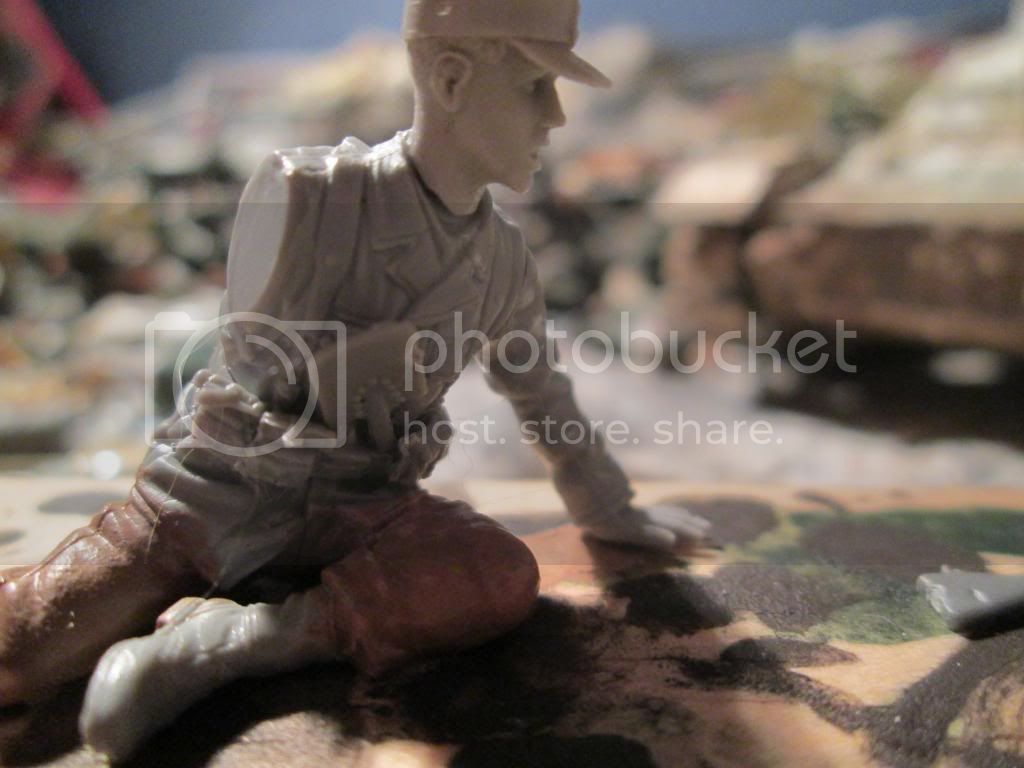
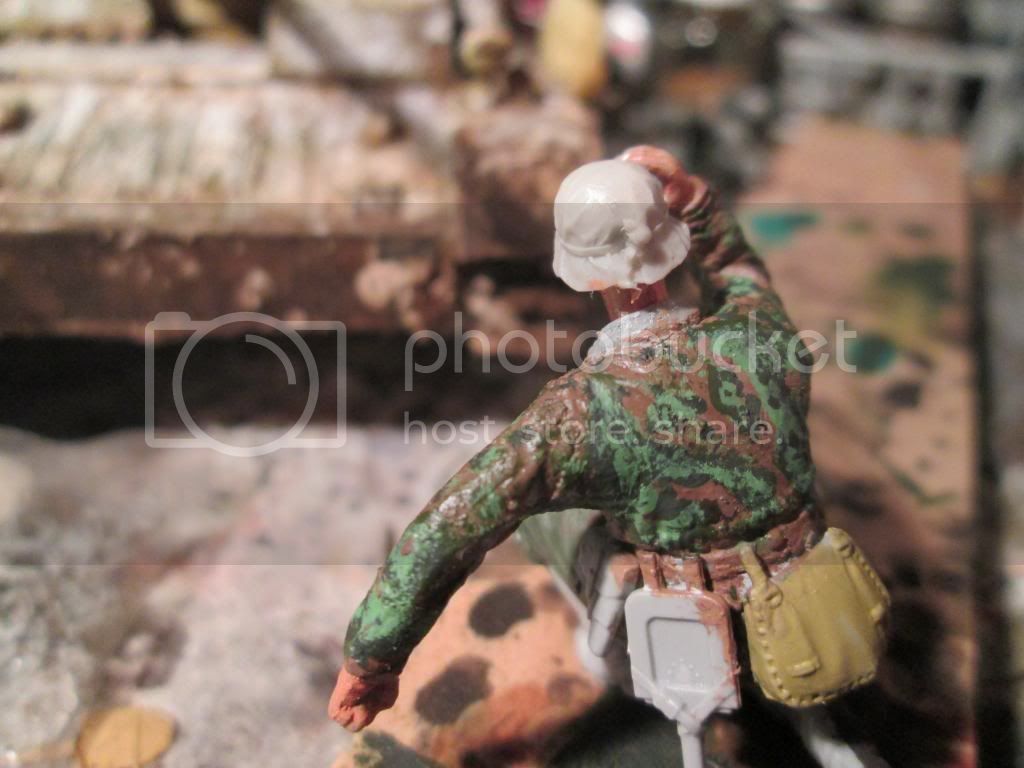
I'm just about done with another grenadier. He looks rough in some spots, but for the most part it's just the camera


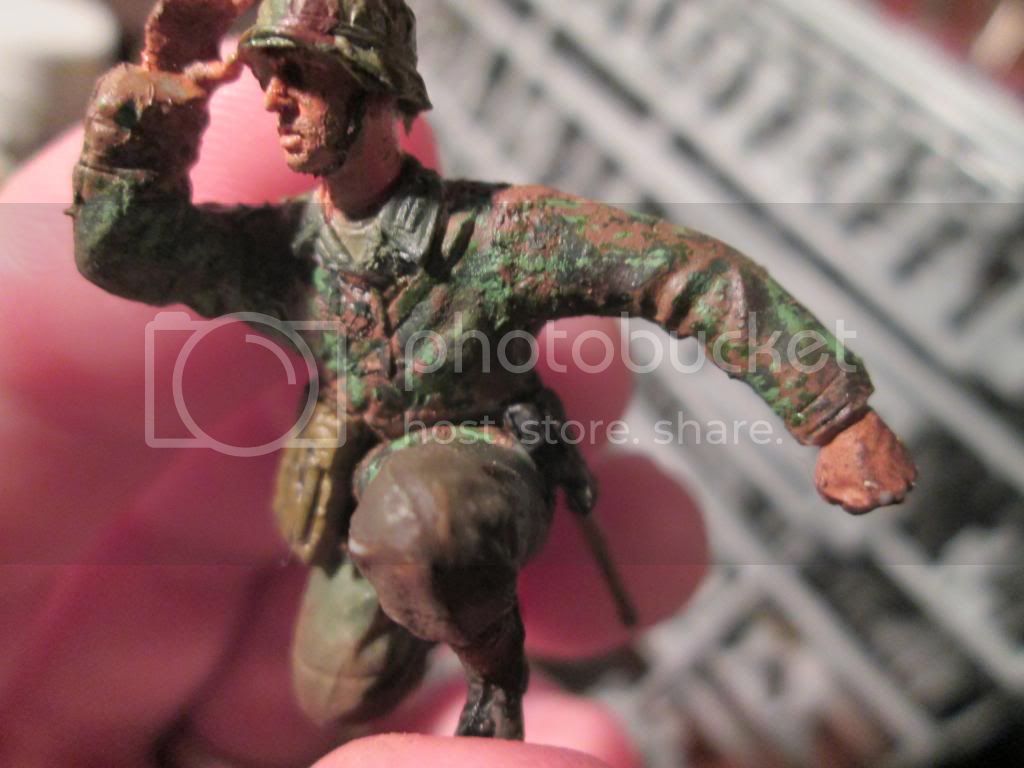
I mixed AK interactive Dark Mud with some plaster, and the result is fantastic.


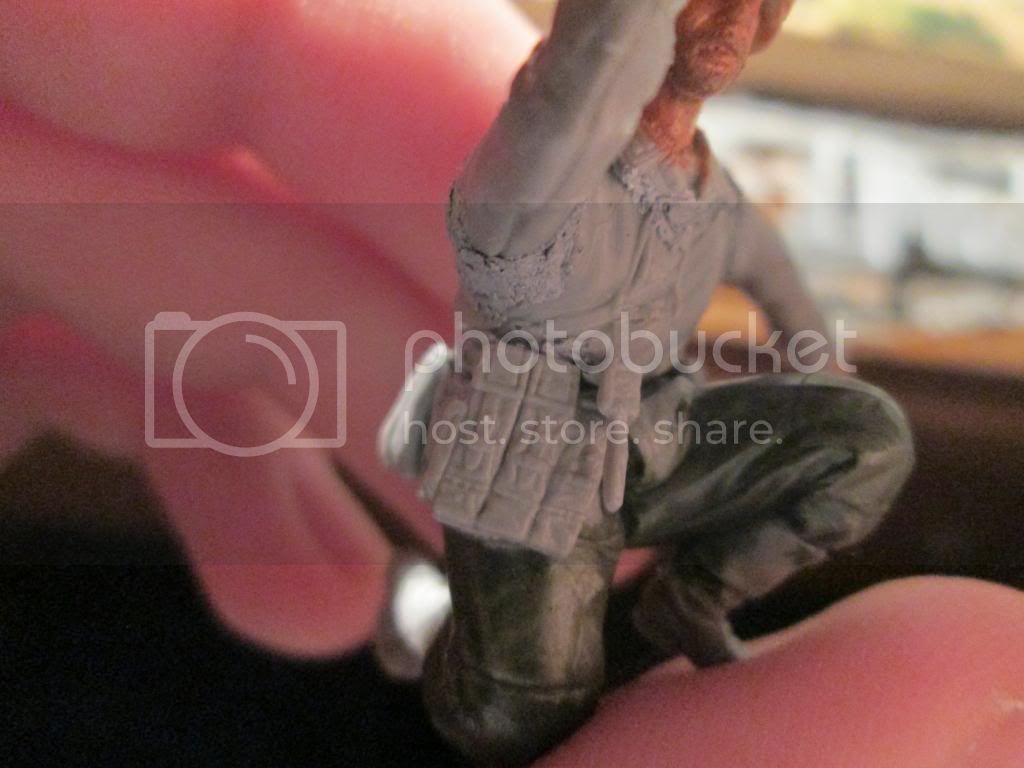
That gap on his arm is new...I've got to fix that. But the AK paints are amazing. Highly recommend them, and I've only used 2 effects. But as of now that's where I am.

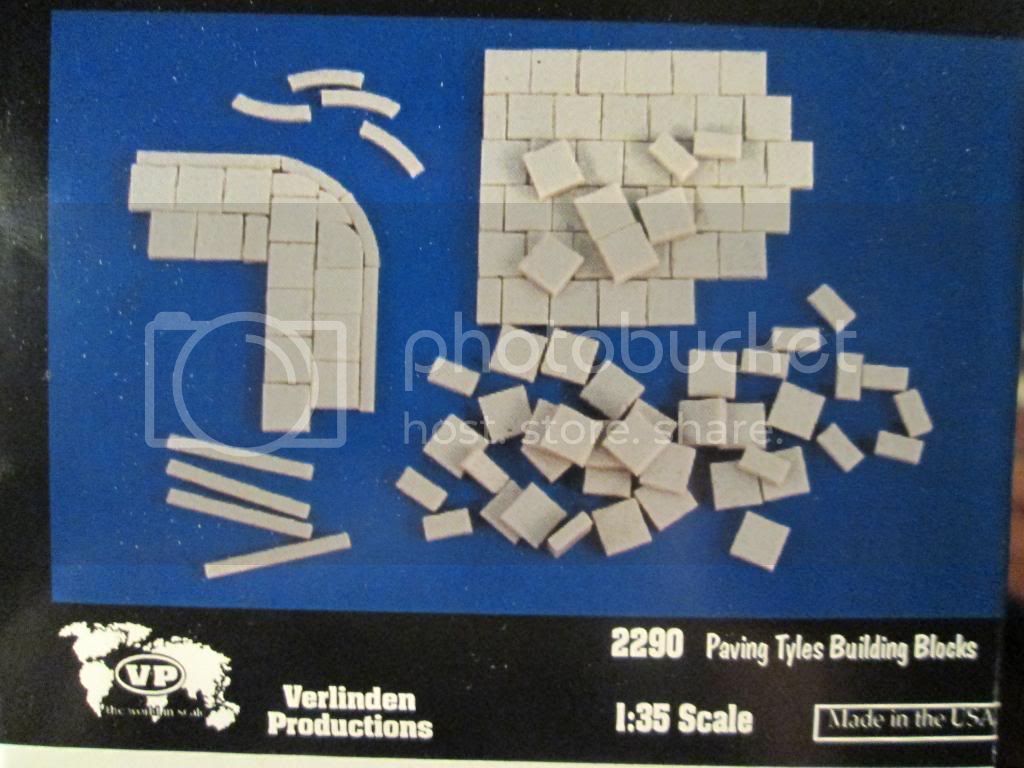
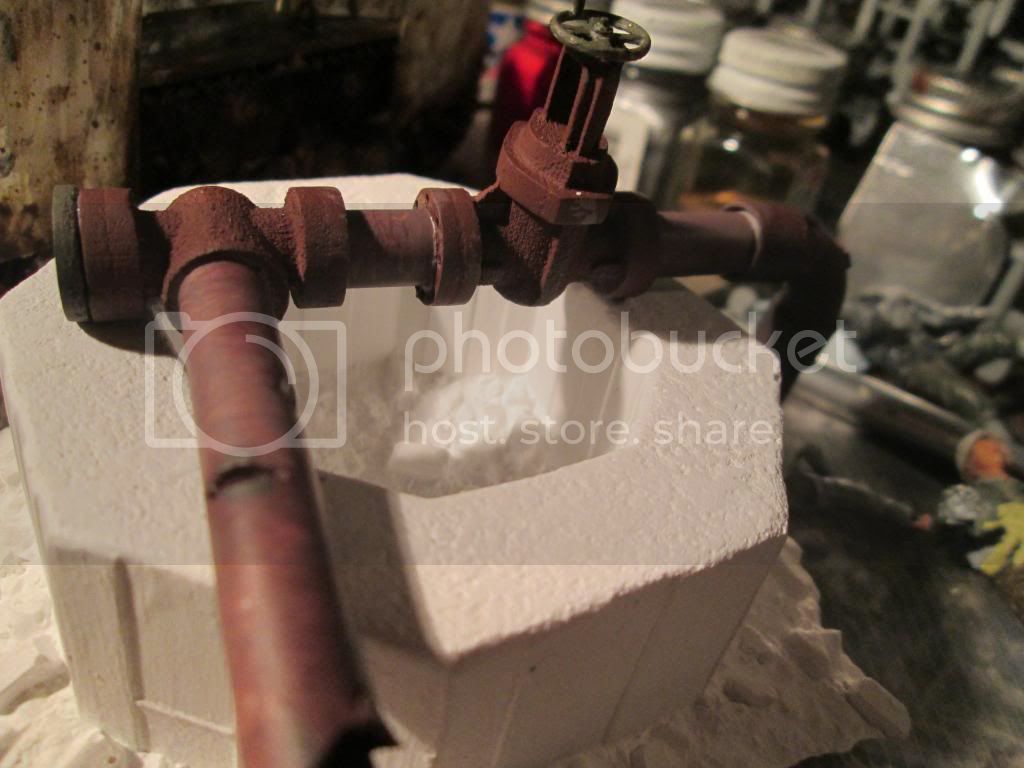
I know what I'm going to do with my figures, but what about groundwork? I'm not sure how to go about making the debris/rubble pile the JS-1 is crawling over. I've got styrofoam packing peanuts I saved for putting down. Then maybe use paper mache followed by plaster?

-Conor
 _GOTOTOP