Miniart diorama with park wall

#130
Noord-Holland, Netherlands
Joined: June 07, 2002
KitMaker: 8,797 posts
Armorama: 4,190 posts
Posted: Sunday, February 17, 2013 - 03:42 AM UTC
Ola Guys
I reviewed this kit (36051) for the site some days ago. It is not yet published but that is a matter of time. And since it was a built review I decided to continue with the kit as it was a nice inbetween project.
I really love these Miniart diorama's. If you want a good result quick this is the way to go.
These are the parts
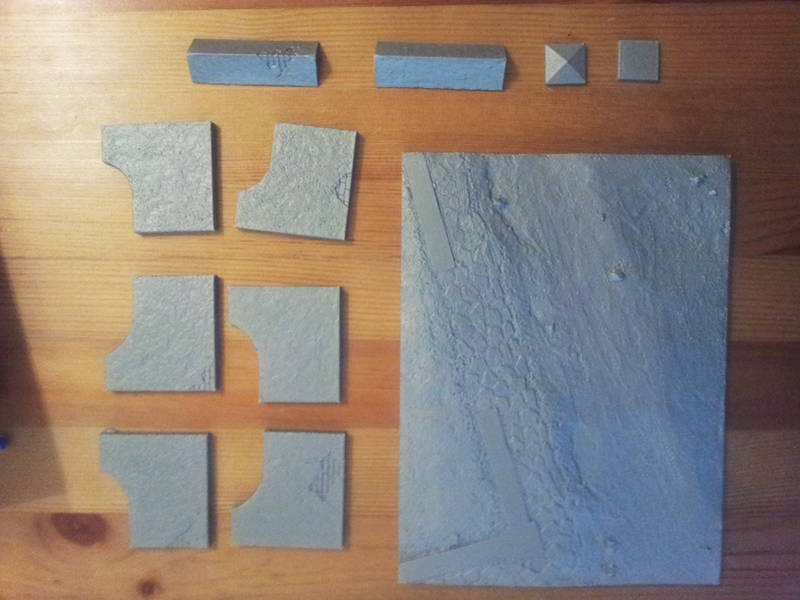
And after an hour or two it looked like this
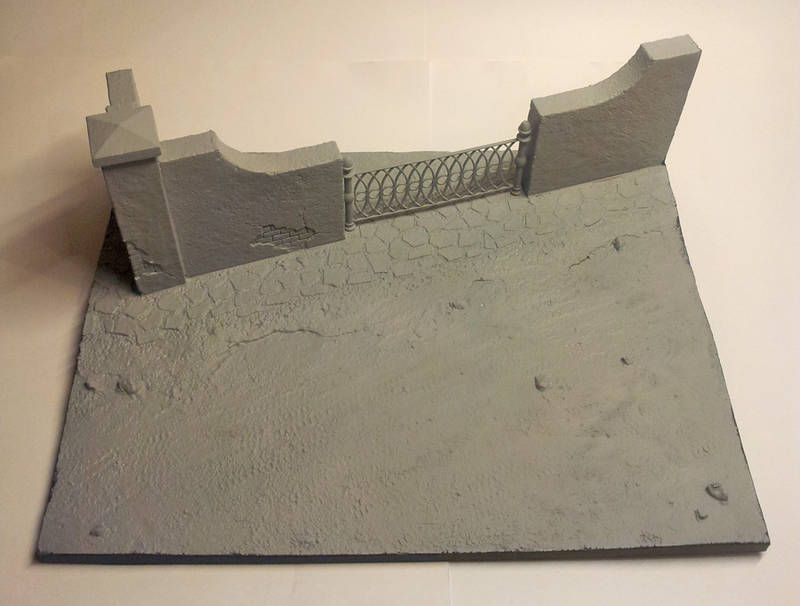
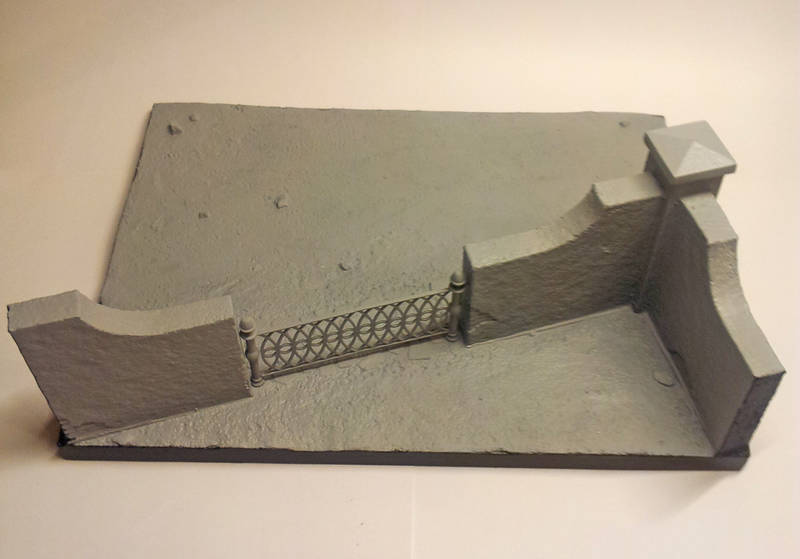
And after two evenings of hurling paint at it the result was this
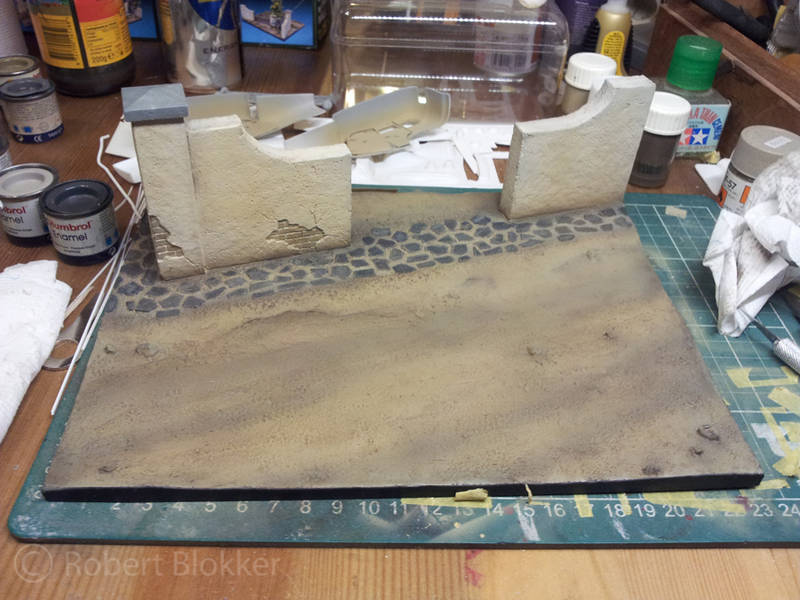
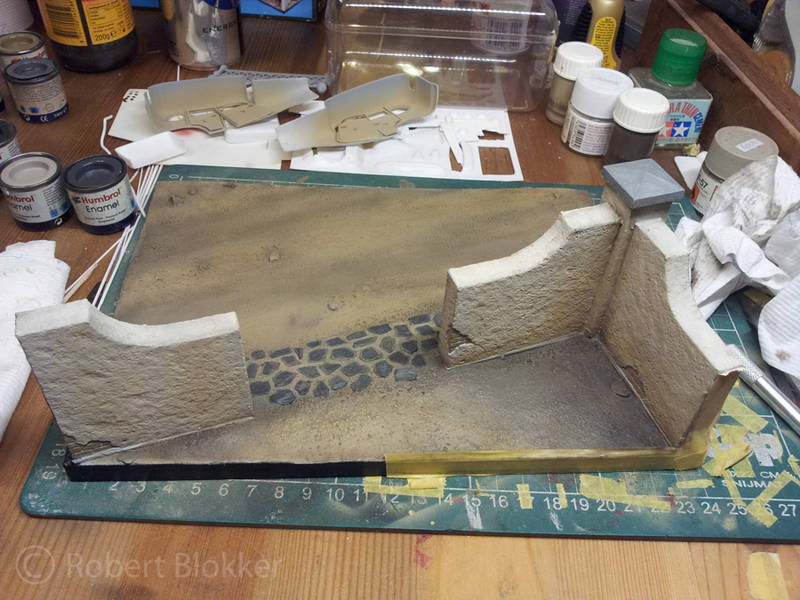
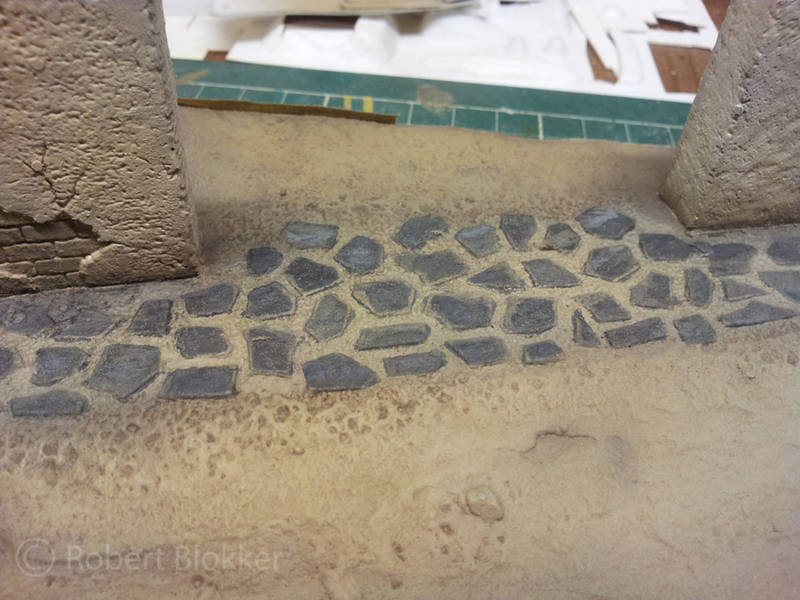
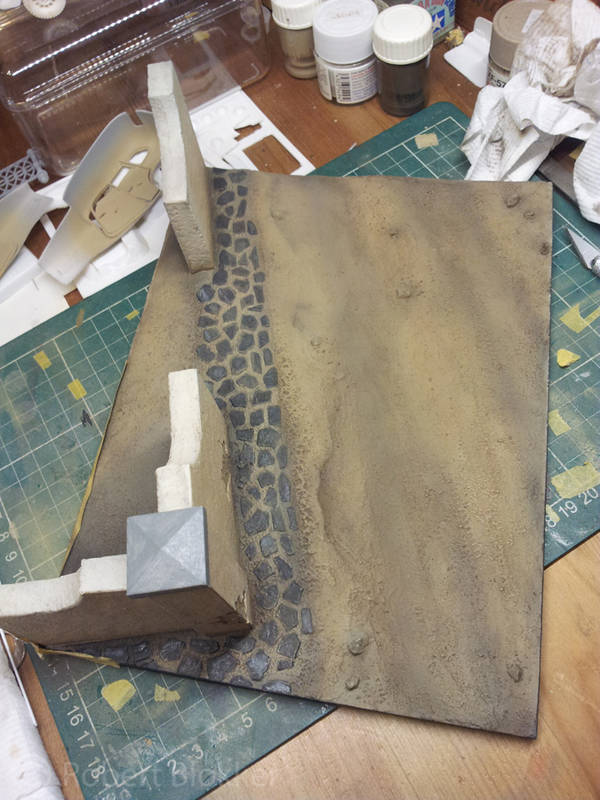
And then comes the weathering and vegetation.
Of which I only have a picture of the Pinetree that is going behind the wall.
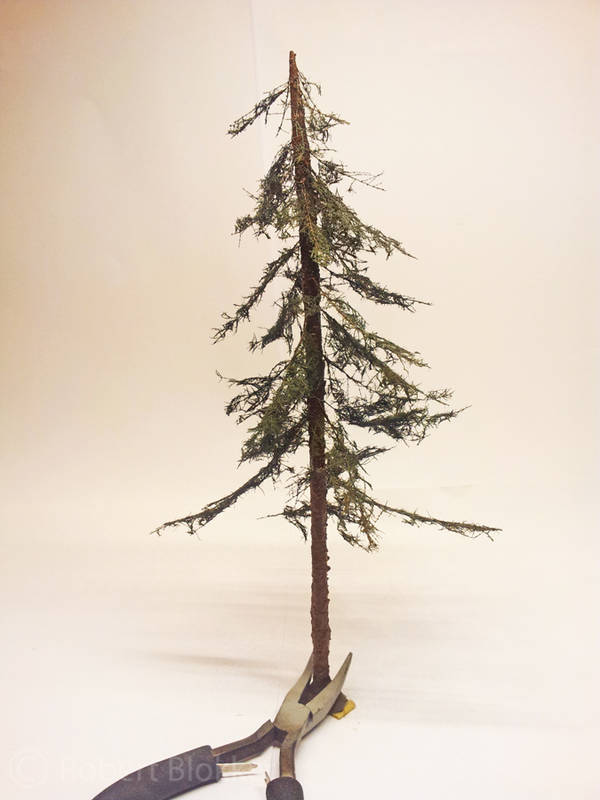
More about the vegetation soon.
With friendly greetz
Robert Blokker
Greetz Robert "FAUST" Blokker
"Wees niet onverstandig, haastig of voortvarend; alles sal regkom, as ons almal ons plig doen".
FUTBOL KAVGADIR!!!!!!!
SgtRam
 Contributing Writer
#197
Ontario, Canada
Joined: March 06, 2011
KitMaker: 3,971 posts
Armorama: 2,859 posts
Posted: Sunday, February 17, 2013 - 04:07 AM UTC
Looks great, I have been eyeing that one. Nice job.
Massachusetts, United States
Joined: February 08, 2012
KitMaker: 1,271 posts
Armorama: 1,253 posts
Posted: Sunday, February 17, 2013 - 04:12 AM UTC
You make it look so...easy hahaha. Looks good, I'll be watching

I'm doin' stuff. Lotta stuff.
Nordjylland, Denmark
Joined: July 19, 2012
KitMaker: 194 posts
Armorama: 188 posts
Posted: Sunday, February 17, 2013 - 04:38 AM UTC
The colour and weathering on the wall looks stunning...
Nice work
On the workbench:
M1 Panther II
CV9035
Canada
Joined: February 08, 2009
KitMaker: 82 posts
Armorama: 77 posts
Posted: Sunday, February 17, 2013 - 04:38 AM UTC
Nice finish. What kind of filler did you use for the walls?

#130
Noord-Holland, Netherlands
Joined: June 07, 2002
KitMaker: 8,797 posts
Armorama: 4,190 posts
Posted: Sunday, February 17, 2013 - 05:18 AM UTC
Ola guys
Thanks for the comments.
@ Kevin
It is a neat base that's for sure. The review is just arrived online if you want more details.
@ Conor
Well it is. I only used three colors for the sandy road, the wall and the park area. And the slate path with only 4 enamel colors. After that is where it gets interesting but I think what I do really anybody can. Modelling should not be hard

@ Per
Thanks a lot for the kind words on the colors.
@ Richard
I use Vallejo white putty. Works really nice. With the fine tip you can place it very precisely... you lay down a line. And with a Qtip you whipe it smooth in the groove.
I made a few photographs of the vegetation. Far from finished but it starts to look like something.
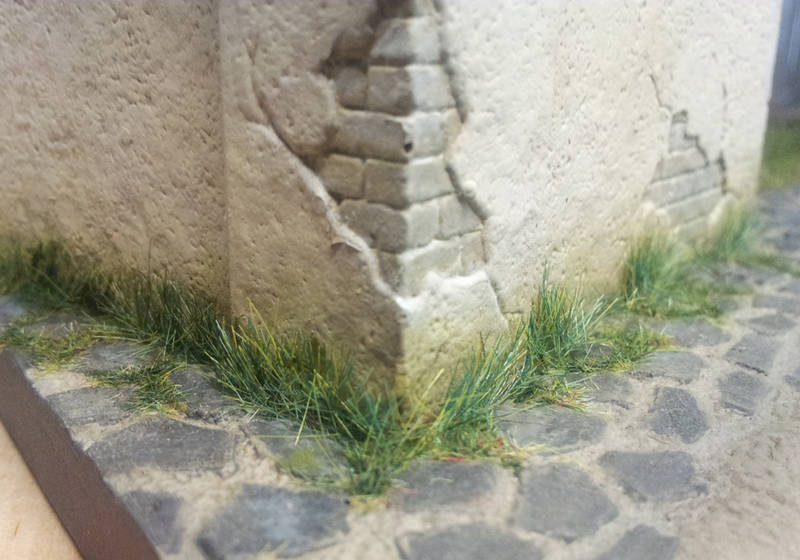
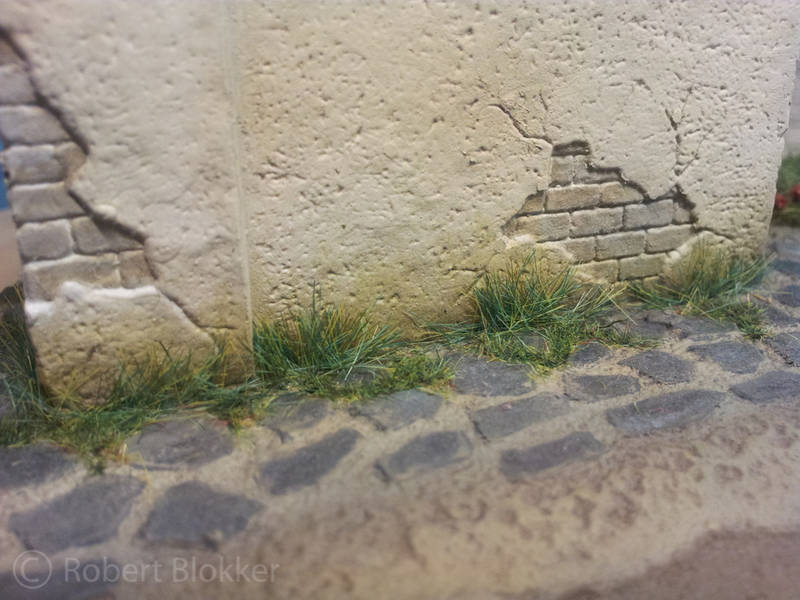
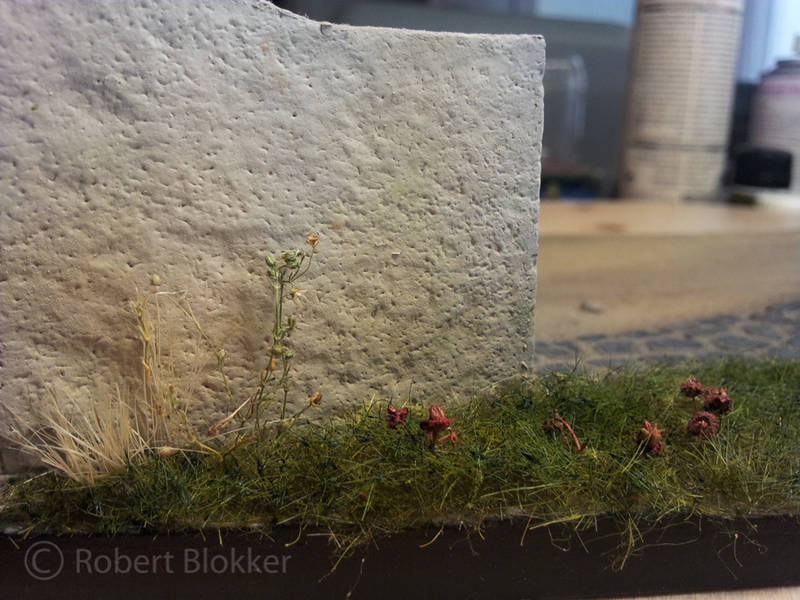
And I noticed that I forgot to fill a hole. Need to fix that.
More vegetation will follow soon.
Greetz Robert "FAUST" Blokker
"Wees niet onverstandig, haastig of voortvarend; alles sal regkom, as ons almal ons plig doen".
FUTBOL KAVGADIR!!!!!!!
England - North West, United Kingdom
Joined: September 20, 2008
KitMaker: 365 posts
Armorama: 283 posts
Posted: Sunday, February 17, 2013 - 06:29 AM UTC
Very nice diorama, how did you do the grass clumps at the foot of the wall?

#130
Noord-Holland, Netherlands
Joined: June 07, 2002
KitMaker: 8,797 posts
Armorama: 4,190 posts
Posted: Sunday, February 17, 2013 - 06:38 AM UTC
Ola Paul
Thanks to you too for the compliments.
For the grassclumps I first added a bit of white woodglue with a toothpick at the base of the wall. And then I took medium sized static grass of which I applied clumps with a tweezer. Let it rest for a bit and with a pensil I shaped them a bit so they were sticking up.
Then between the stones I extended the grassclumps with short Static grass in the same manner. First a bit of white glue and then applying clumps of the static grass. This does not neccesarily have to stand perfectly upright. People walk there.
Greetz Robert "FAUST" Blokker
"Wees niet onverstandig, haastig of voortvarend; alles sal regkom, as ons almal ons plig doen".
FUTBOL KAVGADIR!!!!!!!
Gelderland, Netherlands
Joined: July 29, 2008
KitMaker: 799 posts
Armorama: 63 posts
Posted: Sunday, February 17, 2013 - 06:46 AM UTC
Very nice work Robert! Will you share this work on the Benelux part of this site as well?
Greetings,
Marnix

#130
Noord-Holland, Netherlands
Joined: June 07, 2002
KitMaker: 8,797 posts
Armorama: 4,190 posts
Posted: Sunday, February 17, 2013 - 06:54 AM UTC
Ola marnix
Thanks for the compliments. And you are right. I should show my face more often on the Benelux section but it was so quiet for months there. I see the activity has picked up.
Greetz Robert "FAUST" Blokker
"Wees niet onverstandig, haastig of voortvarend; alles sal regkom, as ons almal ons plig doen".
FUTBOL KAVGADIR!!!!!!!
Utrecht, Netherlands
Joined: December 14, 2006
KitMaker: 2,679 posts
Armorama: 313 posts
Posted: Sunday, February 17, 2013 - 07:02 AM UTC
Nice Robert,
Quick post it on benelux please.
Jakarta Raya, Indonesia
Joined: August 22, 2012
KitMaker: 599 posts
Armorama: 527 posts
Posted: Sunday, February 17, 2013 - 07:09 AM UTC
Wow! The little red flowers among the grass are nice touches for detailing such vegetation you implemented, Robert

Some bricks exposed from plaster cover should be painted soon, can't wait to see the finished one!

Cheers

Garry
From A Dream Becomes A Vision
From A Vision Becomes A Reality
(Hiram Maxim)

#130
Noord-Holland, Netherlands
Joined: June 07, 2002
KitMaker: 8,797 posts
Armorama: 4,190 posts
Posted: Sunday, February 17, 2013 - 08:00 AM UTC
@ martin
Done.. posted it to the benelux
@ Rick
Thanks for the compliments. The Bricks are actually painted in a different color but they are not of the red kind. More like sandcolored/yellow brick
Greetz Robert "FAUST" Blokker
"Wees niet onverstandig, haastig of voortvarend; alles sal regkom, as ons almal ons plig doen".
FUTBOL KAVGADIR!!!!!!!
Jakarta Raya, Indonesia
Joined: August 22, 2012
KitMaker: 599 posts
Armorama: 527 posts
Posted: Sunday, February 17, 2013 - 08:09 AM UTC
Quoted Text
@ Rick
Thanks for the compliments. The Bricks are actually painted in a different color but they are not of the red kind. More like sandcolored/yellow brick
You're welcome my friend

Cheers
Garry
From A Dream Becomes A Vision
From A Vision Becomes A Reality
(Hiram Maxim)

#130
Noord-Holland, Netherlands
Joined: June 07, 2002
KitMaker: 8,797 posts
Armorama: 4,190 posts
Posted: Monday, February 18, 2013 - 11:52 AM UTC
And we continue with a bit of an update
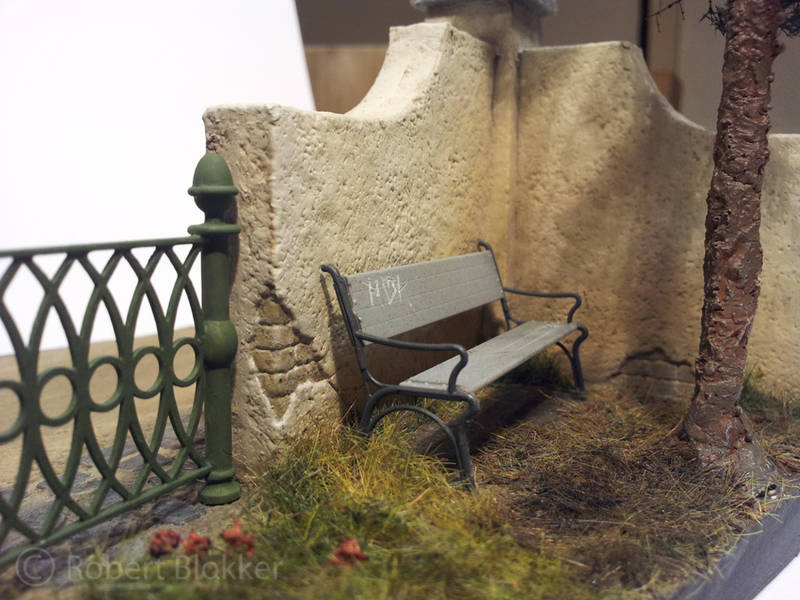
Bar finishing the park bench and some light weathering the park section of the diorama is finished.
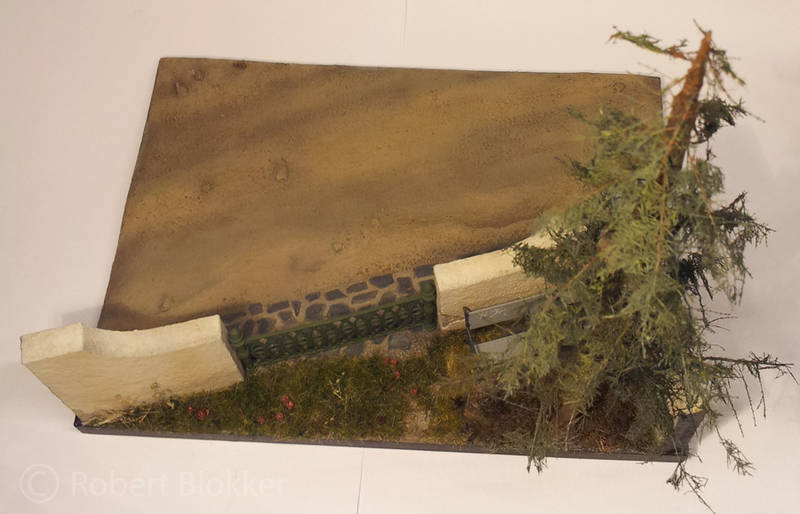
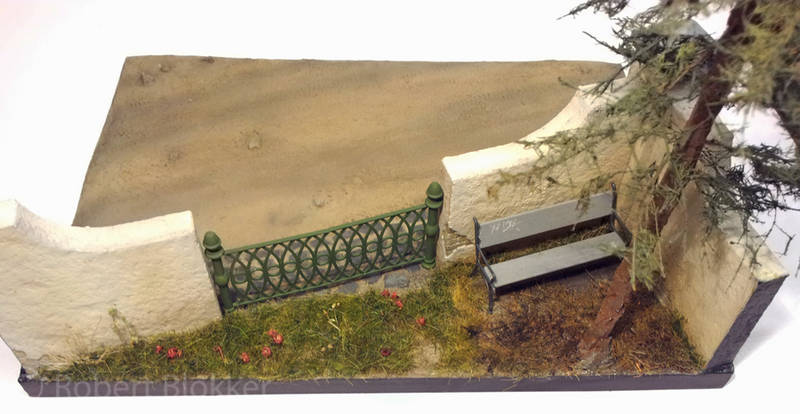
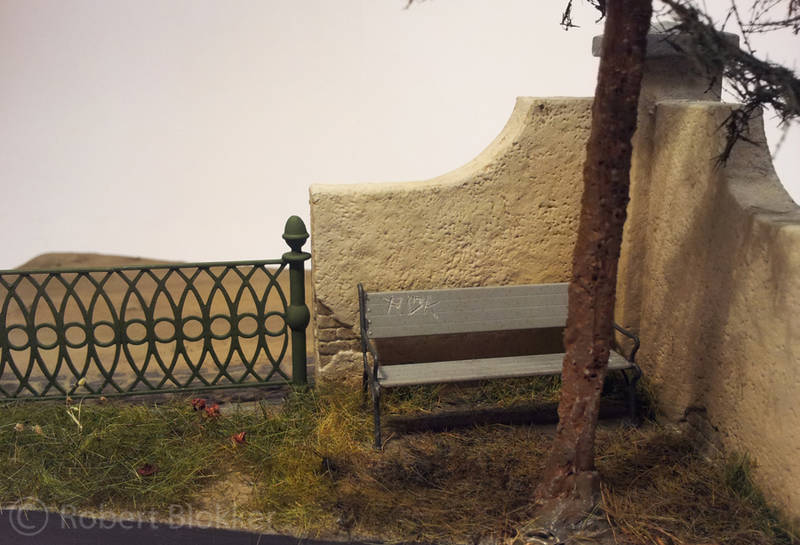
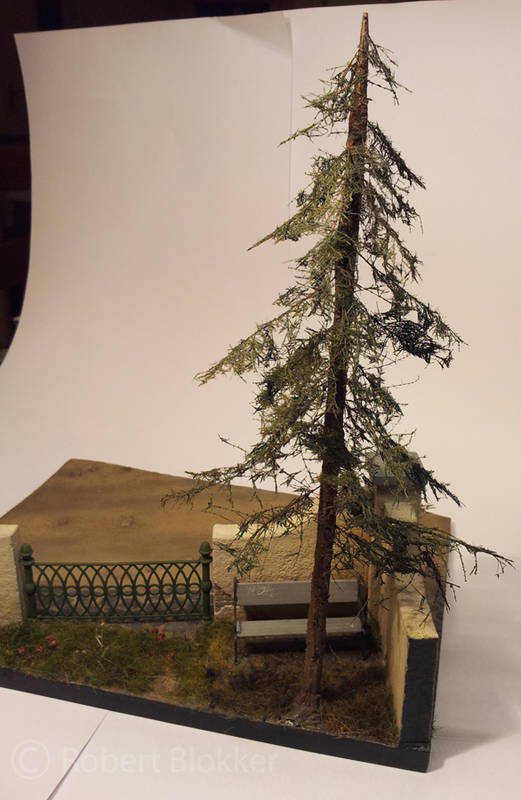
And a nice view on the lovers corner
As always looking forward to any feedback.
With friendly greetz
Robert
Greetz Robert "FAUST" Blokker
"Wees niet onverstandig, haastig of voortvarend; alles sal regkom, as ons almal ons plig doen".
FUTBOL KAVGADIR!!!!!!!
Jakarta Raya, Indonesia
Joined: August 22, 2012
KitMaker: 599 posts
Armorama: 527 posts
Posted: Monday, February 18, 2013 - 06:19 PM UTC
Stunning!

IMO, a little bit of worn and chipping on the iron material of the fence and park bench may be make them perfectly appeared, aren't they?
Really good job

Cheers,
Garry
From A Dream Becomes A Vision
From A Vision Becomes A Reality
(Hiram Maxim)

#130
Noord-Holland, Netherlands
Joined: June 07, 2002
KitMaker: 8,797 posts
Armorama: 4,190 posts
Posted: Monday, February 18, 2013 - 09:04 PM UTC
Ola Ricky
Thanks for the compliments. The things you mention are exactly what is in the planning for the Bench and the Fence. plus a black wash on the pinetree stem to give it more depth.
Greetz Robert "FAUST" Blokker
"Wees niet onverstandig, haastig of voortvarend; alles sal regkom, as ons almal ons plig doen".
FUTBOL KAVGADIR!!!!!!!

#284
Northern Ireland, United Kingdom
Joined: October 04, 2006
KitMaker: 3,094 posts
Armorama: 2,942 posts
Posted: Monday, February 18, 2013 - 11:25 PM UTC
Robert- you've managed to put together a fantastic scene from this base- the colors and vegetation really bring it together nicely. Is the pine tree scratch-built or a ready-made item?
On The Bench:
Ethiopian BMP-1 (Trumpeter 1/35)
AMX-13/75 (Takom 1/35)
Nordjylland, Denmark
Joined: July 19, 2012
KitMaker: 194 posts
Armorama: 188 posts
Posted: Monday, February 18, 2013 - 11:36 PM UTC
What colour did you use for the walls?
On the workbench:
M1 Panther II
CV9035

#130
Noord-Holland, Netherlands
Joined: June 07, 2002
KitMaker: 8,797 posts
Armorama: 4,190 posts
Posted: Monday, February 18, 2013 - 11:56 PM UTC
Ola Guys
Thanks for the replies
@ Karl.
Thanks for the compliments. Glad you like it. The pine tree was a kit from VBM, a dutch manufacturer that I purchased a while ago. It contains 3 trunks and asparagus fern leaves for the branches. Plus a little bag with static grass for the fallen needles on the floor. You have to assemble and paint the tree yourself.
@ Per
The wall is actually painted in 3 colors.
The bottom cm is first painted in a dirty dark greyish brown, Then the maincolor was an off white (White with a little buff in the mix). I personally always think pure white is way too white for scale. And then the lower section of the wall also received a misting of Buff. To tie everything together.
Greetz Robert "FAUST" Blokker
"Wees niet onverstandig, haastig of voortvarend; alles sal regkom, as ons almal ons plig doen".
FUTBOL KAVGADIR!!!!!!!

#130
Noord-Holland, Netherlands
Joined: June 07, 2002
KitMaker: 8,797 posts
Armorama: 4,190 posts
Posted: Wednesday, February 20, 2013 - 12:15 PM UTC
Ola Guys
Got a few steps further with this dio. For the past few days I have painted the parkbench and I have been focusing extensively on dirtying up the parkcorner section under the pinetree. making it the kind of hideout where the local youth stands kinda out of the wind for their smoke and drink. So the ground there is littered with rubbish from empty cigarette packages to cigarette butts empty bottles etc.
It started with this. Cigarette pack and butts and a few empty bottles.

And I also wanted an old newspaper in there. So I went searching for a newspaper among the stuff I collected through the years. And I could not find any


Possibly I have some stuff still at my parents house. Easy you might say.. Just print it... But I don't own a printer. So I decided to get creative. I had some yellowing paper around from an old kit. And I took a pencil and drew me a paper myself. It does not resemble any paper iy just has to look like one and since it will never be viewed up close it will do it's job just fine.

And I have a larger version of the bottom right image of the last picture where all the rubbish and debris is now added to that corner.
Only need to weather the parkbench and then I can focus on the road.

As usual looking forward to any feedback.
Greetz Robert "FAUST" Blokker
"Wees niet onverstandig, haastig of voortvarend; alles sal regkom, as ons almal ons plig doen".
FUTBOL KAVGADIR!!!!!!!
Luxembourg
Joined: January 19, 2004
KitMaker: 2,406 posts
Armorama: 2,224 posts
Posted: Thursday, February 21, 2013 - 03:49 AM UTC
Nice work Robert
I like the finishing of the wall!
The litter is convincing too!
Greets
Claude
England - South East, United Kingdom
Joined: March 04, 2007
KitMaker: 1,330 posts
Armorama: 1,017 posts
Posted: Thursday, February 21, 2013 - 04:13 AM UTC
Robert, the rubbish is superb, just the right amount I would say. That newspaper looks the part as well.
Paul

#130
Noord-Holland, Netherlands
Joined: June 07, 2002
KitMaker: 8,797 posts
Armorama: 4,190 posts
Posted: Thursday, February 21, 2013 - 05:57 AM UTC
Ola Guys
Thank you both for the kind words. Glad you both like the rubbish. It is funny how such a small amount of rubbish can change the complete character of that little space of diorama.
Greetz Robert "FAUST" Blokker
"Wees niet onverstandig, haastig of voortvarend; alles sal regkom, as ons almal ons plig doen".
FUTBOL KAVGADIR!!!!!!!
England - South East, United Kingdom
Joined: November 19, 2008
KitMaker: 2,249 posts
Armorama: 2,007 posts
Posted: Thursday, February 21, 2013 - 10:21 AM UTC
Quoted Text
It is funny how such a small amount of rubbish can change the complete character of that little space of diorama.
Haha, yes, it looked quite nice until you did that, now I don't want to go there. Looks like someone already took a wee under the tree.

You built and painted this up very quickly for such a nice piece of work.


