Texas, United States
Joined: July 16, 2005
KitMaker: 264 posts
Armorama: 263 posts
Posted: Friday, March 22, 2013 - 01:57 PM UTC
Kildare, Ireland
Joined: November 21, 2007
KitMaker: 3,212 posts
Armorama: 2,807 posts
Posted: Saturday, March 23, 2013 - 12:34 AM UTC
Looks fantastic so far! Love all the extras.
California, United States
Joined: December 25, 2011
KitMaker: 314 posts
Armorama: 244 posts
Posted: Saturday, March 23, 2013 - 04:24 AM UTC
nice build
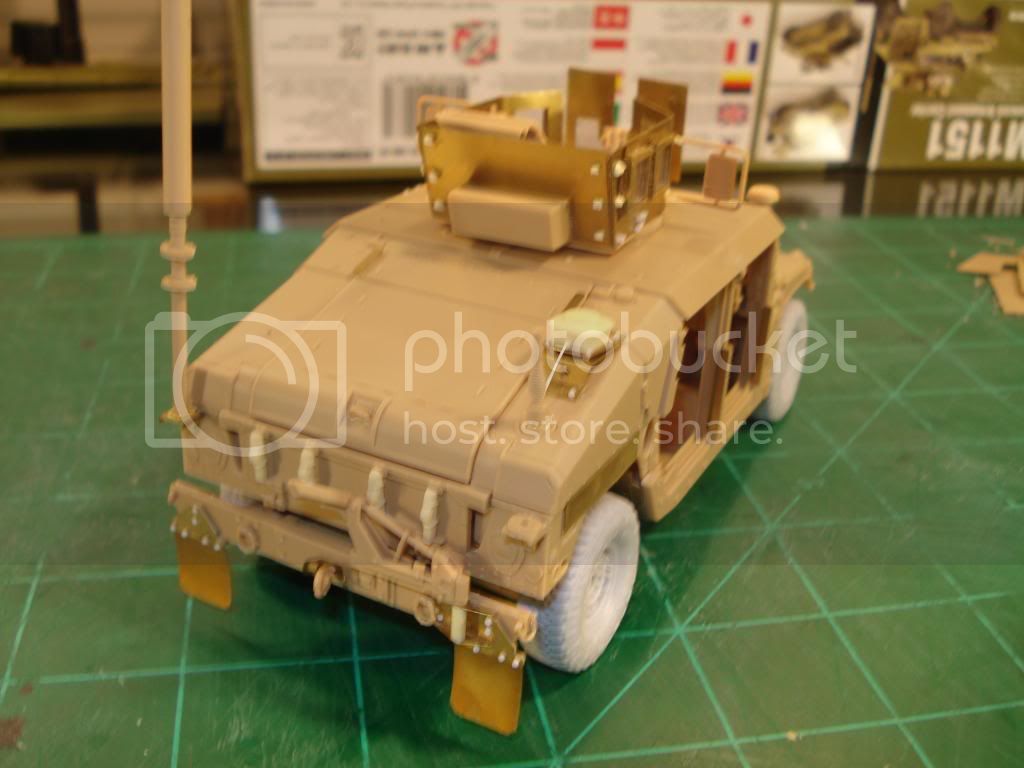
I believe the mirrors you have attached to the gun tub
are meant to go on the side as rear view mirrors
Ontario, Canada
Joined: November 10, 2010
KitMaker: 587 posts
Armorama: 550 posts
Posted: Saturday, March 23, 2013 - 06:53 AM UTC
Quoted Text
nice build
I believe the mirrors you have attached to the gun tub
are meant to go on the side as rear view mirrors
Google O-GPK turret and you will see that the majority of O-GPK turrets have the mirrors installed. It is to afford the gunners rear view by looking out the armored instead of popping their head out of the turret.
Removed by original poster on 03/23/13 - 22:16:15 (GMT).
Texas, United States
Joined: July 16, 2005
KitMaker: 264 posts
Armorama: 263 posts
Posted: Saturday, March 23, 2013 - 10:16 AM UTC
Quoted Text
Looks great.
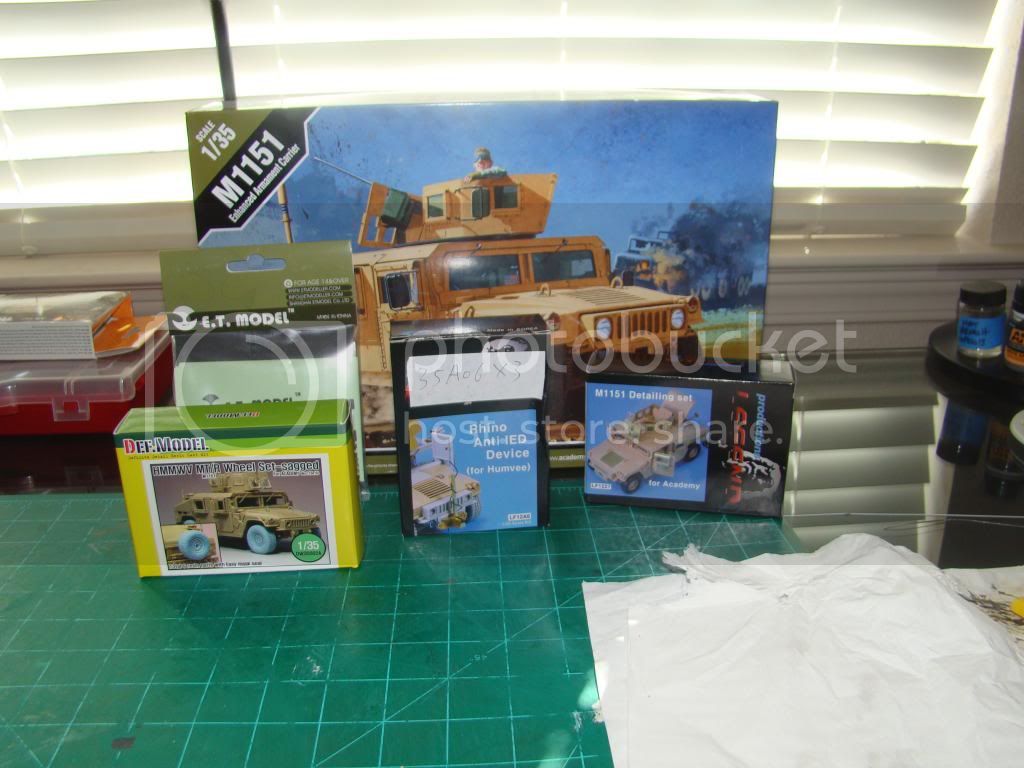
Can you tell me which set includes those parts for the undercarriage protection?
Gr,
Marcel
its legend m1151 resin kit
California, United States
Joined: November 19, 2010
KitMaker: 798 posts
Armorama: 797 posts
Posted: Saturday, March 23, 2013 - 11:13 AM UTC
The legend update set is worth every penny!

Looking good,
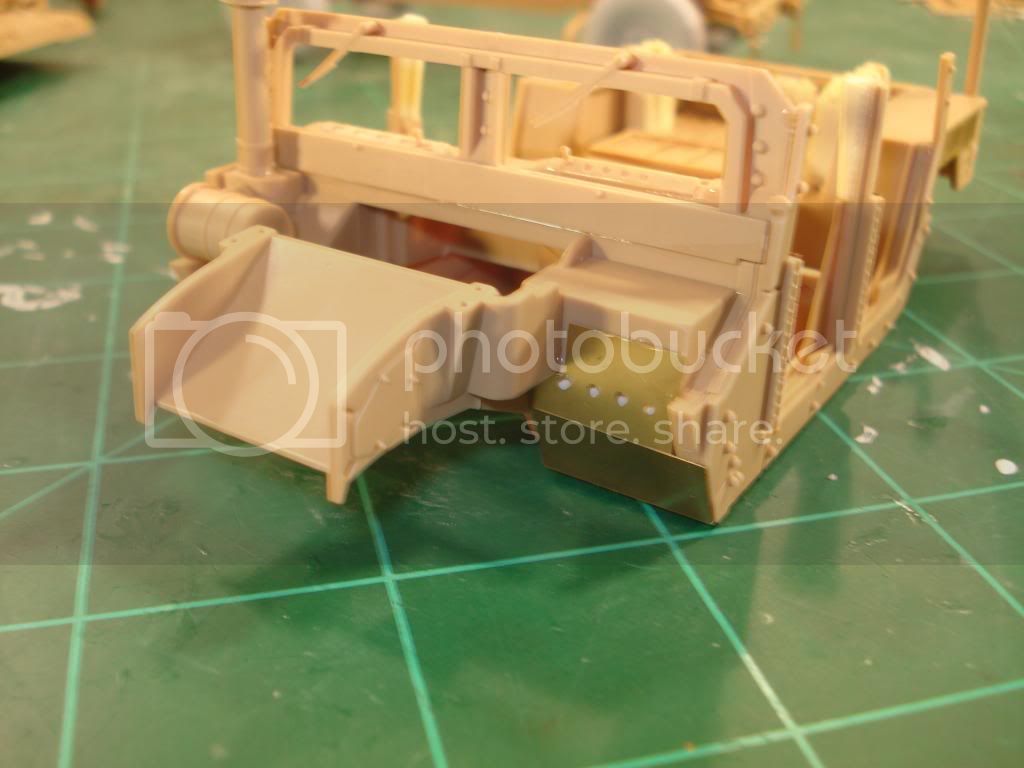
just from my eyes, I can tell that you might put the bonnet buckles( Left and Right side above the front wheels) upside down. 2nd, make sure the radiator grille sits on the right place , then the bonnet will be right on the top(To me that is the hardest part of the build) 3rd shorten the mirror holder since you used the legend update resin, looks very long to me.
Good work
Jay
Rio de Janeiro, Brazil
Joined: June 16, 2010
KitMaker: 69 posts
Armorama: 57 posts
Posted: Saturday, March 23, 2013 - 12:09 PM UTC
I really like this kit. Good fit, detail and easy build. Don't have the extras like Bronco's Humvees, but is cheaper. It's a good start for a more detailed construction.
Watching...
I build one some time ago, but, except for some scratch details he's basically OOB. Can I share the pics here?
Istanbul, Turkey / Türkçe
Joined: December 05, 2007
KitMaker: 953 posts
Armorama: 705 posts
Posted: Saturday, March 23, 2013 - 12:25 PM UTC
Looks good....


#065
Missouri, United States
Joined: March 30, 2002
KitMaker: 2,605 posts
Armorama: 1,814 posts
Posted: Sunday, March 24, 2013 - 05:11 AM UTC
Quoted Text
Looks great.
Can you tell me which set includes those parts for the undercarriage protection?
Gr,
Marcel
Marcel, Eduard produces a photo-etch set that is product #36211 M1151 EAC underbody protection FRAG 2. It is designed specifically for the Academy kit.
IPMS # 41155
Current Campaigns:
#065
Missouri, United States
Joined: March 30, 2002
KitMaker: 2,605 posts
Armorama: 1,814 posts
Posted: Sunday, March 24, 2013 - 05:12 AM UTC
Quoted Text
Quoted Text
nice build
I believe the mirrors you have attached to the gun tub
are meant to go on the side as rear view mirrors
Google O-GPK turret and you will see that the majority of O-GPK turrets have the mirrors installed. It is to afford the gunners rear view by looking out the armored instead of popping their head out of the turret.
I just want to reaffirm that the mirrors on the O-GPK turret are in fact the same mirrors that are used on the HMMWV itself. Designers used the same mirrors to speed up design, reduce costs and simplify operational maintenance by providing commonality of parts.
IPMS # 41155
Current Campaigns:
#065
Missouri, United States
Joined: March 30, 2002
KitMaker: 2,605 posts
Armorama: 1,814 posts
Posted: Sunday, March 24, 2013 - 05:16 AM UTC
Quoted Text
The legend update set is worth every penny!
Looking good,
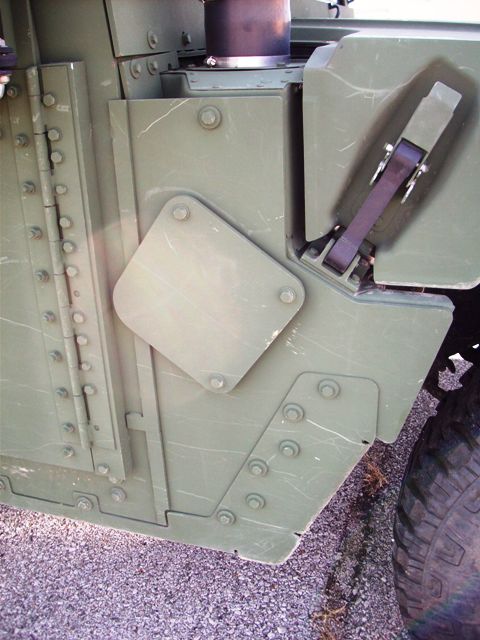
just from my eyes, I can tell that you might put the bonnet buckles( Left and Right side above the front wheels) upside down. 2nd, make sure the radiator grille sits on the right place , then the bonnet will be right on the top(To me that is the hardest part of the build) 3rd shorten the mirror holder since you used the legend update resin, looks very long to me.
Good work
Jay
Jay is correct about the hood latch being on upside down. Here is a photo for you to reference.
IPMS # 41155
Current Campaigns:
Texas, United States
Joined: July 16, 2005
KitMaker: 264 posts
Armorama: 263 posts
Posted: Sunday, March 24, 2013 - 08:30 AM UTC
Quoted Text
Quoted Text
The legend update set is worth every penny!
Looking good,
just from my eyes, I can tell that you might put the bonnet buckles( Left and Right side above the front wheels) upside down. 2nd, make sure the radiator grille sits on the right place , then the bonnet will be right on the top(To me that is the hardest part of the build) 3rd shorten the mirror holder since you used the legend update resin, looks very long to me.
Good work
Jay
Jay is correct about the hood latch being on upside down. Here is a photo for you to reference.
Thanks for the feedback I'll fix them and correct the mirror length
California, United States
Joined: November 19, 2010
KitMaker: 798 posts
Armorama: 797 posts
Posted: Monday, March 25, 2013 - 02:27 AM UTC
Here is the Brent's Humvee site for the mirrors.
http://www.hmmwvinscale.com/apps/photos/album?albumid=13000873Keep the good work coming and can't wait to see the painting .
Jay
Texas, United States
Joined: July 16, 2005
KitMaker: 264 posts
Armorama: 263 posts
Posted: Tuesday, March 26, 2013 - 07:38 AM UTC
Here are some photos of the corrected areas, still need to add some commo cable, after that painting


Texas, United States
Joined: July 16, 2005
KitMaker: 264 posts
Armorama: 263 posts
Posted: Tuesday, April 23, 2013 - 04:48 PM UTC
Just finish putting my ET Model Blue Force Tracker together, but I don't know what resin radio I should use? The one that came with it or the Pro Art Model?
This came with the kit


or the this one the Pro Art Model


Any feedback is welcomed?
California, United States
Joined: November 19, 2010
KitMaker: 798 posts
Armorama: 797 posts
Posted: Wednesday, April 24, 2013 - 05:18 AM UTC
the third one on the right, and you can add the other single Sincgars ASIP from the pro Art set(the set you have)on the top if you want or just leave it.
http://img.readtiger.com/wkp/en/RT-1523-VRC-89.png Jay
Texas, United States
Joined: July 16, 2005
KitMaker: 264 posts
Armorama: 263 posts
Posted: Wednesday, April 24, 2013 - 10:38 AM UTC
California, United States
Joined: November 19, 2010
KitMaker: 798 posts
Armorama: 797 posts
Posted: Wednesday, April 24, 2013 - 10:56 AM UTC
i have a request. would you mind to upload some closeup door pictures from deferent angels? I want to see how it looks with the legend PE window.
Thank you
Jay
United States
Joined: April 30, 2013
KitMaker: 2 posts
Armorama: 2 posts
Posted: Monday, April 29, 2013 - 01:03 PM UTC
I have got to ask because I have exhausted my search know how looking for the answer. Where did you find your radios??

#161
New York, United States
Joined: May 03, 2010
KitMaker: 392 posts
Armorama: 373 posts
Posted: Monday, April 29, 2013 - 03:01 PM UTC
I'm enjoying your build and have questions about your PE stuff and the tools you use.
Happy Modeling
Wdecicco
Texas, United States
Joined: July 16, 2005
KitMaker: 264 posts
Armorama: 263 posts
Posted: Tuesday, April 30, 2013 - 02:46 PM UTC
Quoted Text
I'm enjoying your build and have questions about your PE stuff and the tools you use.
Happy Modeling
Wdecicco
I used the Mission Model Etch Mate bending tool with a plan razor blade, Mission Model small Multi-Tool set MIO 07 and the PE is E.T. Model and Legend
Texas, United States
Joined: July 16, 2005
KitMaker: 264 posts
Armorama: 263 posts
Posted: Tuesday, April 30, 2013 - 02:55 PM UTC
Quoted Text
I have got to ask because I have exhausted my search know how looking for the answer. Where did you find your radios??
I got the radios from Pro Art Models about four years ago. Just been hanging on to them for the right build.
http://www.proartmodels.be/productgallery/product_gal_020.htmlhttp://www.luckymodel.com/scale.aspx?search=Y&q_brand=PAU&q_category=&q_scale=&q_word=&q_show_instock_only=NTexas, United States
Joined: July 16, 2005
KitMaker: 264 posts
Armorama: 263 posts
Posted: Sunday, May 05, 2013 - 03:48 AM UTC
Here are some pictures of the PE I have been working on for the build
BFT

[/URL]

[/URL]
RHINO

[/URL]
[/URL" TARGET="_blank">
50 Cal


[/URL]