_GOTOBOTTOM
Armor/AFV: Modern - USA
Modern Armor, AFVs, and Support vehicles.
Hosted by Darren Baker
'Thunder Run' M113A2 Ambulance
sgtsauer
#065
Visit this Community
Missouri, United States
Joined: March 30, 2002
KitMaker: 2,605 posts
Armorama: 1,814 posts
Posted: Sunday, March 24, 2013 - 10:27 AM UTC
Here I'm going to complete a build log of a US Army M113A2 Ambulance used in the first 'Thunder Run' conducted by Task Force 1–64 Armor of the U.S. Army's 3rd Infantry Division, 2nd Brigade on April 5th, 2003.

Below are images of the items I'm using to complete the build. The need for more accessories will probably be identified as the project progresses.


bat-213
Visit this Community
Canada
Joined: December 30, 2011
KitMaker: 902 posts
Armorama: 788 posts
Posted: Sunday, March 24, 2013 - 06:36 PM UTC
looks like you will have your hands full with this kit,i will watch as you build.
sgtsauer
#065
Visit this Community
Missouri, United States
Joined: March 30, 2002
KitMaker: 2,605 posts
Armorama: 1,814 posts
Posted: Saturday, July 06, 2013 - 04:11 PM UTC
Here is the progress made so far.

In this photo I filled in the alignment holes for kit periscope guards in preparation for installing periscope guards from the PE set.


Here the holes are filled in and excess removed. Some PE is in place on the drivers hatch.


In this image, the PE periscope guards are in place. I have added a resin antennae base.


More PE work completed.


This photo shows the beginning of work on the rear ramp. You can see the difference between the PE tow cable 'keeper' and the kit molded 'keeper' that the tow cable goes around.


These next two shots show the completed rear ramp. I used an extra PE power socket from a HMMWV PE set to replace the molded on power socket that is to the right of the tow pintle.


wing_nut
Visit this Community
New Jersey, United States
Joined: June 02, 2006
KitMaker: 1,212 posts
Armorama: 674 posts
Posted: Sunday, July 07, 2013 - 11:32 PM UTC
Nice start there Brent. Pretty soon we may need a "Thunder Run" sub-category in the forum.
pascalbausset
Visit this Community
Moselle, France
Joined: February 05, 2002
KitMaker: 1,416 posts
Armorama: 1,379 posts
Posted: Monday, July 08, 2013 - 04:28 AM UTC
Nice start Brent, I'am waiting the finished kit !!
sgtsauer
#065
Visit this Community
Missouri, United States
Joined: March 30, 2002
KitMaker: 2,605 posts
Armorama: 1,814 posts
Posted: Sunday, July 28, 2013 - 02:22 PM UTC
Here I have completed the preliminary assembly of the commanders cupola.


The holes on the right side of the cupola hatch interior are filled and smooth. I used CA glue as the filler and it appears translucent when sanded.


This is the best I could do with the hatch locking mechanism. It doesn't look to bad but probably could have been done better by someone with more experience.

AirCav79
Visit this Community
European Union
Joined: March 24, 2013
KitMaker: 16 posts
Armorama: 15 posts
Posted: Wednesday, July 31, 2013 - 09:46 AM UTC
I like that and will keep track of your post as I have the kit already at home and still some other work to do
wing_nut
Visit this Community
New Jersey, United States
Joined: June 02, 2006
KitMaker: 1,212 posts
Armorama: 674 posts
Posted: Thursday, August 01, 2013 - 11:21 PM UTC
Brent the cupola looks just fine. Keep at it and you'll be that guy with the experinece
FatMike
Visit this Community
Illinois, United States
Joined: September 11, 2006
KitMaker: 106 posts
Armorama: 107 posts
Posted: Sunday, August 04, 2013 - 05:34 PM UTC
I was just wondering if you were planning on mounting the .50 cal? As I do not recall any Medic 113's having them or even the mounting bracket for them. I know that in 2/37 AR our medic 113 didn't have the mounting bracket on the TC hatch. It looks great so far.
sgtsauer
#065
Visit this Community
Missouri, United States
Joined: March 30, 2002
KitMaker: 2,605 posts
Armorama: 1,814 posts
Posted: Monday, August 05, 2013 - 12:56 AM UTC
Hi Michael....The pictures I have show the mounting arm for the .50 cal on the commanders cupola. If I find photos that indicate something different I will certainly change it. Feel free to comment at any time...I know zero about medic tracks.
jrutman
Visit this Community
Pennsylvania, United States
Joined: April 10, 2011
KitMaker: 7,941 posts
Armorama: 7,934 posts
Posted: Monday, August 05, 2013 - 01:30 AM UTC
This build brings back a lot of memories for me. You are off to a great start and are doing it justice for sure. What I really remember about the medic tracks is that they were sure to have a working heater,something very rare to have back in the 70s in Germany.
J
sgtsauer
#065
Visit this Community
Missouri, United States
Joined: March 30, 2002
KitMaker: 2,605 posts
Armorama: 1,814 posts
Posted: Sunday, August 18, 2013 - 08:08 AM UTC
Well, I finally have the preliminary detailing and assembly of the top deck completed of the M113 Ambulance. I did not replacet the tie-downs right behind the rear hatch because that area will be covered by stowage.


sgtsauer
#065
Visit this Community
Missouri, United States
Joined: March 30, 2002
KitMaker: 2,605 posts
Armorama: 1,814 posts
Posted: Sunday, November 24, 2013 - 04:31 PM UTC
I'm finally getting back to the bench and hope to start making rapid progress on this build.

Here is the left rear water can installed.


Here is preliminary kit modification and strap work for the right water can.


Left and right water can installed on the ambulance. Rear ramp is held on with some handi-tak for the photo. I took a little bit of artistic license and tried to make the straps look like they were dangling a bit. I'm pretty much happy with the result.
hliu24
Visit this Community
California, United States
Joined: November 19, 2010
KitMaker: 798 posts
Armorama: 797 posts
Posted: Sunday, November 24, 2013 - 05:52 PM UTC
Great pe work
sgtsauer
#065
Visit this Community
Missouri, United States
Joined: March 30, 2002
KitMaker: 2,605 posts
Armorama: 1,814 posts
Posted: Monday, November 25, 2013 - 05:01 PM UTC
Small update tonight.

I put on the rear ramp, the top deck and began work on the front plate and engine compartment cover.


In this photo, I have filled holes for the kit headlights and lifting ring. The kit headlights will be replaced by a combination photoetch and kit part assembly. The lifting ring is being relocated.

sgtsauer
#065
Visit this Community
Missouri, United States
Joined: March 30, 2002
KitMaker: 2,605 posts
Armorama: 1,814 posts
Posted: Monday, December 23, 2013 - 05:52 PM UTC
Well, I got a little bit of time back at the bench tonight and I made just a little bit of progress.

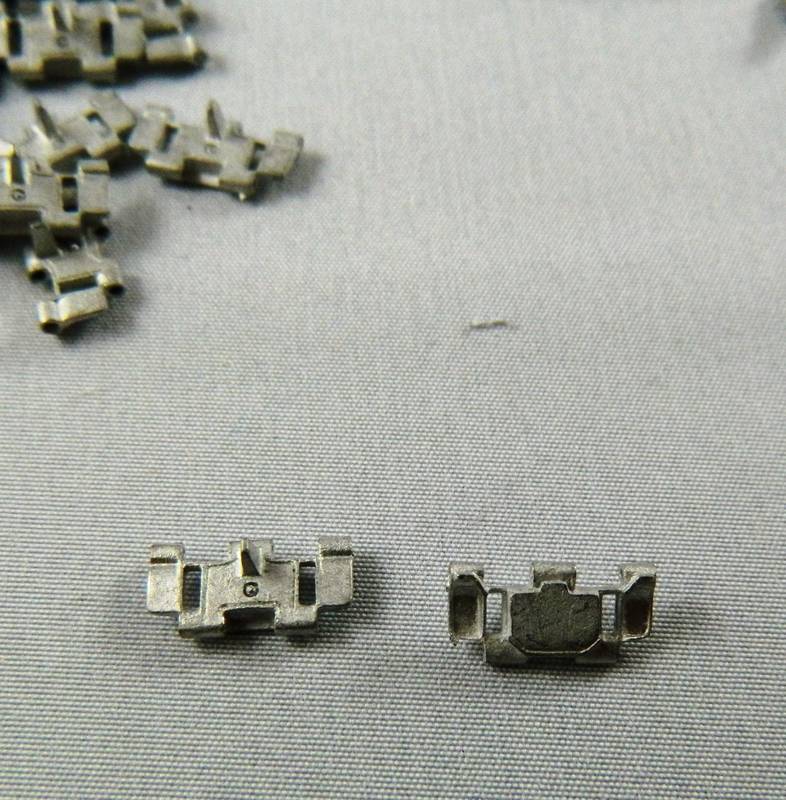
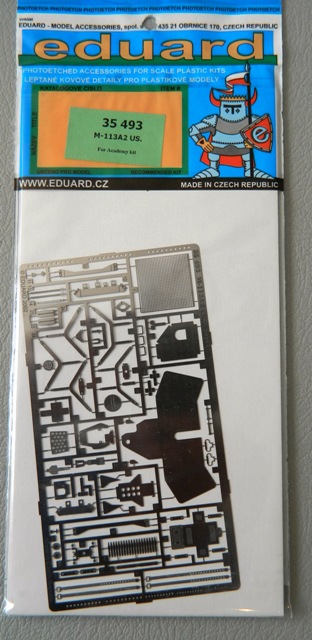
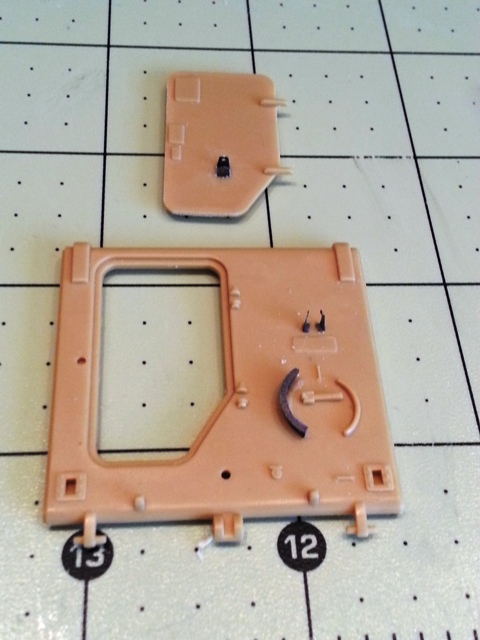
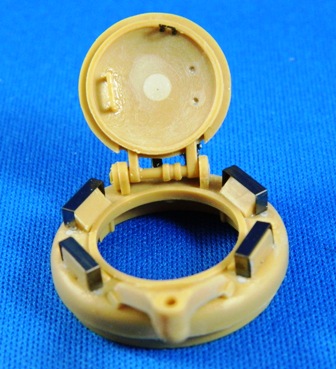
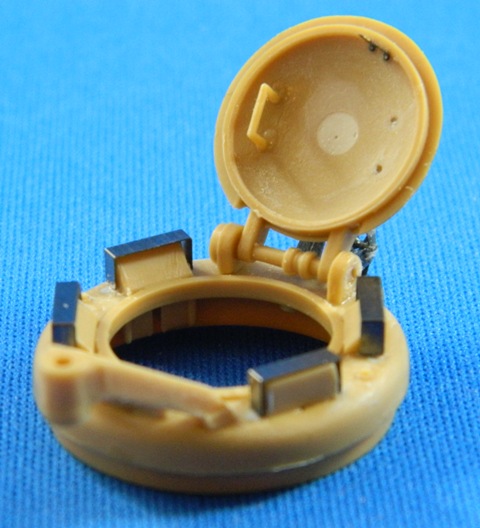
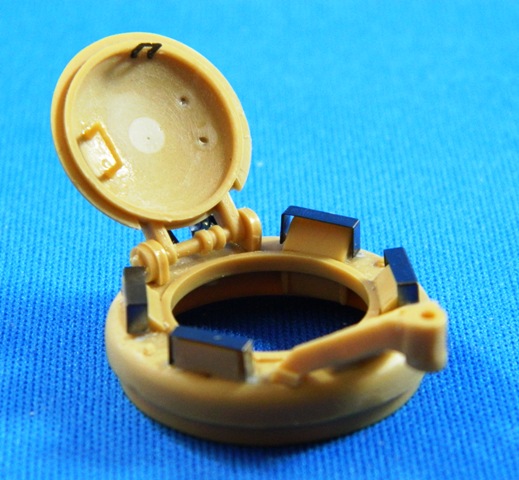
I had decided to try and convert the kit light assemblies to use the photoetch parts in the Eduard set. I recommend against making this modification unless you just absolutely feel like doing it. The amount of work required and potential of really messing up your project isn't worth the risk in my opinion. To make the light assembly using the Eduard parts, you have to cut up the light assemblies provided in the kit. Once you start cutting off light bodies from the kit part, there is no turning back.

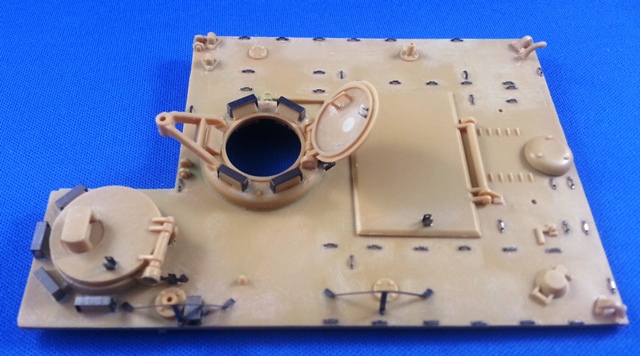
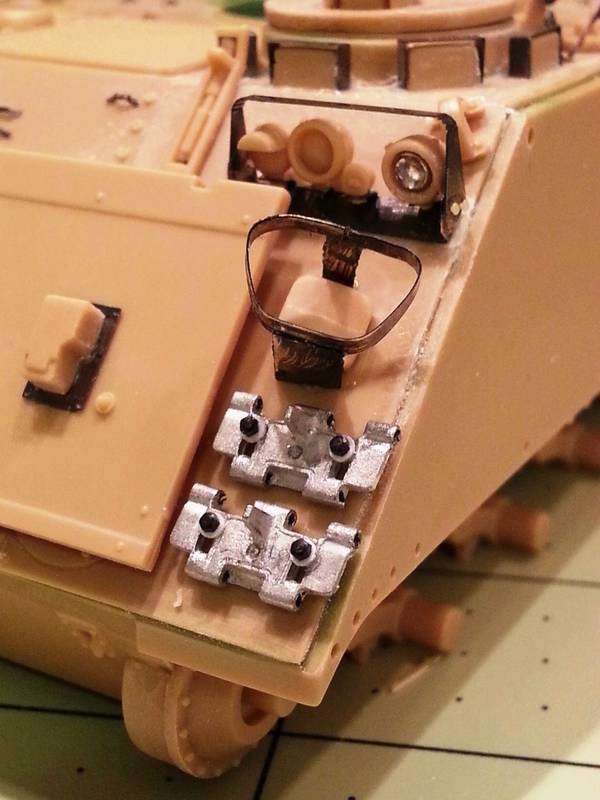
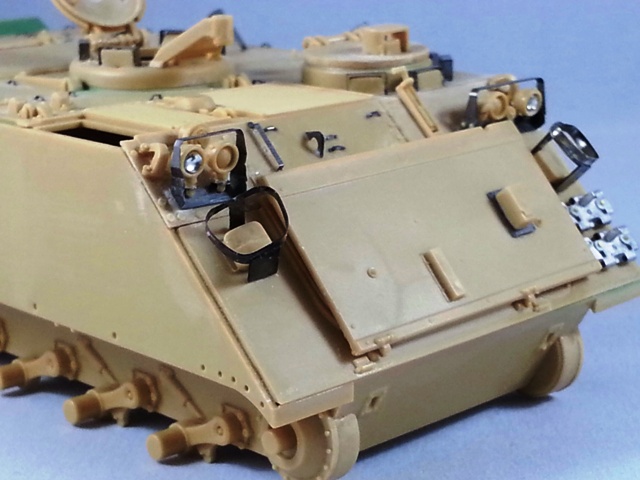
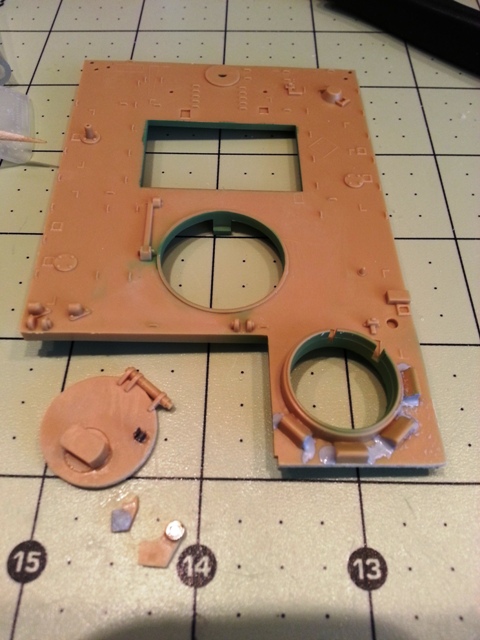
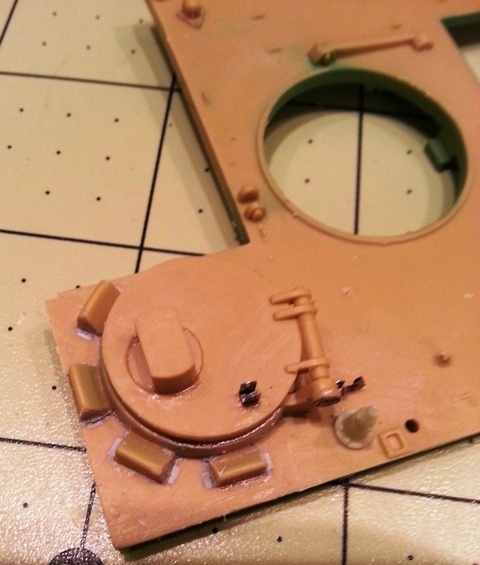
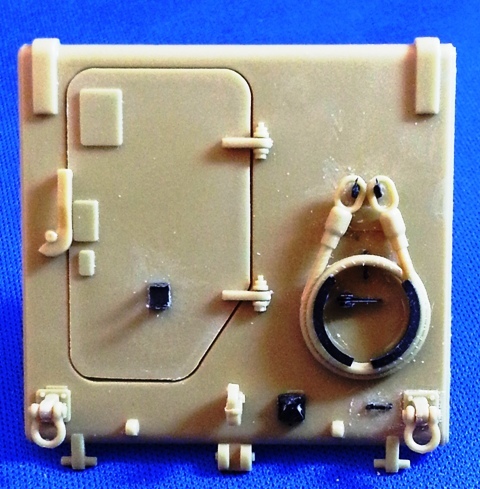
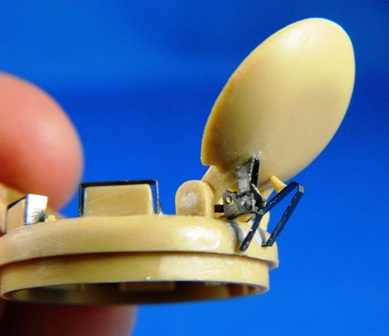
In my haste to make some progress I had put the lightguard on backwards. Fortunately, Gino gave me a reality check and pointed out my error to me. Additionally, the pe lightguards sit way too high. Here is the photo of the initial backward installation of the light guard which also shows the excessive lightguard height.


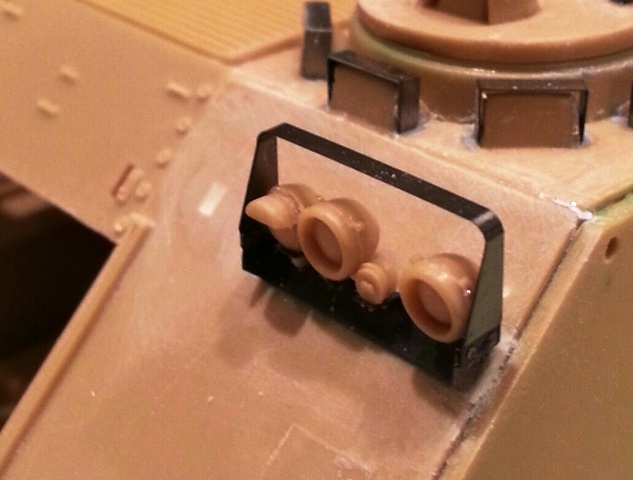
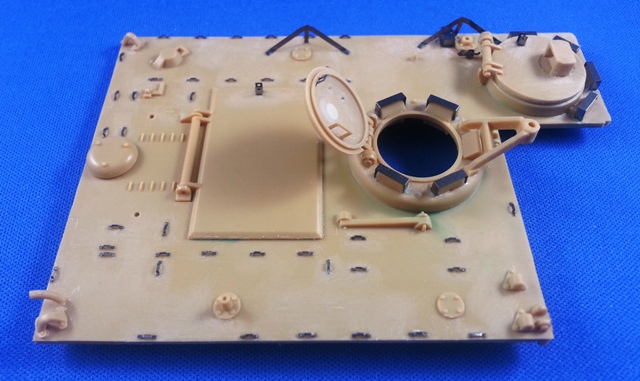
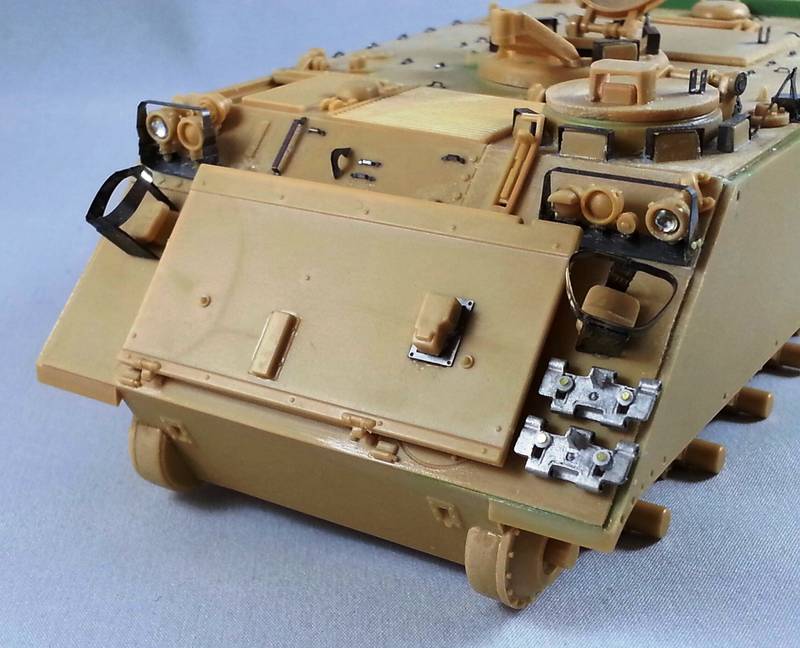
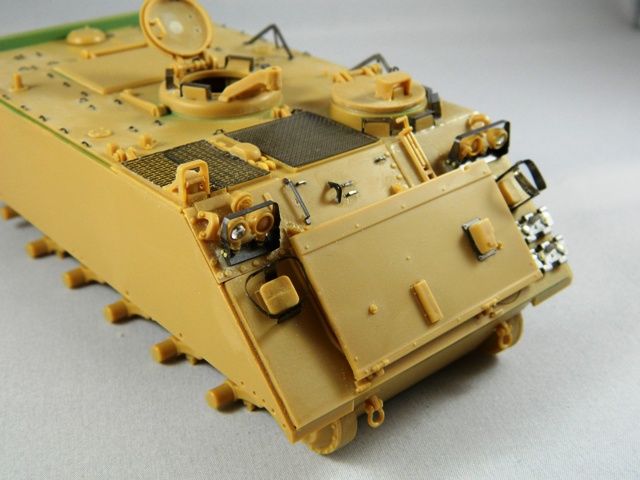
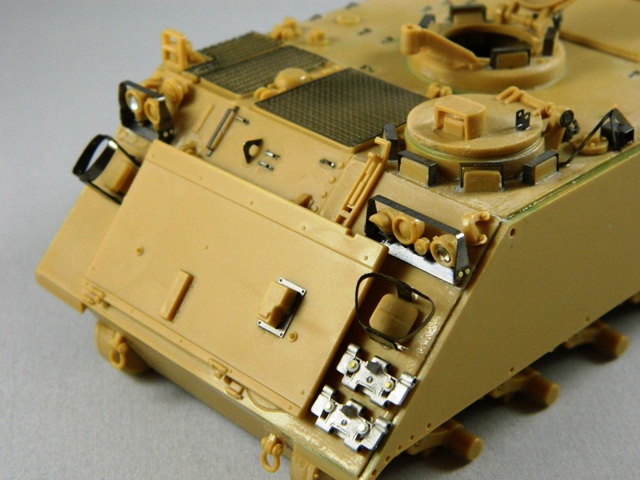
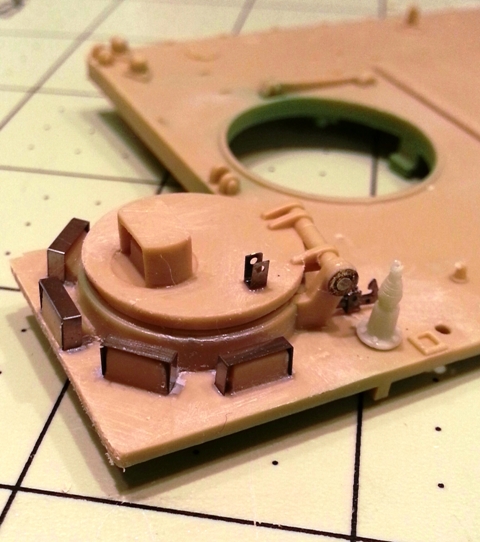
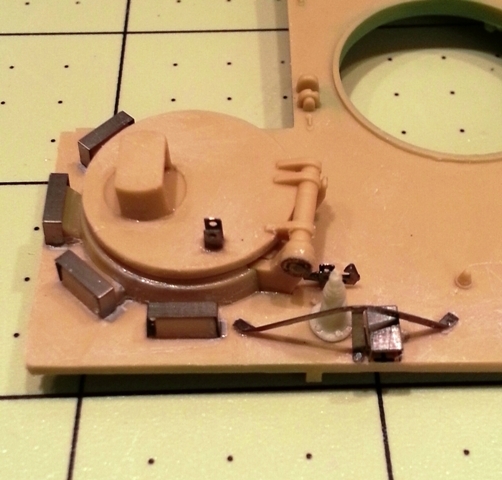
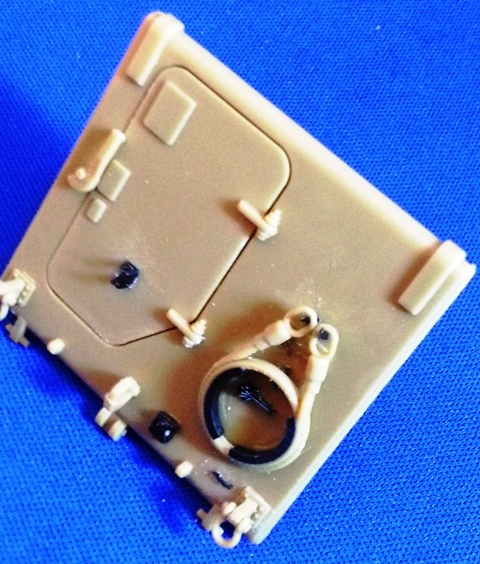
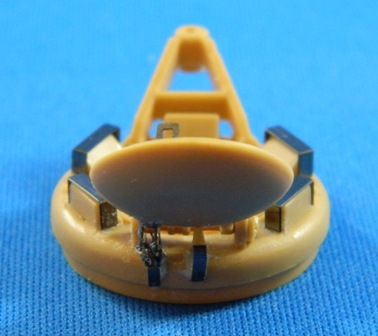
I removed the PE lightguard, trimmed the part down on both sides and reinstalled it facing the correct direction. This reduced the excessive height to what I think is acceptable. I added a couple of resin bolt heads to replace the lost pe bolt details.


I'm looking for some opinions on how this headlight assembly looks before I proceed to the next side. If it looks ok, I will trim the headlight guard on the other side to match heights.

Overall, I think the lightguard still stands a little too tall but I think I'm stuck with this assembly like it is. If I trim the lightguard down any more, it won't line up very well with the headlight base.
Foxtrot1
Visit this Community
Gauteng, South Africa
Joined: March 03, 2011
KitMaker: 234 posts
Armorama: 200 posts
Posted: Monday, December 23, 2013 - 11:45 PM UTC
Brent, the light guard look great. I especially like the bolt heads that you added. The height discrepancy isn't really that noticeable since you lowered it. Can't wait to see the end result of this build.
grunt26
Visit this Community
Michigan, United States
Joined: July 23, 2005
KitMaker: 155 posts
Armorama: 121 posts
Posted: Tuesday, December 24, 2013 - 04:09 AM UTC
Looking great! Really nice amount of detail work that dresses up an already good kit into something special. Can't wait for more, and to see it painted! Makes me want to start a 113 project myself..

Rod
sgtsauer
#065
Visit this Community
Missouri, United States
Joined: March 30, 2002
KitMaker: 2,605 posts
Armorama: 1,814 posts
Posted: Thursday, December 26, 2013 - 06:27 PM UTC
Thanks for the compliments guys. This project is taking into deeper detail than I normally go.

Got a little more work done tonight.


I tried to replicate the spare track retaining bolts by punching out a couple of sheet styrene disks to replicate the retaining washers and I used CMK .6mm boltheads to replicate the bolts. However, after seeing this photo


I will need to buy some smaller boltheads and replace what I put on.
sgtsauer
#065
Visit this Community
Missouri, United States
Joined: March 30, 2002
KitMaker: 2,605 posts
Armorama: 1,814 posts
Posted: Friday, December 27, 2013 - 05:36 PM UTC
I have the front top glacis assembly done now I think. The swim vane is held on by handi-tak. I won't glue it on till later. I still have to do the lower front hull and the top of the engine area now. I replaced the CMK boltheads on the spare track with some Alliance Model Works PE hex boltheads. I think it looks much better. Let me know if you have any comments or criticisms. Thanks!


sgtsauer
#065
Visit this Community
Missouri, United States
Joined: March 30, 2002
KitMaker: 2,605 posts
Armorama: 1,814 posts
Posted: Saturday, December 28, 2013 - 02:21 PM UTC
I completed work on the engine deck tonight. I'm calling the initial assembly completed.

I'm going to let everything sit for about 12 hours and then spray an initial coat of Model Master Medium Green as an undercoat. This will enable me to achieve the CARC green color behind the road wheels as seen in the attached photo.


sgtsauer
#065
Visit this Community
Missouri, United States
Joined: March 30, 2002
KitMaker: 2,605 posts
Armorama: 1,814 posts
Posted: Monday, January 20, 2014 - 10:16 AM UTC
I'm continuing work on my M113A2 Ambulance. I know some model builders may not have used Fruil tracks and may be curious about what is in the box and how they go together. I thought I would take a few 'step-by-step' photos to show you how Fruil tracks are assembled.


Compare to this real M113 track...


These tracks are cast by the manufacturer (Fruil) in white metal. You have to drill out the holes for the 'track pins'. You use small wire, which is included, for the track pins. You use a small drop of thick CA glue to hold the wire 'track pin' in place.


When I assemble Fruil tracks, I assemble them in runs of 10 links. They are easier to manage this way. The M113 kit tracks have 66 links. I will test fit my runs starting at roughly 63 or 64 links per side to make sure I get accurate track sag.


More to follow.
jrutman
Visit this Community
Pennsylvania, United States
Joined: April 10, 2011
KitMaker: 7,941 posts
Armorama: 7,934 posts
Posted: Monday, January 20, 2014 - 10:33 AM UTC
Very nice job. It brings back memories for me.
J
henkp
Visit this Community
Overijssel, Netherlands
Joined: September 30, 2005
KitMaker: 1,080 posts
Armorama: 1,064 posts
Posted: Monday, January 20, 2014 - 11:10 AM UTC
thats a lot of work but its looks good
henk
 _GOTOTOP