Skoda Radschlepper Ost (RSO) - Build Log

#521
Kentucky, United States
Joined: April 13, 2011
KitMaker: 9,465 posts
Armorama: 8,695 posts
Posted: Saturday, April 06, 2013 - 01:38 PM UTC
Hey Pat; What do you make of the "sleeper cab" they seemed to have tried to create? I would have put the bed up higher and then accessed a storage locker under it by flipping the rear of the driver's seat forward.

Pat - From your photos it looks like you confirmed my ideas about the sleeper cab with the bed deck being much higher up and there being a storage locker behind the swing out seat back. The minute I saw those two leather straps attached to the ceiling in the model I thought of a upper birth Pullman sleeping car with the straps intended to keep the off-duty driver from falling out of the birth. Don't however know what that stack of pads in that locker is all about?
From Pat:
Maybe it's the medevac version and they are spare sleeping pads for the back load box.

#521
Kentucky, United States
Joined: April 13, 2011
KitMaker: 9,465 posts
Armorama: 8,695 posts
Posted: Saturday, April 06, 2013 - 04:59 PM UTC
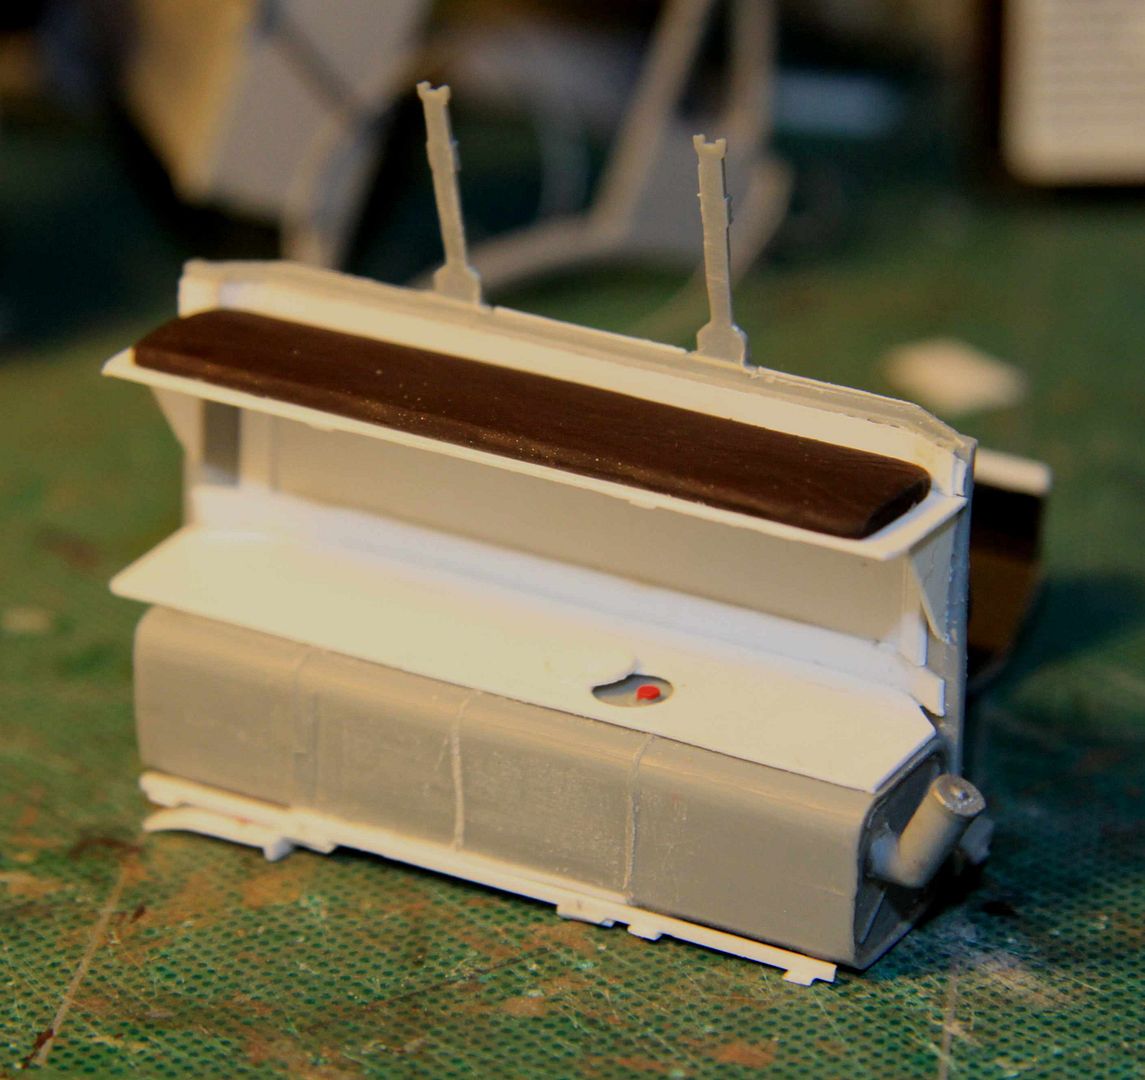
Work'n out the design . . . .

#521
Kentucky, United States
Joined: April 13, 2011
KitMaker: 9,465 posts
Armorama: 8,695 posts
Posted: Saturday, April 06, 2013 - 05:04 PM UTC
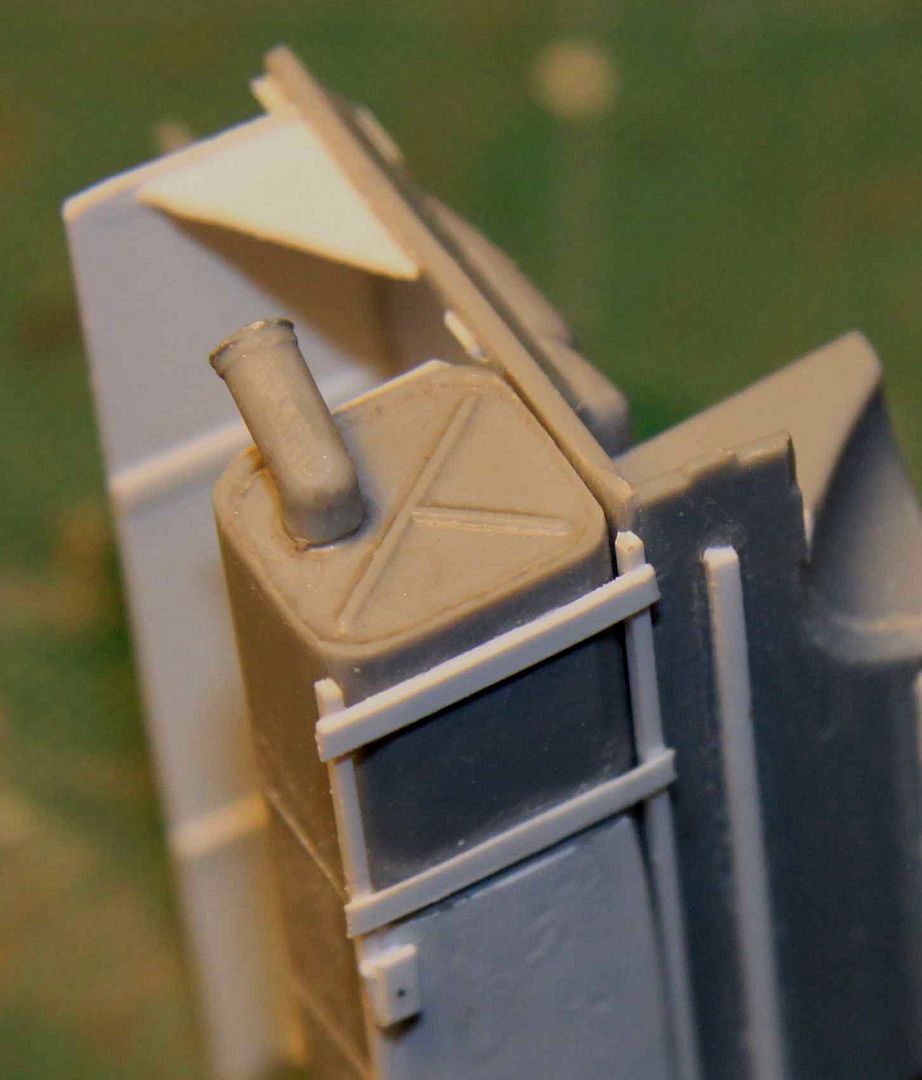
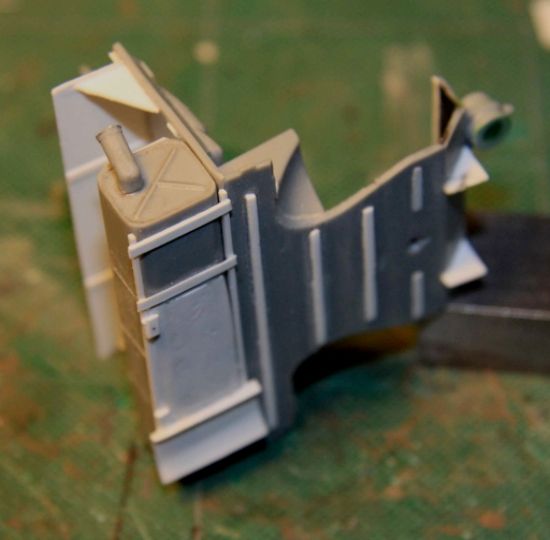
Also working on a support frame for the gas tank. I saw this detail in the Capricorn book.

#521
Kentucky, United States
Joined: April 13, 2011
KitMaker: 9,465 posts
Armorama: 8,695 posts
Posted: Sunday, April 07, 2013 - 05:58 AM UTC
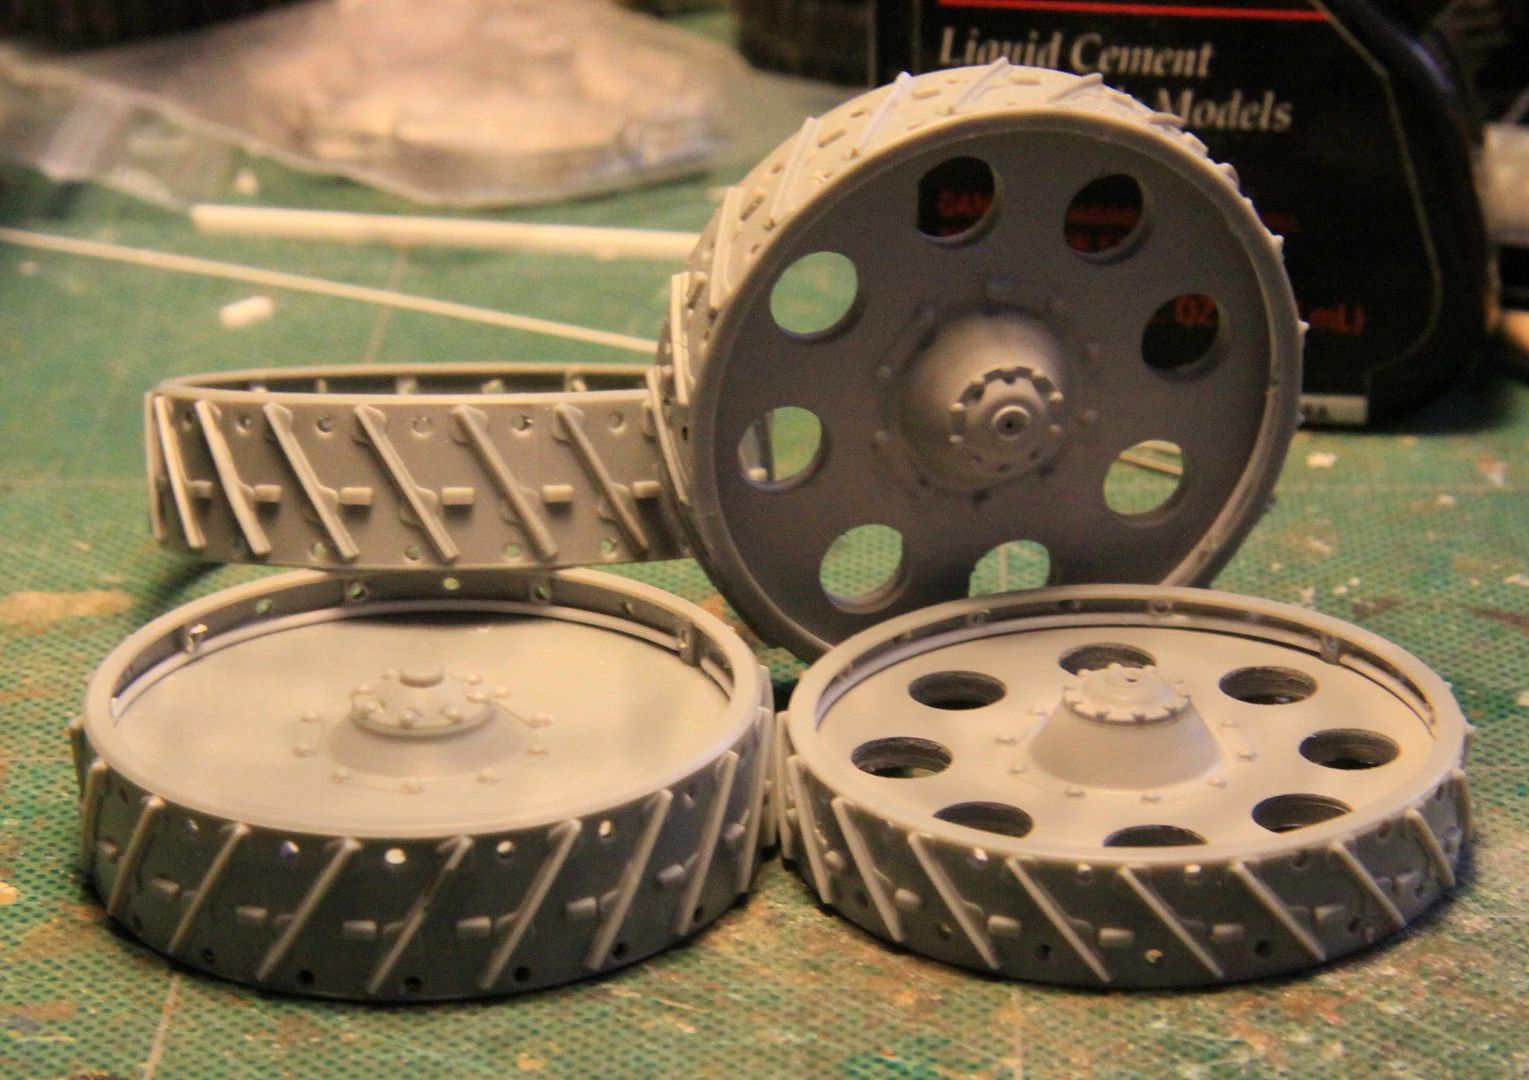
SUCCESS ! ! !
I've been sweating bullets working up my nerve to the time when it was necessary to drill out these wheels to build the prototype Skoda RSO. Well now I am half way there and well on my way!
Chubut, Argentina
Joined: August 15, 2010
KitMaker: 593 posts
Armorama: 548 posts
Posted: Sunday, April 07, 2013 - 06:03 AM UTC
Good advances

Omar

#521
Kentucky, United States
Joined: April 13, 2011
KitMaker: 9,465 posts
Armorama: 8,695 posts
Posted: Sunday, April 07, 2013 - 08:39 AM UTC
All set - Four for Four on drilling the wheels!
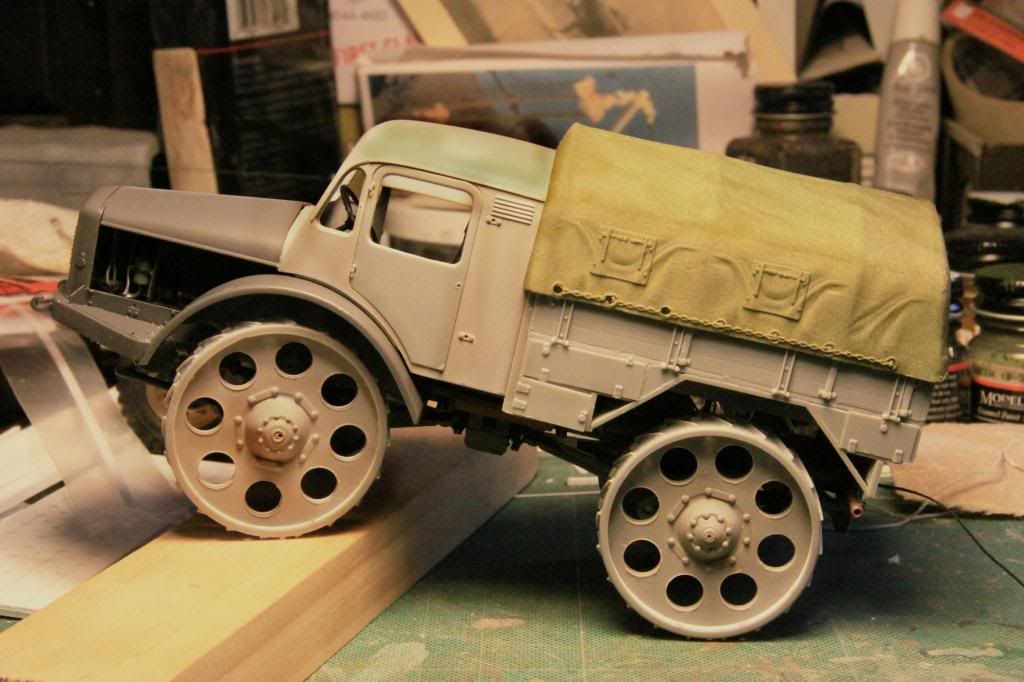
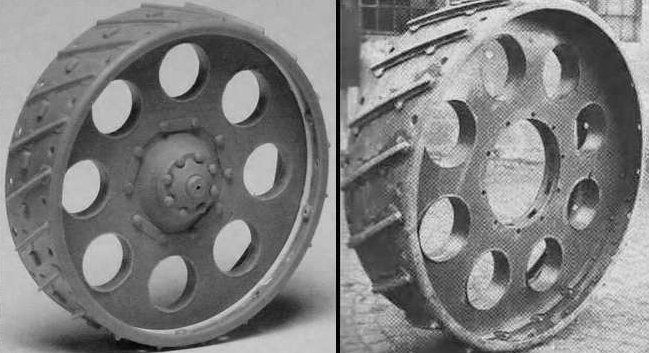
I further enlarged the wheel holes to better match the photos of the prototype wheels. Final diameter of holes is 9/32 inch.
(My work is on the left.)
Dublin, Ireland
Joined: November 27, 2004
KitMaker: 6,048 posts
Armorama: 4,619 posts
Posted: Sunday, April 07, 2013 - 10:22 AM UTC
Very neat drilling. Can you say how you went about marking them and how you drilled them. Small bit first for a guide hole and then large bit.
Pat
work to become not to acquire

#003
Donegal, Ireland
Joined: May 14, 2002
KitMaker: 9,763 posts
Armorama: 7,444 posts
Posted: Sunday, April 07, 2013 - 10:24 AM UTC
Nice model Michael. Great job on the wheels.

IPMS Stockholm
"The problem with common sense, is that it is not that common"

#521
Kentucky, United States
Joined: April 13, 2011
KitMaker: 9,465 posts
Armorama: 8,695 posts
Posted: Sunday, April 07, 2013 - 02:21 PM UTC
Thanks guys!
As to drilling the wheels: Laying out the drill hole pattern was tougher than actually drilling the holes! I glued the front and back wheel disks together. Then sanded off all the little triangles that supported the wheel rim. (The prototype did not have them.) And then with a hand held drill put a very small guide hole in the center hub of each wheel. (We will refill these holes a little later.)
I have a screw adjustable compass with a cutting blade that I picked up at the local art supply store. I used this compass and blade to scribe a large circle around the wheel disk. This circle gave me the main centerline to drill all the perforations in the wheels.
I picked an arbitrary starting point along this scribed circle for the first perforation and hand drilled a small guide hole. I then used a set of dividers to VERY carefully sub-divide the large scribed circle into four equal sections. I triple checked this spacing and then drilled small guide holes at each of these points. Then again, using the dividers, I split each of these four sections again which gave me eight equal points along the circle.
As to the actual drilling of the larger holes I started with small hand drilled guide holes at each of the eight points on the circle, then larger hand drilled guide holes and the final 9/32" holes were drilled using a small drill press on its slowest speed setting.
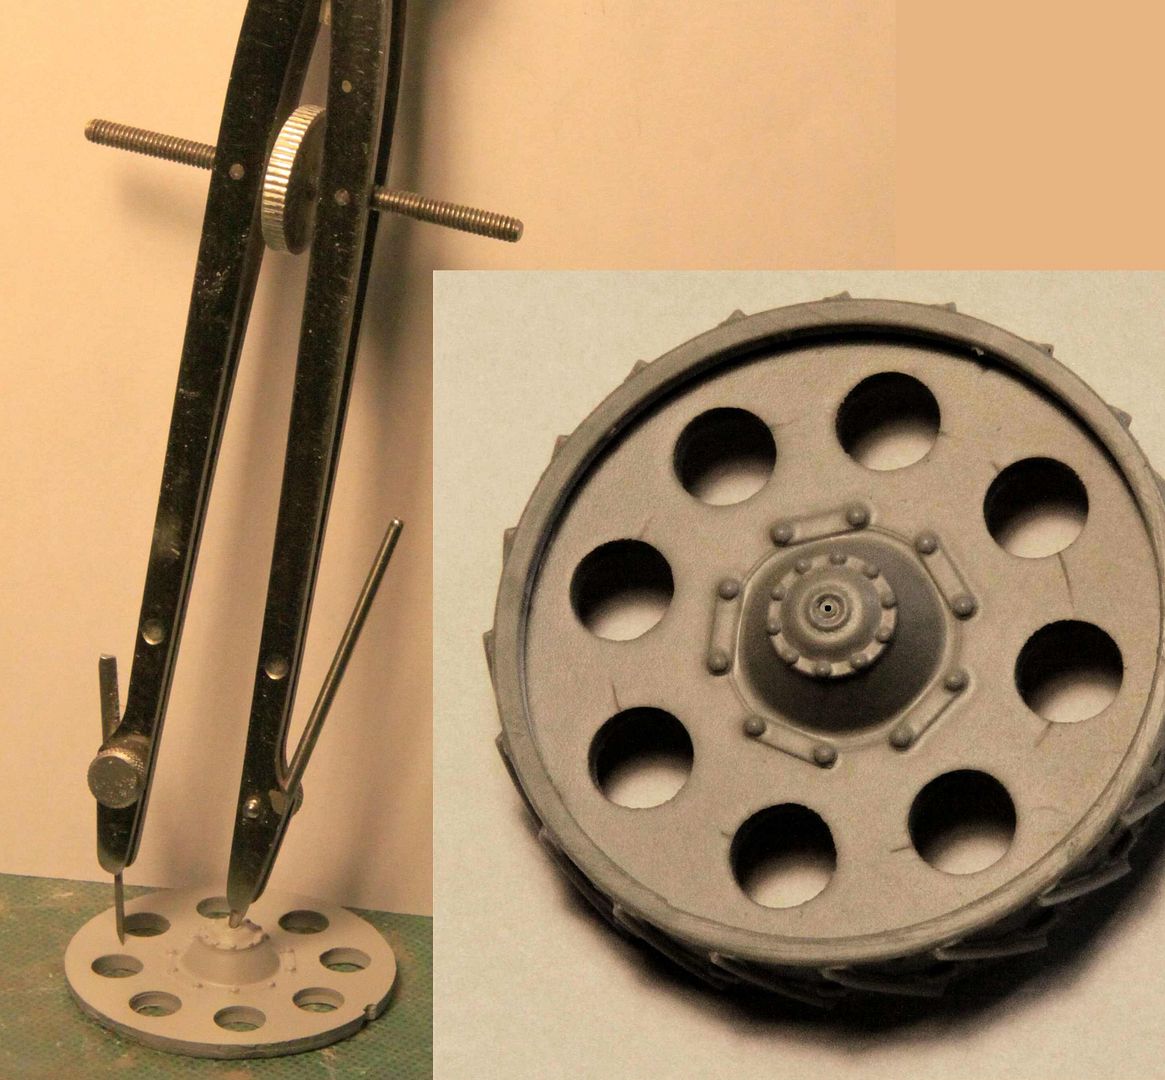
It took the better part of a Saturday to complete the four wheels. The holes shown above are actually 1/4" and I decided these were too small and I went back with a 9/32" bit and enlarged them a little more.

#521
Kentucky, United States
Joined: April 13, 2011
KitMaker: 9,465 posts
Armorama: 8,695 posts
Posted: Monday, April 08, 2013 - 08:37 AM UTC
A GENERAL QUESTION:
Any clues where I might find the Capricorn book stateside?
Tried Amazon, tried Squadron, tried a general internet search, the only sources I could find were in the UK or the Czech Republic.

#521
Kentucky, United States
Joined: April 13, 2011
KitMaker: 9,465 posts
Armorama: 8,695 posts
Posted: Wednesday, April 10, 2013 - 05:14 AM UTC
VERY happy with the progress so far on my Skoda RSO Radschlepper Ost prototype!
Now I get to start working on the fender mounted air filter.
The drilled out open wheels at least now reveal some of the details otherwise covered up by the superstructure.
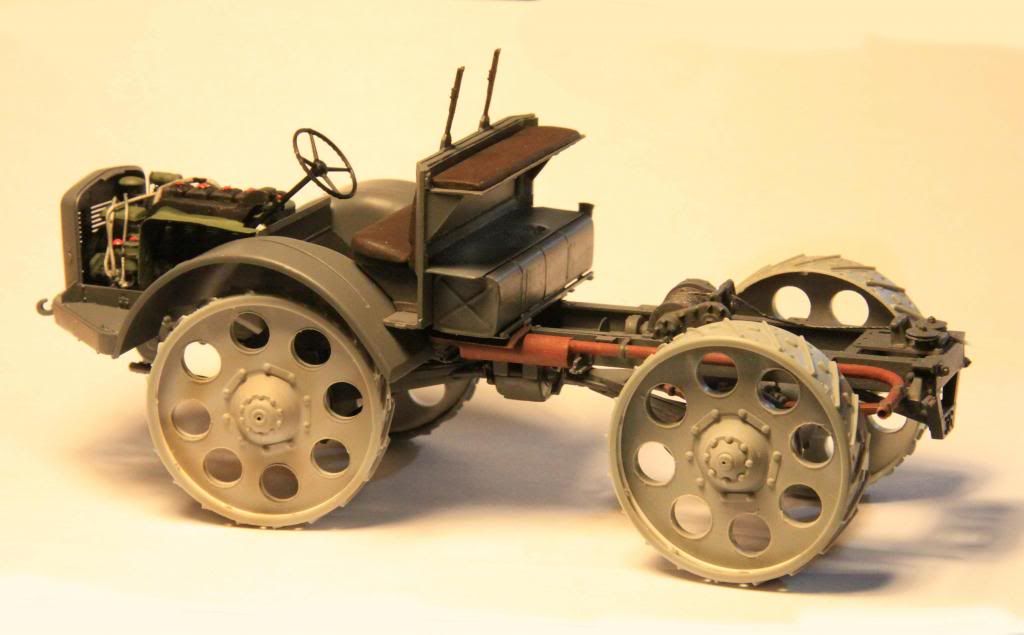
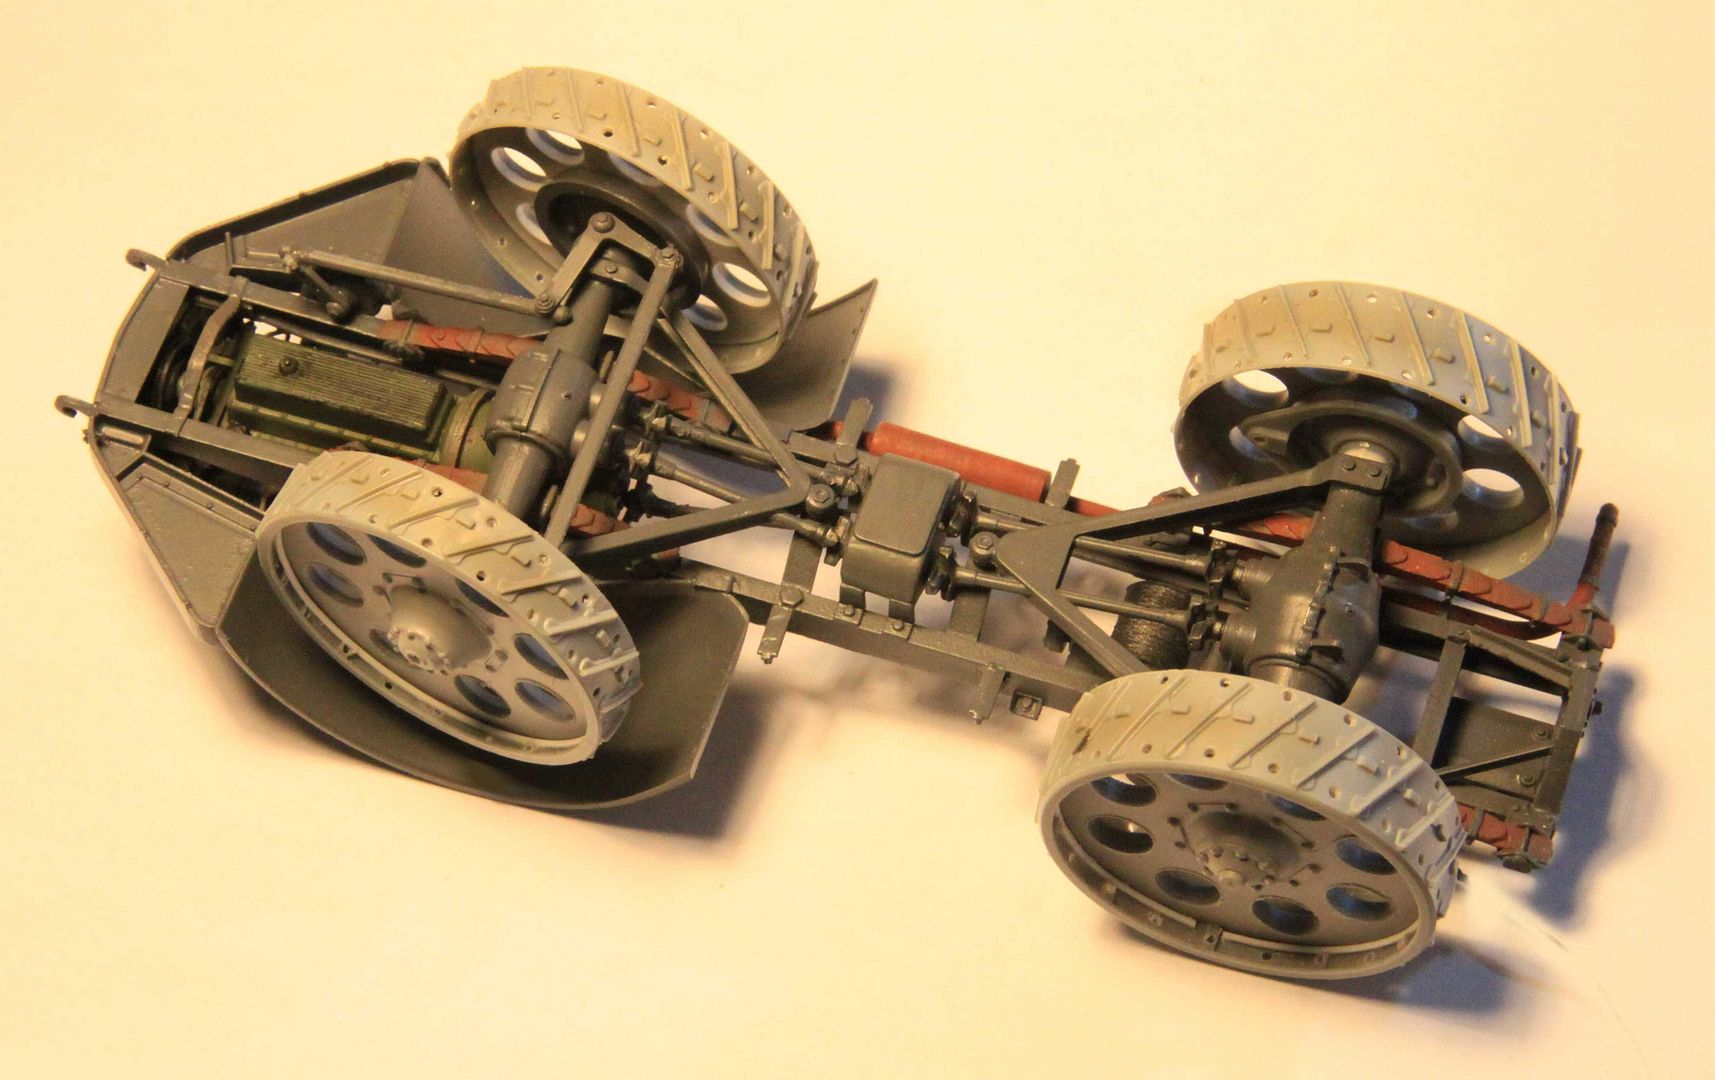
Front wheels have been positioned slightly angled and the steering linkage as been modified to match.

#521
Kentucky, United States
Joined: April 13, 2011
KitMaker: 9,465 posts
Armorama: 8,695 posts
Posted: Wednesday, April 10, 2013 - 05:23 AM UTC
The revised layout for the "sleeper cab": The truck now has a support structure for the fuel tank, a heat shield over the muffler, a floor installed over the gas tank and the raised deck for the bed/pallet. These revisions now allow for a stowage compartment below the bed which on the real vehicle can be accessed by folding down the driver's seat back cushion.
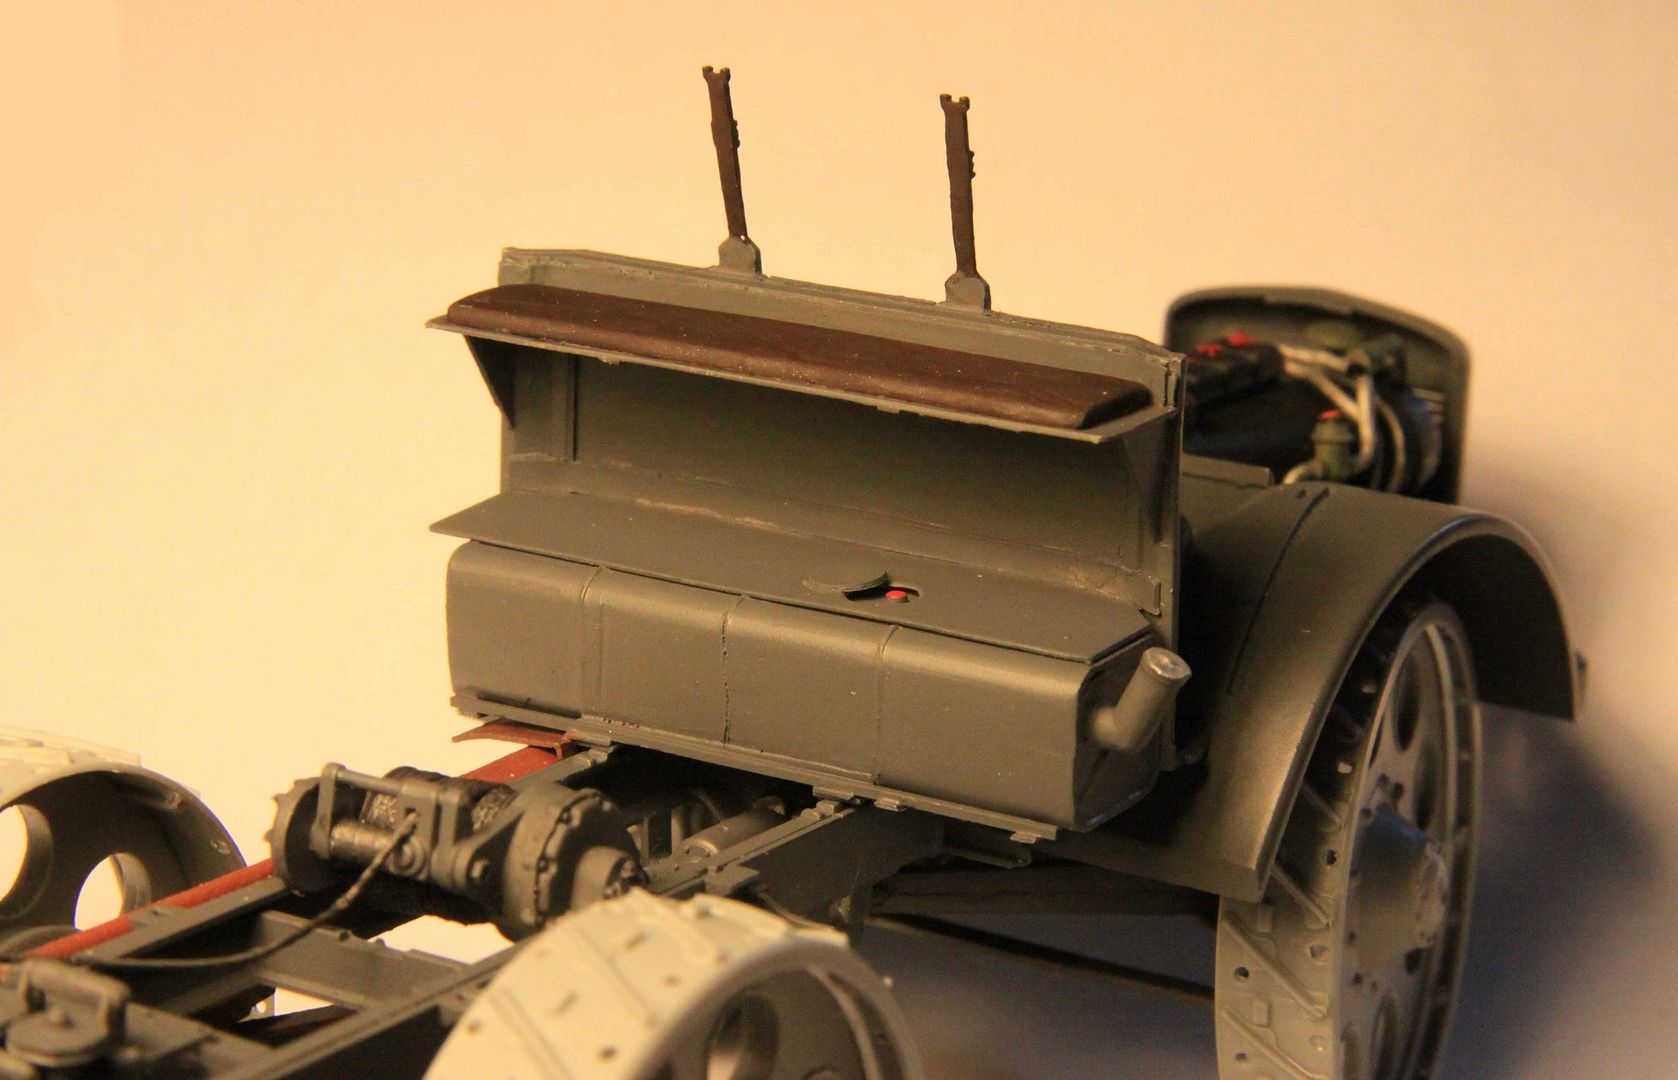
I started to modify my model so the seat back actually folded forward but have so far voted against it!
Texas, United States
Joined: May 02, 2006
KitMaker: 5,425 posts
Armorama: 4,659 posts
Posted: Wednesday, April 10, 2013 - 06:22 AM UTC
Making great progress on this one Michael. Very clean work on those wheels. Got to love the added detail of that sleeper cab too!


#521
Kentucky, United States
Joined: April 13, 2011
KitMaker: 9,465 posts
Armorama: 8,695 posts
Posted: Thursday, April 11, 2013 - 12:25 AM UTC
Thanks Bill. In the end the sleeper area won't be very visable but I had to do it anyway! Just crazy like that I guess.
Mike the Chassis Man

#521
Kentucky, United States
Joined: April 13, 2011
KitMaker: 9,465 posts
Armorama: 8,695 posts
Posted: Thursday, April 11, 2013 - 11:15 AM UTC
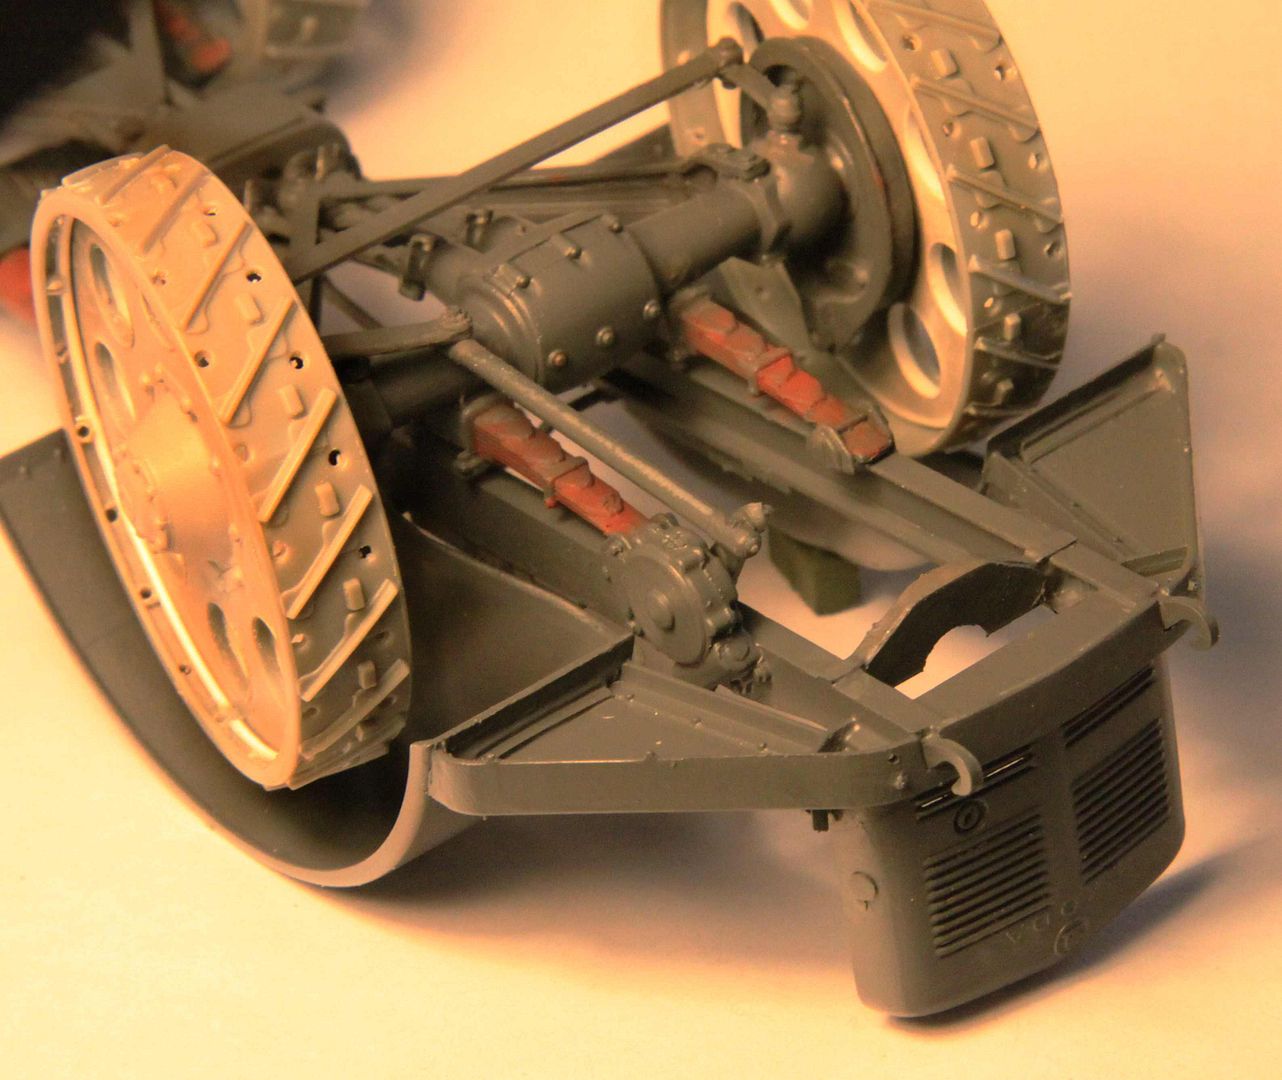
Some additional bracing added to the underside of the cab floor and triangular supports added to the kickboard.
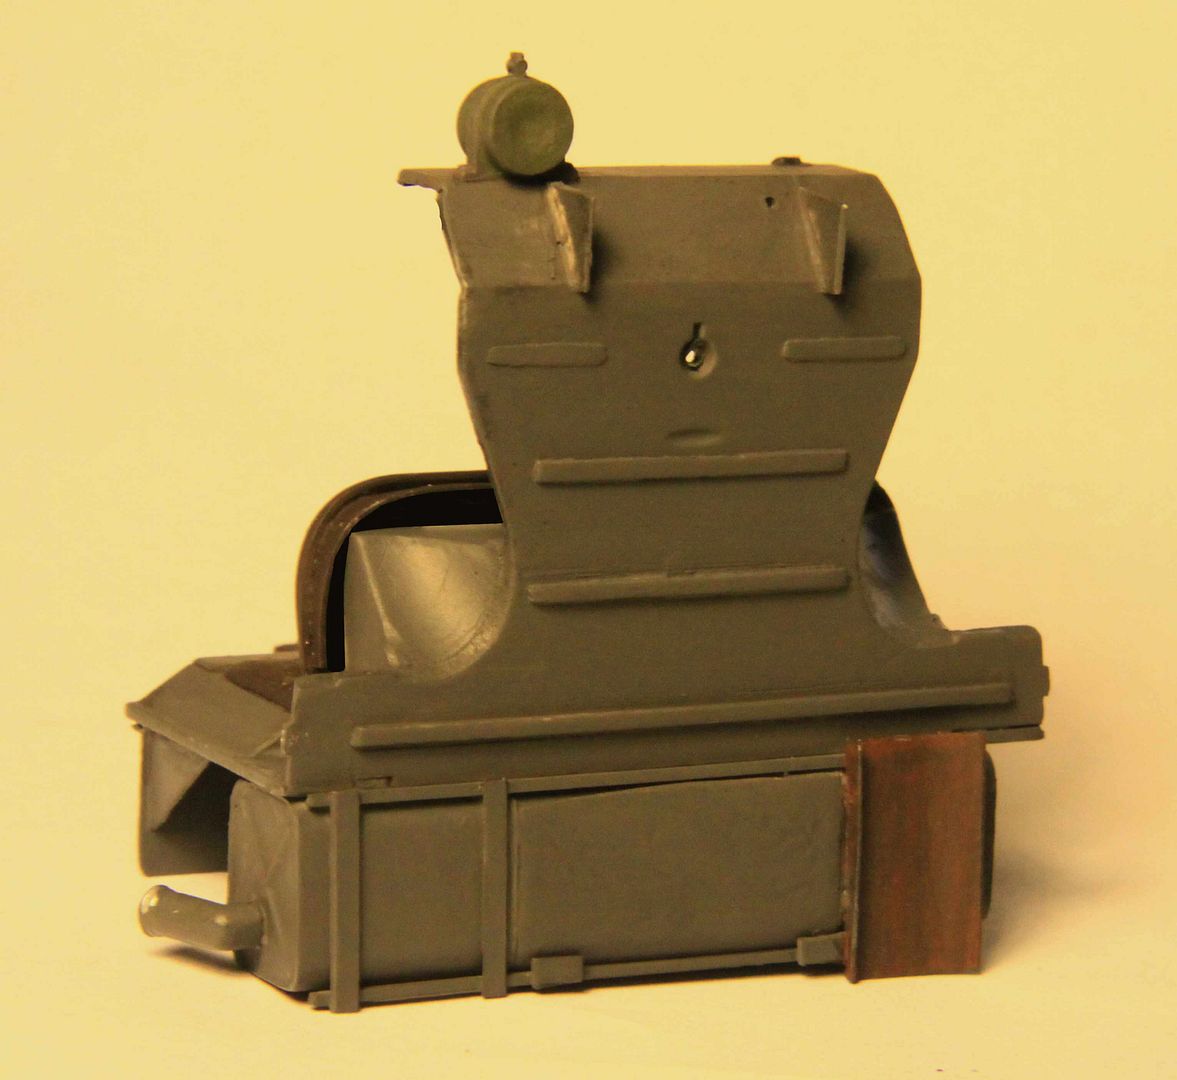
Again this photo shows the added bracing under the gas tank and the heat shield between the gas tank and the muffler.
p.s. Found a bit more reference material: It appears that on the real vehicle the muffler hung further outboard of the frame to avoid being too near the gas tank. This, I think is the reason the gas tank is off center towards the passenger side to increase its distance from the muffler.
Texas, United States
Joined: May 02, 2006
KitMaker: 5,425 posts
Armorama: 4,659 posts
Posted: Friday, April 12, 2013 - 03:54 AM UTC
Quoted Text
Thanks Bill. In the end the sleeper area won't be very visable but I had to do it anyway! Just crazy like that I guess.
Mike the Chassis Man
Always love to see attention to detail even if sometimes it ends up being the case where only you know it's there when done.


#521
Kentucky, United States
Joined: April 13, 2011
KitMaker: 9,465 posts
Armorama: 8,695 posts
Posted: Friday, April 12, 2013 - 04:51 AM UTC
Quoted Text
Good advances  Omar
Omar
Thank you Omar, I very much appreciate everyone's positive comments!

#521
Kentucky, United States
Joined: April 13, 2011
KitMaker: 9,465 posts
Armorama: 8,695 posts
Posted: Friday, April 12, 2013 - 07:19 AM UTC
OK - - I STAND CORRECTED!
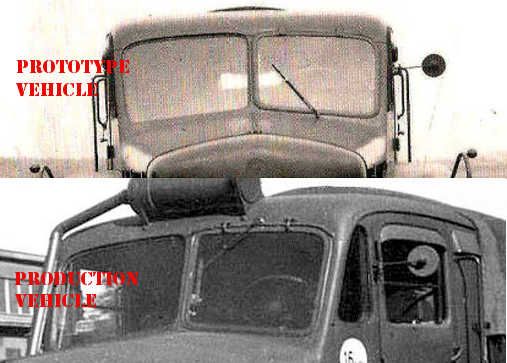
The prototype Skoda RSO DID have an opening front driver's window! So I don't have to revise the one on the model cab! The only difference being that the windshield wiper was located at the bottom of the window on the prototype. (Don't know how they handled the wiper when the window was open??)
Also I will need to remove the "drip strip" eye brow over the window that was used only on the production variant.

#521
Kentucky, United States
Joined: April 13, 2011
KitMaker: 9,465 posts
Armorama: 8,695 posts
Posted: Sunday, April 14, 2013 - 06:10 AM UTC
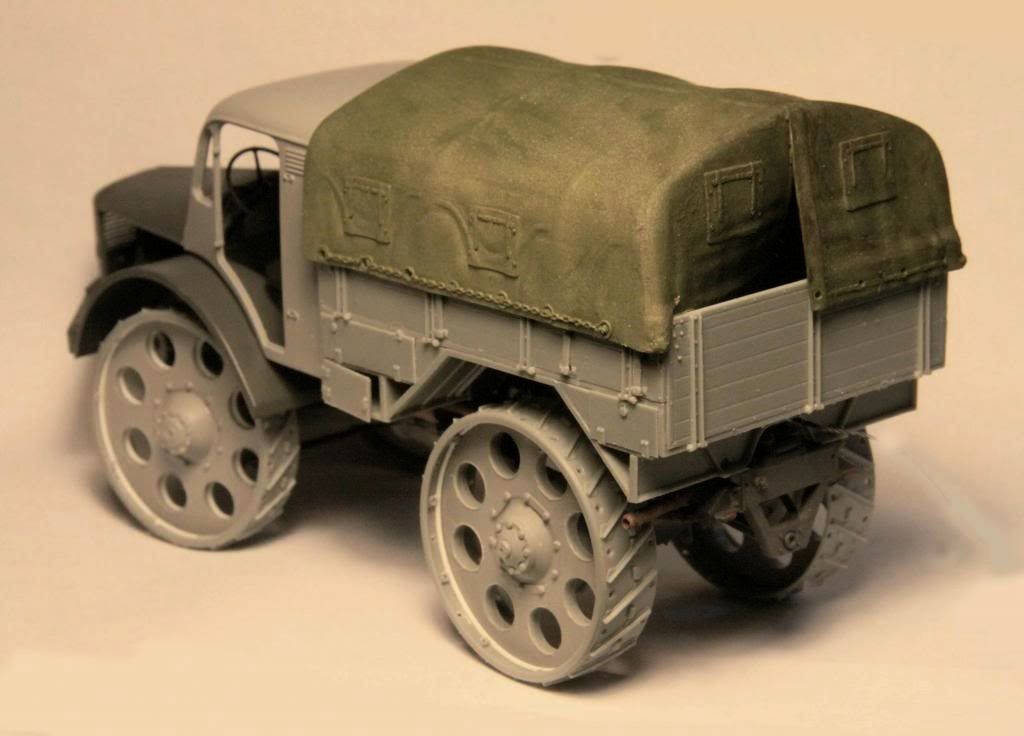
Decided to try and add a bit more interest to the very nice cloth top molding. Opened up the back entry a little and am planning on adding real chains to the side curtains.
Indiana, United States
Joined: June 10, 2005
KitMaker: 6,188 posts
Armorama: 5,960 posts
Posted: Sunday, April 14, 2013 - 07:04 AM UTC
Nice work and a great touch on the wheel detail as I hadn't noticed it.

~ Jeff
Dublin, Ireland
Joined: November 27, 2004
KitMaker: 6,048 posts
Armorama: 4,619 posts
Posted: Sunday, April 14, 2013 - 07:52 AM UTC
Great progress Mike. I like what you did with the tarp.
Pat
work to become not to acquire

#521
Kentucky, United States
Joined: April 13, 2011
KitMaker: 9,465 posts
Armorama: 8,695 posts
Posted: Sunday, April 14, 2013 - 11:18 AM UTC
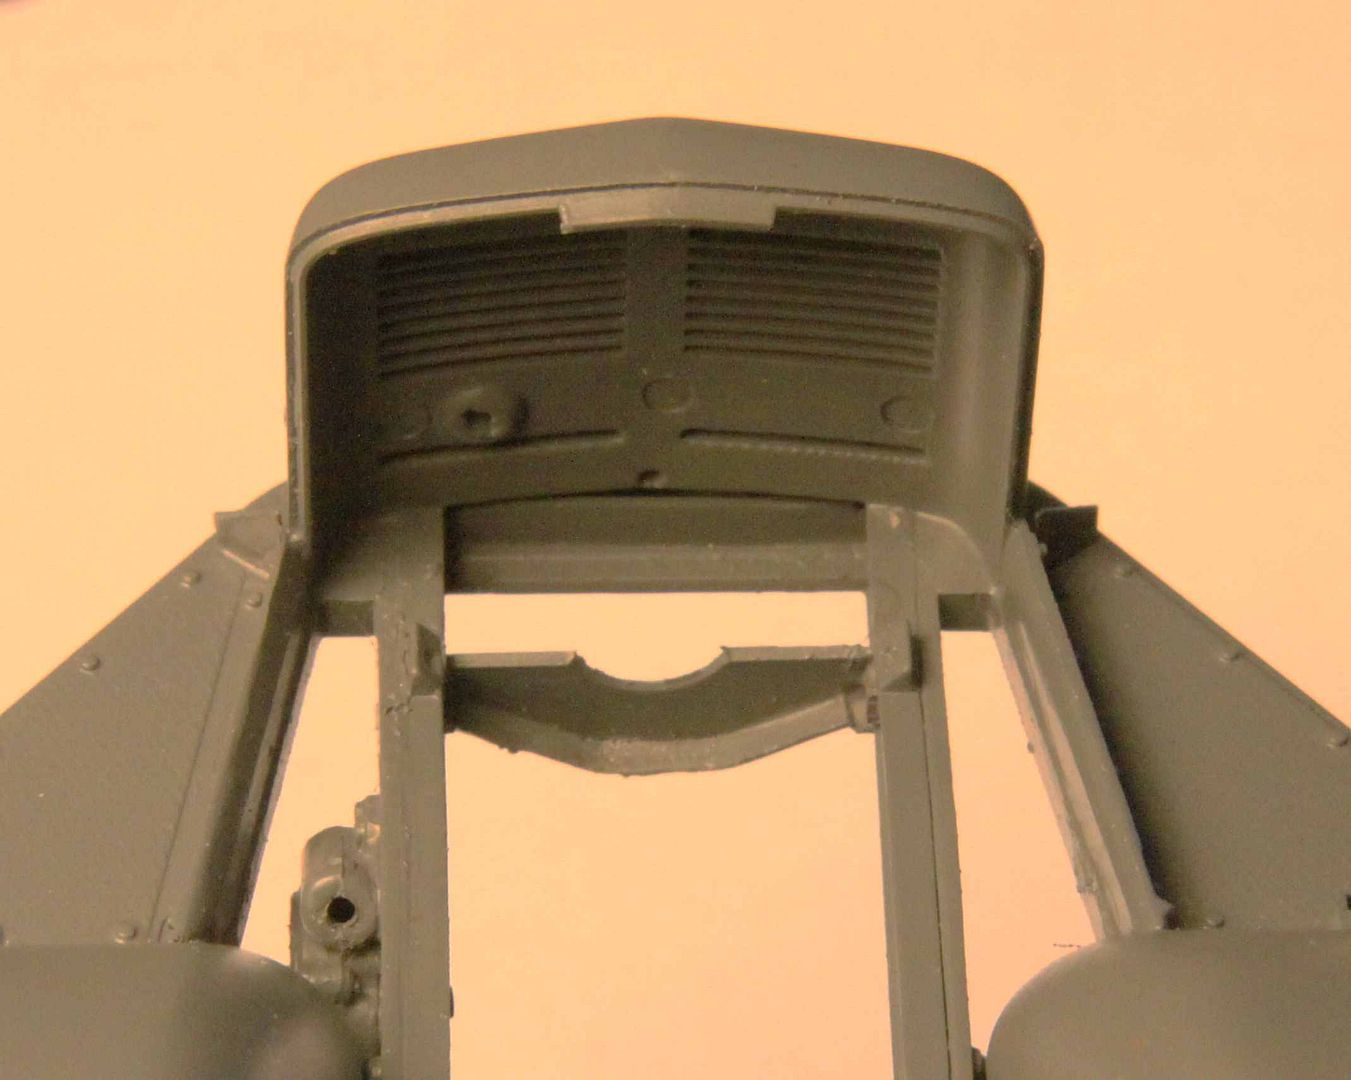
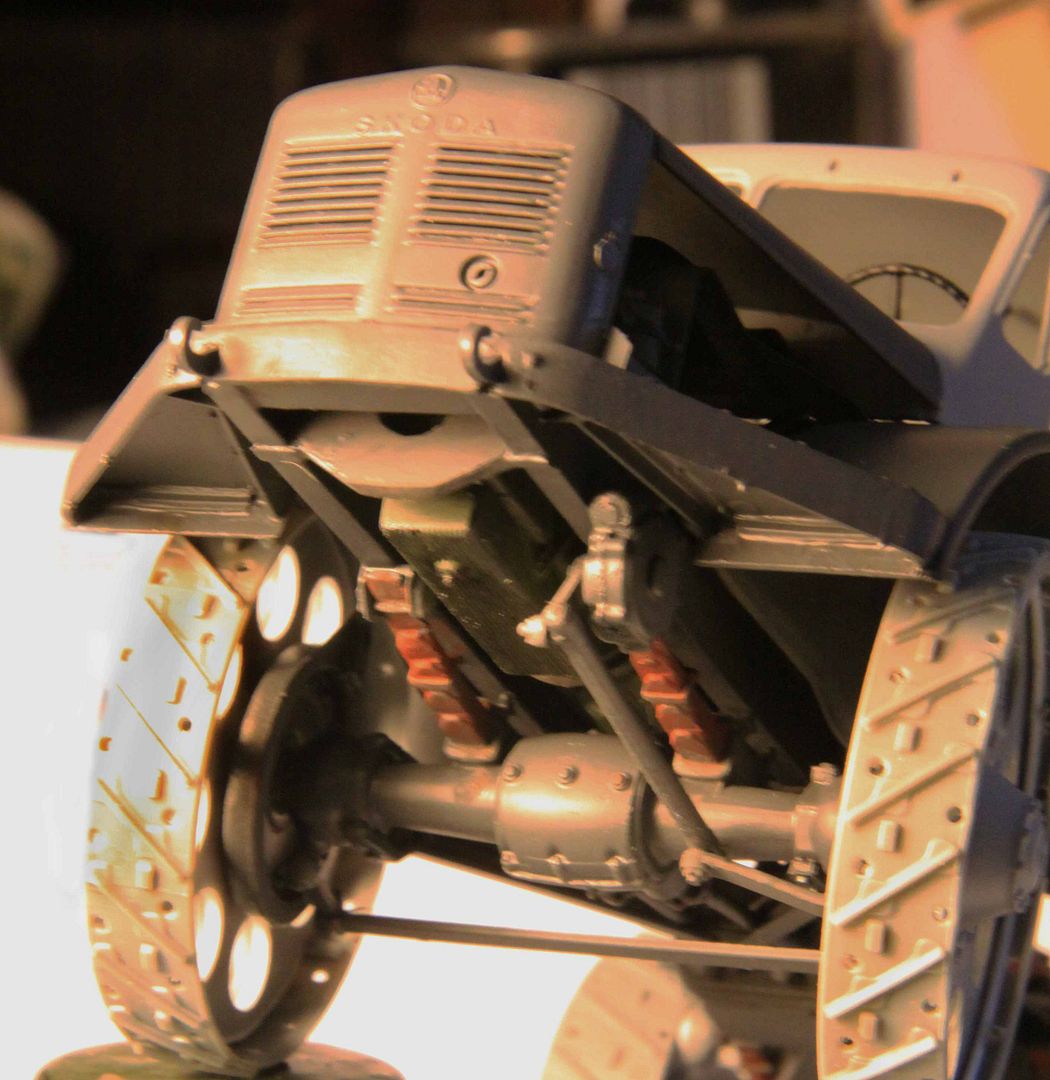
Don't get me wrong, I really like this model and I am glad it is now being produced in plastic. However I am afraid I have found a missing detail - a rather visible frame cross member below the forward engine mounts. I have since added this cross member to my model. Its purpose as much as anything seems to have been to protect the oil pan.
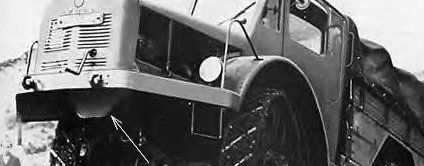

#521
Kentucky, United States
Joined: April 13, 2011
KitMaker: 9,465 posts
Armorama: 8,695 posts
Posted: Sunday, April 14, 2013 - 11:21 AM UTC

#521
Kentucky, United States
Joined: April 13, 2011
KitMaker: 9,465 posts
Armorama: 8,695 posts
Posted: Friday, April 19, 2013 - 12:29 AM UTC
Working now on the fender mounted air filter (roof mounted on the production version.) Photos to follow.

#521
Kentucky, United States
Joined: April 13, 2011
KitMaker: 9,465 posts
Armorama: 8,695 posts
Posted: Tuesday, April 23, 2013 - 04:22 AM UTC
QUESTION Armorama Webmasters:
Why was the title of my topic changed? The title "Radschlepper Ost - Build Log" now could refer to ANY German RSO and ANY model ever offered. Most RSO's were tracked vehicles built by Steyr and designed by who knows who. This WHEELED vehicle was built by Skoda and designed by F. Porsche himself. - BIG DIFFERENCE!
Further; Not everyone will know that Radschlepper Ost and RSO are one and the same thing. Finally, to change to this title hides from your readers the fact that this posting covers the new Riich Models offering????
I am at a loss to understand your actions. Please if you would add the words Skoda and RSO back into the title, I would then be OK with your alterations.
Mike


