_GOTOBOTTOM
Armor/AFV: Braille Scale
1/72 and 1/76 Scale Armor and AFVs.
Hosted by Darren Baker
Zvezda Panther D - without glue?
firstcircle
Visit this Community
England - South East, United Kingdom
Joined: November 19, 2008
KitMaker: 2,249 posts
Armorama: 2,007 posts
Posted: Monday, April 15, 2013 - 08:45 AM UTC
Peter Ganchev did a review of this new Zvezda Panther a little while ago here, but since we also have this review sample, kindly provided by Dragon USA, I thought I might take the opportunity to blog details on the building of this small kit. (Well...I know, don't feel sorry for me or anything... )

I will test out how much I can avoid using glue. While building MiniArt's City Building recently, I used an industrial amount of liquid cement and with the cold weather didn't have the window open, so I could do with a rest from the poisonous fumes.

Dramatic art work on the box, and we see the proclamation no glue required:


Back of the box (previously unseen!)


Instructions header:


Step 1:


All those suspension members clip in nice and firmly through semi-circle location holes and don't move around at all:


The drive covers for the sprocket clip in OK but only firmly in one place so there is some wobbliness:

Step 2:

Nice accurate fitting of the first wheel unit, all one piece, so very quick:


Idler constructed from three parts, clips together tightly, no glue here:

This tab sticking out from the idler mouting hole looks like it's meant to be there, but it seems to stop the wheel unit from sitting parallel to the hull, so I removed it. The mounting for the ilder also wedges in and sits firm with no glue.

The two part sprockets don't fit together quite so tightly...


... and when fitted to the hull there's a definite looseness as you can see:

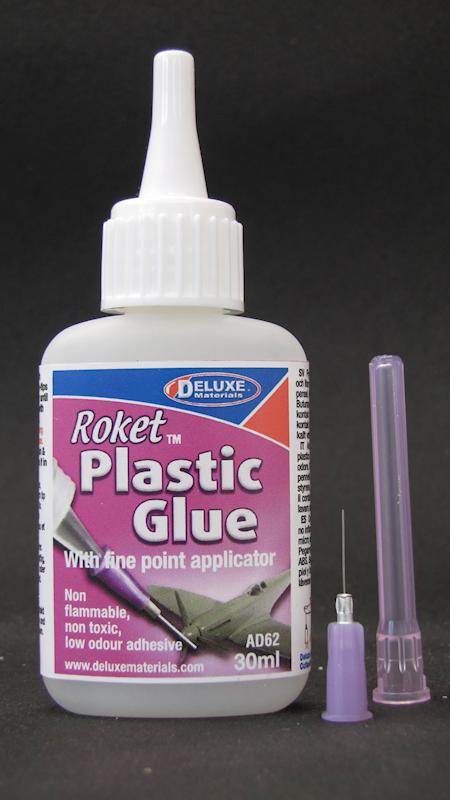
So I used some glue, still avoiding Dichloromethane; I have no idea what Roket Plastic Glue is made of, but it doesn't smell very much and doesn't cause ice crystals to form on the applicator:
PantherF
Visit this Community
Indiana, United States
Joined: June 10, 2005
KitMaker: 6,188 posts
Armorama: 5,960 posts
Posted: Monday, April 15, 2013 - 09:54 AM UTC
Believe it or not, when I was little I had asthma and was treated for it too.

AND, I could not use any paint or glue. So what did I do?

I learned how to use white glue to assemble my models. Yep, no paint or cement but I still assembled model kits! So it can be done.


~ Jeff
firstcircle
Visit this Community
England - South East, United Kingdom
Joined: November 19, 2008
KitMaker: 2,249 posts
Armorama: 2,007 posts
Posted: Monday, April 15, 2013 - 10:27 AM UTC
Jeff, you know, the first time I got my daughter to build a kit she managed to flick the end of the Liquid Poly 70 brush on the bottle edge and shot a drop of it into her eye... "great" I thought "she'll never want to do this again" (was also worried about her eye of course ). So yes, this low odour glue makes sense especially for children to use, particularly when ventilation is not so good. The other nice thing about this kit so far is that without much glue, it is very quick and easy to build, so again, perfect for introducing children to model making.
exer
Visit this Community
Dublin, Ireland
Joined: November 27, 2004
KitMaker: 6,048 posts
Armorama: 4,619 posts
Posted: Monday, April 15, 2013 - 10:27 AM UTC
Interesting Kit Matthew. I'd like to try one of these if I can find one in my LHS


Quoted Text


I learned how to use white glue to assemble my models. Yep, no paint or cement but I still assembled model kits! So it can be done.
~ Jeff


You must have the patience of a saint Jeff- white glue is strong when it dries but it does take a really looooonnnng time to dry
tread_geek
Visit this Community
Ontario, Canada
Joined: March 23, 2008
KitMaker: 2,847 posts
Armorama: 2,667 posts
Posted: Monday, April 15, 2013 - 11:27 AM UTC
Fascinating Matthew!

A fellow in my local club just picked one of these up in a nearby city. He hasn't started it yet but says that the detail is quite amazing. His only minor complaint was about the lack of screening for the engine apertures. After having built and reviewed the Dragon offering of this vehicle, I be watching your progress faithfully.

Cheers,
Jan
PantherF
Visit this Community
Indiana, United States
Joined: June 10, 2005
KitMaker: 6,188 posts
Armorama: 5,960 posts
Posted: Monday, April 15, 2013 - 11:40 AM UTC

Quoted Text


You must have the patience of a saint Jeff- white glue is strong when it dries but it does take a really looooonnnng time to dry


Thanks Pat. I did eventually grow out of the asthma.

And yes, I am no longer a saint.


Matthew... I use an odor-free cement right now called Ambroid Pro Weld and it's pretty darn good.


~ Jeff
firstcircle
Visit this Community
England - South East, United Kingdom
Joined: November 19, 2008
KitMaker: 2,249 posts
Armorama: 2,007 posts
Posted: Tuesday, April 16, 2013 - 10:43 AM UTC
Cheers for the interest guys. Some more glue was needed for this little part, arrowed, otherwise it was going to fall out and disappear:

Notice now I also have the second row of wheels on correctly, unlike in the previous photo of them (good thing I'm not using glue on them then...)
Step 3 is fitting the tracks, which are quite stiff black styrene:

Notice the holes in the tracks that mean they can only go on one way - so make sure you start off the right way! The holes engage with the pins on the wheels.


To hold the bottom run in place while it was bent around the sprocket, I added this outer wheel:


The tracks should then meet up with the holes over the pins:

They join up OK, with the track curving around the idler tightly without much problem - at first I was afraid of them snapping so applied a little heat from a heat gun, (only melted it a little, honest ) but on the second run I just bent it and it was fine. Harder was the sprockets; I assumed as the sprocket halves had a locating pin that the teeth were aligned, and hadn't bothered checking even, but they aren't quite. Also, as is common with tiny teeth and tracks, locating the teeth in the holes is quite hard, so I superglued them in place as I bent it around, as can be seen in this photo:


Outer wheels in place, ensuring the track holes engage with the wheel pins:

The end of step 3, the only glue in this step being that used to seat the tracks on to the sprocket teeth:

That looks OK doesn't it, and was easier and neater than the big stiff rubbery tracks that Airfix used on their recent King Tiger.
jon_a_its
Visit this Community
England - East Midlands, United Kingdom
Joined: April 29, 2004
KitMaker: 1,336 posts
Armorama: 1,137 posts
Posted: Tuesday, April 16, 2013 - 11:19 PM UTC
Ingenious tracks!
tread_geek
Visit this Community
Ontario, Canada
Joined: March 23, 2008
KitMaker: 2,847 posts
Armorama: 2,667 posts
Posted: Wednesday, April 17, 2013 - 03:27 AM UTC

Quoted Text

Ingenious tracks!


I couldn't agree more! The thoughtfulness and ingenuity that went into that suspension is truly remarkable.

Matthew,

The one thing that I foresee is that this suspension is going to be the dickens to paint! As Peter mentions in his review, painting before assembly could lead to some inconvenient fit issues. Having built two Pegasus "snap together" kits and from what I see already of this kit, there is some remarkable engineering taking place. I think it would be fair to say that while most of the kit might snap together, there will always be the need for judicious use of glue here and there. Having built and reviewed the recent Dragon Panther 'D' offering, this Zvezda kit is comparable if not in several ways superior.

Cheers,
Jan
spacewolfdad
Visit this Community
England - West Midlands, United Kingdom
Joined: May 23, 2010
KitMaker: 642 posts
Armorama: 593 posts
Posted: Wednesday, April 17, 2013 - 11:02 PM UTC
Hi Matthew,

With regard to the tracks not only do they go on well they look really well detailed, I shall be getting one of these to build.

All the best,

Paul
weathering_one
Visit this Community
Ontario, Canada
Joined: April 04, 2009
KitMaker: 458 posts
Armorama: 456 posts
Posted: Thursday, April 18, 2013 - 04:14 AM UTC
Beautiful SBS and this looks like a kit that I'd like to try (if I can find one in my area). Thanks for posting this.


Regards,
AJ
PanzerAlexander
Visit this Community
Attica, Greece / Ελλάδα
Joined: February 17, 2010
KitMaker: 625 posts
Armorama: 608 posts
Posted: Thursday, April 18, 2013 - 08:52 AM UTC
Simple yet extremely effective way to make the track sag.

Bravo to Zvezda.
firstcircle
Visit this Community
England - South East, United Kingdom
Joined: November 19, 2008
KitMaker: 2,249 posts
Armorama: 2,007 posts
Posted: Monday, April 22, 2013 - 09:23 AM UTC
With the tracks done it moves to step 4:

Fitting the periscopes, no glue needed, just perfect alignment and a firm hold from the semi-circular locating holes:

From step 5, moving around now as the tools will be done later:

Same goes for the headlamps, then the barrel clamp and the gun cleaning rod stowage tube, all without glue:

Step 6 / 7:

This internal plate goes between the hull upper and lower; it carries the side armour, and also the rear lamp, a bit precariously and delicately moulded on to the plate. The arrow shows where one of the locating pins was missing for the part that has the fans that sit underneath the circular vents on the rear deck.

Fitting the one piece exhaust unit to the rear plate:

A perfect fit with no glue, and no gap, just slightly enlarged the holes in the ends of the tubes:

A little glue was run around the back plate, not necessary to hold it in place, but to fill the slight gap that is apparent.

Steps 9 / 10:

Gun is in three parts, this just wedges together firmly. A bit of clean up to be done on the side of the inner mantlet, and drilling out and cleaning up the muzzle brake:


The internal plate that holds turret to hull slots firmly in with no cleaning up necessary:

These two holes are for the smoke grenade tubes:

The detail on them, as usual for a 1/72 kit, isn’t great, and after consulting several books I found that most photos of Panthers, including Ausf D, showed these not fitted. So I cut the tubes off their mounts and slotted the mounts into the holes to fill in the gap, and I think this really demonstrates just how well this kit fits together – see how well the mounts fill the holes. All I had to do was sand it back flush with the turret:

There we also see the cupola and hatch fitted, as well as the turret lifting rings – none of them needed glue. The instructions show the hatch fitting rotated through 90˚, but the way the locating pins are configured means it can only be fitted correctly.


firstcircle
Visit this Community
England - South East, United Kingdom
Joined: November 19, 2008
KitMaker: 2,249 posts
Armorama: 2,007 posts
Posted: Monday, April 22, 2013 - 09:41 AM UTC
A bit more… I noticed something odd about the hull top, a crack that runs right through from the turret ring almost to the edge. I’m sure it’s not from an impact, but looks more like a moulding defect; however it is so fine that I don’t think it will show once painted. Notice the extra reflection coming from the edges of the fissure, I think that might be oil:

And on the edge (and it goes through to the under side as well):

Anyway, the sandwich filling and the top slice of bread…

…fit together with the fans perfectly aligned under the holes in the rear engine deck:

Now it takes on the characteristic look of the Panther:

So I need to go and prepare all of the tools next then get ready for painting.
erhntly
Visit this Community
Izmir, Turkey / Türkçe
Joined: June 11, 2004
KitMaker: 1,426 posts
Armorama: 464 posts
Posted: Monday, April 22, 2013 - 11:15 AM UTC
Hi Matthew ,

I want this kit. Go ahead, please, I'm waiting ..
firstcircle
Visit this Community
England - South East, United Kingdom
Joined: November 19, 2008
KitMaker: 2,249 posts
Armorama: 2,007 posts
Posted: Friday, April 26, 2013 - 10:40 AM UTC

Quoted Text

I want this kit. Go ahead, please, I'm waiting ..


If you like the look of this Erhan, you might like the sound of these other planned Zvezda releases in the same series: Iosef Stalin-2; T-90; King Tiger Ausf B; ISU-152; Topol Mobile Missile (that one looks like it will be big).
So getting the tools and details together… having had a few of these thin types of items snap before I tried to do most of the clean up with the parts still on the sprues, cutting the surrounding empty sprue to give better access:


I said I was doing that before going to the paint shop, but then this arrived from Ebay:


Why keep things simple just when construction was almost finished? Having used almost no glue on the model now reveals another advantage – it can be taken apart again with very little difficulty. Cupola and hatch component pulls off the turret, here it is shown next to the replacement item:

Nothing really wrong with the Zvezda item apart from it is one piece so can’t be modelled open. The turret is designed with the single locating socket for the turret base right underneath the cupola, so that needs to be removed:


There’s also the turret back plate, again the Black Dog part allows the rear hatch to be modelled open and improves the detail a little by adding the rain strip around the top of the pistol port to the left of the hatch. So the back of the turret is cut out by snipping down the sides with sprue cutters (carefully, without splitting the plastic too far near the turret roof) and drilling across the top. The aperture is then filed back; the right profile needs to be achieved to enable the new part to fit properly, to provide the right appearance of the square cut edges of the turret side plates that curve around to the rear, and to get the plate to sit square at the base:


Bits of the turret base were cut away to ensure some space underneath the now open turret hatches, and now glue is necessary to attach the new rear plate:

Now the new cupola is glued on too:

The Black Dog commander’s hatch is appropriately thin in profile, but when it came away from the resin block it lost a little piece of that edge; also it has a kind of chamfered edge, which a photo I have suggested is incorrect, and the hatch should really just be a flat, square-edged sheet; not only that, but I think the detail on the Zvezda hatch is better. So I cut away the bulk of the cupola with the sprue cutters, then trimmed with a knife, then filed and sanded it down until it was just the hatch lid:

Another Black Dog resin piece is the side tool box, as seen on some photos of these Ausf Ds. Black Dog’s instructions show it going right at the rear end of the side plate, while photos I found show it in the middle, between the jack block and the spare track links, so, temporarily adding the spare links to get the positioning right, this was attached here.


Also in the above photo is the first of the Black Dog mesh screens being test fitted; although designed for the Dragon Panther, thankfully, the dimensions here are exactly the same and the fit is perfect:

tread_geek
Visit this Community
Ontario, Canada
Joined: March 23, 2008
KitMaker: 2,847 posts
Armorama: 2,667 posts
Posted: Saturday, April 27, 2013 - 05:26 AM UTC
Matthew,

This is definitely a symptom of Justcantleaveitaloneitis and the beginning stage of this insidious and chromic infection! The causes are numerous but it's usually associated with handling too much styrene and inhalation of adhesive vapours. You have been warned!

I fear that while the option for an open hatch in the rear and cupola are enticing, this means that some form of rudimentary interior may need to be fashioned. I must say that you've done a splendid job at getting that rear turret plate to fit well and I can appreciate that it must have taken some time to get right.

Does the left side turret loading hatch with this kit have a rain bead? On the Dragon version that was the only port that did not and I had to construct one from Evergreen .020" pre-shaped hex rod.


With all the trouble that you are now going through, will you be substituting brass wire handles for the moulded on ones on drivers and co-drivers hatches? What about the handles over the engine compartment? You see what a "can of worms" you have opened?

Cheers,
Jan
CMOT
Staff MemberEditor-in-Chief
ARMORAMA
Visit this Community
England - South West, United Kingdom
Joined: May 14, 2006
KitMaker: 10,954 posts
Armorama: 8,571 posts
Posted: Saturday, April 27, 2013 - 06:26 AM UTC
Matt the crack looks like a flow line in the plastic but the two sides never joined.
something odd about the suspension; why go the route of indivdual swing arms and then supply the wheels as a single moulding, that makes no sne to me.

Regardless nice work Matt
firstcircle
Visit this Community
England - South East, United Kingdom
Joined: November 19, 2008
KitMaker: 2,249 posts
Armorama: 2,007 posts
Posted: Tuesday, April 30, 2013 - 07:56 AM UTC

Quoted Text

Justcantleaveitaloneitis … usually associated with handling too much styrene and inhalation of adhesive vapours.


Jan, indeed, I did tell you that right at the start of this blog… it was that big “City Building” that did it, all that dichloromethane.

Quoted Text

I fear that while the option for an open hatch in the rear and cupola are enticing, this means that some form of rudimentary interior may need to be fashioned.


No way; I’m planning to avoid that by plugging the open hatches with figures. I already had some 1/76 Dan Taylor figures, but am thinking that they might just exaggerate the large proportions of the Panther a bit too much, and therefore they may be reserved for that Airfix KT, but I shall see. Just in case I have some 1/72 Caesar figures on order, not sure what they’ll be like, they’re quite cheap. I saw some of their Romans once, and they looked quite nice.

Quoted Text

I must say that you've done a splendid job at getting that rear turret plate to fit well and I can appreciate that it must have taken some time to get right.


Thanks, in fact not quite as long as it seems to be taking to get the rear hatch attached at a suitable angle – it opens out in a slightly unexpected kind of way:


Quoted Text

Does the left side turret loading hatch with this kit have a rain bead? On the Dragon version that was the only port that did not and I had to construct one from Evergreen .020" pre-shaped hex rod.


Likewise, no it doesn’t. Thanks for pointing this out  I made mine from a strip of left over brass, looks a bit wonky in this 5x mag photo…

Quoted Text

something odd about the suspension; why go the route of individual swing arms and then supply the wheels as a single moulding


Darren, I suppose it means you still get a better view looking at the suspension from the front and back – and also you can do this

firstcircle
Visit this Community
England - South East, United Kingdom
Joined: November 19, 2008
KitMaker: 2,249 posts
Armorama: 2,007 posts
Posted: Thursday, May 02, 2013 - 09:56 AM UTC
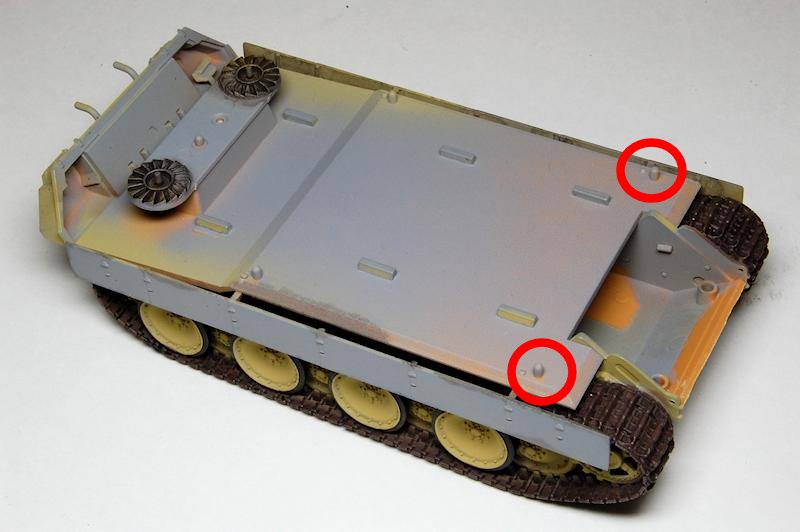
So, a bit more progress: the front most screens go straight on and fit perfectly. The rear two rectangular screens need a bit of work to the plastic before they will fit flush, the pips in each corner plus the ridge on the outside of each (examples ringed below) need to be removed.

Back to the turret and the fitting of that rear hatch: the bracket that it swings out on is too delicate to actually take the weight of the hatch so it needs to be cemented to the rear of the turret, then the bracket attached to the hatch. Once that glue was set, the bracket was carefully bent round until it could attach to the internal hinge.

Now the commander’s hatch is attached, pivoted round to the side, and the grab handle over the rear hatch is added as well. All the lifting rings then went back in, as well as the mantlet and gun:

The Caesar figures arrived, and look very nice, great poses and nice sculpting. I’ll let them have a play on the tank soon to see who might get a role.
robertkru
Visit this Community
Austria
Joined: August 31, 2010
KitMaker: 28 posts
Armorama: 26 posts
Posted: Thursday, May 02, 2013 - 11:30 PM UTC
Hi Matthew
You made a nice build and the aftermarket parts are a good idea. But something is wrong with cupola. I guess the lowest diameter is just a location pin for Dragons Panther D and the cupola should sit lower. check your references.
Regards from Vienna
Robert
firstcircle
Visit this Community
England - South East, United Kingdom
Joined: November 19, 2008
KitMaker: 2,249 posts
Armorama: 2,007 posts
Posted: Thursday, May 02, 2013 - 11:48 PM UTC
Robert, yes, you're right - it should sit on the widest point. Thanks for pointing this out, I'm glad someone is paying attention... Thankfully CA glue has little shear strength so it should come off easily enough.
Braille
#135
Visit this Community
California, United States
Joined: August 05, 2007
KitMaker: 1,501 posts
Armorama: 1,485 posts
Posted: Sunday, May 05, 2013 - 10:49 AM UTC
@firstcircle – Matthew,

You have a first rate build log going here, easy to understand and well explained step-by-step assembly, pointing out issues and supplying a remedy, plenty of reference pictures and great close up photographs, you’ve even managed to include the kits instructions providing both a clear picture of the suggested assembly steps and allowing the viewer to see exactly what area(s) of the model you are addressing.

It’s interesting to me in that this kit requires no glue or very little of it and the detail rivals that of its contenders! The parts engineering appears to be well thought out so that a novice modeler could easily put this kit together without much effort and come out with a pleasing outcome! And as noted a more experienced modeler could easily go back and disassemble areas of the kit to update it with improved aftermarket items or for painting.

Well, you have my attention so I’m going to keep following your blog to see what you have in store for the rest of this build and to see the figure(s) you mentioned and what role they will play on the Panther?


Quoted Text

Robert, yes, you're right - it should sit on the widest point. Thanks for pointing this out, I'm glad someone is paying attention... Thankfully CA glue has little shear strength so it should come off easily enough.


Matthew, in case you didn’t already know, you could place a small drop of super glue on a fresh piece of wax paper and it will last you one modeling session, by mixing in talcum powder you’ll effectively add tensile strength to the glue.

~ Eddy
firstcircle
Visit this Community
England - South East, United Kingdom
Joined: November 19, 2008
KitMaker: 2,249 posts
Armorama: 2,007 posts
Posted: Thursday, May 16, 2013 - 11:08 AM UTC
Well, I have fixed the turret, but haven't taken a photo of that yet, for some reason... but have made progress elsewhere.
Thanks for the comments Eddie, in some ways this is a kind of "addendum" to Peter's review (which incidentally I see is right up at the number 2 most read spot currently - wow!) and is intended to show the build stages.
I am familiar with the wax paper and CA glue combo - I have had a few bags of pine sweets from France (Croix Bleu) which are wrapped in the perfect paper for this. Very bad for the teeth though.

I have that Osprey Kursk book which has a painting that I like, based on a couple of photos, and although it is of a PzKpfwIV, I am planning something similar, though with just a couple of figures I think. One of those photos:


So, the issue is how to paint the tracks without getting into difficulties around the skirts which are attached to the filling in that hull sandwich. I found that Mig Jimenez addresses the issue of painting tracks in situ in the original FAQ book, so I followed his advice, although with the top of the hull off. After priming, first paint the hull lower sides and the wheels with the base colour:

Then mask off the wheels and the hull:

Spray the tracks matt browny-grey:

Apply a dark wash to the parts of the tracks that may be visible:

Paint the tyres - I only did the outer wheels, and I suspect Mig did the same, though his photos don't quite show it. The inner tyres are thinner than the outer ones, and would be extremely hard to paint well using this method. I figure that a dark wash on the wheels and then the application of the mud bath will mean it won't matter, and that's not far from what seems to have been done to Mig's 1/35 Panther too:

Now I added the middle layer which has the engine fans and the side skirts. This went on OK, nice and close fitting. I cut the front nose locating pins off (ringed below) to ensure they didn't create any sort of gap on that most visible of joins right at the front, when the top went on.

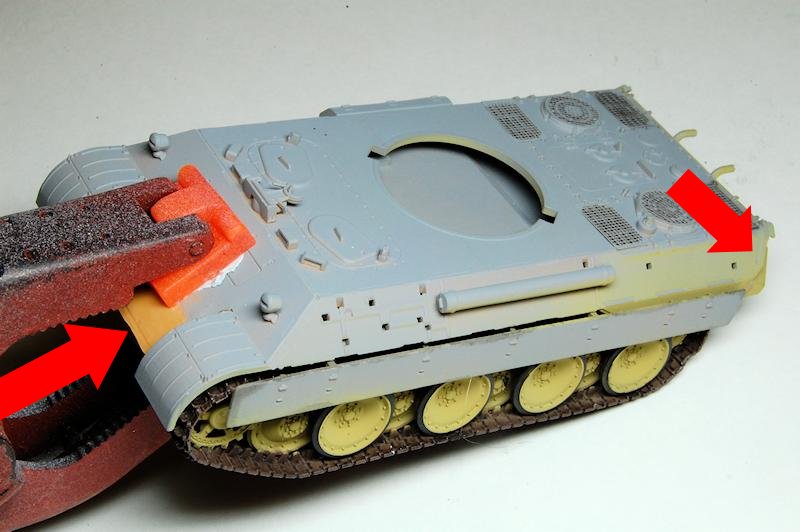
When the top was added care needed to be taken to fit the fronts of the track guards in with the towing eyes that are part of the hull sides. The fit right at the back on the side (arrowed below) needed a little glue to ensure a close fit. I had removed the front upper locating pins as the fit of the top of the hull was quite stiff and I wanted to be sure it would locate down enough without being forced so hard that I would risk breaking something. Of course the nose needed glue (also arrowed below) - I think this is one join you really couldn't get away with leaving unglued:
Braille
#135
Visit this Community
California, United States
Joined: August 05, 2007
KitMaker: 1,501 posts
Armorama: 1,485 posts
Posted: Thursday, May 16, 2013 - 12:51 PM UTC
@firstcircle – Matthew,

Your making good progress on this build with the lower portion of the tank and running gear already painted. I do have some questions; ‘Were the outer road wheels, on each track run, glued in place?’ ‘Could those road wheels have been removed allowing access to the inner road wheels for detail painting?

Because I haven’t been painting much I am not familiar with the matt brown-gray color you used for the tracks, what brand of paint did you use? Did you mix your own color? With the dark wash applied over this color it looks quite attractive and appropriate and brings out the wealth of detail on these tracks, plus they appear to scale too!

Matthew, I had been looking at a similar set of plastic molded modeling clamps, like the one shown holding the upper and lower hull together in your last picture of your last update, but have shied away from purchasing them because of the potential of marring detail on the kit surface. I see you are using something sandwiched between the clamps floating contact pad and the kit surface, what is it? Good idea!

~ Eddy
 _GOTOTOP