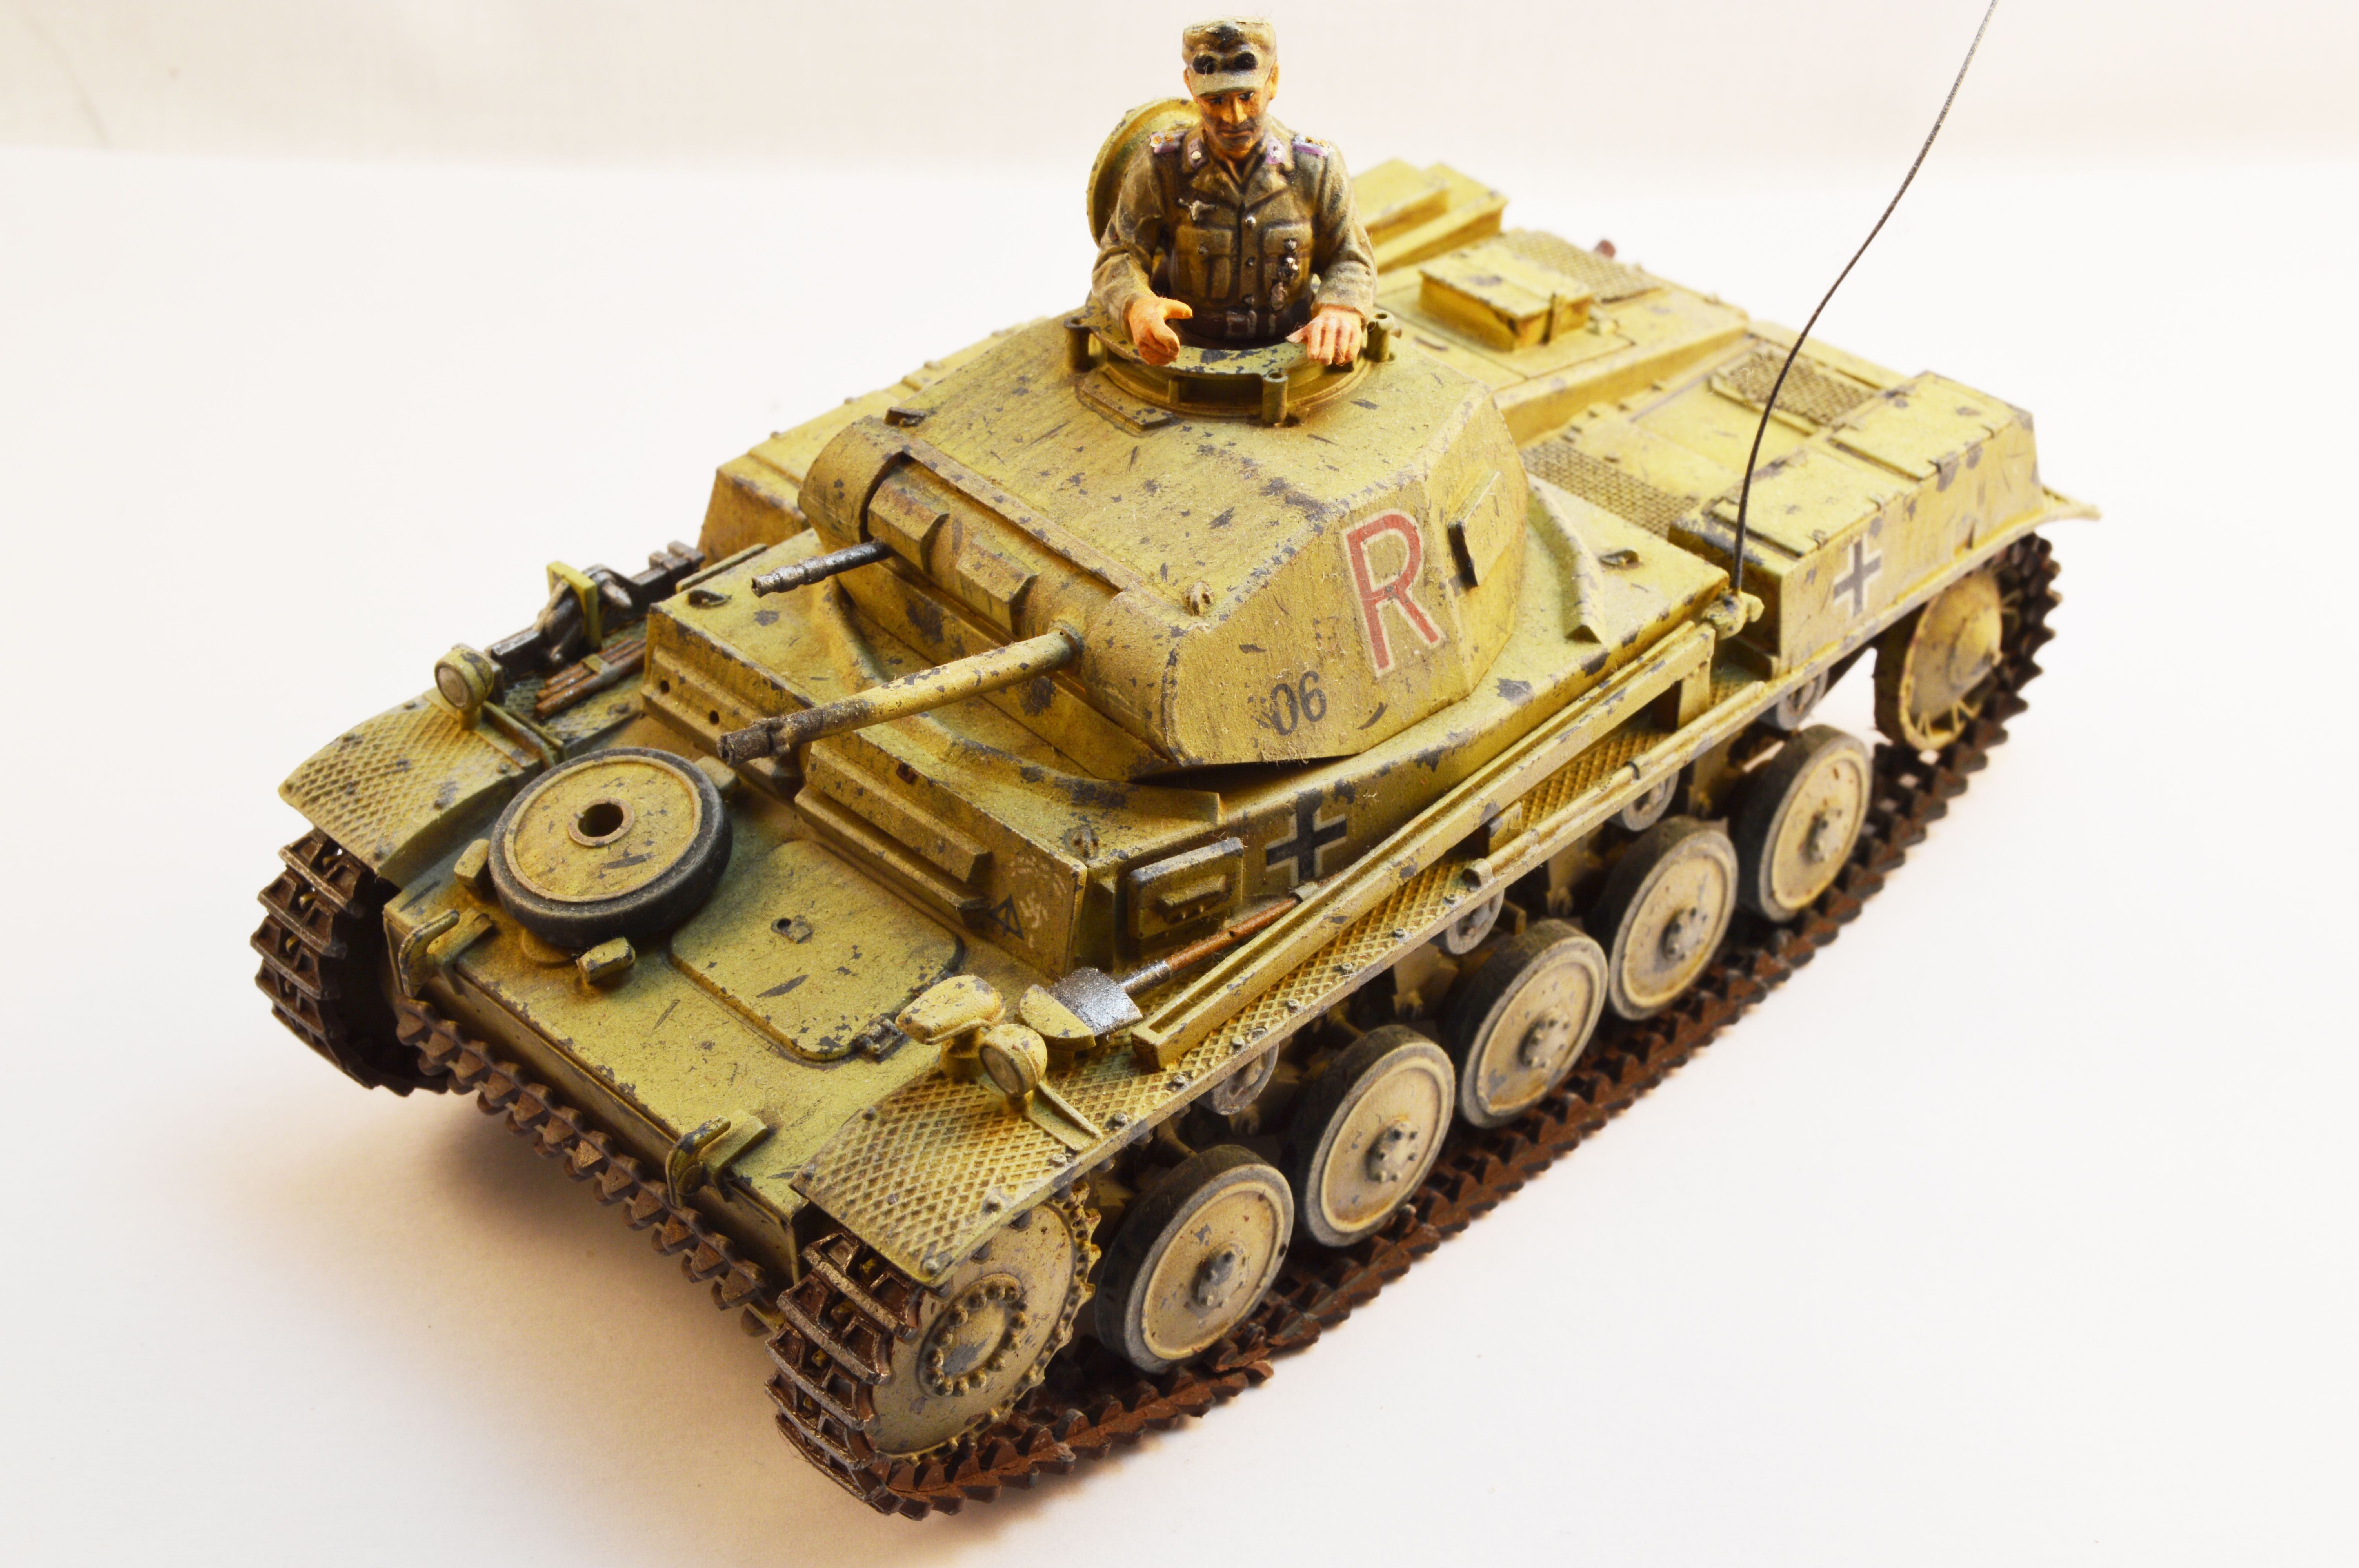
My 1/35 Tamiya Pz2
Constructive Feedback
For in-progress or completed build photos. Give and get contructive feedback!
Hosted by Darren Baker, Dave O'Meara
Panzer 2
gerrysmodels
Scotland, United Kingdom
Joined: September 13, 2012
KitMaker: 441 posts
Armorama: 429 posts
Joined: September 13, 2012
KitMaker: 441 posts
Armorama: 429 posts
Posted: Sunday, September 01, 2013 - 09:05 AM UTC
Tojo72
North Carolina, United States
Joined: June 06, 2006
KitMaker: 4,691 posts
Armorama: 3,509 posts
Joined: June 06, 2006
KitMaker: 4,691 posts
Armorama: 3,509 posts
Posted: Sunday, September 01, 2013 - 12:27 PM UTC
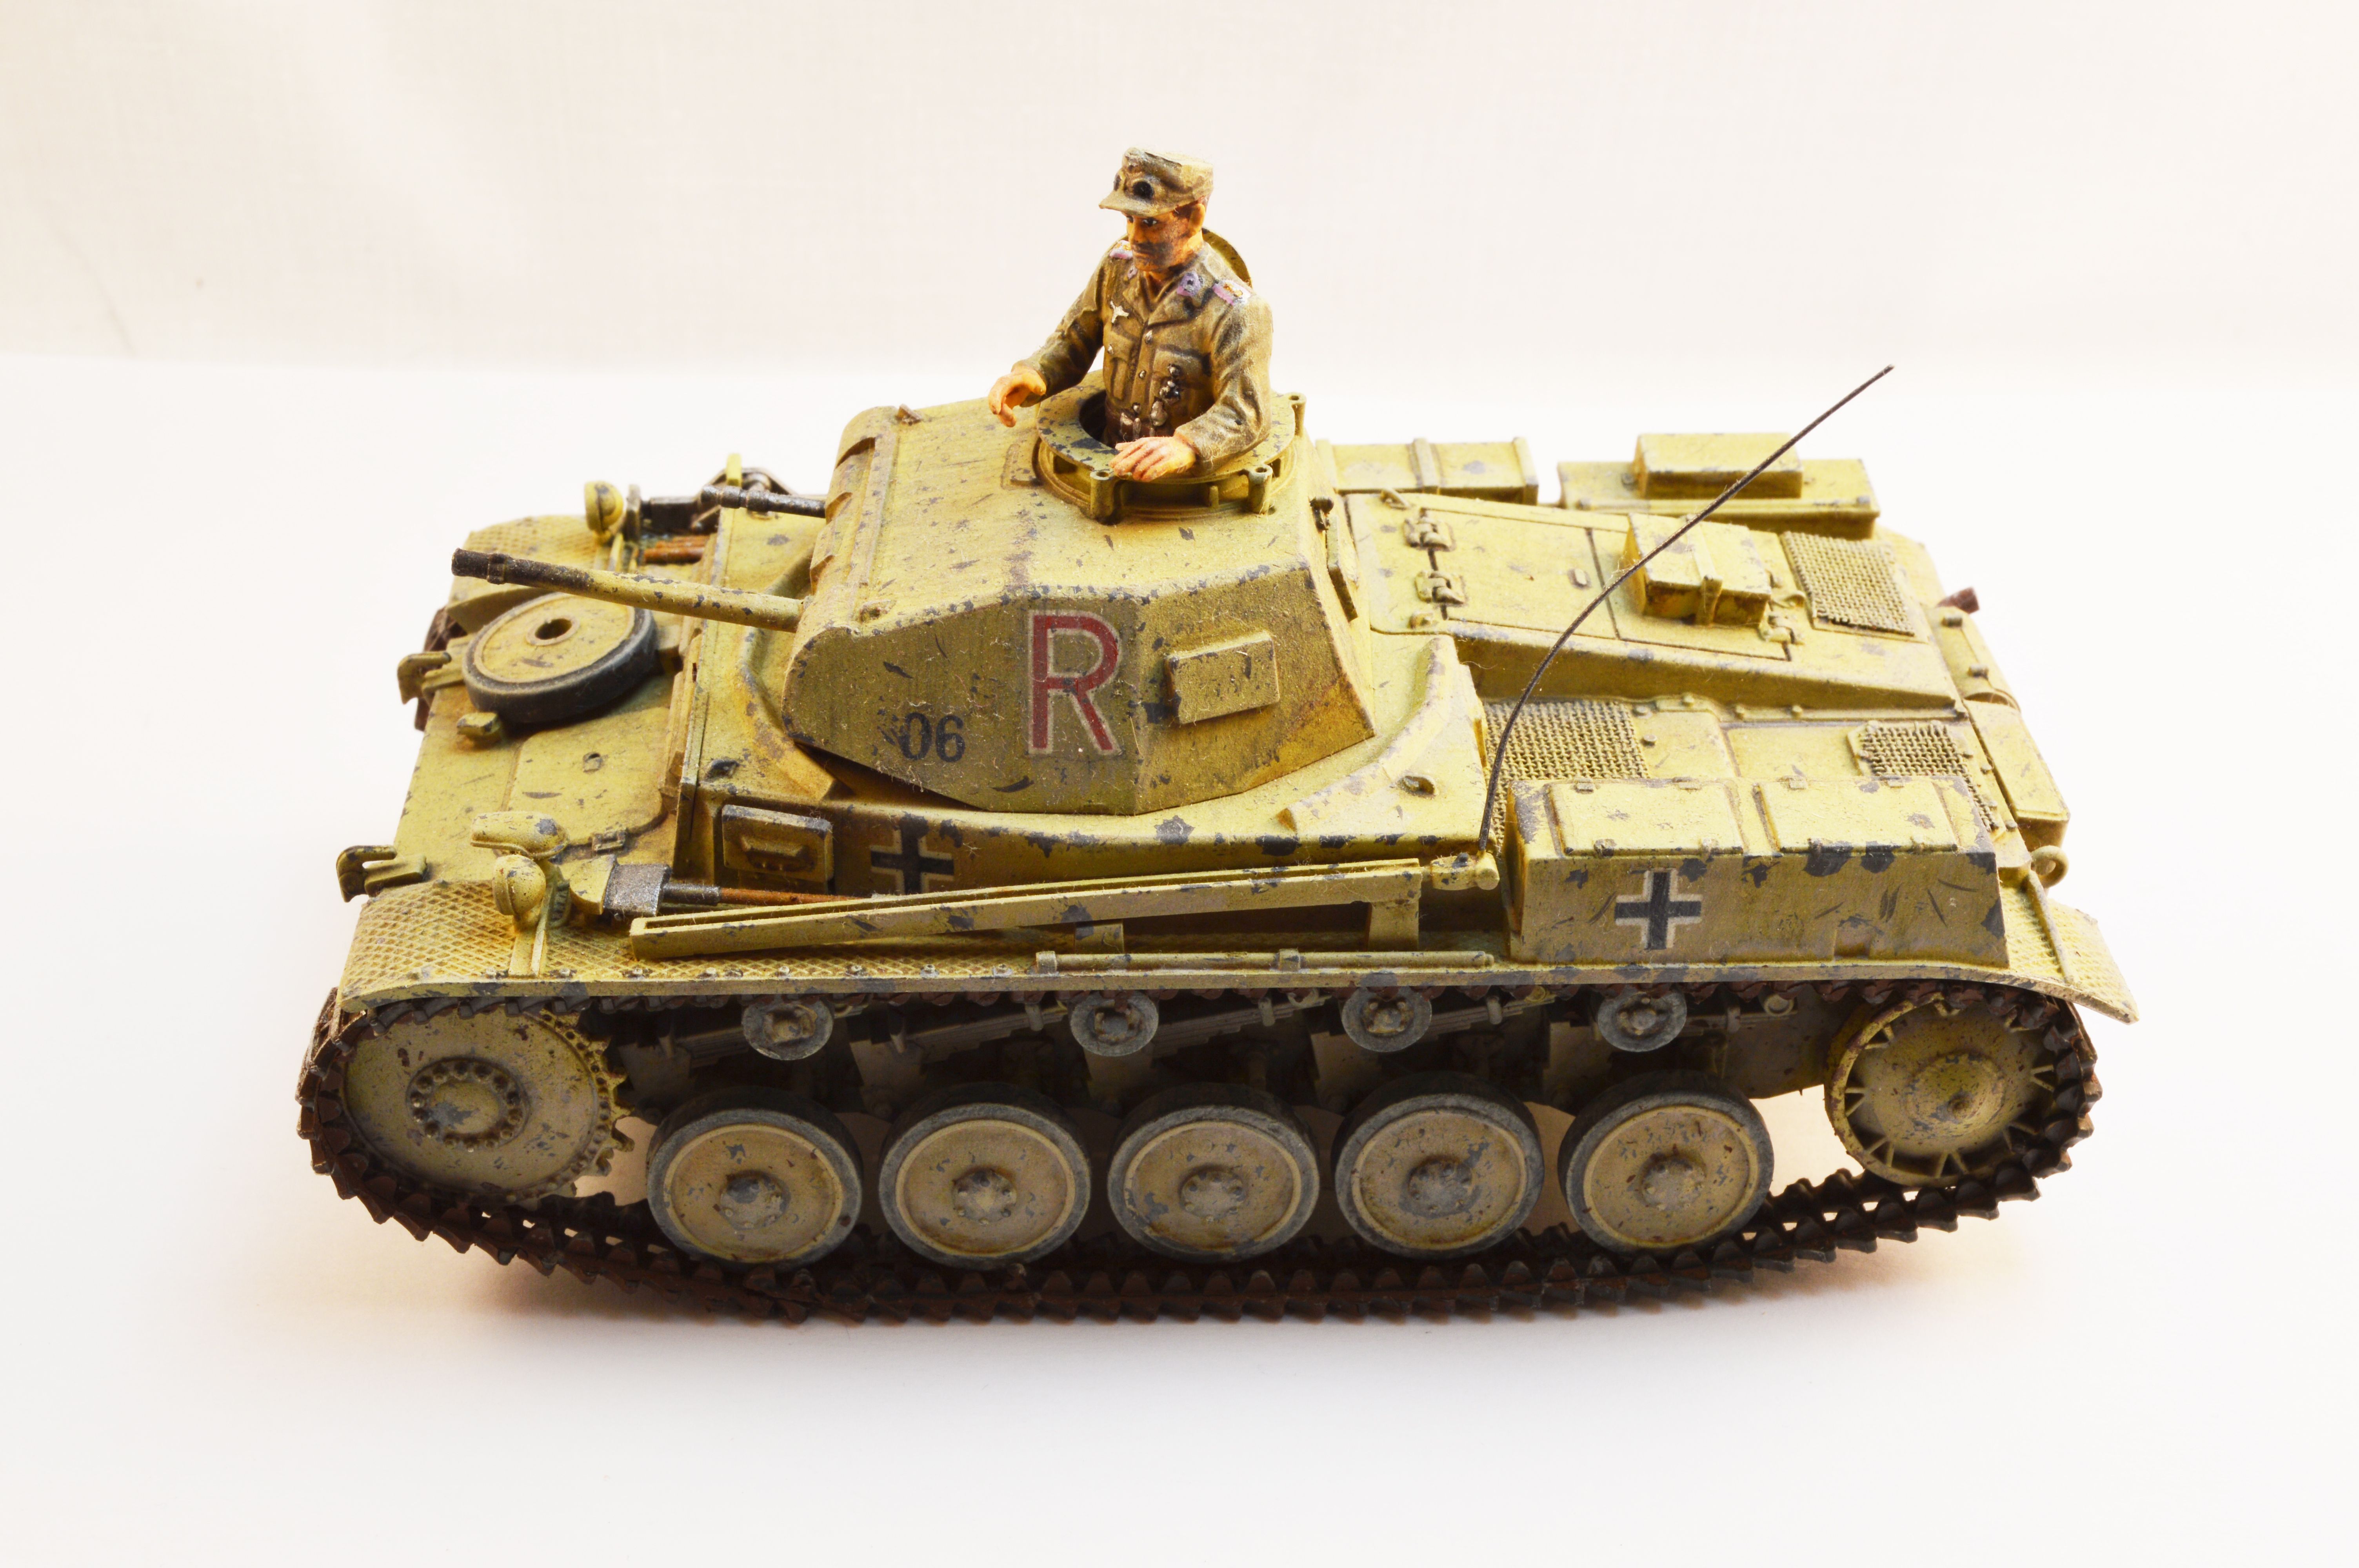
Your chipping is really well done,realistic looking.
I think I read that German antennas are stiff,that they don't bend like that,small matter I'm not sure about,perhaps someone knows for sure.
But no matter a great job
I think I read that German antennas are stiff,that they don't bend like that,small matter I'm not sure about,perhaps someone knows for sure.
But no matter a great job
gerrysmodels
Scotland, United Kingdom
Joined: September 13, 2012
KitMaker: 441 posts
Armorama: 429 posts
Joined: September 13, 2012
KitMaker: 441 posts
Armorama: 429 posts
Posted: Sunday, September 01, 2013 - 02:29 PM UTC
Quoted Text
Your chipping is really well done,realistic looking.
I think I read that German antennas are stiff,that they don't bend like that,small matter I'm not sure about,perhaps someone knows for sure.
But no matter a great job
Anthony
Thans for looking and taking the time to reply.
I was not aware about this info on the German radio ariels fitted to their armour. Thanks for that tip.
Cheers
Gerry
Posted: Sunday, September 01, 2013 - 10:58 PM UTC
Hi Gerry. When I look at this model, I see two areas that you should consider for future models, and will make a huge difference, in my humble opinion.
The desert sand colour is very monotone as it is. A scale model cannot reflect light and cannot cast shadows like the 1/1 version. There are many artistic methods to imply this like washes/drybrushing, pre and/or post shading, colour modulation, etc. As well as immitating the natural colouring we see, it also helps details stand out and adds interest to the model.
There are many schools of thought when it comes to chipping, and "to do or not to do" is not of interest here as we all have diferent opinions. But one thing is for sure, when chipping, some thought should go into where one should chip. In your model the turret appears to be as chipped (if not more) than the hull and lower hull. The chipping should get gradually lighter as the eye travels up the model. Of course there are areas on the uppermost details that can get very worn, but these are specific and not as random as shown here.
Both of these comments are meant constructively .. hopefully you can accept them as that. I see your results getting better model after model. With a little more "love", you can easily go up a few levels in finish qualty.
AFVFan
North Carolina, United States
Joined: May 17, 2012
KitMaker: 1,980 posts
Armorama: 1,571 posts
Joined: May 17, 2012
KitMaker: 1,980 posts
Armorama: 1,571 posts
Posted: Monday, September 02, 2013 - 05:46 AM UTC
Quoted Text
Thans for looking and taking the time to reply.
I was not aware about this info on the German radio ariels fitted to their armour. Thanks for that tip.
Cheers
Gerry
Gerry, the antenna is bendable to allow the turret to traverse, but should spring back to straight, as Anthony pointed out. What he didn't bring up is the fact that you show the antenna mounted to the antenna that's in the stored position. You can have it one way or the other, but you can't have both. In light of that, you may want to think about just removing the standing one.
Frank brings up a couple of good points for future thought. I'll add a couple more detail oriented things that may help you out on future builds. First, pick up a small pin vise (finger drill) and a set of bits going down to a #80. Use these to drill out your exhaust pipes and gun barrels (this could still be easily done to this one). The other thing is that most vehicles that have seen usage would show some damage to the rubber on the road wheels (generally small bits of rubber chipped off). This is easy to simulate with a razor knife.
Overall, a pretty nice job. Great job on the figure. I look forward to seeing some more of your work in the future.