Australian Capital Territory, Australia
Joined: March 27, 2008
KitMaker: 546 posts
Armorama: 541 posts
Posted: Tuesday, December 31, 2013 - 10:14 AM UTC
After some consideration - about ten year's worth - I've commenced a double scratchbuilding project: 1/16 Long Range Patrol Vehicle (LRPV) and Surveillance Reconnaissance Vehicle - Special Forces (SRV-SF).
The LRPV can be seen here:
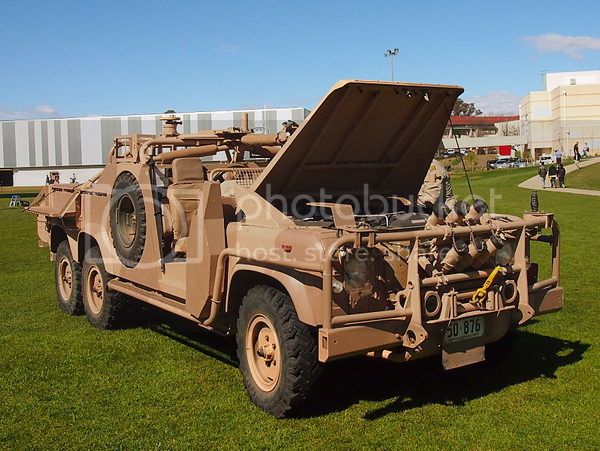
(Photo credit: Wikipedia commons, posted under fair use guidelines)
Both of these truck were use by the Australian Army in Afghanistan, more specifically by the Special Operations Task Group (SOTG), itself drawn from Special Operations Command (SOCOMD).
Wish me luck!
Greg
Maki
 Senior Editor
Croatia Hrvatska
Joined: February 13, 2002
KitMaker: 5,579 posts
Armorama: 2,988 posts
Posted: Tuesday, December 31, 2013 - 10:03 PM UTC
Good luck and don't forget to post some photos of your build!
Mario
Queensland, Australia
Joined: January 17, 2006
KitMaker: 752 posts
Armorama: 569 posts
Posted: Tuesday, December 31, 2013 - 11:42 PM UTC
i'll be following this.
but why 1/16? wouldn't it be easier in 1/35 or even 1/24?
Australian Capital Territory, Australia
Joined: March 27, 2008
KitMaker: 546 posts
Armorama: 541 posts
Posted: Wednesday, January 01, 2014 - 06:36 AM UTC
Quoted Text
i'll be following this.
but why 1/16? wouldn't it be easier in 1/35 or even 1/24?
Thanks guys.
I choose 1/16 as there's little chance of a kit being released in that scale. It wouldn't surprise me if a 1/35 scale kit appeared. 1/24 has the problem of sourcing weapons.
Thanks to 3D printing, wheels & tyres have been taken care of.
Greg
France
Joined: February 20, 2012
KitMaker: 1,932 posts
Armorama: 1,907 posts
Posted: Wednesday, January 01, 2014 - 06:56 AM UTC
Interesting project.
This vehicle has been replaced by Jackal and Coyote Supacat for Afghanistan.
Queensland, Australia
Joined: January 17, 2006
KitMaker: 752 posts
Armorama: 569 posts
Posted: Wednesday, January 01, 2014 - 03:04 PM UTC
Quoted Text
Interesting project.
This vehicle has been replaced by Jackal and Coyote Supacat for Afghanistan.
Don't think so tim. SOTG started using the Bushmaster. I haven't seen any info the supacats have been used by our SF in operations yet. I could be wrong though. would be good to see any pics if they have been deployed.
Australian Capital Territory, Australia
Joined: March 27, 2008
KitMaker: 546 posts
Armorama: 541 posts
Posted: Wednesday, January 01, 2014 - 08:01 PM UTC
Here's the link to the wheels on shapeways:
https://www.shapeways.com/model/1575602/1-16th-wheels-for-australian-lrpv.htmlThe CAD was done in pretty short order by Dennis Loep of Peolini Designs. I am yet to receive the order from shapeways - I'm blaming the Christmas/NY thing - but I'm seriously impressed with Dennis' skills, attitude and determination to draw a superior product. I can't recommend him highly enough.
With the wheels done, I really had no more excuses....
Australian Capital Territory, Australia
Joined: March 27, 2008
KitMaker: 546 posts
Armorama: 541 posts
Posted: Thursday, January 02, 2014 - 10:00 AM UTC
Here are some progress shots of the tray & tailgate:
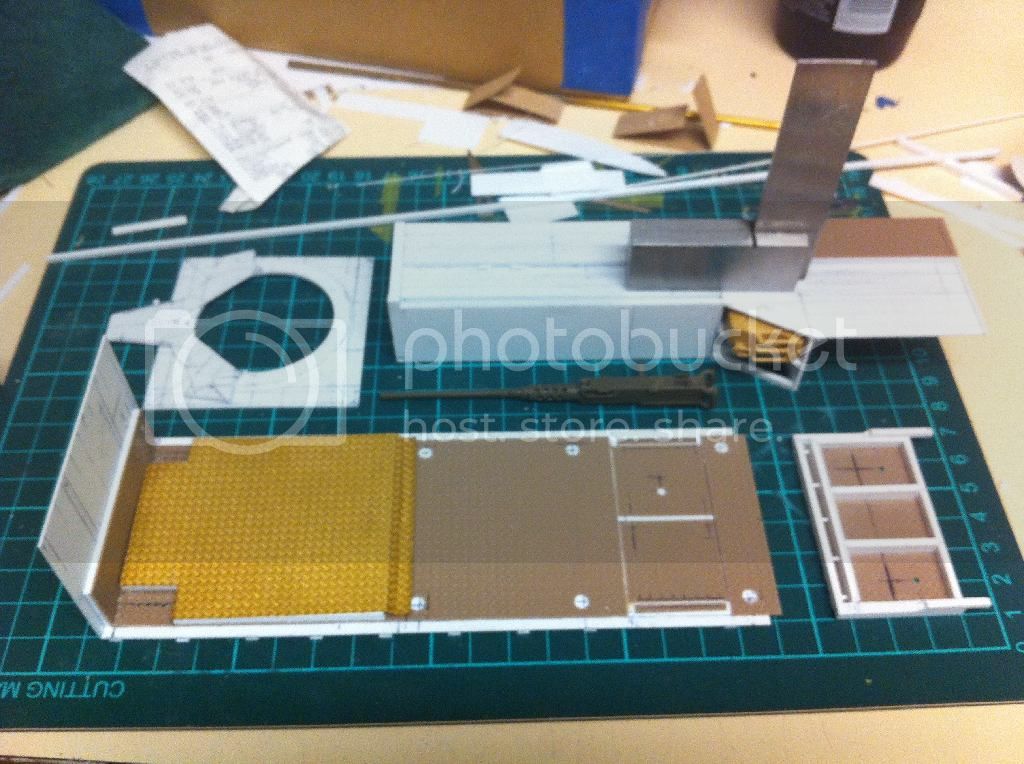
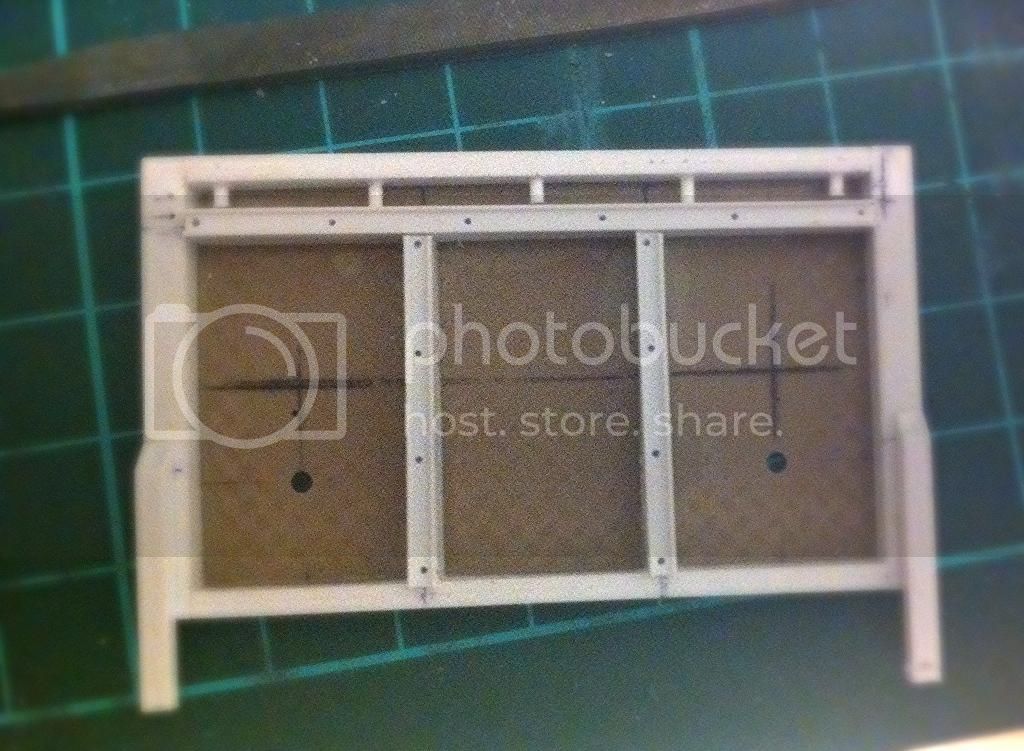
Apologies for the quality of these quick shots.
The brown styrene is single bar chequer plate by Plastruct.
Queensland, Australia
Joined: January 17, 2006
KitMaker: 752 posts
Armorama: 569 posts
Posted: Thursday, January 02, 2014 - 08:49 PM UTC
hey greg, the links don't work
Australian Capital Territory, Australia
Joined: March 27, 2008
KitMaker: 546 posts
Armorama: 541 posts
Posted: Thursday, January 02, 2014 - 09:32 PM UTC
Queensland, Australia
Joined: January 17, 2006
KitMaker: 752 posts
Armorama: 569 posts
Posted: Thursday, January 02, 2014 - 10:28 PM UTC
working now. did you do the 1/35 version that Jason miller has now?
Australian Capital Territory, Australia
Joined: March 27, 2008
KitMaker: 546 posts
Armorama: 541 posts
Posted: Thursday, January 02, 2014 - 10:32 PM UTC
Cool - glad they work.
Yep, that 1/35 one Jas Miller had was my work. This one is a bit more accurate.
Greg.
Queensland, Australia
Joined: January 17, 2006
KitMaker: 752 posts
Armorama: 569 posts
Posted: Thursday, January 02, 2014 - 10:48 PM UTC
cheers greg. that was still pretty good work!
Australian Capital Territory, Australia
Joined: March 27, 2008
KitMaker: 546 posts
Armorama: 541 posts
Posted: Friday, January 03, 2014 - 05:23 PM UTC
Started work on the spare wheel 'towers' today.
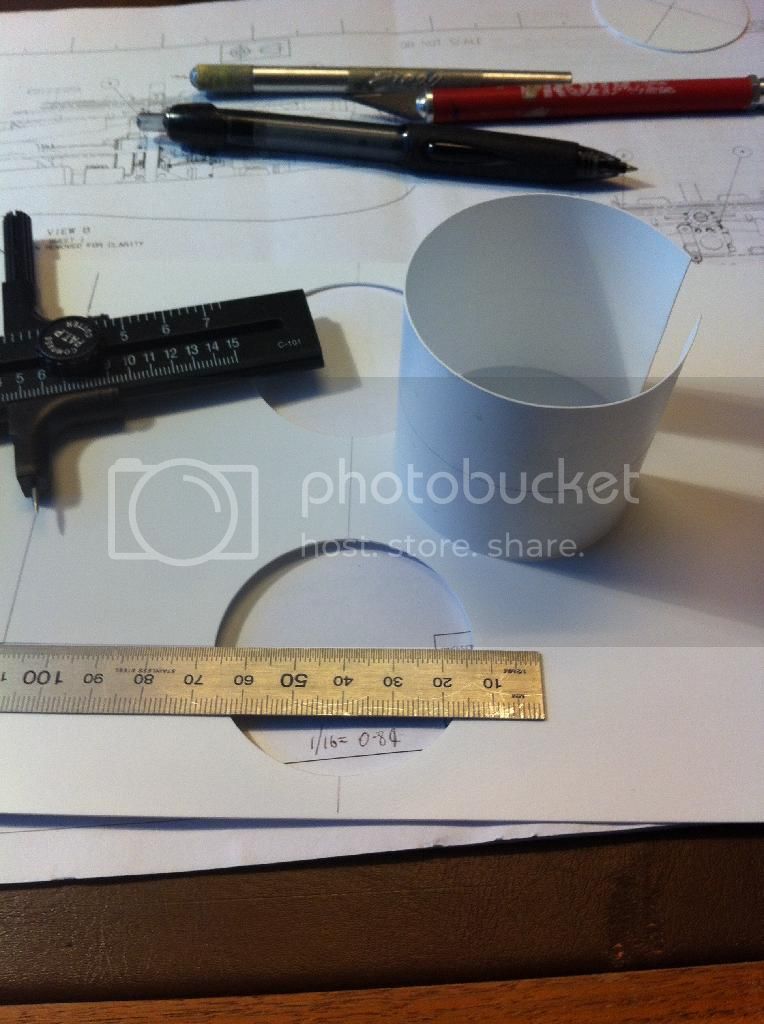
Step 1 - determine the circumference & depth of the opening.
Step 2 - cut 0.25mm thick styrene to size.
Step 3 - wrap styrene around suitable diameter object.
Step 4 - immerse in boiling water.
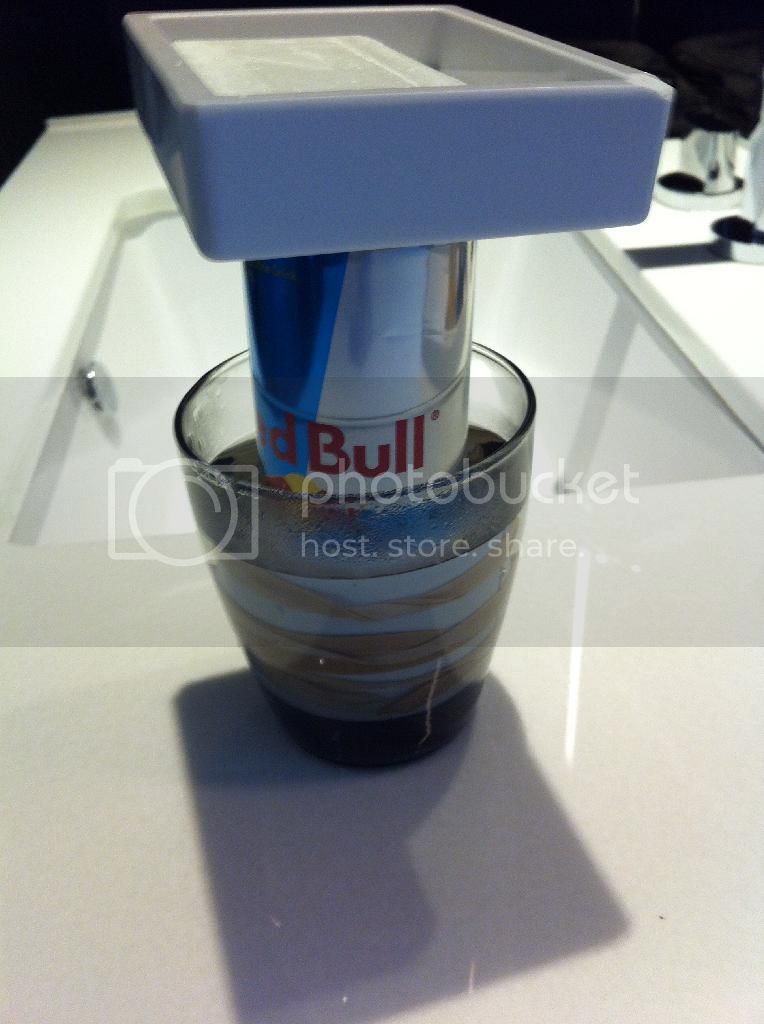
Step 5 - wait until cool....
Australian Capital Territory, Australia
Joined: March 27, 2008
KitMaker: 546 posts
Armorama: 541 posts
Posted: Friday, January 03, 2014 - 10:31 PM UTC
Once the water cooled, the plastic card was removed from the mandrel. Concurrenty, I marked & drilled out the centre-point of the inner skins of the spare wheel towers. After scribing with a compass cutter, they were snapped out.
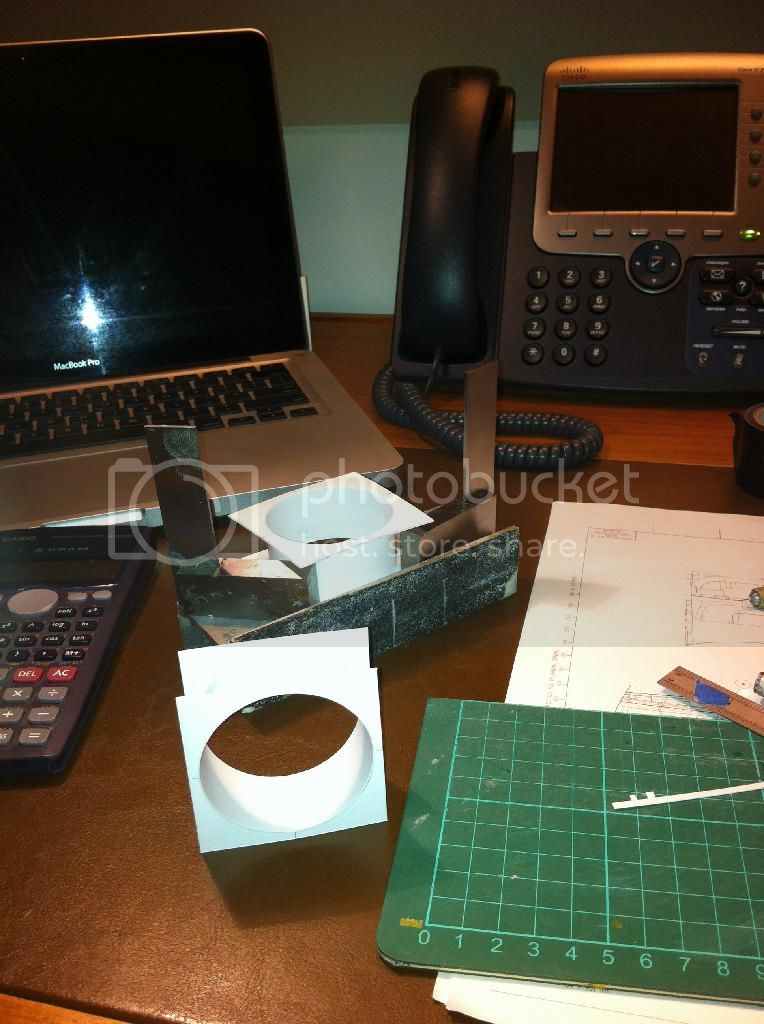
Once four holes had been cut, they were square cut from the backing sheet. The pre-curved card was taped and bookended with the tower inner skins and cemented.
Once dry, the tape was removed and the part positioned to do an initial fit check against the tray walls and the sponson stowage bins.
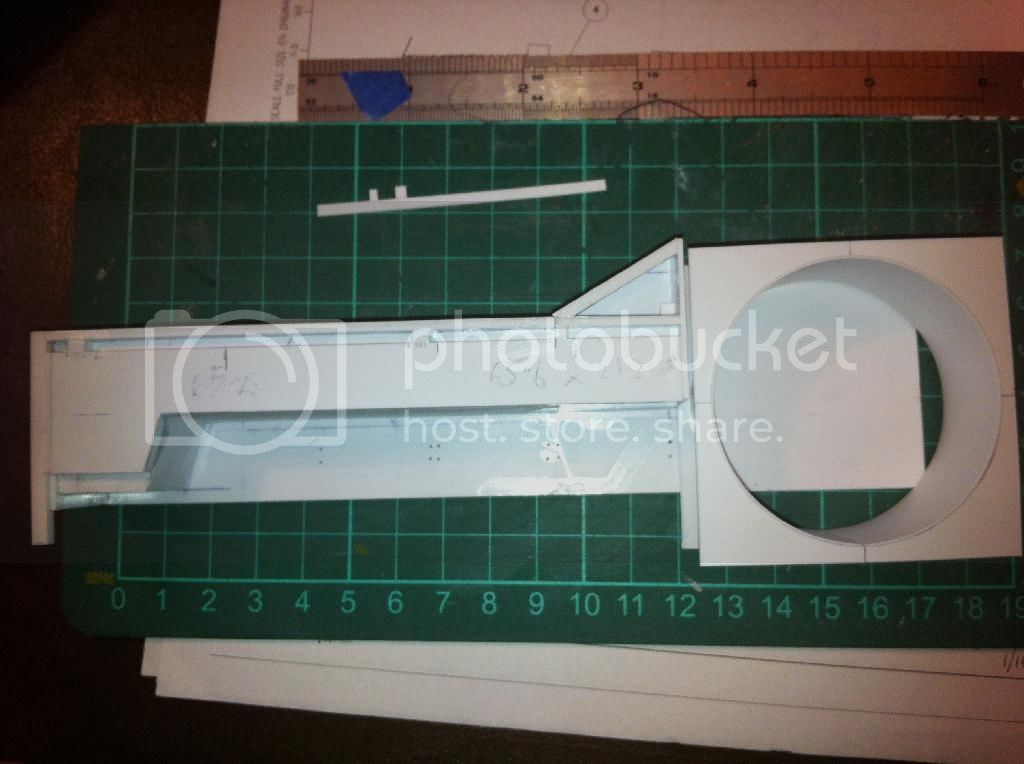
Looks good so far!
Australian Capital Territory, Australia
Joined: March 27, 2008
KitMaker: 546 posts
Armorama: 541 posts
Posted: Saturday, January 04, 2014 - 07:15 PM UTC
Glued the RHS spare wheel stowage to the RHS sponson stowage bin & RHS interior tray wall.
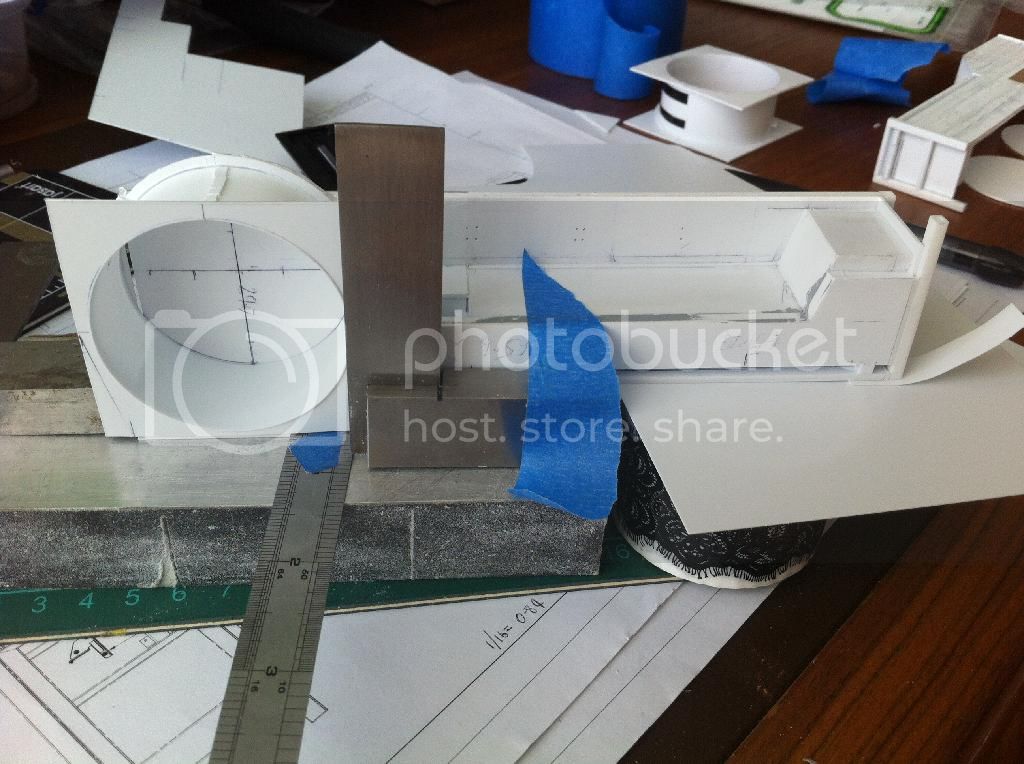
Looks a little messy, but that's how the sausage is made....
This is the view of the inside RHS tray side. As can seen, the spare wheel stowage protrudes below the floor level of the tray and into the front crew cabin.
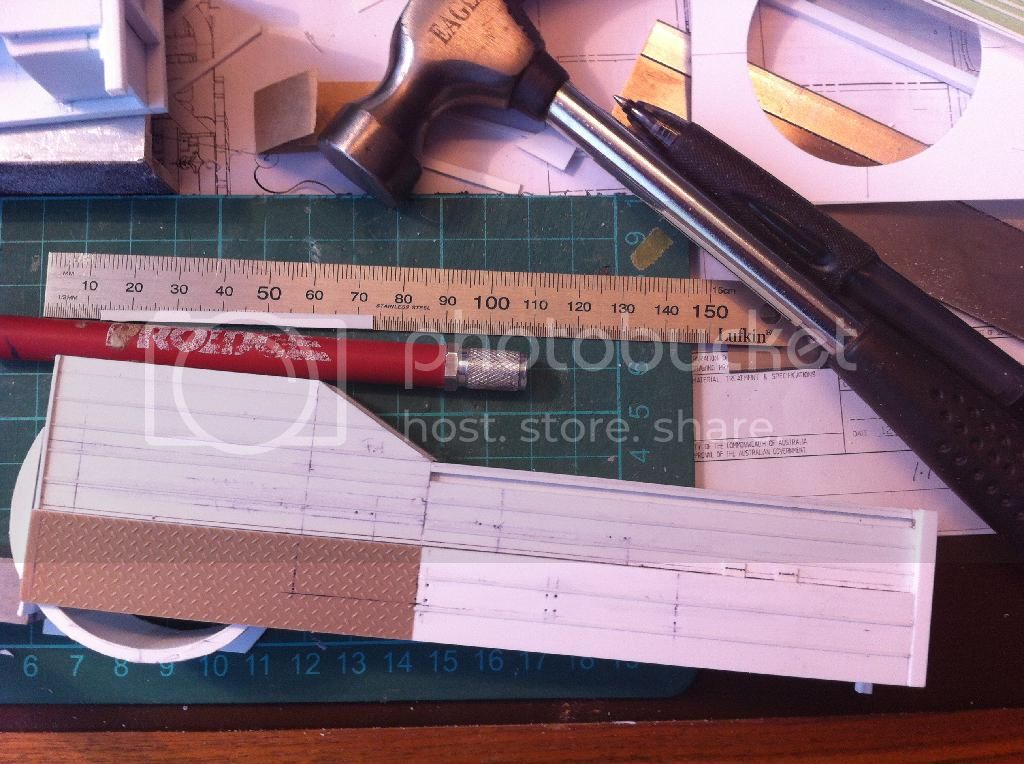
More to come...
Australian Capital Territory, Australia
Joined: March 27, 2008
KitMaker: 546 posts
Armorama: 541 posts
Posted: Monday, January 06, 2014 - 09:04 AM UTC
Still sorting the spare-wheel stowage & tray sides. None of the outer 'skin' of the sides has been fitted. Scale thickness for the skin is 0.13mm - hardly structural!
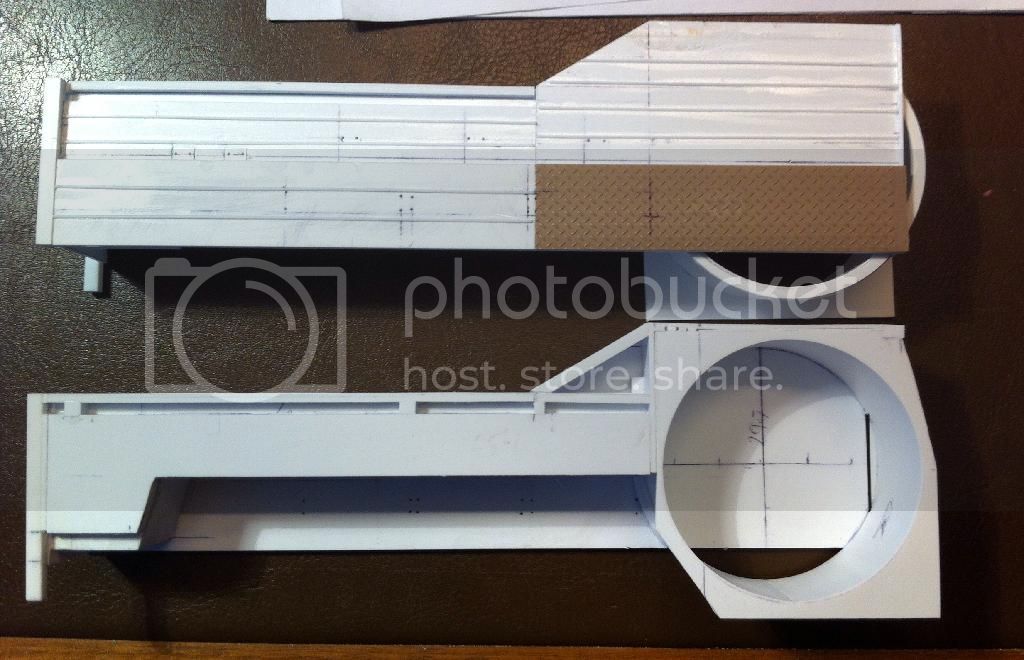
What can be seen here is the sloping, blanked off area where the fuel fillers will be fitted and the adjacent jerry-can stowage. The strengthening ribbing (the misalignment is prototypical) on the tray wall will be toned down with sanding and the tie-down loops added. You can also see the front third of the bottom of the tray wall is fitted with chequer-plate.
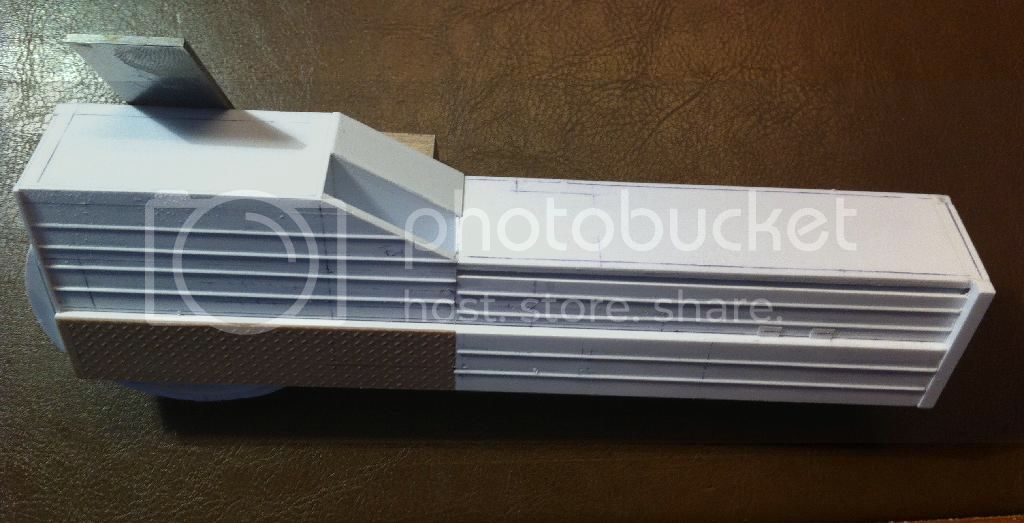
Getting there...
Australian Capital Territory, Australia
Joined: March 27, 2008
KitMaker: 546 posts
Armorama: 541 posts
Posted: Monday, January 06, 2014 - 07:23 PM UTC
Well, the 3D printed wheels are on their way from Shapeways - can't wait!
This is what they'll look like - spare hub on the left, fitted wheel on the right:
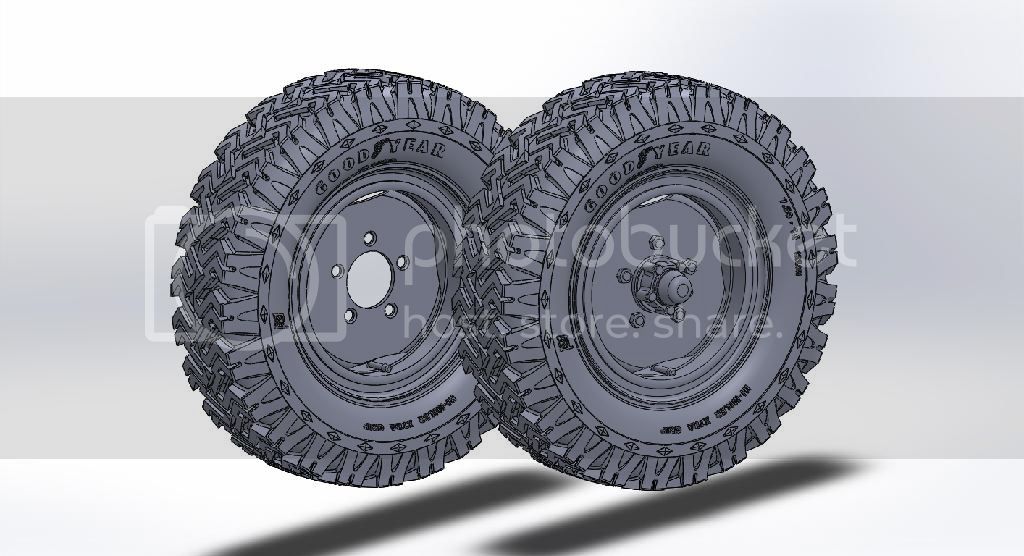
(Copyright for the CAD model & image belongs to Peolini Designs)
I'll post pics of the real thing (1/16) when I get it. Just have to get them reproduced in resin. I need 10 for the LRPV (4 spare & 6 on the truck) & 6 for the SRV-SF (2 spare & 4 on the truck). It adds up pretty quickly....
Maki
 Senior Editor
Croatia Hrvatska
Joined: February 13, 2002
KitMaker: 5,579 posts
Armorama: 2,988 posts
Posted: Monday, January 06, 2014 - 08:01 PM UTC
Thanks for the step-by-step, it is always cool seeing people so talented with styrene. I also like the 3D stuff... please post the pics of the wheels when you receive them.
Are you thinking of commercializing your build?
Mario
Queensland, Australia
Joined: January 17, 2006
KitMaker: 752 posts
Armorama: 569 posts
Posted: Monday, January 06, 2014 - 08:16 PM UTC
Looking good Greg! I'm surprised they designed the wheel wells coming into the space behind the seats, seems a waste of space.
I've got in touch with your designer, I'm going to get some wheels made in 1/35, to convert a hobbyboss defender into a RAAF gun buggy.
Australian Capital Territory, Australia
Joined: March 27, 2008
KitMaker: 546 posts
Armorama: 541 posts
Posted: Tuesday, January 07, 2014 - 09:29 AM UTC
Quoted Text
Thanks for the step-by-step, it is always cool seeing people so talented with styrene. I also like the 3D stuff... please post the pics of the wheels when you receive them.
Are you thinking of commercializing your build?
Mario
Thanks Mario,
I appreciate your kind words...no plans to commecialise at this stage: it's just too big!
Australian Capital Territory, Australia
Joined: March 27, 2008
KitMaker: 546 posts
Armorama: 541 posts
Posted: Tuesday, January 07, 2014 - 09:35 AM UTC
Quoted Text
Looking good Greg! I'm surprised they designed the wheel wells coming into the space behind the seats, seems a waste of space.
I've got in touch with your designer, I'm going to get some wheels made in 1/35, to convert a hobbyboss defender into a RAAF gun buggy.
Glad Dennis is helping you out - I'm getting the wheels on Firday (according to UPS).
Not a lot goes on behind the seats: on the original build state had that area plated over. It was subsquently removed to allow access to the fuel breather tubes and the front wall of the tray...why? you'll see in a bit

Australian Capital Territory, Australia
Joined: March 27, 2008
KitMaker: 546 posts
Armorama: 541 posts
Posted: Tuesday, January 07, 2014 - 11:39 PM UTC
Added the framing/structure in the wheel wells and spare wheel stowage. Excuse the putty, need to fix up some flaws before skinning the tray.
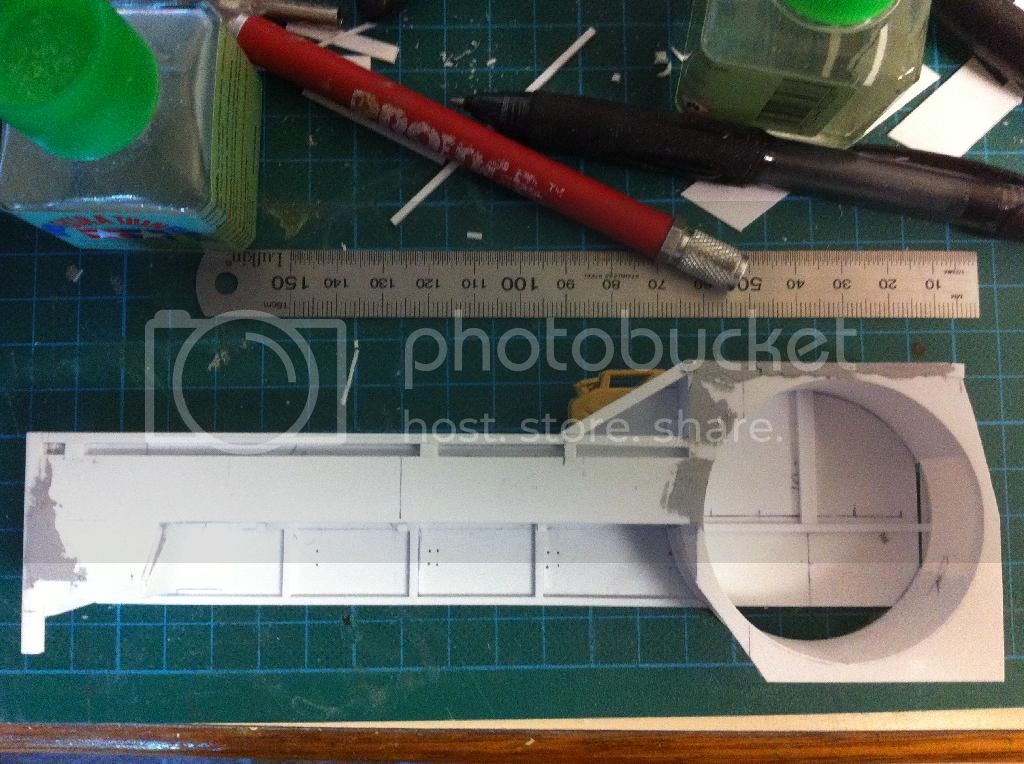
Australian Capital Territory, Australia
Joined: March 27, 2008
KitMaker: 546 posts
Armorama: 541 posts
Posted: Wednesday, January 08, 2014 - 09:53 PM UTC
Added the sub-frame for the outer skin using 1.5 x 1.5mm styrene. The skin itself is 0.13mm sheet.
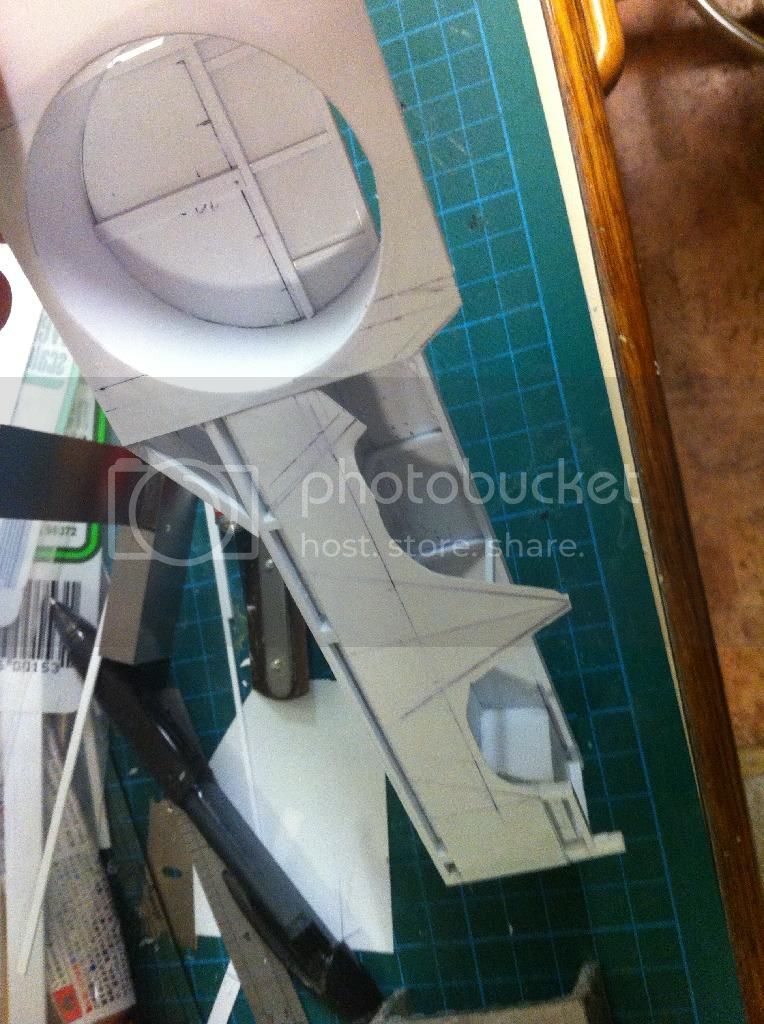
The putty was sanded out & structural details finalised in the spare wheel stowage. This work included tapping a 1mm hole in the centre - ready to accept a threaded 1mm rod to hold the spare wheels.
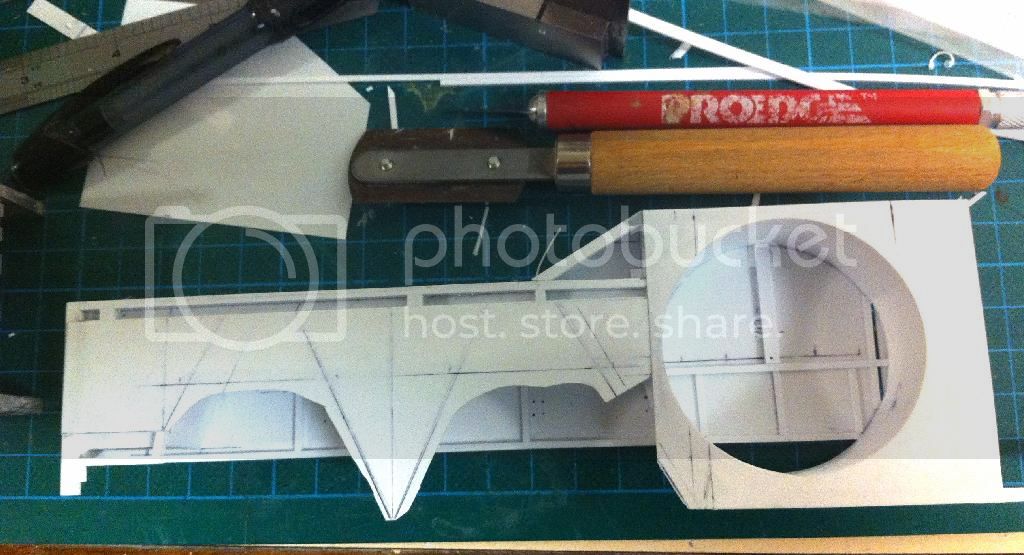
The rest of my time has been taken up with matching the LHS with the progress of the RHS.
I hope the Merit MRAP comes with a Mk 19.....
Australian Capital Territory, Australia
Joined: March 27, 2008
KitMaker: 546 posts
Armorama: 541 posts
Posted: Friday, January 10, 2014 - 04:13 PM UTC
The biggest problem with scratchbuilds is if there's something wrong there's no-one to blame but yourself!
I found I incorrectly measured the angle for the tray - I measured 22 degree slope, whereas it's actually 12 degrees. Oops. Fixed now.
(Pic)
Started the tie-downs that run under the outside of the tray. These are vertical pieces of circular section rod on the 1/1 subject & come in two flavours; full & partial. 'Full' run top to bottom of the rim, whereas 'partial' run from the top for shot 4/5 of the gap. I guess they're for hooking running pieces or rope under? In 1/16, my eye puts them a 1mm rod.
To insert them, I drill from the top straight down. 'Full' requires a mating hole in the bottom of the recess:
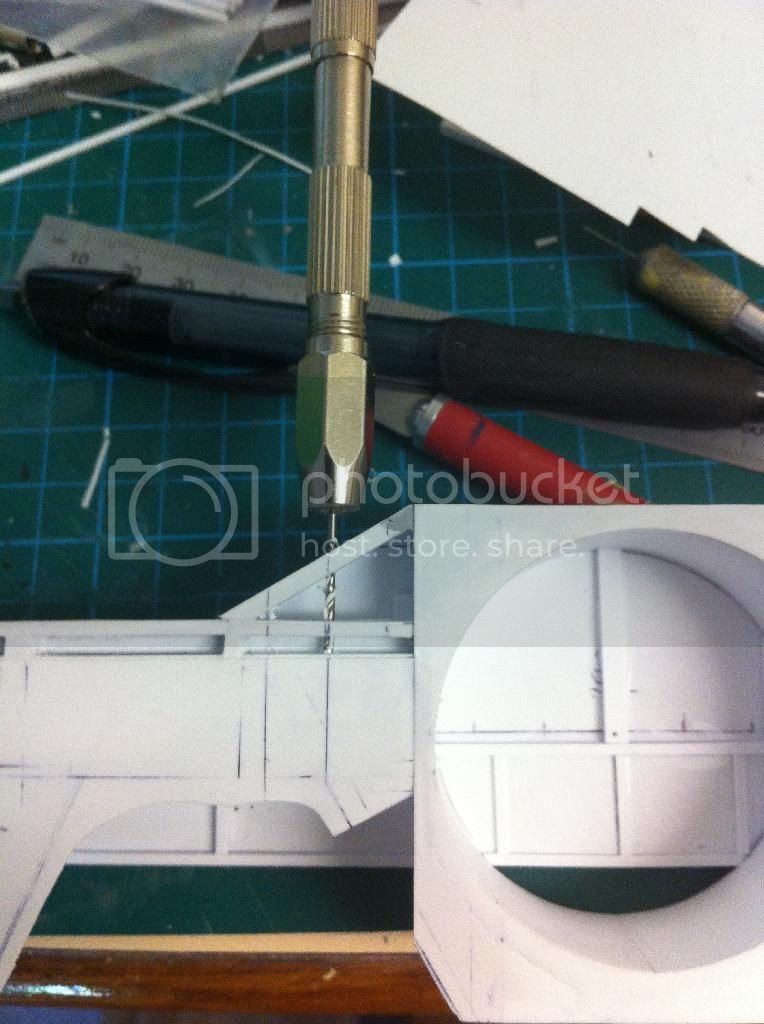
Then inserted a length of 1mm rod. For 'partials' I used the back end of a #11 blade to maintain a consistent gap.
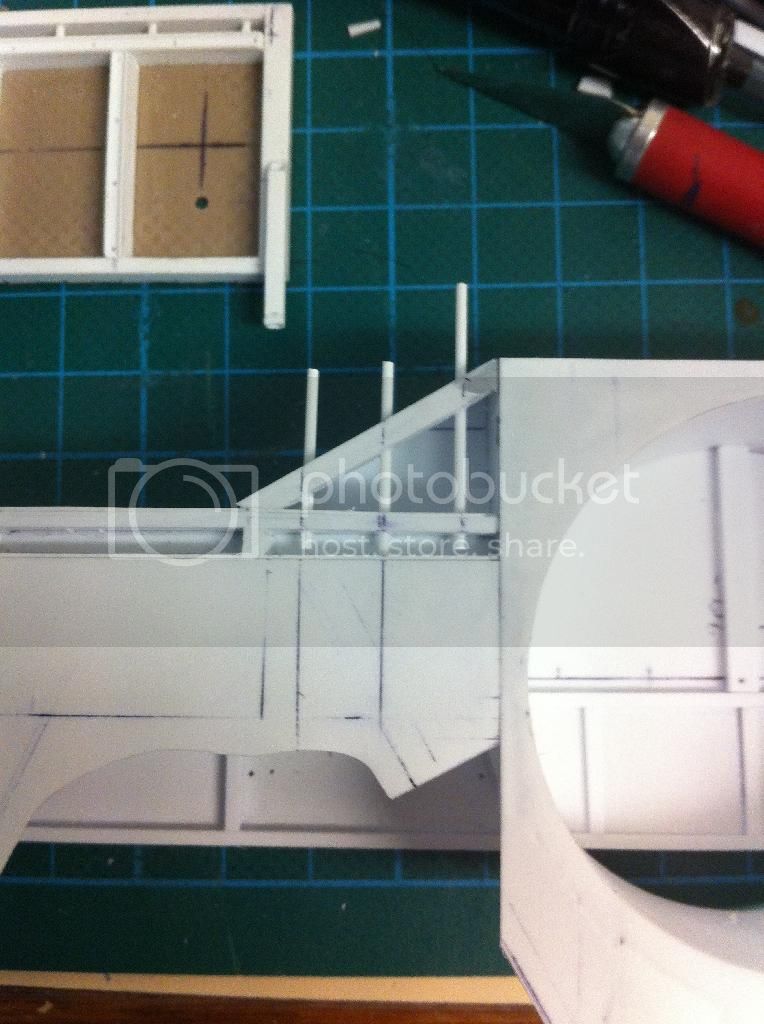
Once glued & dried they were flush-cut & sanded back.
More to come.


