_GOTOBOTTOM
Constructive Feedback
For in-progress or completed build photos. Give and get contructive feedback!
Zvezda Tiger I Early
russamotto
Visit this Community
Utah, United States
Joined: December 14, 2007
KitMaker: 3,389 posts
Armorama: 2,054 posts
Posted: Wednesday, January 22, 2014 - 06:24 AM UTC
As a follow up to the review I posted of this kit a few months ago, here is a basic build up of the kit. For the most part things are good, there are no major fit issues and the plastic is holding up well. The turret comes with a fairly detailed interior, but minus the gun breech block, and the gun itself needs some filler and help. There is no machine gun either, although a barrel stub is provided for at the end of the build. Still, there is enough detail to allow for a crewman to be in a hatch and provide a hint interest with the inside.


I did some basic painting, although I don't plan to leave much visible.


I carefully filed around the edge of the roof plate to get it to sit more flush with the turret sides.


The lower track hangars fit into recessed boxes. There is room to spare that will need a touch of filler. The hangars are slightly offset with the uppers, which is correct. There is nice detailing on the upper brackets as well, with casting numbers included.


A few more details were added to the turret-periscope and turret bin.


I have now moved on to the hull, which is coming along fairly well. I looked the tracks over, the rubber band style are soft and pliable, but not gluable. They weren't included after the initial run, and now link and length are provided. I have some sink marks to deal with on the hull sides, but to this point it isn't a bad kit. I see that Voyager has just released an etch set for this, with barrel.
russamotto
Visit this Community
Utah, United States
Joined: December 14, 2007
KitMaker: 3,389 posts
Armorama: 2,054 posts
Posted: Wednesday, January 22, 2014 - 10:13 AM UTC
This will be based on a Tiger knocked out at Ponte Dirillo (Biazza Ridge) during fighting with the 504th PIR (I think). I found a unit history which quoted then Col. Gavin as saying the Tiger bore only a cross, or balkenkreuz, with no numbers or unit markings visible. It would appear to be one of the last tanks issued to pz.abt. 504 in April or May of 1943. If anyone has better information about this tank or incident would you please share?

http://www.worldwarphotos.info/wp-content/gallery/germany/tanks/tiger/Tiger_tank_sicily.jpg
russamotto
Visit this Community
Utah, United States
Joined: December 14, 2007
KitMaker: 3,389 posts
Armorama: 2,054 posts
Posted: Friday, January 24, 2014 - 06:40 AM UTC
Just a quick update. It is hard to find time for the bench right now. First, I did a test fit of deck to the hull sides. The driver's plate was pushed out a little at the top so the quickest solution was to trim a little off the inside corner of the hull.


Another test fit and it was straight.


The rear plate (heckpanzer? dangpanzer? it's the back) was then attached. It took some dry fitting and a bit of sanding to get things in to place. It may need some filler in a couple of small places. I also added putty to fill the sink marks on the left side. The right side looked pretty good.


The inner half of the drive sprocket is placed AFTER the torsion arms for the road wheels as the sprocket covers the placement hole on one side.


I added the fans to the rear and applied some primer.


I have assembled the double road wheel sets, to be placed after painting. Detail is good, bolt heads are clear and the outer tire face has the "Continental" logo embossed.


Hopefully I can throw some black on the fans and place the top. It seems to fit ok, but I did have to force the hull sides up a bit as they were both bent down at the join with the hull. It wasn't really bad, but for those who have had this problem (it seems to vary considerably with this kit) some internal bracing and clamping may be necessary. If I have messed up anything significant (like naming parts) let me know while there is still time to fix things.
russamotto
Visit this Community
Utah, United States
Joined: December 14, 2007
KitMaker: 3,389 posts
Armorama: 2,054 posts
Posted: Wednesday, January 29, 2014 - 01:03 AM UTC
A few more updates on the kit. I seem to be able to get only a few minutes at a time at the bench. Two or three parts attached at best each session.

The turret is fixed to the hull by a large plastic ring. It has slots cut in the side but some trimming was needed to get it placed-as if they had planned on having tabs to fit it and then changed their minds.


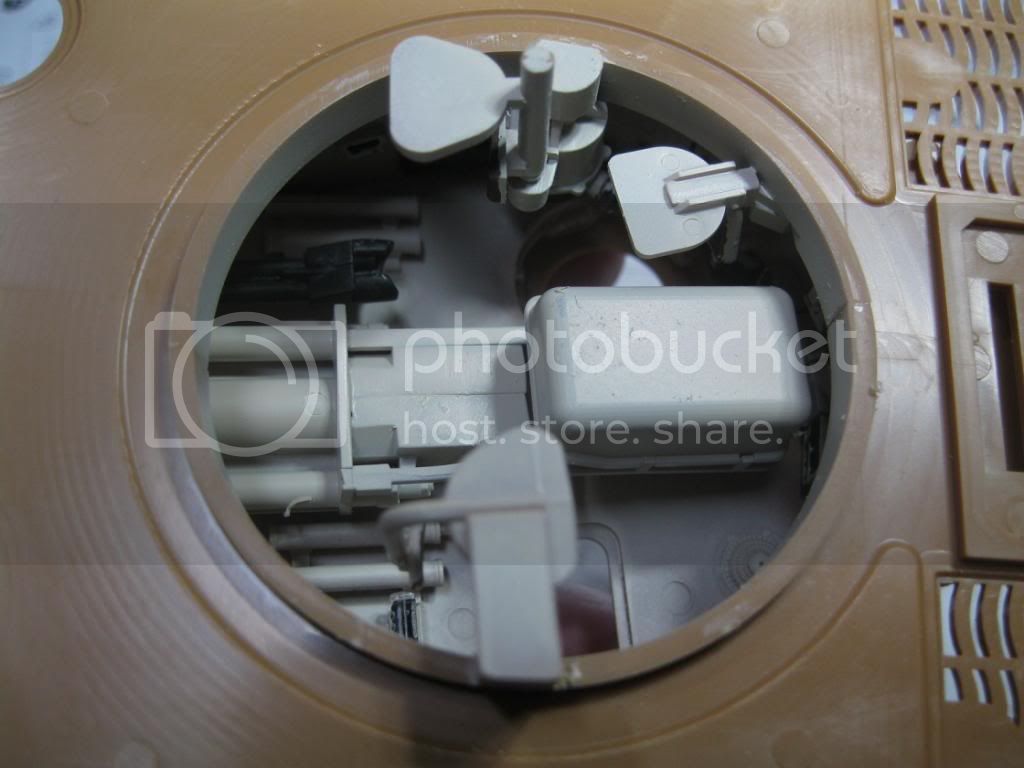
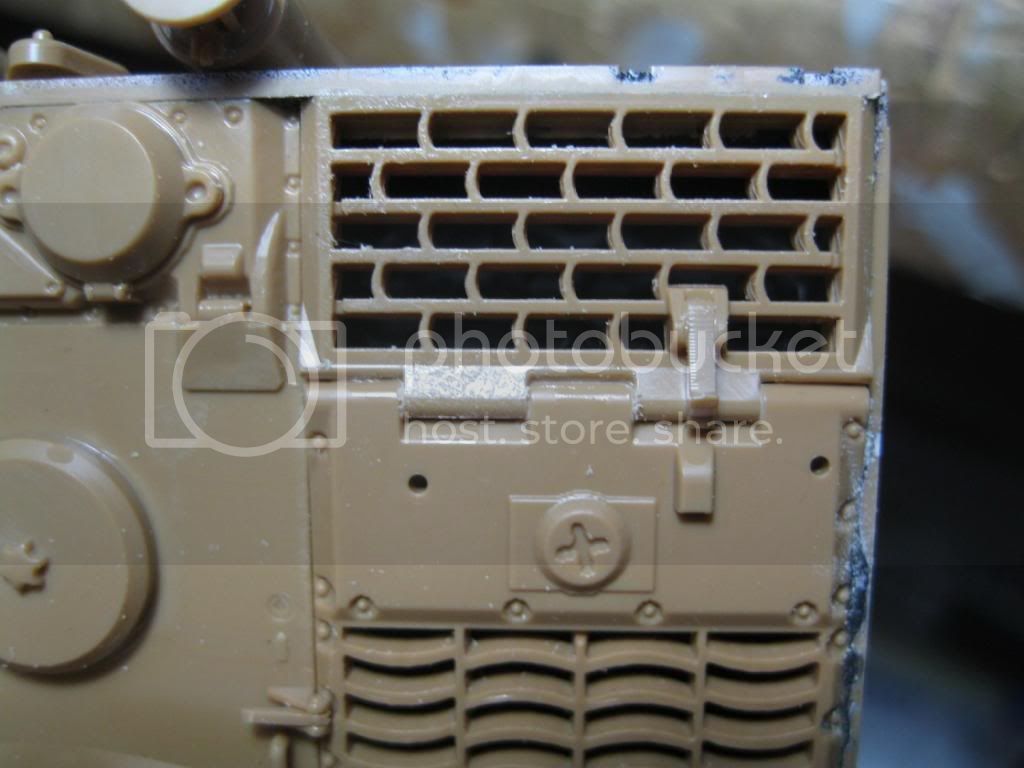
That gap at the bottom leaves it somewhat loose and free spinning. Now tools and accessories are added to the upper hull. I placed to tools, first cleaning out the solid-molded clamps. The jack block was also scraped with a file to add texture to the sides and end. The rear engine vents are two parts, molded so that the louvers are angled. I managed to get the latch hooks placed facing the wrong way and then broke them both trying to re-position. It will take some careful work to get them out and faced properly.


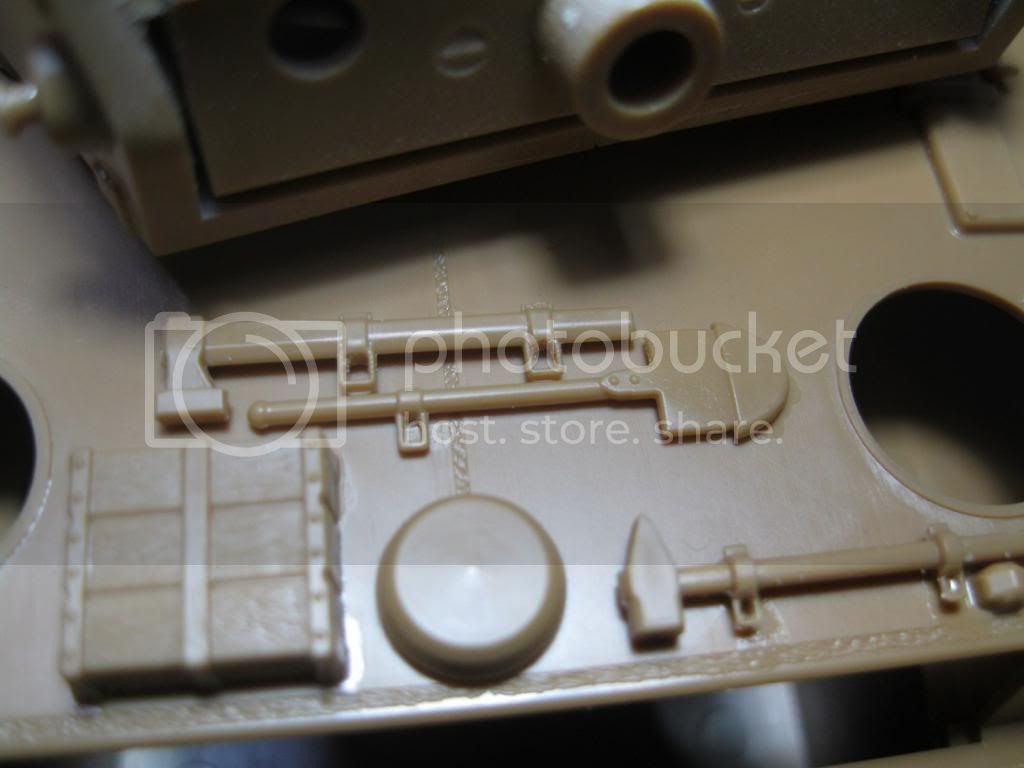
The exhausts have some seam lines that need cleaning up, but are well detailed, including the hinged flap cover. I also added the jack and other rear details. The jack isn't bad, comparing decently to the Dragon one, minus the separate foot and plate.


The shields do have ejector pin marks inside that will be visible and need to be cleaned up. There are also some tool marks on the inside where it meets the hull.

The front driver's plate had deep sink marks. I opted to file it down carefully until it was flat. I will need to rework the bolt and wing nuts for the cover mount on the hull mg. Also, the headlamps have very fine lettering as seen on the Bovington tiger. I did not notice this until after they were placed-upside down of course. I also hollowed out the S-mine dischargers. The side skirts were placed after I had carefully cut through the join line.


The build is nearing completion, and would move fairly quickly if I had the time. I should mention that as this kit does not include etch parts, I used Tamiya etch for their tigers. There is some really good detail with this kit, but also some that is not so good. Some details are missing, and I am surprised at the tool marks that I have found in some areas. It is as if someone came into the workshop and pushed the kit through before it was quite ready.


AFVFan
Visit this Community
North Carolina, United States
Joined: May 17, 2012
KitMaker: 1,980 posts
Armorama: 1,571 posts
Posted: Wednesday, January 29, 2014 - 01:17 AM UTC
The build is going together pretty well, Russ, despite the problems you've encountered. It's a shame it has some of the flaws it does. It seems like it would otherwise be a great kit with a lot of the details that are supplied.

Looking forward to the grand finale!
CMOT
Staff MemberEditor-in-Chief
ARMORAMA
Visit this Community
England - South West, United Kingdom
Joined: May 14, 2006
KitMaker: 10,954 posts
Armorama: 8,571 posts
Posted: Wednesday, January 29, 2014 - 04:22 AM UTC
The ejector pin marks look big inside the turret
russamotto
Visit this Community
Utah, United States
Joined: December 14, 2007
KitMaker: 3,389 posts
Armorama: 2,054 posts
Posted: Wednesday, January 29, 2014 - 05:57 AM UTC
Thanks, Bob. If I could follow directions better or pay more attention, this build would have been a better as well. Of course, that is how it is with all my builds. Overall, it still isn't too bad a kit. I will add the AFV Club workable tracks, and have started assembling them. Much better than the tracks that came with this.

Darren, yes, they are very large. There are a few others to deal with as well, but not nearly so bad. For what I paid, it was still a pretty good deal. I have seen (and done) worse on a kit.
lukiftian
Visit this Community
British Columbia, Canada
Joined: March 12, 2010
KitMaker: 791 posts
Armorama: 592 posts
Posted: Friday, January 31, 2014 - 04:57 PM UTC
I've heard this kit has issues, but I wouldn't throw it out of bed for eating crackers. If I could find one on a deal I'd buy it. Good work so far
russamotto
Visit this Community
Utah, United States
Joined: December 14, 2007
KitMaker: 3,389 posts
Armorama: 2,054 posts
Posted: Saturday, February 01, 2014 - 03:44 AM UTC
I'll have more updates to post, hopefully tonight or tomorrow. I have noted that the plastic takes the cement quickly, but doesn't set for a while. The coaxial MG slipped back a bit after it was placed and I thought it was set. Mold seam lines are placed at the edges as much as possible. There is a sort of triangular shape to some parts where the mold seam runs in the center.

Kevin, it is on sale right now at Lucky Model, and now includes a Tristar figure set.
russamotto
Visit this Community
Utah, United States
Joined: December 14, 2007
KitMaker: 3,389 posts
Armorama: 2,054 posts
Posted: Sunday, February 02, 2014 - 09:13 AM UTC
Did some more work. Pretty much finished with main assembly now. I will place the wheels after they are painted, and the tracks are being built. Again, there is some very nice detail with the kit. Here are the air cleaners installed.


The hoses have really nice detail. I also placed the cleaning rods in their racks with the tow cables. The tow cables are fairly springy but secure well. It will help hold them up during detail painting.


Turret hatches are next. I opted to leave the escape hatch closed as the view would be right into the gun breech. The missing breech block would stand out quite a bit. I will leave the other two hatches open. The driver's hatches will be left closed as there is no interior hull detail.


I built the main gun assembly. There were no real issues other than the seam line clean up for the two barrel halves. As I mentioned, the plastic takes cement quite well, but does soften some and becomes brittle if you need to move a part. I sat with the kit for 15 minutes after I placed the coaxial mg and the hatches. I returned and found that the mg had sunk back into the opening and the commander's hatch had tilted a bit.


The small brace that holds the hatch up had broken off earlier and I had replaced it at the same time as I placed the hatch, so it was of little support. I added the smoke grenade launchers to both sides of the turret and that pretty much finished things off. I will add the spare tracks to the turret after painting. Also the track cable will be placed after painting so I can see how well I patched up the side. The subject tank has three spares on the right hand side of the turret, the kit only two.


It looks to me like a tiger. Not much for the spares bin, either.
 _GOTOTOP