_GOTOBOTTOM
Figures
Military figures of all shapes and sizes.
Figure WIP Hans Tragarsky aka winter fritz
tskross
Visit this Community
New York, United States
Joined: August 29, 2008
KitMaker: 160 posts
Armorama: 152 posts
Posted: Sunday, February 02, 2014 - 08:47 AM UTC
Hello peoples,

We'll after a long hiatus I decided to get back into some figure modeling. I will be posting a bit of a build log here so that I can get some constructive feedback and also document the figure conversion (minor) and research going into it.

The background:

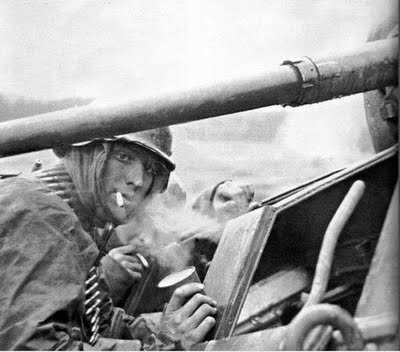
I had a project in mind of a scene of a single American soldier in Manstein based on a photo I have from the bundesarchive. But since it requires some serious conversion and sculpting I thought I would have a go at a simple practice project. I had a box of dragon's ambush at poteau in the stash and thought i could use a figure from that set. I picked the soldier wearing the US army rain gear as there is very little camo to paint, you know to keep it simple (ha!). Somehow I seemed to have forgotten that this figure is molded after one of the most iconic images of the war...


Little to say after over two months later this has turned into a real labor of love. Not only did it turn out I would have to do more sculpting than anticipated, I came to find out that the soldier in the photograph has been (most likely) been identified as one Hans Tragarsky. So now I feel an extra level of obligation to "get it right"

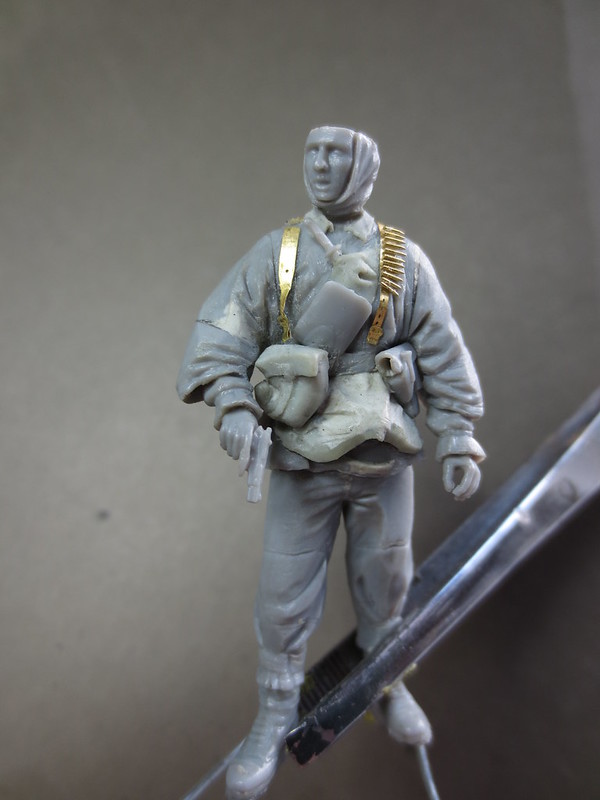
This is where the figure is at the moment:


Sorry for the crappy cell phone photo, it's just a quicky. The figure is a bit dirty from handling and some of the sculpt is still quite rough at the moment, but overall I'm happy with where it stands.

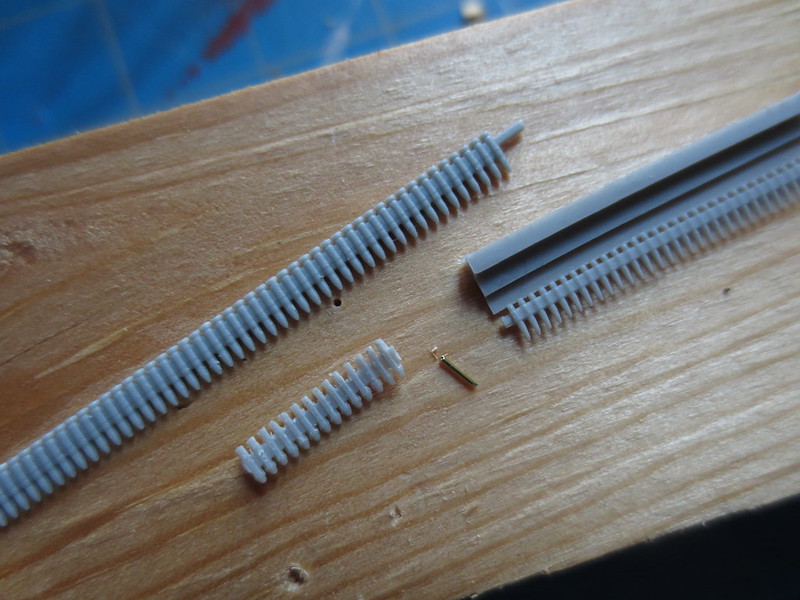
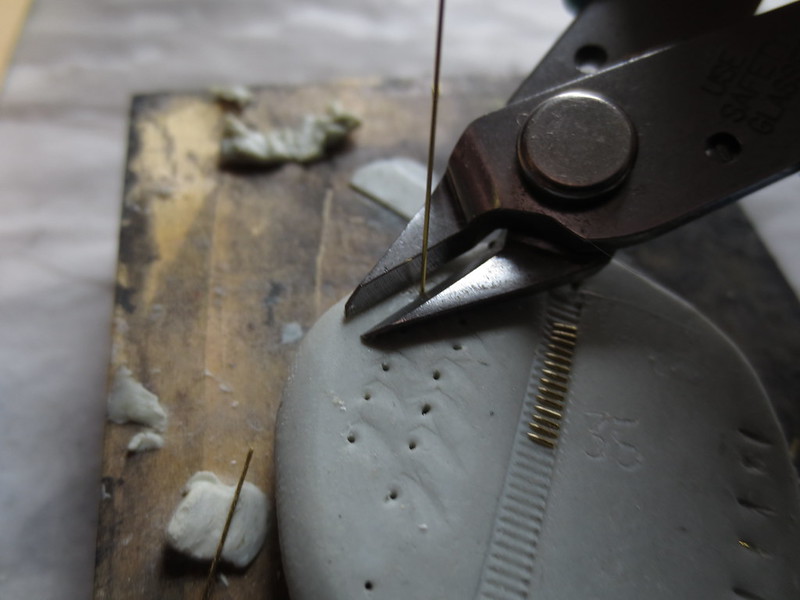
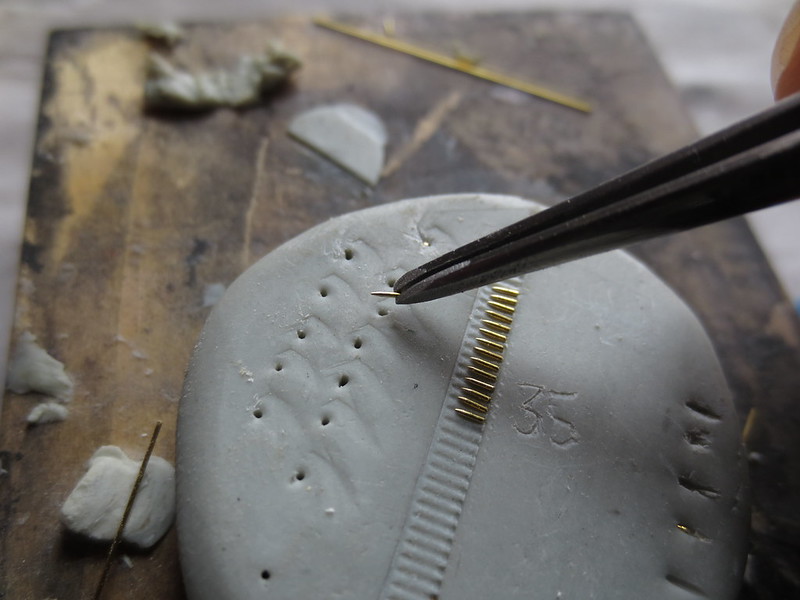
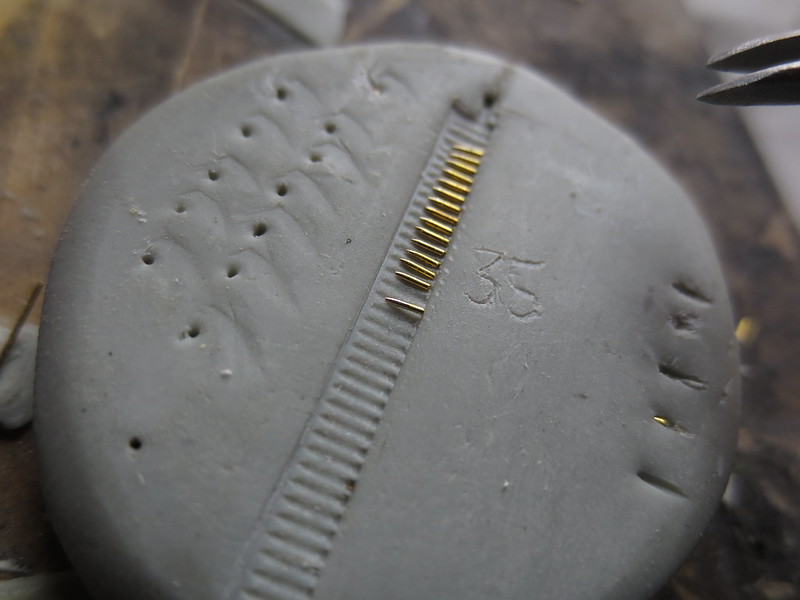
Right now I am a bit stuck, before I get too into sculpting any more fine details I want to get the ammo belt sorted. The kit one is unusable unfortunately, the amount of flash on it means that it just won't work.

(this is after spending an hour trying to cut the flash away)

It is such an important part of the picture I feel it needs to be as realistic as possible.

Q: does anyone have any suggestions? I know griffon models does a set of belts for the mg42 but PE just looks too flat, I would prefer resin or even a decent styrene one so that I can soften it in hot water to bend into shape (you can see in the photo that the strap from his mg has caught on the bullet belt making in bend over on itself) But I'm kind of out of the loop on accessories of this sort.

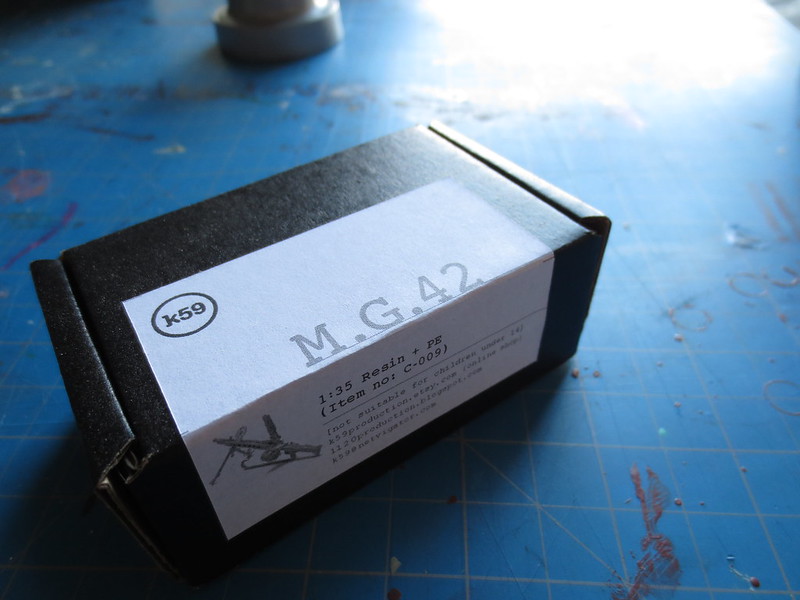
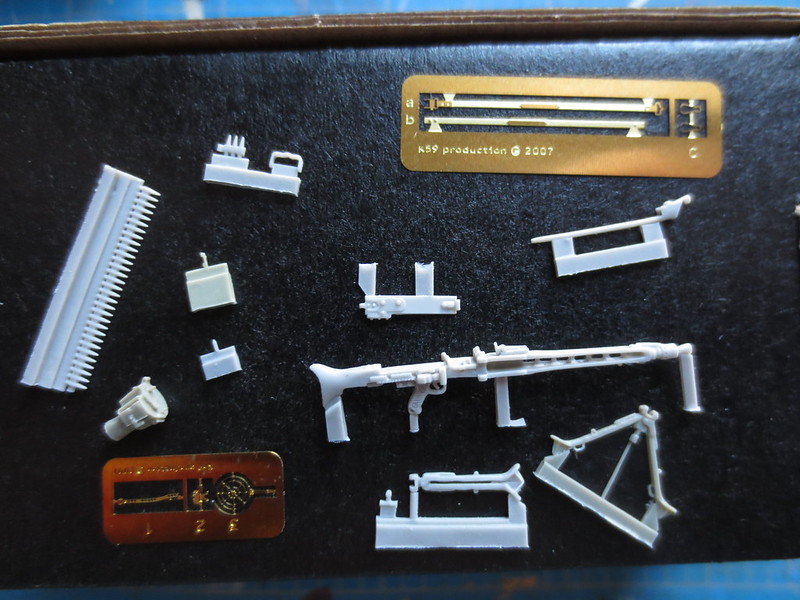
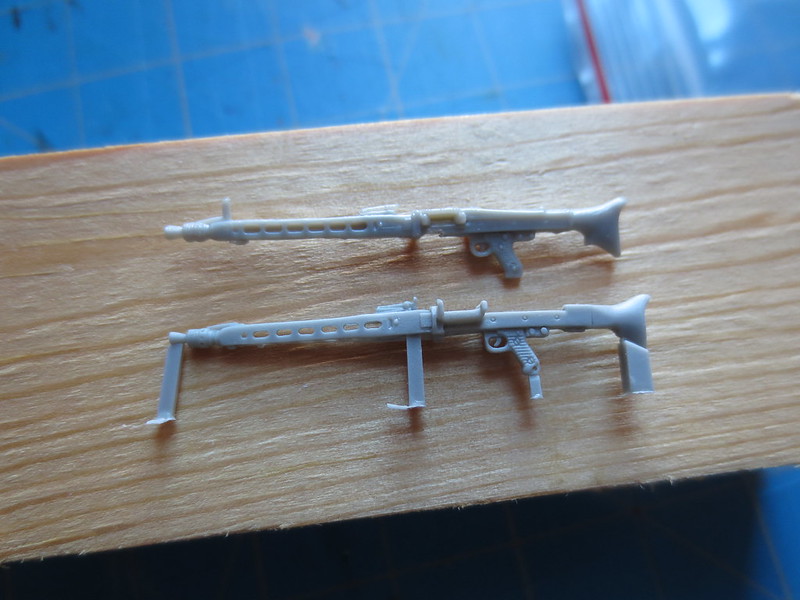
I'm also waiting for the arrival of a beautiful resin mg42 by k49 productions And that will finish off the aftermarket parts (the PE webbing is the old verlinden set, not bad at $6)

Here are some more reference pictures:


Of course any tips are must appreciated

Cheers

)btw sorry for the sideways photo, apparently armorama and dropbox don't get along....I'll get it fixed eventually...

jrutman
Visit this Community
Pennsylvania, United States
Joined: April 10, 2011
KitMaker: 7,941 posts
Armorama: 7,934 posts
Posted: Monday, February 03, 2014 - 04:43 AM UTC
Some of the newer dragon sets have nice mg belts and are a lot better as far as flash goes.
This is what Gary used IIRC. He heated them in hot water. Best to experiment with thin plastic to get your temp and time down so you don't ruin your belts.
Your fig looks good so far. Those PE straps are a problem as they seldom get settled down enough. Maybe run some thinned down putty at the edges? Make the straps look like they cut into his shoulders?
Nice project on an interesting topic.
J
tskross
Visit this Community
New York, United States
Joined: August 29, 2008
KitMaker: 160 posts
Armorama: 152 posts
Posted: Monday, February 03, 2014 - 06:53 AM UTC
Thanks Jerry! So dragon it is, now I just have to find a newer set that has one. As for the PE web straps, yes I plan on going back in and sculpting some more detail around them to get the sit right, I had to cut them at the shoulders to get them to bend properly, but I do find if you carefully warm the brass it becomes softer to work with and easier to mold to the figure by glueing it down as you go. Not quite brave enough to try to construct it from foil yet!
jrutman
Visit this Community
Pennsylvania, United States
Joined: April 10, 2011
KitMaker: 7,941 posts
Armorama: 7,934 posts
Posted: Monday, February 03, 2014 - 08:58 AM UTC

Quoted Text

Thanks Jerry! So dragon it is, now I just have to find a newer set that has one. As for the PE web straps, yes I plan on going back in and sculpting some more detail around them to get the sit right, I had to cut them at the shoulders to get them to bend properly, but I do find if you carefully warm the brass it becomes softer to work with and easier to mold to the figure by glueing it down as you go. Not quite brave enough to try to construct it from foil yet!


Good idea. I did that on a few figgies already. The only time I was able to use a whole PE webgear set was when I made on being taken off a wounded guy. Otherwise they are bothersome.
Great minds think alike as I just started a new blog on the dio forum concerning ardennes figures.
J
1stjaeger
Visit this Community
Wien, Austria
Joined: May 20, 2011
KitMaker: 1,744 posts
Armorama: 1,727 posts
Posted: Wednesday, February 05, 2014 - 11:45 PM UTC

You are in the process of hitting the nail on the head with this guy from what I've seen so far!!
So naturally I'm very much interested to see progress!
Glad to hear you find PE webgear troublesome too! I was afraid I might just be too heavy-handed!

Cheers

Romain

P.S: it's so funny to see how he clings to the .45 he captured!

Grindcore
Visit this Community
New York, United States
Joined: September 23, 2006
KitMaker: 389 posts
Armorama: 358 posts
Posted: Thursday, February 06, 2014 - 01:22 AM UTC

Quoted Text


P.S: it's so funny to see how he clings to the .45 he captured!


I believe that it's a Browning High Power. Some were manufactured for Germany in a Belgium plant after they captured it.
1stjaeger
Visit this Community
Wien, Austria
Joined: May 20, 2011
KitMaker: 1,744 posts
Armorama: 1,727 posts
Posted: Thursday, February 06, 2014 - 11:25 AM UTC

Quoted Text


Quoted Text


P.S: it's so funny to see how he clings to the .45 he captured!


I believe that it's a Browning High Power. Some were manufactured for Germany in a Belgium plant after they captured it.


It could indeed be a FN grande puissance!! Difficult to say as they are almost identical in design!! After all, it was John Moses Browning's work!

Cheers

Romain
tskross
Visit this Community
New York, United States
Joined: August 29, 2008
KitMaker: 160 posts
Armorama: 152 posts
Posted: Tuesday, April 01, 2014 - 04:40 AM UTC
Thanks for the interest!
I have never done such an involved figure project for me so this is all new, learning on the job!
@Jerry and Romain, yeah the PE webgear sucked, but I think that I would have been better off with Aber, that is what Calvi Tan demonstrates in his book Modelling the Waffen SS, and he seems to have a lot more luck with the fit, he also lays down thin putty first and presses the PE into it...too bad I got the book after I started...

And for those wondering it is indeed a Browning High Power as issued to german troops...just don't ask me for my reference on that because I cannot remember for the life of me!

Alright people on to the post, sorry for the long absence. But don’t worry, its not that I haven’t been working away, I’ve just been thinking and experimenting with different problems and their possible solutions.

First things first though. I’d like to talk about the subject a little bit. In my title you will notice that I’ve gone ahead and identified this trooper as one Hans Tragarsky. Now I must say here and now that I am no historian, amateur or otherwise, and I realize that by using this name I may be stirring up controversy. You see over the years many people have attempted to identify this soldier. And in the past he had been identified as Heinrich Severloh, Arno Funke, and Walter Armbrust (sp), none of these identities have been proven and one of which, Walter Armbrust has been pretty roundly disproven. So you see Hans Tragarsky is only the latest in a string of names attached to this photo, and the evidence seems circumstantial at best, apparently a forum poster on Axis History Forums came forward saying that he knew Hans, that he only learned of this photo late in life but did indeed confirm it was him. However, Mr Tragarsky passed away in 2011 so we may never know the truth.
You can read the discussion on AHF here and learn some more about other soldiers in the pictures as well:
scroll down to post 37

The only point of agreement seems to be that this man was a MG-42 gunner with the SS-Schütze rank in the LAH, most likely part of Kampfgruppe Hansen of the 2nd Company, I./SS-Pz.Gren.Rgt 1.

So onto the project…

In the process or refining the sculpt of the poncho I realized that I would have to resolve the ammo belt so that I could get the proper sit and also because of the way the strap of the MG crosses over the ammo belt, causing it to flip forward in the picture.
So after some research I decided that a Dragon gen2 ammo belt would do the trick. Unfortunately after about 2 hours of carefully heating and bending the belt I realized that it was too out of scale with the figure, comparing to the picture it was way too big.

As a comparison below you can see the Dragon Gen 2 on the top, the belt that came with the kit on the bottom and the belt that came with the K59 MG 42 (yes I got one! but more on that later) on the right. According to some quick calculations it seems that the old school Dragon belt is actually closest in scale, with the K59 close behind (and way more accurate, never-mind the fact that the dragon belt is unusable because of flash).


I contemplated using the K59 belt, but it was too short (I estimate that the belt in the pic is about 40- 50 rounds, while the K59 is around 25) and besides, I would need that for the MG itself. So I started contemplating actually making a belt by hand...I know kind of crazy, and also I’ve never seen it done well. But 1 solving problems like this is one thing I love about this hobby, and 2 because of the original photo, and the unusual draping of the belt I feel like this is maybe the most important part of gear on the soldier.
I finally decided, after some experimenting, and even putting 4 of these in my shopping cart at one point (but my wallet just wouldn’t open), to use wire and my good old dremel to make the bullets individually, glue them in place and sculpt the links from tiny pieces of putty…

So after some rudimentary scale calculations I got some of this:


I’m going to take a break, but later on today I will post up my short tutorial on how to make the bullets themselves, and make them acceptably uniform...hopefully
tskross
Visit this Community
New York, United States
Joined: August 29, 2008
KitMaker: 160 posts
Armorama: 152 posts
Posted: Tuesday, April 01, 2014 - 06:24 AM UTC
[Sorry for the double post, wasn't sure if I'd have time for this one when I put the first one up]

OK so on to the bullet tutorial.

I had to think of what I had on hand that I could use to make these bullets. After a lot of messing about this is the solution I came up with. The great thing is that this could be used for any small caliber bullets.

First things first, I knew that in order to maintain uniformity I would need a template, so I began by flattening a lump of putty (I use magic sculpt, but anything would do, and in fact something that holds a crisper indentation like kneadite might be better) and impressing one of my existing bullet belts into it. I used the Dragon Gen 2 because it is a bit bigger that the finished product that I am going for and therefore leaves just the right amount of space for the individual rounds to sit.

I began by putting a short length of straightened wire into my dremel (I had to buy the micro collet set to get one small enough to clamp down on the wire)


I then slowly formed the tip of the wire into the shape I was looking for, first on a 400 grit wet/dry sandpaper and then refining it on a finishing stick (this one is a squadron one I believe)


(forgive the blurry image, couldn’t get my camera to focus on the tip)

Next I took out the wire and placed it in my handy template, which also had holes pushed in that are the correct length (took some trial and error thats why so many holes, but I once I got it the correct length I used the same one every time for continuity).


Then I cut it off using a good pair of flush cutters, luckily the wire is fairly soft so the the cuts came out pretty clean.


Then I removed the bullet from the hole and placed it in line with the others


That is basically it. I found that it was best to sit down for an extended period of time and sort of get in the zone, that way I got more consistently shaped bullets. I should also say in the end, probably 85% were good enough for use in the end, either cut too short, or not shaped well.


I was sceptical at first, thinking there was no way that it would work (or work well enough) but I actually think they look pretty good!

I toyed with the idea of actually using something to make a flexible belt to hold them all together, but it just didn’t work, too fiddly and nothing I could think of would stick to that small an area while still maintaining the flexibility needed to behave like an actual ammo belt.

So I then began gluing the rounds on one by one.


I think it will actually work!!

Once I finish with the ammo belt I can really get in there and refine the sculpting, the fun part!
I’m also waiting on a set of hornet heads, hopefully one of them will work, it has been quite difficult finding one that has similar features and expression that the soldier in the photo has.

Next up I will share a side by side of the K59 mg42 and the Dragon Gen2 offering...
taesung
Visit this Community
New Jersey, United States
Joined: February 14, 2004
KitMaker: 493 posts
Armorama: 340 posts
Posted: Tuesday, April 01, 2014 - 11:30 AM UTC
Wow.... it looks good so far. But that's gonna be a lot of work!
ahandykindaguy
Visit this Community
Alberta, Canada
Joined: August 20, 2008
KitMaker: 1,295 posts
Armorama: 1,191 posts
Posted: Tuesday, April 01, 2014 - 03:01 PM UTC
Alotta lotta work indeed, as my little girl would say... But well worth it in the end if the beginning is any indication! Great job so far.

Dave
panzerconor
Visit this Community
Massachusetts, United States
Joined: February 08, 2012
KitMaker: 1,271 posts
Armorama: 1,253 posts
Posted: Tuesday, April 01, 2014 - 04:05 PM UTC
I was just thinking about this thread a little while ago, and now it's back! Weird. But holy &@$% that's some very fine detail work there. Can't imagine even attempting that. Looking forward to the rest!

-Conor
tskross
Visit this Community
New York, United States
Joined: August 29, 2008
KitMaker: 160 posts
Armorama: 152 posts
Posted: Tuesday, April 01, 2014 - 10:44 PM UTC
Thanks for commenting guys! Well yeah it's a lot of "work" but like I said I enjoy it (maybe I'm crazy!?). It probably takes about 2 minutes per round but I will do 5-10 whenever I get a few extra minutes, I've done about 35-40 so far so I'm almost there.
I still think about getting the adlers nest rounds but at over $1 a piece that would be a bit too rich for my blood!

Honestly this is kind of a version 1.0 for this technique. It's still a bit rough, but for my skill level I think it works. My hope is that by sharing it someone else can use it and improve on it.

@Taesung I was happy to see your comment here. I was really considering getting a set of the Alpine heads for this figure. I prefer the style of sculpting, the expressions seem a little less expressive than hornet, which almost seem cartoonish to me sometimes. But I couldn't quite seem to find one that would fit are there any that you can think of that might work?

Thanks again guys!
jrutman
Visit this Community
Pennsylvania, United States
Joined: April 10, 2011
KitMaker: 7,941 posts
Armorama: 7,934 posts
Posted: Wednesday, April 02, 2014 - 02:29 AM UTC
Check out Alpines' website man. There are a few heads there that will work as they are wearing the "stock" or winter headscarf with helmet. Your original guy in the pic doesn't really have much of a wild expression anyway.
Those mg rounds turned out very nice. Did you consider maybe using a strip of lead foil glued to the bottom of the belt to replicate the link belt? It is very bendable. The German ammo belts were non-disintegrating and had to be re-loaded. This would work when you run into an area where you can't glue the rounds to the fig?
Pretty cool to have Taesung post on your blog.
J
tskross
Visit this Community
New York, United States
Joined: August 29, 2008
KitMaker: 160 posts
Armorama: 152 posts
Posted: Wednesday, April 02, 2014 - 03:02 AM UTC
Hi Jerry,

Thanks for the idea. I actually hadn't thought about the lead foil (strangely enough). I guess I figured I could have more control just sculpting with putty. I know you get asked this all the time, but do you have a good source? I'll run some experiments...

Way to go with the stoumont diorama by the way, that is one hell of an undertaking. One figure at a time is about all I can handle!!
tskross
Visit this Community
New York, United States
Joined: August 29, 2008
KitMaker: 160 posts
Armorama: 152 posts
Posted: Wednesday, April 02, 2014 - 09:03 AM UTC
While in the middle of trying to figure out the ammo belt conundrum I received my K59 mg 42. Although it was no longer in production, I emailed the producer on etsy and he was kind enough to cast one for me (and a few more, they are still available folks!) Originally I was just going to stick with the very nice dragon gen 2 but I a combination of my curiosity, and a desire for more detail led me to get the K59 version. I’m kind of treating this figure the same way I would an armor model so $13 for a pretty important accessory didn't seem so bad.

It arrived in a nice box with the sub assemblies individually packaged in zip lock baggies, with a well illustrated set of instructions.


The parts all look well cast and the detail is very crisp


sorry about the picture, doesn’t quite capture the detail

I was especially impressed with the tiny details such as the sight, strap connection points and the interior of the receiver cover. There are also pe frets with the (incredibly detailed) strap as well as AA sight.

Next to the Dragon gen 2 offering I have to say I was still quite impressed with what dragon could do with the slide mold technology (why they seem to have stopped doing this is a mystery, they could make money selling sets up german and us weapons and gear, especially now that prices overall have gone up).


I was a little concerned at first with the scale, but on further inspection it seems the K59 version will work, especially looking at this photo


you can see that the MG looks quite large next to the figure so I think the K59 version will work.

I don’t know much about the MG 42 so I found this image to use as a reference and I think it is quite helpful so I will share it here:


OK thats it for now, I hope you found this helpful. Next post will be a return to the sculpting and hopefully fitting the new head to the figure...
jrutman
Visit this Community
Pennsylvania, United States
Joined: April 10, 2011
KitMaker: 7,941 posts
Armorama: 7,934 posts
Posted: Thursday, April 03, 2014 - 02:18 AM UTC

Quoted Text

Hi Jerry,

Thanks for the idea. I actually hadn't thought about the lead foil (strangely enough). I guess I figured I could have more control just sculpting with putty. I know you get asked this all the time, but do you have a good source? I'll run some experiments...

Way to go with the stoumont diorama by the way, that is one hell of an undertaking. One figure at a time is about all I can handle!!


For lead foil? Wine bottle wraps my friend. Best source!! You have to search a bit because now a lot more wine bottles have the cork wrapped with plastic or something else but there are still a number that come with lead foil. The added benefit of course,is that you then get to consume the adult beverage contained therein.
Barring that there are some armor aftermarket firms that handle different thicknesses of foil and lead wire as well. Both come in handy.
Thanks for the kind words about Stoumont btw,
J
tskross
Visit this Community
New York, United States
Joined: August 29, 2008
KitMaker: 160 posts
Armorama: 152 posts
Posted: Thursday, April 03, 2014 - 03:22 AM UTC
Ah thats what I figured Jerry, I asked because I can't think of the last bottle of wine I bought that had foil...Is that an indication of the cheap plonk I've been drinking?!

OK will have to hunt down a bottle, sounds like my kind of "research"
Plasticbattle
#003
Visit this Community
Donegal, Ireland
Joined: May 14, 2002
KitMaker: 9,763 posts
Armorama: 7,444 posts
Posted: Thursday, April 03, 2014 - 04:42 AM UTC
Serious amount of work to build a bullet belt in 1/35, but by the looksof things, its turning out great. Nice work. Looking forward to more updates.
Fenbeiduo
Visit this Community
Jiangsu, China / 简体
Joined: April 05, 2014
KitMaker: 103 posts
Armorama: 90 posts
Posted: Friday, April 04, 2014 - 08:04 PM UTC
I though that one day I would build a fig just like the man in the pic.Your prosess may very usefull for me.great work,looking forward!
fen
 _GOTOTOP