_GOTOBOTTOM
Constructive Feedback
For in-progress or completed build photos. Give and get contructive feedback!
ICMs 1:48 scale Sd.Kfz. 222
SuperSandaas
Visit this Community
Sør-Trøndelag, Norway
Joined: October 23, 2012
KitMaker: 189 posts
Armorama: 37 posts
Posted: Friday, February 07, 2014 - 10:45 AM UTC
Some pictures of my latest project, ICMs quaterscale "clown car". At this level I wish they release more armour in this scale.

A few notes: There's no way to easily pose the wheels and the interior is bare, so unless you plan major scratch-building, leave the hatches closed.

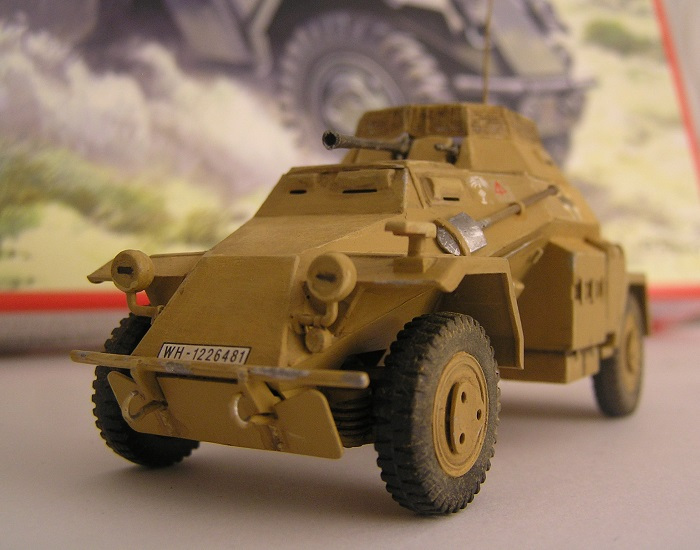
There are also a few ejection marks that needs work, especially on the armoured guards on the wheels. The PE grenade guard is also a bit challenging to get to line up.

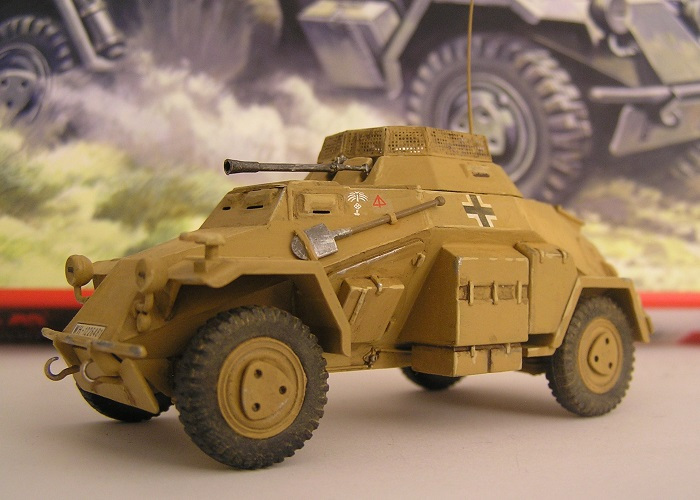
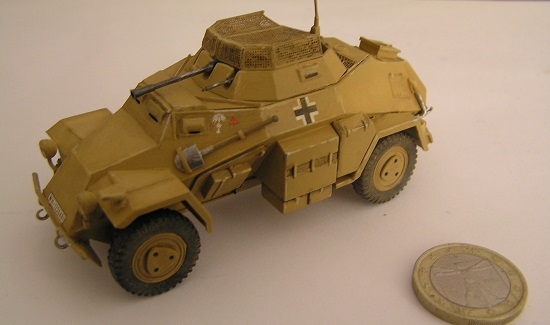
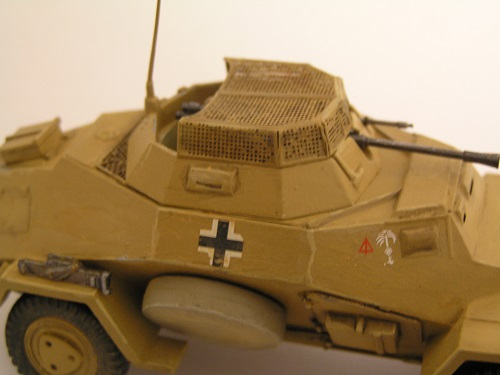
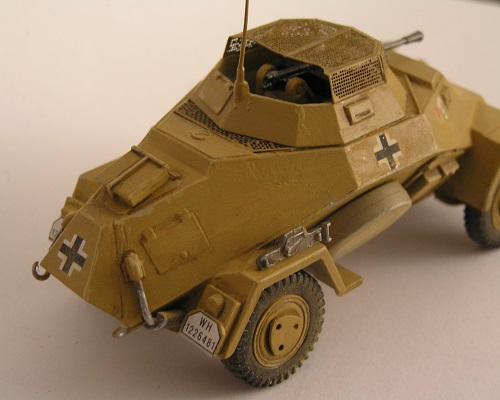
The decals where reasonably easy to work with, except the DAK-symbol who broke up so I had to jigsaw it back together in-situ.

Weathering was kept simple with some restrained chipping and a dusting of pulverized artists chalk.

But all in all a very enjoyable build.


Any and all comments are welcome.
retiredyank
Visit this Community
Arkansas, United States
Joined: June 29, 2009
KitMaker: 11,610 posts
Armorama: 7,843 posts
Posted: Friday, February 07, 2014 - 01:44 PM UTC
Great starting point, for a very detailed build. The first thing I noticed, after the restrictions of scale was the mesh. You should ream the holes with a needle, just to get rid of the paint build up. I've built a couple of German armored cars in 1:35 and found that to be one of the most simple and rewarding fixes. It just sticks out. Sand gets everywhere. I'm not sure exactly how to translate that to 1:48, but you may want to consider a little more pigment or a sand filter on the horizontal surfaces. I like the chipping. I'm a hypocrite, as I go crazy with weathering too. Way overdoing the rust and paint chips. Did you drill the barrel or was that oob? Another great fix. I also like the attention to the spare wheel cover not being the same color as the rest of the vehicle. The decals look very nice. AND, MOST IMPORTANTLY if you enjoyed it, then you did it right. Every model is a lesson learned. All of this, is just mho. Do you plan to stay in 1:48 or branch out to 1:35/72?
SuperSandaas
Visit this Community
Sør-Trøndelag, Norway
Joined: October 23, 2012
KitMaker: 189 posts
Armorama: 37 posts
Posted: Friday, February 07, 2014 - 04:21 PM UTC
The barrel had no need for drilling, but there was a lot of flash around the edge, and the barrel is quite flexible so I took my time cleaning it up. I tried to go over the netting with a fine needle, but the width of the holes are actually so fine most needles I had was to blunt! Might go over it once more with a ultrafine tungsten needle.

The instructions was a bit unclear on where to mount the jack and spade so I found some online pictures. I left the fire extinguisher(?) off as it was very basic. I could have scratched one, but it seems they were sometimes lost or removed on the real thing, so I didn't bother.
The arial is stretched sprue from the kit, so I knew thematerial would bond well.

I didn't want it too dusty as these things was more used in dry brushland than actual desert in Libya. I can add more or dust some off, as it's not varnished on, my models live a sheltered life in a glass cabinet.

My references seemed to suggest they were painted ivory inside, but that's not really visible on the finished model.

I have built 1:35 before, but 1:48 are a sweet spot in my view. Needs less room for display, and makes a nice counterpoint to any aircraft in 1:48 I build.
AFVFan
Visit this Community
North Carolina, United States
Joined: May 17, 2012
KitMaker: 1,980 posts
Armorama: 1,571 posts
Posted: Friday, February 07, 2014 - 04:33 PM UTC
Eirik, she looks pretty good. Matt covered most of the areas I would have mentioned already. The top of the list is definitely those screens. In the future when you're doing them, either use the airline from your compressor to lightly blow the excess paint out (if you use a compressor)right after you paint them, or use a straw and manually do it.

The two other items I'll mention are that the antenna looks a bit thick for the scale. You may want to use stretched sprue to replace it. The second would be to use a small round file or drill bit to thin the walls at the front of the flash suppressor down to more of a scale thickness.

Just something to think about....
retiredyank
Visit this Community
Arkansas, United States
Joined: June 29, 2009
KitMaker: 11,610 posts
Armorama: 7,843 posts
Posted: Friday, February 07, 2014 - 10:27 PM UTC
If you are depicting one in dry brush-land, you should emphasize that with your weathering. Or you could go with it being fresh off the boat.
SuperSandaas
Visit this Community
Sør-Trøndelag, Norway
Joined: October 23, 2012
KitMaker: 189 posts
Armorama: 37 posts
Posted: Saturday, February 08, 2014 - 05:34 AM UTC
It's brush painted, so no compressor, but I did try to blow off the excess. The problem _I think_ was that I didn't paint only one "face" at a time, so there probably was some seepage when it dried. The flat grill behind the tower did not have the same problem.

As for the flash-suppressor, I found the plastic too soft to thin it further without risking it tearing. The same played into the aerial diameter. In hindsight I probably could have used a bit of guitar string.

I tried to use a mix of dusting pigments more typical of Mediterranean soil,(more greys and browns than ochre). But as always the colours on photos are not perfect.
AFVFan
Visit this Community
North Carolina, United States
Joined: May 17, 2012
KitMaker: 1,980 posts
Armorama: 1,571 posts
Posted: Saturday, February 08, 2014 - 05:45 AM UTC

Quoted Text

It's brush painted, so no compressor, but I did try to blow off the excess. The problem _I think_ was that I didn't paint only one "face" at a time, so there probably was some seepage when it dried. The flat grill behind the tower did not have the same problem.


Try the straw trick next time. It will focus your breath into a higher velocity stream and you should see results. The other thing to try is to have less paint on the brush. You may have to do two coats.
pablo_g
Visit this Community
Wojewodztwo Slaskie, Poland
Joined: October 21, 2003
KitMaker: 529 posts
Armorama: 500 posts
Posted: Saturday, February 08, 2014 - 07:40 AM UTC

Quoted Text

The same played into the aerial diameter. In hindsight I probably could have used a bit of guitar string.


I do antenna with acupuncture needles are thin and elastic so there is no fear that the damage or bent, you just have to be careful not to get hurt because they are very sharp.


Pawel
SuperSandaas
Visit this Community
Sør-Trøndelag, Norway
Joined: October 23, 2012
KitMaker: 189 posts
Armorama: 37 posts
Posted: Saturday, February 08, 2014 - 12:47 PM UTC

Quoted Text

Try the straw trick next time. It will focus your breath into a higher velocity stream and you should see results. The other thing to try is to have less paint on the brush. You may have to do two coats.


I used Tamyia rattle-can primer (which did not give any "filled" effect) and then two coats of the dark yellow base coat and a topwash of very diluted burnt umber. But I'll note the trick with the straw. I actually have used it to mimic the airflow on modelplanes (fuel-leaks from drop-tanks and so on) But somehow I forgot to try that and just blew with my mouth. Oh well, after a work over with a ultrafine needle it's been much improved.
retiredyank
Visit this Community
Arkansas, United States
Joined: June 29, 2009
KitMaker: 11,610 posts
Armorama: 7,843 posts
Posted: Saturday, February 08, 2014 - 12:59 PM UTC
Can you post some more photos?
SuperSandaas
Visit this Community
Sør-Trøndelag, Norway
Joined: October 23, 2012
KitMaker: 189 posts
Armorama: 37 posts
Posted: Saturday, February 08, 2014 - 01:55 PM UTC
I'll take some more tomorrow in daylight, had to recharge the camera.
SuperSandaas
Visit this Community
Sør-Trøndelag, Norway
Joined: October 23, 2012
KitMaker: 189 posts
Armorama: 37 posts
Posted: Sunday, February 09, 2014 - 07:48 AM UTC
Busy day, but here's a couple of pics post-cleanup. An improvement, and now looks good at 20 cm distance, which is all I aim for.

AFVFan
Visit this Community
North Carolina, United States
Joined: May 17, 2012
KitMaker: 1,980 posts
Armorama: 1,571 posts
Posted: Sunday, February 09, 2014 - 12:36 PM UTC
That is an improvement.
 _GOTOTOP