_GOTOBOTTOM
Constructive Feedback
For in-progress or completed build photos. Give and get contructive feedback!
Taymiya 1/35 panther
JoLuke
Visit this Community
Oregon, United States
Joined: July 30, 2013
KitMaker: 61 posts
Armorama: 54 posts
Posted: Tuesday, March 04, 2014 - 11:13 AM UTC
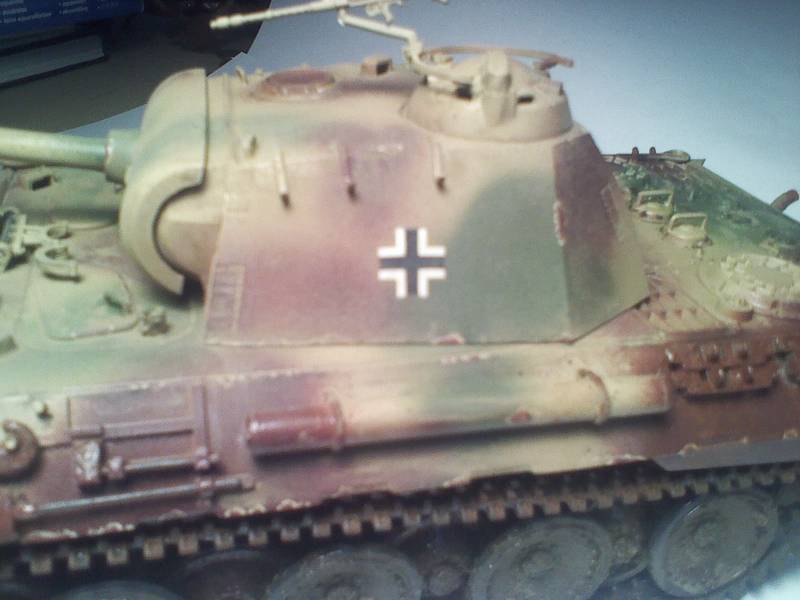
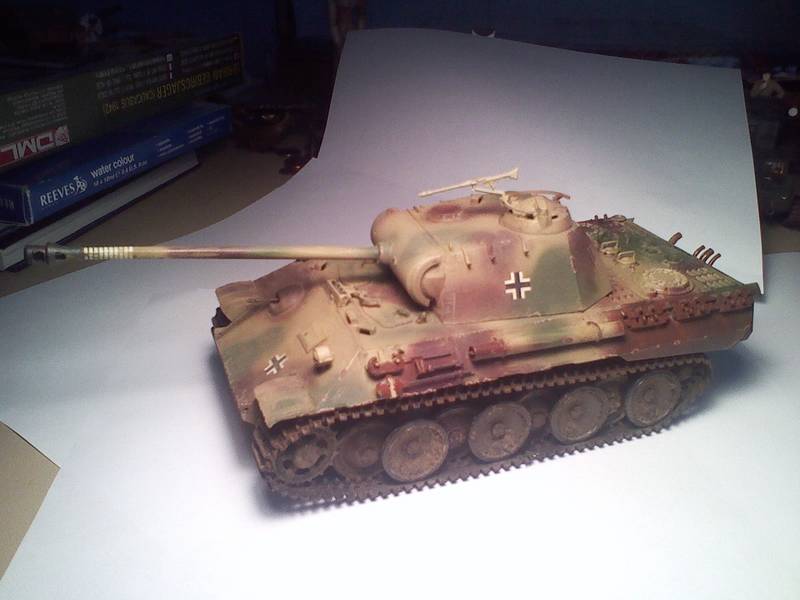
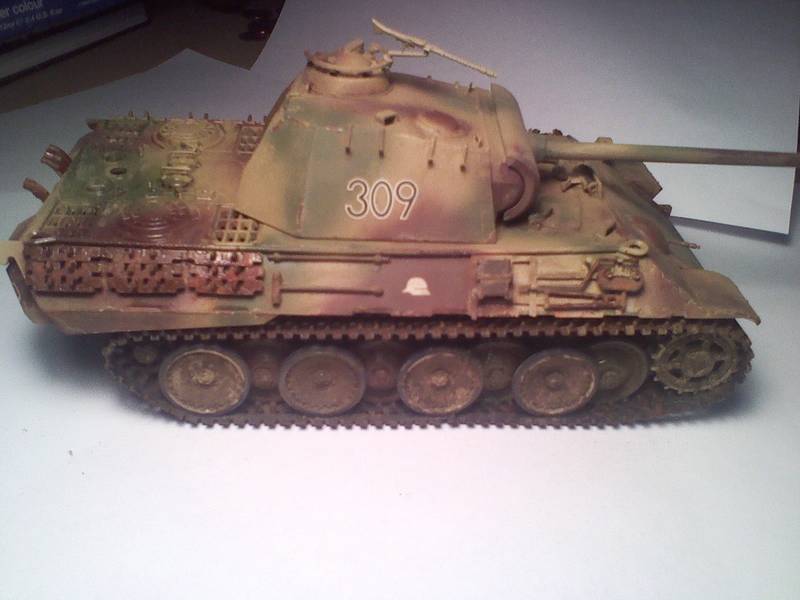
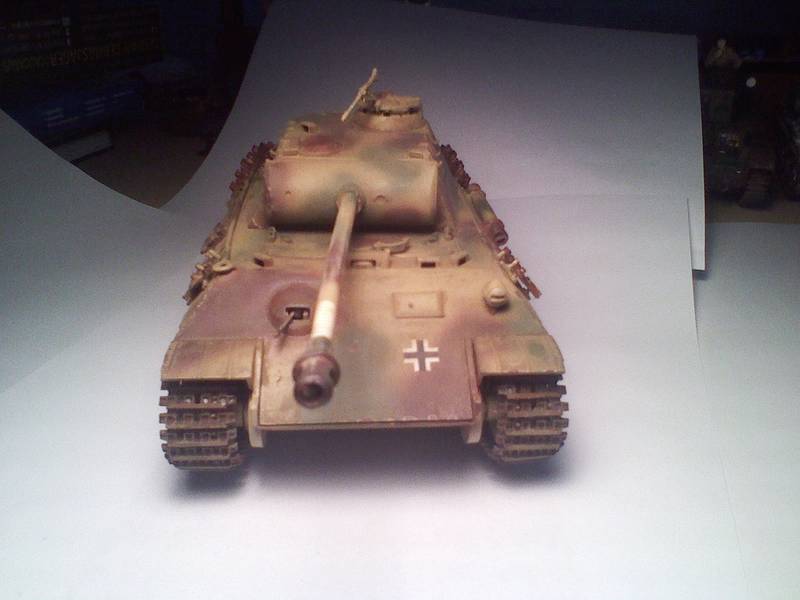
This is my first submission to the sight, im pretty happy with how it turned out for the most part, but since I was in such a hurry to paint it, I didnt notice the gap between the upper and lower glacis plate, this was also the first model I did with pigments, any feed back or opinions are welcome since im still learning


retiredyank
Visit this Community
Arkansas, United States
Joined: June 29, 2009
KitMaker: 11,610 posts
Armorama: 7,843 posts
Posted: Tuesday, March 04, 2014 - 12:23 PM UTC
Very nice. Hull matings plague several kits and I understand being in a hurry. This hobby takes time and patience. The engine deck looks a little glossy, but that may be a trick of light. I like the camo. It looks quite faded. The tools and tracks are very well done and I see no silvering around the decals. You have made exceptional use of pigments. I really enjoy the weathering process. Since the pigments are in place, it may be a little late for this model. I would recommend adding a filter, before you apply the pigments and after you apply the decals. Pre or post shading is very important. It will help define the edges and add shadows. I'm just getting into applying washes. Previously, I used water colors(the cheap ones). I work fairly well. You may want to look into this. But, a very nice kit with few errors. As I am no expert, accuracy doesn't play a part. It looks like you enjoyed it and that is what the hobby is about. FUN By the way, what brand of paint did you use? From what you have posted, I see more potential in your work than in mine.
JoLuke
Visit this Community
Oregon, United States
Joined: July 30, 2013
KitMaker: 61 posts
Armorama: 54 posts
Posted: Tuesday, March 04, 2014 - 01:15 PM UTC
Thanks for the comments,I used tamiya paint for the cammo scheme, then I did some streaking ( not very noticable in the photo's) with oil paints, I tried doing black pin washes, but the overall dusting I did kinda covered them all up, im not the best at working with tracks though, you cant realy notice in the pictures, but I sewed the tracks together and the rust paint I used on the tracks only got on the outside so the inside of the tracks are still black, I meant to do a filter to make the colors in the camo and chips blend together, but I was too excited about trying out pigments and I skipped the step
Petro
Visit this Community
Connecticut, United States
Joined: November 02, 2003
KitMaker: 984 posts
Armorama: 846 posts
Posted: Tuesday, March 04, 2014 - 01:58 PM UTC
I agree with what Matt said about the glossy look on the rear deck.
Pin washes would definitely help. Then some dry brushing on the raised details.
Impatience is really one of my problems. Apparently some others also. I can really get sick of the build part and want to move on to painting and finishing, as i find that the enjoyable part of models. (but it can be stressful!!! )

Browse some of the build logs and you'll see what patience can do for your modelling.
corsair924
Visit this Community
New Hampshire, United States
Joined: August 11, 2008
KitMaker: 403 posts
Armorama: 322 posts
Posted: Tuesday, March 04, 2014 - 03:03 PM UTC
Hey Jonas,
just like anything else, practice!
that and watch this site and others like it for models that catch your eye
-"AH! I like that!" or "How the heck did he get that effect and can I do it to my next tank"
Good thing about this site is the depth to it's archive so you can usually find previous posts about research, painting, weathering, and kits with known assembly/quality issues
(Go look up the berating that the new Dragon M103 is getting just this week)
and if you toss out any question there is usually someone who can educate you on it.
Keep working at it
Oh and: nice job, I've had that exact kit for about 30 years and its on it's third camo scheme, second gun, but still original set of tracks.
AFVFan
Visit this Community
North Carolina, United States
Joined: May 17, 2012
KitMaker: 1,980 posts
Armorama: 1,571 posts
Posted: Tuesday, March 04, 2014 - 04:01 PM UTC
Pretty nicely done, for a first effort. The only thing I'd add to what others have already mentioned is about the tracks. I know it can be a pain sometimes, but you want to make sure the track goes down all the way on the sprocket teeth. In the case of the band style tracks, it may only mean a bit of pressure to force them down, though sometimes more drastic measures need to be utilized. The other thing is that the Panther has a characteristic droop in the upper run. To get it with the band tracks, you'll need to glue the track to the sprocket as it comes around the top and then glue it to the tops of the road wheels (normally starting with the 1st outer set). As for your unpainted inner track runs you can use some pigments to dust them up. This would help hide the unpainted portions.

Hope this helps.
JoLuke
Visit this Community
Oregon, United States
Joined: July 30, 2013
KitMaker: 61 posts
Armorama: 54 posts
Posted: Tuesday, March 04, 2014 - 05:06 PM UTC
Thanks for all the imput, I've only been making models for about a year and a half now, and I took about a 6 or 7 month break, I only started building again last november, but during that break I read up on alot of techniques and went through tons of build reviews and tutorials, now its just a matter of working on them and being able to actualy execute them, washes and fiters are something I realy need to start doing more of, and I also need to practice oil dot filters, im still learning, but whenever I ask for help on tips or techniques on the sight, people usualy jump to help, im pretty impressed with the modeling community, there a very helpful bunch
AFVFan
Visit this Community
North Carolina, United States
Joined: May 17, 2012
KitMaker: 1,980 posts
Armorama: 1,571 posts
Posted: Wednesday, March 05, 2014 - 10:02 AM UTC
You're doing quite well for the short time that you've been doing this. Reading about techniques is okay, but it's the hands on practice time that makes all the difference. That's when you actually learn what's going on.

210cav
Visit this Community
Virginia, United States
Joined: February 05, 2002
KitMaker: 6,149 posts
Armorama: 4,573 posts
Posted: Wednesday, March 05, 2014 - 10:19 AM UTC
Jonas-- welcome to the site and I look forward to seeing more of your work
DJ
JoLuke
Visit this Community
Oregon, United States
Joined: July 30, 2013
KitMaker: 61 posts
Armorama: 54 posts
Posted: Wednesday, March 05, 2014 - 02:44 PM UTC
When I first started the hobby I was getting pretty frustrated because my end results were not great, but now im just looking at flaws as a learning curve, also having a few test tanks help
thebear
Visit this Community
Quebec, Canada
Joined: November 15, 2002
KitMaker: 3,960 posts
Armorama: 3,579 posts
Posted: Wednesday, March 05, 2014 - 08:21 PM UTC
Hi Jonas ... As the others have said this is a very good start .. I've been building models for close to 40 yrs now and I still try a new technique on each new model I build . You're very lucky to be starting now as with the internet and forums like this one ,you'll learn so much more and a lot faster than I did just reading books and magazines.. I have learned SO much since the internet and just how amazing is it to ask a question and have people like David Bryden , Tom Cockle ,and so many more answer you directly .. So keep asking questions and don't get discouraged if the first time it doesn't come out the way you hoped .. (It still happens to me all the time ) And as Matt says the most important thing is to have fun .. Hope to see more of your work soon.

Rick
 _GOTOTOP