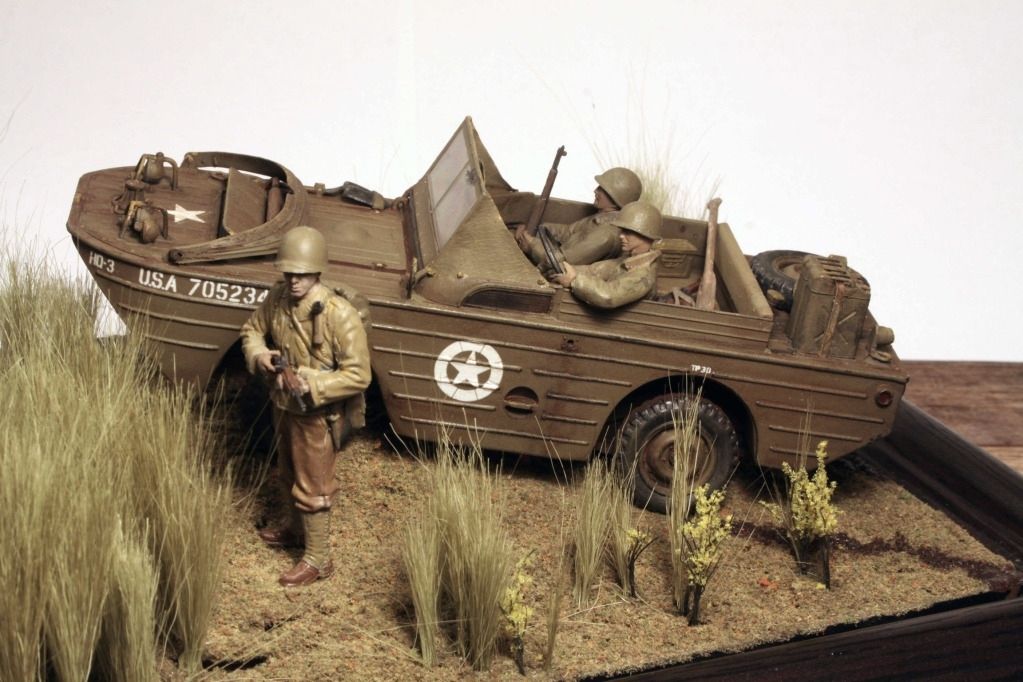
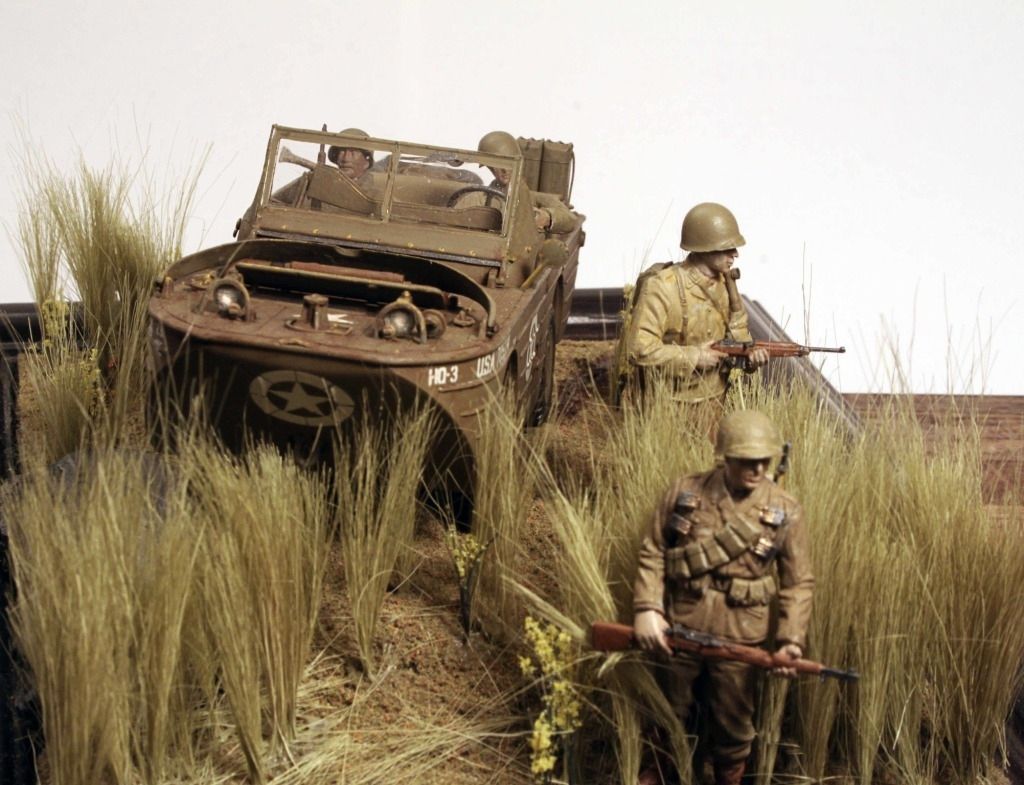
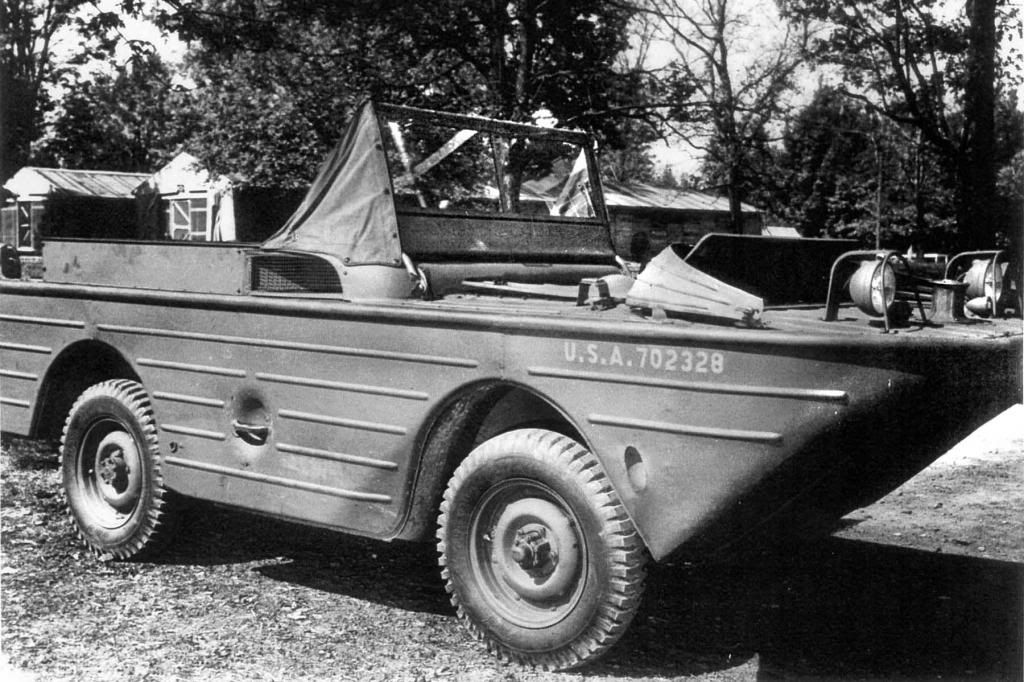
Tamiya offers a new boxing of the old Ford GPA, with new parts for an engine, some etch, and three new figures to boot. Here is a look at how the kit builds up.
Link to Item
If you have comments or questions please post them here.
Thanks!
Armor/AFV
For discussions on tanks, artillery, jeeps, etc.
For discussions on tanks, artillery, jeeps, etc.
Hosted by Darren Baker, Mario Matijasic
REVIEW
Ford GPA AmphibianPosted: Friday, March 14, 2014 - 12:03 PM UTC
armyguy

Joined: December 07, 2012
KitMaker: 262 posts
Armorama: 150 posts

Posted: Friday, March 14, 2014 - 12:49 PM UTC
I didn't think Tamiya would go the retooling rout . But a couple new figures and some P E parts might not be a bad deal.
Now a little work on their jeep, even if they just put in some
new decals that would generate some new interest in it.
I'm still holding out for a covered windshield and top.
In taking a second look at those figures they might look good in a regular Jeep.
Now a little work on their jeep, even if they just put in some
new decals that would generate some new interest in it.
I'm still holding out for a covered windshield and top.
In taking a second look at those figures they might look good in a regular Jeep.
Posted: Friday, March 14, 2014 - 03:25 PM UTC
Nice job Russ. $40 for such an old kit is not justified by the newer figures. When I saw this listed in news, I had high hopes. Maybe they'll make one for their 1/48 line (Hint hint, Tamiya!)?
Posted: Friday, March 14, 2014 - 04:08 PM UTC
The opening hood is more retooling than Tamiya is usually willing to put into an old kit much less offering a new spruce with a full engine AND figures. Having just recently built the older version of this kit I am impressed.
I too wish they had included their new Jeep tires and wheels plus they need to add an oar!
F.Y.I. There should be a small driveshaft going forward from the high pulley on the engine. This somewhat Rube Goldberg device, driven off the fanbelt is what powers the front mounted capstan winch.
I too wish they had included their new Jeep tires and wheels plus they need to add an oar!
F.Y.I. There should be a small driveshaft going forward from the high pulley on the engine. This somewhat Rube Goldberg device, driven off the fanbelt is what powers the front mounted capstan winch.
russamotto


Joined: December 14, 2007
KitMaker: 3,389 posts
Armorama: 2,054 posts

Posted: Saturday, March 15, 2014 - 12:58 AM UTC
Darren, thanks for getting this posted.
Thanks for the comments, all. I have shopped around on the internet and the kit can be had for less than the MSRP. Have to get it primarily through Asian shops-Hobby easy, HLJ or Lucky Model. I think the figures would fit just fine in a jeep.
I doubt Tamiya will push their jeep line further. But Bronco...
Posted: Saturday, March 15, 2014 - 01:18 AM UTC
Nice new boxart!
backswampcub

Joined: July 12, 2013
KitMaker: 172 posts
Armorama: 157 posts
Posted: Saturday, March 15, 2014 - 02:35 AM UTC
I just scored a vintage gpa kit and picked up a eduard pe set for it. But man I wish I had the motor and working hood. Oh well not worth the cost. Shame on tamiya for charging so much for same crap tires.
Posted: Saturday, March 15, 2014 - 02:57 AM UTC
Are their any better resin Jeep tires out there? I know there are some with chains but any without?
Posted: Saturday, March 15, 2014 - 03:59 AM UTC
SKP Model have some options.

Frenchy

Joined: December 02, 2002
KitMaker: 12,719 posts
Armorama: 12,507 posts

Posted: Saturday, March 15, 2014 - 04:43 AM UTC
armyguy

Joined: December 07, 2012
KitMaker: 262 posts
Armorama: 150 posts

Posted: Saturday, March 15, 2014 - 09:37 AM UTC
The E.T.Model wheels look pretty good, the DEF MODEL ones are they for the M-38A1 or are all four for the front axle.
Posted: Saturday, March 15, 2014 - 02:42 PM UTC
Thanks guys.
The Def Models wheels look like they give you four front wheels instead of two fronts and two rears. (The wheel center hubs should be slightly different front to back.)
The Def Models wheels look like they give you four front wheels instead of two fronts and two rears. (The wheel center hubs should be slightly different front to back.)
Posted: Saturday, March 15, 2014 - 04:04 PM UTC
Posted: Sunday, March 16, 2014 - 01:13 AM UTC
Sorry David you said the very same thing about the hubs of the Def. Models wheel hubs.
backswampcub

Joined: July 12, 2013
KitMaker: 172 posts
Armorama: 157 posts
Posted: Wednesday, March 19, 2014 - 10:30 PM UTC
I am going to use these wheels as I had a set in my spares.
http://www.ebay.com/itm/271207441443?ssPageName=STRK:MEWNX:IT&_trksid=p3984.m1497.l2649#ht_2142wt_922
I had to use an 1/8" drill bit to open up the holes in the back in order to fit Tamiya kit.
http://www.ebay.com/itm/271207441443?ssPageName=STRK:MEWNX:IT&_trksid=p3984.m1497.l2649#ht_2142wt_922
I had to use an 1/8" drill bit to open up the holes in the back in order to fit Tamiya kit.
Posted: Saturday, March 22, 2014 - 06:35 AM UTC
Unfortunately I just recently built mine before the introduction of the new kit. Just wanted to do a straight out of the box kit for a change. Wish I had added the resin wheels though.


I did add some much improved jerry cans from Tasca, Archer gauges and info plates, scratch built the canvas side curtains and the oar and finally I custom positioned the driver and passenger figures.


I did add some much improved jerry cans from Tasca, Archer gauges and info plates, scratch built the canvas side curtains and the oar and finally I custom positioned the driver and passenger figures.
russamotto


Joined: December 14, 2007
KitMaker: 3,389 posts
Armorama: 2,054 posts

Posted: Saturday, March 22, 2014 - 11:24 AM UTC
Looks really nice. With care, the kit can certainly build up very well.
Posted: Saturday, March 22, 2014 - 02:30 PM UTC
I agree with you! However I got taken to school by a couple of guys on this site who said you can't just add a couple of gas cans to an old kit and make it a winner. At the time we were talking about the old Peerless Max White Scout Car. My feeling is that SOME, not all, of these old kits have a real quality to them that only call for some minor updating to become a competitor!.
If I had it to do over I would perhaps put even more effort into this model with the Eduard etch set and some raised letter tires. But none the less I am very happy with the results. Thanks
If I had it to do over I would perhaps put even more effort into this model with the Eduard etch set and some raised letter tires. But none the less I am very happy with the results. Thanks
backswampcub

Joined: July 12, 2013
KitMaker: 172 posts
Armorama: 157 posts
Posted: Sunday, March 23, 2014 - 01:27 AM UTC
I am A$$ deep in the eduard PE set for this kit as we speak. It is extremely detailed. The only problems I am having are with the kit parts. The surf shield(the little flip up thing on front) is warped and I cannot get it pulled out straight. I am considering leaving it off as I have seen some pics with it removed.
Posted: Sunday, March 23, 2014 - 04:31 AM UTC
Have you tried hot water to soften it before reshaping it?
backswampcub

Joined: July 12, 2013
KitMaker: 172 posts
Armorama: 157 posts
Posted: Sunday, March 23, 2014 - 05:25 AM UTC
Quoted Text
Have you tried hot water to soften it before reshaping it?
I am going to try that tonight when I get home.
SdAufKla

Joined: May 07, 2010
KitMaker: 2,238 posts
Armorama: 2,158 posts

Posted: Wednesday, March 26, 2014 - 08:06 AM UTC
I built this copy of the 1974 original Tamiya release finishing it up about 2 weeks ago for our local AMPS club's intra-club contest.
The theme for the build was "Anything U.S.," so I was looking for an easy OOTB build to participate with.
The Tamiya kit is an oldie-moldy, but with some basic TLC, I thought it whipped into shape fairly nicely.
I painted on most of the markings (the spade unit insignia and "Devries" name are kit decals) using stencils following the color plate located in Zaloga's Osprey book on the Jeep. I also found original WWII photos of each side of the subject vehicle which showed the markings were not perfectly symmetrical, side to side.
I finished this one using Tamiya paints for the airbrushing, Vallejo model colors for the details, and artist oils for the washes.
The hardest finishing tasks are masking off the windscreen (molded as a single part with the wiper, etc detail) and the screens on the sides and front. I think Tamiya's inclusion of the PE screens is a very logical improvement and would simplify the painting (as long as the builder can deal with the PE).


When I get a break between other projects, I'll go back and add a 5 gal fuel can (the kit can is the old "two handle" type) and maybe a driver figure and put it on a base.
Until someone like Bronco or Miniart release a 21st century version of the Ford GPA, the old Tamiya kit is the only 1/35th scale game in town. The new release is, IMO, an improvement, but certainly not the kit that this subject deserves.
The theme for the build was "Anything U.S.," so I was looking for an easy OOTB build to participate with.
The Tamiya kit is an oldie-moldy, but with some basic TLC, I thought it whipped into shape fairly nicely.
I painted on most of the markings (the spade unit insignia and "Devries" name are kit decals) using stencils following the color plate located in Zaloga's Osprey book on the Jeep. I also found original WWII photos of each side of the subject vehicle which showed the markings were not perfectly symmetrical, side to side.
I finished this one using Tamiya paints for the airbrushing, Vallejo model colors for the details, and artist oils for the washes.
The hardest finishing tasks are masking off the windscreen (molded as a single part with the wiper, etc detail) and the screens on the sides and front. I think Tamiya's inclusion of the PE screens is a very logical improvement and would simplify the painting (as long as the builder can deal with the PE).


When I get a break between other projects, I'll go back and add a 5 gal fuel can (the kit can is the old "two handle" type) and maybe a driver figure and put it on a base.
Until someone like Bronco or Miniart release a 21st century version of the Ford GPA, the old Tamiya kit is the only 1/35th scale game in town. The new release is, IMO, an improvement, but certainly not the kit that this subject deserves.
Posted: Monday, March 31, 2014 - 08:37 AM UTC
Mike, I really like the panel shading affects on your GPA! Not really panels I guess more like rib shading!
SdAufKla

Joined: May 07, 2010
KitMaker: 2,238 posts
Armorama: 2,158 posts

Posted: Monday, March 31, 2014 - 10:17 AM UTC
Quoted Text
Mike, I really like the panel shading affects on your GPA! Not really panels I guess more like rib shading!
Thanks, Mike!
The shading was done with the airbrush and then using a variation of oil color modulation.
I pre-shaded using Tamiya XF-62 Olive Drab straight from the bottle, and then highlighted with the same color mixed with XF-60 Dark Yellow at about 3:1 OD to yellow.
After the markings were done, I used indigo artist oils for the shadow washes followed by yellow ocher for the highlight washes. Each wash color was applied individually and blended out with a brush damp with mineral spirits. I also used ordinary mineral spirits to make the washes.
These indigo shadow washes were applied carefully, more like pin washes, just around or in the details instead of indiscriminately like general washes. The yellow ocher washes were applied across wider areas, like the fields between the ribs, somewhat like filters, as well as to the tops of the ribs, rivets and bolts, etc.
All very "old school" and low-tech.
I followed this with the dirt and dust colors airbrushed on. I used a raw umber oil wash in those areas.
That's really all there is to the basic colors.
The detail painting and chipping were done with Vallejo and Citadel acrylics. The whole thing got a "dust" glaze airbrushed on made with Tamiya Buff, gloss clear and thinners.


I still have some detail painting to do on the seat cushions and to add a 5 gal fuel can. (I couldn't bring myself to use the two-handled can that came with the kit!)
Glad you like, though!
Happy modeling!
Posted: Monday, April 14, 2014 - 03:03 PM UTC
 |


