_GOTOBOTTOM
Constructive Feedback
For in-progress or completed build photos. Give and get contructive feedback!
Charlie's Sherman.
rfbaer
Visit this Community
Texas, United States
Joined: June 12, 2007
KitMaker: 1,866 posts
Armorama: 1,696 posts
Posted: Friday, May 30, 2014 - 06:02 AM UTC
I don't have pics with a clean background yet, but this one is going to a show tomorrow and was hoping to throw it out there and see if anyone sees something I'm missing. And, my long-time neighbor passed away last week, and he rode a Sherman towards the end of the war, so this one is for Charlie Shafer, may he rest in well-deserved peace.
Charlie's tank:


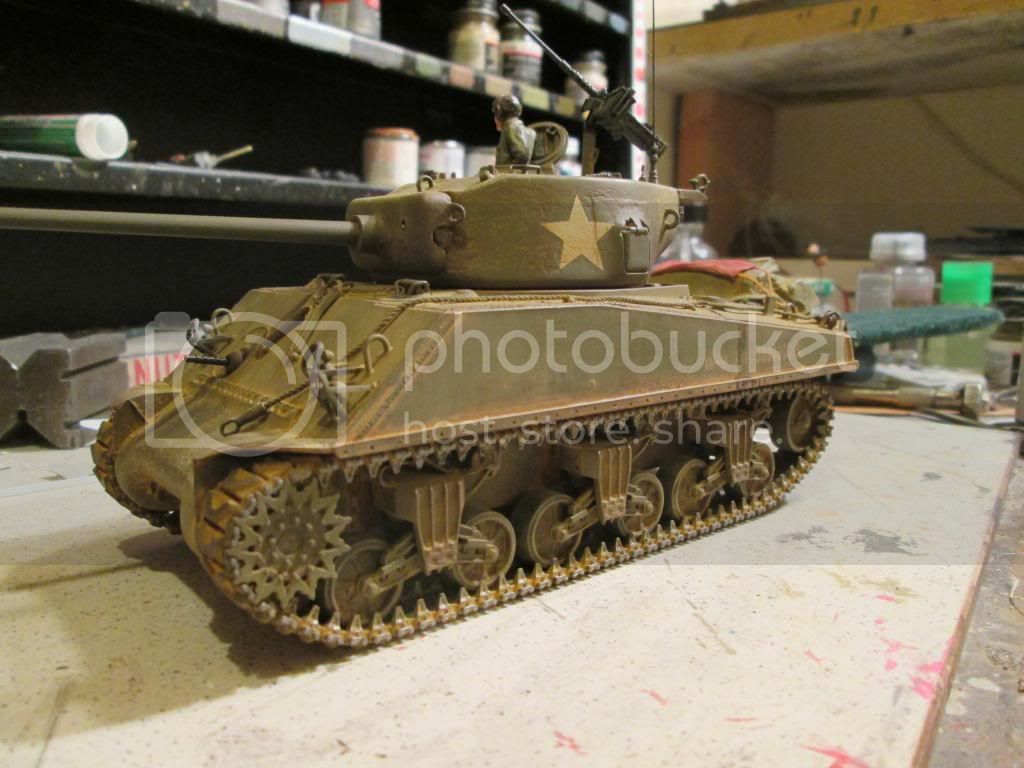
The model is from a Tamiya hull, Tasca suspension and tracks and a very old Dragon turret that took lots of re-shaping to get the look "right".
Any comments welcomed.
stufer
Visit this Community
England - East Anglia, United Kingdom
Joined: May 25, 2003
KitMaker: 416 posts
Armorama: 342 posts
Posted: Friday, May 30, 2014 - 06:30 AM UTC
nice build,and one that has a story behind it,anything that represents those who served is a fine endeavour.I like the stowage,the rope tying it all down,the weathering and the overall finish.
my only observation (and it may or may not be important) is the exhaust deflector,it's a late model and rare on M4A3s in the ETO,maybe you have an early one in the spares box?
But as I say,fine looking ride

rfbaer
Visit this Community
Texas, United States
Joined: June 12, 2007
KitMaker: 1,866 posts
Armorama: 1,696 posts
Posted: Friday, May 30, 2014 - 06:55 AM UTC
Thanks, Steve. That's exactly the kind of feedback I'm looking for.
Re the deflector: I found pics of these in the ETO on VVSS tanks, and my build is a late example. Pics came from "Son of Sherman".
exer
Visit this Community
Dublin, Ireland
Joined: November 27, 2004
KitMaker: 6,048 posts
Armorama: 4,619 posts
Posted: Friday, May 30, 2014 - 06:59 AM UTC
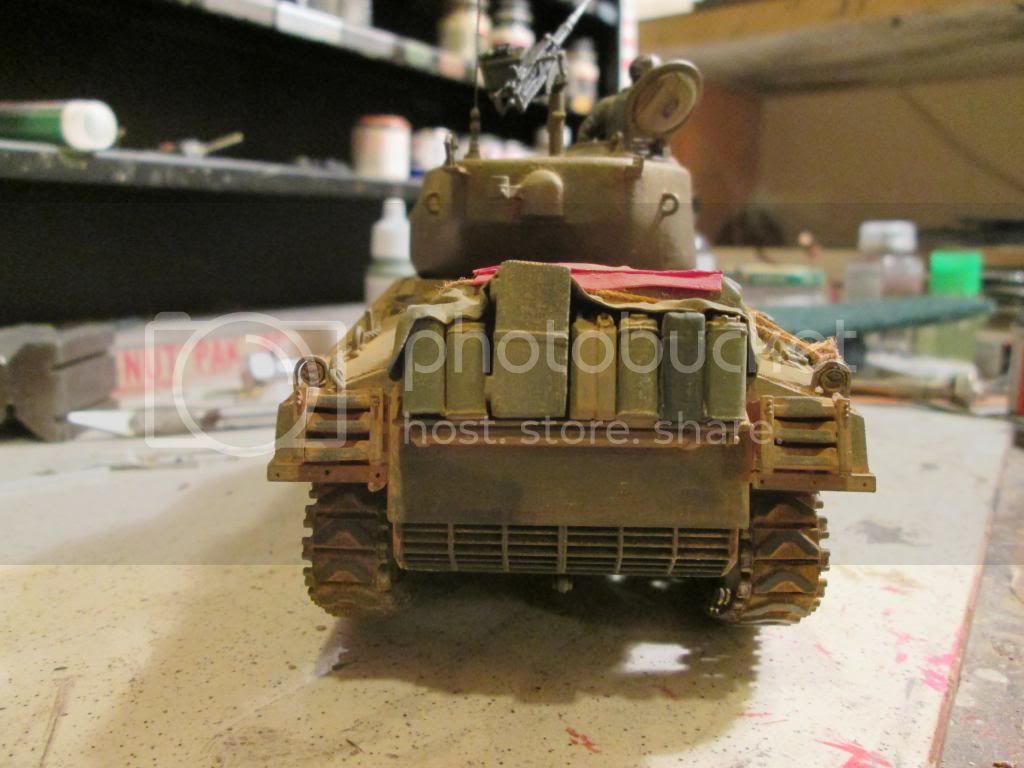
You could maybe add a rope around the jerry cans and the crate on the luggage to stop them falling backwards.
Removed by original poster on 05/14/19 - 00:19:04 (GMT).
rfbaer
Visit this Community
Texas, United States
Joined: June 12, 2007
KitMaker: 1,866 posts
Armorama: 1,696 posts
Posted: Friday, May 30, 2014 - 07:49 AM UTC
Good idea, Pat. I can still do that.
Matt, thanks, and yeah, it's a weird area, looks like the mold underwent some repair, but it's pretty common on the oval-hatch turrets.
Removed by original poster on 05/14/19 - 00:19:19 (GMT).
Armored76
Visit this Community
Bayern, Germany
Joined: September 30, 2013
KitMaker: 1,615 posts
Armorama: 1,500 posts
Posted: Friday, May 30, 2014 - 04:04 PM UTC
Wow! Nice one!
The only things that got my attention was the "free hanging" towing cable and the "gun clamp" (what was the right name of that, again...?) that probably fall and point downwards when the tank starts moving (or am I wrong on this one?).

Other than that a great build! Specially the weathering on the white star is a nicely done.

Hope this helps!
gastec
Visit this Community
Auckland, New Zealand
Joined: February 03, 2014
KitMaker: 1,042 posts
Armorama: 871 posts
Posted: Friday, May 30, 2014 - 05:02 PM UTC
Tow cable is typical as found on a Sherman. There are two small brackets on the upper hull to keep it in place. Weight will keep ends where they usually simply 'drape'.
Gun travel lock has a latch to keep it in position when not in use.

Looks like a nice build - the lighting doesn't do it justice

Gary
TacFireGuru
Visit this Community
Colorado, United States
Joined: December 25, 2004
KitMaker: 3,770 posts
Armorama: 2,263 posts
Posted: Saturday, May 31, 2014 - 09:48 AM UTC

Quoted Text

You could maybe add a rope around the jerry cans and the crate on the luggage to stop them falling backwards.


Agreed. Was my first thought. The crate does not appear to have anything keeping it in place but the angle of the shelf. One 'goose' to the engine and it'd probably fall off.

Mike
rfbaer
Visit this Community
Texas, United States
Joined: June 12, 2007
KitMaker: 1,866 posts
Armorama: 1,696 posts
Posted: Monday, June 02, 2014 - 02:40 AM UTC
Thanks so much, all. I'll have pics up shortly (I hope) of the tank on a clean background, as it went to the show.
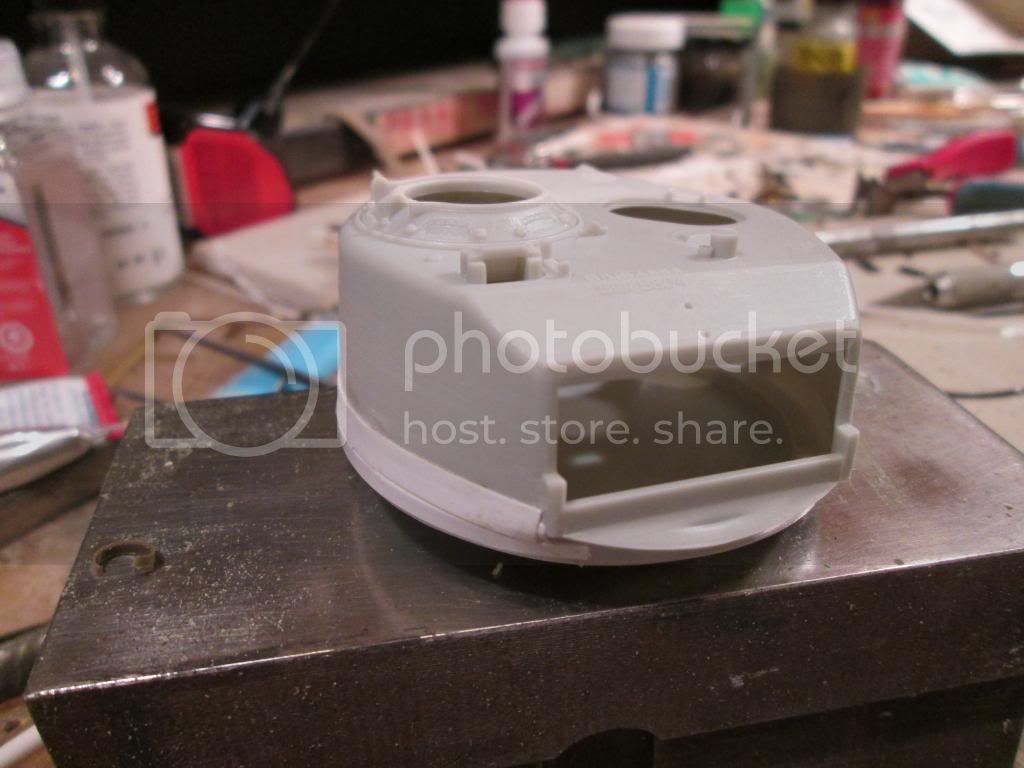
Matt, I used MrSurfacer 500, stippled and then lightly smoothed. As soon as I get settled in here at work, I'll get a pic of it before paint.
rfbaer
Visit this Community
Texas, United States
Joined: June 12, 2007
KitMaker: 1,866 posts
Armorama: 1,696 posts
Posted: Monday, June 02, 2014 - 06:45 AM UTC
Pics as it went to the show, and I'm calling it done, at least until I decide how to display it.


And a pic of the FDA before paint:
Removed by original poster on 05/14/19 - 00:19:37 (GMT).
rfbaer
Visit this Community
Texas, United States
Joined: June 12, 2007
KitMaker: 1,866 posts
Armorama: 1,696 posts
Posted: Friday, June 06, 2014 - 03:06 AM UTC
Hmmm.......
Yeah, MrSurfacer is handy stuff. I use it quite a bit. In fact, the turret on this model has about a half-mil on the sides, worked well to blend in all the different mediums I used to get the profile right.
Here's a pic of the very beginning of the process:

And somewhere in the middle:

And before paint, with the smoother area around the shell-ejection port done in a different texture after masking:

It's good stuff.
Next time however, I'll use a better turret, but I do have another one of these old Dragon things in the stash....
Removed by original poster on 05/14/19 - 00:19:55 (GMT).
rfbaer
Visit this Community
Texas, United States
Joined: June 12, 2007
KitMaker: 1,866 posts
Armorama: 1,696 posts
Posted: Monday, June 09, 2014 - 03:04 AM UTC
Oooo,, the anticipation!

I'm going to play with different textures next, I now have enough partial Tamiya Merk1 kits to build a whole tank, and I've always wanted to show the different textures on the turret and hull. The bench is cleaned off and the stash is back in its place, all I need to find are some of the goofy Centurion-type tow cables.
 _GOTOTOP