_GOTOBOTTOM
Dioramas: Large Scale
Dioramas with large scale (1/16 plus) subjects.
Hosted by Darren Baker
British Advance in Normandy WIP
SiStorey
Visit this Community
England - North East, United Kingdom
Joined: March 14, 2014
KitMaker: 242 posts
Armorama: 161 posts
Posted: Friday, June 06, 2014 - 03:04 AM UTC
Good afternoon, well after tossing and turning about what I was going to build for my first diorama I've eventually came to the decision that I am going to go with a British Forces in Normandy.

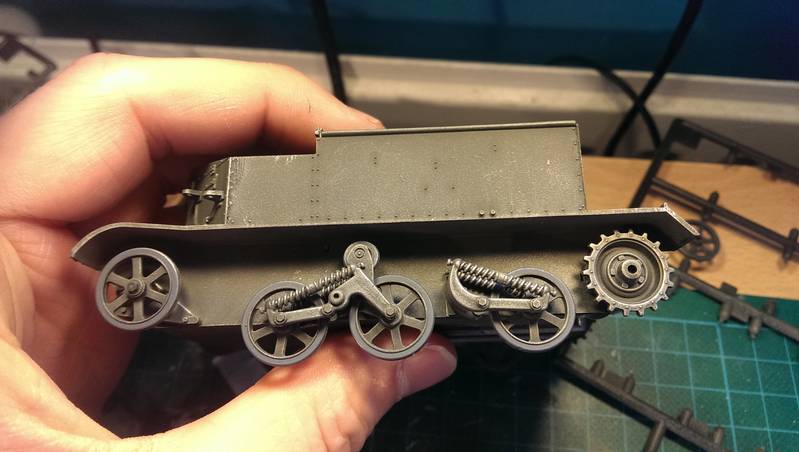
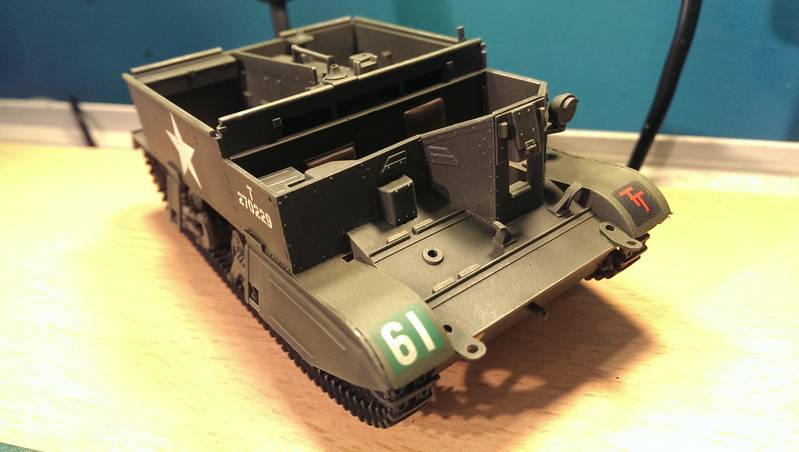
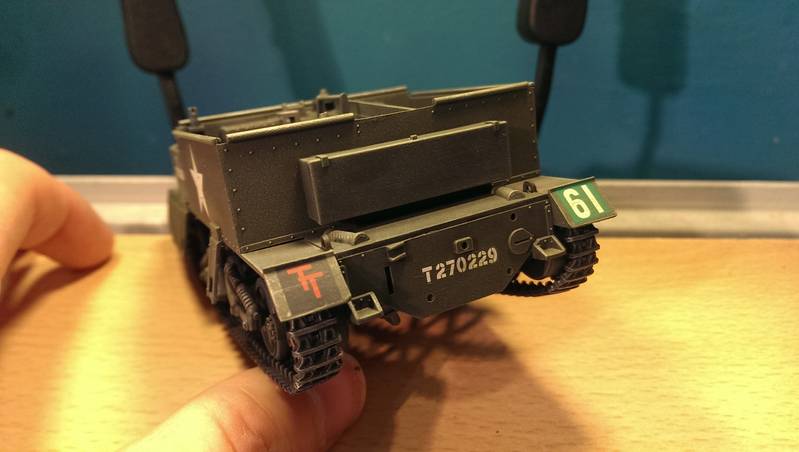
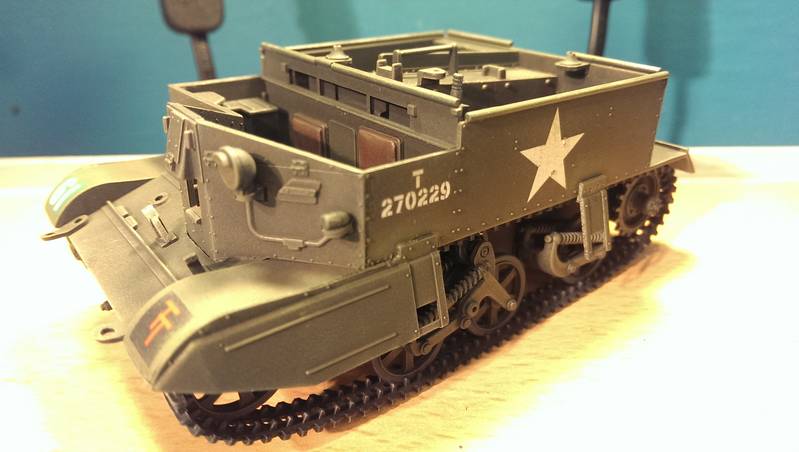
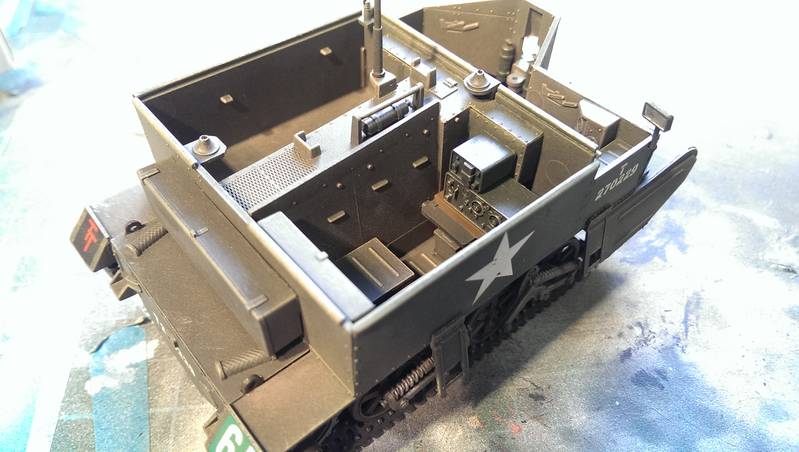
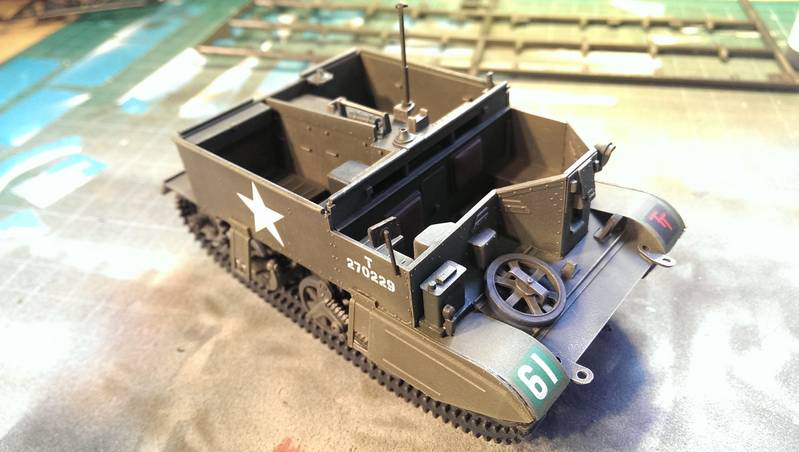
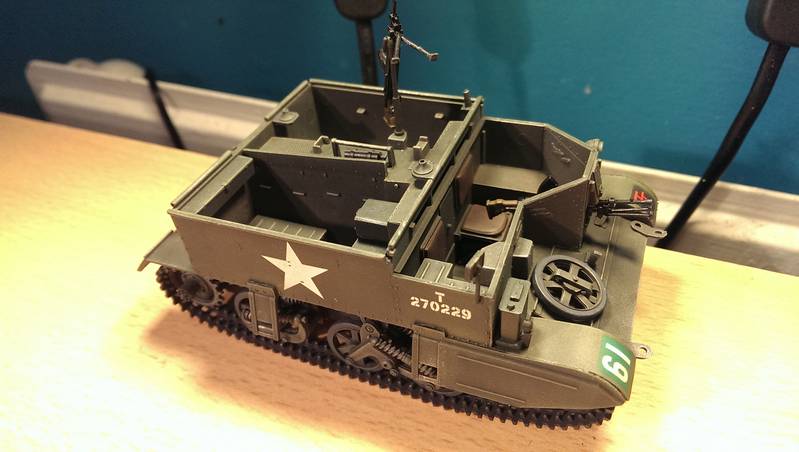
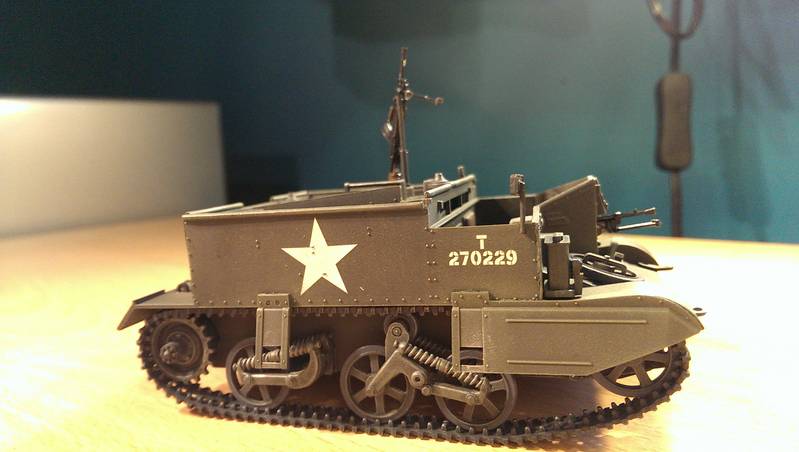
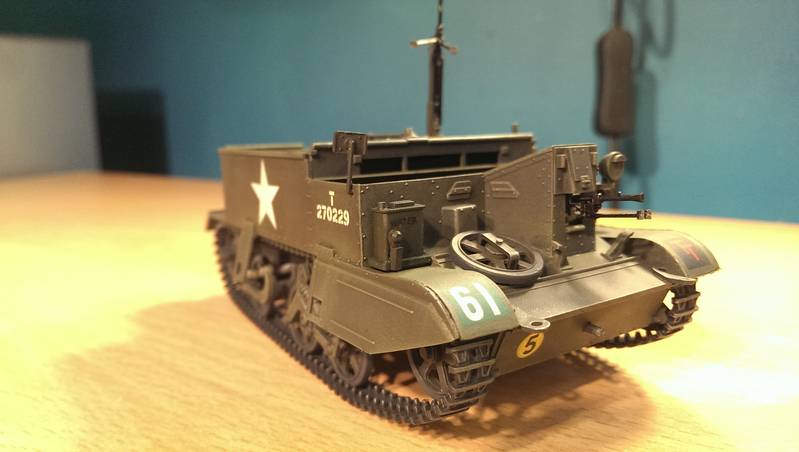
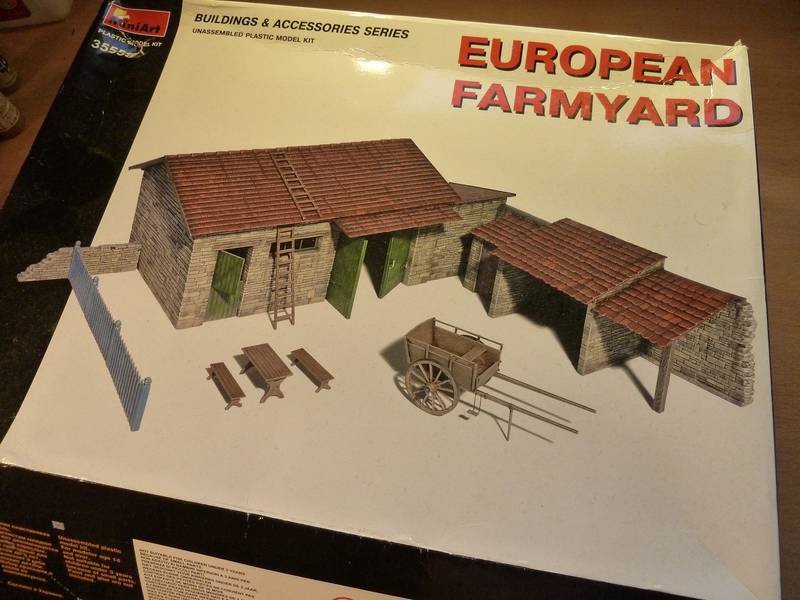
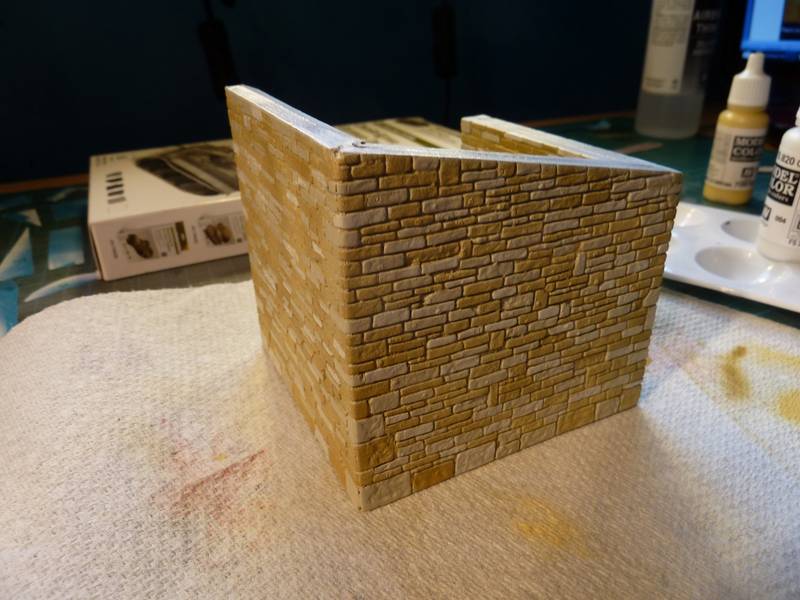
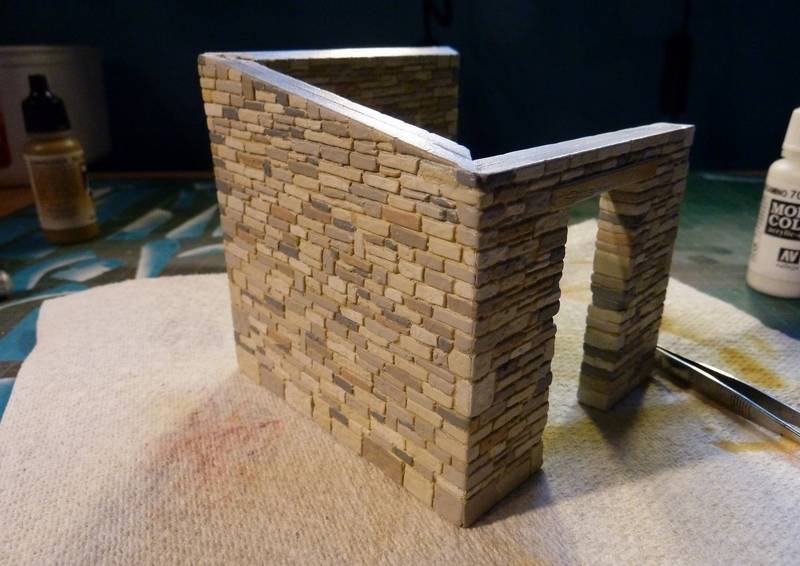
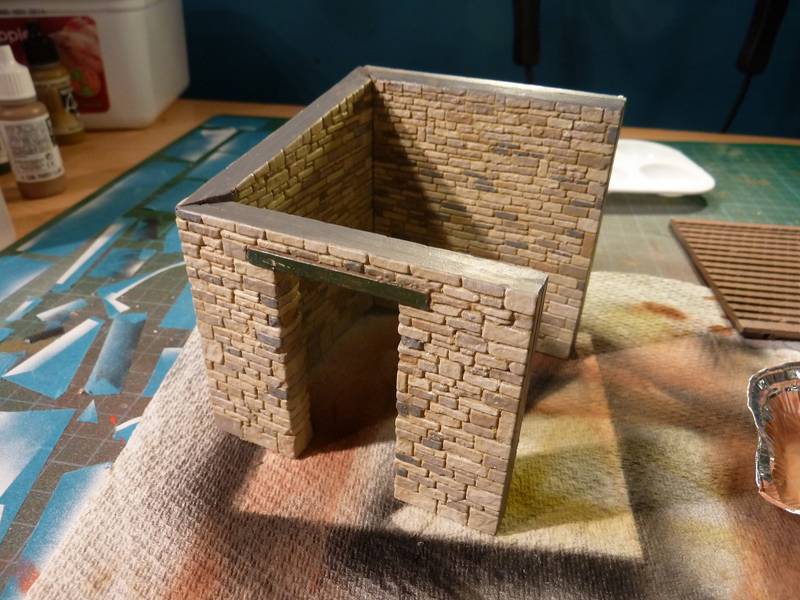
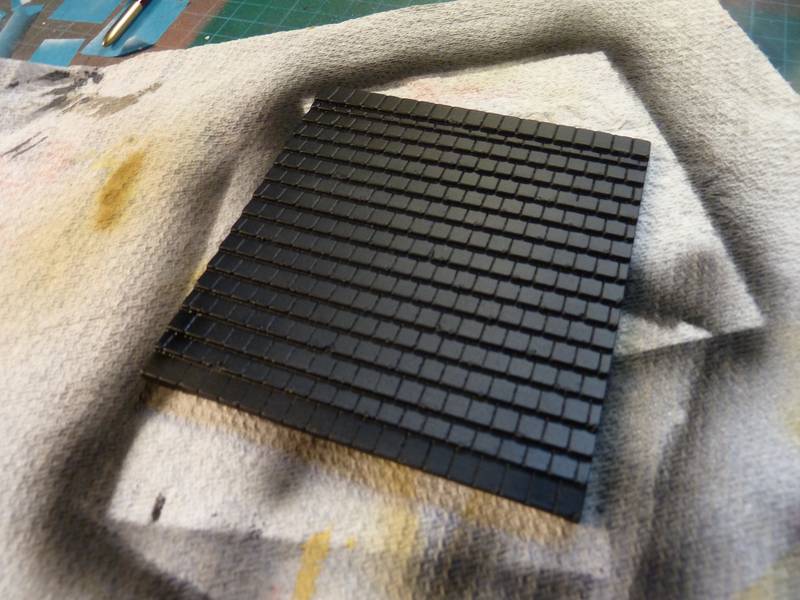
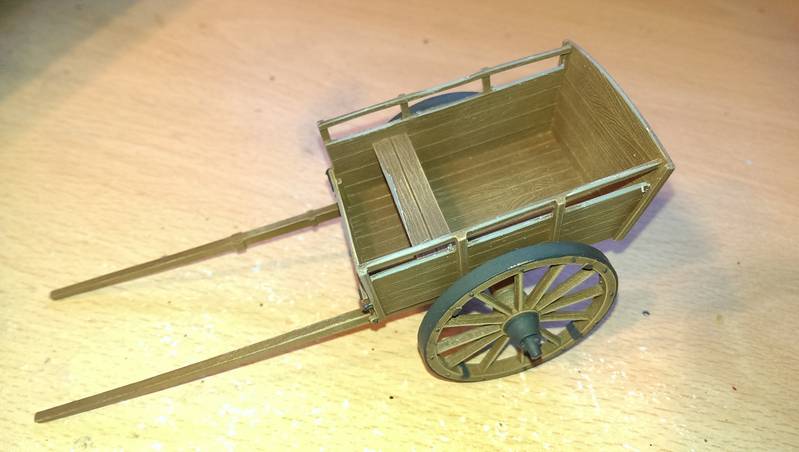
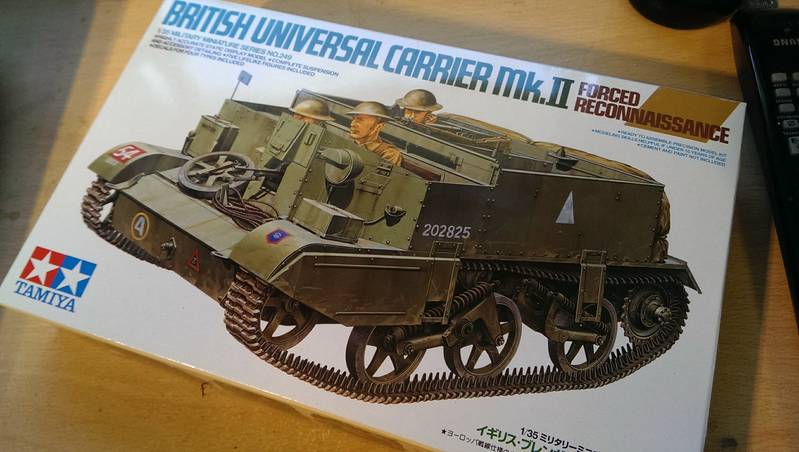
Within this dio it will should the lead elements of the invasion within the British sector so the basic overview will be set within a farm complex, with two British Universal Carriers reporting to a Churchill tank after completing a reconnaissance mission.

Also there will be some British Infantry as well who would have been supporting the Armoured advance.

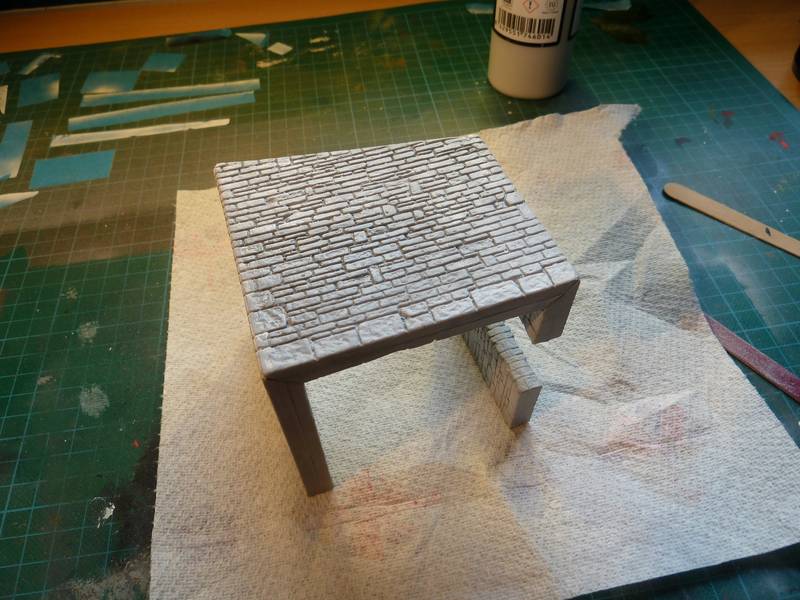
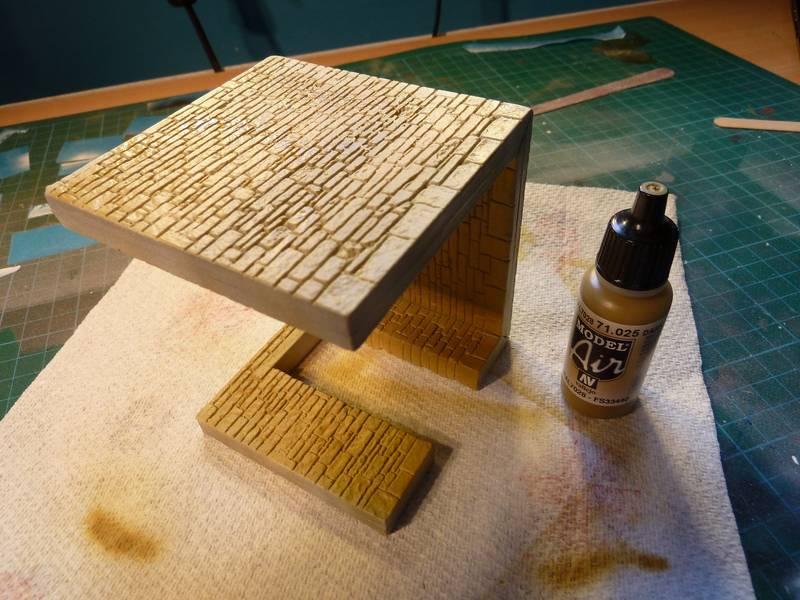
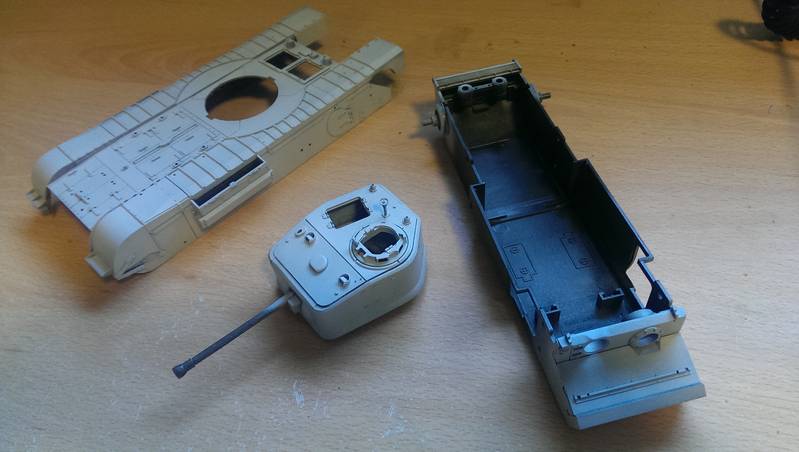
As it stands I've started to build all the components first, so the building, Churchill Tank, Universal Carriers etc first before I start on the base. This is also as I have never build a Dio base so I need to do allot of research into it and lots of trial runs to make sure I don't muck it up.

Ok, so first off I'll start off with what I've got done so far.

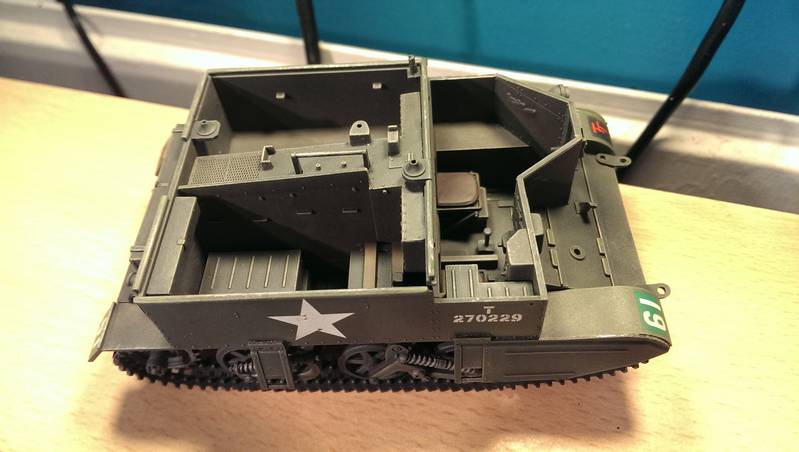
First off I'll go threw the Tamiya Churchill Tank. I have already had a forum about the build progress with some of the items so far, however as I've now decided what I'm doing I'm going to put them all in this forum, keep everything together so everyone can follow my progress.

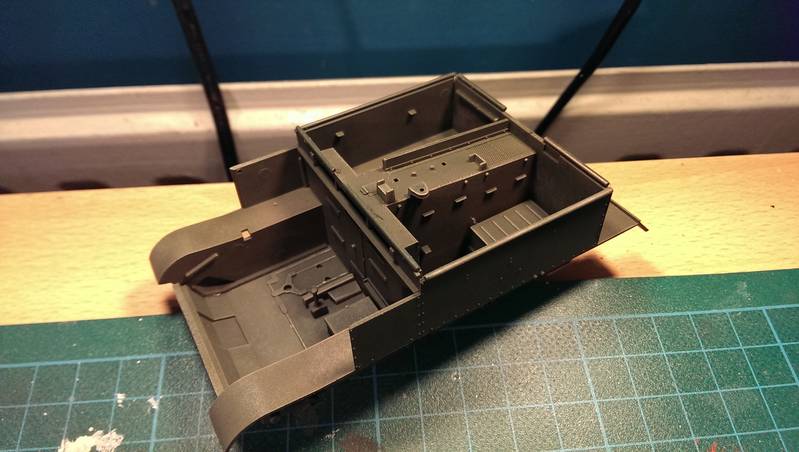
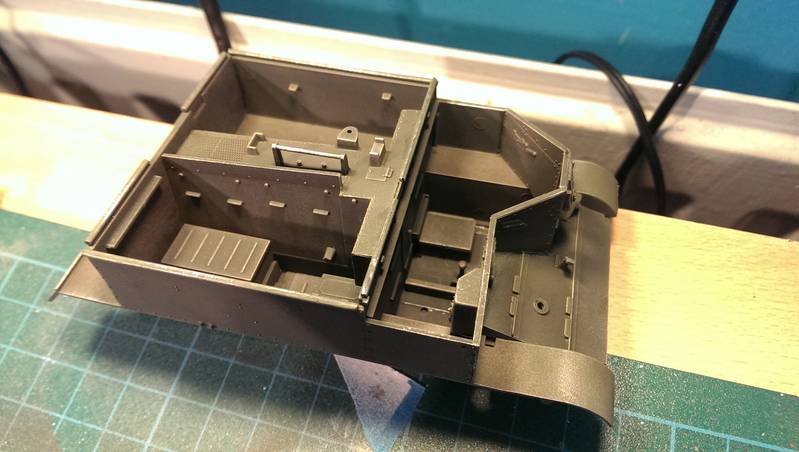
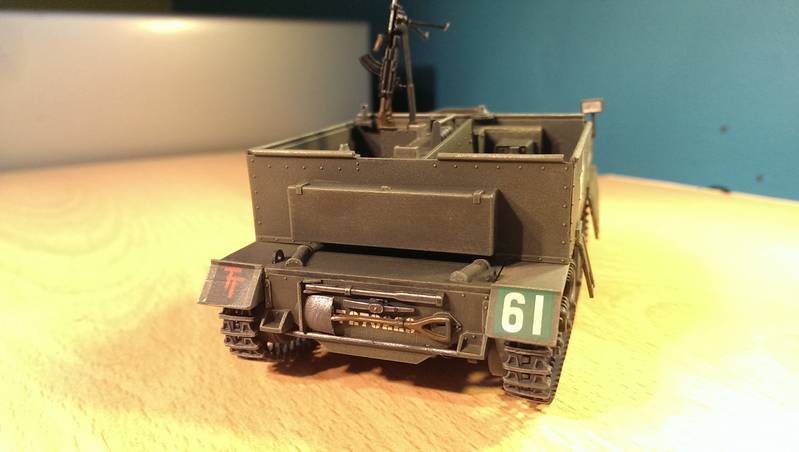
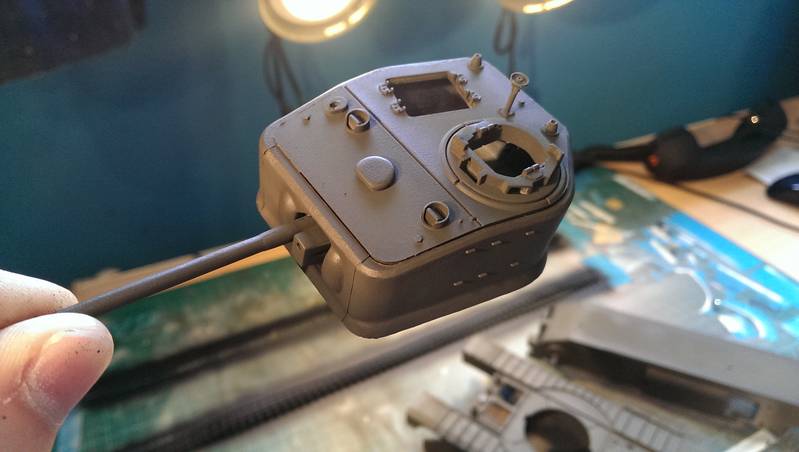
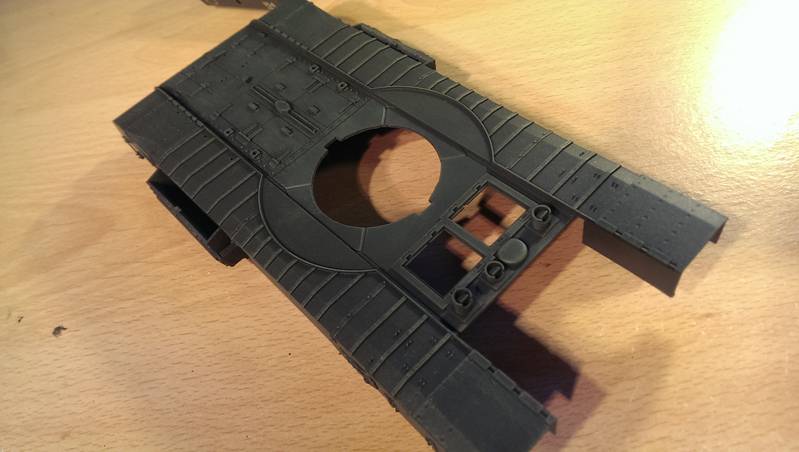
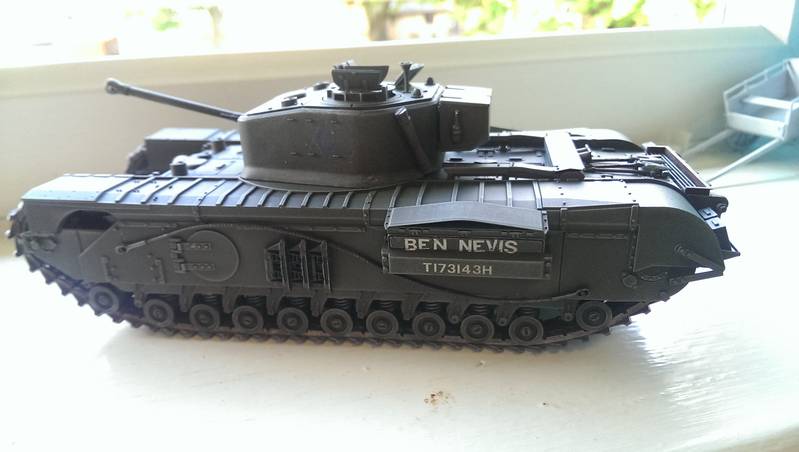
So, first picture is off some of the main components of the Churchill all primed ready for its colour coat. For the primer I use Vallejo Grey Surface Primer #74.601.


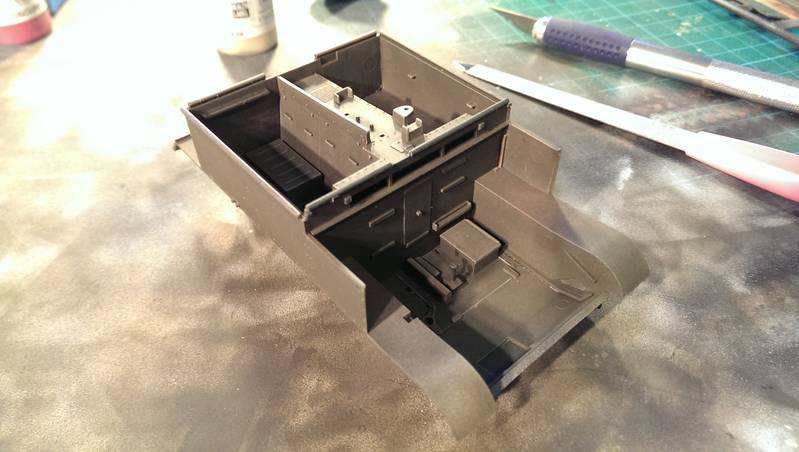
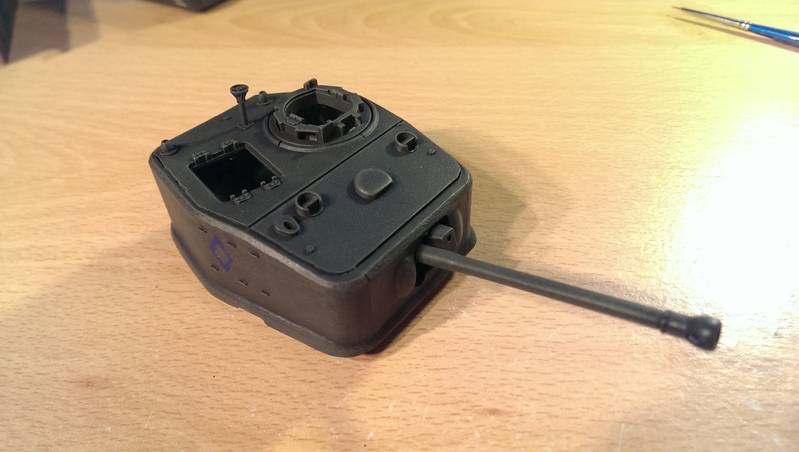
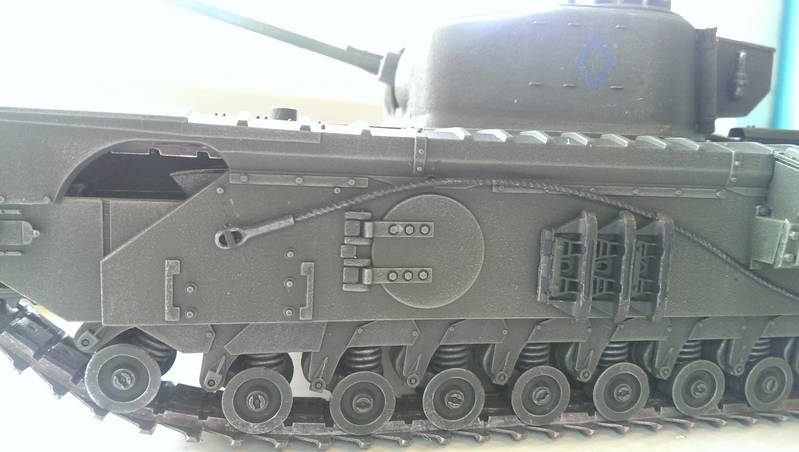
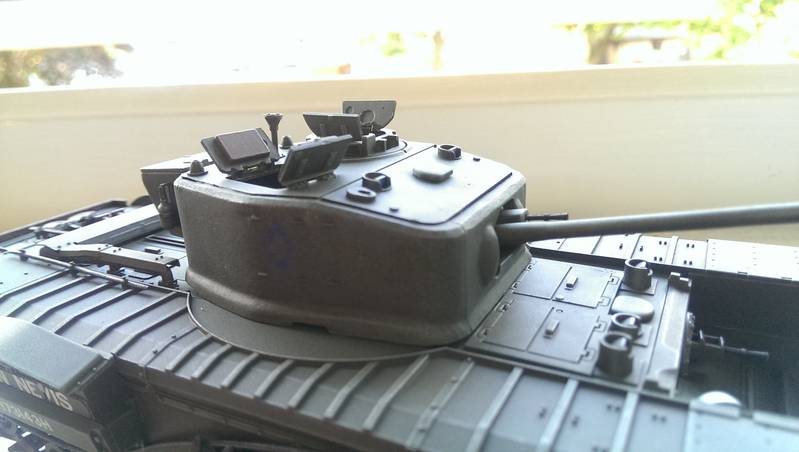
From there it got its colour coat,, using Tamiya XF-61 for the base coat followed by adding a little drop of brown in mix and spraying some of the depressions to bring out some depth. Unfortunately the images don't really do it justice.


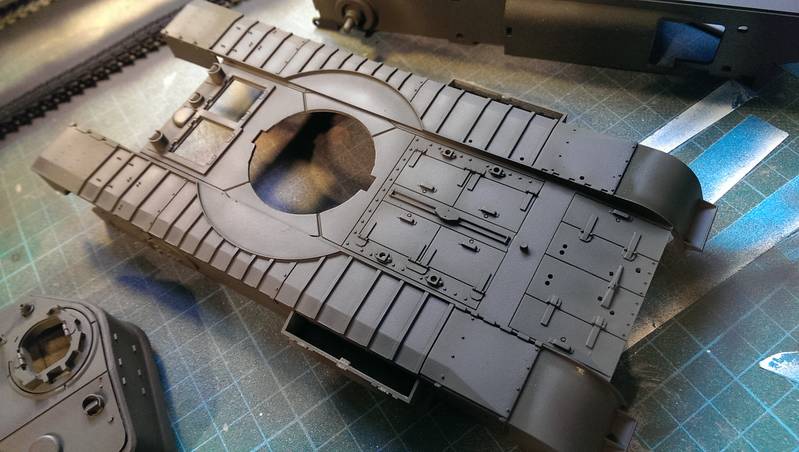
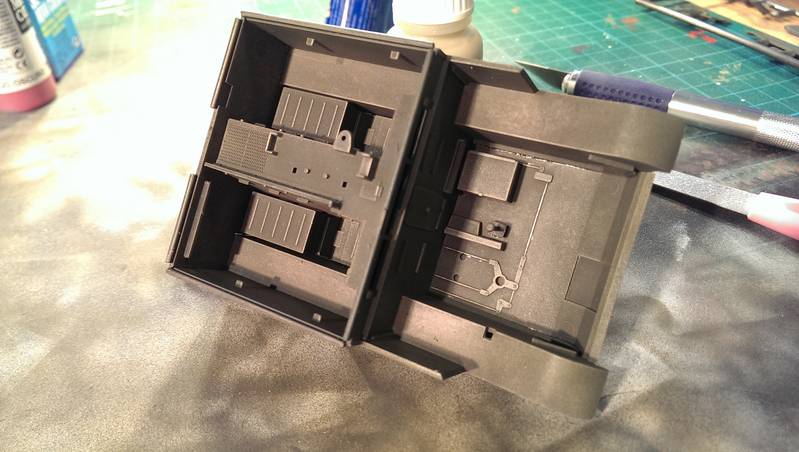
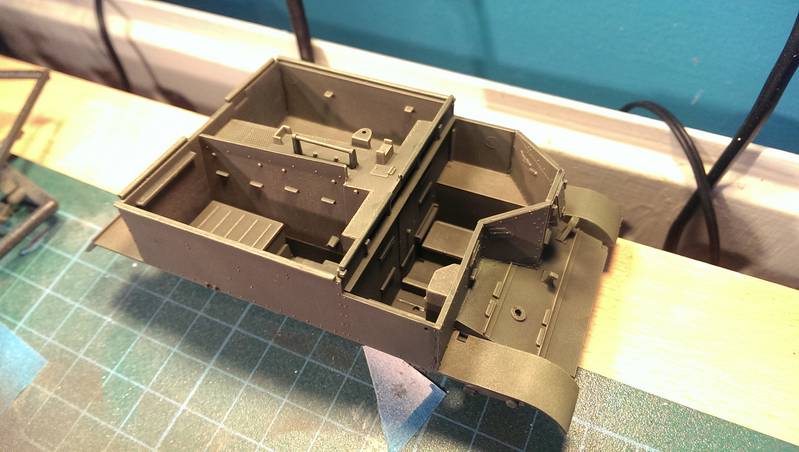
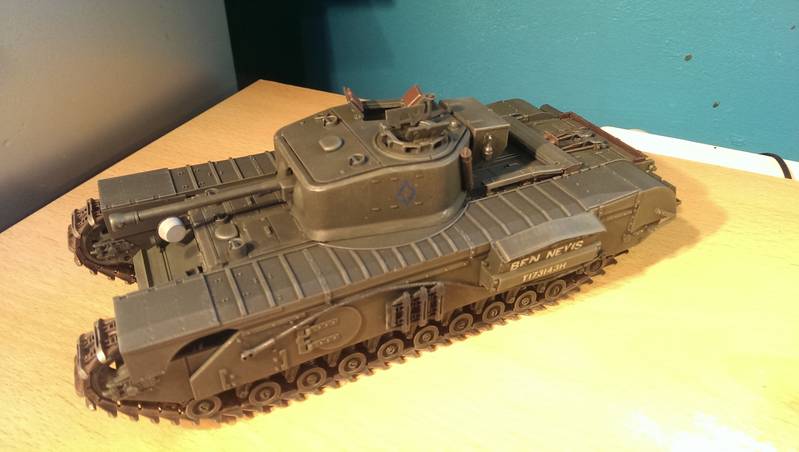
From there I added the decals and then gave it a basic dry brushing using Vallejo Panzer Aces #336 to give the risen areas some highlights.


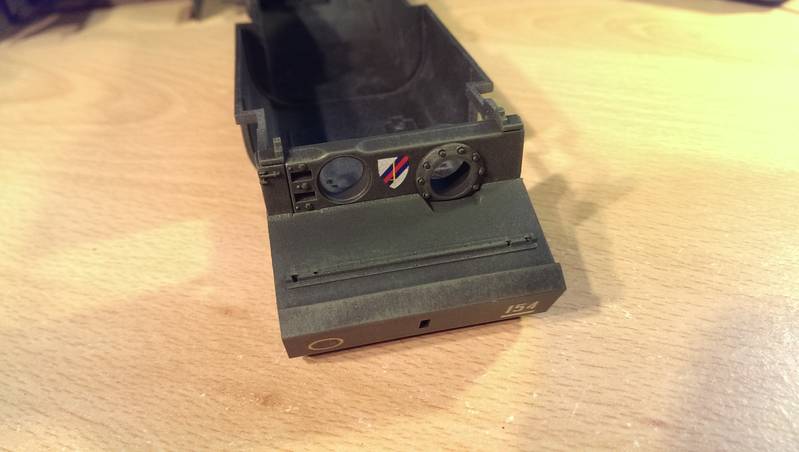
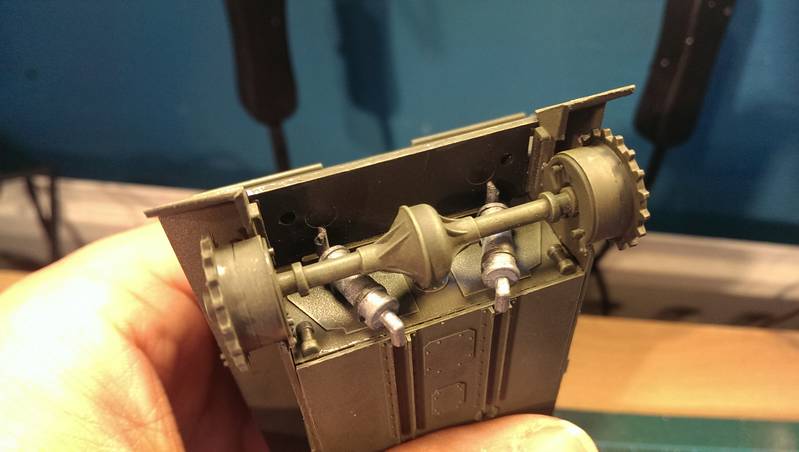
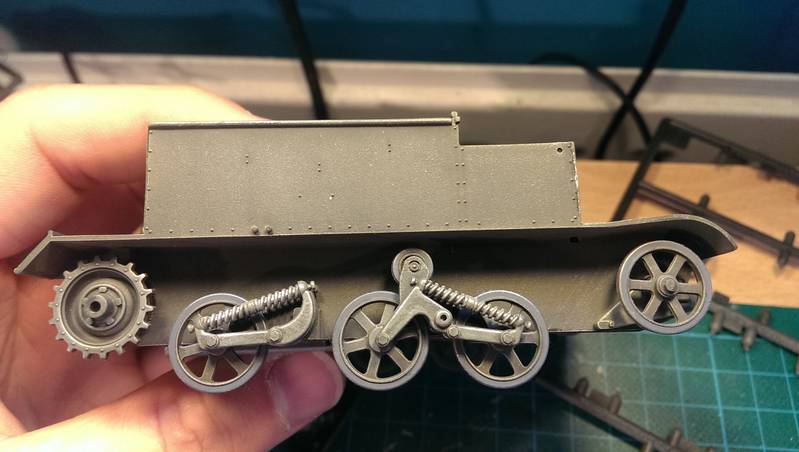
After that I completed the assembly, then gave it a good going over with some Revell Steel metallic #91 to start giving it a slight worn look.


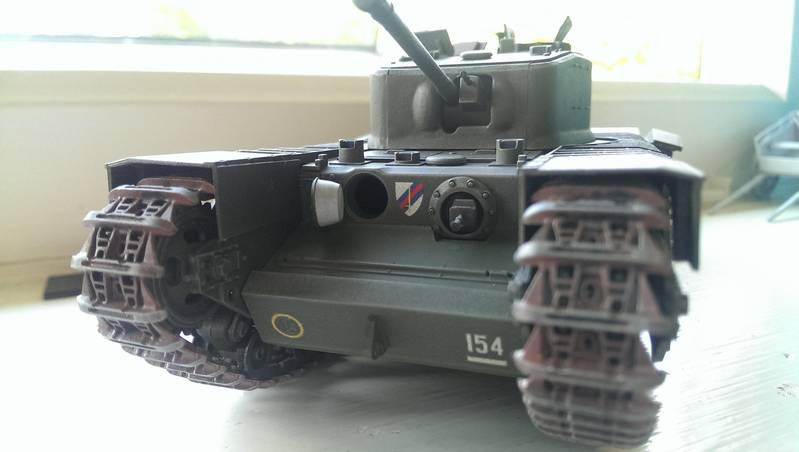
So still do to on the Churchill is make it look dirty, going to try give it a more durst look rather than think wet mud, I'm imagining that as its a big heavy slow tank it would have more been on the roads rather than threw the country side.
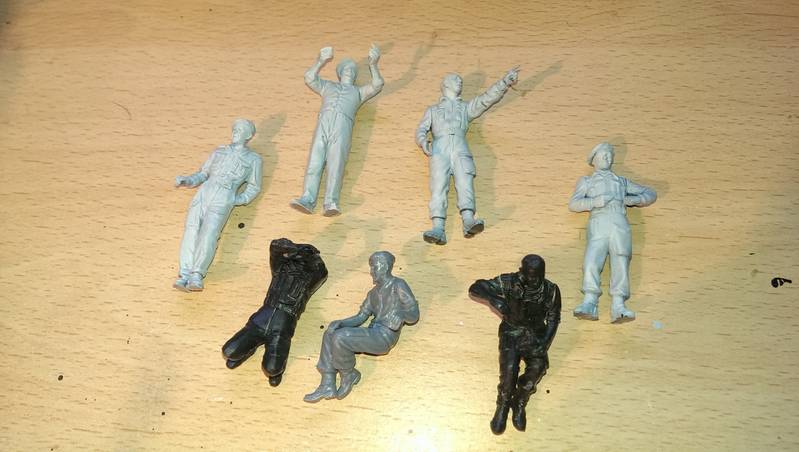
Also I need to add the figures, I've got them built just not yet painted.
And finally I need to add some items like ration boxes etc as if it had been carrying them from the beaches. But they will all be done in time.
SiStorey
Visit this Community
England - North East, United Kingdom
Joined: March 14, 2014
KitMaker: 242 posts
Armorama: 161 posts
Posted: Friday, June 06, 2014 - 03:34 AM UTC
Now onto the first of the two Universal Carriers. The first one I have done is Tamiyas British Universal Carrier Mk.II European Campaign #35175


So as always, everything gets a spray primer using my vallejo #74.601.


From there the basic colour coat was added using Tamiya XF-61.


And so the assembly begins. First to be built was the the main structure of the Universal Carrier. Once I got this far I started to dry brush it with Vallejo Panzer Aces #336, Revell Metallic Steel #91 and a mixture or Vallejo Scarlet Red #70.817 and Desert Yellow #70.977. I started with the Panzer Aces #336 first to give the subtle changes of greens then moved onto the Scarlet Red and Desert Yellow mix to give that look of the paint being worn threw and the base primer coming threw. And finally I went over certain areas with the Revell #91 Steel on areas of heavy wear and tare. I think the layers worked really well indeed.


Bit more assembly.


So after the main build of the sides of the Carrier I moved on to the exhaust and axle assembly. As always I gave it a good dry brushing. After that I moved onto the side wheels.


Moving back into the Carrier itself I started to add all the seats and radios etc and then adding the decals for the 50th Infantry Division as that's what I the Infantry side to be, Including the dismounted soldiers.


And finally all the Guns, Ammo tins, Rations etc added.


Still to do. I need to weather it but that will come before being added to the Dio. The figures need painting and adding and some more little bits and bobs need to be added, like rations etc.
SiStorey
Visit this Community
England - North East, United Kingdom
Joined: March 14, 2014
KitMaker: 242 posts
Armorama: 161 posts
Posted: Friday, June 06, 2014 - 06:20 AM UTC
Ok the last part I've got so far. Its Miniarts European Farmyard #35558.


Basic put together of one of the smaller outer structure.


Basic sandstone base colour.


And now the fun task of painting all the bricks. Mega fun!!


And now onto the roof. Firstly a base primer layer of Vellajo Black Primer 74.602.


Then a basic colour of the tiles followed by painting a few random tiles to make it not look as uniform.


And here we are so far, just the other building to go!!


SiStorey
Visit this Community
England - North East, United Kingdom
Joined: March 14, 2014
KitMaker: 242 posts
Armorama: 161 posts
Posted: Friday, June 06, 2014 - 11:01 PM UTC
Good morning everyone, well today I'm going to be working on Miniarts wooden cart that came with the european farm set. I've previously already built it and primed it and now its time to get some colour on it.


Firstly I'll give it a basic coat of Vallejo German Cam. Medium Brown #70.826 and then start working the lighter shades.
SiStorey
Visit this Community
England - North East, United Kingdom
Joined: March 14, 2014
KitMaker: 242 posts
Armorama: 161 posts
Posted: Saturday, June 07, 2014 - 02:42 AM UTC
So after a bit of work this morning my miniart wooden cart its pretty much done, just need to weather the wheels and that's another part done.

So to start this is the basic brown colour.


From there it was using progressively more lighter shades of browns ranging all the way threw to a desert yellow do give it some more depth.


And finally the metal work was painted on, just needs a dry brushing with some lighter grey colours then that's that done.


Now if anyone knows what I can do to make it look even more worn and used and more like wood I'm all ears.

Cheers!!
Motives
Visit this Community
Stockholm, Sweden
Joined: October 15, 2013
KitMaker: 444 posts
Armorama: 428 posts
Posted: Saturday, June 07, 2014 - 05:00 AM UTC
Great progress so far! Looking forward to seeing it evolve

SiStorey
Visit this Community
England - North East, United Kingdom
Joined: March 14, 2014
KitMaker: 242 posts
Armorama: 161 posts
Posted: Saturday, June 07, 2014 - 05:17 AM UTC
cheers Johan, I eventually have internet in my room so there's going to be steady stream of progress appearing
jrutman
Visit this Community
Pennsylvania, United States
Joined: April 10, 2011
KitMaker: 7,941 posts
Armorama: 7,934 posts
Posted: Monday, June 09, 2014 - 02:09 AM UTC
Making the cart appear more worn will take you back a few steps but if you are willing.....
Get your hobby knife and using a scraping motion take away the sharp corners on areas of wood that would get the most wear. Like the top edge of the cargo area boards and the tonques for the horses to get hitched to. Also "chip" away some of the edges of the boards like the ones that would hit things when moving,etc.
Then you will have to re-paint but you get my drift?
J
SiStorey
Visit this Community
England - North East, United Kingdom
Joined: March 14, 2014
KitMaker: 242 posts
Armorama: 161 posts
Posted: Monday, June 09, 2014 - 04:26 AM UTC
Nar that all makes sense jerry, shouldn't take me too long to do that, stand by for progress pictures lol

Cheers
SiStorey
Visit this Community
England - North East, United Kingdom
Joined: March 14, 2014
KitMaker: 242 posts
Armorama: 161 posts
Posted: Thursday, June 26, 2014 - 08:14 PM UTC
Good morning everyone!!! Sorry for the delay but I'm currently in the process of buying a new house and haven't had to much time to get to the work bench. However I did go get my second Tamiya Universal Carrier however I need to know if there's anywhere that sells the decals from the old tamiya kit as the kit I have now if the new Forced Recon and this does not have the unit markings I'm after.
1stjaeger
Visit this Community
Wien, Austria
Joined: May 20, 2011
KitMaker: 1,744 posts
Armorama: 1,727 posts
Posted: Thursday, June 26, 2014 - 09:02 PM UTC

Quoted Text

Nar that all makes sense jerry, shouldn't take me too long to do that, stand by for progress pictures lol

Cheers


Hi,

if you allow me one comment...I would turn the colour more to the greyish side while you're at it!
These carts are under constant influence from sun and rain...and they suffer accordingly.

I like your vehicles a lot! Great weathering! Maybe a tad too clean..!?

What figures are you going to use?

Having seen most elements of the dio....but no figs so far...I suspect that you might not necessarily be a figures afficionado!??

Cheers

Romain


RLlockie
Visit this Community
United Kingdom
Joined: September 06, 2013
KitMaker: 1,112 posts
Armorama: 938 posts
Posted: Thursday, June 26, 2014 - 09:44 PM UTC
You might like to have another go at the turret front, as the whole of the shell except the roof was a casting, so the join lines that result from Tamiya moulding it with a separate front plate are not there in reality. I think those bulges either side of the mantlet showed up after Normandy too. 6GTB had mainly Mk IVs in Normandy as far as I am aware; not sure when it received Mk VIIs but it must have been after 30th June as none appear on the RAC six-monthly returns for it for that date (31TB and 34TB did have Mk VIIs then however).

Not sure that Carriers has stainless steel exhausts either.

Hopoe this is some help.
Removed by original poster on 06/27/14 - 09:52:26 (GMT).
SiStorey
Visit this Community
England - North East, United Kingdom
Joined: March 14, 2014
KitMaker: 242 posts
Armorama: 161 posts
Posted: Friday, June 27, 2014 - 12:12 AM UTC
Hi Romain,

What sort of grey would you suggest, a lighter grey??? I've started to take the sharpness of the edges like Jerry suggested but since then my minds been in other places sorting this new house out lol however I'll try and get the cart done next week.

Now in regards to the figures im going to use, I have most of the built and primed just not painted. I'll be using the figures that came with the two universal carriers and with the Churchill and the Tamiya British infantry on patrol. Also thinking of using some of Miniarts British tank riders as well but I'll see how I get on as that might over crowd the diorama.

I cant remember if I said earlier on in the forum but I'm going to leave all the muddying up of the vehicles till the end once I've got the base all made up as I'll be able to make the models fit the terrain rather the terrain fit the models. However I envisage it will be a light brown covering simulating more dust than mud but I'll see how the base gets on.

But cheers though Romain!!

Hi Robert,

Thanks for the heads up on the turret, I'll give that a crack at sometime in the future as the churchill is currently up at my parents in the display cabinate for safety. However when I'm settled in my new home I'll have all my models and equipment will be set up good to go so I'll give turret another going over and get rid of those joining lines. Cheers for the heads up though!!

With the exhausts in the carriers, what colour would you suggest??

Giovanni1508
Visit this Community
Napoli, Italy
Joined: April 17, 2014
KitMaker: 652 posts
Armorama: 600 posts
Posted: Friday, June 27, 2014 - 12:40 AM UTC

Hi Si,

Very nice project. Great progress so far! I'm interested into the builing of the farmyard. You had a lot of patience with all these bricks !

Looking forward to see the progress of works !

SiStorey
Visit this Community
England - North East, United Kingdom
Joined: March 14, 2014
KitMaker: 242 posts
Armorama: 161 posts
Posted: Friday, June 27, 2014 - 12:43 AM UTC
Hi Giovanni,

Yeah took me hours of painting, but its what needed to be done, only problem is that was the smallest of the buildings!!! so thats going to be a fun few days of building and painting for me me thinks.

cheers Giovanni!!
1stjaeger
Visit this Community
Wien, Austria
Joined: May 20, 2011
KitMaker: 1,744 posts
Armorama: 1,727 posts
Posted: Friday, June 27, 2014 - 01:12 AM UTC


Hej Si,

just sent you a PM! Check your inbox!

Cheers

Romain

1stjaeger
Visit this Community
Wien, Austria
Joined: May 20, 2011
KitMaker: 1,744 posts
Armorama: 1,727 posts
Posted: Friday, June 27, 2014 - 01:25 AM UTC

Capital choice for the figures (but we don't have too many options now, do we!)

Rearding the vehicles, I meant stains from dried up dirty water along some lines, and the odd stain from fuel or oil. Just subtle additions, not mud o.s.!

Cheers

Romain

SiStorey
Visit this Community
England - North East, United Kingdom
Joined: March 14, 2014
KitMaker: 242 posts
Armorama: 161 posts
Posted: Friday, June 27, 2014 - 01:42 AM UTC
Got your PM's Romain, Thanks for them, they will come in handy.

Yeah figure selection are not amazing but I think that what Tamiya have to offer should d just fine.

Well I'll get looking at photos of the vehicles from back in the day and see what was the common oil stains and water marks etc,I thought you meant mud etc lol my bad!!

Cheers Romain, top man!
1stjaeger
Visit this Community
Wien, Austria
Joined: May 20, 2011
KitMaker: 1,744 posts
Armorama: 1,727 posts
Posted: Friday, June 27, 2014 - 02:36 AM UTC

You're welcome m8! Anytime!!

Cheers

Romain

RLlockie
Visit this Community
United Kingdom
Joined: September 06, 2013
KitMaker: 1,112 posts
Armorama: 938 posts
Posted: Friday, June 27, 2014 - 06:17 AM UTC
For the carrier exhausts, I'd imagine that they would have bene painted the same colour as the vehicle but would rust over time to a brownish shade. Don't overdo it though - most of 21AG's armoured vehicles were either reasonably new or recently rebuilt, so it shouldn't look as though it's been driving round since the BEF returned from Dunkirk...
SiStorey
Visit this Community
England - North East, United Kingdom
Joined: March 14, 2014
KitMaker: 242 posts
Armorama: 161 posts
Posted: Friday, June 27, 2014 - 07:44 AM UTC
I'll add that to the list of amendments I need to make, however this is the exact feedback I need lol well i have some of the Humbrol rust powder so I'll give that a test then a try out on the carrier to give it that rustic look.

Cheers for the advice though Robert!!
SiStorey
Visit this Community
England - North East, United Kingdom
Joined: March 14, 2014
KitMaker: 242 posts
Armorama: 161 posts
Posted: Sunday, June 29, 2014 - 04:09 AM UTC
Hi everyone,

Got a couple of pics of the small progress I've made so far. Romain this is the small section of figures I have so far.


Going to paint them all once I've got the farm finished and second Carrier.

Next Image is of the wooden cart. A while back Jerry suggested I start wearing down the Cart to make it look more worn, so following his advise I got my knife out and started scrapping the edges to round them off. Sorry the pictures not amazing but light isn't the best in my room lol Just needs some paint and a good grey dry brush and hopefully that'll look allot more weather and used.


And Finally the last piece of the vehicle jigsaw for the Dio


Cheers for the help and advice everyone, keep it coming!!!

1stjaeger
Visit this Community
Wien, Austria
Joined: May 20, 2011
KitMaker: 1,744 posts
Armorama: 1,727 posts
Posted: Sunday, June 29, 2014 - 06:52 AM UTC

Hi Si,

could it be that the dark figure bottom right is way bigger than the others??

I have this impression when I look at the picture!

Otherwise the figures are OK!

Have you ever considered infantry on foot?? Tamiya's inf on patrol set is a good basis. Improvements (scarfs, scrim net on the helmets f.ex.) and slight conversions (better heads f.ex.) can turn these figs into real beauties!

Cheers

Romain

SiStorey
Visit this Community
England - North East, United Kingdom
Joined: March 14, 2014
KitMaker: 242 posts
Armorama: 161 posts
Posted: Sunday, June 29, 2014 - 10:38 PM UTC
Yeah now you mention it he does look a little bigger than the others, however he will be sat in on of the vehicles so hopefully the scale will be ok.

Thats going to be my next buy, the Tamiya Inf on Patrol, just havent got round to getting it yet. Need to keep an eye out for it I will.

Well seeing as this is supposed to be a few days after the D-Day landings the helmets will defiantly need some scrim, so I'll have to get a hunt out for them as well. But that will come in time. Want to get the vehicles done first followed by the buildings.

Cheers!!!
 _GOTOTOP