_GOTOBOTTOM
Constructive Feedback
For in-progress or completed build photos. Give and get contructive feedback!
Academy Sheridan Build
bmowery5308
Visit this Community
North Carolina, United States
Joined: July 24, 2014
KitMaker: 16 posts
Armorama: 16 posts
Posted: Thursday, July 24, 2014 - 08:31 AM UTC
I love the Sheridan.

With its large road wheels, sports car looking hull and asymmetrical turret with short barreled gun, its one of the most unique looking AFVs out there. I must have built half a dozen Sheridan kits (both Tamiya and knock-offs) over the years, so when Academy announced a brand new tooling, i was very excited.
Unfortunately, that excitement didn't last beyond the opening of the box.
As Vodnik pointed out in his review, this kit is a disappointment on many levels. With the suspension too far forward, the drivers hatch squished and the turret oddly shaped, this kit is one large turn key away from looking like a wind up toy. So this thing languished on my shelf for years while I sulked about it.
However, until something better comes along, I just have to stop griping and build it. I don't need a super accurate representation, but I would like something that looks better than what comes straight out the box.

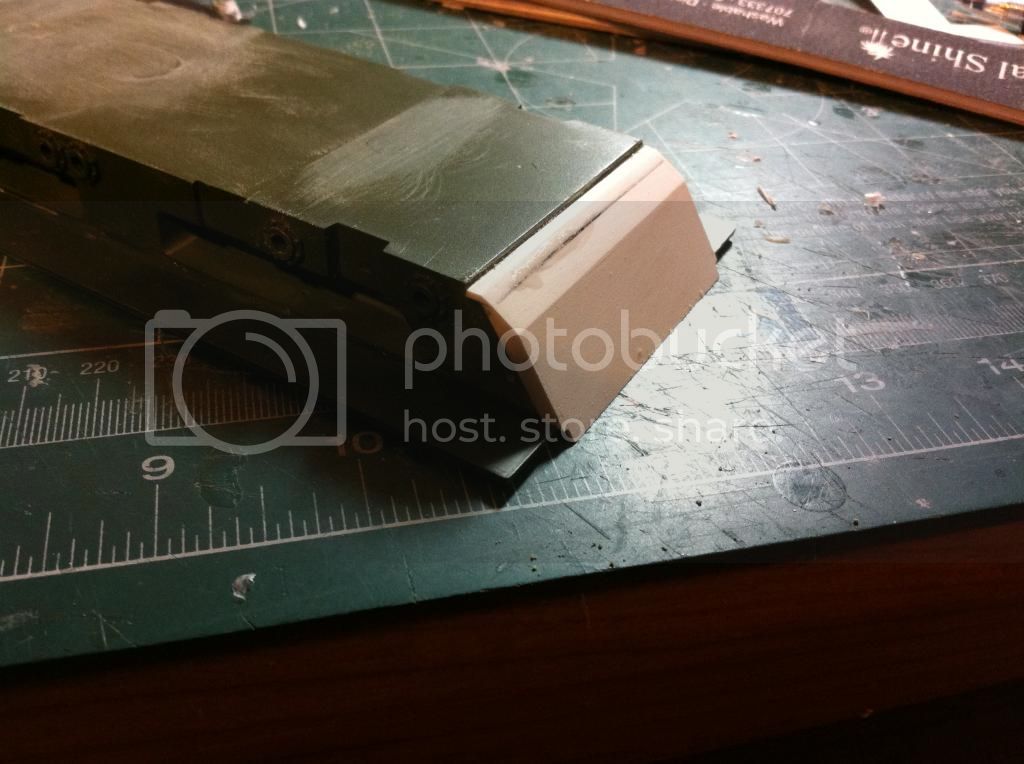
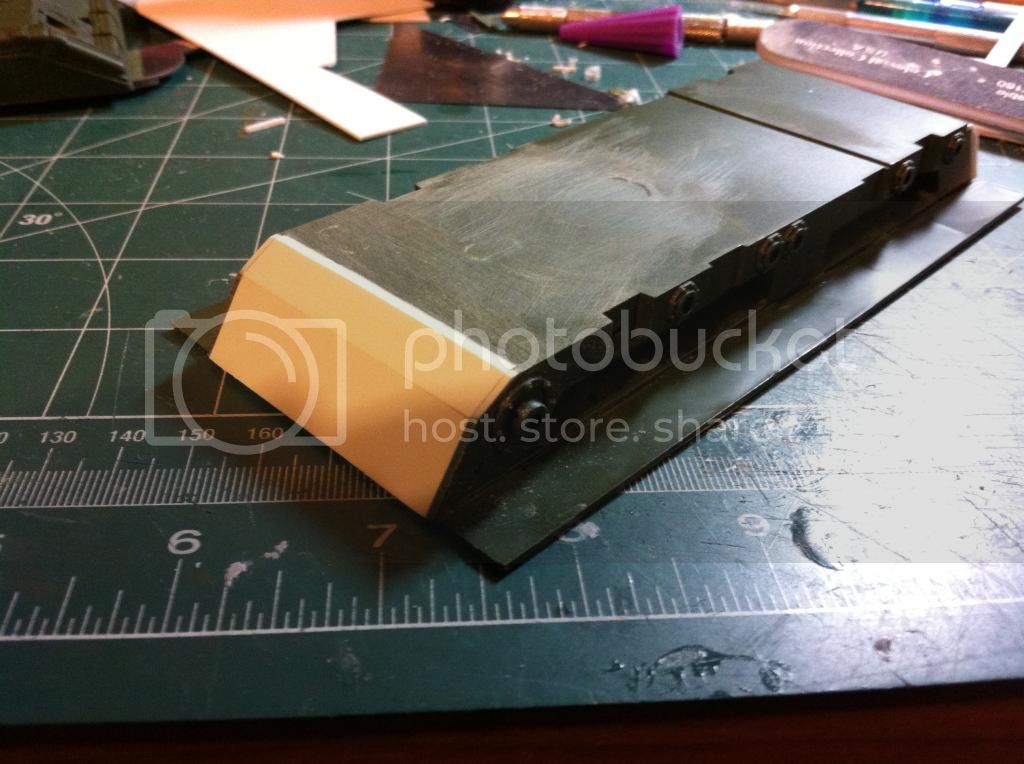
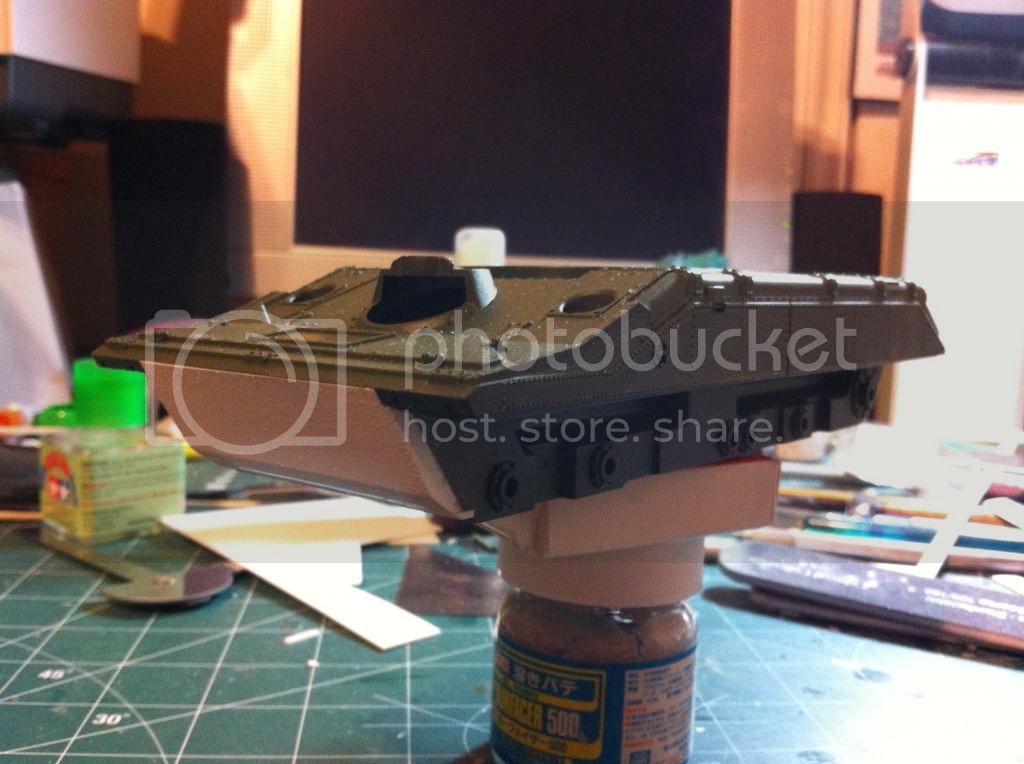
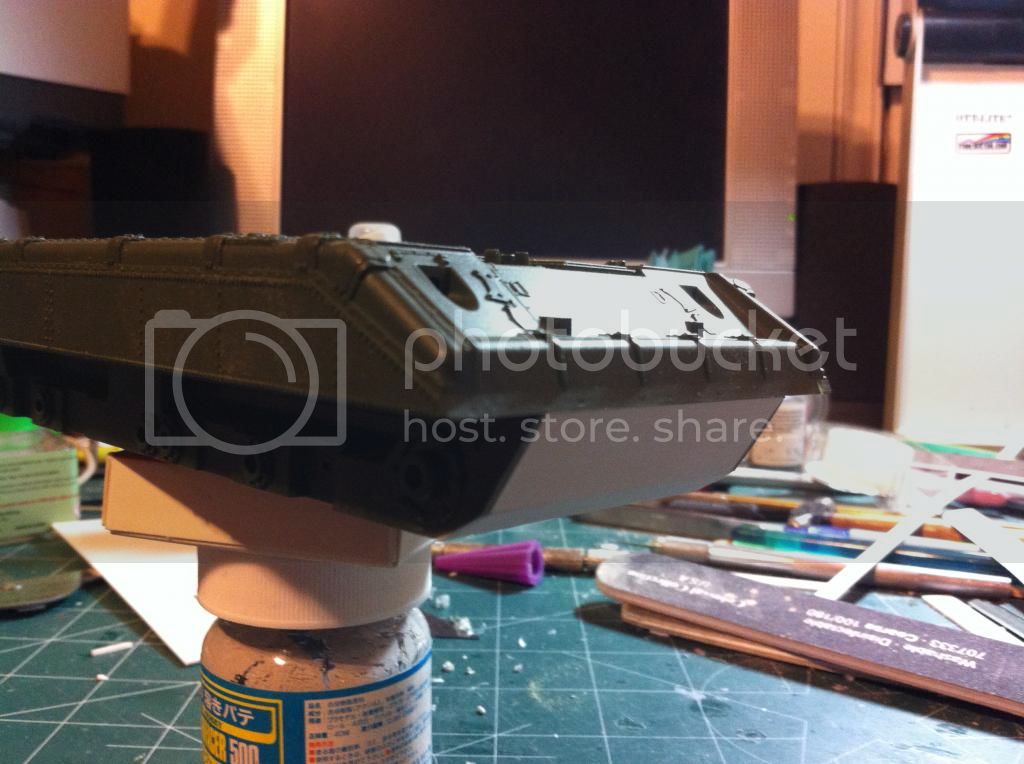
The first thing I wanted to address was the suspension. Its too far forward on the lower hull. Short of scratch building it, there is no easy way to build it accurately. So I decided to cut up the hull in preparation for rebuilding the fore and aft.
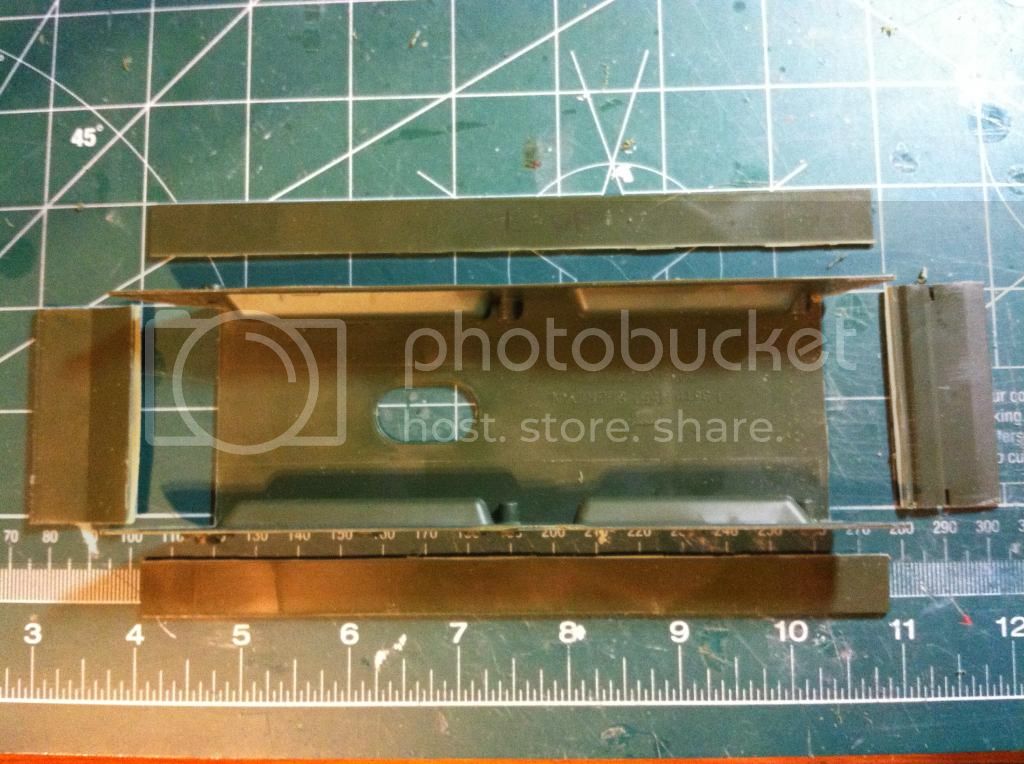
I made a paper template to judge where to cut the new angles at the rear and than worked my way to the front.


Then I built everything up with sheet plastic.


This shifts thing back to a more accurate look.


I've got a little bit more work to do before adding the suspension parts and detail, but I'm pleased with what I've got so far. All comments and critiques are welcome.
18Bravo
Visit this Community
Colorado, United States
Joined: January 20, 2005
KitMaker: 7,219 posts
Armorama: 6,097 posts
Posted: Thursday, July 24, 2014 - 12:45 PM UTC
That's going to be quite the undertaking, but it looks as if you're up to the challenge. You could probably get a Tamiya turret pretty cheaply.
bmowery5308
Visit this Community
North Carolina, United States
Joined: July 24, 2014
KitMaker: 16 posts
Armorama: 16 posts
Posted: Tuesday, July 29, 2014 - 07:42 AM UTC
Been sick so the updates will be slow going. On to the model!

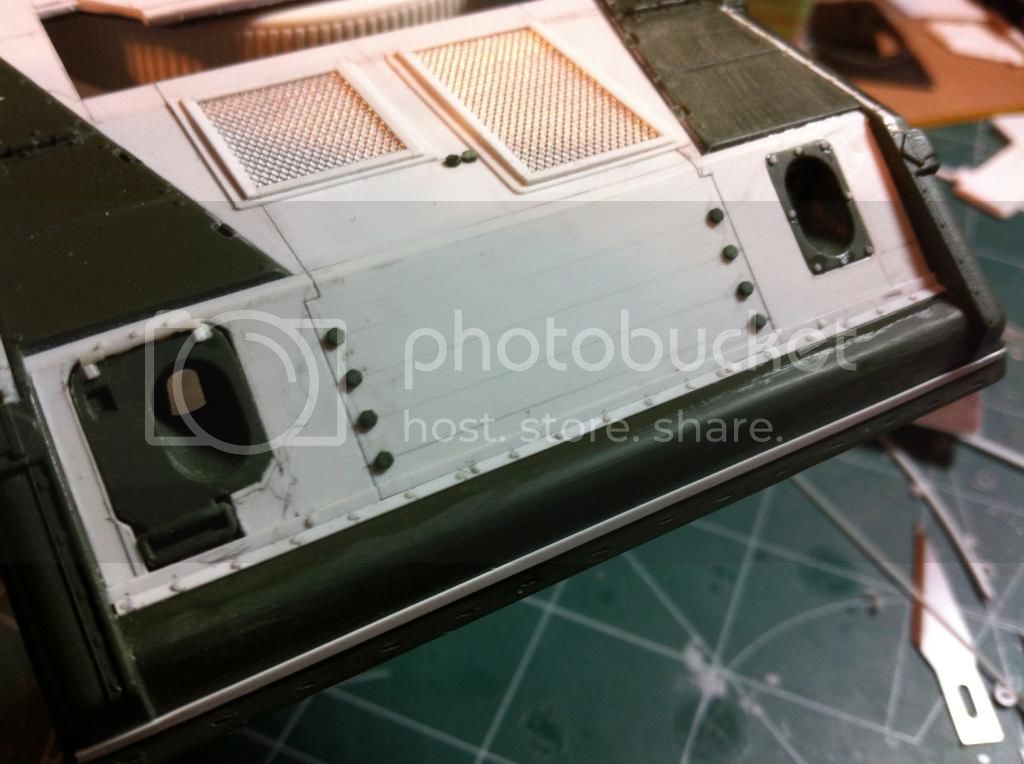
So the one detail I've never seen replicated is the small angle that runs along the length of the hull's sponson. So I went ahead and added some plastic strip.


I also built on the add on armor for the the hull indentations. the bolt heads are a little on the largish side, but I think it works.


So that's where I'm at for now. Hopefully I'll have more by the end of the week. Thanks for looking.


Mark
Visit this Community
Noord-Brabant, Netherlands
Joined: February 07, 2003
KitMaker: 554 posts
Armorama: 461 posts
Posted: Tuesday, July 29, 2014 - 09:09 AM UTC
ambitious project, great start!

good luck and keep going!

Mark
bmowery5308
Visit this Community
North Carolina, United States
Joined: July 24, 2014
KitMaker: 16 posts
Armorama: 16 posts
Posted: Tuesday, August 05, 2014 - 08:08 AM UTC
Alright, before I detail the lower hull, I need to mate it to the upper hull. Which means I need to start correcting the the many problems it has. What are they? Lets count it down.

1: The drivers hatch is too small and mis-shapen.
2: The rivet detail on the side is too pronounced and the pattern is wrong.
3: The fire extinguisher handle port is in the wrong spot.
4: The upper deck in the central portion of the hull is too deep.
5: The engine deck hatches are too close together.
6: there are one too many straps on the water fording curtains.
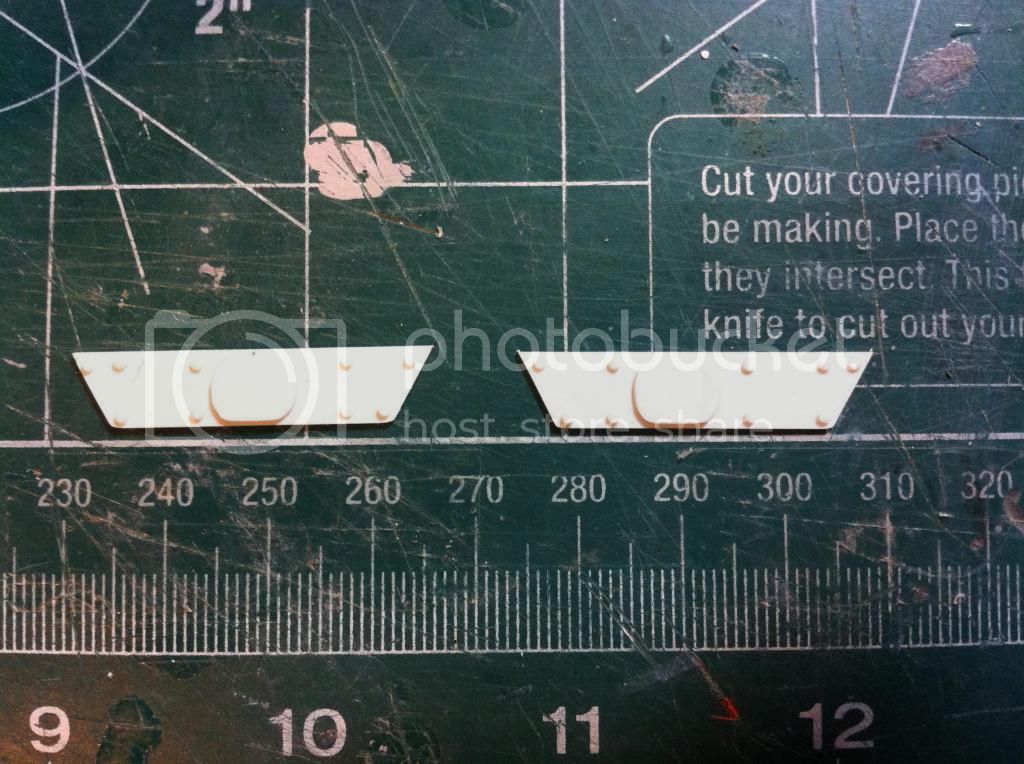
7: The taillight hatches need to sit flush withe rear deck.
8: The oil filler caps are backward.

So I started by removing all detail from the upper hull; engine hatches, turret ring, drivers hatch and filler caps.


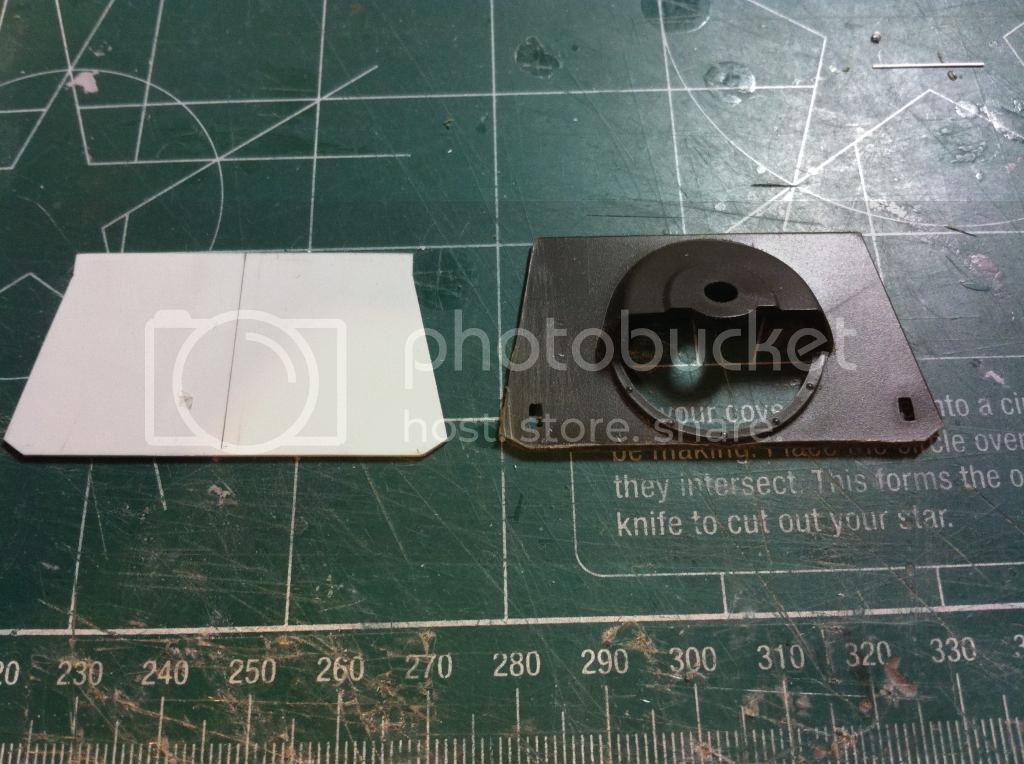
There's only supposed to be a minor lip between the outer and central portion of the upper deck. However, Academy chose to represent this with a cliff. So I corrected the height by adding a new deck with 0.30 sheet plastic.


Another odd detail is the added strap and engine deck extension on the rear sides of the hull (highlighted in red).
These need to be removed as they don't exist on the real vehicle. Then replace the srip and rivet detail.


The rear sloping deck was also stripped of its detail and a 0.20 plastic plate was cut so the taillight hatches would sit flush.


This is where I'm at for now and should have more later.
rfbaer
Visit this Community
Texas, United States
Joined: June 12, 2007
KitMaker: 1,866 posts
Armorama: 1,696 posts
Posted: Wednesday, August 06, 2014 - 03:05 AM UTC
Well done. I have to confess, I really like this kind of modeling.
bmowery5308
Visit this Community
North Carolina, United States
Joined: July 24, 2014
KitMaker: 16 posts
Armorama: 16 posts
Posted: Sunday, August 10, 2014 - 05:02 AM UTC
Minor update.

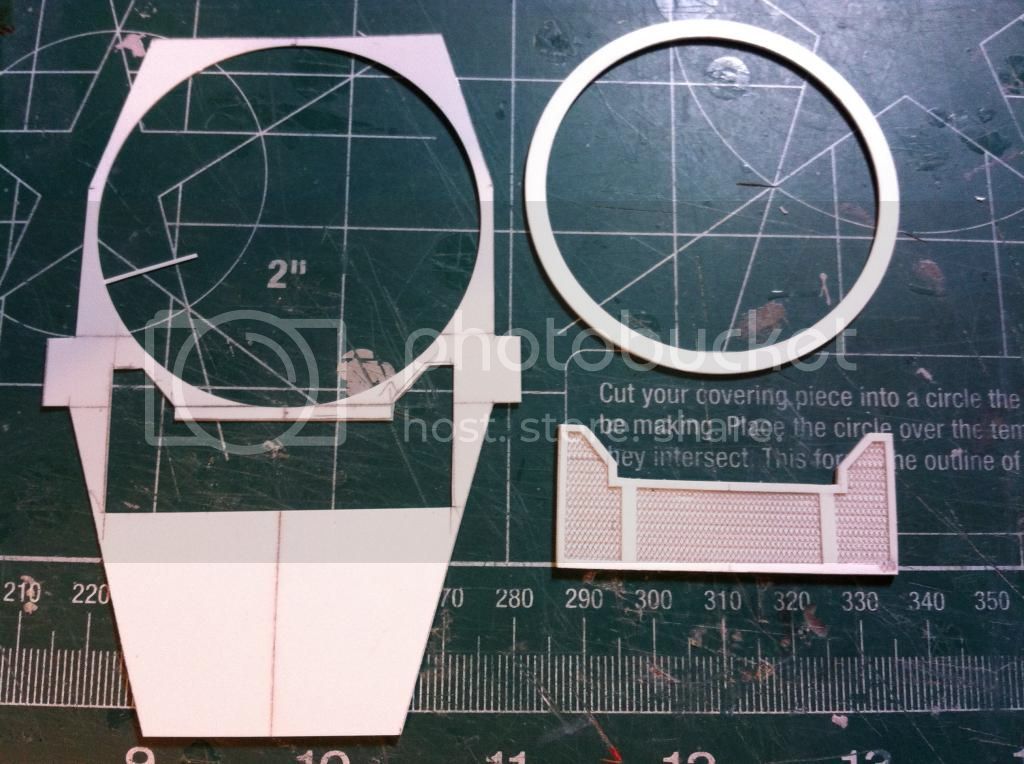
So looking at photos , I realized I still didn't get the upper deck level enough with the surrounding area. This ended up being a good thing. As I needed to remake the engine hatches with louvered styrene, they ended up too thick to just sit on the deck and needed to be inset. So I cut out a second piece with 0.10 styrene and started to knock out holes to fit the turret ring and engine hatches.


I may still have to cut out the deck below as things still sit too high, but its a start.
bmowery5308
Visit this Community
North Carolina, United States
Joined: July 24, 2014
KitMaker: 16 posts
Armorama: 16 posts
Posted: Monday, August 11, 2014 - 03:22 PM UTC
OK, minor update, part duh.

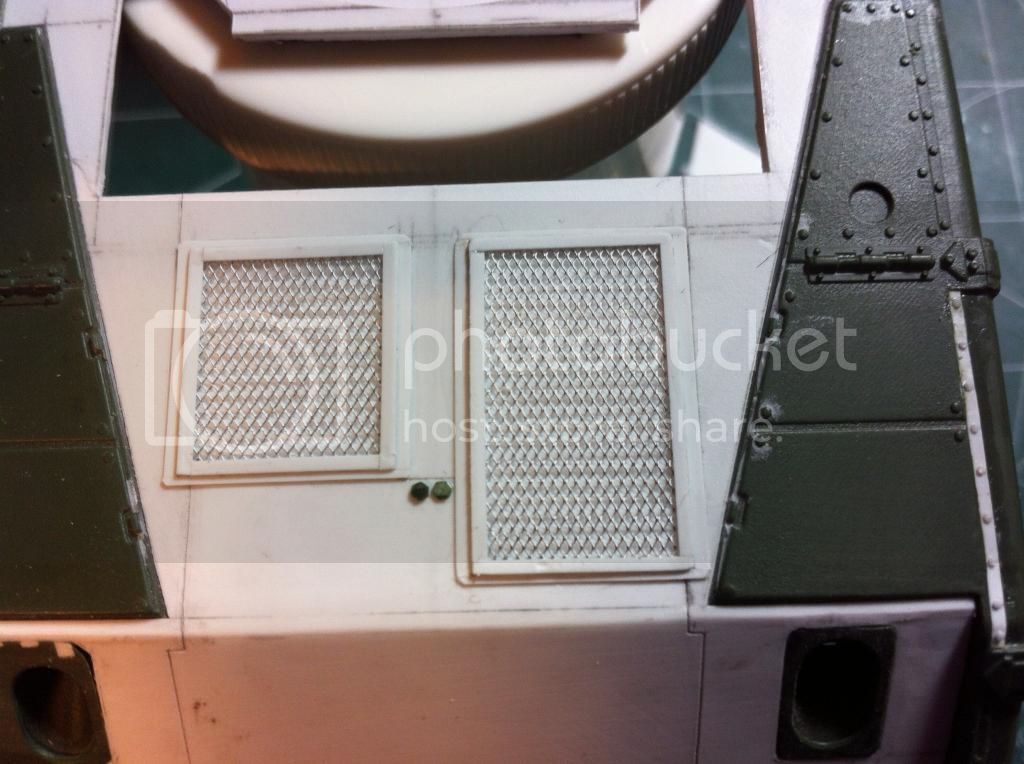
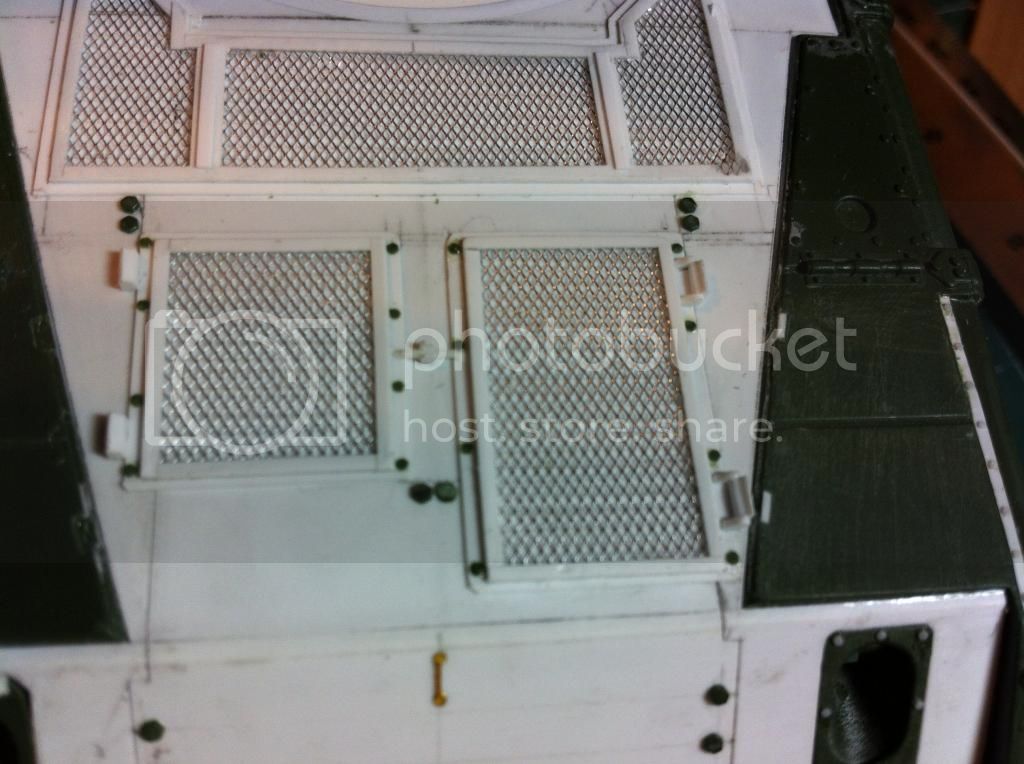
Got some more of the engines deck done. Framed in and installed two of the hatches, scribed the deck and added some of the stripping on the rear fording curtain.


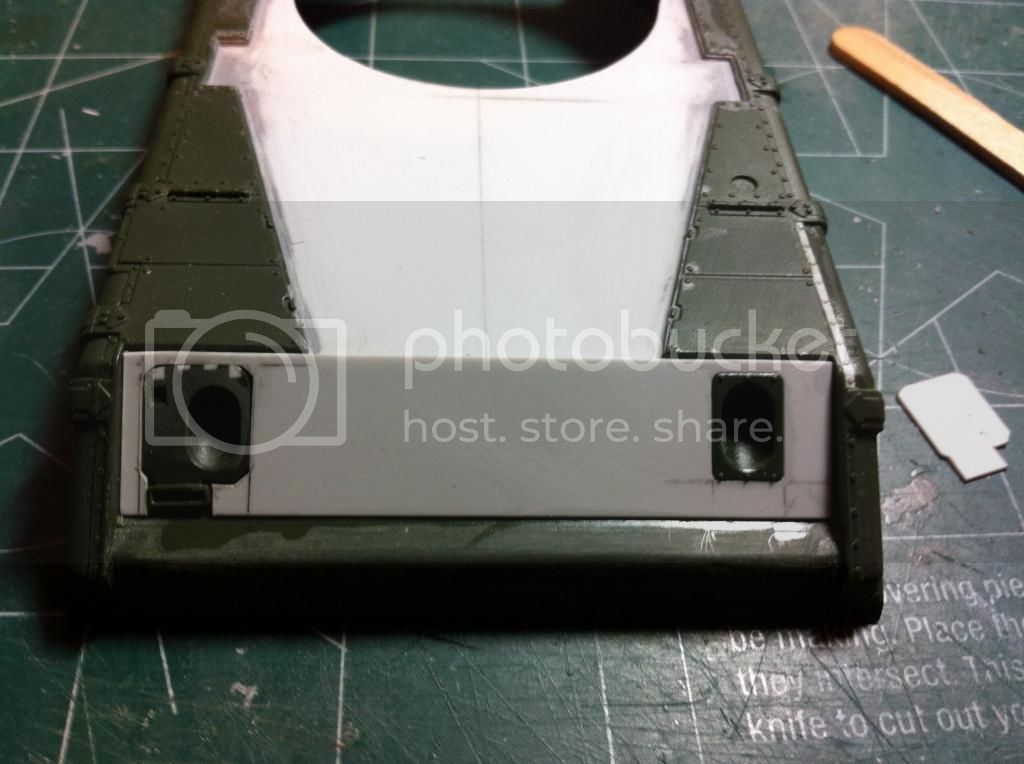
I also started on the front glacis plate and drivers hatch.


All comments welcome.
Tiger_213
Visit this Community
California, United States
Joined: August 10, 2012
KitMaker: 1,510 posts
Armorama: 1,443 posts
Posted: Monday, August 11, 2014 - 04:09 PM UTC
Crazy. I do love the Sheridan. Looking forward to seeing more.
bmowery5308
Visit this Community
North Carolina, United States
Joined: July 24, 2014
KitMaker: 16 posts
Armorama: 16 posts
Posted: Tuesday, August 12, 2014 - 05:53 PM UTC
Another mini update: BOLTS!


And the hinge for the infantry phone.


As an aside, I think I now know who's responsible for the design of this kit. Jaguar.
I had one of their DS Sheridan kits when it came out way back when but got rid of during one of the many collection purges I've had. However, I did keep a box of their track sets. Looking at it, I see it also suffers from lack of track pads. And photos I've been seeing online shows that it it seems to suffer from the same incorrect detailing of the engine deck and extra rear fording curtain straps. It also appears that the (incorrect) suspension detailing has been successfully replicated down to the too far forward position of the running gear.
So my guess is that rather than do any major research on their own, Academy just grabbed a Jaguar kit and made it plastic. Again, just a guess.
Delta42
Visit this Community
Georgia, United States
Joined: August 27, 2002
KitMaker: 616 posts
Armorama: 511 posts
Posted: Wednesday, August 13, 2014 - 01:29 AM UTC
Hey Brian,

I have been following your build with great interest. You are doing a great job so far. I don't know if you need them, but I have extensive pictures of almost every area of the Sheridan that I used during my conversion/build. If you need additional pictures of a particular area, let me know.

Dave
bmowery5308
Visit this Community
North Carolina, United States
Joined: July 24, 2014
KitMaker: 16 posts
Armorama: 16 posts
Posted: Wednesday, August 13, 2014 - 03:28 AM UTC
Dave,

Thanks for the kind offer, I just may hit you up on that. I'm thinking I might do one as an OPFOR T-80 next, so if you've got any without the fording gear attached, I'd be very grateful. Thanks again.

Brian
Delta42
Visit this Community
Georgia, United States
Joined: August 27, 2002
KitMaker: 616 posts
Armorama: 511 posts
Posted: Wednesday, August 13, 2014 - 03:33 AM UTC

Quoted Text

if you've got any without the fording gear attached


Sorry Brian, all my pictures are of the M551A1 and M551 TTS.

But I do have an extensive photo collection of the XM551 that I used to scratch build that vehicle.

Dave
Vodnik
Visit this Community
Warszawa, Poland
Joined: March 26, 2003
KitMaker: 4,342 posts
Armorama: 3,938 posts
Posted: Wednesday, August 13, 2014 - 04:11 AM UTC

Quoted Text


So my guess is that rather than do any major research on their own, Academy just grabbed a Jaguar kit and made it plastic. Again, just a guess.


Yup. I discovered it long time ago (just by looking at Jaguar kit pics, as I have never seen it myself)... This unfortunately means the accurate Sheridan kit never existed in this scale
bmowery5308
Visit this Community
North Carolina, United States
Joined: July 24, 2014
KitMaker: 16 posts
Armorama: 16 posts
Posted: Wednesday, August 13, 2014 - 08:43 AM UTC

Quoted Text


Sorry Brian, all my pictures are of the M551A1 and M551 TTS.


Bummer, but I will probably still ask for some later. Thanks again for the offer.

Brian
bmowery5308
Visit this Community
North Carolina, United States
Joined: July 24, 2014
KitMaker: 16 posts
Armorama: 16 posts
Posted: Saturday, August 16, 2014 - 06:10 PM UTC
Mini update time.

Added more bolts, some tie downs and hinges to one of the engines covers.


I now realize I made the smaller of the two hatches too small, but I can live with it. Now that I know, I can make the next one more accurate.
bmowery5308
Visit this Community
North Carolina, United States
Joined: July 24, 2014
KitMaker: 16 posts
Armorama: 16 posts
Posted: Wednesday, August 20, 2014 - 02:41 PM UTC
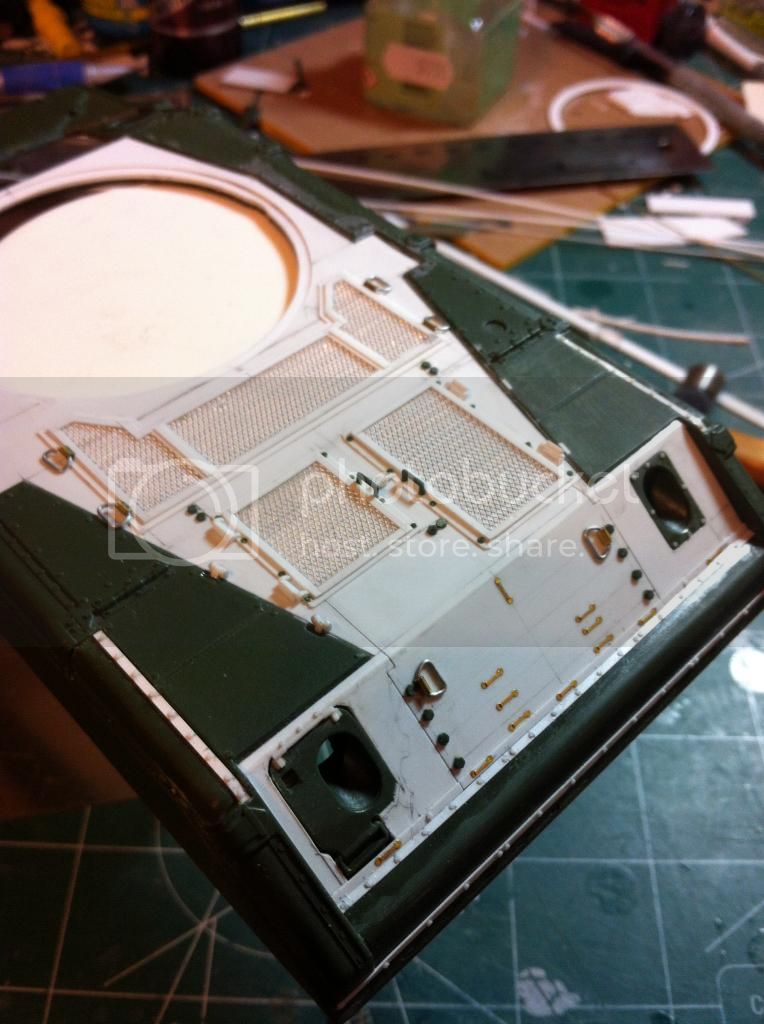
Micro Update: I finished the hinges for the engine deck and added the grab handles.


Next, I'll concentrate on the tie down straps, tools and bilge covers.
rfbaer
Visit this Community
Texas, United States
Joined: June 12, 2007
KitMaker: 1,866 posts
Armorama: 1,696 posts
Posted: Thursday, August 21, 2014 - 07:13 AM UTC
Goodness, this is nice work!
bmowery5308
Visit this Community
North Carolina, United States
Joined: July 24, 2014
KitMaker: 16 posts
Armorama: 16 posts
Posted: Thursday, August 28, 2014 - 06:08 PM UTC
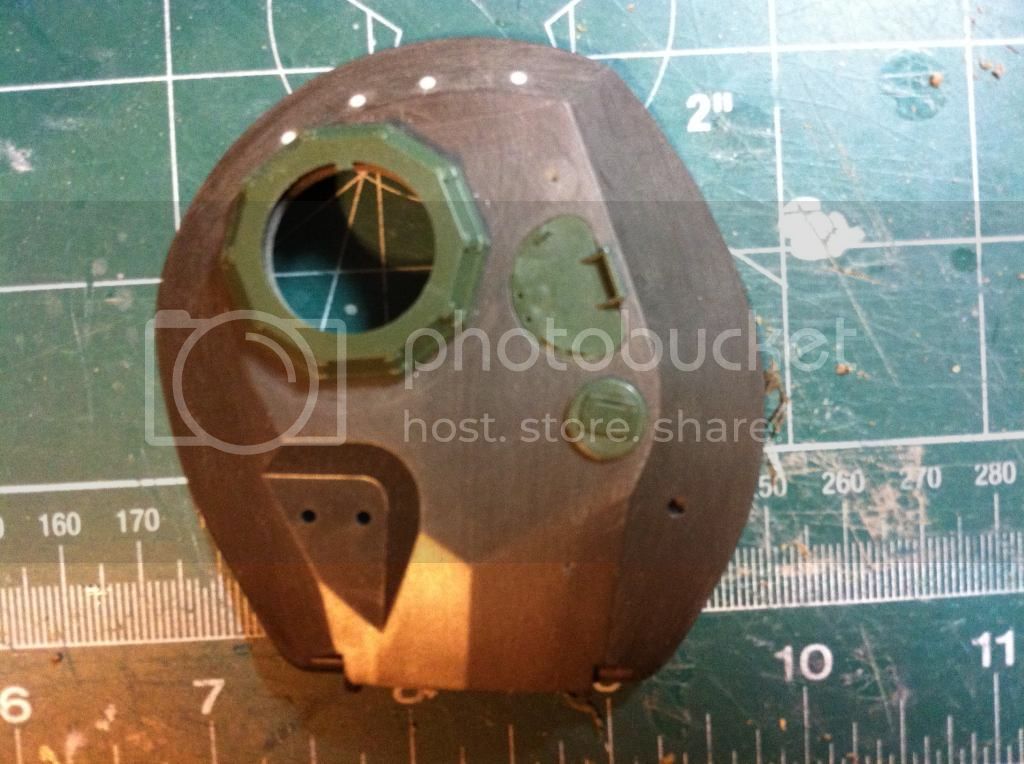
Took a small break and then decided to work on the turret for a bit. I had the Tamiya kit and grabbed the turret from it. I find it it sad that a 43 year old model is more dimensionally accurate than one tooled in '05. Which means Academy's previous Sheridan knockoff was, too. Irony, ladies and gentlemen.

Anyway, on to the update.

I removed all of the detail and cleaned up the turret. Also, I opened up holes for the hatches and periscope.


Even though the Tamiya turret is more accurate, it still needs some correcting around the gunners sight area. It has an extensive point towards the front (lined in red) when it needs to be a more perpendicular line (in white). This throws off where you apply the side weld bead.


This affects the angle of the upper roof panel, so I added a plastic shim and super glue and sanded the area to shape.


I needed to add the weld beads, so I started taping and puttying. I used Bondo's glazing putty and Testor's liquid cement to get the molten look.


I still need to finish up the welds around the gunners area and the mantlet plus start on the lower portion of the turret. Then on to the details! Thanks for looking.
RobinNilsson
Staff MemberTOS Moderator
KITMAKER NETWORK
Visit this Community
Stockholm, Sweden
Joined: November 29, 2006
KitMaker: 6,693 posts
Armorama: 5,562 posts
Posted: Sunday, October 05, 2014 - 09:13 PM UTC
Very interesting. I just decided that I'll wait with building a Sheridan in the hope that there is a new kit sometime in the future ..
I'm impressed by all the work you have put into this :-)
7 Robin
MikeyBugs95
Visit this Community
New York, United States
Joined: May 27, 2013
KitMaker: 2,210 posts
Armorama: 1,712 posts
Posted: Thursday, October 30, 2014 - 05:18 AM UTC
Hey Brian, why not use this as a master for an accurate model of a Sheridan?
rfbaer
Visit this Community
Texas, United States
Joined: June 12, 2007
KitMaker: 1,866 posts
Armorama: 1,696 posts
Posted: Friday, October 31, 2014 - 03:23 AM UTC
Very impressive, and I have to say (again) my favorite kind of modeling.
18Bravo
Visit this Community
Colorado, United States
Joined: January 20, 2005
KitMaker: 7,219 posts
Armorama: 6,097 posts
Posted: Sunday, November 02, 2014 - 03:56 AM UTC
I've got walkarounds of several M551 based VISMODs, including the T-80.
JUSTK
Visit this Community
Trinidad And Tobago
Joined: December 01, 2005
KitMaker: 91 posts
Armorama: 85 posts
Posted: Sunday, November 02, 2014 - 04:14 AM UTC
Hi Brain,
Greetings from Trinidad. Following your amazing build/correction.
I have the Academy Gulf War version, are these corrections appropriate for that version. Thanks in advance.
TankSGT
Visit this Community
New Jersey, United States
Joined: July 25, 2006
KitMaker: 1,139 posts
Armorama: 946 posts
Posted: Saturday, November 08, 2014 - 03:32 PM UTC
The build is coming along nicely. Have you decided on which era your building, Nam, Germany, Panama, DS? I was a Sheridan crewman in the 11th ACR in Germany but don't have many pictures. When it ran it was a good vehicle but I was on them at the end of there careers in the Cavalry. Keep up the good work. I too was very disappointed in the Academy kit.

Tom
 _GOTOTOP