

Hi Jesse,
Yes, I remember the Grant. I just photograph in whatever the natural light is, sometimes it's better than others.
Hi Pierantonio,
Yes, I've seen the drawing and the pictures, another job to do, but I took the time to cut them out to give the openings more depth and it also gave me a point of reference inside the shell.
I'm going to have to photocopy the drawings from the book, the green hue makes reading them difficult.
I tried your link re the rear plate but no luck so far, I have Vector engineer quick tool but file didn't want to open. When I get time I'll try another program.
Cheers guys
Al
Hosted by Darren Baker
Tamiya Mk IV Build Blog

AlanL

Joined: August 12, 2005
KitMaker: 14,499 posts
Armorama: 11,675 posts
Posted: Monday, August 25, 2014 - 06:13 AM UTC
AlanL
Joined: August 12, 2005
KitMaker: 14,499 posts
Armorama: 11,675 posts
Posted: Wednesday, August 27, 2014 - 05:10 AM UTC
Hi folks,
A question for any of the WW1 tank guys. On the Mk IV sponson doors is a chute that was used to tip out spent cartridges. Was this chute attached to the door or was it a separate item affixed beneath the doors?
Anyone got a decent picture of the door?
Thanks
Al
A question for any of the WW1 tank guys. On the Mk IV sponson doors is a chute that was used to tip out spent cartridges. Was this chute attached to the door or was it a separate item affixed beneath the doors?
Anyone got a decent picture of the door?
Thanks
Al

tatbaqui

#040

Joined: May 06, 2007
KitMaker: 2,713 posts
Armorama: 2,451 posts

Posted: Friday, August 29, 2014 - 10:48 AM UTC
Alan, are you building this as motorized -- was wondering what kind / brand of rubber cement is applicable? Cheers, Tat

gastec

Joined: February 03, 2014
KitMaker: 1,042 posts
Armorama: 871 posts
Posted: Friday, August 29, 2014 - 11:44 AM UTC
Alan
I'm pretty certain it's part of the door judging by the photo here - http://wwimodeller.co.nz/walkaround-british-mk-iv-tank/
Gary
I'm pretty certain it's part of the door judging by the photo here - http://wwimodeller.co.nz/walkaround-british-mk-iv-tank/
Gary
gastec
Joined: February 03, 2014
KitMaker: 1,042 posts
Armorama: 871 posts
Posted: Friday, August 29, 2014 - 11:45 AM UTC
AlanL
Joined: August 12, 2005
KitMaker: 14,499 posts
Armorama: 11,675 posts
Posted: Friday, August 29, 2014 - 08:50 PM UTC
Hi Tat,
I'm building a static display - but as best I can tell you don't need any cement for the tracks as they click together with quite string fixing joints.
Hi Gary,
Many thanks, useful set of photographs, both of the doors and the rear plate of the tank that needs corrected.
Appreciated.
Cheers
Al
I'm building a static display - but as best I can tell you don't need any cement for the tracks as they click together with quite string fixing joints.
Hi Gary,
Many thanks, useful set of photographs, both of the doors and the rear plate of the tank that needs corrected.
Appreciated.
Cheers
Al
warmonger

Joined: November 08, 2006
KitMaker: 217 posts
Armorama: 117 posts
Posted: Friday, August 29, 2014 - 10:10 PM UTC
Alan, Before you correct to much, remember the first set of pics are of a Mark V not a IV. That would explain why the tail is so different. There is a ID poster in one of the pics.

hofpig

Joined: March 04, 2007
KitMaker: 1,330 posts
Armorama: 1,017 posts

Posted: Friday, August 29, 2014 - 10:30 PM UTC
Great riveting Al,I can't wait to see more.
Paul
Paul

AlanL
Joined: August 12, 2005
KitMaker: 14,499 posts
Armorama: 11,675 posts
Posted: Friday, August 29, 2014 - 11:21 PM UTC
Quoted Text
Alan, Before you correct to much, remember the first set of pics are of a Mark V not a IV. That would explain why the tail is so different. There is a ID poster in one of the pics.
Hi Troy,
Thanks for pointing that out. Tamiya modeled their kit on the Bovington example and in that respect it is correct but the Bovington tank had incorrect detail on the rear armour so I will have to make some adjustments to the layout. Their is another build blog on the Mk IV on the go on site and that's where I picked it up.
Thanks Paul,
It's a slow process. I only need limited internal detail for the open doors although I would love a full interior so that you could leave the sponsons off.
I plan to build the other gun this weekend but I have a mountain of shells to paint for my second Somme dio.
Cheers giys
Al
ironhull

Joined: November 23, 2013
KitMaker: 134 posts
Armorama: 134 posts
Posted: Saturday, August 30, 2014 - 01:32 AM UTC
Quoted Text
Hi folks,
...
On the Mk IV sponson doors is a chute that was used to tip out spent cartridges. Was this chute attached to the door or was it a separate item affixed beneath the doors?
Anyone got a decent picture of the door?
Thanks
Al
It was a chute attached beneath the door and it was made by thin armour (I belive 8 mm) so the Tamiya is too thick.
Look at this nice picture of LODSTAR
http://www.brusselspictures.com/wp-content/photos/WWI-tanks/mark-iv.jpg
Ciao
Pierantonio
tatbaqui
#040
Joined: May 06, 2007
KitMaker: 2,713 posts
Armorama: 2,451 posts
Posted: Saturday, August 30, 2014 - 12:11 PM UTC
Quoted Text
Hi Tat,
I'm building a static display - but as best I can tell you don't need any cement for the tracks as they click together with quite string fixing joints.
Thanks Alan. Sorry for not being clear -- I was referring to the "synthethic rubber glue" called out in the installation of the moving / motor-related parts. Seems generic adhesive stuff but just wanted to find what it refers to. Any advise much appreciated. Cheers, Tat
AlanL
Joined: August 12, 2005
KitMaker: 14,499 posts
Armorama: 11,675 posts
Posted: Wednesday, September 03, 2014 - 09:41 PM UTC
Hi Tat,
Sorry for the delay in replying. The small tube is Tamiya Grease to lubricate the moving parts of the engine mechanism. How much and how often you might need to apply this I don't know but anyone one who builds their racing cars could probably answer that question.
As to the Synthetic rubber cement shown in the Recommended Tool section of the instructions it's not a product I'm familiar with. Have a look here it appears to be for attaching a metal part and a plastic part.
http://www.rcuniverse.com/forum/rc-electric-off-road-trucks-buggies-truggies-more-147/8821594-tamiya-synthetic-rubber-cement.html
Cheers
Al
Bizarre

Joined: July 20, 2010
KitMaker: 1,709 posts
Armorama: 1,581 posts

Posted: Wednesday, September 03, 2014 - 09:56 PM UTC
nice build Alan, I like the added detail on the inside of sponsons. Is there a similar scheme for female?
AlanL
Joined: August 12, 2005
KitMaker: 14,499 posts
Armorama: 11,675 posts
Posted: Wednesday, September 03, 2014 - 11:48 PM UTC
Hi Roman.
Yes, although the layout of the sponson is obviously different. One issue with the Tamiya gun is that is sits in a polly cap for easy turning. This tends to force the shield up a little. Tamiya had a circular shape on the underside of the top of the sponson, most probably for that reason, but I couldn't get a decent fit with it in place and removed it as nothing similar shows in the reference pictures I have. This will probably mean I have to make a small wedge to get the gun to sit true.
Cheers
Al
Bizarre
Joined: July 20, 2010
KitMaker: 1,709 posts
Armorama: 1,581 posts
Posted: Thursday, September 04, 2014 - 12:27 AM UTC
Excuse me for my poor English. I was wondering if you have similar scheme for female. Drawing or plan?

rfbaer
Joined: June 12, 2007
KitMaker: 1,866 posts
Armorama: 1,696 posts
Posted: Thursday, September 04, 2014 - 03:42 AM UTC
I'm riveted to this thread.
Sorry.....
Sorry.....
tatbaqui
#040
Joined: May 06, 2007
KitMaker: 2,713 posts
Armorama: 2,451 posts
Posted: Thursday, September 04, 2014 - 10:09 AM UTC
Quoted Text
Hi Tat,
Sorry for the delay in replying. The small tube is Tamiya Grease to lubricate the moving parts of the engine mechanism. How much and how often you might need to apply this I don't know but anyone one who builds their racing cars could probably answer that question.
As to the Synthetic rubber cement shown in the Recommended Tool section of the instructions it's not a product I'm familiar with. Have a look here it appears to be for attaching a metal part and a plastic part.
http://www.rcuniverse.com/forum/rc-electric-off-road-trucks-buggies-truggies-more-147/8821594-tamiya-synthetic-rubber-cement.html
Cheers
Al
Thanks for the link Al. When I read shoe goo -- it got me to thinking on glue that shoe repair guys use here:
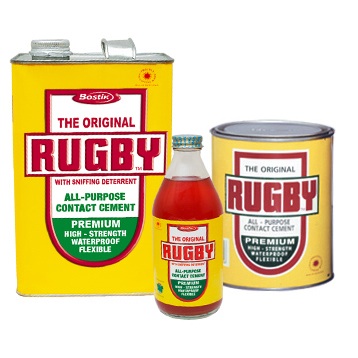
Read some more on it and its specs are spot on. Having that part is cleared up, now all I need figure out us when to start building

Cheers,
Tat
AlanL
Joined: August 12, 2005
KitMaker: 14,499 posts
Armorama: 11,675 posts
Posted: Friday, September 05, 2014 - 04:48 AM UTC
Hi Roman,
Sorry, no plans for the MG sponsons - yet!
Hi Tat,
Looks promising, let us know how you get on.
Hi Russel.
Thanks for looking in. I finally got around to cleaning up the parts for the 2nd 6pdr.

Cheers
Al
Sorry, no plans for the MG sponsons - yet!
Hi Tat,
Looks promising, let us know how you get on.
Hi Russel.
Thanks for looking in. I finally got around to cleaning up the parts for the 2nd 6pdr.

Cheers
Al
ironhull
Joined: November 23, 2013
KitMaker: 134 posts
Armorama: 134 posts
Posted: Friday, September 05, 2014 - 08:25 AM UTC
Hi Al,
really anice job on the sponson.
Which color did you choose for exterior gun shield?
Bye
Pierantonio
really anice job on the sponson.
Which color did you choose for exterior gun shield?
Bye
Pierantonio
AlanL
Joined: August 12, 2005
KitMaker: 14,499 posts
Armorama: 11,675 posts
Posted: Friday, September 05, 2014 - 06:18 PM UTC
Quoted Text
Hi Al,
really anice job on the sponson.
Which color did you choose for exterior gun shield?
Bye
Pierantonio
Many thnks. It's just a base coat of Tamiya XF 52.
Cheers
Al
AlanL
Joined: August 12, 2005
KitMaker: 14,499 posts
Armorama: 11,675 posts
Posted: Saturday, September 27, 2014 - 11:39 PM UTC
Hi folks,
Been a few weeks since I got anything done but having cleared some space I assembled the 2 6pdr last night and started on the sponson.

Cheers
Al
Been a few weeks since I got anything done but having cleared some space I assembled the 2 6pdr last night and started on the sponson.

Cheers
Al
AlanL
Joined: August 12, 2005
KitMaker: 14,499 posts
Armorama: 11,675 posts
Posted: Sunday, September 28, 2014 - 09:58 PM UTC
Hi folks,
Riveting of the second sponson underway. As I plan to have the sponson doors open one thing that concerned me was the possibility of a large empty space. To this end I might construct the basic idea of an engine, not the nuts and bolts but a basic shape to fill the space and give the impression of something there. To that end I cut down an old bit of the UC engine and will see how that develops during the build. So there will be the idea of an interior but not necessarily that accurate. I'm not to bothered about this as long as I don't end up with a black hole between the guns. I'll see if this is necessary as the build progresses.
It might also be necessary to make a mock up of the ammo racks, I'll see how things go.

Cheers
Al
AlanL
Joined: August 12, 2005
KitMaker: 14,499 posts
Armorama: 11,675 posts
Posted: Monday, September 29, 2014 - 07:31 PM UTC
Hi folks,
The skeleton of the tank went together with no problems. lovely fit of parts. I cut out the engine stand pegs and filled the on/off switch as I won't be adding the engine.
There are 54 road wheels, the British surely like their wheels. Two different types one made up of two parts and the other wheel of 4 parts, they inter link in pairs of 3s and 4s. Again no issues so far. A really nice kit to work with.


Cheers
Al
Bizarre
Joined: July 20, 2010
KitMaker: 1,709 posts
Armorama: 1,581 posts
Posted: Monday, September 29, 2014 - 09:29 PM UTC
lovely detail on the sponsons!
the running gear looks simple in comparison to Takom.
the running gear looks simple in comparison to Takom.
AlanL
Joined: August 12, 2005
KitMaker: 14,499 posts
Armorama: 11,675 posts
Posted: Monday, September 29, 2014 - 09:52 PM UTC
Thanks Roman, it is a very nice kit to work with.
Al
Al
 |

WEB HOSTING BY


Copyright ©2021 Armorama and Kitmaker Network, a subsidiary of Silver Star Enterprises
All Rights Reserved. Please read our Conditions of Use and Privacy Policy.
All Rights Reserved. Please read our Conditions of Use and Privacy Policy.