_GOTOBOTTOM
Constructive Feedback
For in-progress or completed build photos. Give and get contructive feedback!
Tiger I Command Version with Tamiya Zimmerit
suntze
Visit this Community
California, United States
Joined: April 03, 2010
KitMaker: 59 posts
Armorama: 45 posts
Posted: Friday, September 12, 2014 - 09:25 AM UTC
This is an experiment with Vallejo paint and Tamiya Zimmerit.

I am curious about how the Tamiya Zimmerit will work out on this Dragon Tiger I Mid Command version.

At the same time trying the Vallejo AirBrush Thinner as well as the Retarder Medium and see if they help the paint to perform better with my air brush.

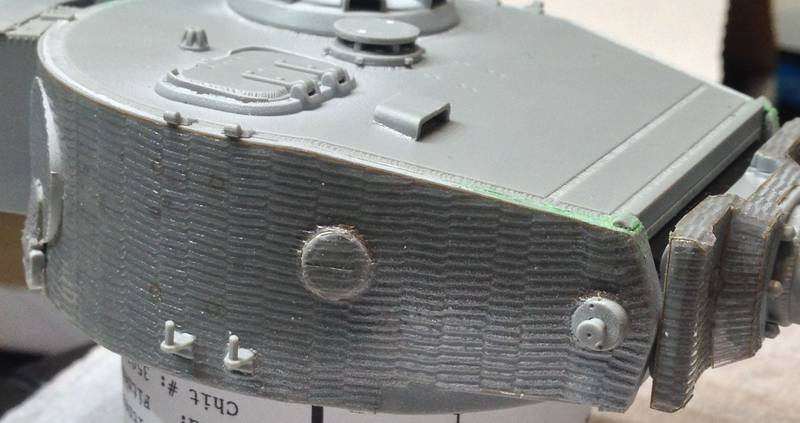
The Tamiya Zimmerit for Tiger I is not difficult to get onto the dragon model. I just photo copied them on paper and test fit them with the model. At the same time precut the holes needed for this version of Tiger I.

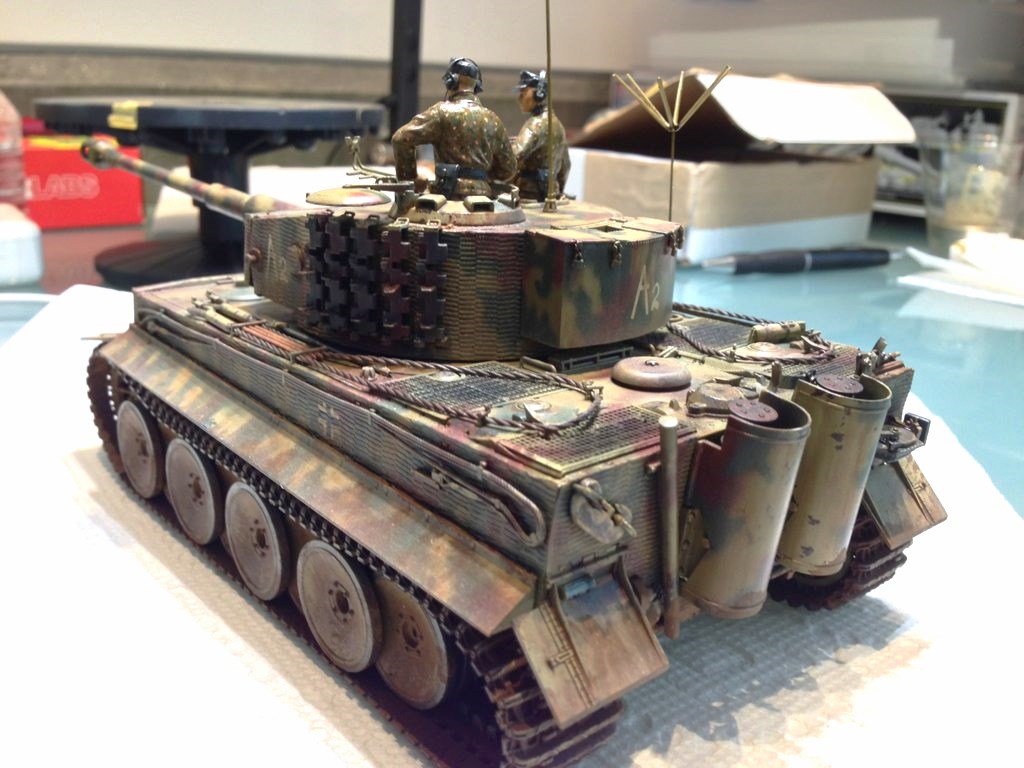
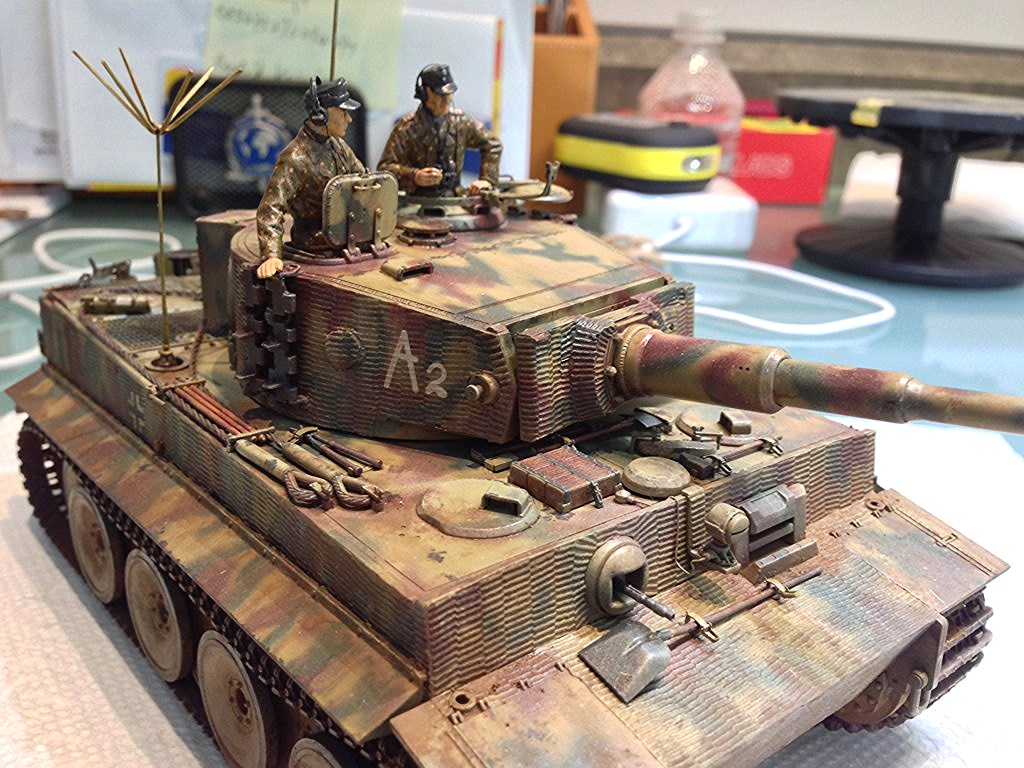
Here is a few pictures. All feedbacks are welcome.

With Tamiya Zimmerit applied. These are transparent so it is easy for you to cut out any opening after application. The negative is for complex surface they don't adhere to curves too well and will need to use some super glue.


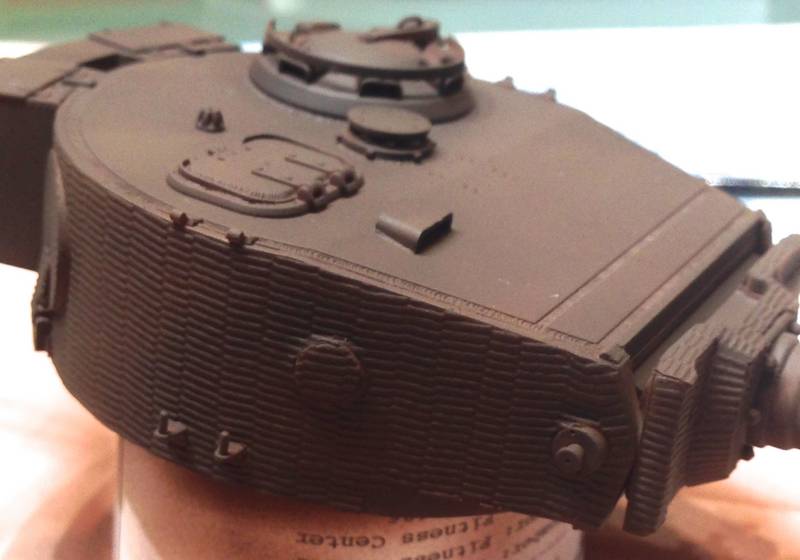
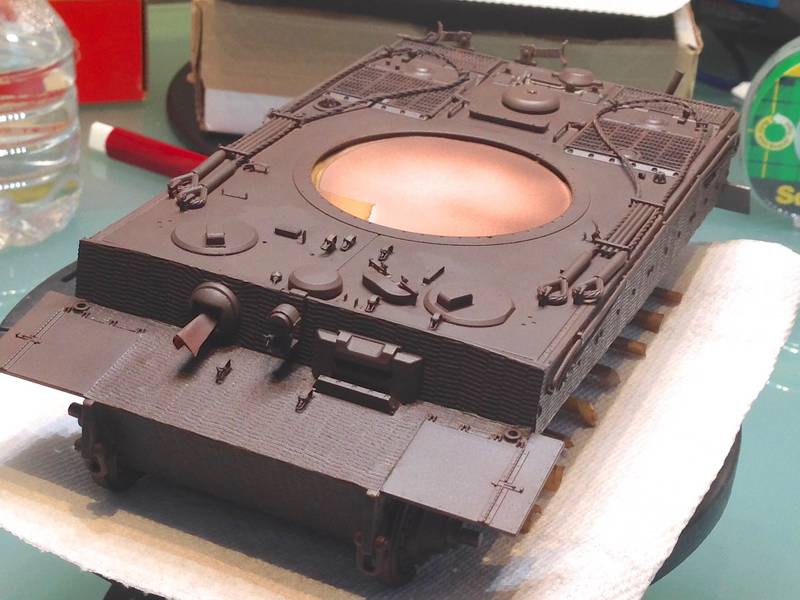
After applying the base coat of primer.


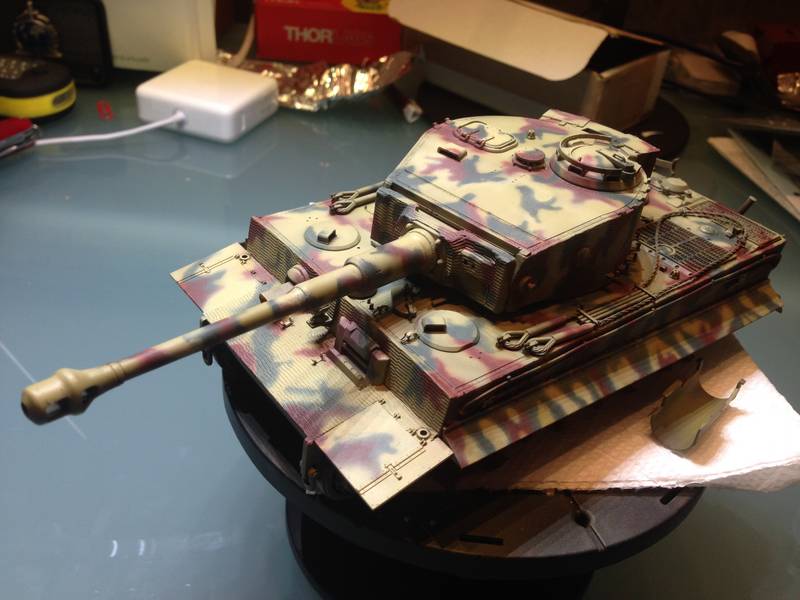
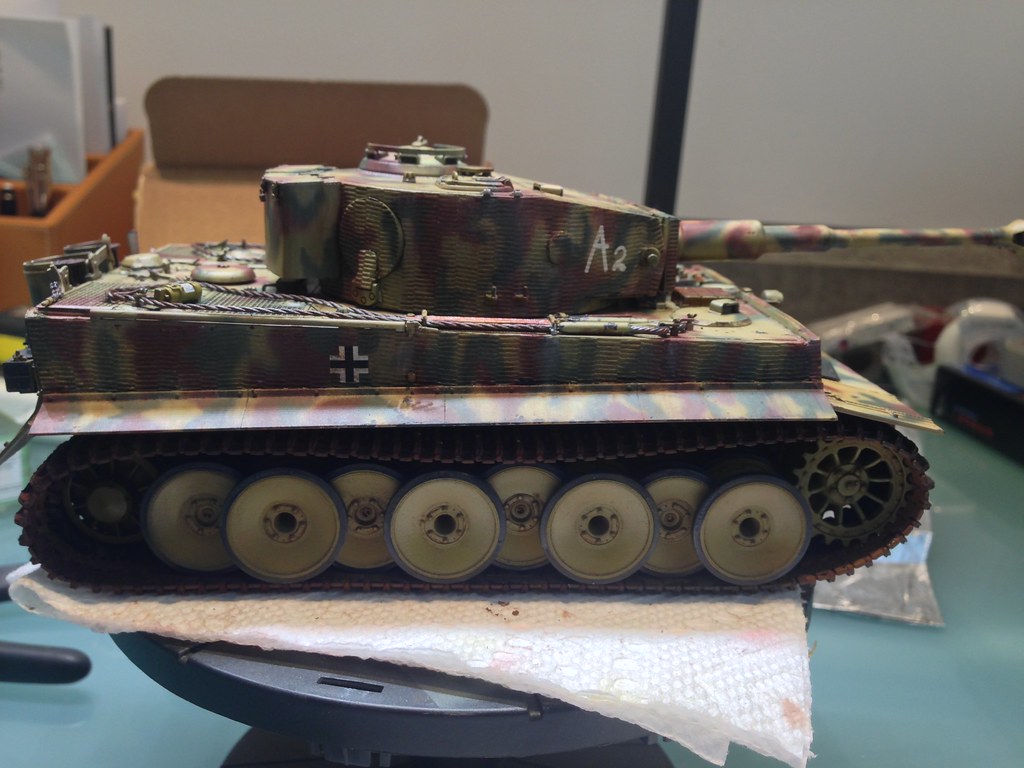
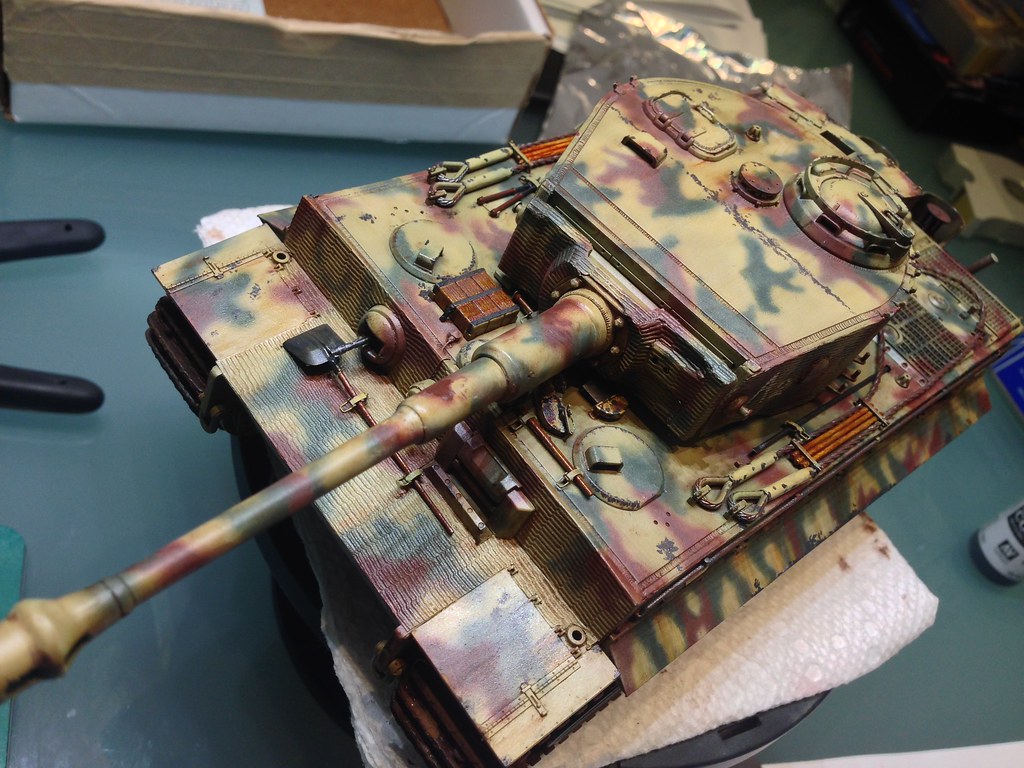
This is the camouflage of Pz. Abt 508. Dragon just provide the left side view and front and back view. So I have to guess what is on the other side of the tank.

Blackstoat
Visit this Community
England - East Anglia, United Kingdom
Joined: October 15, 2012
KitMaker: 568 posts
Armorama: 561 posts
Posted: Friday, September 12, 2014 - 10:48 AM UTC
Looks good.

I'm liking that primer base colour. Personally I would've been tempted to hairspray chip to that.

good stuff
acebatau
Visit this Community
Colorado, United States
Joined: February 10, 2008
KitMaker: 730 posts
Armorama: 616 posts
Posted: Friday, September 12, 2014 - 11:13 AM UTC
Nice camo, so Tamiya zimmerit do fit Dragon Tiger I, good to know that, thanks
suntze
Visit this Community
California, United States
Joined: April 03, 2010
KitMaker: 59 posts
Armorama: 45 posts
Posted: Friday, September 12, 2014 - 01:33 PM UTC
Thanks for the comments.

The primer is just 50:50 mix of black and RAL 8012 surface primer from Vallejo. The RAL 8012 carries too much red hue so I mixed that with black.

My experience with Vallejo paint and air brush is still more on the problematic side. Even with retarder and thinner, they still clog up the air brush after a few long sessions. You need to clean the tip of the needle once in a while to maintain a smooth spray. Tamiya paint behaves a lot better with air brushes.

The Tamiya Zimmerit fits the chassis very well. The turret portion is a bit off, not too much. You need to cut off a bit of the Zimmerit to join the two halves together at the back of the turret. The holes for various part are off a bit on the turret. It is not hard to fix.


Tojo72
Visit this Community
North Carolina, United States
Joined: June 06, 2006
KitMaker: 4,691 posts
Armorama: 3,509 posts
Posted: Friday, September 12, 2014 - 04:57 PM UTC
I really like the camo job
Blackstoat
Visit this Community
England - East Anglia, United Kingdom
Joined: October 15, 2012
KitMaker: 568 posts
Armorama: 561 posts
Posted: Friday, September 12, 2014 - 08:35 PM UTC

Quoted Text

Thanks for the comments.

The primer is just 50:50 mix of black and RAL 8012 surface primer from Vallejo. The RAL 8012 carries too much red hue so I mixed that with black.

My experience with Vallejo paint and air brush is still more on the problematic side. Even with retarder and thinner, they still clot up the air brush after a few long sessions. You need to clean the tip of the needle once in a while to maintain a smooth spray. Tamiya paint behaves a lot better with air brushes.

I know what youre saying about Vallejo, I have the same problems. Even the air series clogs for me - so I prefer Tamiya or Lifecolor.


The Tamiya Zimmerit fits the chassis very well. The turret portion is a bit off, not too much. You need to cut off a bit of the Zimmerit to join the two halves together at the back of the turret. The holes for various part are off a bit on the turret. It is not hard to fix.


Removed by original poster on 09/13/14 - 08:36:50 (GMT).
suntze
Visit this Community
California, United States
Joined: April 03, 2010
KitMaker: 59 posts
Armorama: 45 posts
Posted: Tuesday, September 30, 2014 - 02:16 PM UTC
I added wash and some chipping and weathering.


peter-panzer
Visit this Community
South Carolina, United States
Joined: September 30, 2014
KitMaker: 10 posts
Armorama: 10 posts
Posted: Thursday, October 02, 2014 - 02:35 AM UTC
wow that looks great! I'm in the process of the same kit possibly using the same zimm sheets from tamiya. As far as fitment to corners/edges how does it "handle"?
suntze
Visit this Community
California, United States
Joined: April 03, 2010
KitMaker: 59 posts
Armorama: 45 posts
Posted: Thursday, October 02, 2014 - 12:10 PM UTC
Thanks Adam.

The straight corners and edges are pretty good. You do need to take a short round pencil or roller to make sure the adhesive are in full contact. I trimmed and sanded the edges to remove any excess. If not, the corners will get caught and peel.

The difficult part is the mantel. There are a lot of curves, so you need to push hard and make sure their follow the contour. You do need to trim the excess and use some super glue to fill up the gaps.

Also, the two piece turret zimmerit are a bit longer than needed. So you need to make a cut at the overlap to secure a seamless joint at the back of the turret.

With the command version, you also need to punch a round piece from the spare zimmerit to cover the machine gun opening that is not with command version.

Apart from that, it is pretty straight forward.
thebear
Visit this Community
Quebec, Canada
Joined: November 15, 2002
KitMaker: 3,960 posts
Armorama: 3,579 posts
Posted: Monday, October 06, 2014 - 03:15 AM UTC
Great job and the zimmerit looks just fine... I hadn't thought of that option for my mid .. I might just pick up a set to try it out ..
Nice paint job ... Congrats!
suntze
Visit this Community
California, United States
Joined: April 03, 2010
KitMaker: 59 posts
Armorama: 45 posts
Posted: Sunday, October 19, 2014 - 10:29 AM UTC
Thanks for the feedbacks.

I finally finished the model with weathering and added two tank crews. As this is intent to test the Tamiya zimmerit and Vallejo paint, I am happy with the result but may have overdone the weathering.

I would say that Vallejo paint with retardant and added air brush thinner seems to work ok. It still dried up very fast at the tip of the air brush. The Tamiya zimmerit gave me a better than expected result. I would say it is a easier and faster way to create zimmerit but not as flexible in terms of creating damages and for complex surface as putty.

Here is some finished photos.


 _GOTOTOP