_GOTOBOTTOM
Armor/AFV: Axis - WWII
Armor and ground forces of the Axis forces during World War II.
Hosted by Darren Baker
Bergepanther
wedgetail53
Visit this Community
Queensland, Australia
Joined: October 02, 2008
KitMaker: 658 posts
Armorama: 629 posts
Posted: Friday, November 28, 2014 - 02:27 PM UTC
G’day all
For some time now, I have entertained the idea of building another Bergepanther, having already built one some years ago based on the Italeri kit and a DML Panther A. To the best of my knowledge, the following are the only Bergepanther kits available in 1/35:
- DML make two, both Ausf D, one mounting a Pz IV turret and one mounting a quad Flak 38
- Italeri make their venerable Ausf A, which has more wrong with it than right
- ICM make two Ausf Ds, an early and a late
- Revell make an Ausf D
- Hobbyboss make an Ausf D mounting a 3.7cm Flak

It is possible to make a reasonable Ausf A, based on and/or using some of the parts from the Italeri kit, or alternatively, New TMD makes a highly detailed kit for an Ausf A, but I wasn’t about to fork out $150 for it. Besides, it makes up an Ausf A and I wanted to make a late Ausf G.
I made use of three publications in my researching for this model:
- Panzer Tracts No. 16-1 Bergepanther Ausf. D, A, G by Thomas L. Jentz, Hilary Louis Doyle, and Lukas Friedli.
- Tankpower Panther Vol . 4 by Waldemar Trojca
- Im Detail Bergepanther Teil 2 by Waldemar Trojca (written in German)

There were somewhere between 290 and 347 Bergepanthers built (sources vary), but I have yet to find any information regarding how many of each of the different variants, Ausf D, A or G, were built. Ausf G was the last variant built, and the vehicle I am proposing to build is based on a very late version Ausf G photographed in Iserlohn in April 1945. This vehicle was one of four issued to Pz. Abt. 512 on 13 March 1945, so was almost brand new when it was surrendered at Iserlohn along with the rest of 512 Pz. Abt. only a few weeks later.

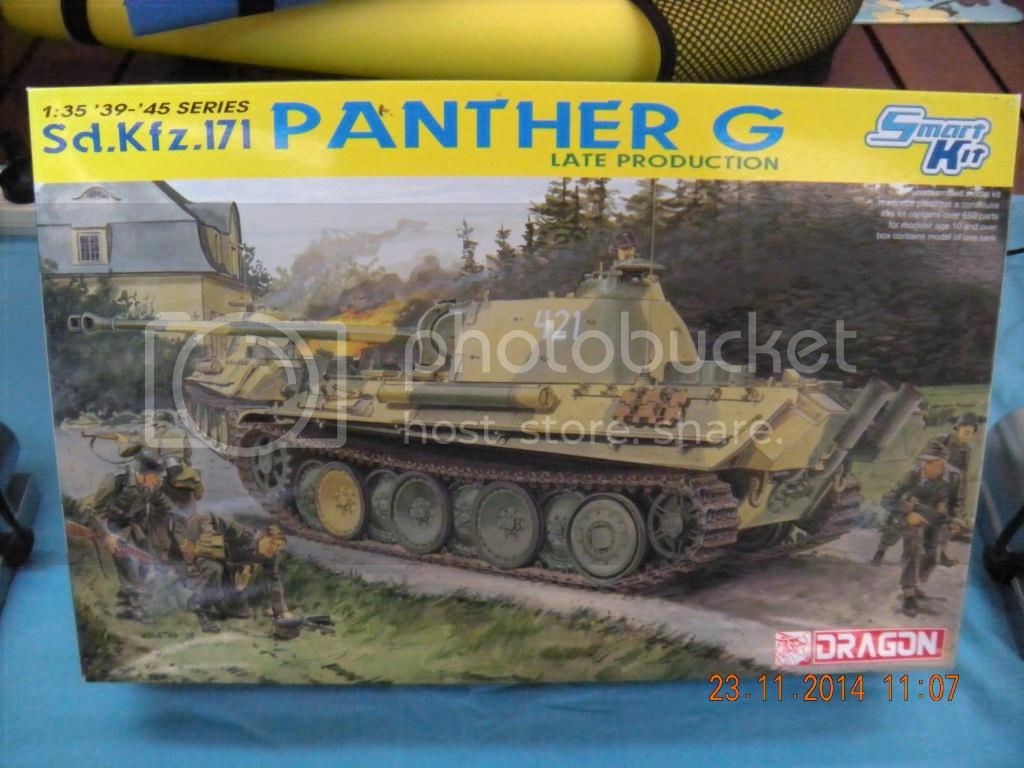
The base kit is the DML Panther G late production (6268), but considerable alterations are required to this kit. The first and most important change is to the upper hull, which is almost entirely removed forward of the engine firewall, and the shape of the insert piece required was as shown in Panzer Tracts 16-1 for an Ausf G hull.


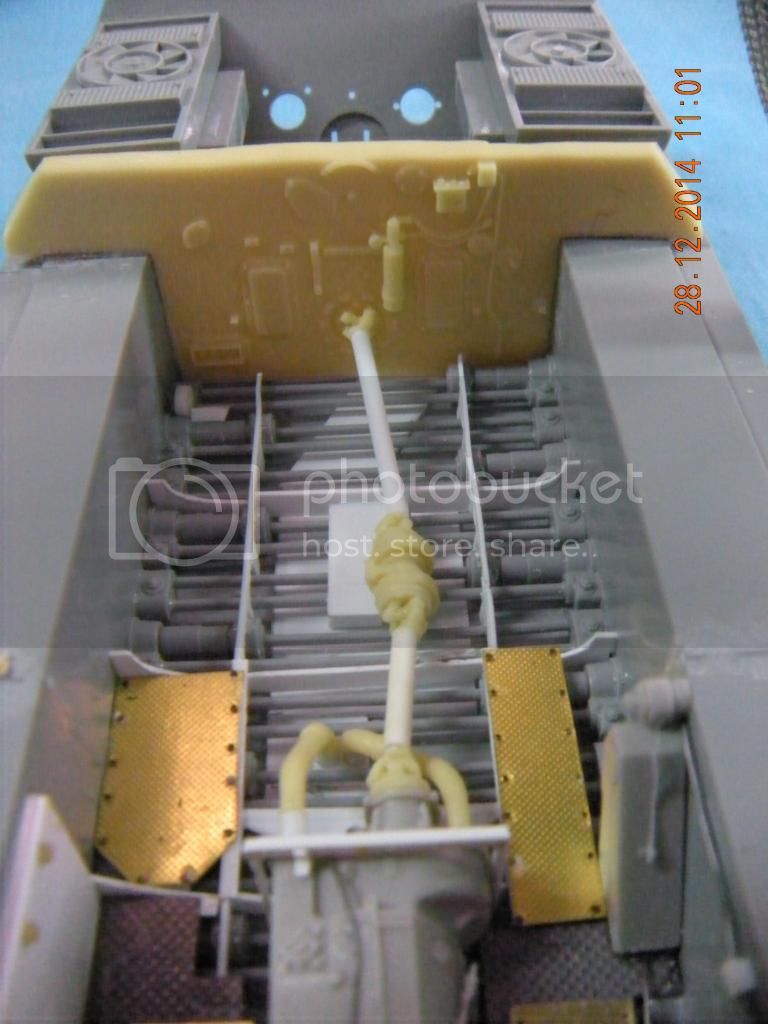
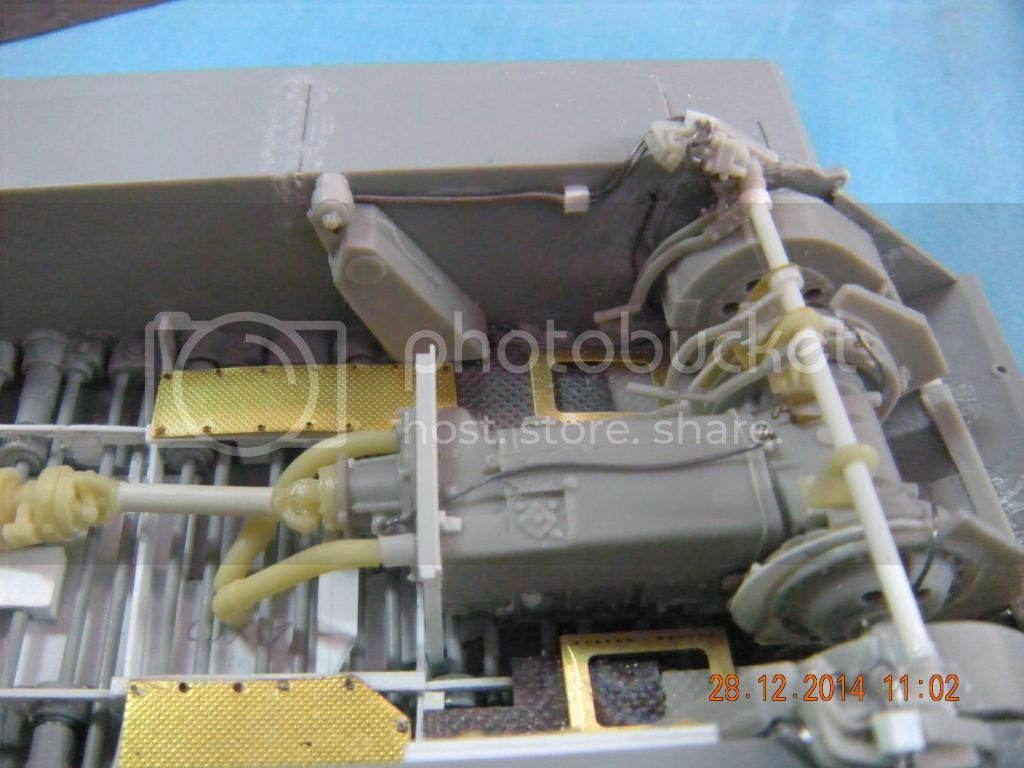
Internally, the torsion bars, are, of course, provided in the kit, but the two longitudinal strips are not, and have to be scratch built. I decided to hold off adding anything more to the interior until I receive the CMK Panther Driver's Compartment kit which I currently have on order.


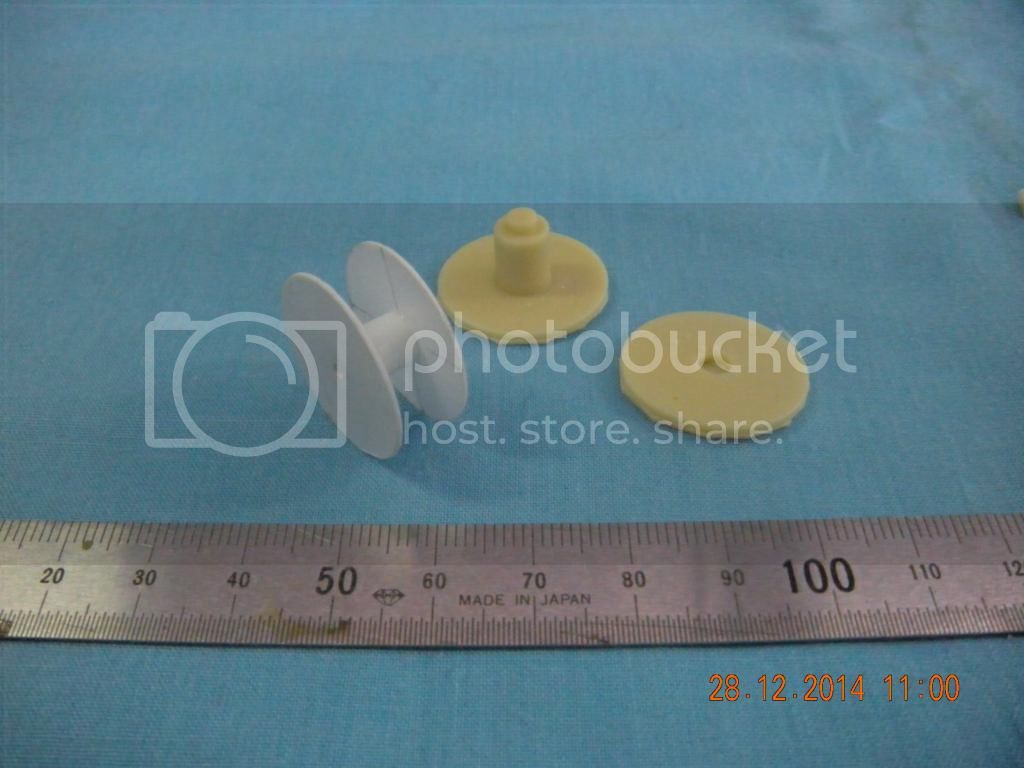
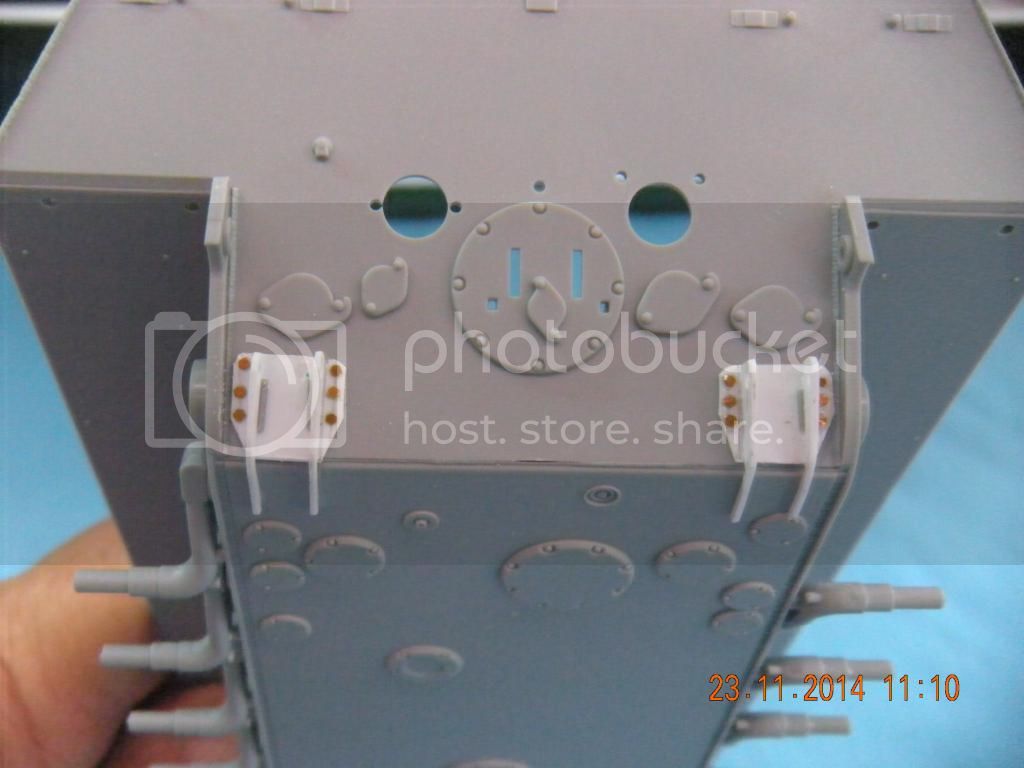
On the rear hull, two brackets have to be added, which I scratch built. It's interesting to think that when the spade is in use, and the 45 ton tank is pulling a vehicle of the same or greater weight, there is enormous stress placed on the point where the spade attaches to the tank, and it is at this point that the only attachment is two pins of about 40mm diameter!


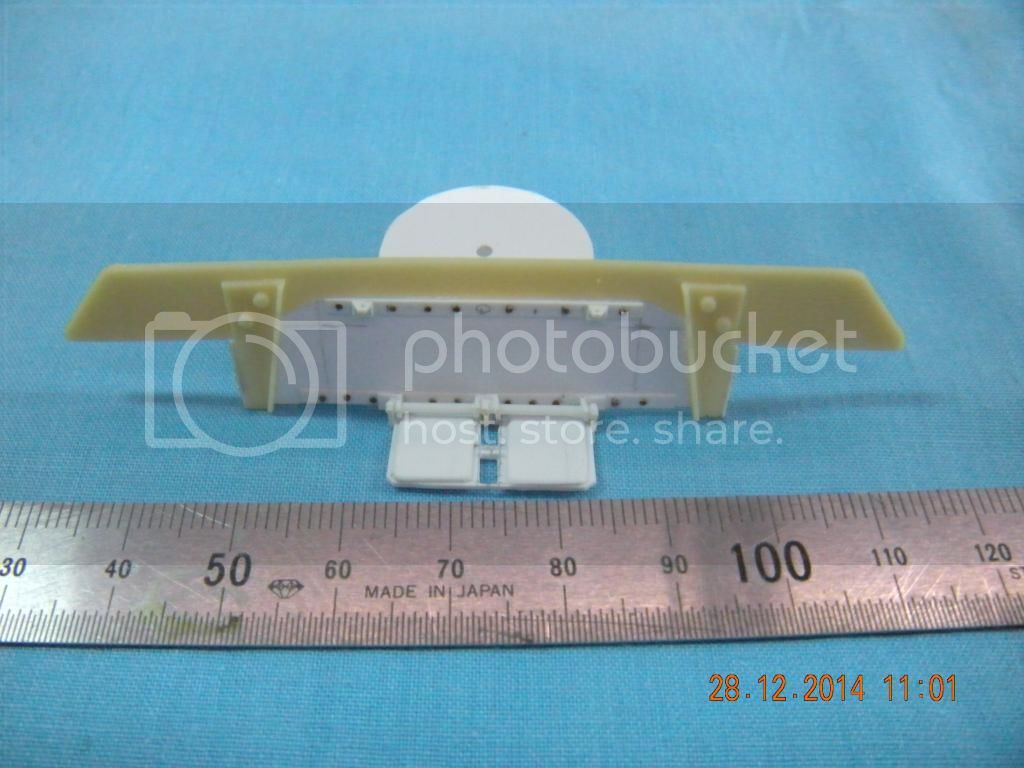
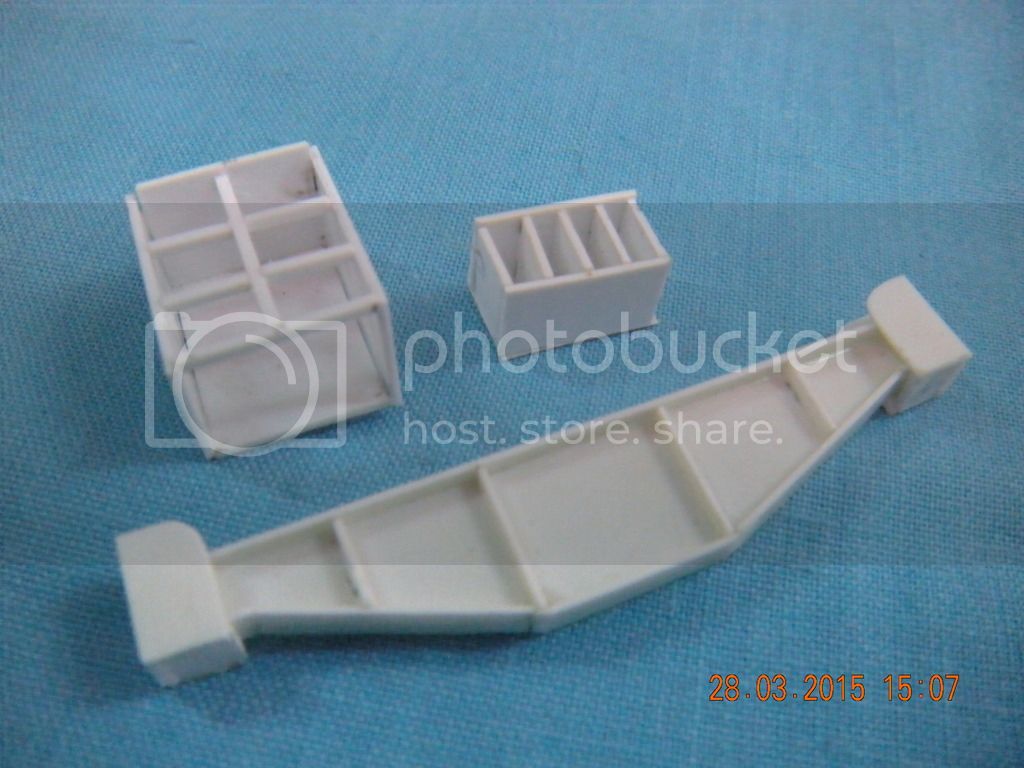
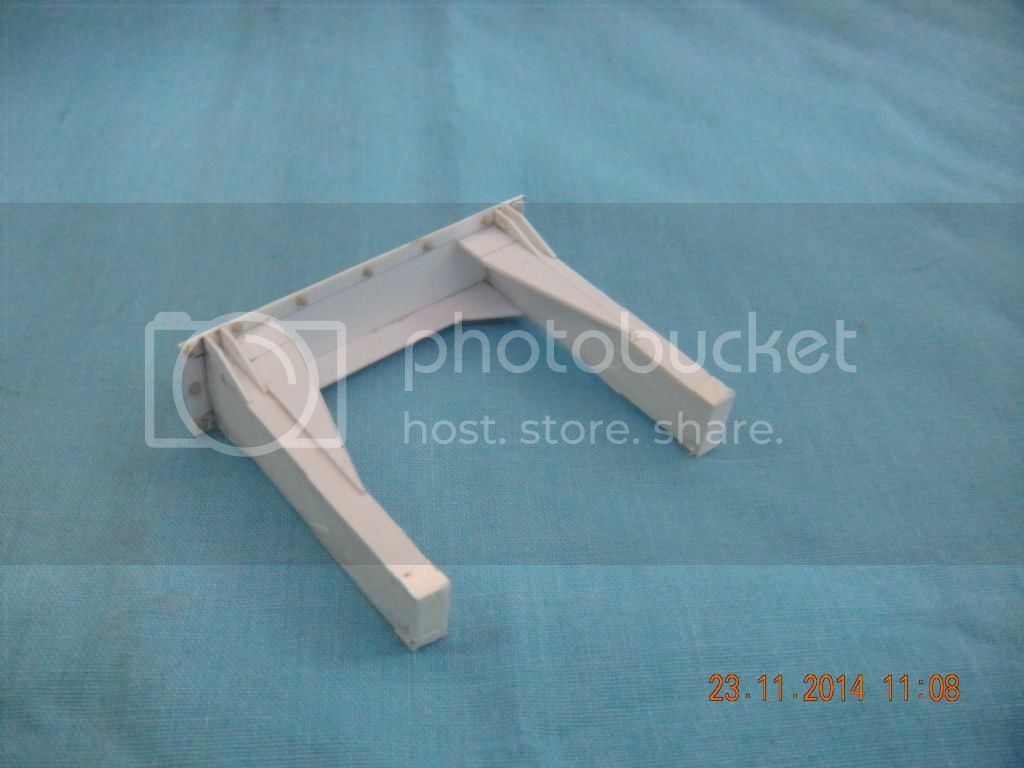
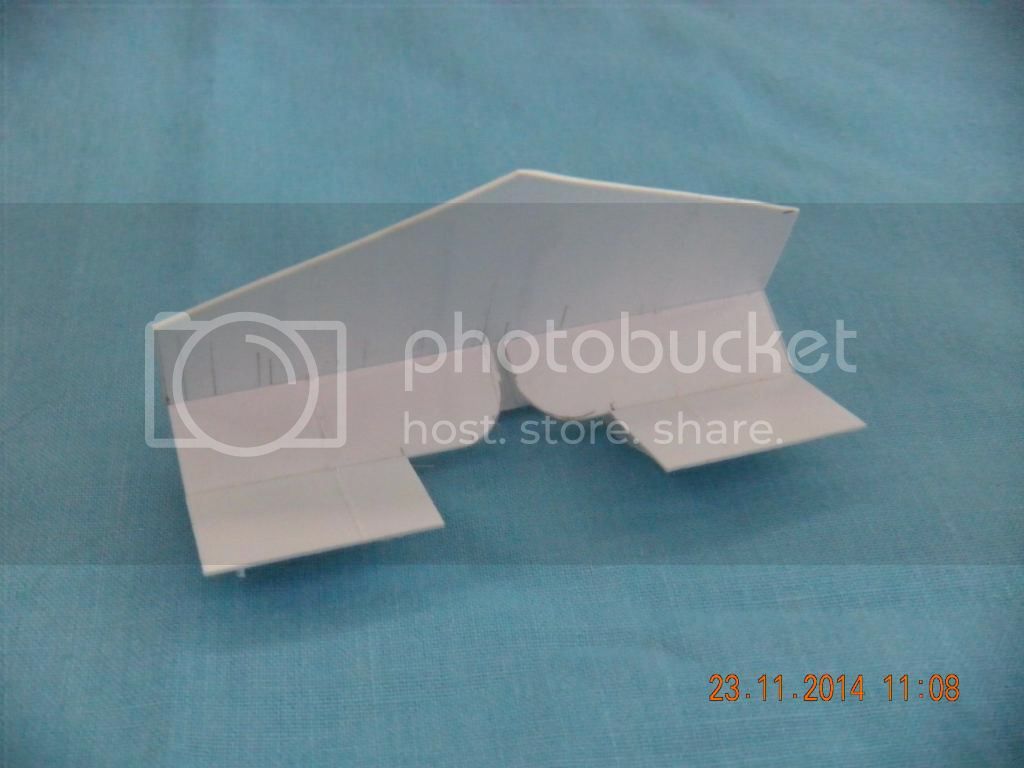
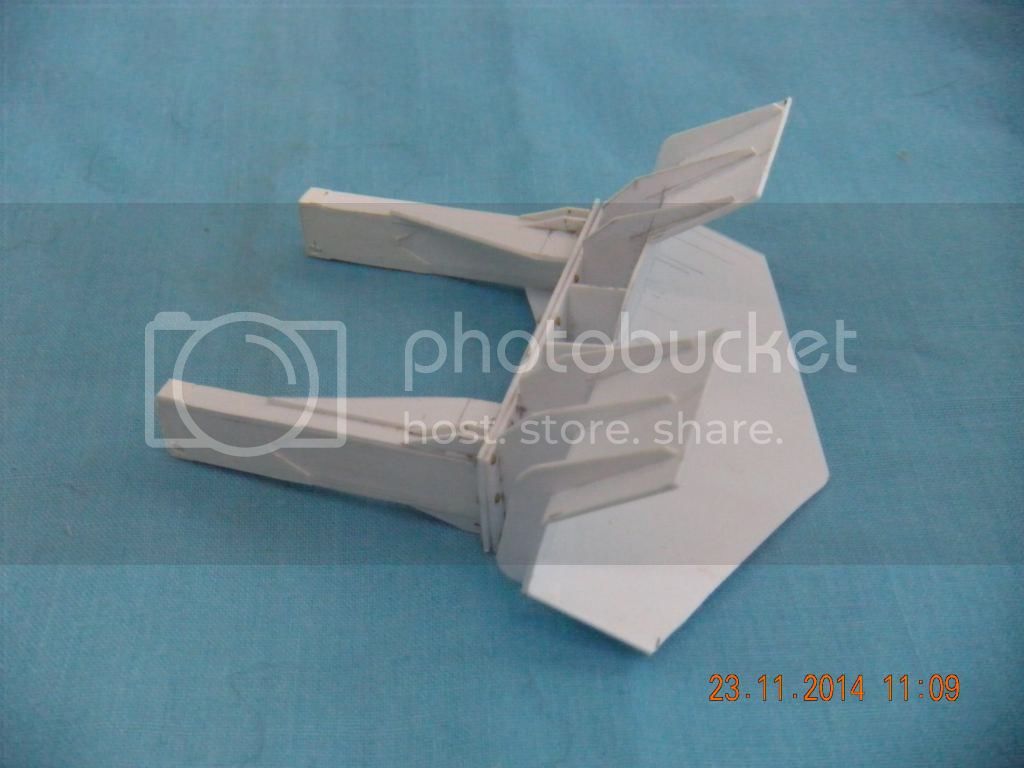
I decided that the spade in the Italeri kit bore very little resemblance to an Ausf G spade, so, using the drawings in Panzer Tracts 16-1, I completely scratch built a new one. This is in two pieces, one of which is the spade itself, and the other the two support arms. Both of these terminate in a broad flat plate, which are then bolted together.


My CMK Panther Driver's Compartment has now turned up, so there will be further updates over the next week or so.

Please note - there is an identical post on the General Modelling area, which was my mistake. This is the one which will be continuing.

Regards

Rob
Klinker
Visit this Community
Tasmania, Australia
Joined: December 26, 2009
KitMaker: 369 posts
Armorama: 352 posts
Posted: Friday, November 28, 2014 - 02:44 PM UTC
Rob this is a fanatstic idea for a build, have you got 'Panzerwrecks 3' there are some great pictures of the 512's (BergePanther included) surrender at Iserlohn in that book.

This is the kind of thing Dragon should and could be doing instead of a lot of their recent releases.

Great start looking forward to more updates.

Subscribed

ColinEdm
Staff MemberAssociate Editor
ARMORAMA
Visit this Community
Alberta, Canada
Joined: October 15, 2013
KitMaker: 1,355 posts
Armorama: 1,229 posts
Posted: Friday, November 28, 2014 - 07:55 PM UTC
Very nice work so far!
ahandykindaguy
Visit this Community
Alberta, Canada
Joined: August 20, 2008
KitMaker: 1,295 posts
Armorama: 1,191 posts
Posted: Friday, November 28, 2014 - 08:27 PM UTC
I have always loved the look of th Bergpanther, and want to build one someday too. Will be following this. Good work on he spade.

Dave

jrutman
Visit this Community
Pennsylvania, United States
Joined: April 10, 2011
KitMaker: 7,941 posts
Armorama: 7,934 posts
Posted: Friday, November 28, 2014 - 08:40 PM UTC
Very very nice beginnings. We should all look highly on this build,as it does all of us that want a decent kit of the Bergepanther a huge favor.
It is a given that as soon as this excellent scratchbuild is completed,a new kit will be released!!
So...it's all good.
J
wedgetail53
Visit this Community
Queensland, Australia
Joined: October 02, 2008
KitMaker: 658 posts
Armorama: 629 posts
Posted: Saturday, November 29, 2014 - 04:12 AM UTC

Quoted Text

Rob this is a fanatstic idea for a build, have you got 'Panzerwrecks 3' there are some great pictures of the 512's (BergePanther included) surrender at Iserlohn in that book.


G'day Duncan

yes, I have Panzerwrecks 3 - you're right, the photos are very good, even though they're stills from a video.

Regards

Rob
PantherF
Visit this Community
Indiana, United States
Joined: June 10, 2005
KitMaker: 6,188 posts
Armorama: 5,960 posts
Posted: Saturday, November 29, 2014 - 04:18 AM UTC
I'm liking this!


Jeff
varanusk
Staff MemberManaging Editor
ARMORAMA
Visit this Community
Santa Cruz de Tenerife, Spain / España
Joined: July 04, 2013
KitMaker: 1,288 posts
Armorama: 942 posts
Posted: Saturday, November 29, 2014 - 05:16 PM UTC
Wow, this looks great. So you are scratchbuilding the whole interior, winch, etc?

I will be definitively following.

Cheers,

Carlos
wedgetail53
Visit this Community
Queensland, Australia
Joined: October 02, 2008
KitMaker: 658 posts
Armorama: 629 posts
Posted: Sunday, November 30, 2014 - 03:25 AM UTC

Quoted Text

Wow, this looks great. So you are scratchbuilding the whole interior, winch, etc?


Carlos

I'm not quite that ambitious as to scratchbuild the entire interior. It will be more of a case of a part from here, a part from there and scratchbuilding to bring it all together.

I have the Verlinden update set for a Bergepanther A, which is designed to work with the Italeri kit, and will be using quite a bit from that, particularly the winch.

I will probably scratchbuild the superstructure out of basswood strips and plastic card.

Regards

Rob
ahandykindaguy
Visit this Community
Alberta, Canada
Joined: August 20, 2008
KitMaker: 1,295 posts
Armorama: 1,191 posts
Posted: Sunday, November 30, 2014 - 11:12 AM UTC
I do on look forward to whatever you do Rob... Like I said I love the Bergepanther look, and will probably build one some day.

Take care

Dabe
wedgetail53
Visit this Community
Queensland, Australia
Joined: October 02, 2008
KitMaker: 658 posts
Armorama: 629 posts
Posted: Saturday, December 27, 2014 - 06:18 AM UTC
G'day fellas

OK, now we have Christmas etc out of the road (did you have a good one?), and I've got to work on the Bergepanther. First, an overall view of the hull, with rear bulkhead and turret drive from the Verlinden update set for the Italeri Bergepanther.


Next, the driver's side of the front hull, and you can see a few Evergreen replacement bits. Assembly of the CMK Panther G driver's compartment was not easy. I recommend anybody who has ever complained about DML's instructions to try this kit and you will never complain about DML's instructions again


Next, the front bulkhead and crew seats, and again, a mix of Verlinden and Evergreen.


Back to the driver's compartment, this time the co-driver's side. I have made the instrument panel and radio gear, and will install them after painting them.


As I do NOT like sanding resin, I decided to rebuild the main cable reel out of scrap plastic card, and it looks much better than the original. Besides, the walls on the original part were far too thick.


Last but not least, flushed with the success of the cable reel, I rebuilt a couple of smaller pieces as well.


OK, that's it for now - I'm going out to the shed to sand large quantities of resin off the larger components of the winch.

Regards

Rob
AikinutNY
Visit this Community
Pennsylvania, United States
Joined: October 21, 2003
KitMaker: 683 posts
Armorama: 630 posts
Posted: Monday, December 29, 2014 - 07:11 AM UTC
WOW!!! I am keeping my eyes on this build! I am just finishing up my first Bergepanther Ausf D on a Dragon kit and planning on the Ausf G soon.

I am also planning an Ausf F modelled after the M32 to go along with a G version of a M2 Bradley troop carrier.

Have you looked at the Tiger Model Designs kit? expensive!
wedgetail53
Visit this Community
Queensland, Australia
Joined: October 02, 2008
KitMaker: 658 posts
Armorama: 629 posts
Posted: Tuesday, December 30, 2014 - 02:45 AM UTC
G'day Jim

yes, I looked at the TMD kit. Two problems - one, it's for an Ausf A and I'm building a G, and two, the cost ($A150).

Mind you, by the time I've finished, I'll probably have spent more than that on all the various bits and pieces, but I think I'll have had more fun, and that's what this hobby is all about after all.

Regards

Rob
AikinutNY
Visit this Community
Pennsylvania, United States
Joined: October 21, 2003
KitMaker: 683 posts
Armorama: 630 posts
Posted: Tuesday, December 30, 2014 - 09:30 PM UTC
What are the two tubes on the rear of the transmission for?
spaarndammer
Visit this Community
Noord-Holland, Netherlands
Joined: January 28, 2007
KitMaker: 1,945 posts
Armorama: 282 posts
Posted: Tuesday, December 30, 2014 - 11:30 PM UTC
Interesting build thus far. Your scratchbuild spade is impressive.

Why does the drive shaft has a nick and what is that nick?


Jelger
easyco69
Visit this Community
Ontario, Canada
Joined: November 03, 2012
KitMaker: 2,275 posts
Armorama: 2,233 posts
Posted: Tuesday, December 30, 2014 - 11:53 PM UTC
send me your turret & barrel plz.
wedgetail53
Visit this Community
Queensland, Australia
Joined: October 02, 2008
KitMaker: 658 posts
Armorama: 629 posts
Posted: Wednesday, December 31, 2014 - 06:07 AM UTC

Quoted Text

What are the two tubes on the rear of the transmission for?


Jim

As far as I know, they're ventilation tubes.

Regards

Rob
wedgetail53
Visit this Community
Queensland, Australia
Joined: October 02, 2008
KitMaker: 658 posts
Armorama: 629 posts
Posted: Wednesday, December 31, 2014 - 06:09 AM UTC

Quoted Text

Interesting build thus far. Your scratchbuild spade is impressive.

Why does the drive shaft has a nick and what is that nick?


Jelger


Jelger

What nick?

Regards

Rob
wedgetail53
Visit this Community
Queensland, Australia
Joined: October 02, 2008
KitMaker: 658 posts
Armorama: 629 posts
Posted: Wednesday, December 31, 2014 - 06:11 AM UTC

Quoted Text

send me your turret & barrel plz.


G'day David

No, sorry, I'm going to do a Pantherturm at some time in the future.

Regards

Rob
KoSprueOne
Visit this Community
Myanmar
Joined: March 05, 2004
KitMaker: 4,011 posts
Armorama: 1,498 posts
Posted: Wednesday, December 31, 2014 - 06:36 AM UTC
Just found this thread and now following progress. I like your styrene scratch building


Giovanni1508
Visit this Community
Napoli, Italy
Joined: April 17, 2014
KitMaker: 652 posts
Armorama: 600 posts
Posted: Wednesday, December 31, 2014 - 06:50 AM UTC

Hi Rob,

Great job so far on your bergepanther and the thread is very interesting for me.

I'm planning to build the same baby, so I'll follow your progress.

Great job with the scratch built spade.

Cheers
Giovanni

spaarndammer
Visit this Community
Noord-Holland, Netherlands
Joined: January 28, 2007
KitMaker: 1,945 posts
Armorama: 282 posts
Posted: Wednesday, December 31, 2014 - 11:31 PM UTC

Quoted Text


Quoted Text

Interesting build thus far. Your scratchbuild spade is impressive.

Why does the drive shaft has a nick and what is that nick?


Jelger


Jelger

What nick?

Regards

Rob


Hi Rob,

I took the liberty to take your photo and add a red circle to point out what I meant:


Jelger
wedgetail53
Visit this Community
Queensland, Australia
Joined: October 02, 2008
KitMaker: 658 posts
Armorama: 629 posts
Posted: Thursday, January 01, 2015 - 04:57 AM UTC
Jelger

I suspected that is what you meant. In a normal Panther it would be the drive for the turret. In the Bergepanther, it provides power to the winch, via a transfer box on the underside of the winch - the winch could not be used if the engine was not running, and needed the driver to be in his seat to control the engine.

Regards

Rob
wedgetail53
Visit this Community
Queensland, Australia
Joined: October 02, 2008
KitMaker: 658 posts
Armorama: 629 posts
Posted: Friday, March 27, 2015 - 10:18 AM UTC
G'day again fellas

No, I haven't gone to sleep or fallen off theplanet. For a little while there, I was seduced by a DAK Panzer IV D and an Austin Tilly, but having got those out of my system, I have returned to the Bergepanther.

I seem to have made more progress in the last week or so than in the last six months.


This is the top deck, and the beginnings of the superstructure.

It was the winding of the cable onto the winch which proved the most frustrating part, which I ended up doing THREE times - the first with copper cable, which was too stiff even after annealing, the second time with nylon cable which proved to be too thick, and finally with string intended for model boats, which after being soaked in primer proved ideal.


These two shots show the winch mostly completed, just a few very fine bits to add.

Next it was back to the interior.


This shows the left hand side, with the Italeri fuel tank, Verlinden battery, one of the roof supports (scratch built), and the lubrication plate. Each of those 0.4mm lead wire lubrication lines fits into a hole drilled in the underside of the plate.


Right hand side showing much the same thing.


This is the front compartment, to which I have added the front bulkhead, winch controls and jump seats.


Finally a few of the smaller scratch built parts - the rack for the ammunition bags, rack for the spare vision blocks, and the rear winch support beam.

Now for some interior painting!

Regards

Rob
 _GOTOTOP