_GOTOBOTTOM
Constructive Feedback
For in-progress or completed build photos. Give and get contructive feedback!
Challenger 1 Mk.3, King's Royal Hussars, 1/35
Sleepwalker71
Visit this Community
Singapore / 新加坡
Joined: August 30, 2012
KitMaker: 265 posts
Armorama: 186 posts
Posted: Sunday, December 28, 2014 - 11:00 AM UTC
The next sacrifice on my modeling desk will be Tamiya's Challenger 1 Mk.3. It will show tank (callsign 21) from 2nd Troop, A Squadron of King's Royal Hussars from KFOR forces in Kosovo in 1999 in green-black camouflage. Challengers taking part in "Joint Guardian" operation were only tanks fully uparmored as during the 1991 "Desert Sabre" operation. Command felt that there is a possibility of engagements with retreating Serbian armor units. It was the last operation with Challengers 1 before their phasing out and introducing Challengers 2.

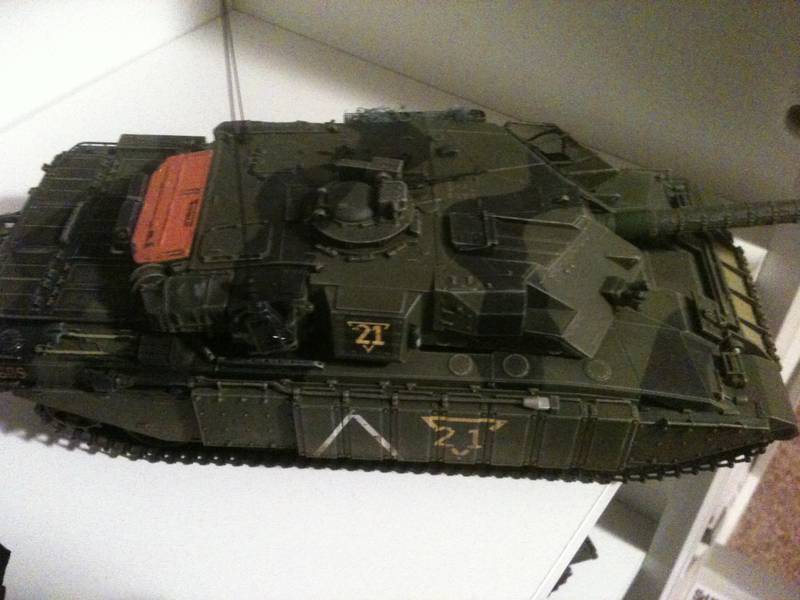
Photo used for the discussion purpose only.

Besides the model I will use photoetched parts by Eduard (only available fot this tank) and Echelon's decals. Later I will add tracks since the kit's one are of very poor quality.
Moder is pretty old, but on the first glance it is very nice detailed. I like top of the hull. However there are some issues need to be addressed.


1. Hull bottom - missing reinforcement running along the bottom as well as unexplainable lack of the any part closing the round hole in the hull bottom.


2. Recessed armor panels in the front hull - need to be filled-in and even with the rest of the hull.


2. Open hull sponsons. It is quite irritating but closely related with origins of this model. As designed years back it was motorized model, therefore you can find rails for engine fixing inside the hull, as well as cutouts in the hull walls for driving shafts. Ridiulous is (according to the manual) mounting way of the top and bottom halves of the hull. Just snap in allowing for access to the hull interior.
3. Mounting of the side skirts. In the model they are just glued to the hull, while in the real tank, there was a distance gap.
4. Modifications related with the particular tank. First of all there are no additional fuel tanks on the rear plate - instead some boxes will be mounted. Some details and modified baskets/boxes will be applied to the the turret.

I will use as a references Concord 7505 and Osprey Vanguard 23, some photos found on the Internet, in particular showing Challengers 1 from KRH during the action in Kosovo. Anyway any help will be highly appreciated.
Armored76
Visit this Community
Bayern, Germany
Joined: September 30, 2013
KitMaker: 1,615 posts
Armorama: 1,500 posts
Posted: Tuesday, December 30, 2014 - 04:39 PM UTC
A very nice original, indeed to follow!

The weathering of the original is also very eye catching... You'd think modern armors are kept clean(er) by their commanders
Sleepwalker71
Visit this Community
Singapore / 新加坡
Joined: August 30, 2012
KitMaker: 265 posts
Armorama: 186 posts
Posted: Wednesday, December 31, 2014 - 07:03 PM UTC
It seems, that summer 1999 in Kosovo was quite rainy since KRH action photos are showing their tanks negotiation quite muddy roads.

Meanwhile...

Last days I spent on resources research and analysis, including propheting....


The first victim of my transplantology experiments are drive wheels. Kit's ones are halfway correct - their outer part only. Inner part is... Ok let's mind the language this time. Apparently I have in my stock rising Challenger 2 wheels. They differ from those used in Challenger 1, but not to the last. I can use the inner part of the wheel and connect it with outer part of the kit's wheel. What I'm doing now is delicately separating already glued wheels and sanding the outer part flat to match resin one.

On the photo, gray wheels - resin, sand wheels - Tamiya. You can see the difference by yourself.


Besides I'm loosing my hair trying to sort out the proper outfit of the lower hull. What I see for now the number of additions and corrections is scarying - but this will be in the next episode.

I have a strange feeling, that when I will finish my CR1 someone will release fresh, extremely detailer Challenger 1 Mk.3 model.
Kenaicop
#384
Visit this Community
Nevada, United States
Joined: August 23, 2005
KitMaker: 1,426 posts
Armorama: 1,316 posts
Posted: Thursday, January 01, 2015 - 12:57 AM UTC
Hi Damian,

Hope these help in some way. I used a combination of Tamiya and Trumpeter parts to get the correct side armor on mine. The middle, front parts and mounting brackets are Trumpeter and the rear end is Tamiya, all modified to fit together. It wasn't too difficult to blend them all together
blabla
Visit this Community
Niedersachsen, Germany
Joined: December 02, 2006
KitMaker: 147 posts
Armorama: 142 posts
Posted: Thursday, January 01, 2015 - 02:26 AM UTC
Hello,

For my Challenger 1 I did some research basicly on the base of photos and comparisions. My conclusion was that the biggest Problem with Tamiya Challengers are the lower hull and that Trumpeter`s Chally 2 represents the Chally with the best lower hull. Here is a roughly result of my measurements. Please notice “Mittelmaß means the distance from the bottom of the lower hull to the top edge of the lower hull and Winkel means angle and Grad means angular degree:

Accurate Armour:

Mittenmaß: ca. 22mm
Winkel: ca. 4 Grad

Trumpeter:

Mittenmaß: ca. 22mm
Winkel: ca. 5 Grad

Tamiya:

Mittenmaß: ca. 21mm
Winkel. ca. 7 Grad

The shape problem with Tamiya`s Challenger becomes obviously when the additional front armour is mounted which is nearly higher than the front of hull itself!

Cheers
Sleepwalker71
Visit this Community
Singapore / 新加坡
Joined: August 30, 2012
KitMaker: 265 posts
Armorama: 186 posts
Posted: Thursday, January 01, 2015 - 06:56 AM UTC
Thanks a lot for the hints. The biggest problem I think is lack of detailed CR1/CR2 drawings. At least I didn't find anything so far.Hull bottom is terra incognito, no walkaround shows that area. Due to the kindness one modelers I have photos of the CR1 bottom of being dismantled unit. It looks very busy, witn not only central reinforcement strip. Not trying to figure out the features dimensions and positions since the perspective makes it very tricky.
Sleepwalker71
Visit this Community
Singapore / 新加坡
Joined: August 30, 2012
KitMaker: 265 posts
Armorama: 186 posts
Posted: Saturday, January 03, 2015 - 09:39 PM UTC
Thanks to the kindness one of the fellow modelers I got nice pictures showing lower hull.
I decided to reproduce, as far as it is possible unique Challenger's hydropneumatic suspension. In contrary to the classic torsion bar system it is very easy to repair - just need to unscrew whole driving wheel along with accompanying hydraulic cylinder. It is also a reason of very low tank silhouette and excellent driving properties.

As one can see I removed molded on imitations of the hydraulic cylinders (halves sunken in the hull). I closed also a big gap in the hull sides. It was a bit tedious work since these parts were solid pieces of plastic, and moreover my chisel decided to taste my blood going straight under my pointing finger nail... This is how it looks for now.


I need to clean-up the remaining plastic bits and sand them flat. Besides new 12 full hydraulic cylinders are to be made. I noticed that driving wheel area is a complete fiction - it missing reinforcements in the front side. Besides hull bottom left to be done, but no rush as I am waiting for some more data about it.
 _GOTOTOP