

I've been practicing my lines (over and over and over) before I attempt my first German WWII tri-color "wavy" camo on my newly completed Sd. Kfz. 7/2.
But in looking at reference photos (soft, smooth edges, but tight into the "main" line) vs. my practice lines (overspray out quite a ways, even with small, tight lines).
Any suggestions on how to better control the overspray (or perhaps the spray generally) so that I can get more scale realistic soft camo edges?
Thanks!
AFV Painting & Weathering
Answers to questions about the right paint scheme or tips for the right effect.
Answers to questions about the right paint scheme or tips for the right effect.
Hosted by Darren Baker, Matthew Toms
Controlling airbrush overspray for camo
communityguy

#280

Joined: May 14, 2012
KitMaker: 493 posts
Armorama: 358 posts

Posted: Thursday, January 01, 2015 - 05:12 AM UTC


retiredyank
Joined: June 29, 2009
KitMaker: 11,610 posts
Armorama: 7,843 posts
Posted: Thursday, January 01, 2015 - 05:23 AM UTC
Try reducing the amount of thinner you use. Hold the airbrush close and spray at a lower pressure. Also, you need a fine or ultra fine ab setup.


Kevlar06

Joined: March 15, 2009
KitMaker: 3,670 posts
Armorama: 2,052 posts
Posted: Thursday, January 01, 2015 - 11:49 AM UTC
Jake,
I agree with what Matt has said, but I thin out my paint to the consistency of water and turn down the pressure to about 12 PSI . I've done some very nice soft edge work without the over spray you mention by simply using lower pressure and thinner paints-- you may need to go over the edge more than once using this technique, and switch to the neighboring color occasionally. I use a Peak C5 airbrush, but I've also obtained pretty good results with a Paasche Millennium and a Badger 155 too. This low-pressure really thin paint method takes longer but the results are exceptional. If you want to get the feathered edge look quicker, I recommend using Silly Putty or Blu-Tac as a masking agent (I prefer Silly Putty, it comes off cleaner). However, this means you need to be really careful around any fragile details.
VR, Russ

BigSmitty
Joined: October 01, 2008
KitMaker: 597 posts
Armorama: 439 posts

Posted: Thursday, January 01, 2015 - 07:59 PM UTC
Quoted Text
Try reducing the amount of thinner you use. Hold the airbrush close and spray at a lower pressure. Also, you need a fine or ultra fine ab setup.
Actually, you need to INCREASE the amount of thinner to reduce the overspray as your pressure will be lower and the medium needs to be a thinner consistency to move it through the airbrush - basic fluid dynamics.
By thinning out your paint more and lowering the pressure on your airbrush you can get closer to the surface of the model, which will result in a smaller spray pattern, a cone which gets larger the further away from the surface you are. Get in close and you've got a lot less area your paint is going to touch. Lowering the pressure means you're not going to puddle up paint, or blow off parts of the kit.
As far as nozzle size, I don't think anything smaller than 0.35mm would be necessary. That's the standard size nozzle I have on my airbrush here:

Also, if I'm doing close in detail work I remove the protective needle cap at the head of the airbrush. It leaves the needle unprotected, but I've gotten lines down to less than 1/16" with it.
This is just a generic rule of thumb, and you haven't mentioned if you're spraying acrylics or enamels, or if your airbrush is gravity fed or suction fed (gravity fed takes a lot less pressure to use than a suction fed setup).
Feel free to post what you spray with (airbrush type) and what you're spraying through (paints) and you will probably get some pretty good advice.
communityguy
#280
Joined: May 14, 2012
KitMaker: 493 posts
Armorama: 358 posts
Posted: Friday, January 02, 2015 - 01:46 AM UTC
Good advice, thanks!
I'm spraying Vallejo (Model Air) acrylics with an Iwata HP-CS.
I'm spraying Vallejo (Model Air) acrylics with an Iwata HP-CS.

panzerbob01
Joined: March 06, 2010
KitMaker: 3,128 posts
Armorama: 2,959 posts
Posted: Friday, January 02, 2015 - 03:06 AM UTC
Jake;
Work from what Matt S. has described - use your Iwata CS (same brush I use! ) with lowered p, very thin paint, and try removing that needle-cap protector to get very close, as he mentioned.
IF you have a paint-setting (stop) handle, set this up to help ensure that you are getting only a tiny amount of paint.
USE this close-up, fine-line technique to outline the blotches you want. Once that is done, open the AB up a little and fill in your outlines.
Another trick you should try, if you want to get the "soft-edge" look but also want to keep edges pretty tight, is to use a piece of paper or sheet styrene as a sort of dynamic "semi-mask" - The kit has to be mounted or propped for this route, as you'll need both hands for tools... set up your AB with low p, thin paint, and paint-set handle if you have it. Use a small square of paper or plastic in the other hand - hold it perhaps 1/4 inch above the kit surface and spray along that edge. Move the square around as desired to get your curves and bends in the blotch outline. This avoids sticking masking stuff onto the build but helps get the edges tighter.
Cheers!
Bob
Work from what Matt S. has described - use your Iwata CS (same brush I use!
) with lowered p, very thin paint, and try removing that needle-cap protector to get very close, as he mentioned.IF you have a paint-setting (stop) handle, set this up to help ensure that you are getting only a tiny amount of paint.
USE this close-up, fine-line technique to outline the blotches you want. Once that is done, open the AB up a little and fill in your outlines.
Another trick you should try, if you want to get the "soft-edge" look but also want to keep edges pretty tight, is to use a piece of paper or sheet styrene as a sort of dynamic "semi-mask" - The kit has to be mounted or propped for this route, as you'll need both hands for tools... set up your AB with low p, thin paint, and paint-set handle if you have it. Use a small square of paper or plastic in the other hand - hold it perhaps 1/4 inch above the kit surface and spray along that edge. Move the square around as desired to get your curves and bends in the blotch outline. This avoids sticking masking stuff onto the build but helps get the edges tighter.
Cheers!
Bob
BigSmitty
Joined: October 01, 2008
KitMaker: 597 posts
Armorama: 439 posts
Posted: Friday, January 02, 2015 - 03:47 AM UTC
Quoted Text
Good advice, thanks!
I'm spraying Vallejo (Model Air) acrylics with an Iwata HP-CS.
As do I. I would recommend thinning down the Model Air along the order of 5:2 (paint:thinner) to spray fine lines and tight camo patterns.
Along the same lines as Bob W. mentioned, you can also use templates to get a soft edge.
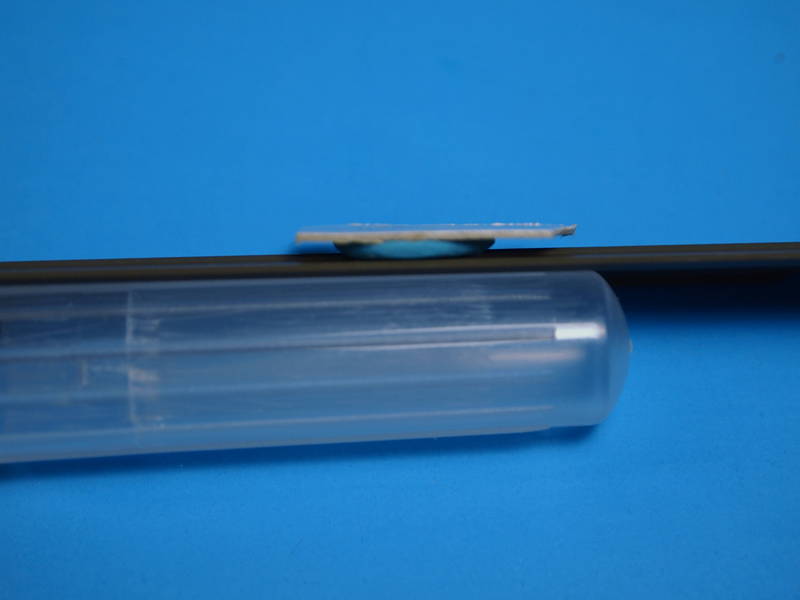
I use Elmer's Blu Tac like this:
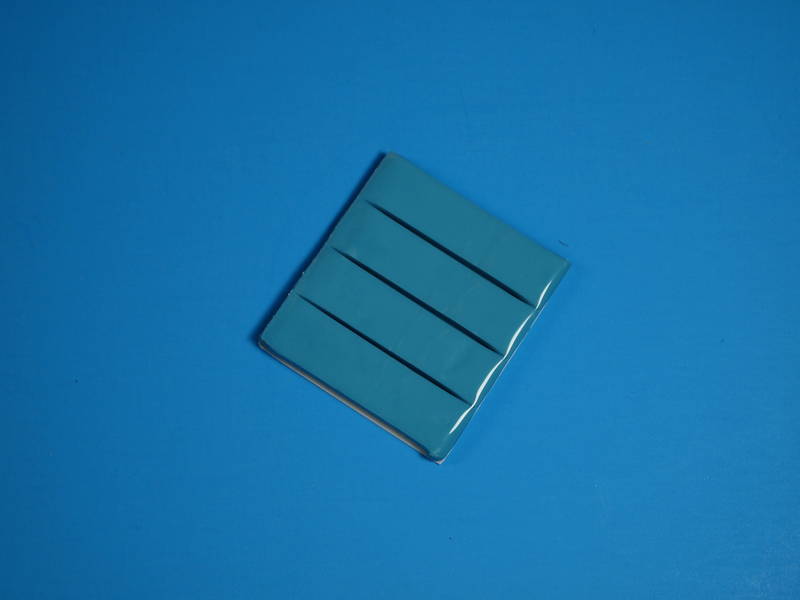
Take a SMALL piece, flatten it out and it will give you a little distance between the model surface and your template like this:
It's how I used to do soft edge camo (think 3 color SE Asia USAF) before I bought an airbrush.
communityguy
#280
Joined: May 14, 2012
KitMaker: 493 posts
Armorama: 358 posts
Posted: Friday, January 02, 2015 - 11:58 AM UTC
So after mucho testing tonight, I finally found a combo that worked well for me:
1. low-medium air pressure
2. Tamiya or Vallejo Model Air
3. Tamiya X20 thinner in a 5:2 ratio with the paint
There's something about the X20 that really, really makes the paint spray wonderfully!
1. low-medium air pressure
2. Tamiya or Vallejo Model Air
3. Tamiya X20 thinner in a 5:2 ratio with the paint
There's something about the X20 that really, really makes the paint spray wonderfully!
BigSmitty
Joined: October 01, 2008
KitMaker: 597 posts
Armorama: 439 posts
Posted: Friday, January 02, 2015 - 10:11 PM UTC
Glad to hear you got things working well for you!
Belt_Fed
Joined: February 02, 2008
KitMaker: 1,388 posts
Armorama: 1,325 posts

Posted: Friday, January 02, 2015 - 11:54 PM UTC
I'm glad you got things to work out. I recommend you add a flow-aid and retarder to all of your Vallejo Model Air paints. I use ones from Liquitex which are sold in chain art supply stores. The flow aid is basicly soapy water that breaks the surface tension of the liquid in Vallejo paints. I think part of the reason it can be hard to get fine lines with Vallejo mis because of the surface tension does not allow the paint to atomize into a fine enough must for fine lines.
 |

WEB HOSTING BY


Copyright ©2021 Armorama and Kitmaker Network, a subsidiary of Silver Star Enterprises
All Rights Reserved. Please read our Conditions of Use and Privacy Policy.
All Rights Reserved. Please read our Conditions of Use and Privacy Policy.