_GOTOBOTTOM
Armor/AFV: Axis - WWII
Armor and ground forces of the Axis forces during World War II.
Hosted by Darren Baker
Tamiya 1/35th STUG III Ausf G.
sgtsauer
#065
Visit this Community
Missouri, United States
Joined: March 30, 2002
KitMaker: 2,605 posts
Armorama: 1,814 posts
Posted: Friday, January 16, 2015 - 05:04 AM UTC
In February 2003, I began assembling the Tamiya 1/35th STUG II Ausf G out of the box. Then I decided to add Cavalier Zimmerit. You can see a review of the product here:
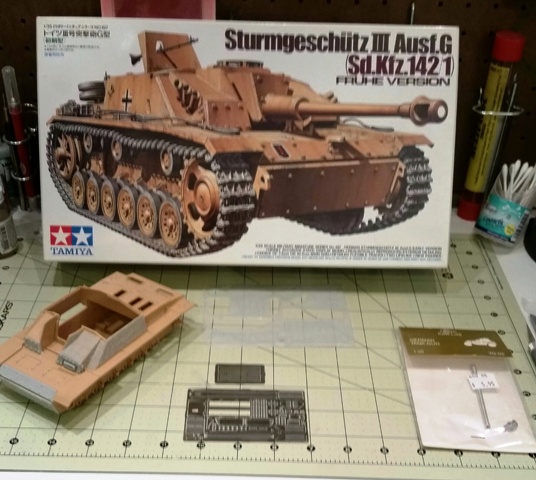
Cavalier STUG III Ausf G Zimmerit

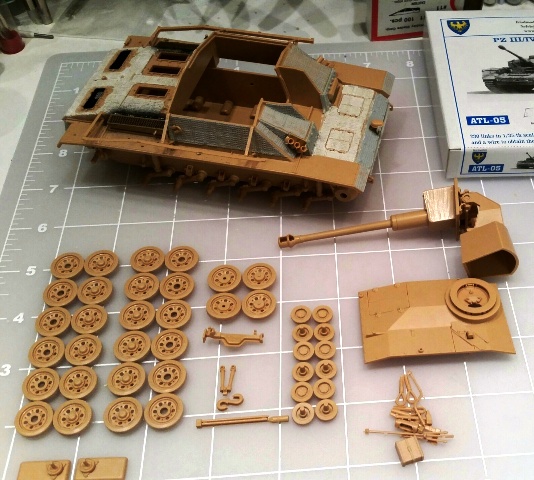
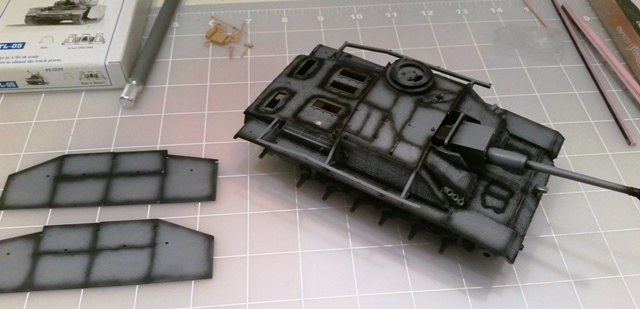
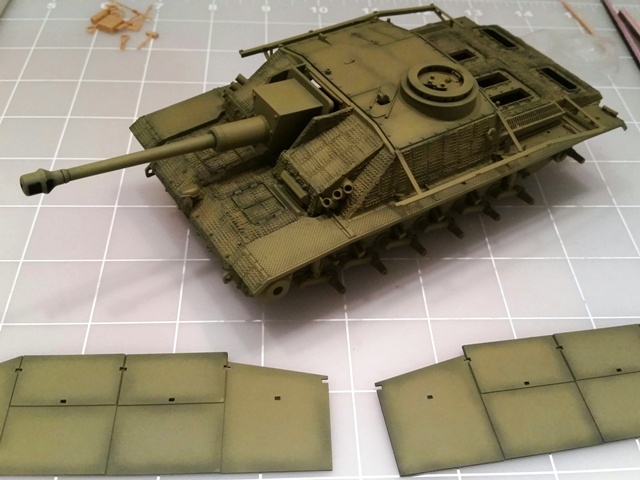
I then decided to add a set of Eduard PE to it. Well, in March of 2003, I was sent on a 17 month deployment to Iraq and this kit got packed away. Now, January 2015, I have decided it is time to finish this kit. Here is where I am at now.


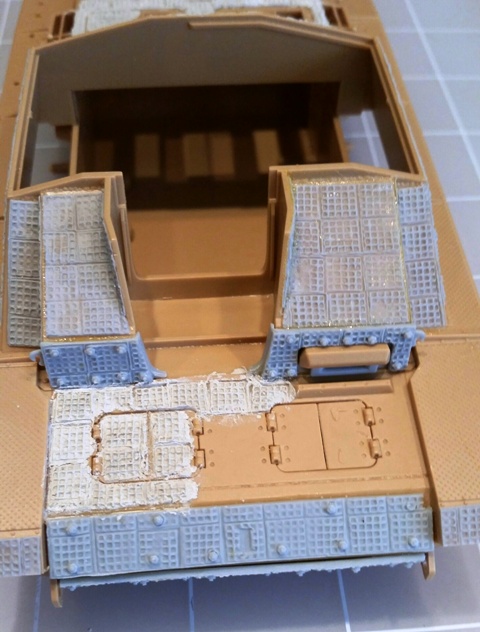
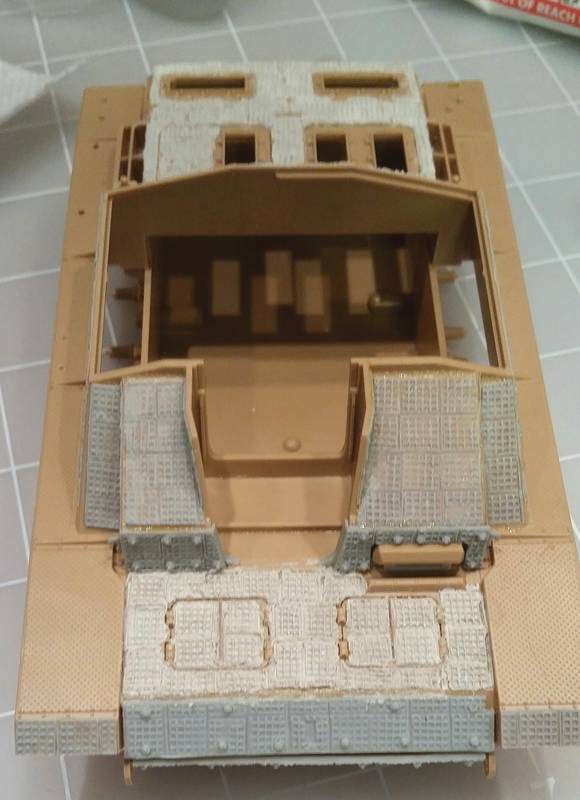
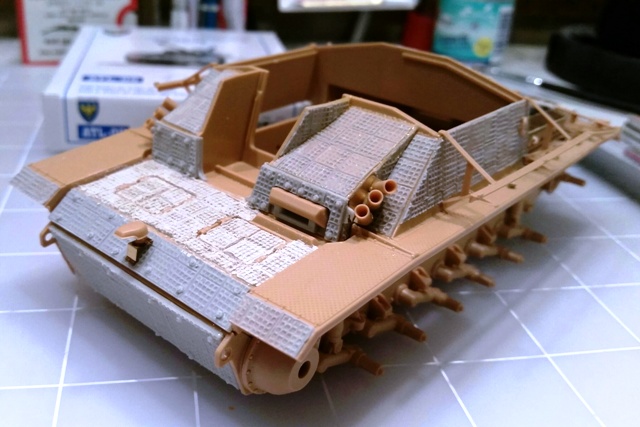
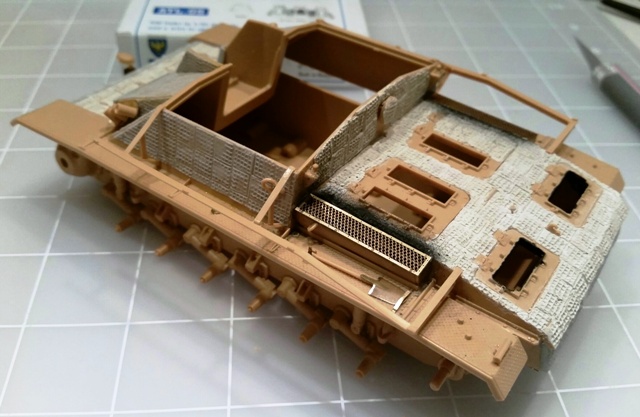
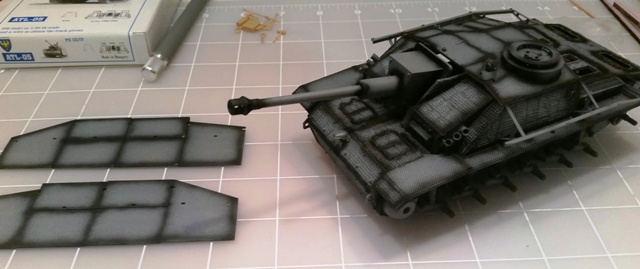
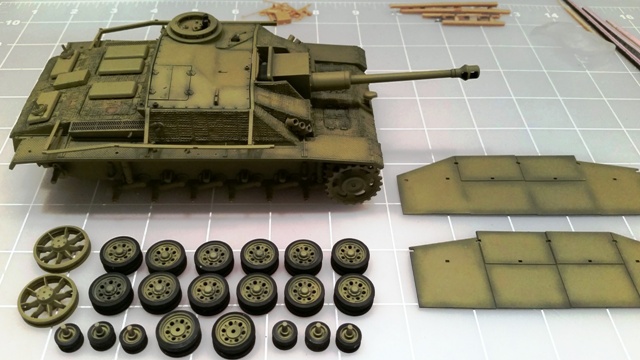
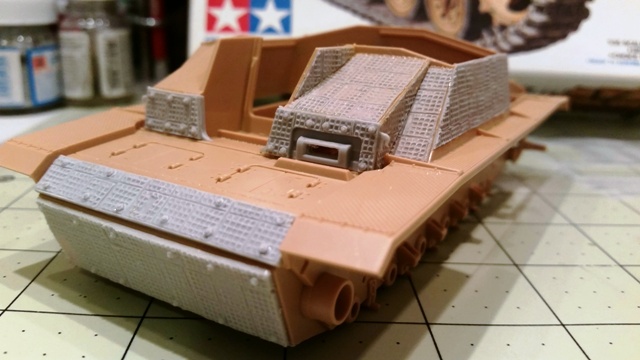
Here is the kit with the Cavalier Zimmerit parts added. You have to add zimmerit by hand because Cavalier did not provide enough zimmerit parts for the entire vehicle.


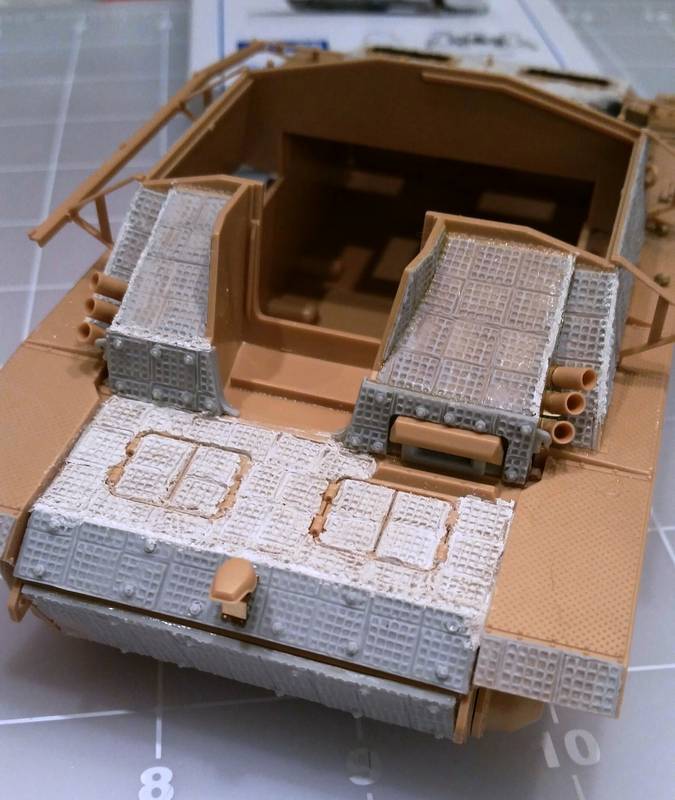
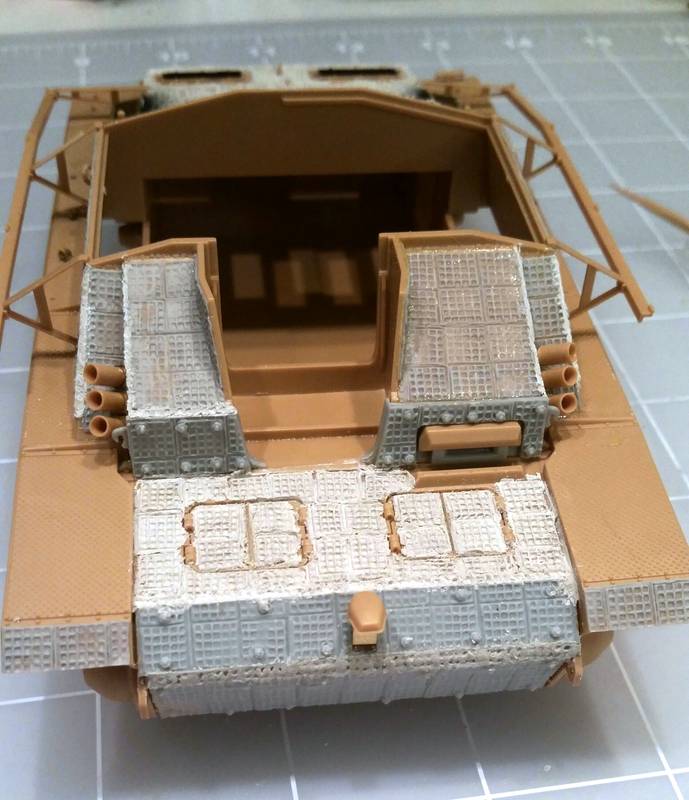
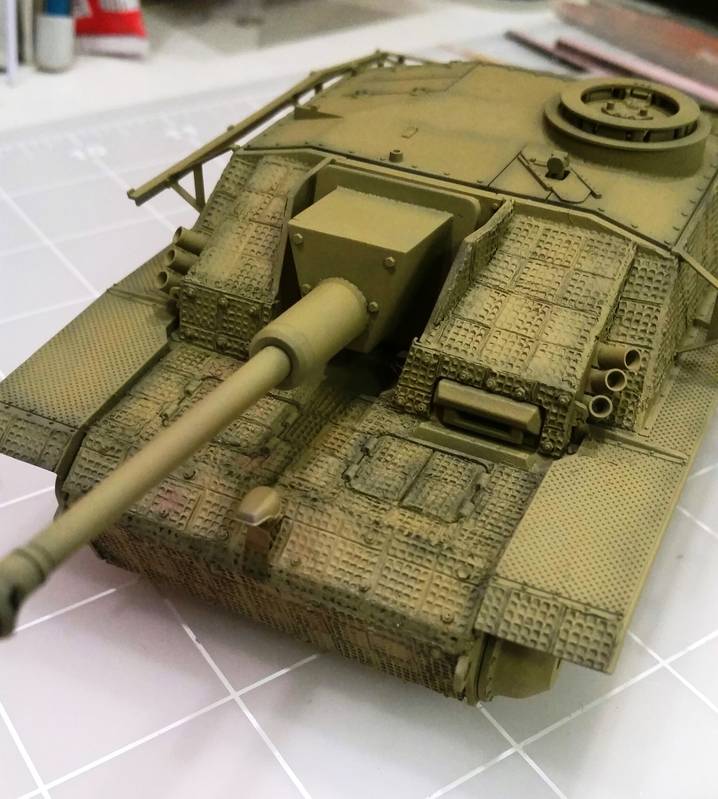
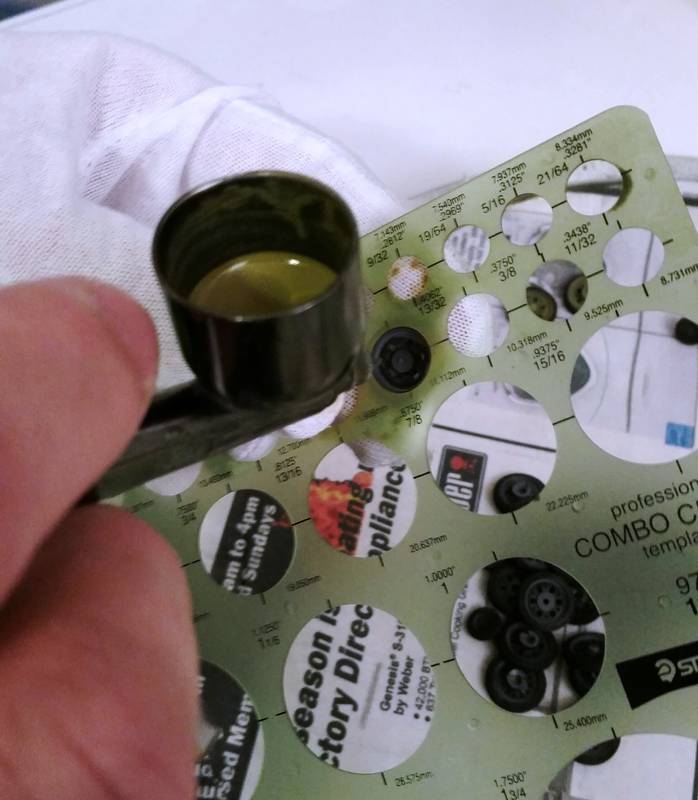
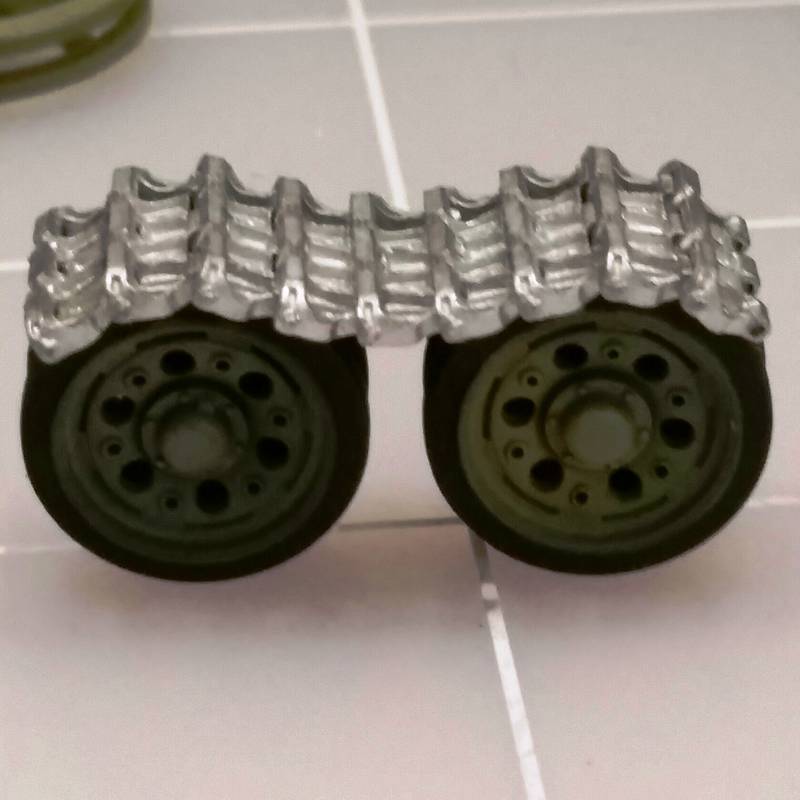
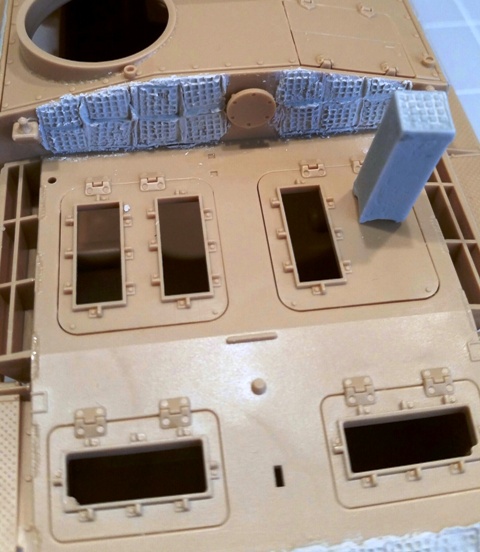
In this photo, the bottom part is a Cavalier resin replacement. The Waffle pattern zimmerit on the top surface is being done by hand with a small tool that Cavalier provides.


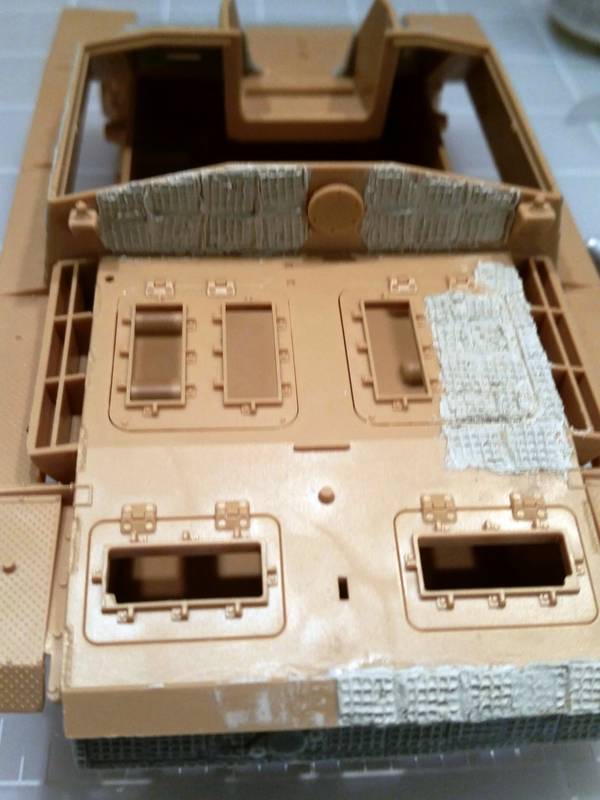
This is my first time ever trying to make zimmerit. I know its not going to be perfect. The goal is to get the experience and finish the kit. I'm having fun with it so far.
panzerman1
Visit this Community
Maryland, United States
Joined: September 30, 2010
KitMaker: 430 posts
Armorama: 291 posts
Posted: Friday, January 16, 2015 - 06:12 AM UTC
Brent, Good job on the zimmerit application. It takes time to practice, but you'll get it right. Good Luck.
Bill.
stoney
Visit this Community
British Columbia, Canada
Joined: October 16, 2006
KitMaker: 480 posts
Armorama: 399 posts
Posted: Friday, January 16, 2015 - 06:22 AM UTC
Brent, good job, It seems odd though Cavalier didn't giver you enough to do the superstructure. Im impressed, the waffle pattern is rather intimidating but yours is looking good. One thing I found using putty was to try to get it as think as possible before putting my pattern in, Ive only done simple stuff like tiger and panther patterns but I found it helped.
Good luck and keep us posted!
ivanhoe6
Visit this Community
Wisconsin, United States
Joined: April 05, 2007
KitMaker: 2,023 posts
Armorama: 1,234 posts
Posted: Friday, January 16, 2015 - 11:56 AM UTC
Brent, first off welcome back and thanks for your service !
You are off to a good start. I don't think that Zimm application was perfect at the 1 to 1 scale unlike Dragon kits are. I too think it's odd that Cavalier didn't supply everything that you needed. But you are making great progress and will have that tool forever. Please keep posting your progress and thanks again.
sgtsauer
#065
Visit this Community
Missouri, United States
Joined: March 30, 2002
KitMaker: 2,605 posts
Armorama: 1,814 posts
Posted: Saturday, January 17, 2015 - 03:17 AM UTC
Thanks for the comments guys. I appreciate it.

I spent some more time at the bench today and here is where I am at.


I wish the stuff that I had to do by hand matched the grey resin zimmerit better. But, I think when I get the vehicle painted and weathered it will look ok to me.

I have more work to do obviously.

More to come!
sgtsauer
#065
Visit this Community
Missouri, United States
Joined: March 30, 2002
KitMaker: 2,605 posts
Armorama: 1,814 posts
Posted: Sunday, January 18, 2015 - 07:28 AM UTC
Well, I'm calling the front zimmerit done.


I'm looking forward to moving forward with the project.
sgtsauer
#065
Visit this Community
Missouri, United States
Joined: March 30, 2002
KitMaker: 2,605 posts
Armorama: 1,814 posts
Posted: Thursday, January 22, 2015 - 11:23 AM UTC
I have all of the major assembly done now. Here is where the project currently sits..


I plan to start shooting primer tomorrow.

Here are a few views of the vehicle body.


Biggles2
Visit this Community
Quebec, Canada
Joined: January 01, 2004
KitMaker: 7,600 posts
Armorama: 6,110 posts
Posted: Thursday, January 22, 2015 - 08:39 PM UTC
That's a mighty large gap between the lower and upper front zimmeritted plates. Are you supposed to fill that with putty? Somehow it doesn't look right.
sgtsauer
#065
Visit this Community
Missouri, United States
Joined: March 30, 2002
KitMaker: 2,605 posts
Armorama: 1,814 posts
Posted: Thursday, January 22, 2015 - 09:15 PM UTC
I'm not sure. I have pondered that myself.
edmund
Visit this Community
United States
Joined: November 10, 2014
KitMaker: 668 posts
Armorama: 456 posts
Posted: Thursday, January 22, 2015 - 09:25 PM UTC
consider the zimmerit as being field applied .
AFVFan
Visit this Community
North Carolina, United States
Joined: May 17, 2012
KitMaker: 1,980 posts
Armorama: 1,571 posts
Posted: Thursday, January 22, 2015 - 10:44 PM UTC
I would fill the gaps between the zimmed areas. The zim paste was trowelled on with no real thought about leaving nice clean edges between the sections. You can use your tool to stamp it so it blends in better.

On a sidenote, I wouldn't worry too much about the roughness of the zim you applied. As can be seen in the photo it didn't always come out nice and neat.


(for discussion only)
sgtsauer
#065
Visit this Community
Missouri, United States
Joined: March 30, 2002
KitMaker: 2,605 posts
Armorama: 1,814 posts
Posted: Saturday, January 24, 2015 - 10:25 AM UTC
Thanks for your replies and feedback guys. I have gone back and filled the zimmerit gaps per your recommendation. Does this look better?

In addition to the front gap, I filled in some of the corner joints also.


Lisec
Visit this Community
Croatia Hrvatska
Joined: September 13, 2006
KitMaker: 306 posts
Armorama: 282 posts
Posted: Saturday, January 24, 2015 - 01:58 PM UTC
i believe he meant the space between the upper and lower glacis plates( front armor, not superstructure)
AFVFan
Visit this Community
North Carolina, United States
Joined: May 17, 2012
KitMaker: 1,980 posts
Armorama: 1,571 posts
Posted: Saturday, January 24, 2015 - 06:18 PM UTC
Hi Brent, the spots you did repair look good. Now, as Matija brought up, you need to take care of that big one in front, too.
sgtsauer
#065
Visit this Community
Missouri, United States
Joined: March 30, 2002
KitMaker: 2,605 posts
Armorama: 1,814 posts
Posted: Saturday, January 24, 2015 - 08:13 PM UTC
Ahh ok. I thought you guys were talking about a different place but you are talking about the front glacis below the Notek light. Pictures posted on The Armor Journal FB page show a STUG IIIG with waffle zim but the spaces between applique armor panels (like the front glacis) are not filled in. I will research some more.
AFVFan
Visit this Community
North Carolina, United States
Joined: May 17, 2012
KitMaker: 1,980 posts
Armorama: 1,571 posts
Posted: Saturday, January 24, 2015 - 11:54 PM UTC
Not going to argue with photo evidence. If you've seen pics then some were done like that. If you're happy with it leave it as is.

Thanks for pointing out something new for me.
sgtsauer
#065
Visit this Community
Missouri, United States
Joined: March 30, 2002
KitMaker: 2,605 posts
Armorama: 1,814 posts
Posted: Sunday, January 25, 2015 - 07:20 AM UTC
I decided to go ahead and fill the front glacis gap per our discussion. I do think, when all is said and done, I will be glad I did it. Additionally, I used some putty and toothpick to add zimm below the ventilation fan cover on the rear bulkhead.

Here is the front glacis gap filled. I'm not happy with how it looks in the white. Perhaps I will look better after primed, painted and weathered.


This photo shows the area just below the vent fan cover filled with putty and texture added using a toothpick.
AFVFan
Visit this Community
North Carolina, United States
Joined: May 17, 2012
KitMaker: 1,980 posts
Armorama: 1,571 posts
Posted: Sunday, January 25, 2015 - 08:02 PM UTC
Why don't you go ahead and hit that line with a light coat of primer to see how it'll look with paint? If you still don't like it, now's the time to find out.
sgtsauer
#065
Visit this Community
Missouri, United States
Joined: March 30, 2002
KitMaker: 2,605 posts
Armorama: 1,814 posts
Posted: Friday, February 13, 2015 - 09:15 AM UTC
I've been moving along some on this project and had forgot that I had started a build log. Here is what I have done since my last post.


Here is where I am currently at after spraying the road wheel rubber parts flat black tonight.


Overall, I am satisfied with how the waffle pattern areas I did by hand seem to blend with the resin parts. I think it will look better after filters and weathering.
AFVFan
Visit this Community
North Carolina, United States
Joined: May 17, 2012
KitMaker: 1,980 posts
Armorama: 1,571 posts
Posted: Friday, February 13, 2015 - 06:26 PM UTC
That does look pretty good. I'd be happy with it.
robw_uk
Visit this Community
England - North East, United Kingdom
Joined: June 22, 2010
KitMaker: 1,224 posts
Armorama: 1,207 posts
Posted: Friday, February 13, 2015 - 09:31 PM UTC
very nice work - that zim looks realistic - I used eduard etched Zim on my StuG IV - that was way too perfect - yours looks properly "handmade" as it should do...

look forward to more progress
joepanzer
Visit this Community
North Carolina, United States
Joined: January 21, 2004
KitMaker: 803 posts
Armorama: 740 posts
Posted: Friday, February 13, 2015 - 11:16 PM UTC
That does look good man! I like the preshading job too. Had a thought, would it be possible to put a big area of putty on a flat surface, with wax paper or something underneath, make the pattern, let it dry, cut it out, then apply it to the model? Kind of like the Zim sheets that you bought?

And thanks for your service!
sgtsauer
#065
Visit this Community
Missouri, United States
Joined: March 30, 2002
KitMaker: 2,605 posts
Armorama: 1,814 posts
Posted: Sunday, February 15, 2015 - 09:13 PM UTC
I did some more work on the STUG on Sunday night. The first thing I did was airbrush the road wheels and return rollers.


Overview of road wheels after painting and assembly.


The next task is assembly of the Fruilmodel white metal tracks. I'm using set ATL-05 for the Panzer III/IV. The track pattern and details are the same type as replicated in the kits vinyl tracks.


In the box you get a bag of right hand track links, a bag of left hand track links, an instruction sheet and a roll of small wire for connecting the links.


This is a pile of links out of one bag.


I build Fruilmodel tracks in runs of 10 links. This helps break up the monotony of assembly. Here are the steps I take:
1. Trim up white metal flash on links if needed.
2. Drill out track pin holes on both sides of link as needed.
3. Repeat for 10 links.


4. I then use the wire to connect 10 links together. I use a small drop of CA glue to seal the hole for the wire (track pin).


Youjust can't beat the appearance you get with the Fruil tracks.


This is where I stopped at last night.


sgtsauer
#065
Visit this Community
Missouri, United States
Joined: March 30, 2002
KitMaker: 2,605 posts
Armorama: 1,814 posts
Posted: Friday, March 06, 2015 - 10:25 AM UTC
I finished assembly of the Fruil tracks tonight. I installed them temporarily to test the fit. I used 93 links on one side and 94 links on the other side. The tracks will be removed to finish the project.


justsendit
Visit this Community
Colorado, United States
Joined: February 24, 2014
KitMaker: 3,033 posts
Armorama: 2,492 posts
Posted: Friday, March 06, 2015 - 10:41 AM UTC
Hi Brent, I've been following your build and it looks great!

Just an observation ... and of course, I could be wrong, but you might want to double-check the direction of the tracks.

—mike
 _GOTOTOP