Hosted by Darren Baker
Meng Cougar as Canadian JERRV
tankfixer

Joined: October 15, 2005
KitMaker: 283 posts
Armorama: 110 posts

Posted: Sunday, February 08, 2015 - 03:55 AM UTC
Ramps came with the old HEV and JERRVs. Most of the ramps used were actually bought from Sears! Most at first were strapped down to the front left fender because that was the best place for them at the time.
rogerjo1

Joined: November 12, 2010
KitMaker: 950 posts
Armorama: 905 posts

Posted: Sunday, February 08, 2015 - 03:55 AM UTC
Quoted Text
Hi all,
make of ramps as PE Parts is any problem. I need photos and all base dimension. Also interior, have all Cougar manuals but any interior photos.
Miloslav


That would be great Miloslav... Is it the same interior on the Canadian and U.S Jerrv version? If so that would be really great if you did the interior parts

tankfixer

Joined: October 15, 2005
KitMaker: 283 posts
Armorama: 110 posts

Posted: Sunday, February 08, 2015 - 03:57 AM UTC
Quoted Text
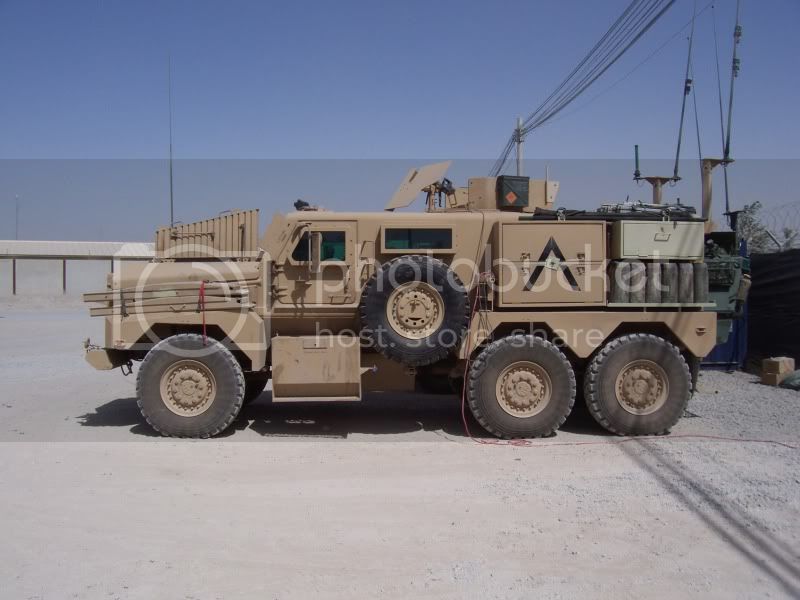
I hope you know that this isn't a Cougar but an HEV right?So I got and started the Meng Cougar, will be converted to a Canadian version in Afghanistan (photo by R. Saucier)
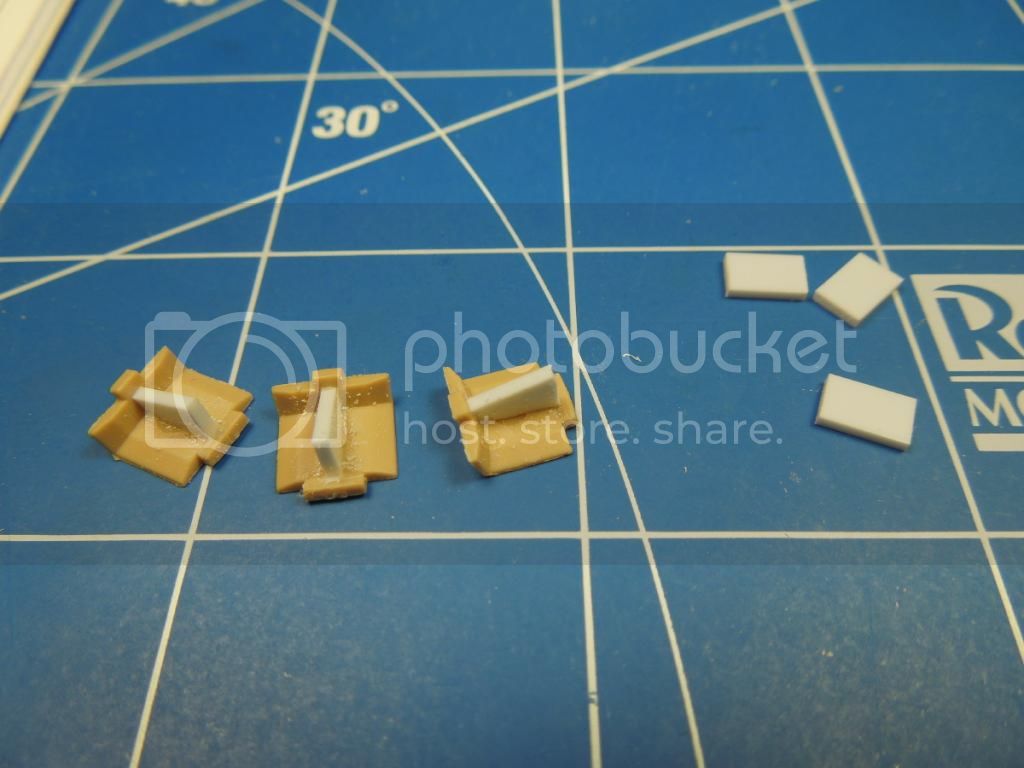
Adding the missing bits in the rear suspension mounts:
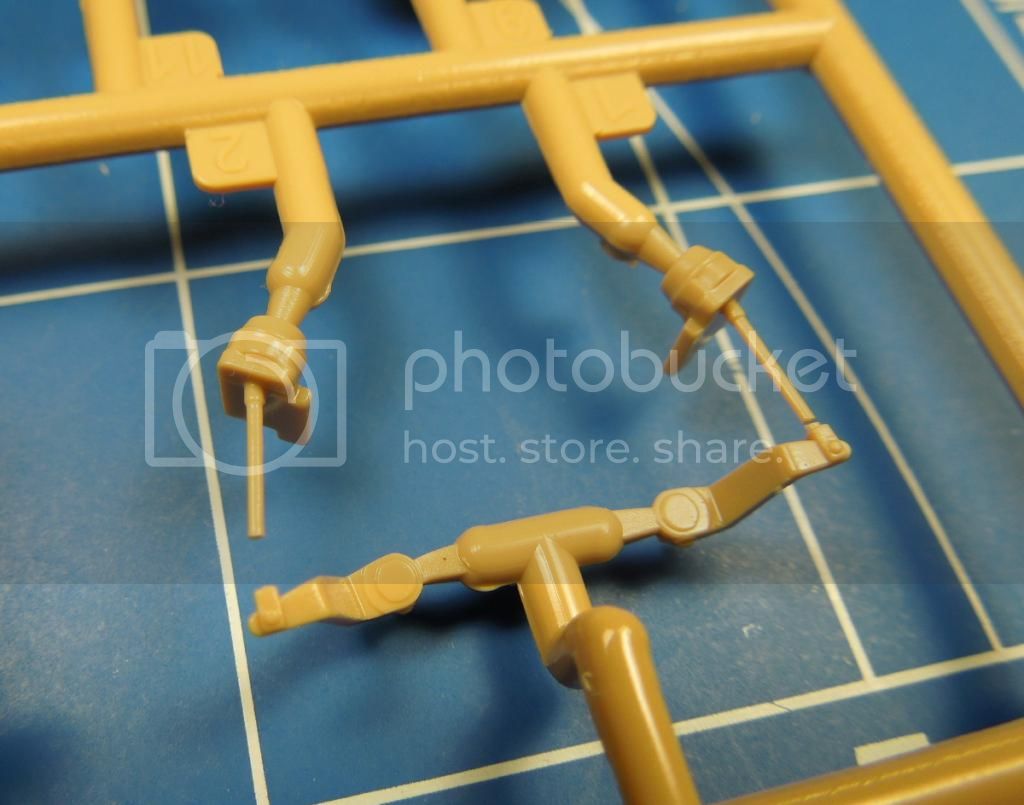
Couple of front suspension pieces had stress fractures out of the box, currently fixing with brass wire replacements...
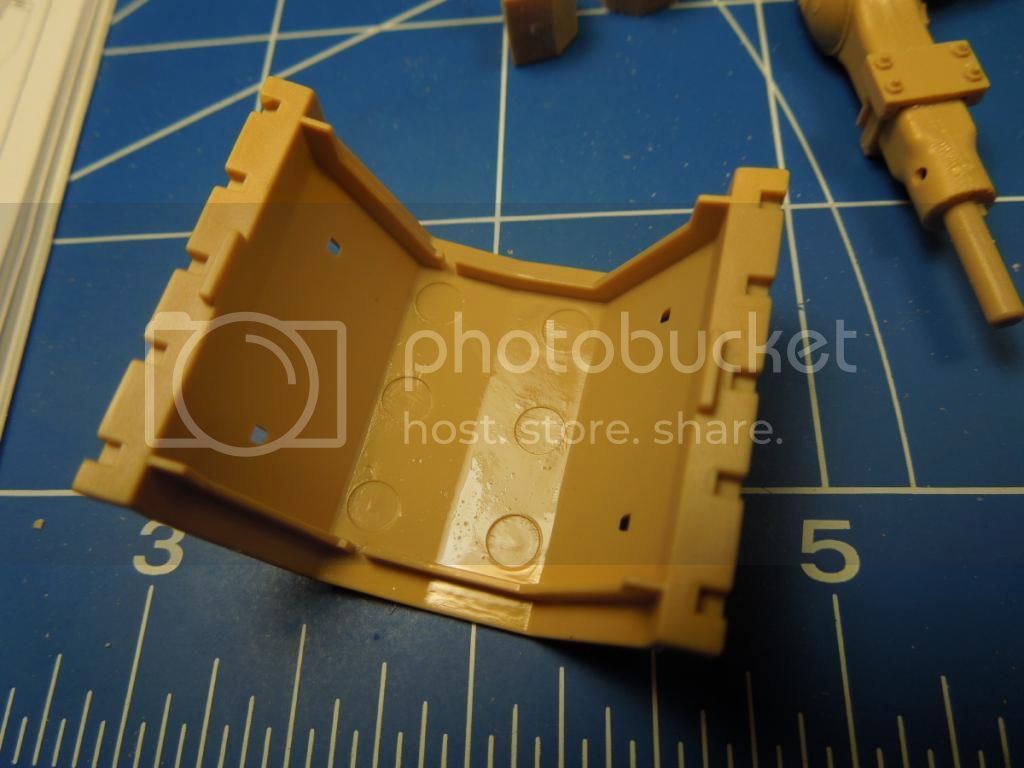
I used to think mold release agent in modern kits was a myth, like the Sasquatch or Global Warming, but alas, it is alive and well! I suggest a good detergent bath before any painting is attempted!
So far, I am mildly disappointed in Meng with this kit - I enjoyed building their Merkava 3D and Terminator, but this one has flash here and there, the excess mold release, the stretched appearance - just seems to be a step down. (maybe I got one built on a Friday?)I will persevere however!
Cheers,
Jim
Youngun

Joined: November 10, 2010
KitMaker: 587 posts
Armorama: 550 posts

Posted: Sunday, February 08, 2015 - 04:38 AM UTC
Quoted Text
I hope you know that this isn't a Cougar but an HEV right?
What's the difference between a Cougar and a HEV? For that matter whats the difference between the Cougar, HEV and JERRV? I'm assuming they are all the same base vehicle the cougar with modifications for specific roles?
Joker

Joined: May 28, 2004
KitMaker: 813 posts
Armorama: 522 posts

Posted: Wednesday, February 11, 2015 - 09:57 PM UTC
Cool...Jim's makin' a model...I have the Cromwell monster myself but I'll steal any ideas I can.... Always looking forward to seeing your work.
Regards from the Wet Coast
P
Regards from the Wet Coast
P

junglejim

Joined: February 18, 2003
KitMaker: 1,728 posts
Armorama: 1,629 posts

Posted: Saturday, February 14, 2015 - 03:18 AM UTC
Geez, go away for a week... 
I figure if the name is good enough for GDLS and the Canadian Army, it's good enough for me. Cougar and Cougar . I just feel odd to call it a Hybrid Electric Vehicle...
Anyhoo If I was back home with my full array of tools and stuff I would consider making a conversion for John; I should be able to muddle through it with what I've got here, we'll see! Besides, sounds like other things are afoot. Once I rest up a bit from from the holiday (!) I'll get back at it.
Jim

junglejim

Joined: February 18, 2003
KitMaker: 1,728 posts
Armorama: 1,629 posts

Posted: Wednesday, February 18, 2015 - 02:56 PM UTC
Progress. Instead of filling/sanding the two rear sets of windows I figured it was just as easy to cut them out and replace the sides. The upper hull is almost exactly .040" thick so that worked out good. The kit actually builds up pretty good so I take back my earlier misgivings! Interior is a little sparse; I'll be redoing it anyway for a Canadian example. Have to add all the spall liners for example. I won't be going nuts on the interior, just basic layout. Also have a Legend GPK turret on the way (I believe this is the only option for an earlier GPK turret, I couldn't think of any plastic examples?)


I didn't add air/brake lines; want to concentrate more on the upper hull conversions and appearance.
Cheers,
Jim


I didn't add air/brake lines; want to concentrate more on the upper hull conversions and appearance.
Cheers,
Jim

sauceman

Joined: September 28, 2006
KitMaker: 2,672 posts
Armorama: 2,475 posts

Posted: Wednesday, February 18, 2015 - 06:08 PM UTC
Sweet!
The spall liners should not be too bad as they are solid, unlike the Buffalo ones which are fabric and harder to reproduce.
Now all we need is a Husky!
cheers
The spall liners should not be too bad as they are solid, unlike the Buffalo ones which are fabric and harder to reproduce.
Now all we need is a Husky!
cheers
Joker

Joined: May 28, 2004
KitMaker: 813 posts
Armorama: 522 posts

Posted: Wednesday, February 18, 2015 - 09:12 PM UTC
Smart fix...when are you back in the Great White North?...I was hoping to get my act together and start coming East for those Alberta shows.
Regards,
P
Regards,
P
rogerjo1

Joined: November 12, 2010
KitMaker: 950 posts
Armorama: 905 posts

Posted: Wednesday, February 18, 2015 - 11:49 PM UTC
Looks very good! Another nice build to follow 
Is the interior much differant from the US version?

Is the interior much differant from the US version?
Youngun

Joined: November 10, 2010
KitMaker: 587 posts
Armorama: 550 posts

Posted: Thursday, February 19, 2015 - 09:48 AM UTC
Quoted Text
Looks very good! Another nice build to follow
Is the interior much differant from the US version?
I had/have images of both the Canadian EROC and American JERRV's and from what I saw they are roughly the same. I think it was Anthony Sewards who supplied me the images of the Canadian Jerrv and 18Bravo who provided me images of the american one.

junglejim

Joined: February 18, 2003
KitMaker: 1,728 posts
Armorama: 1,629 posts

Posted: Wednesday, February 25, 2015 - 01:34 PM UTC
Just for fun, playing around with some 3D modelling and thought this would be a simple project to 'test the water' so to speak. I'm certainly not a pro, just using Sketchup, but it's fun to learn. Blender looks great but a steep learning curve for my old branium!
Left side bins, am getting it printed by Shapeways now so when it gets here I'll post photos, I'm just curious about the quality, if it's acceptable I'll do the other side bin, maybe the can racks and put them on Shapeways.

Cheers,
Jim
Left side bins, am getting it printed by Shapeways now so when it gets here I'll post photos, I'm just curious about the quality, if it's acceptable I'll do the other side bin, maybe the can racks and put them on Shapeways.

Cheers,
Jim
35th-scale

Joined: November 21, 2007
KitMaker: 3,212 posts
Armorama: 2,807 posts

Posted: Wednesday, February 25, 2015 - 02:01 PM UTC
Cool....CAD looks good, will be interesting to see the real product

junglejim

Joined: February 18, 2003
KitMaker: 1,728 posts
Armorama: 1,629 posts

Posted: Tuesday, March 03, 2015 - 06:09 PM UTC
Well, some progress. Lots of quality time with the punch and die set this weekend for the spall liners:

This is as far as I will go for interior detail (just waiting for some ProArt radios if he ever gets back to me). Also will have some basic stowage and a robot if I can find one close to the Canadian ones.


I have to see what's interfering with the rack; it's being pushed over a bit I see.
Also a little detail work to the winch.

Thanks for looking!
Cheers,
Jim

This is as far as I will go for interior detail (just waiting for some ProArt radios if he ever gets back to me). Also will have some basic stowage and a robot if I can find one close to the Canadian ones.


I have to see what's interfering with the rack; it's being pushed over a bit I see.
Also a little detail work to the winch.

Thanks for looking!
Cheers,
Jim


PanzerGeek

Joined: February 10, 2008
KitMaker: 221 posts
Armorama: 217 posts

Posted: Tuesday, March 03, 2015 - 07:17 PM UTC
Looking good so far Jim. Your work is always amazing. 
Cheers
Todd

Cheers
Todd

sauceman

Joined: September 28, 2006
KitMaker: 2,672 posts
Armorama: 2,475 posts

Posted: Tuesday, March 03, 2015 - 07:27 PM UTC
Looks great Jim, Ya I think the Pro Art radios are the best option until someone actually makes a Canadian radio set.
What did you use for the seat belts?
cheers
What did you use for the seat belts?
cheers

junglejim

Joined: February 18, 2003
KitMaker: 1,728 posts
Armorama: 1,629 posts

Posted: Tuesday, March 03, 2015 - 07:49 PM UTC
Included in the kit Rick. Hold well with superglue but also seem to work with liquid cement (Tamiya). And the good news is since I didn't use all the seats I have lots left over for my Dingo 2!
Jim
Jim
rogerjo1

Joined: November 12, 2010
KitMaker: 950 posts
Armorama: 905 posts

Posted: Tuesday, March 03, 2015 - 10:31 PM UTC
Very nice work with the interior... Looks very good! What is it on the floor behind the driver seat and the radio rack? I don't recognize it from the instructions from the meng kit, is that something specific for a canadian interior?
Will save as a reference for my Jerrv.
Very nice work
Will save as a reference for my Jerrv.
Very nice work


junglejim

Joined: February 18, 2003
KitMaker: 1,728 posts
Armorama: 1,629 posts

Posted: Tuesday, March 03, 2015 - 11:53 PM UTC
Thanks Roger,
My references show a radio/comm thingy there (could even a battery), I just used leftover bits from the kit interior parts to fill in the space. It would be specific to the Canadian ones I believe. There is so much more one could add (ducts, wiring, cables etc.) but I don't want to get too bogged down or I'll find myself losing interest...
Cheers,
Jim
rogerjo1

Joined: November 12, 2010
KitMaker: 950 posts
Armorama: 905 posts

Posted: Wednesday, March 04, 2015 - 03:39 AM UTC
Thanks Jim for the answer. 

Posted: Wednesday, March 04, 2015 - 04:45 AM UTC
Jim, incredible work on the interior. It's looking great so far, can't wait to see what's coming next.

junglejim

Joined: February 18, 2003
KitMaker: 1,728 posts
Armorama: 1,629 posts

Posted: Monday, March 16, 2015 - 01:04 AM UTC
Weekend update, ready to button up (just realized I need to add the lights on the ceiling still). Just an anecdote; I used the ammo cans from J's Works Modern Military Equipment Set. I would only use them for interior storage, they seem too large and at 4 and 5 pieces each, are a lot of work, considering other companies (ie Tamiya) can make a one piece detailed one!
Most of the Stowage is from Legends Leopard C2(MEXAS) set, which is great for any vehicle.


Cheers,
Jim
Most of the Stowage is from Legends Leopard C2(MEXAS) set, which is great for any vehicle.


Cheers,
Jim
jwest21

Joined: October 16, 2006
KitMaker: 3,374 posts
Armorama: 3,126 posts

Posted: Monday, March 16, 2015 - 01:27 AM UTC
That looks stunning, Jim!!
Youngun

Joined: November 10, 2010
KitMaker: 587 posts
Armorama: 550 posts

Posted: Monday, March 16, 2015 - 01:47 AM UTC
Looks good Jim. What are your plans for the tEODor robot and front loading and unloading ramps?
rogerjo1

Joined: November 12, 2010
KitMaker: 950 posts
Armorama: 905 posts

Posted: Monday, March 16, 2015 - 04:16 AM UTC
I say as the others, looking very very good....  have you made the left side bins yet that you showed here earlier...
 have you made the left side bins yet that you showed here earlier...
 |


