_GOTOBOTTOM
Armor/AFV: Axis - WWII
Armor and ground forces of the Axis forces during World War II.
Hosted by Darren Baker
Sturer Emil - Trumpeter - 1:35
Stojkovic1987
Visit this Community
Wojewodztwo Slaskie, Poland
Joined: March 26, 2015
KitMaker: 255 posts
Armorama: 254 posts
Posted: Wednesday, March 25, 2015 - 10:24 PM UTC
Hi everyone,

This is my first ever post on this forum - hope not the last one.

I'm actually fighting with this big model.
Any suggestions much needed!


retiredyank
Visit this Community
Arkansas, United States
Joined: June 29, 2009
KitMaker: 11,610 posts
Armorama: 7,843 posts
Posted: Thursday, March 26, 2015 - 01:07 AM UTC
Welcome to the site. Painting that interior is going to be a test of your patience. Without telling you how I would build it, I can't offer more advice. Looks to be a clean build, excepting the rough patch on the right rear of vehicle and the front, side panel on the left. I recommend using a self-etching primer on the barrel and antennae. You should be able to find some at an automotive store. You should definitely add a wash and some filters. The size of the panels will shine, with some rain streaks. These can be easily created, over a gloss cote, with washable markers.
holmerz
Visit this Community
Aarhus, Denmark
Joined: January 02, 2006
KitMaker: 258 posts
Armorama: 121 posts
Posted: Thursday, March 26, 2015 - 01:09 AM UTC
Nice clean Build, looks like you're ahead on points so far. Booking forward to see some paint on it.
Stojkovic1987
Visit this Community
Wojewodztwo Slaskie, Poland
Joined: March 26, 2015
KitMaker: 255 posts
Armorama: 254 posts
Posted: Thursday, March 26, 2015 - 01:35 AM UTC
Thanks for warm welcome!

The model is not painted yet. It is only promed with a primer.

Now I'm painting it with use of colour modulation technique. Soon I'll post some more photos.

Hope to get more of suport from your side!
Axis23
Visit this Community
Michigan, United States
Joined: July 05, 2006
KitMaker: 112 posts
Armorama: 106 posts
Posted: Thursday, March 26, 2015 - 02:08 AM UTC
Looks great so far. Who makes the turned gun barrel that you are using?..
americanpanzer
Visit this Community
Iowa, United States
Joined: May 12, 2014
KitMaker: 542 posts
Armorama: 539 posts
Posted: Thursday, March 26, 2015 - 02:21 AM UTC
looks good! I built this kit a few years ago; it has some tricky moments but it's a cool and unusual subject;
panzerbob01
Visit this Community
Louisiana, United States
Joined: March 06, 2010
KitMaker: 3,128 posts
Armorama: 2,959 posts
Posted: Thursday, March 26, 2015 - 05:25 AM UTC
Great start! Now for the paint!

I am a little perplexed, however, about the MP-40 racks - those were bent trough things that one could set the gun into - and strap it in if desired - or just let gravity keep your piece in place.... way they look, gravity won't help!

Bob

PS: I think I have a huge metal barrel for this kit from, I believe, RB Models... not that I can find it right now!
Stojkovic1987
Visit this Community
Wojewodztwo Slaskie, Poland
Joined: March 26, 2015
KitMaker: 255 posts
Armorama: 254 posts
Posted: Thursday, March 26, 2015 - 01:05 PM UTC
The barrel is from RB Model and fits just fine.

Actually the model is drying after third layer of paint in modulation system of five that will be used.

I'm not convienced that the MP-40 rack will be as much visible from the outside, but if the audience desire I can make some imitation of leather stripe that keep the MP-40 in its place on the rack.

Hope my skills let me make a nice looking kit on the shelf.
Stojkovic1987
Visit this Community
Wojewodztwo Slaskie, Poland
Joined: March 26, 2015
KitMaker: 255 posts
Armorama: 254 posts
Posted: Friday, March 27, 2015 - 04:01 PM UTC
Hello,

The Emil is just after the paint job with base colour modulated as I felt would be ok. Now its time to paint the rest - wooden floor, tools, interior and the muffler. After that the weathering of course.

The photos arent very good because I had to move all my modeling studio to other place because of the need of preparing the room for my upcoming in july son.

The photos:


The tracks have been threated with special fluid from AK Interactive - now are ready for pigments, wash etc.

Cheers,
Stojkovic1987
Visit this Community
Wojewodztwo Slaskie, Poland
Joined: March 26, 2015
KitMaker: 255 posts
Armorama: 254 posts
Posted: Sunday, March 29, 2015 - 10:46 PM UTC
Hello,

By the occasion of need to paint the wood floor I wanted to share with You my solution for wood-look painting.

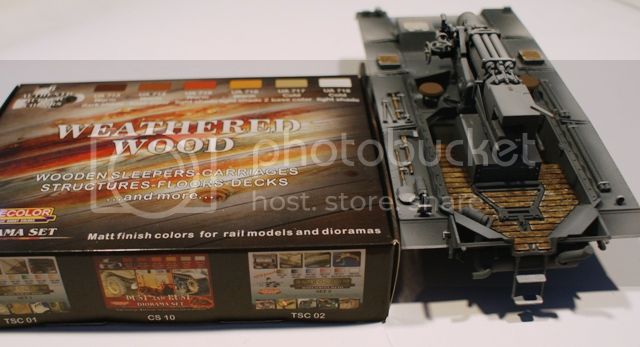
Of course We can paint the elment with bronze paint and fight with use of oil paints. But some time ago on the market appear special set from Lifecolor - weathered wood. I decided to give it a try...


I've started with the first color as a dark base color stright at the primer with brush - Wood warm dark shade


Next step was some lighter color - this is the base for next steps - Warm base color

Third step is now creating the wood looking shades with Warm light shade - I make with this shade some thin lines in the horizontal direction.

Fourth step as previous one is about creating shades with thin lines - this time with lighter colour - Warm Light shade 2

Fifth step is Cold base colour - I use it for creating any wod weathering on edges and the places where wood suffers scratches and cuts by the crew and sell impacts, other wooden crates etc.

At the end of the whole proces I use the lightest color for emphazing all edges and separate the wood pieces from each others. I just focused to line out the north side of wood pieces (looking at the top of the vehicle) The last color is the Cold light shade


This is the final effect

I also use this set for the tools:

...and the barrels and ammo crates


Now You have just to place a thin coat of varnish and brown wash for blending all colours in one nice looking imitation of wood.

For Me this set provides a great solution and help in creating wood-loking paintings.


Cheers!
alanmac
Visit this Community
United Kingdom
Joined: February 25, 2007
KitMaker: 3,033 posts
Armorama: 2,953 posts
Posted: Sunday, March 29, 2015 - 11:03 PM UTC
Hi

Nice progress on one of my favourite vehicles. The gun area is almost a complete kit in itself

I like the way you obtain a wood effect, but however, and no offence intended, the wooden slats on the floor were painted grey the same as the rest of the interior. It may well have worn through in some places to expose the wood, but the finish from being supplied was grey.

Alan

Stojkovic1987
Visit this Community
Wojewodztwo Slaskie, Poland
Joined: March 26, 2015
KitMaker: 255 posts
Armorama: 254 posts
Posted: Monday, March 30, 2015 - 12:40 AM UTC
Hi Alan,

I think I can solve this issue by using the Worn Effect or Chipping fluid from AK Interactive.

Still more fun is brought by that model
Stojkovic1987
Visit this Community
Wojewodztwo Slaskie, Poland
Joined: March 26, 2015
KitMaker: 255 posts
Armorama: 254 posts
Posted: Saturday, April 04, 2015 - 10:11 PM UTC
Hello,

Next photos of the progres with Emil.
Now the satin varnish and alle the effects like wash, oils etc.


Happy Easter!
Stojkovic1987
Visit this Community
Wojewodztwo Slaskie, Poland
Joined: March 26, 2015
KitMaker: 255 posts
Armorama: 254 posts
Posted: Monday, April 06, 2015 - 12:38 AM UTC
Hi,

Still more to come. The model is after wash and basic oil paints touch.


Slowly I'm thinking about some vigniette for Emil... Nothing particular at the moment, but hopefully soon some idea will appear.


Cheers,
ericadeane
Visit this Community
Michigan, United States
Joined: October 28, 2002
KitMaker: 4,021 posts
Armorama: 3,947 posts
Posted: Monday, April 06, 2015 - 02:21 AM UTC
Thanks for posting your progress. May I point out something? In your modulation, for my tastes, it's seems too much and in some areas, doesn't make sense. Why does one area of the gun tube have light grey around its circumference and then fading to darker grey as it goes to the back? The modulation is supposed to trick the viewer into seeing depth according to light -- why would that pattern exist? Modulation is supposed to highlight portions where natural light hits it. The gun tube is strange to me.
Stojkovic1987
Visit this Community
Wojewodztwo Slaskie, Poland
Joined: March 26, 2015
KitMaker: 255 posts
Armorama: 254 posts
Posted: Monday, April 06, 2015 - 11:19 AM UTC
Hi,

Thanks for Your suggestion.
In My modulation I was inspired by MIG's barrel modulation, as seen below:

http://www.hobbiesguinea.es/en/ak-interactive-modulation-sets/3018-ak-interactive-ak-552-german-dunkelgelb-modulation-set-6-assorted-acrylic-colors.html?ps_mobile_site=1

Of course the modulation technque is like a dish in a restaurant - as many opinions as many clients
I'm still learning this technique and as in many cases it takes time and some errors. For Me the modulation on Emil is OK.

Anyway thanks for sharing Your thoughts and please give Me more
Hope to see others opinions as well.
Stojkovic1987
Visit this Community
Wojewodztwo Slaskie, Poland
Joined: March 26, 2015
KitMaker: 255 posts
Armorama: 254 posts
Posted: Sunday, April 12, 2015 - 12:46 AM UTC
Hi everyone,

Next photos of Emil. This time dust and weathering was applied. Hope it blend the modulation a bit, and I did'nt overdo the effects.


Stojkovic1987
Visit this Community
Wojewodztwo Slaskie, Poland
Joined: March 26, 2015
KitMaker: 255 posts
Armorama: 254 posts
Posted: Tuesday, June 30, 2015 - 10:46 PM UTC
Hello,

The Emil project is being continued.


Hope You like it.
Cookiescool2
Visit this Community
Georgia, United States
Joined: May 09, 2014
KitMaker: 273 posts
Armorama: 270 posts
Posted: Wednesday, July 01, 2015 - 12:50 AM UTC
The diorama looks incredible, amazing work!
brekinapez
Visit this Community
Georgia, United States
Joined: July 26, 2013
KitMaker: 2,272 posts
Armorama: 1,860 posts
Posted: Wednesday, July 01, 2015 - 12:52 AM UTC
I assume you'll be adding figures at some point?

A good beginning. I noticed what looks like a buckling under the road in front of the Emil - it looks like where two parts are meeting under the material - I can't tell if that is what I'm seeing or if it is just a ridge. Also, don't forget to put your tread marks on the ground behind the tank. Model tanks have a tendency to float on the diorama materials since they don't have the great weight of a real tank to push them down into it. A lot of people screw their's to the base but you usually have to prep the kit's bottom before assembly - not sure what you can do afterwards that wouldn't risk damaging the model.
Stojkovic1987
Visit this Community
Wojewodztwo Slaskie, Poland
Joined: March 26, 2015
KitMaker: 255 posts
Armorama: 254 posts
Posted: Wednesday, July 01, 2015 - 09:49 AM UTC
Hi,

Of course I'll add some crew and other elements as well to this diorama base.

It's my first diorama with use of still water from Vallejo.

The road has a little "stairs" but I'm planning to make there some grass.

Surely there is a need to make also a track marks behind the model. First option is to use some knife or other tool and make lines in the ground. Other option is to paint the lines and create an optical version.

brekinapez
Visit this Community
Georgia, United States
Joined: July 26, 2013
KitMaker: 2,272 posts
Armorama: 1,860 posts
Posted: Wednesday, July 01, 2015 - 10:15 AM UTC
If you had any leftover tracks you might be able to assemble a few and press the finished bits into the ground behind the tank, like a stamp, and possibly achieve enough of the effect.
Stojkovic1987
Visit this Community
Wojewodztwo Slaskie, Poland
Joined: March 26, 2015
KitMaker: 255 posts
Armorama: 254 posts
Posted: Wednesday, July 22, 2015 - 09:05 PM UTC
A little update:

The diorama is quite huge, so my photo background was not enough.


Hope its quite ok now.
 _GOTOTOP