Hello All,
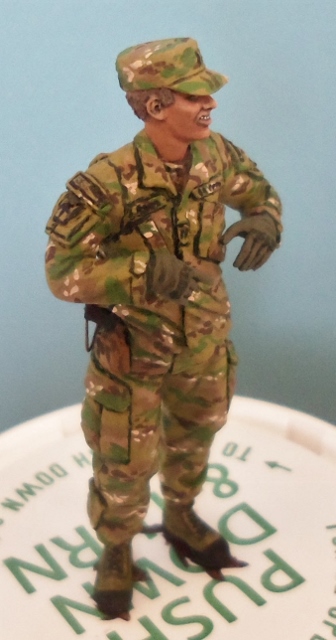
At the Fort Sill, OK Air Defense Artillery Museum, we are preparing an exhibit concerning the use of the CRAM in combat. Jon Berstein, the museum's director, is making the C-RAM weapon system on the trailer that is being deployed to Iraq and Afghanistan (see https://armorama.kitmaker.net/forums/233823&page=1 ). I will be making the figures. Unfortunately, we are on a short time schedule, so I am not able to take the same amount of time I usually spend on figures.
Since these systems are being utilized for defending a base or position against incoming rockets and mortar rounds, the Soldiers manning and maintaining the system tend not to wear the normal gear associated with today's Soldiers overseas. Since they are not wearing gear in the pictures we have of them, the current OIF/OEF figures have limited use for this project. Since I needed Soldiers without all their gear on, I ended up using figures from Bravo 6 and changing them from Vietnam to Modern day Soldiers. I hated doing this since I am primarily a Vietnam Modeler, but it is necessary for this project.
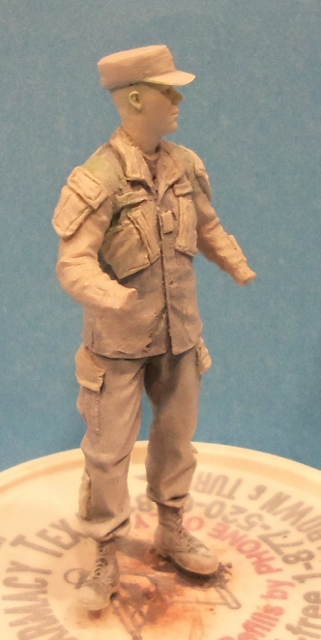
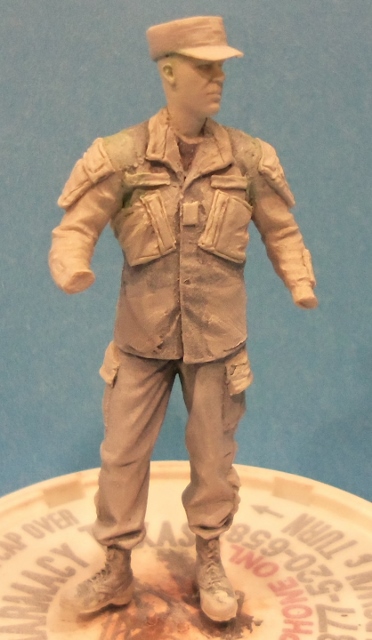
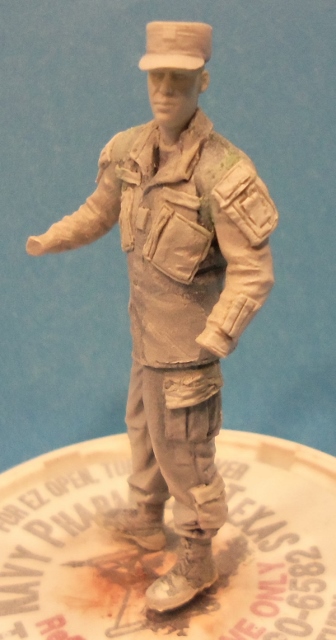
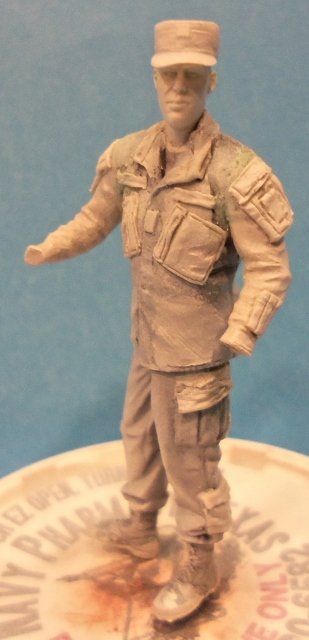
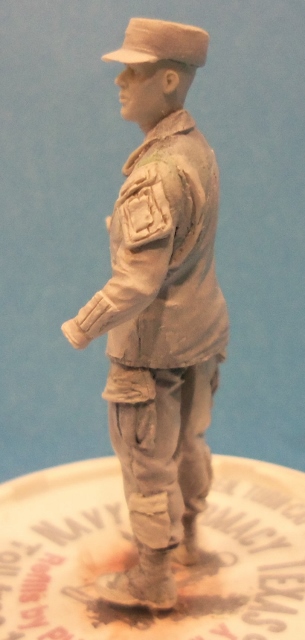
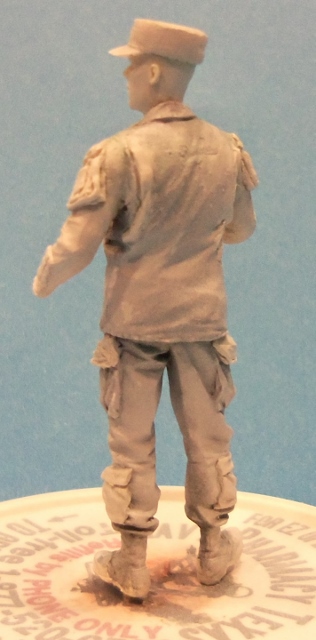
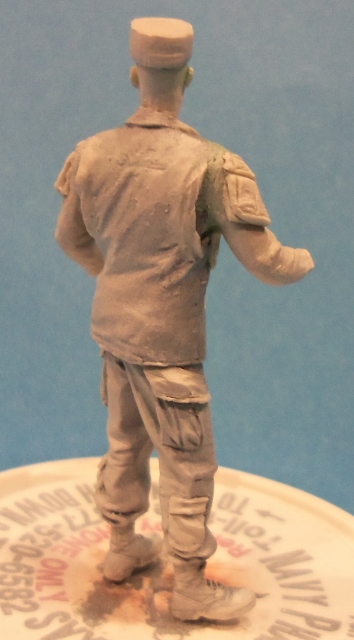
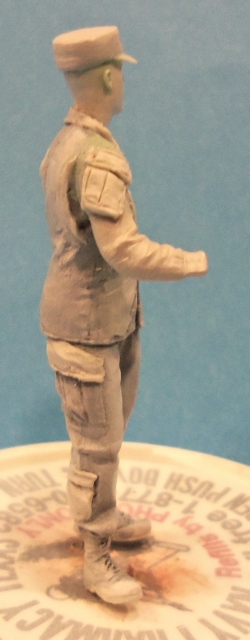
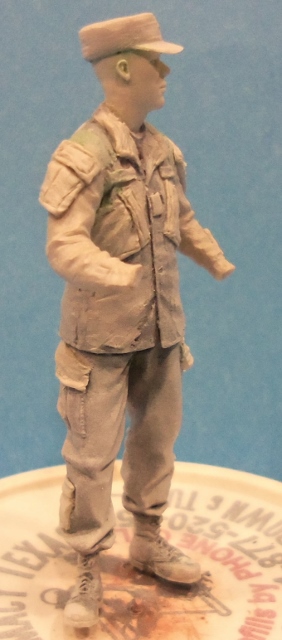
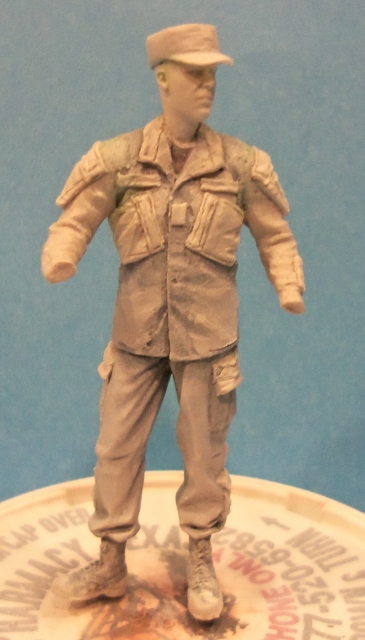
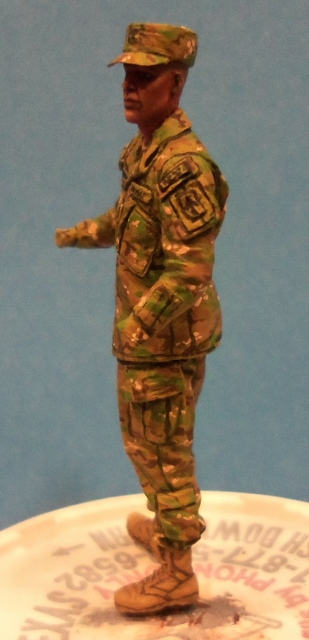
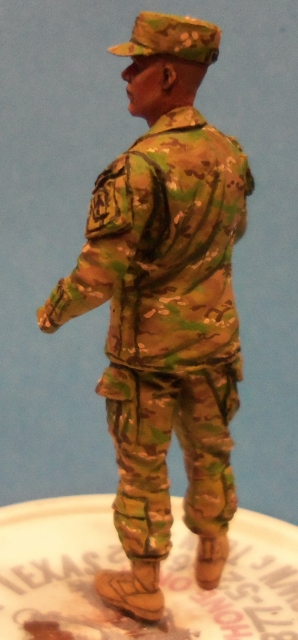
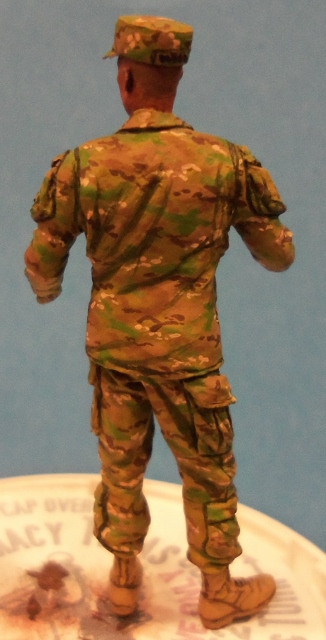
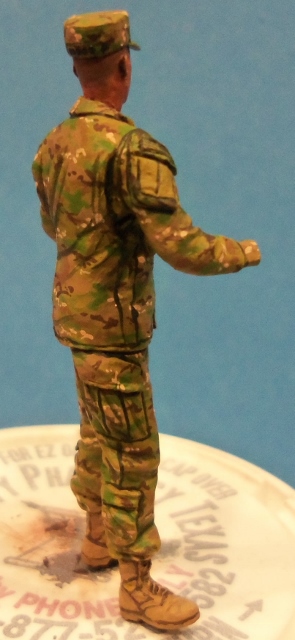
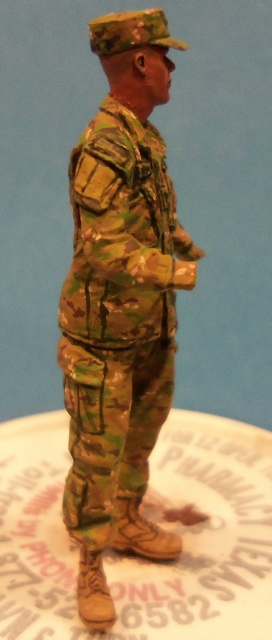
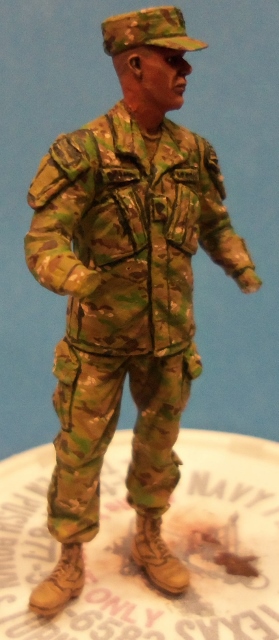
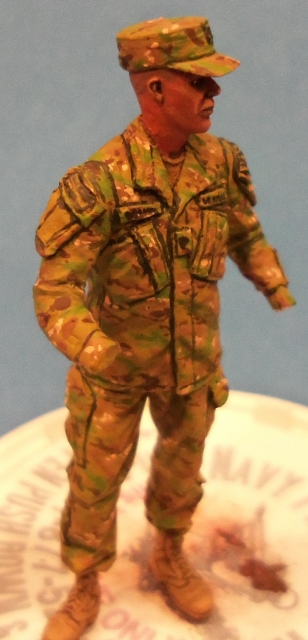
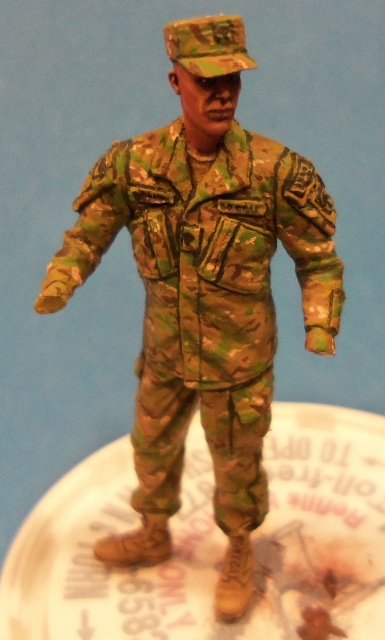
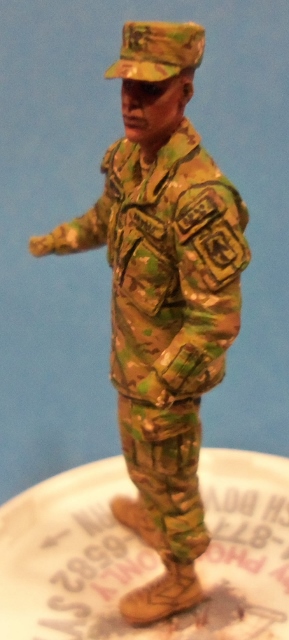
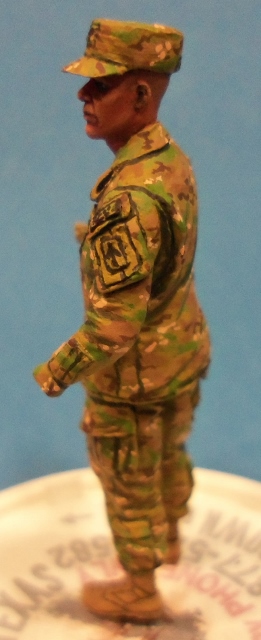
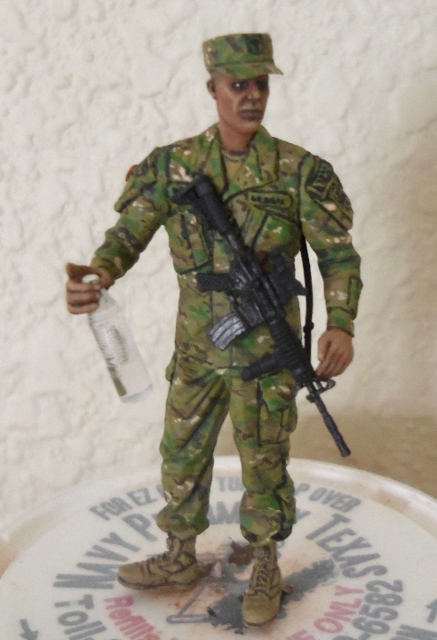
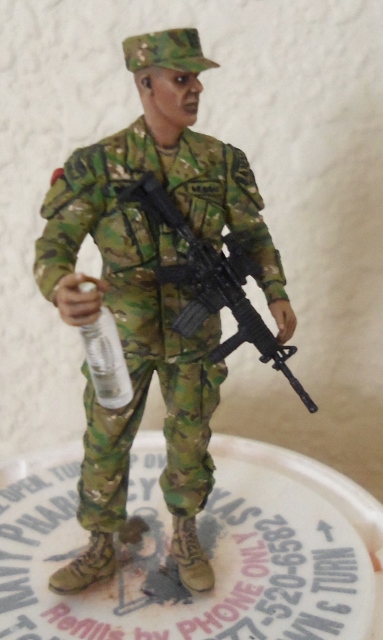
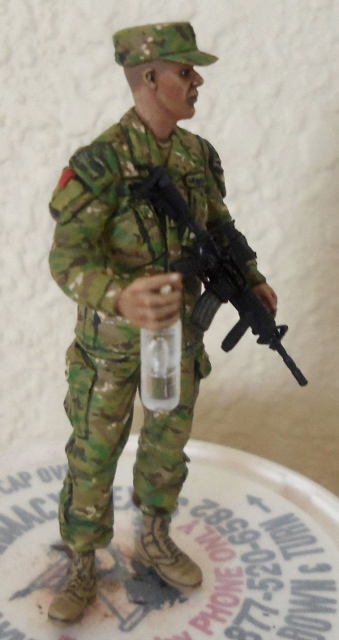
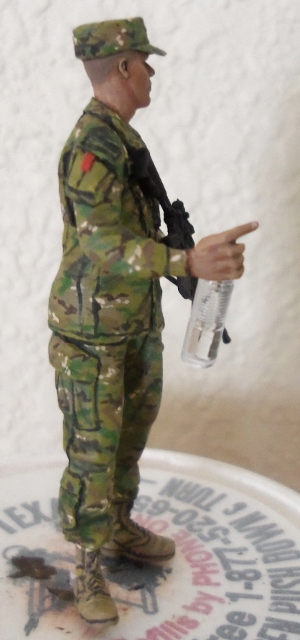
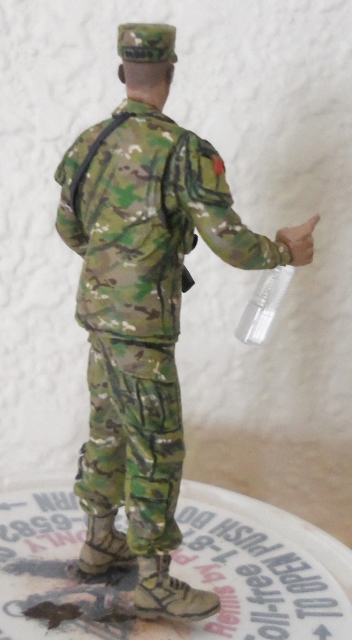
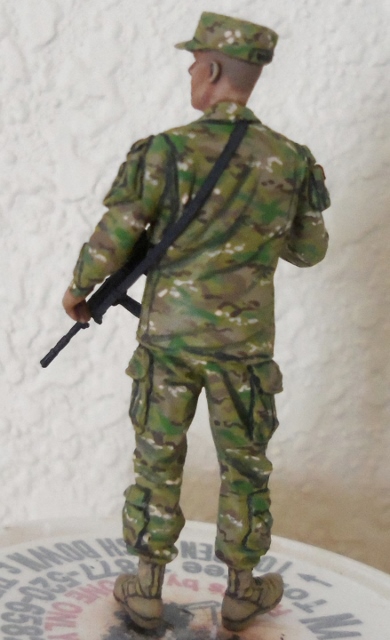
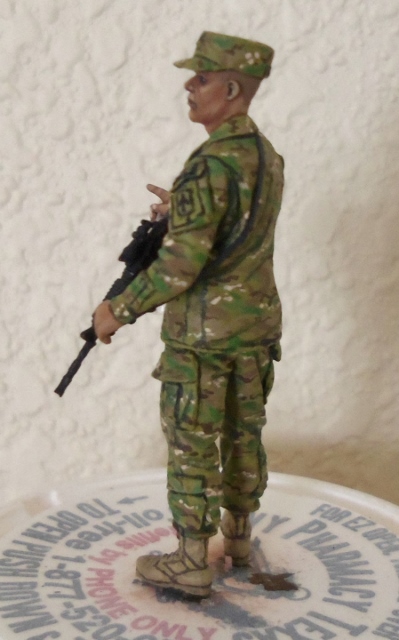
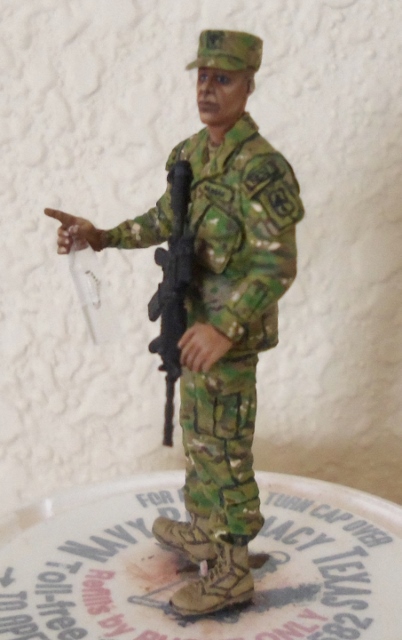
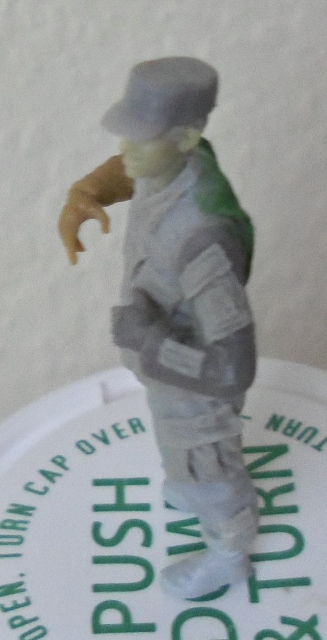
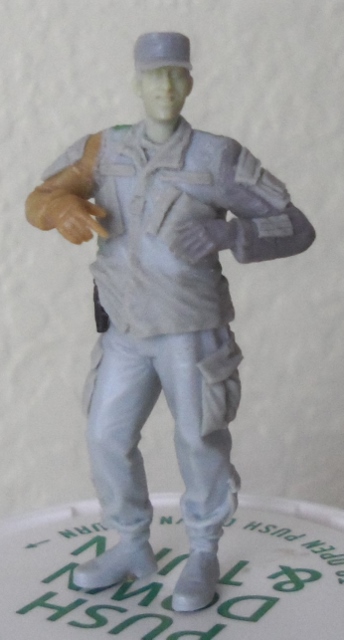
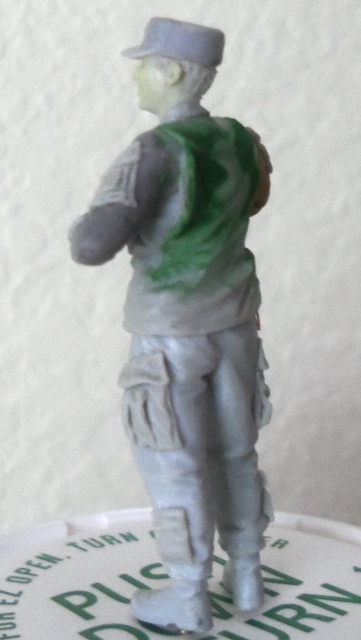
The first figure for this project is of a Specialist who is holding a bottle of water and has his weapon slung across his body. The body is from the GI from the Bravo 6 kit of a GI with a prostitute, arms from Masterbox, head from Hornet, and patrol cap from Dragon's US Special Forces figure kit. I scraped away the Vietnam Jungle Fatigue details and sculpted in ACU-cut uniform details. I even included the gussett back to the shirt.
In these pictures, I have not put the hands on the figure yet and the rifle still needs to be prepared. I have more in-progress photos than these, but to show them all would take up too much space.
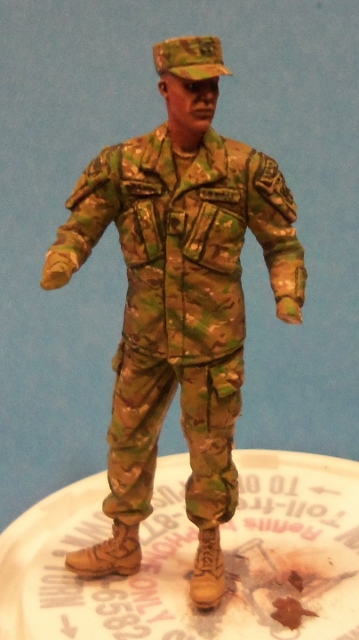
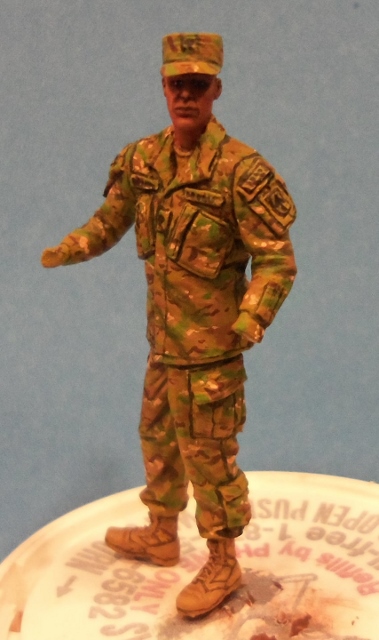
To paint the Multicam pattern, I took one of my Multicam uniforms and used it as a reference for colors, etc. When painting ERDL or Woodland camo patterns, I usually use one of my uniforms and copy the pattern exactly. Since I am on a time constraint and the multicam colors gradually blend into one another, I am just trying to get close. I hope the effect works out.
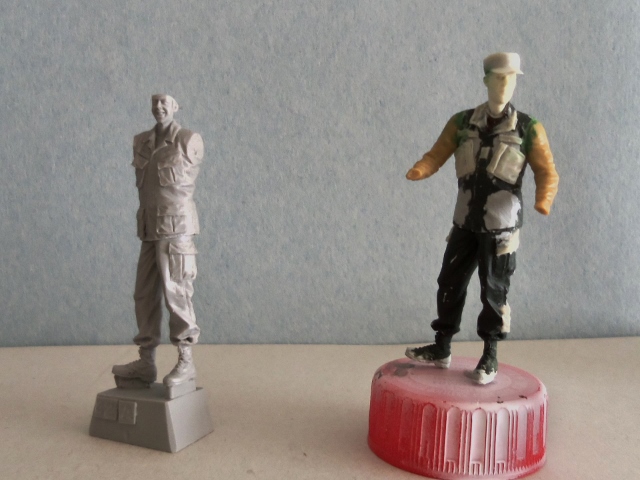
The patches are an impression of the American Flag on the right shoulder pocket flap, name and US Army tapes on chest, ISAF patch on left shoulder pocket flap, Unit patch on left shoulder pocket, SPC rank insignia in center of chest and on front of patrol cap, and a name tape on the back of the patrol cap.
Next pictures will have the Soldier with his hands, water bottle, and weapon.
Cheers,
James
Figures
Military figures of all shapes and sizes.
Hosted by Darren Baker, Mario Matijasic
C-RAM Crew for ADA Museum Display
ReconTL3-1
Texas, United States
Joined: June 07, 2006
KitMaker: 726 posts
Armorama: 687 posts
Joined: June 07, 2006
KitMaker: 726 posts
Armorama: 687 posts
Posted: Saturday, April 11, 2015 - 05:03 AM UTC
Posted: Saturday, April 11, 2015 - 05:42 AM UTC
Hi James - this fellow is looking good! Nice transition between surfaces (pockets etc) and colors, and overall paint work. Thanks for posting the step by step, it's very helpful to see! Looking forward to the update
Cheers
Nick
Cheers
Nick
ReconTL3-1
Texas, United States
Joined: June 07, 2006
KitMaker: 726 posts
Armorama: 687 posts
Joined: June 07, 2006
KitMaker: 726 posts
Armorama: 687 posts
Posted: Saturday, April 11, 2015 - 07:46 PM UTC
Thanks, Nick.
I wasn't too sure how he would turn out, especially when the pictures are larger than the actual figure but I am pleased that the multicam looks close enough. On the next figure I might take pictures of each color I apply to show how easy it ended up being to paint the pattern. Although I took more WIP pics as I was painting, it was pics of the base coat, most of the colors applied, the beginnings of the lightest color spots, and then the completed pattern. It missed the painting of three of the colors.
I was originally a little apprehensive about painting the multicam pattern, but it turned out to be easier than I thought it would be. I had been putting off doing any modern figures because I thought painting the pattern would be more difficult than it was.
Cheers,
James
ReconTL3-1
Texas, United States
Joined: June 07, 2006
KitMaker: 726 posts
Armorama: 687 posts
Joined: June 07, 2006
KitMaker: 726 posts
Armorama: 687 posts
Posted: Wednesday, April 15, 2015 - 07:19 AM UTC
Hello All,
Well, I got the first figure as complete as he is going to get. I added his hands, a bottle of water (the water bottles we had in 2012 to 2013 where I was stationed in Afghanistan did not have any labels on them), and an M4 with an ACOG sight. The red thing hanging out of his right sleeve pocket is the tab to his tourniquet. The tabs came in black and red and this guy has the red one. I know there is a void in the middle of the water bottle, but the ones from the Academy M113 ACAV kit were the only ones I had.
Now on to the last two figures which I started posing tonight.
Cheers,
James
Posted: Wednesday, April 15, 2015 - 07:45 AM UTC
Hi James - this guy looks great! The multicam is very convincing, but, the whole guy is! Nice work. Your use of the tourniquet and weapon strap under the collar are nice touches too - wow. It's either sort of funny, or just depressing that in your intro you mention you are doing this in a bit of hurry..ha! Pretty nice for a "hurried" project!
Cheers
Nick
Cheers
Nick
Graywolf
Senior Editor
Izmir, Turkey / Türkçe
Joined: December 01, 2001
KitMaker: 6,405 posts
Armorama: 1,850 posts
Joined: December 01, 2001
KitMaker: 6,405 posts
Armorama: 1,850 posts
Posted: Wednesday, April 15, 2015 - 12:21 PM UTC
Great final my friend. Camo pattern is very nicely painted.
congrats
congrats
Posted: Wednesday, April 15, 2015 - 03:54 PM UTC
your representation of MULTICAM is incredibly exquisite!!! it even has the horizontal orientation to the greens and the veritcal orientation to the dots of tans and browns! Did you use 5 colors?
jrutman
Pennsylvania, United States
Joined: April 10, 2011
KitMaker: 7,941 posts
Armorama: 7,934 posts
Joined: April 10, 2011
KitMaker: 7,941 posts
Armorama: 7,934 posts
Posted: Wednesday, April 15, 2015 - 07:03 PM UTC
Man! That is really looking good my friend.
Stay thirsty,
J
Stay thirsty,
J
ReconTL3-1
Texas, United States
Joined: June 07, 2006
KitMaker: 726 posts
Armorama: 687 posts
Joined: June 07, 2006
KitMaker: 726 posts
Armorama: 687 posts
Posted: Wednesday, April 15, 2015 - 07:37 PM UTC
Nick, Engin, Brian, and Jerry,
Thanks for the positive comments about my rendition of the multicam camo pattern.
Brian, I used one of my sets of multicams as a guide. I originally was going to try to copy the pattern like I do when I paint ERDL or Woodland on a figure, but the way that the colors fade and blend into each other made that difficult and it would have been time consuming. So what I did was try to get as close to representing the basic qualities of each color as I could. Again, using my own uniform as a guide, I went through my paints to match the colors as close as I possibly could. These are the colors I used for the Multicam uniform in the order I applied them to the figure:
Base: Vallejo 881 Yellow Green
Reaper 29812 Meadow Green
Vallejo 70922 Uniform Green
Reaper 09162 Driftwood Brown
Reaper 09161 Shield Brown
Reaper 09040 Dark Shadow
Reaper 29823 Caucasian Flesh
One of the good things about having the actual stuff I am modeling is that I have it right there as a reference and there is no color distortion from a printing process or digital photography tweeking.
Today I will be working on sculpting in details on the next two figures. The only thing that sucks about the project in regards to the figures is that I am used to telling a story with my figures and in the case of the diorama that these guys are going to be in, there really isn't a "story" to be told per se. They are there to provide size and time reference for the scene. That kind of affects the posing process.
Cheers.
James
ReconTL3-1
Texas, United States
Joined: June 07, 2006
KitMaker: 726 posts
Armorama: 687 posts
Joined: June 07, 2006
KitMaker: 726 posts
Armorama: 687 posts
Posted: Sunday, April 19, 2015 - 06:58 AM UTC
Hello All,
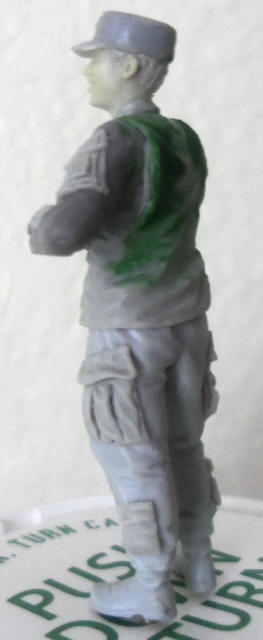
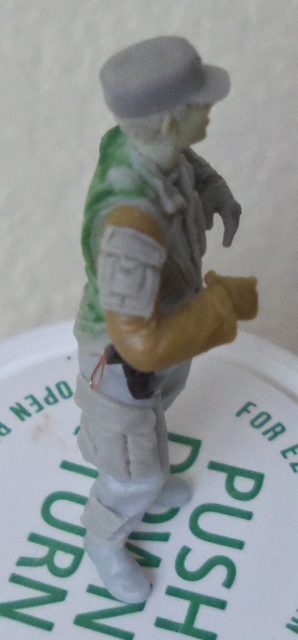
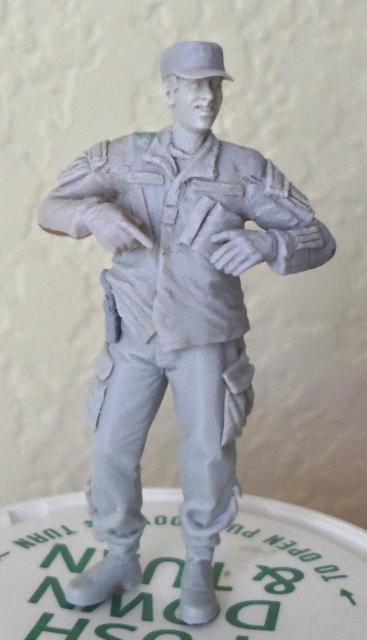
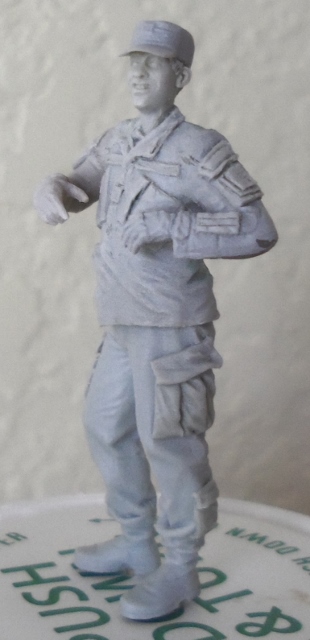
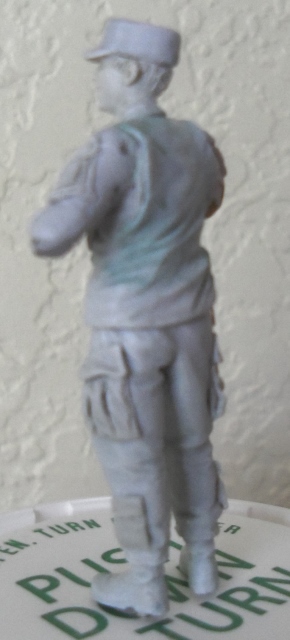
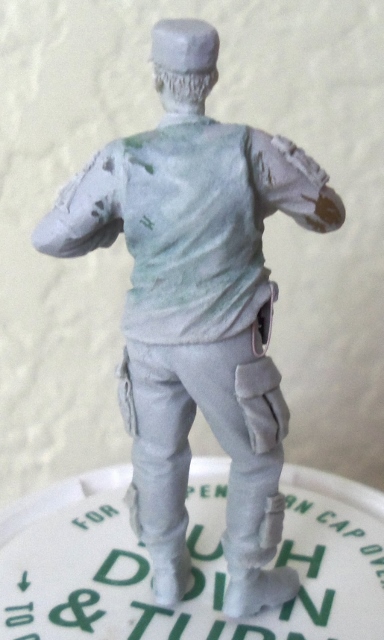
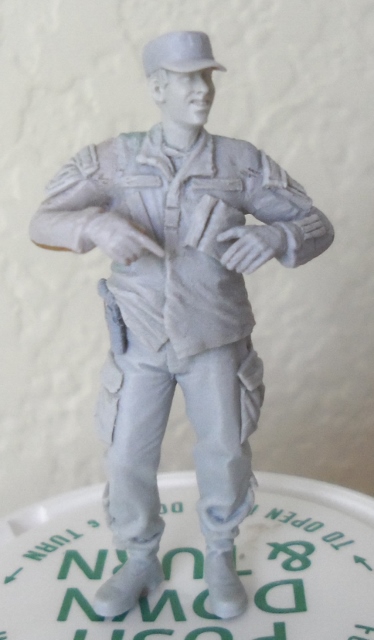
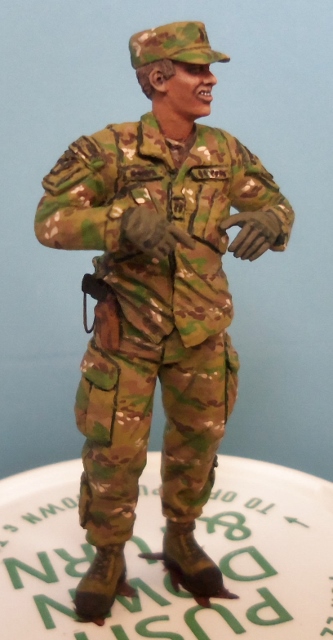
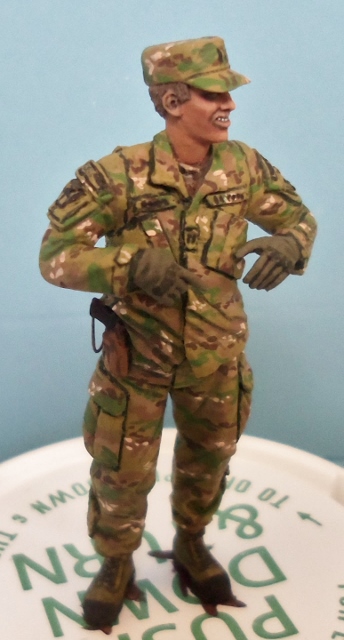
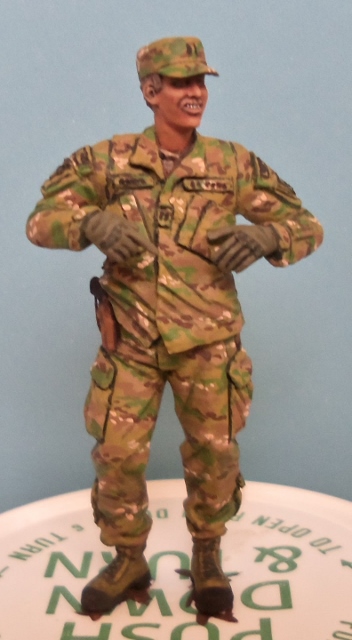
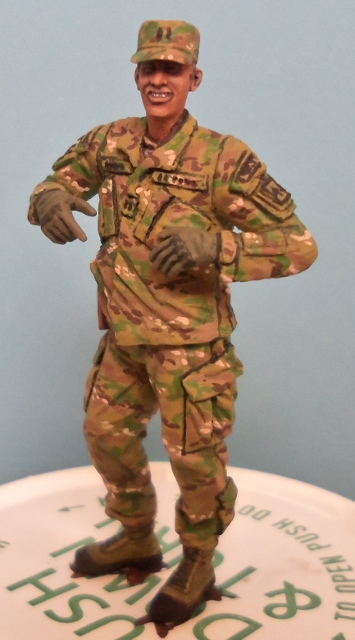
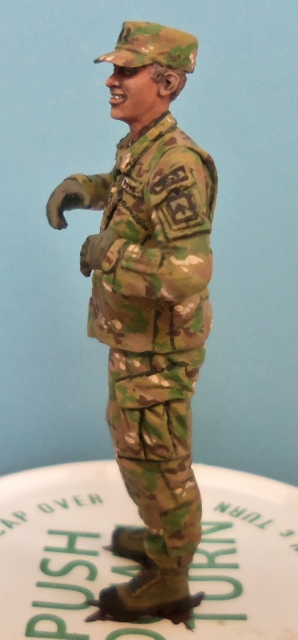
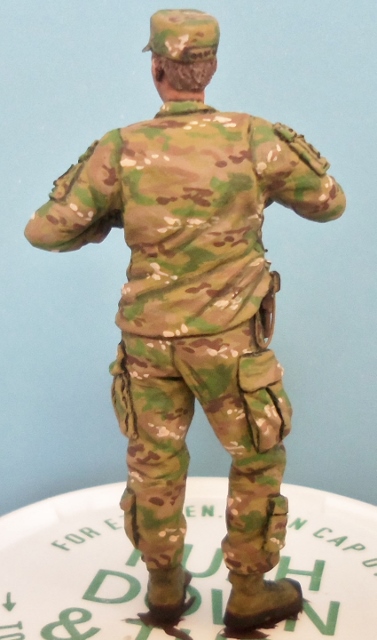
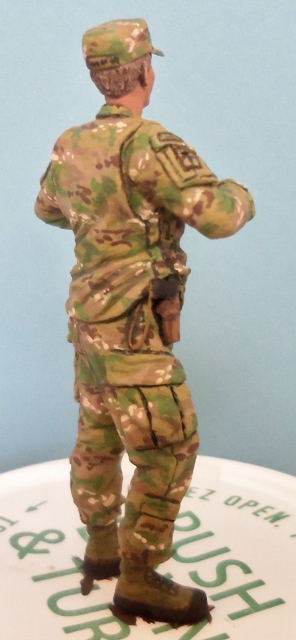
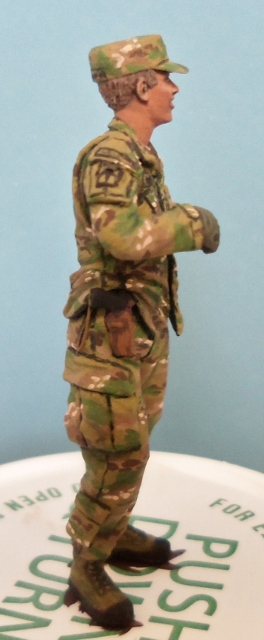
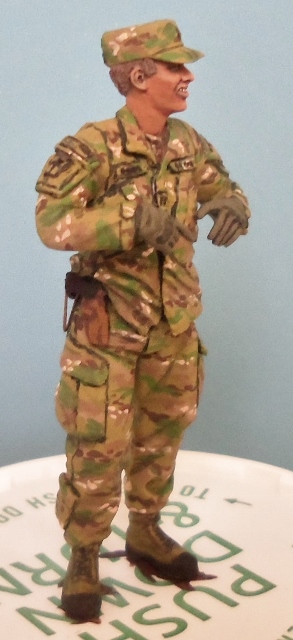
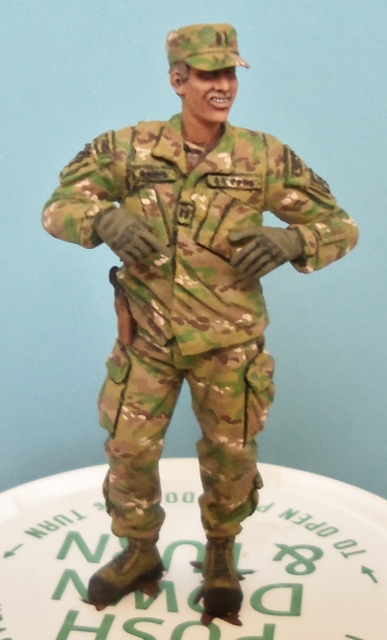
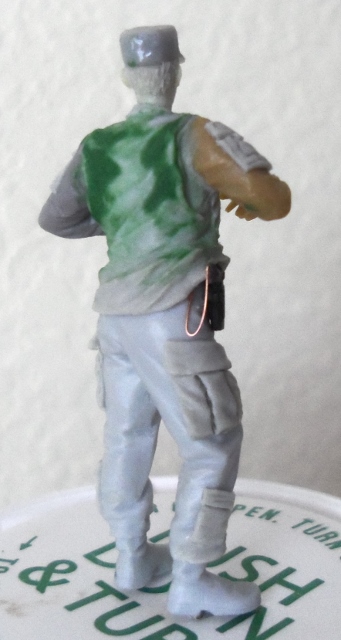
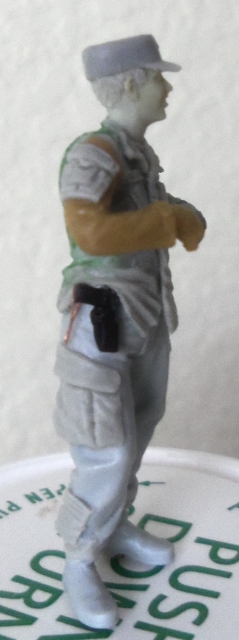
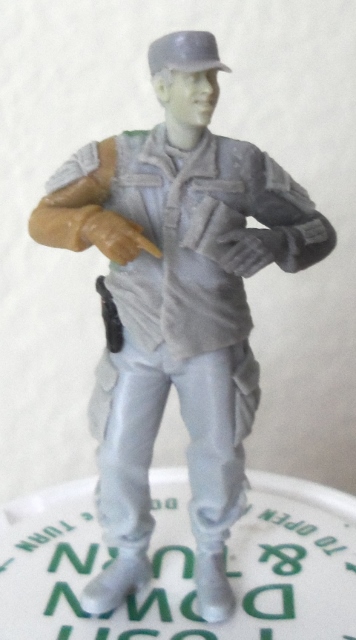
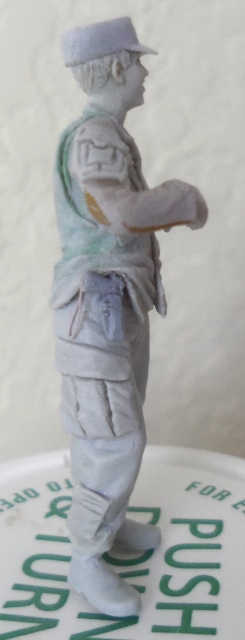
Here is the beginning of the second figure for the C-RAM weapon system diorama being included with a C-RAM exhibit at the Air Defense Artillery Museum at Fort Sill, Oklahoma. He represents the battery commander of the unit being depicted in the diorama.
The figure is a conversion of a Bravo 6 figure - the WWII German Violin Player. I replaced his head with a Hornet head that looks the closest to what the battery commander looks like. His patrol cap is from the Dragon US Special Forces kit like the first figure. His arms come from two different MasterBox kits. I sculpted in the chest pockets, name and US Army tapes, Shoulder pockets with patches and the tab to the tourniquet on the right sleeve pocket, the pen pocket on the lower left sleeve, the gussets on the back of the shirt, the shirt tails making sure they go over the Blackhawk Sherpa holster and pistol lanyard, thigh pockets, and calf pockets. I used Magic Sculpt and blended in the gussets to the figure's back with Squadron Green Putty smoothed out with Tamiya Fine Liquid Cement.
The figure has been primed and flaws are shaved off. He is currently in his base coats, but I have not taken pictures of the figure in that stage yet. I will paint in the other colors starting tomorrow (Monday)
Cheers,
James
ReconTL3-1
Texas, United States
Joined: June 07, 2006
KitMaker: 726 posts
Armorama: 687 posts
Joined: June 07, 2006
KitMaker: 726 posts
Armorama: 687 posts
Posted: Tuesday, April 21, 2015 - 03:01 AM UTC
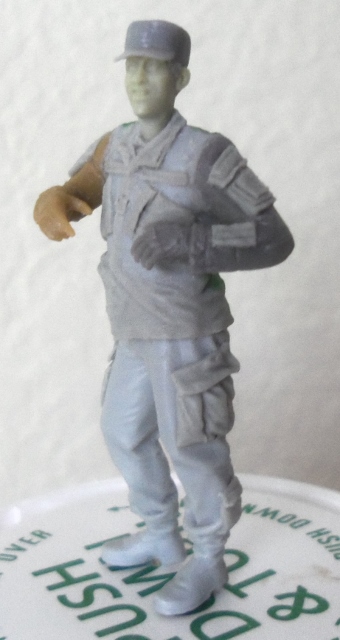
Well, the second figure is as complete as it is going to get. Here are several pictures of him at various angles. I've been surprised at how fast I've been able to knock out the Multicam camo pattern. I painted the pattern in about two to two and a half hours. I know it is not exact as I would like, but it looks close enough for how the figures are going to be displayed.
Now on to the next and final figure for this project:)
Cheers,
James
Now on to the next and final figure for this project:)
Cheers,
James