Don, Tom & Pierantonio,
Yes, Don's work is looking really great. As our discussion on this blog goes along, we've uncovered a couple of "kit overlap" items by AFV Club such as that pesky bore evacuator plug and the air cleaner dust indicators that were likely intended for the next issue kit-- probably the M60A3. That's the great value of this forum, which takes folks separated by years and distance and puts them together to help the collective modeling effort. So, "Tanks" for all your help in jogging my foggy memory before I start my M60A1! Can't wait to see Don's final product. VR, Russ
Hosted by Darren Baker
Building A M60A1 from AFV Club
Kevlar06


Joined: March 15, 2009
KitMaker: 3,670 posts
Armorama: 2,052 posts

Posted: Thursday, May 07, 2015 - 09:39 AM UTC
OldWarloke

Joined: October 14, 2012
KitMaker: 2,663 posts
Armorama: 2,649 posts

Posted: Thursday, May 07, 2015 - 03:56 PM UTC
I'm glad you like it Russ.
Now back to the build, below I have the Tracks fitted.
A little Dust added to them.
Now back to the build, below I have the Tracks fitted.
A little Dust added to them.
OldWarloke

Joined: October 14, 2012
KitMaker: 2,663 posts
Armorama: 2,649 posts

Posted: Thursday, May 07, 2015 - 04:01 PM UTC
Now the Fenders.
I installed the Track first, then the Fenders man that was a real lady getting the Fenders glued on.
The next time I think that I'll attach the fenders first then slip on the Track with the Idler & Sprocket after .Then add the Return Rollers last of all.
I wonder how the Bronco track would fit this kit?
Does anyone know what color the Mantlet Cover should be ?
Donald
TankSGT

Joined: July 25, 2006
KitMaker: 1,139 posts
Armorama: 946 posts

Posted: Thursday, May 07, 2015 - 07:57 PM UTC

The cover looks like a greenish OD leaning toward the 60s OD vs the WW2 OD.They were made of vinyl not canvas. The 50 cal cover was the same color as the mantle cover.
Very nice build Don, I think this kit has spoiled me, I don't want to touch the Academy or Esci kits I have in the stash. I'll just keep waiting for AFV kits.
Tom
SilverDollar

Joined: August 16, 2008
KitMaker: 10 posts
Armorama: 5 posts

Posted: Friday, May 08, 2015 - 09:40 PM UTC
I bought this kit about 2 weeks ago. Thanks for fording the river for me. You've got a lot of great tips here. I'm not a beginner builder but I'm a beginner armor builder. I'm glad now I don't have to reinvent the wheel to get my kit looking right.
BruceJ8365

Joined: December 25, 2012
KitMaker: 441 posts
Armorama: 441 posts

Posted: Saturday, May 09, 2015 - 05:45 AM UTC
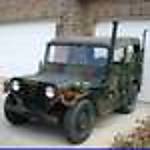
Mantlet covers are vinyl and varry in color. Early stuff was a brownish OD and newer stuff was a brighter blue green with every color in between - unless dusty, it has a slight sheen to it. There are also the equivilant of hose clamps around the protrusions on the cover, these are just the stainless steel ones like you get at the hardware store.
Here's one with a more modern color vinyl...

Here's an older color vinyl...
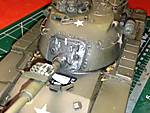
Here's one with a more modern color vinyl...
Here's an older color vinyl...

OldWarloke

Joined: October 14, 2012
KitMaker: 2,663 posts
Armorama: 2,649 posts

Posted: Saturday, May 09, 2015 - 08:22 PM UTC
It's Finished.
OldWarloke

Joined: October 14, 2012
KitMaker: 2,663 posts
Armorama: 2,649 posts

Posted: Saturday, May 09, 2015 - 08:26 PM UTC
OldWarloke

Joined: October 14, 2012
KitMaker: 2,663 posts
Armorama: 2,649 posts

Posted: Saturday, May 09, 2015 - 08:31 PM UTC
OldWarloke

Joined: October 14, 2012
KitMaker: 2,663 posts
Armorama: 2,649 posts

Posted: Saturday, May 09, 2015 - 08:41 PM UTC
Well this is finally finished, I had a blast building it and would highly recommend this kit to any who want a really nice M60A1 fore their shelf.
Like any kit this isn't 100 percent perfect, that's what modeling is.
There are a few mistakes in the instructions, here are some I may have missed some.
#1 There are two armored access panels on the lower rear hull that are not numbered in step 4, they are K22 & K23.
#2 The two gages on the inside of the upper hull in the drivers area are marked C38 & C39 the correct numbers are B38 & B39, this is no big deal as you cant see them.
#3 Don't use parts F7 & K32 on the aircleaners they are for future versions and not the M60A1 .
#4 In step 28 parts numbered E22 are really E25.
I drilled out the headlights and used MV Lenses size 2.9mm
Finished here.
Donald

TankSGT

Joined: July 25, 2006
KitMaker: 1,139 posts
Armorama: 946 posts

Posted: Saturday, May 09, 2015 - 10:11 PM UTC
Don may I be the first to say well done. Looks great, I should start mine soon. Thanks for jogging my memory about my years in those beasts. Its been fun following your build. Again well done. You picked a very interesting cammo scheme.
Tom
Tom
cheswickthecat

Joined: October 13, 2007
KitMaker: 212 posts
Armorama: 208 posts

Posted: Sunday, May 10, 2015 - 07:16 AM UTC
Don, that turned out great! I too like that camo scheme. Well done 
Terry

Terry
phantom8747

Joined: March 09, 2015
KitMaker: 281 posts
Armorama: 273 posts

Posted: Sunday, May 10, 2015 - 06:24 PM UTC
It looks great! Gonna have to get that kit.I have a couple of Esci kits to do also
Kevlar06


Joined: March 15, 2009
KitMaker: 3,670 posts
Armorama: 2,052 posts

Posted: Monday, May 11, 2015 - 02:33 AM UTC
Don,
Your M60A1 looks great, and has inspired me to start my own now that you've got me recalling the "good old days" when I was an M60 platoon leader! Wish there was an M60A1 close by, but all we have here are M60s and CEVs. VR, Russ
Your M60A1 looks great, and has inspired me to start my own now that you've got me recalling the "good old days" when I was an M60 platoon leader! Wish there was an M60A1 close by, but all we have here are M60s and CEVs. VR, Russ
OldWarloke

Joined: October 14, 2012
KitMaker: 2,663 posts
Armorama: 2,649 posts

Posted: Sunday, August 09, 2015 - 11:28 PM UTC
Link is Gone
ShortBusRider

Joined: December 07, 2013
KitMaker: 17 posts
Armorama: 9 posts

Posted: Wednesday, September 02, 2015 - 03:22 AM UTC
Very nice, Don!,
Guys, I read earlier in the thread that all the parts for an A3 are in the box except for the barrel and treads. Question is can an accurate A3 be built with the addition of those items, the crosswind sensor, SGLs and the grenade boxes?
Guys, I read earlier in the thread that all the parts for an A3 are in the box except for the barrel and treads. Question is can an accurate A3 be built with the addition of those items, the crosswind sensor, SGLs and the grenade boxes?
Tankrider

Joined: October 07, 2002
KitMaker: 1,280 posts
Armorama: 1,208 posts

Posted: Wednesday, September 02, 2015 - 04:34 AM UTC
Brian,
You will need to source the main gun barrel with the thermal shroud, the TTS sight cover, the wind sensor, T-142 tracks, SGLs and their spare grenade boxes, as none of these items are included in the kit. Additionally, you will need to scratch the AN/VVS-2 Night Vision periscope mount & cover on the driver's hatch to replace the M17 mount and fab up the welded on cover for the search light receptacle on the top of the turret.
That should about do it...
John
 |


