Italeri/DML Frankenpanzer IV Ausf H
Dodecanese, Greece / Ελλάδα
Joined: April 04, 2015
KitMaker: 195 posts
Armorama: 191 posts
Posted: Monday, June 29, 2015 - 11:57 AM UTC
Sun is shinning
CA Armour Models on FB
England - South East, United Kingdom
Joined: November 19, 2008
KitMaker: 2,249 posts
Armorama: 2,007 posts
Posted: Monday, June 29, 2015 - 02:37 PM UTC
Christos, it looks a fun build, like you say, having to think a bit about what to use where, rather than just following the instructions.
Are you going to use both turret bins, or just wondering which to use?

I'm sure I recall a photo somewhere of a P.IV with an extra turret bin strapped on to the engine deck...
Dodecanese, Greece / Ελλάδα
Joined: April 04, 2015
KitMaker: 195 posts
Armorama: 191 posts
Posted: Monday, June 29, 2015 - 06:05 PM UTC
Hi Matthew,
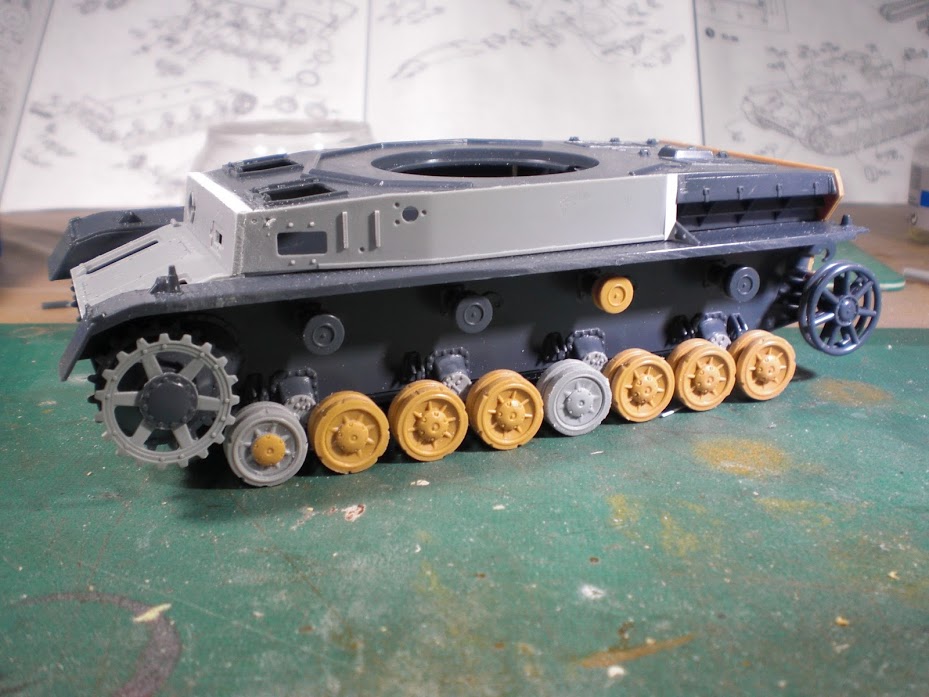
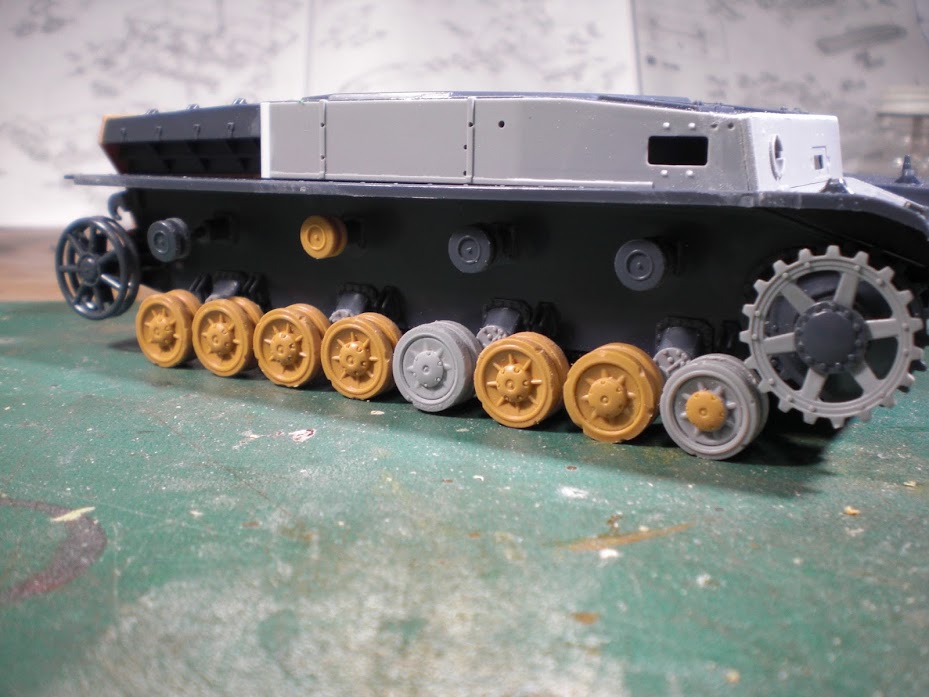
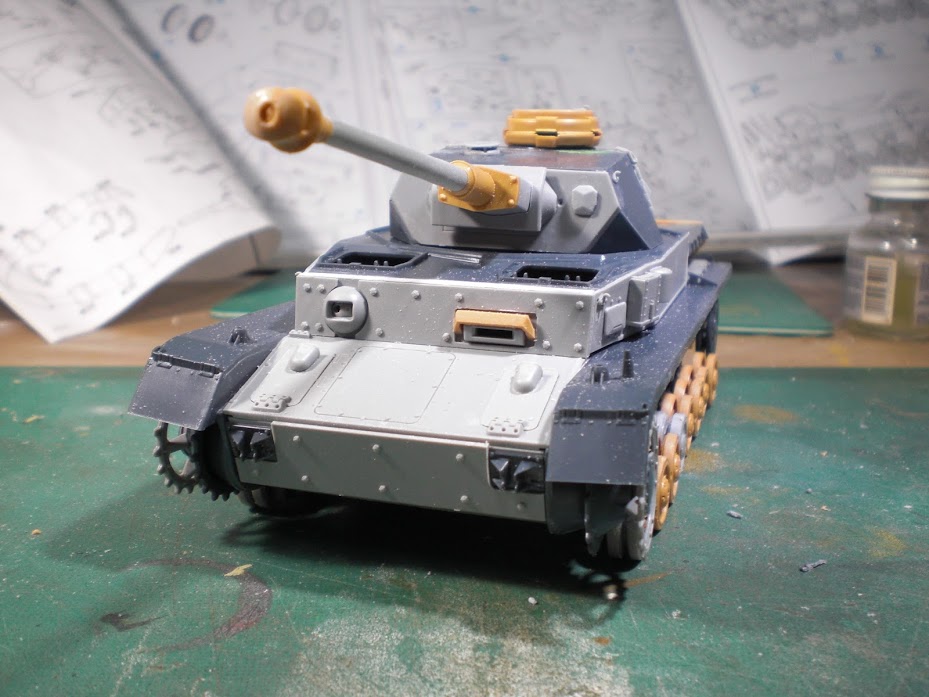
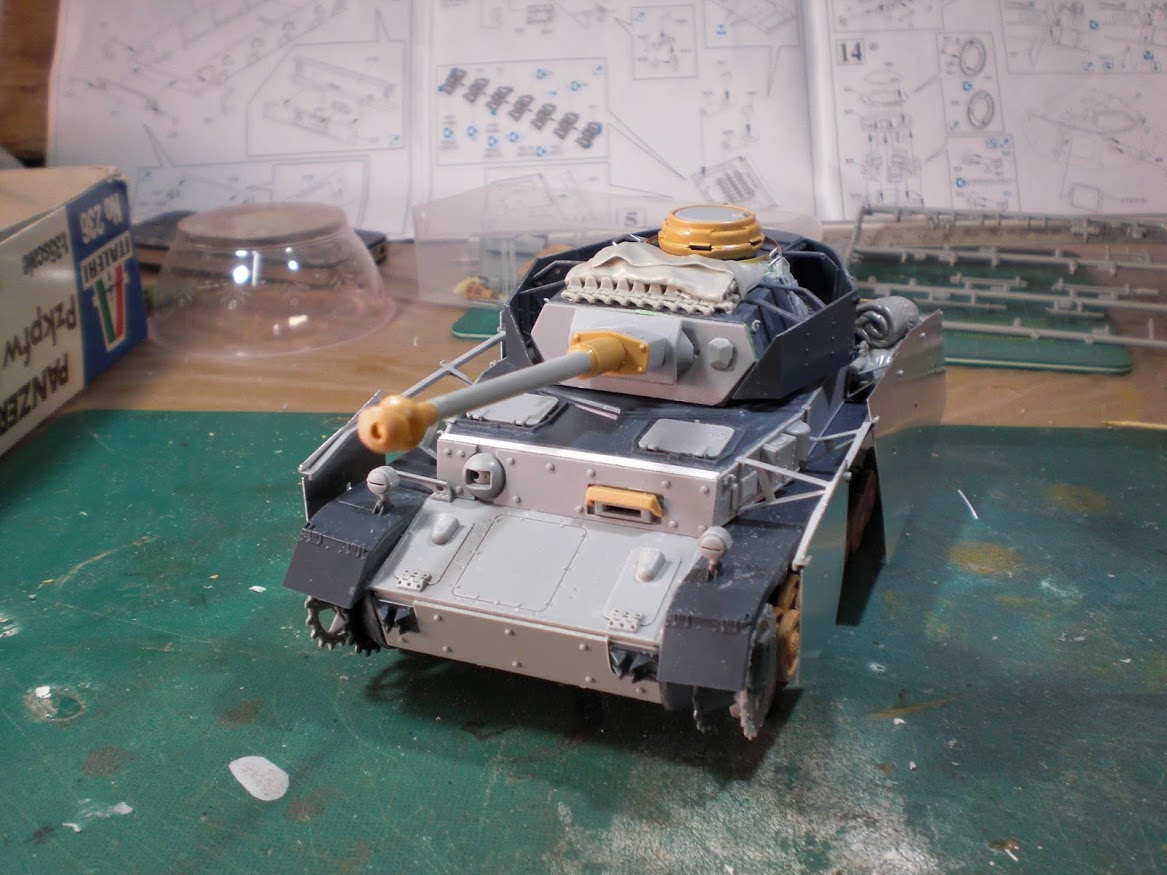
Thanks for dropping in! I did have a look at the instructions, but most of the time I just assembled the kit by looking at the parts; nor the sprues and neither the parts are labelled/numbered anyway!
I was trying to compare and make up my mind which one to use. In the end, I decided to use the Italeri bin as the DML bin was too big for the turret.
Will post some photos later on!
Sun is shinning
CA Armour Models on FB
Texas, United States
Joined: June 12, 2007
KitMaker: 1,866 posts
Armorama: 1,696 posts
Posted: Monday, June 29, 2015 - 09:09 PM UTC
Frankenpanzers rock! Good work, although I may be biased: this is my favorite kind of modeling.
Dodecanese, Greece / Ελλάδα
Joined: April 04, 2015
KitMaker: 195 posts
Armorama: 191 posts
Posted: Monday, June 29, 2015 - 10:57 PM UTC
Thank you very much for thumbs up Russell!
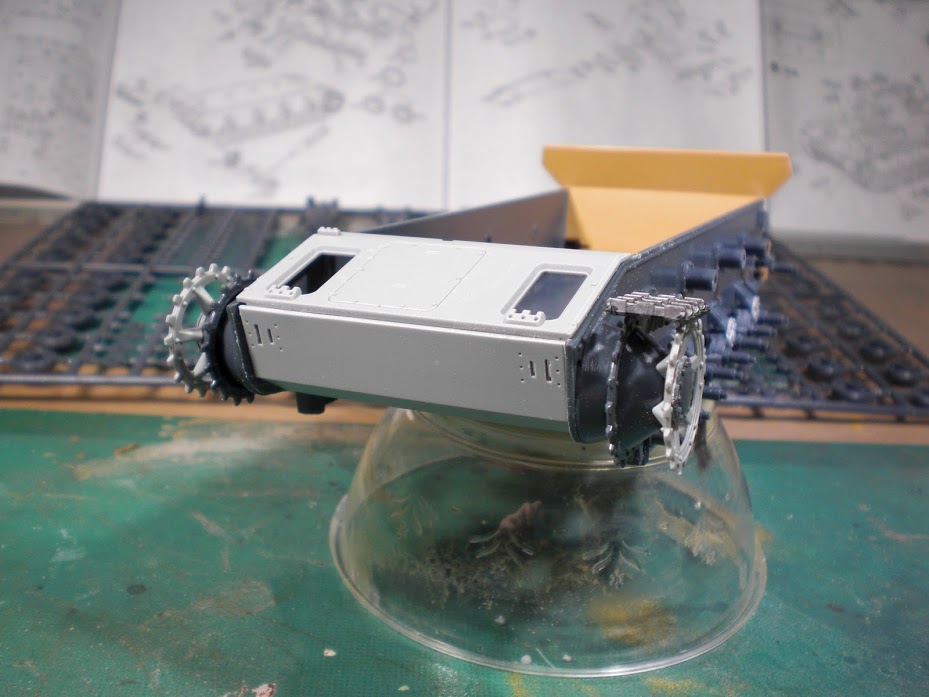
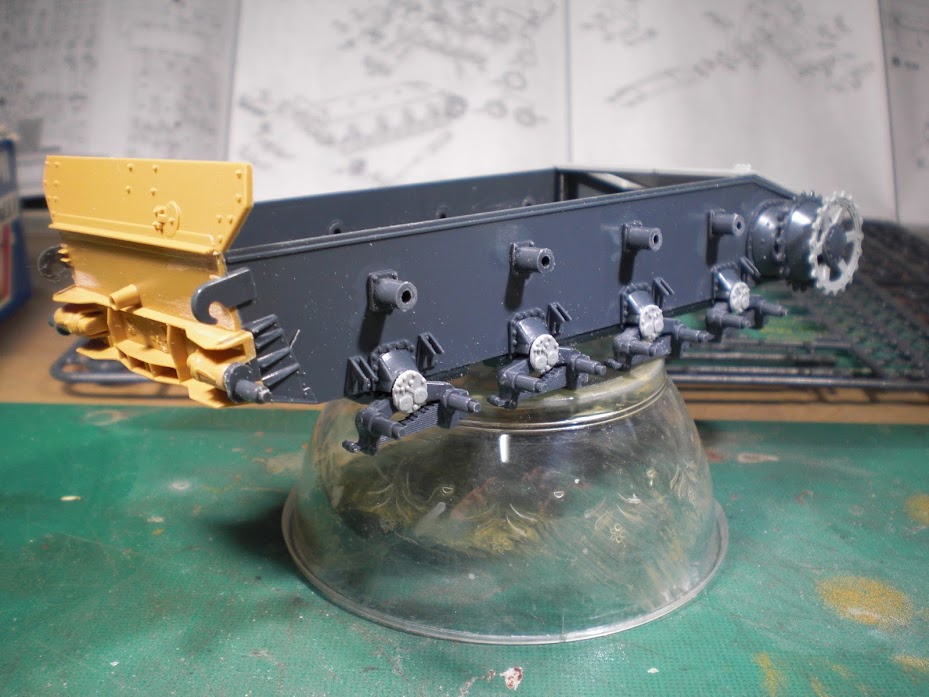
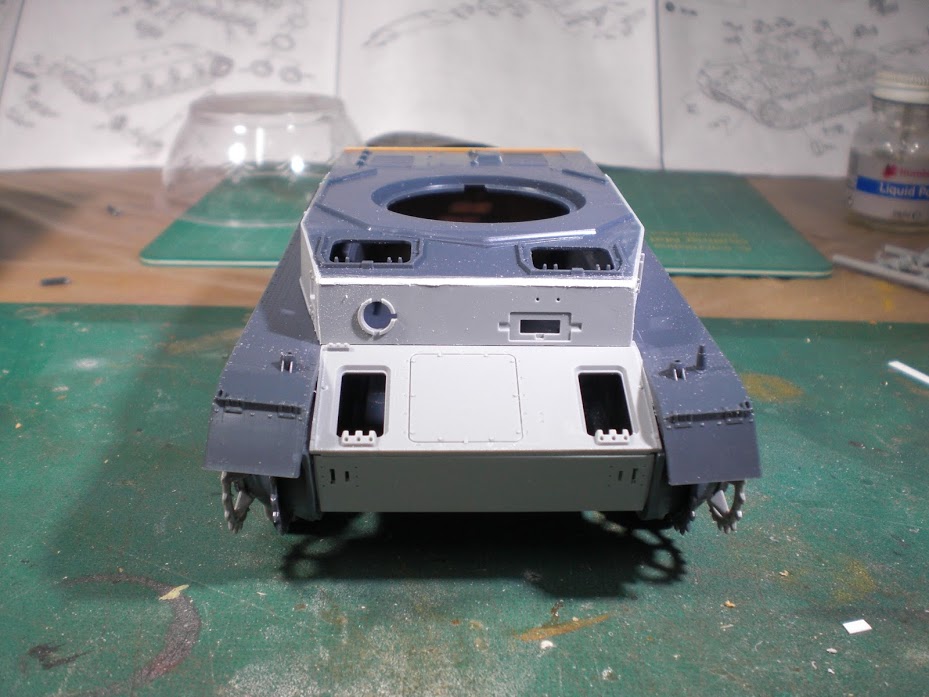
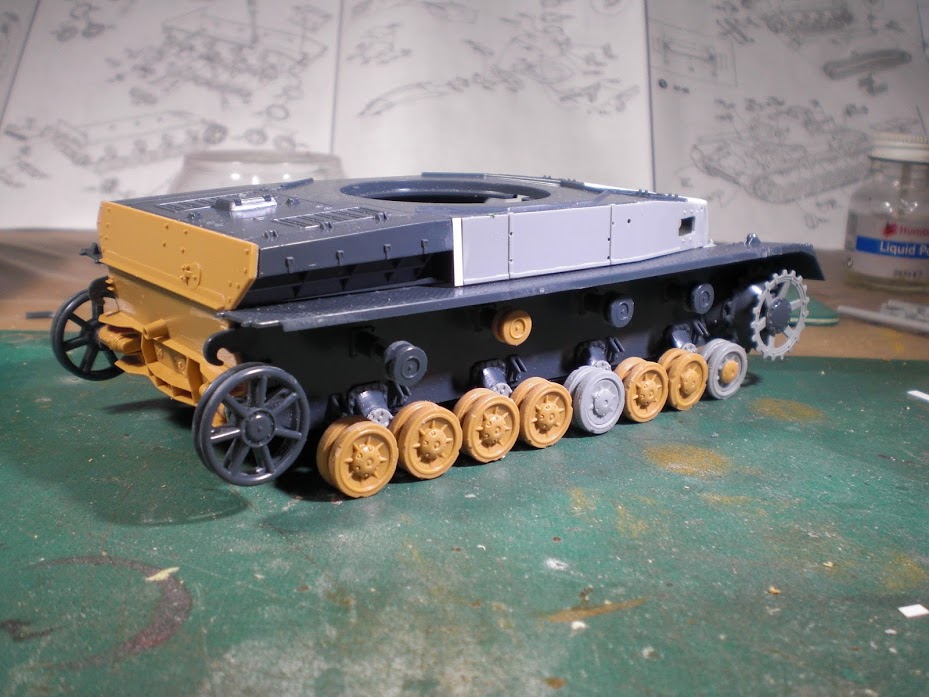
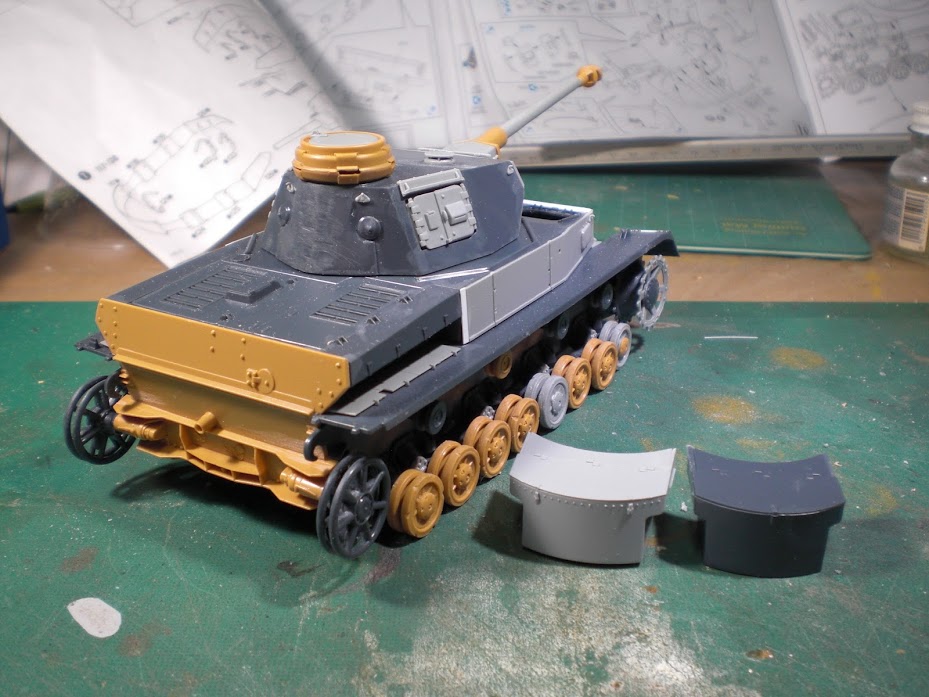
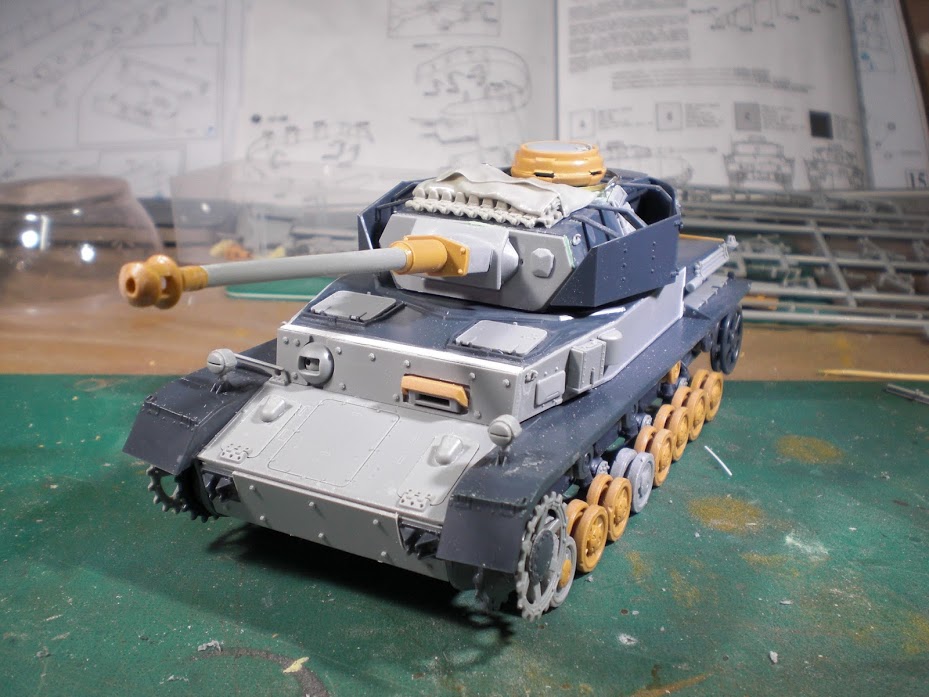
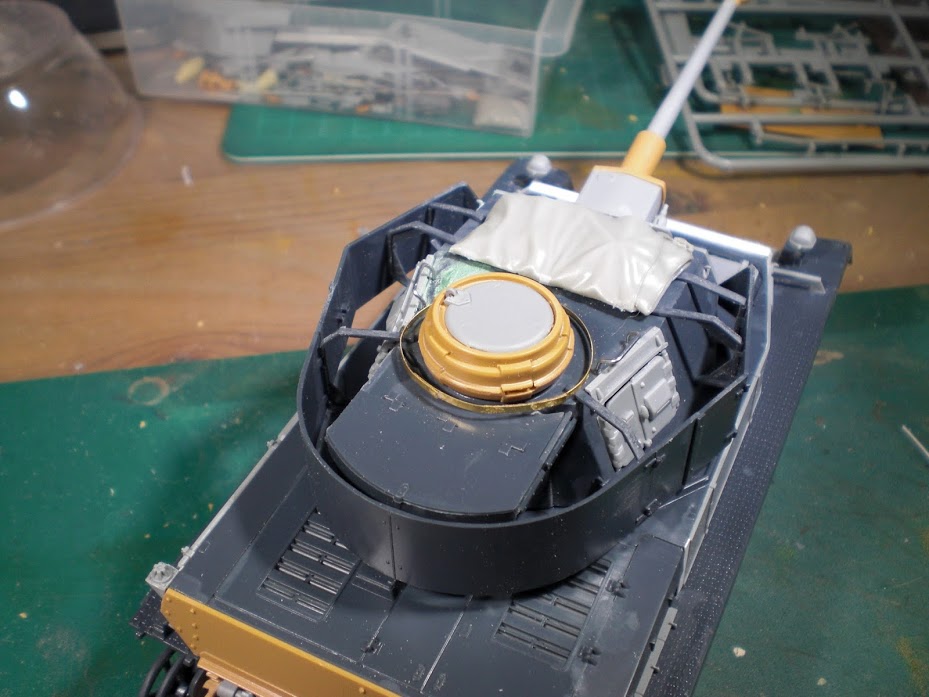
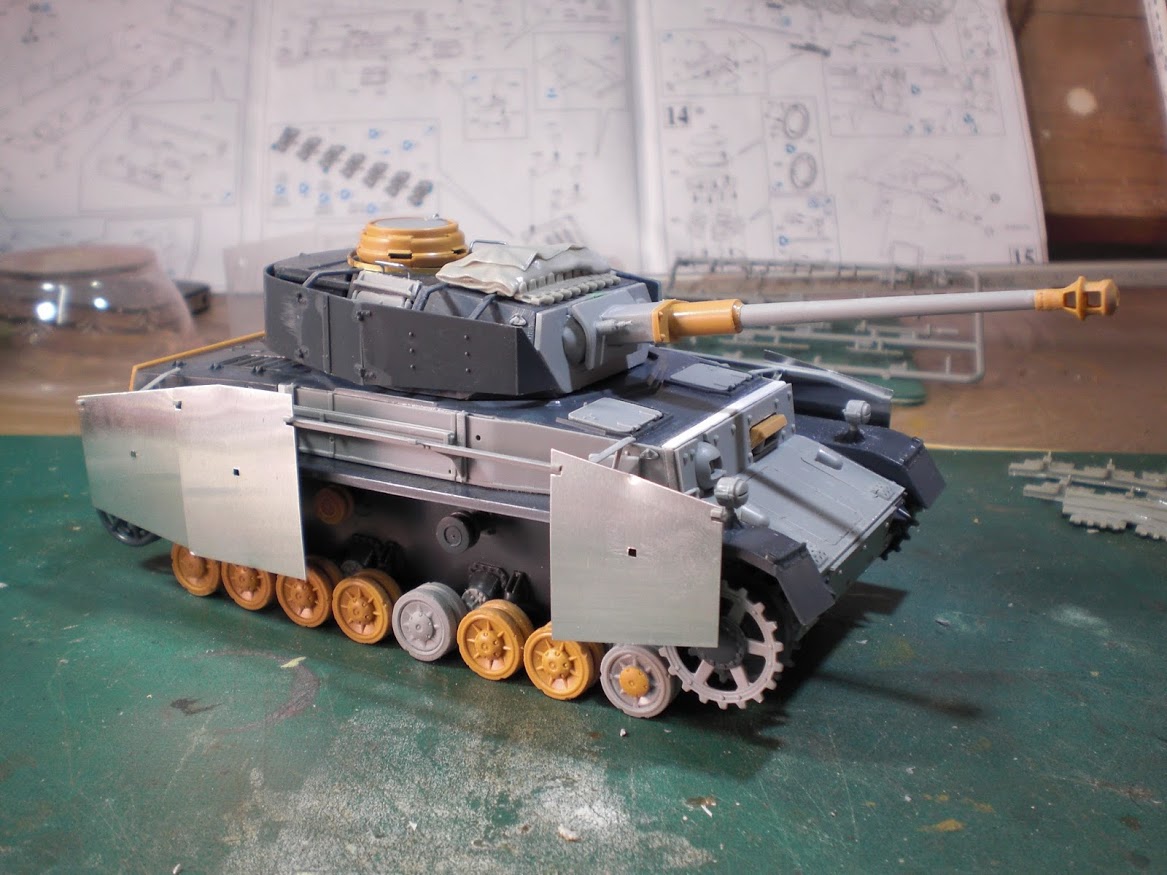
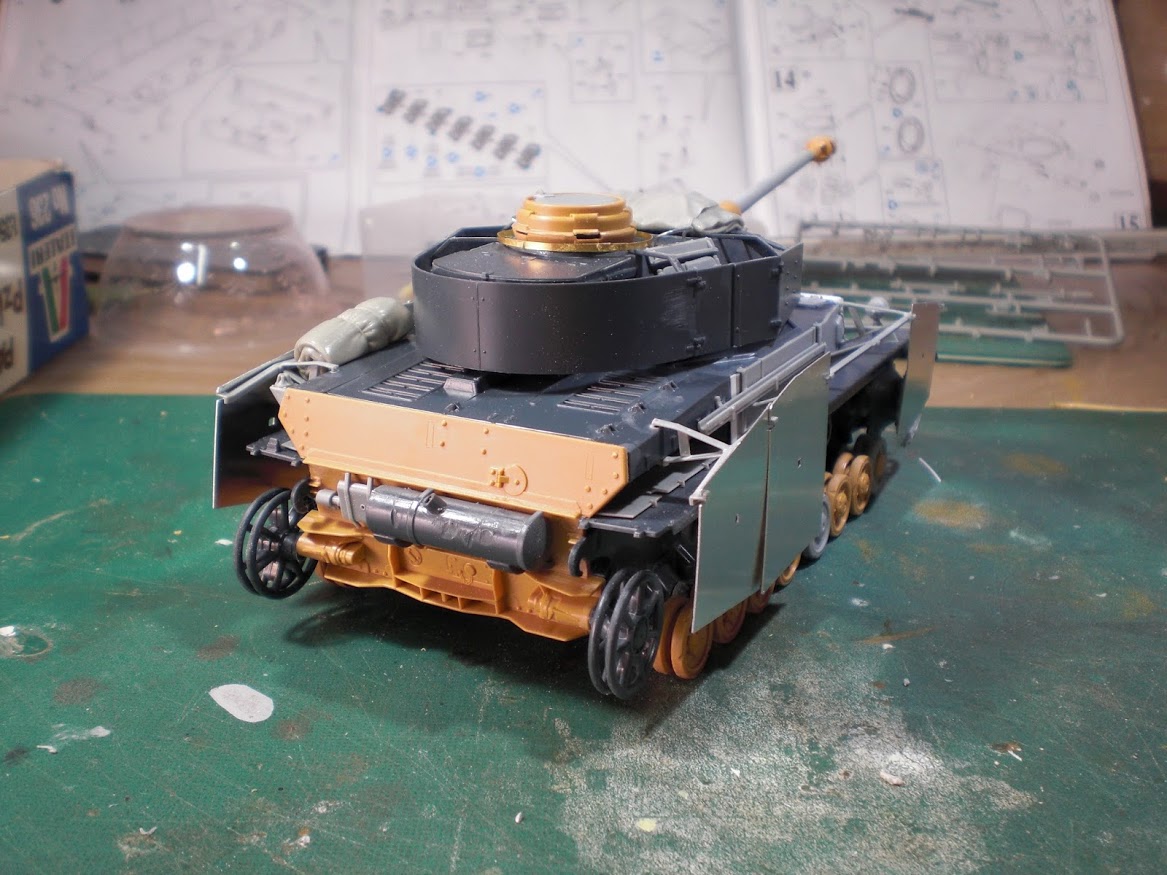
I have done a bit more work today, I think the turret is finished now and I can move on to the hull.


Thanks for wathcing
Christos
Sun is shinning
CA Armour Models on FB
Texas, United States
Joined: June 12, 2007
KitMaker: 1,866 posts
Armorama: 1,696 posts
Posted: Tuesday, June 30, 2015 - 09:59 PM UTC
Dodecanese, Greece / Ελλάδα
Joined: April 04, 2015
KitMaker: 195 posts
Armorama: 191 posts
Posted: Tuesday, June 30, 2015 - 10:09 PM UTC
Thank you Russell!
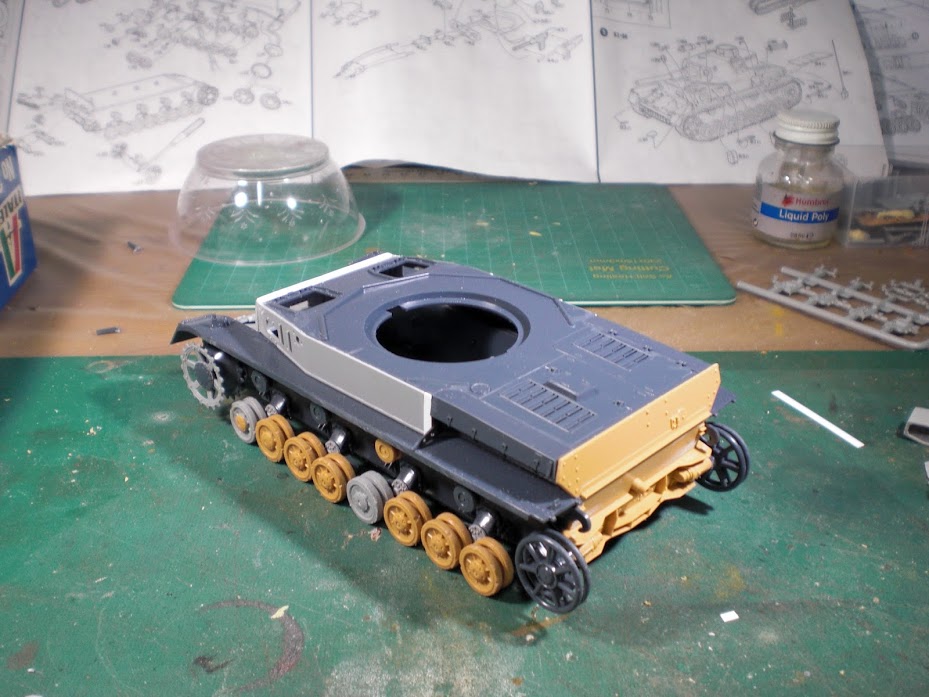
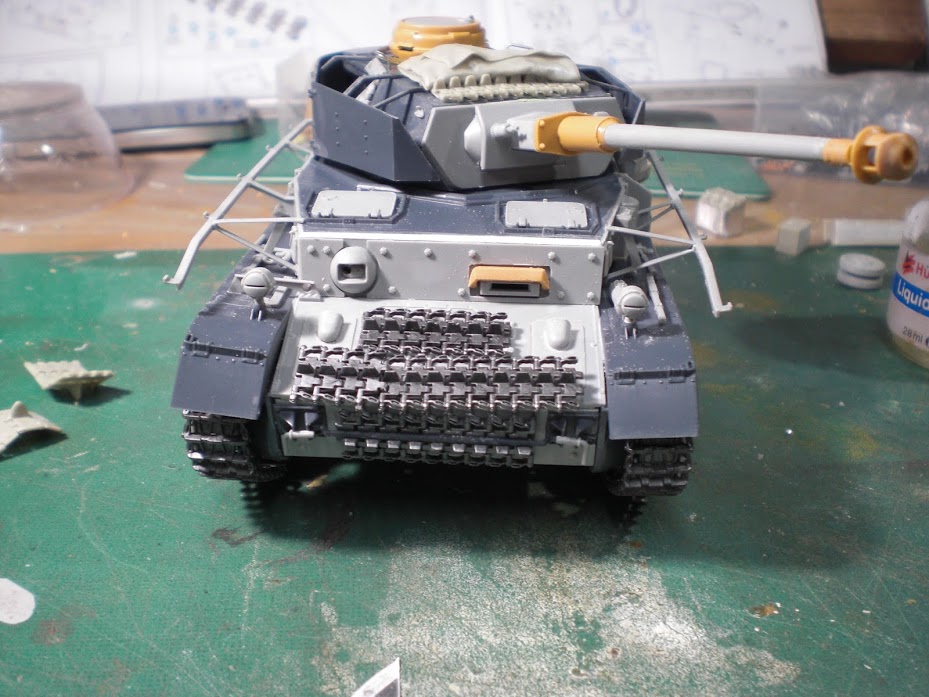
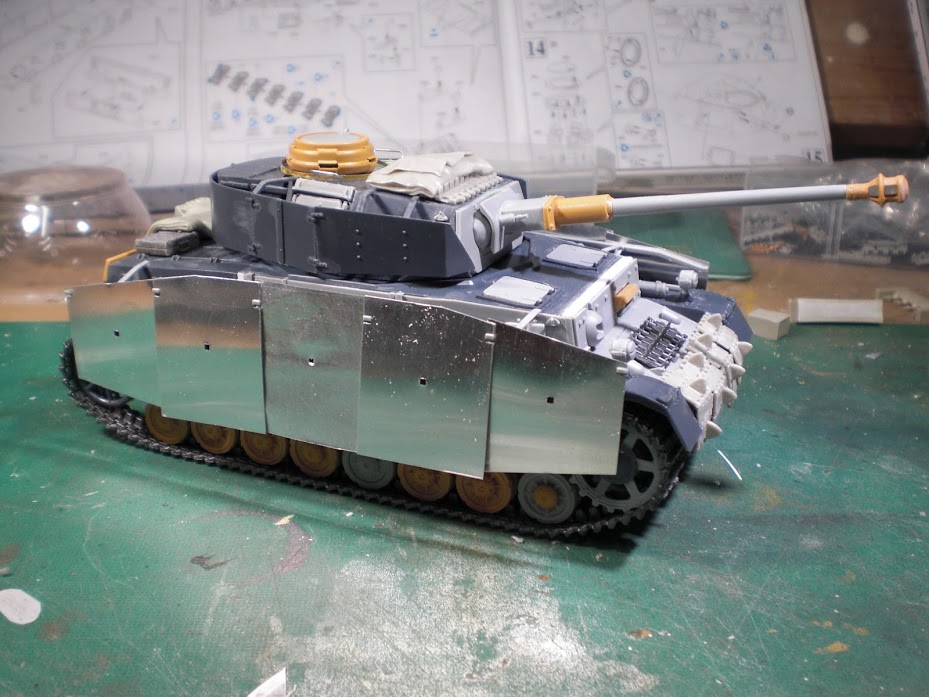
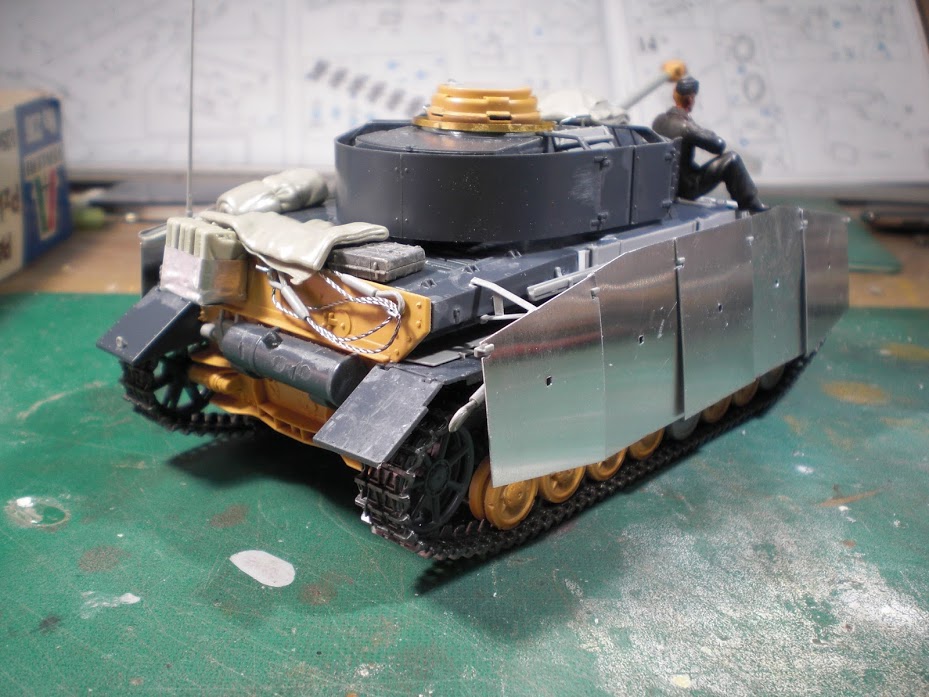
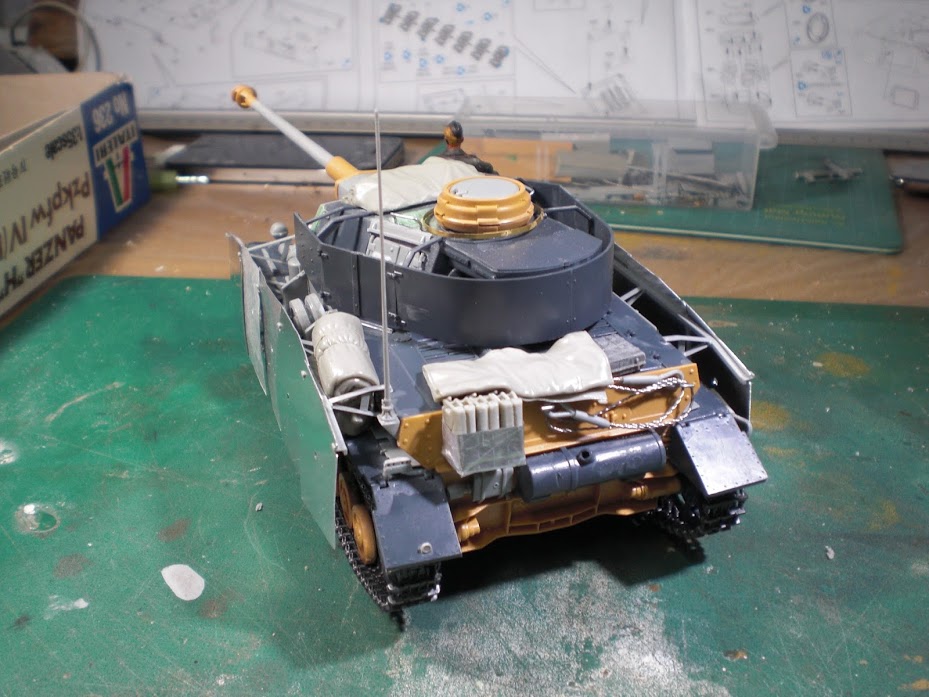
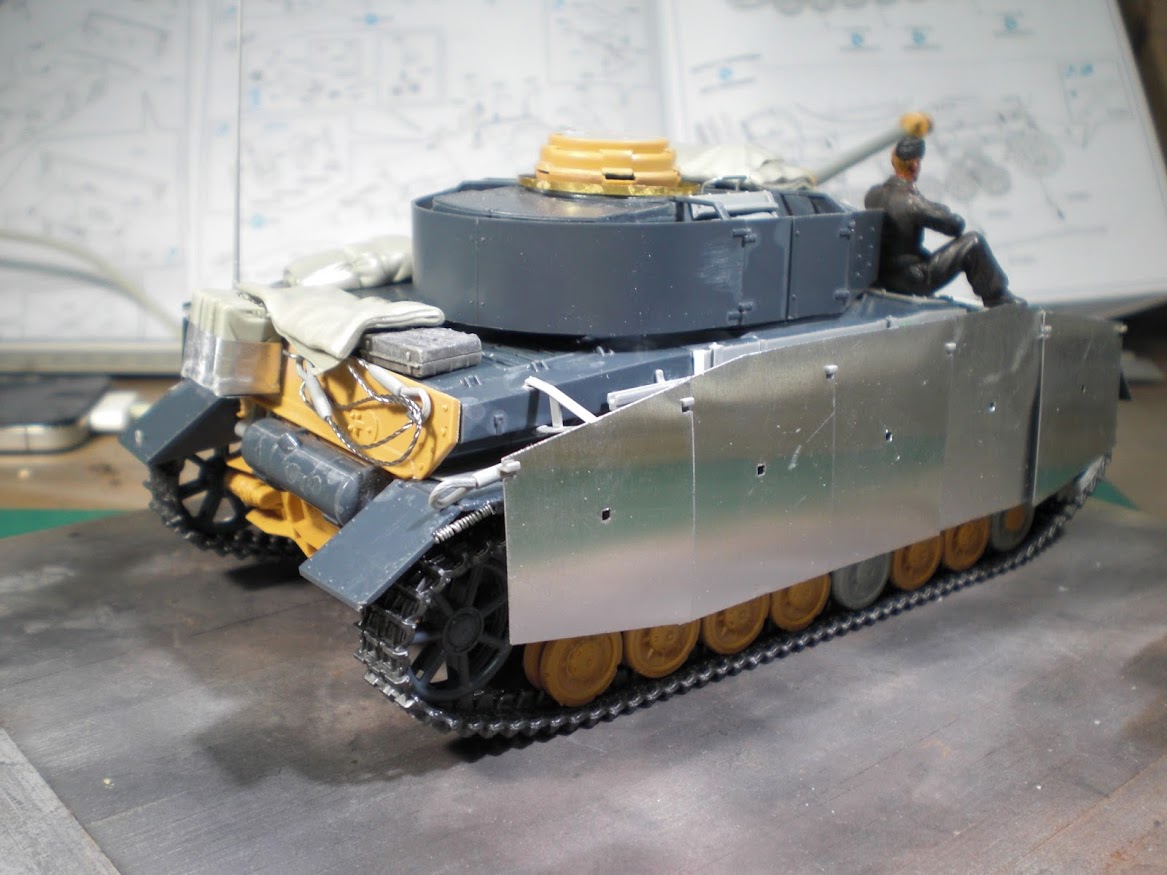
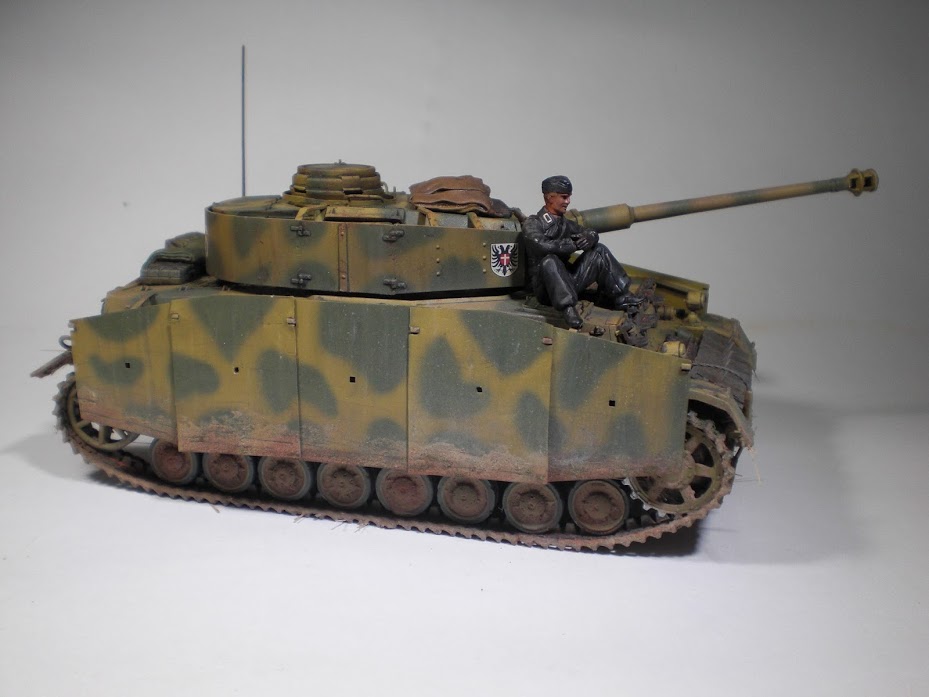
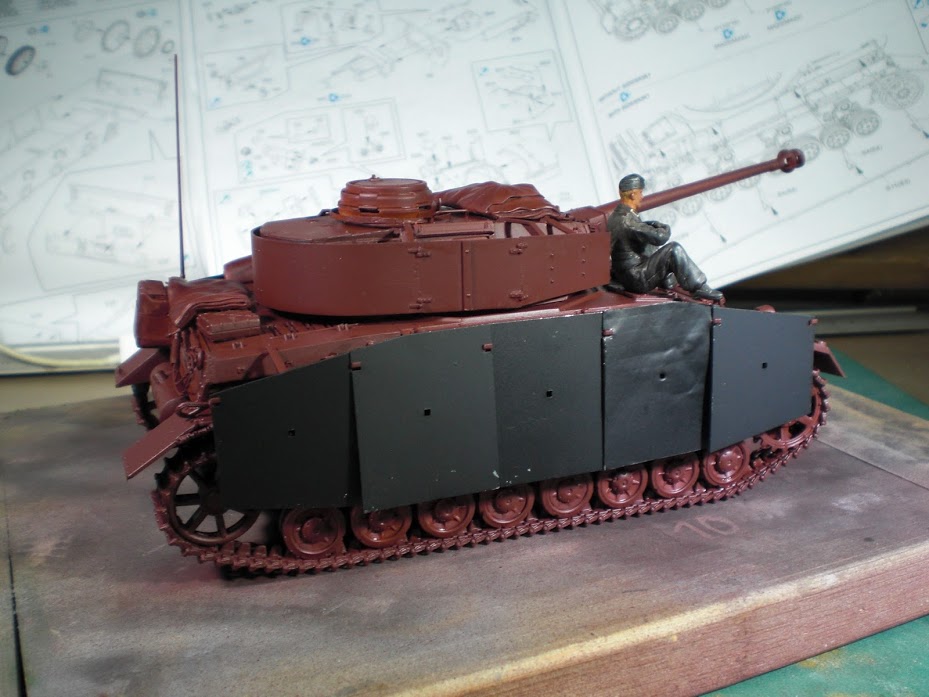
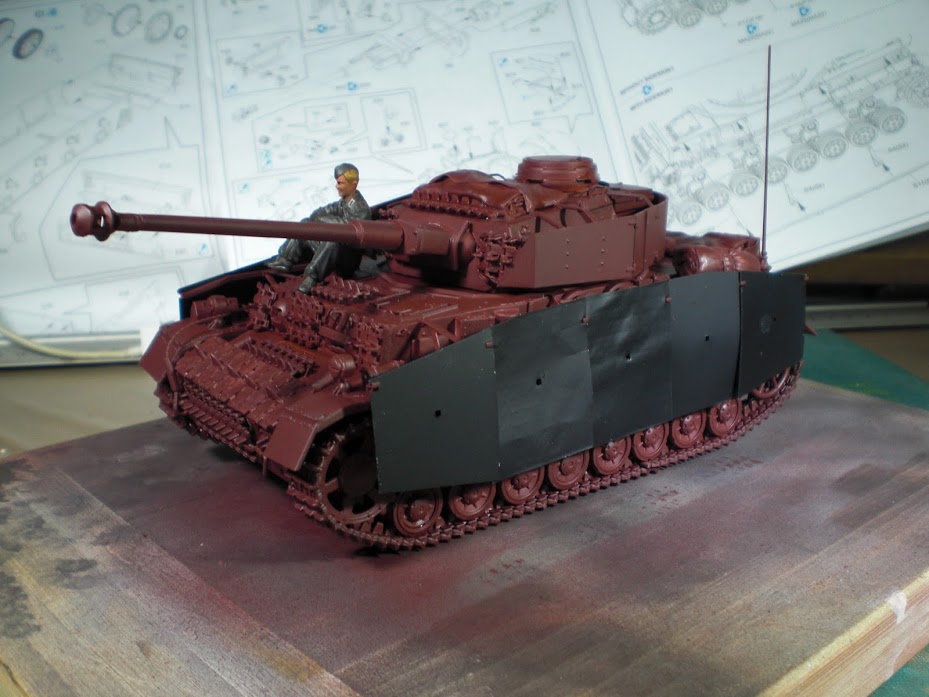
Schurzen are on!
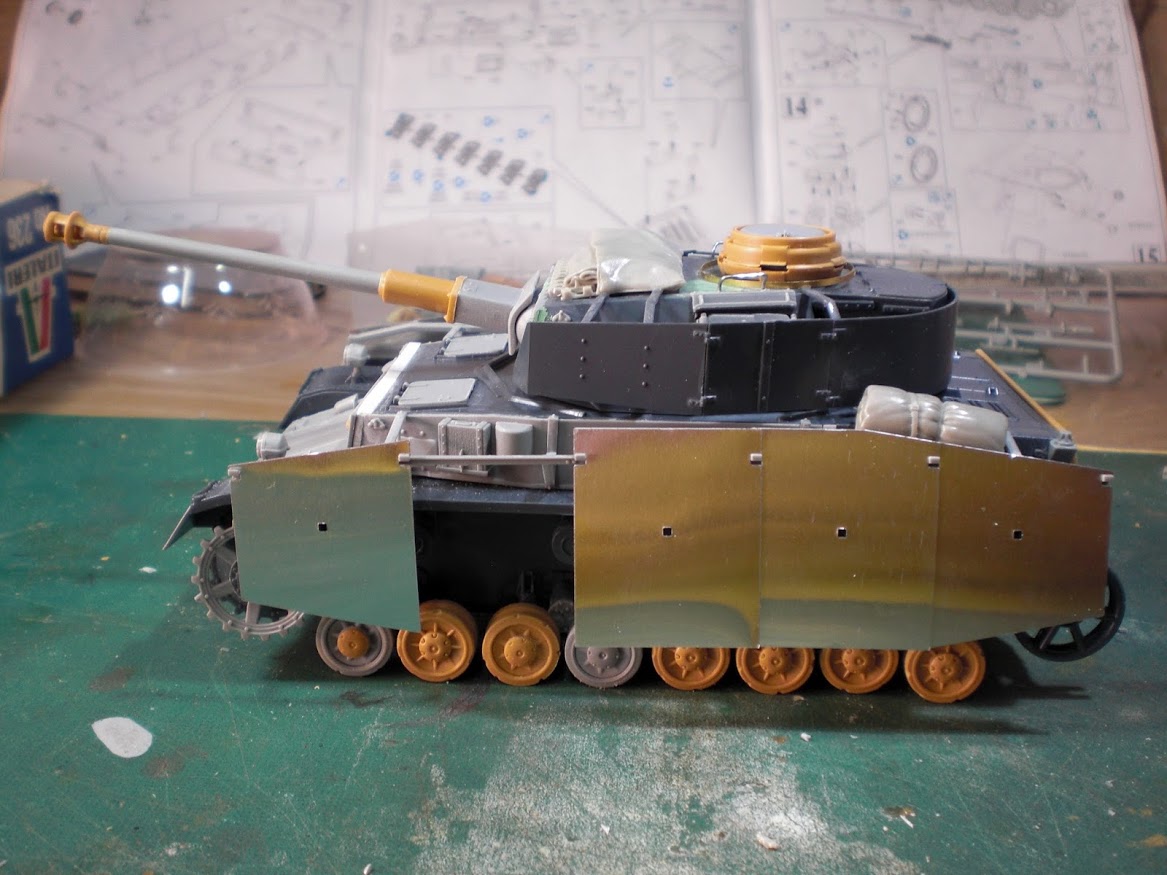
Thanks for watching!
Christos
Sun is shinning
CA Armour Models on FB
Dodecanese, Greece / Ελλάδα
Joined: April 04, 2015
KitMaker: 195 posts
Armorama: 191 posts
Posted: Saturday, July 04, 2015 - 12:02 AM UTC
Sun is shinning
CA Armour Models on FB
Removed by original poster on 05/13/19 - 23:21:10 (GMT).
Dodecanese, Greece / Ελλάδα
Joined: April 04, 2015
KitMaker: 195 posts
Armorama: 191 posts
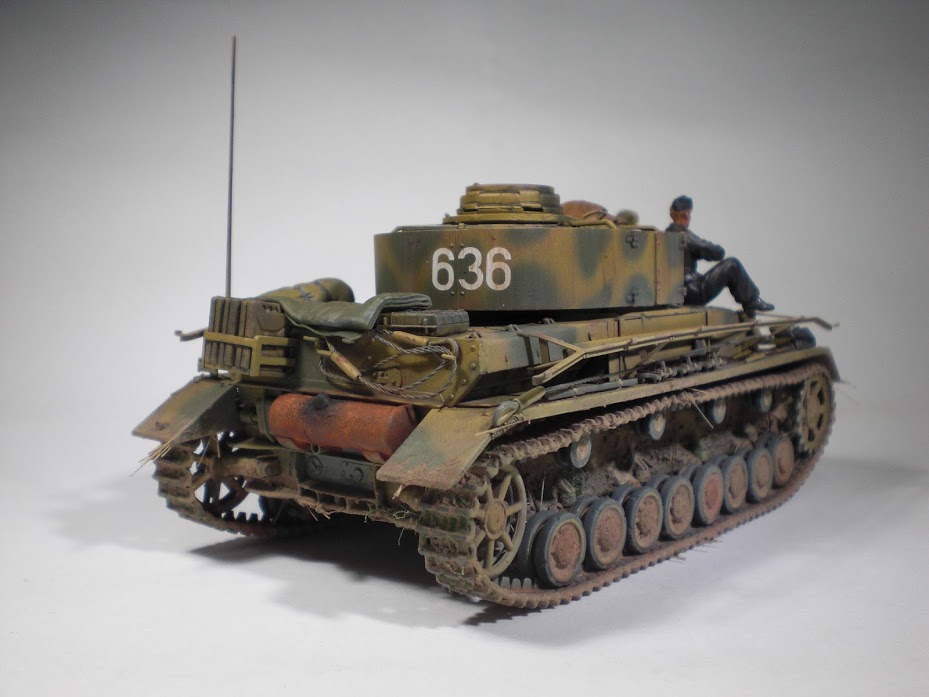
Posted: Sunday, July 05, 2015 - 10:26 AM UTC
Thank you Matt, glad you like it so far!
I am a bit undecided on the T-34 tracks, I might need to reorganise them as in the following photo:
,_Panzer_IV.jpg)
It is a later variant and taken a year after the Battle of Kursk, but still I am intrigued to add the T-34 tracks in a similar fashion. On the other hand, it might not be historically accurate, need to dig deeper!
Thanks for watching, good morning!
Sun is shinning
CA Armour Models on FB
Dodecanese, Greece / Ελλάδα
Joined: April 04, 2015
KitMaker: 195 posts
Armorama: 191 posts
Posted: Sunday, July 05, 2015 - 11:01 PM UTC
Sun is shinning
CA Armour Models on FB
Arkansas, United States
Joined: June 29, 2009
KitMaker: 11,610 posts
Armorama: 7,843 posts
Posted: Monday, July 06, 2015 - 02:35 AM UTC
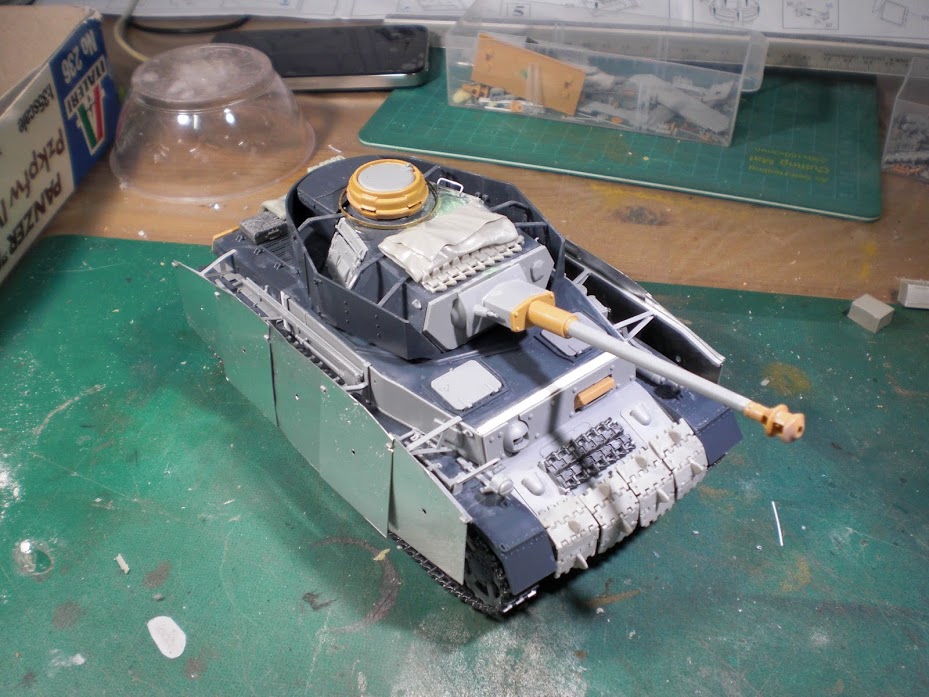
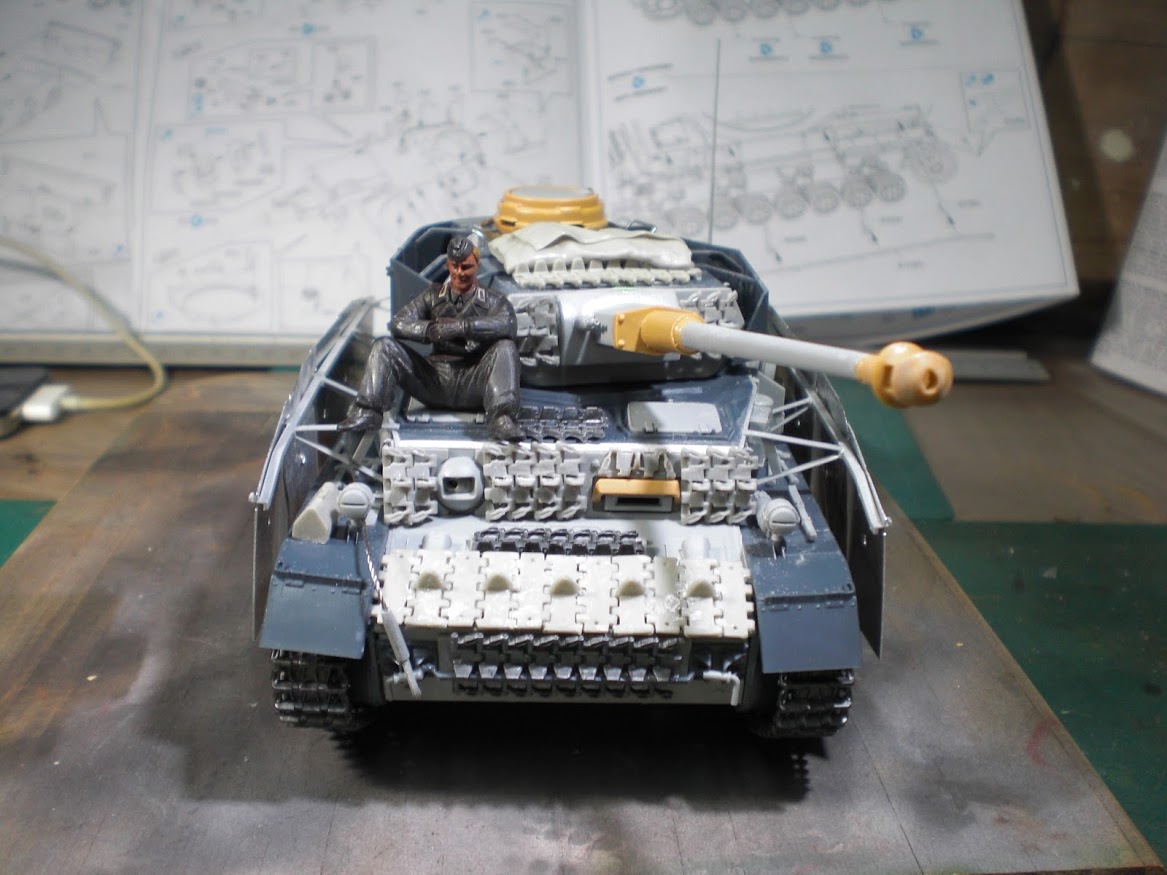
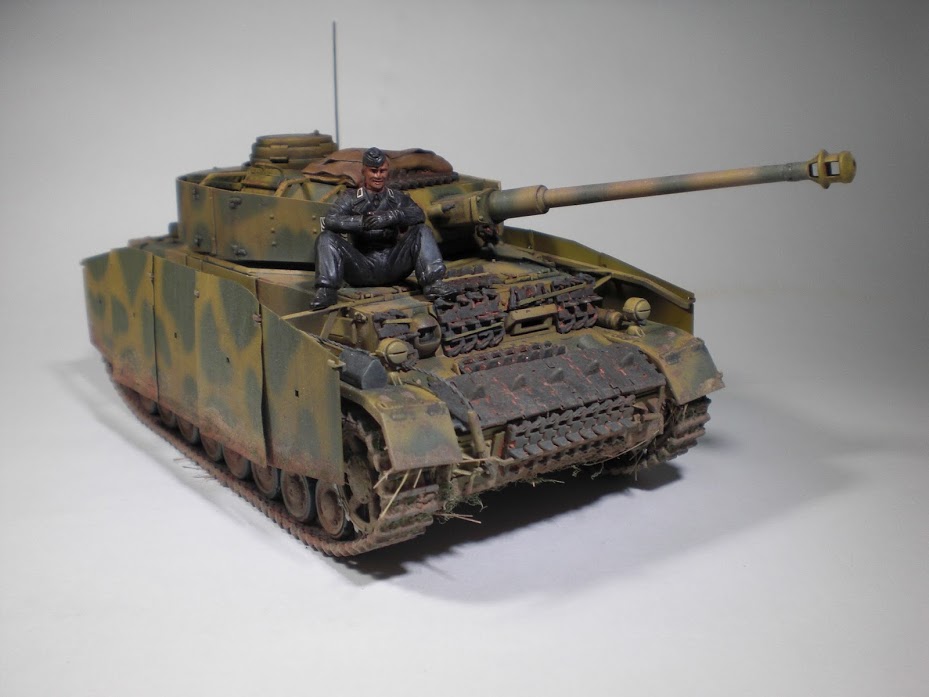
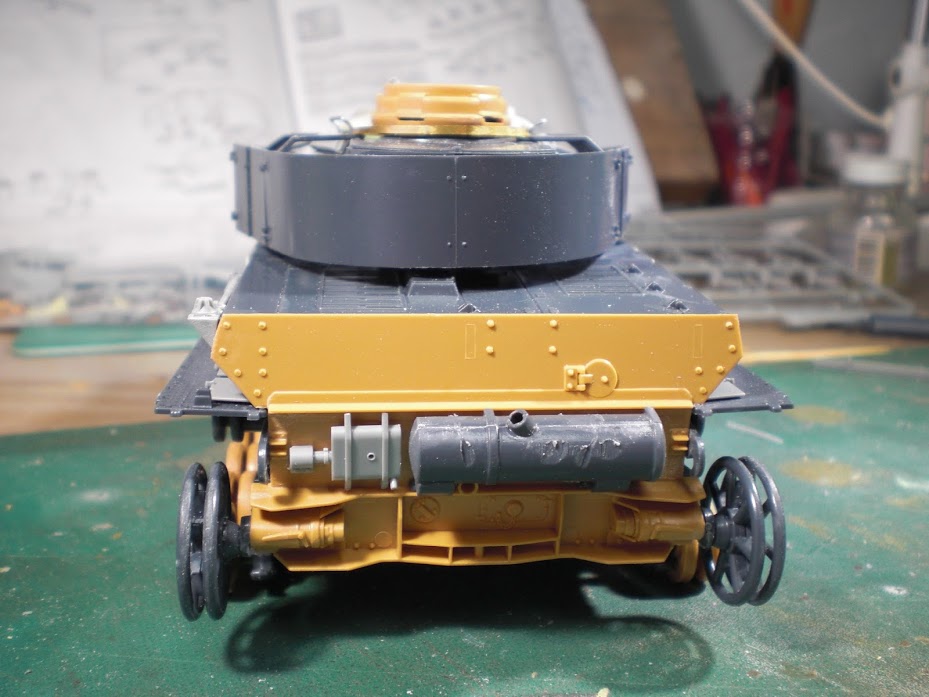
Amazing kit bash! It looks as though the turret armor will collide, with the stowage on the engine deck. Also, you may want to align the fenders. If they sag, it should be down.
Ideals are peaceful. History is violent.
Dodecanese, Greece / Ελλάδα
Joined: April 04, 2015
KitMaker: 195 posts
Armorama: 191 posts
Posted: Monday, July 06, 2015 - 04:53 AM UTC
Thank you very much for the good word!
You are right in both instances and they are down to poor planning.
As far as the side stowage, I think I can get away with it, as many tanks were loaded with stuff that were getting in the way of something else when they were moving towards another area.
I should have done a better job on the fenders, lets just say they are not sagged, but bent upwards!

Sun is shinning
CA Armour Models on FB
Dodecanese, Greece / Ελλάδα
Joined: April 04, 2015
KitMaker: 195 posts
Armorama: 191 posts
Posted: Monday, July 06, 2015 - 11:23 PM UTC
Sun is shinning
CA Armour Models on FB

#041
Kobenhavn, Denmark
Joined: July 20, 2006
KitMaker: 10,069 posts
Armorama: 4,677 posts
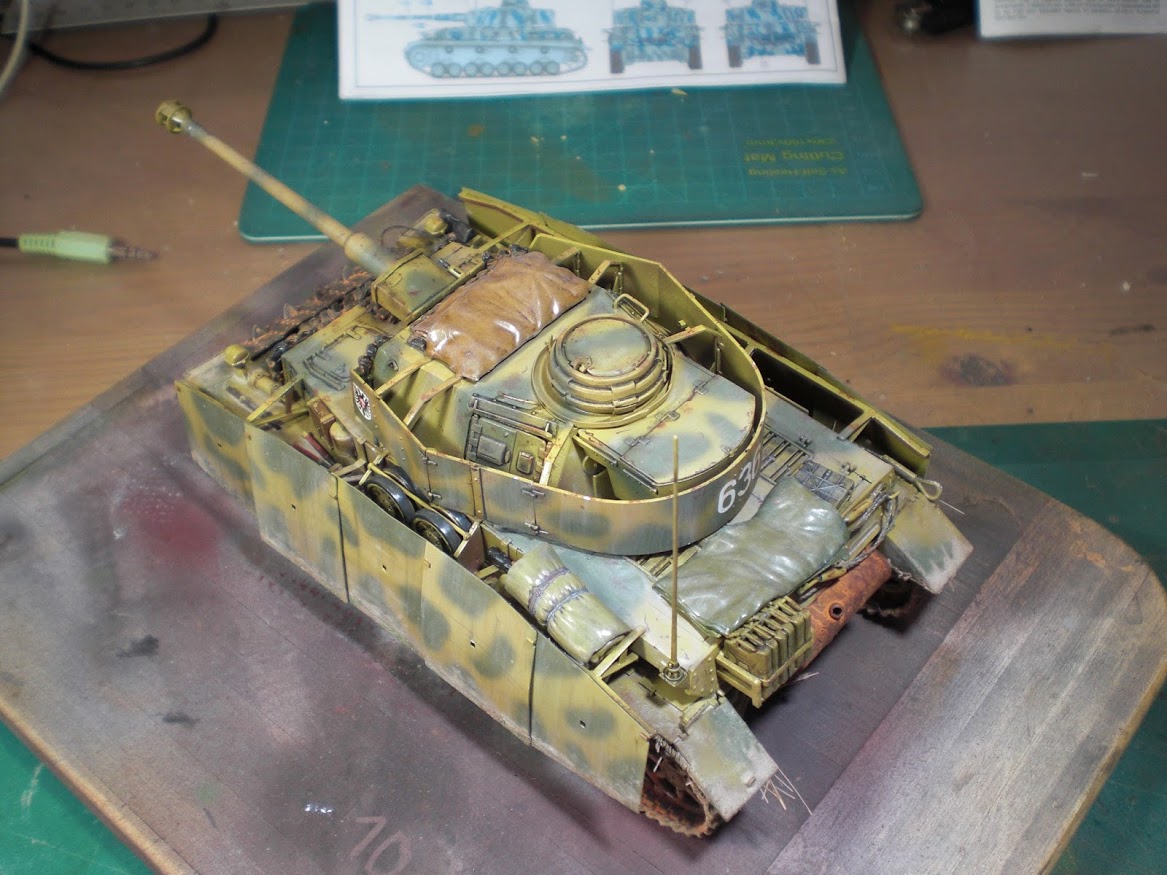
Posted: Tuesday, July 07, 2015 - 03:22 PM UTC
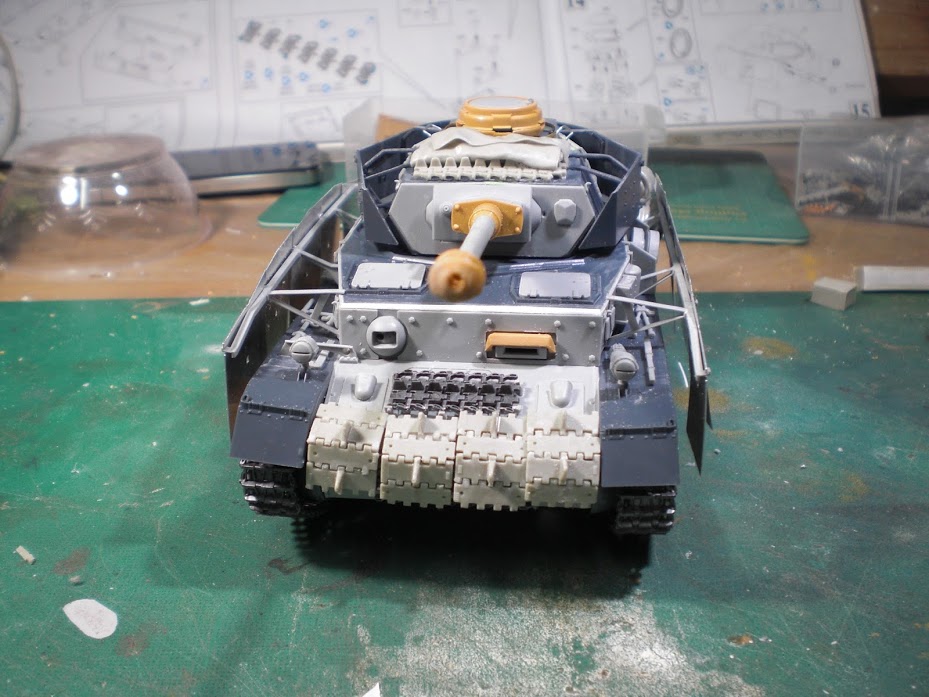
Looks amazing. Really nice details.
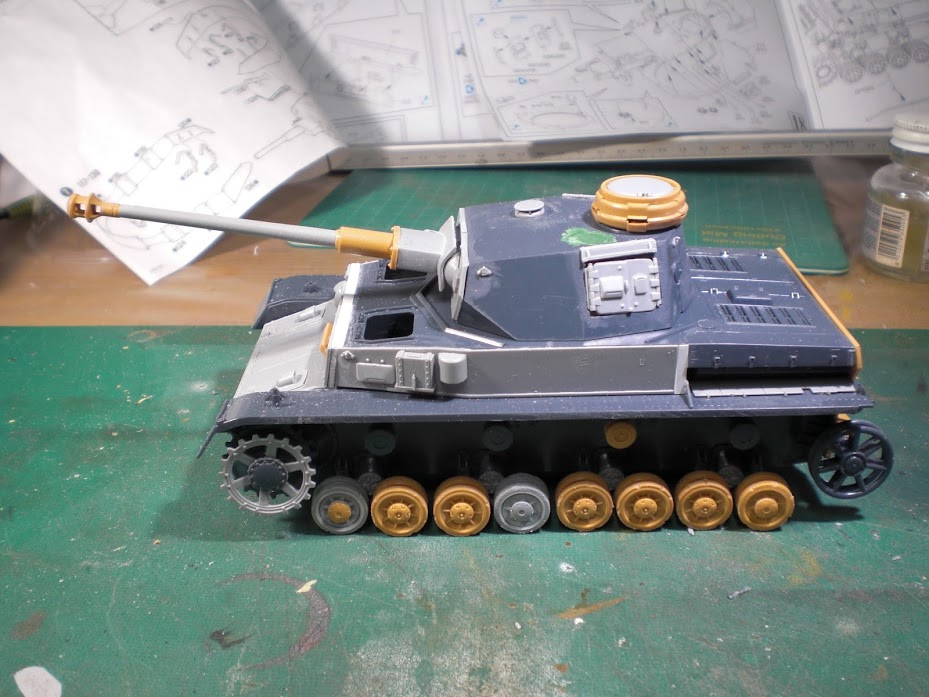
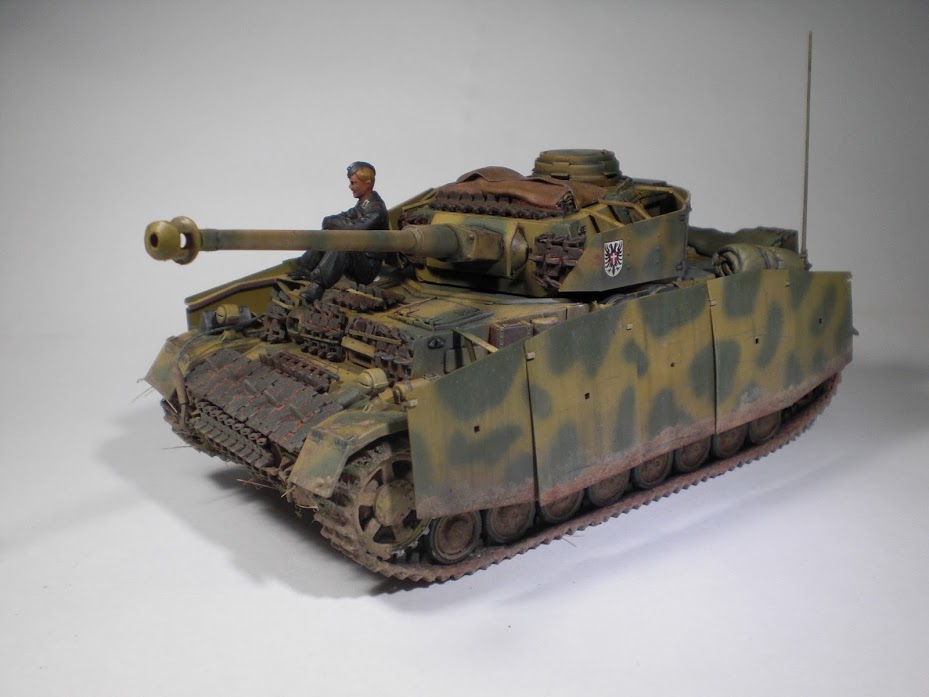
Love the different look of the schutzen. Often they look very different in pictures making it obvious the schutzen were often a mix and match of different materials. You captured that look very well here.
Looking forward to see it with paint!
Campaign'oholic - 252+ campaigns completed
Dodecanese, Greece / Ελλάδα
Joined: April 04, 2015
KitMaker: 195 posts
Armorama: 191 posts
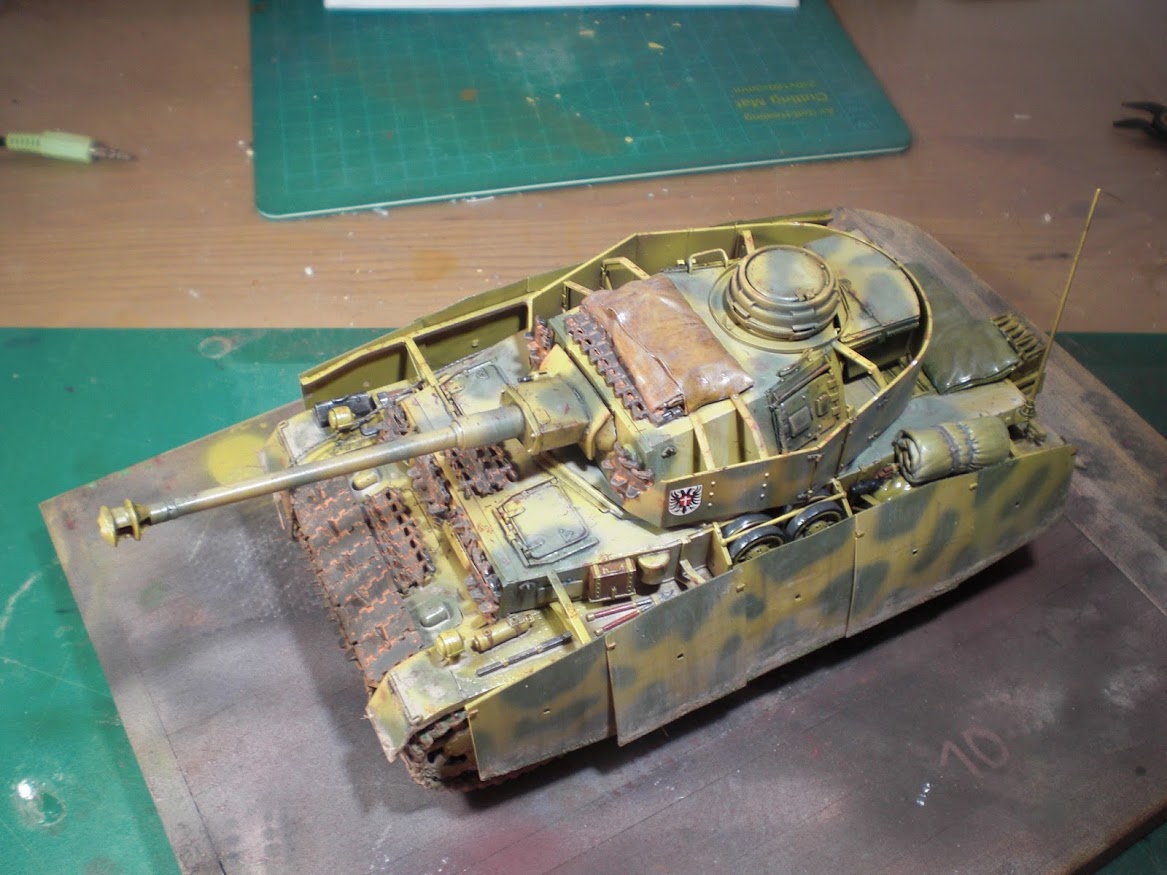
Posted: Tuesday, July 07, 2015 - 09:45 PM UTC
Hello Jesper,
Thank you very much for the good word, glad you like it so far!
It requires a couple more touches to fix some minor issues, but after that I think I can proceed with priming and painting!
Thanks for watching!
Christos
Sun is shinning
CA Armour Models on FB
Dodecanese, Greece / Ελλάδα
Joined: April 04, 2015
KitMaker: 195 posts
Armorama: 191 posts
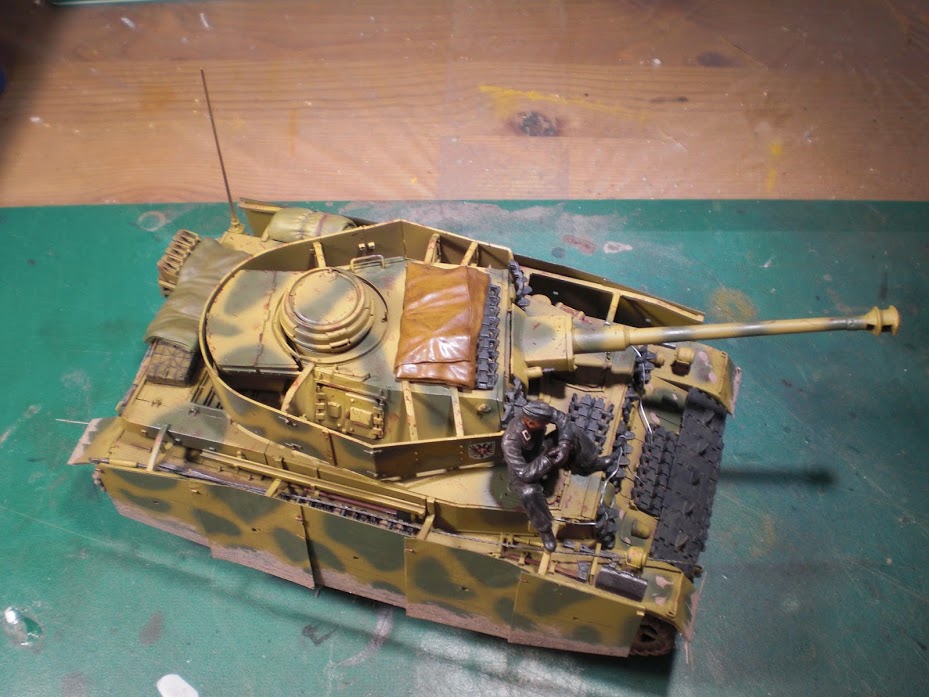
Posted: Thursday, July 09, 2015 - 11:58 PM UTC
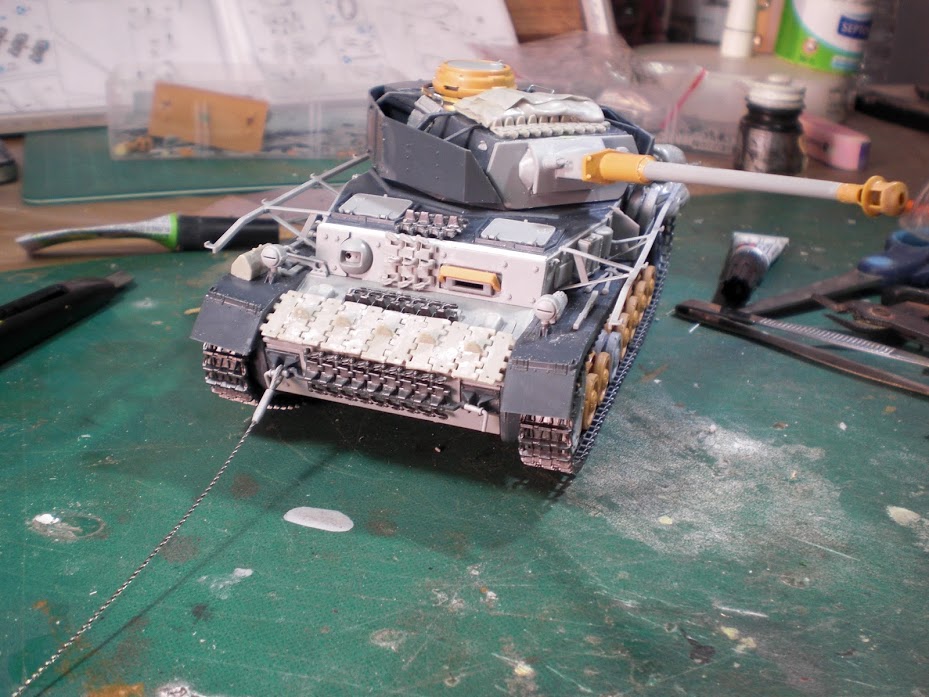
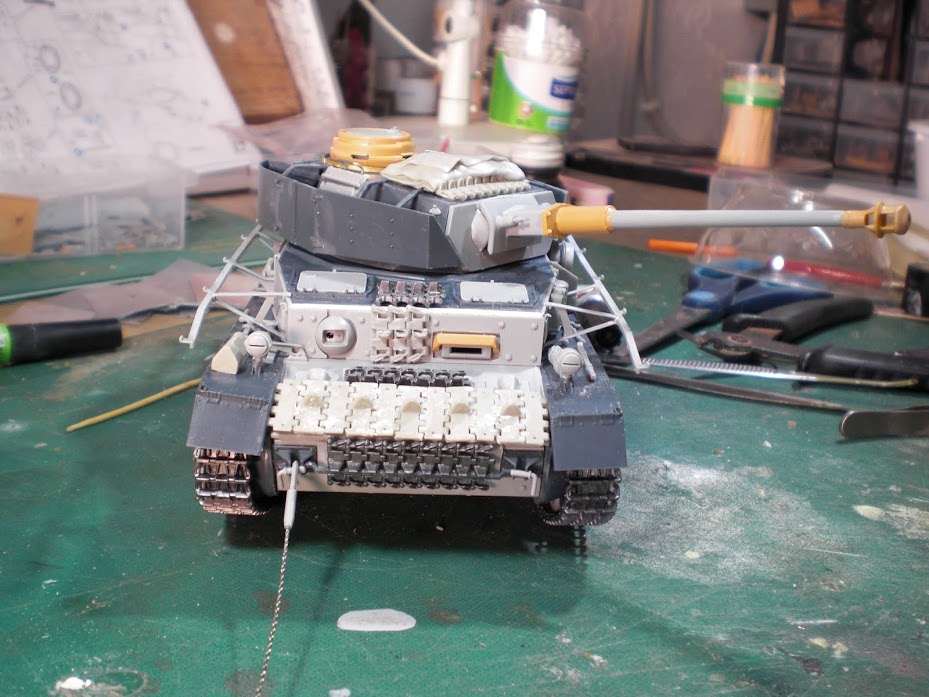
Primed and one step closer to base coat!


Thanks for watching
Christos
Sun is shinning
CA Armour Models on FB
Dodecanese, Greece / Ελλάδα
Joined: April 04, 2015
KitMaker: 195 posts
Armorama: 191 posts
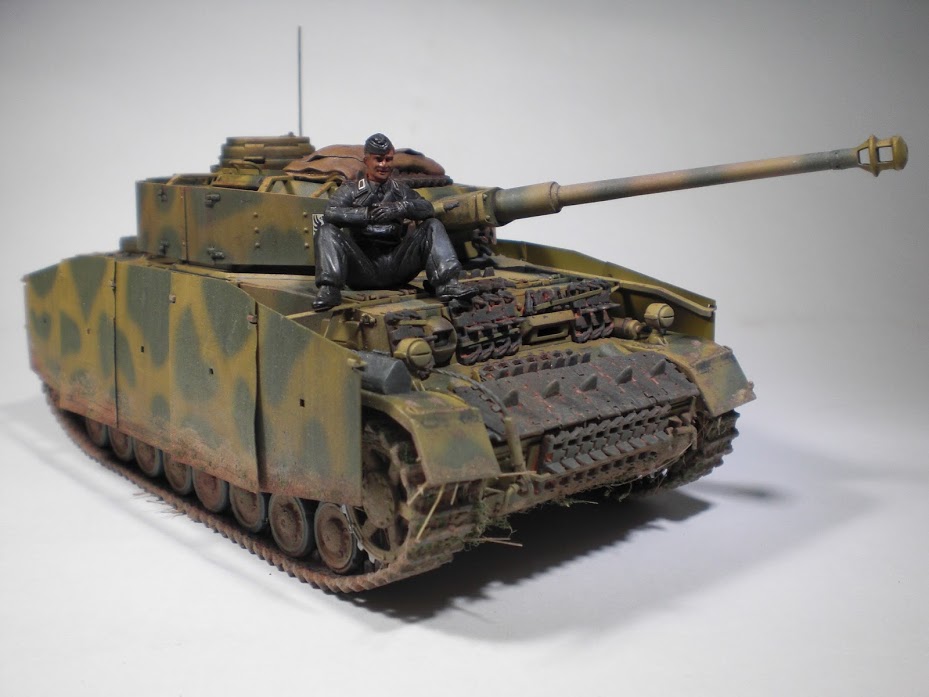
Posted: Sunday, July 12, 2015 - 11:52 PM UTC
Sun is shinning
CA Armour Models on FB
Mendoza, Argentina
Joined: November 13, 2005
KitMaker: 561 posts
Armorama: 553 posts
Posted: Monday, July 13, 2015 - 01:04 AM UTC
WOW impressive building skills! I wouldn't have the patience to do such a nice franken-job!
I really like it!
Congrats on a super job! And I am sure you had such a nice quality time building it... after all that's the whole point of htis hobby!
Pablo
Dodecanese, Greece / Ελλάδα
Joined: April 04, 2015
KitMaker: 195 posts
Armorama: 191 posts
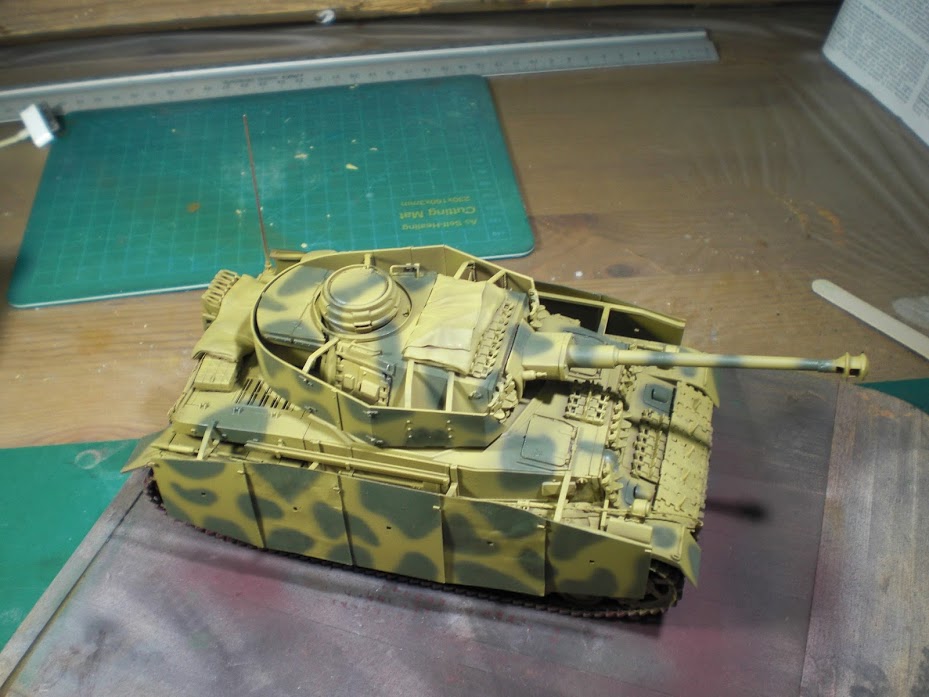
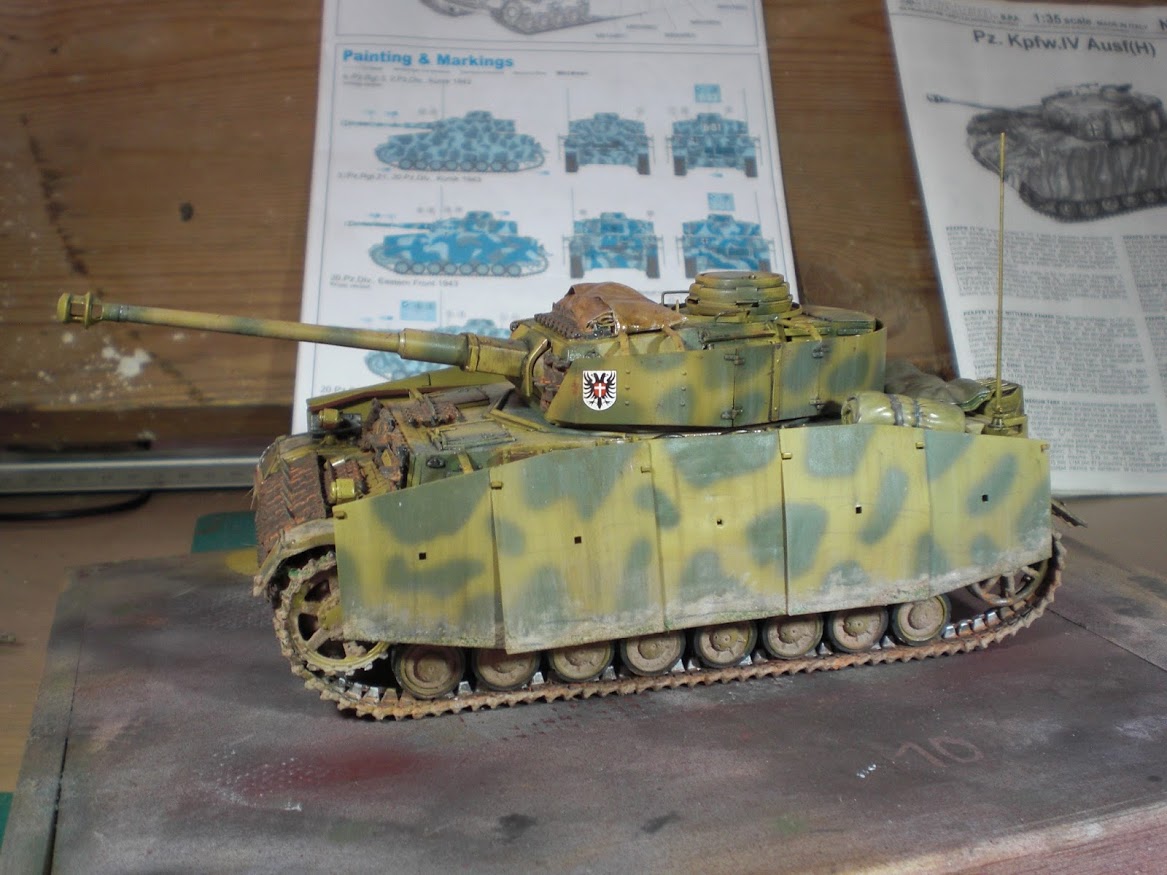
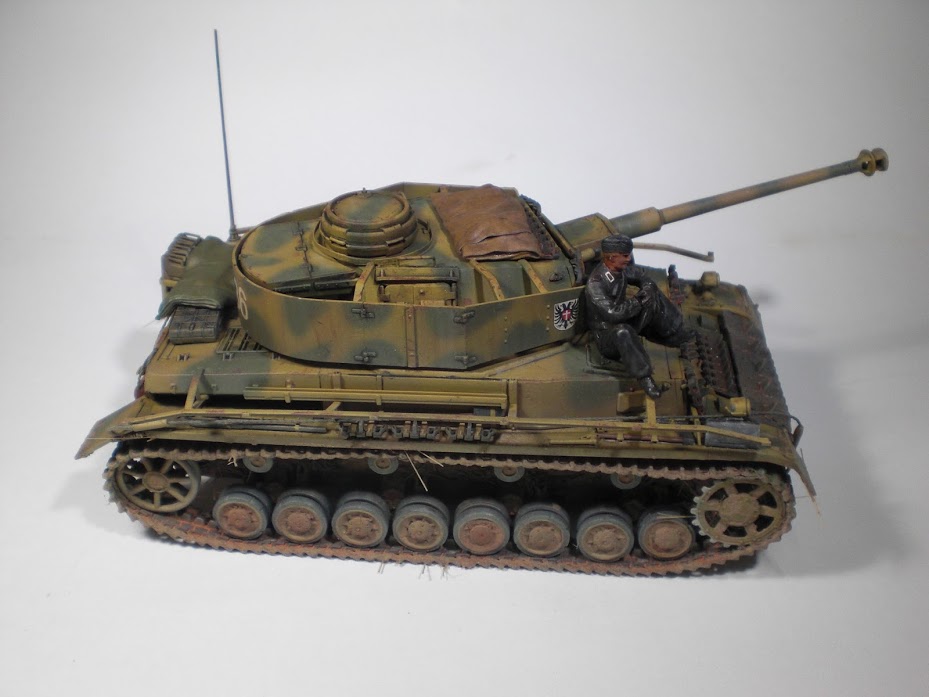
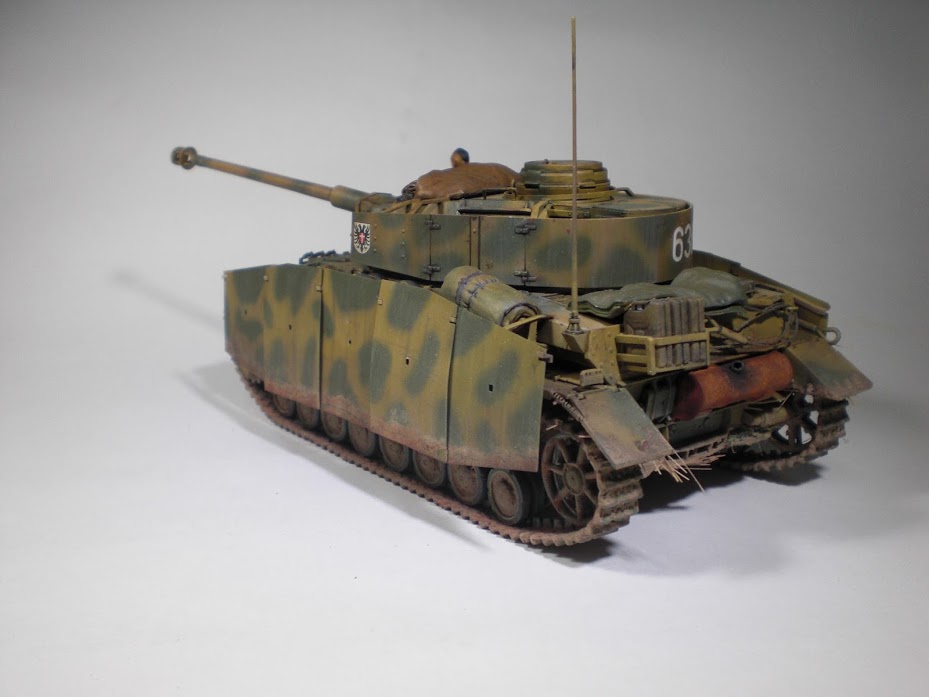
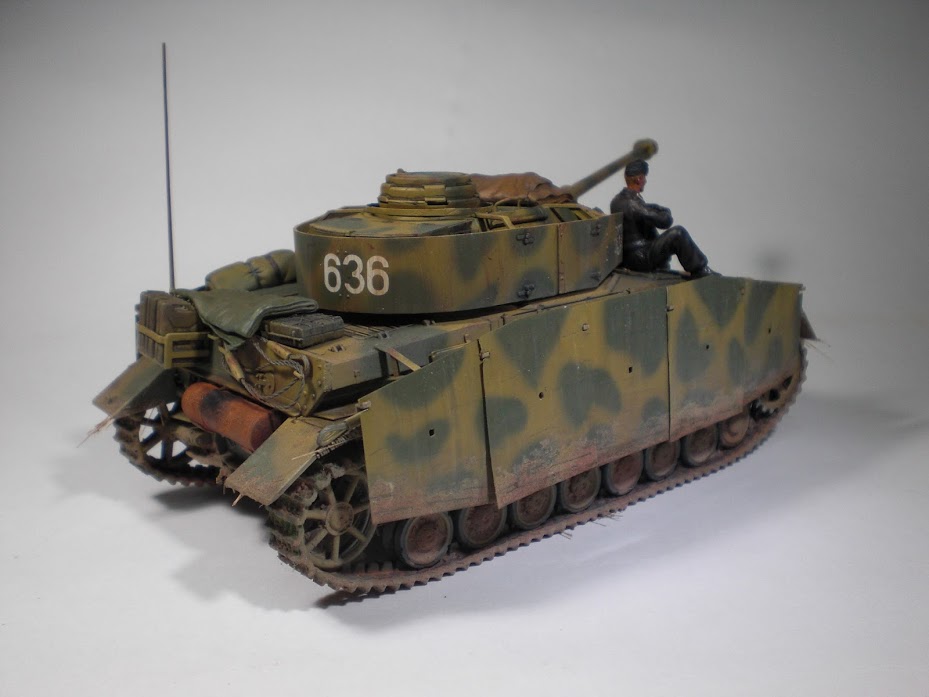
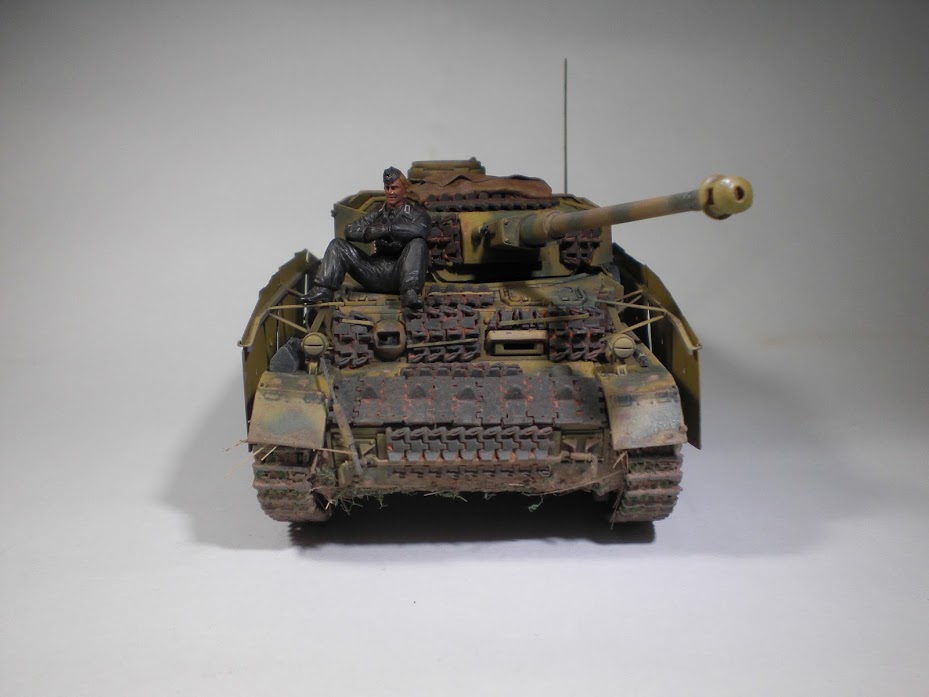
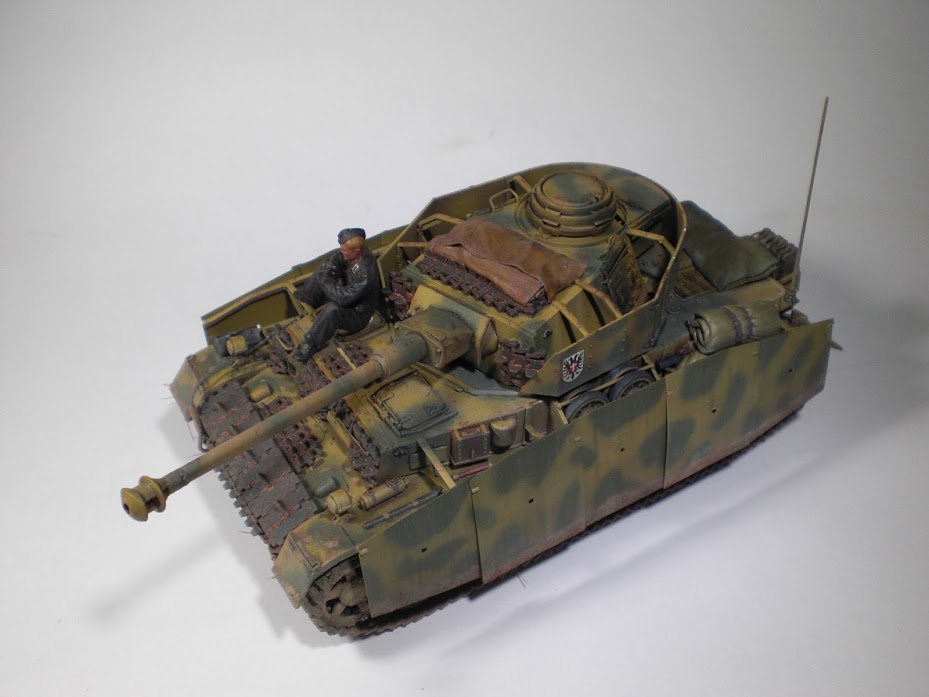
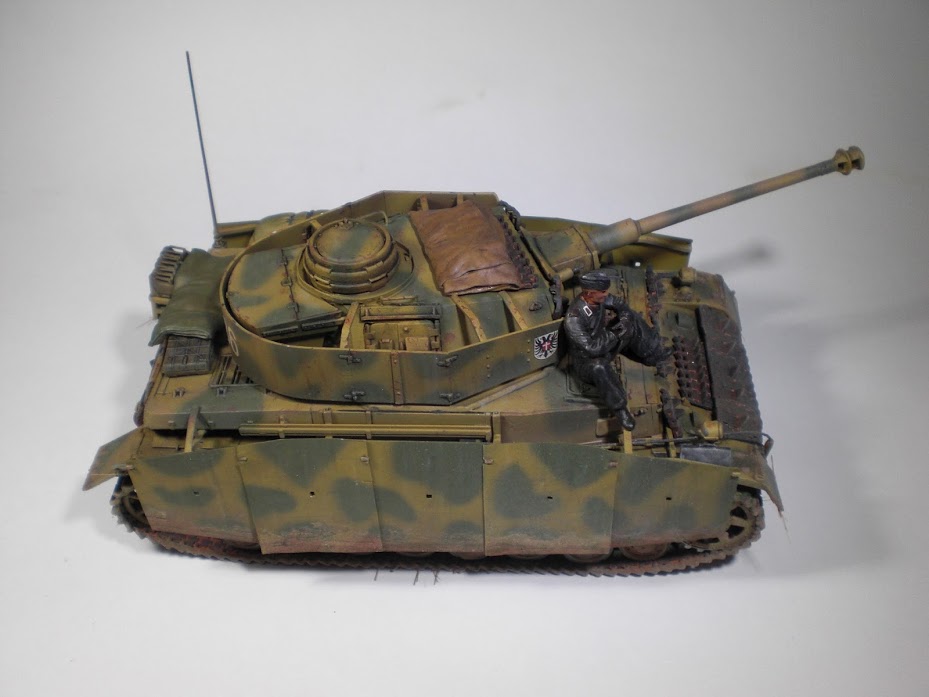
Posted: Monday, July 13, 2015 - 04:14 AM UTC
Pablo,
Thank you very much for the good word, means a lot!
To be honest, I could and should have been more patient building this and had I planned this better, I think I would have done a better job.
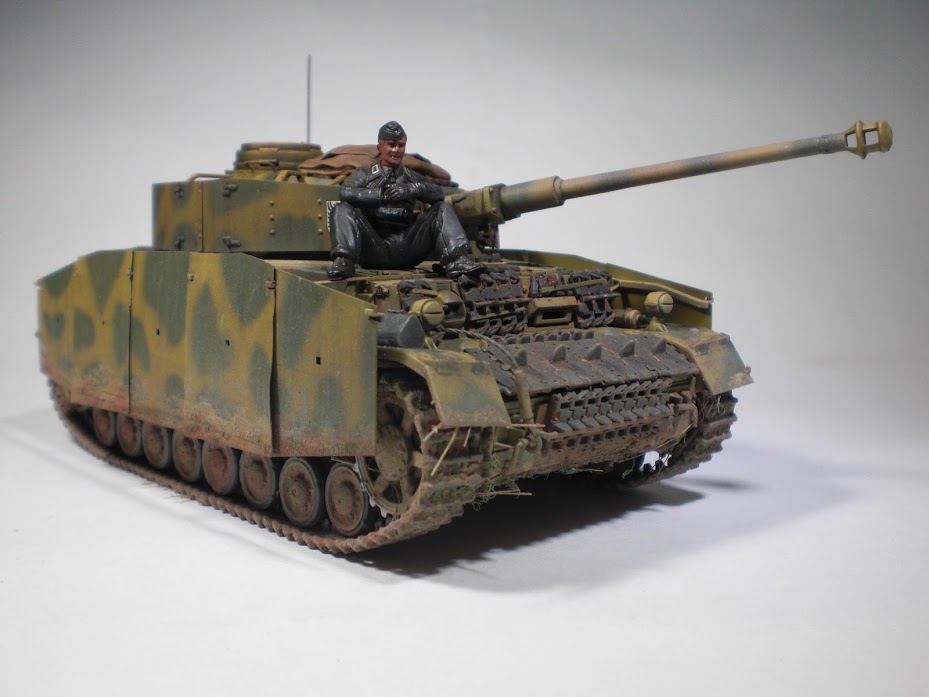
I am glad the paint job has turned out nice, I was a bit anxious, but it looks like the tanks in my reference photos, so all good in the hood!
Catch you later, thanks for watching
Sun is shinning
CA Armour Models on FB
Dodecanese, Greece / Ελλάδα
Joined: April 04, 2015
KitMaker: 195 posts
Armorama: 191 posts
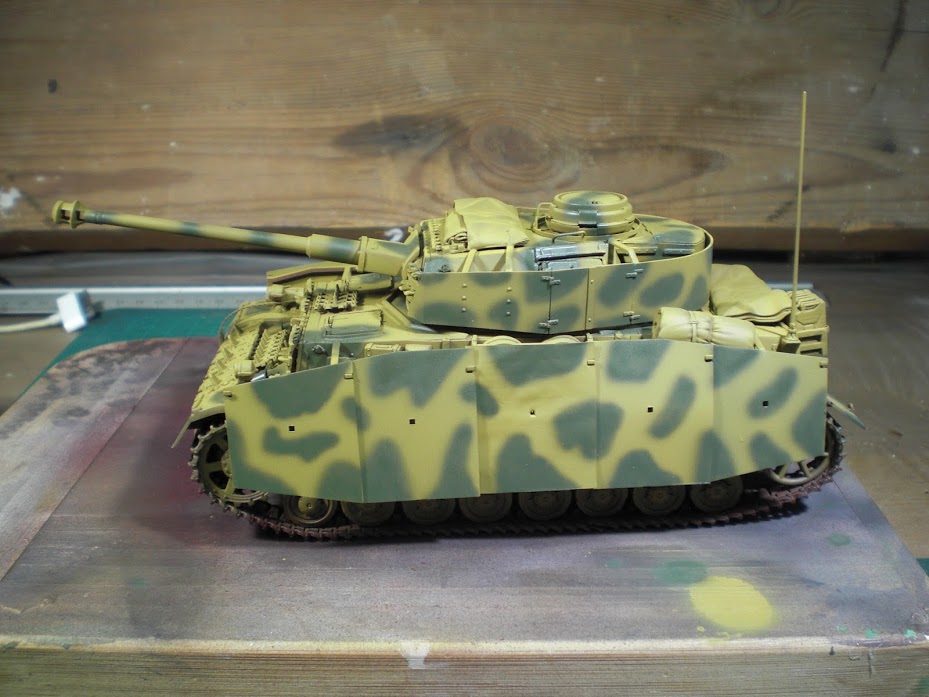
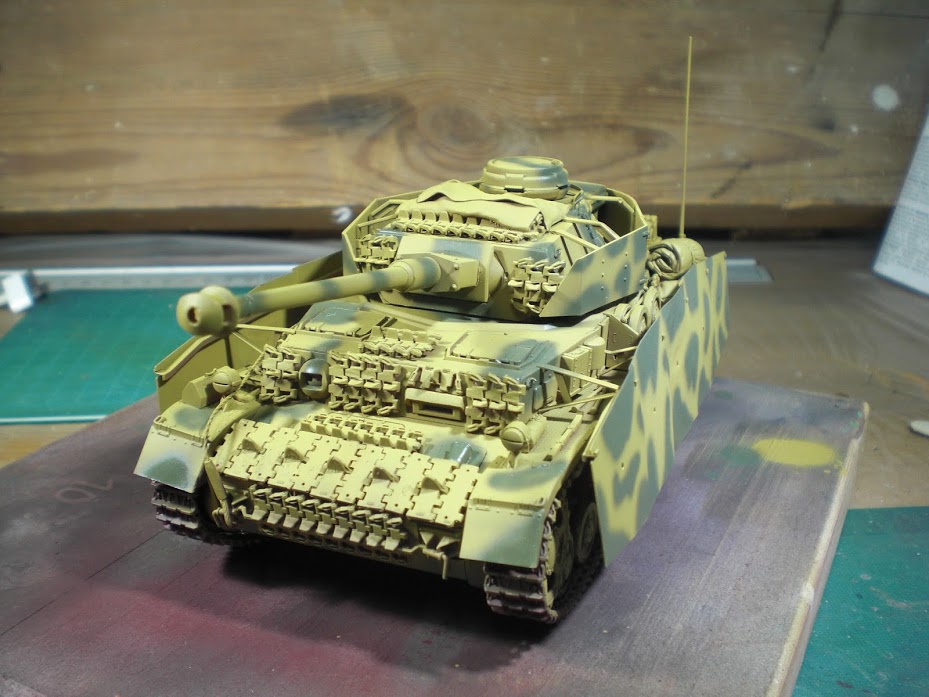
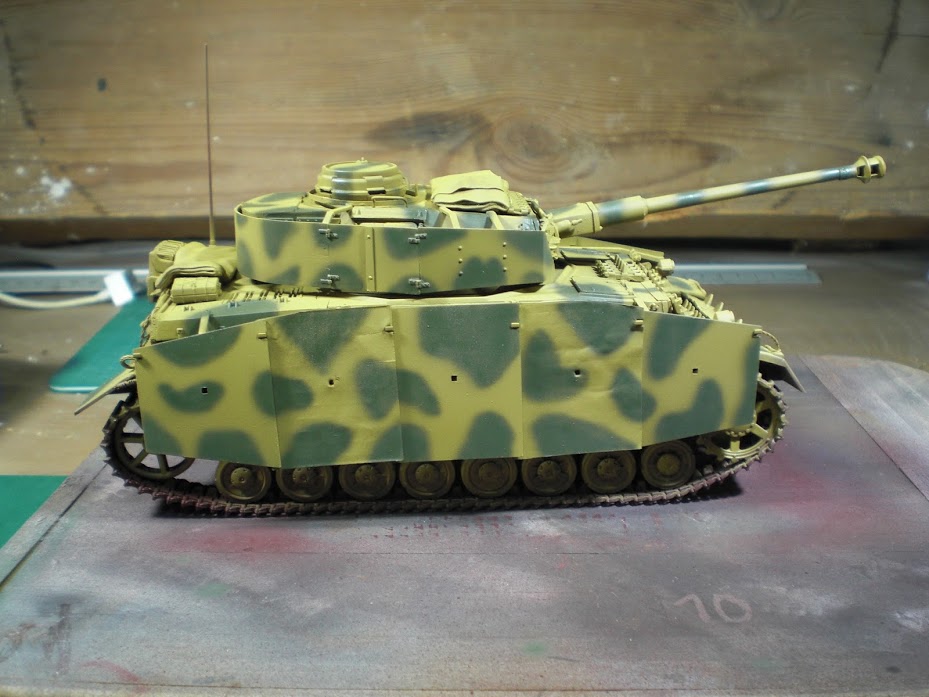
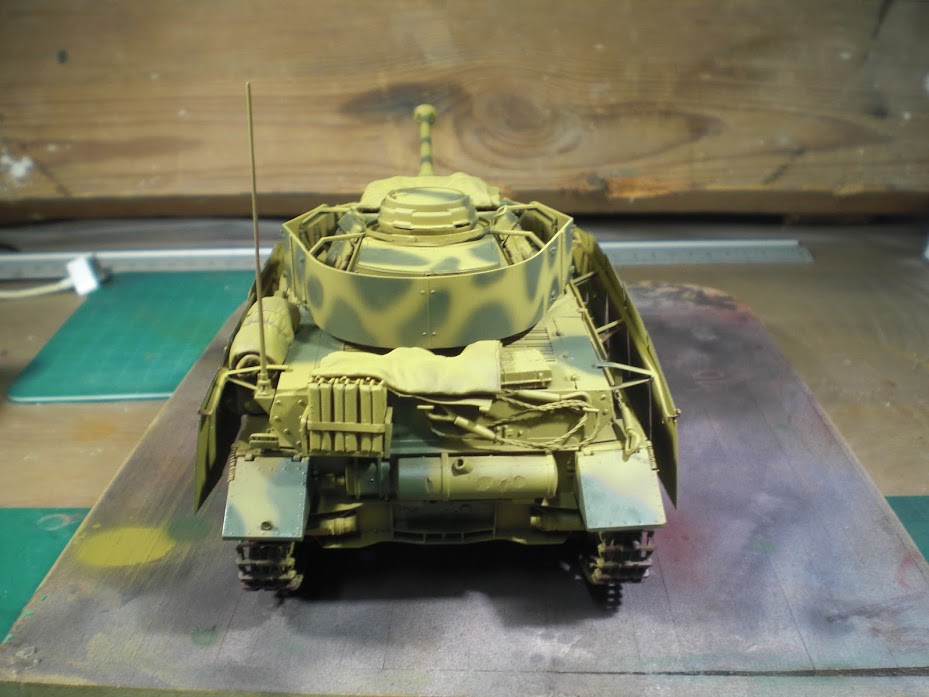
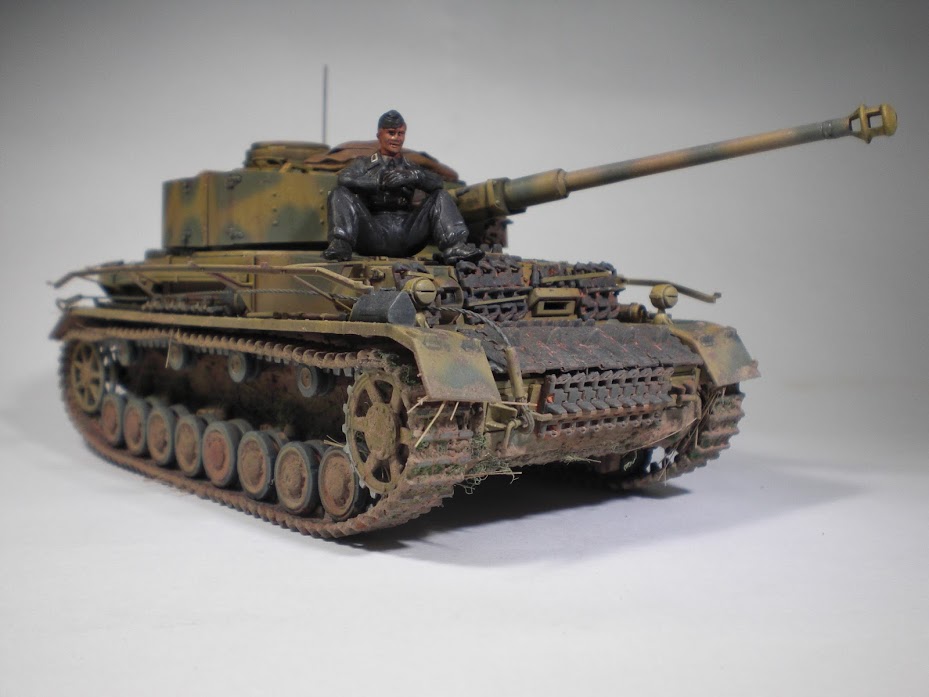
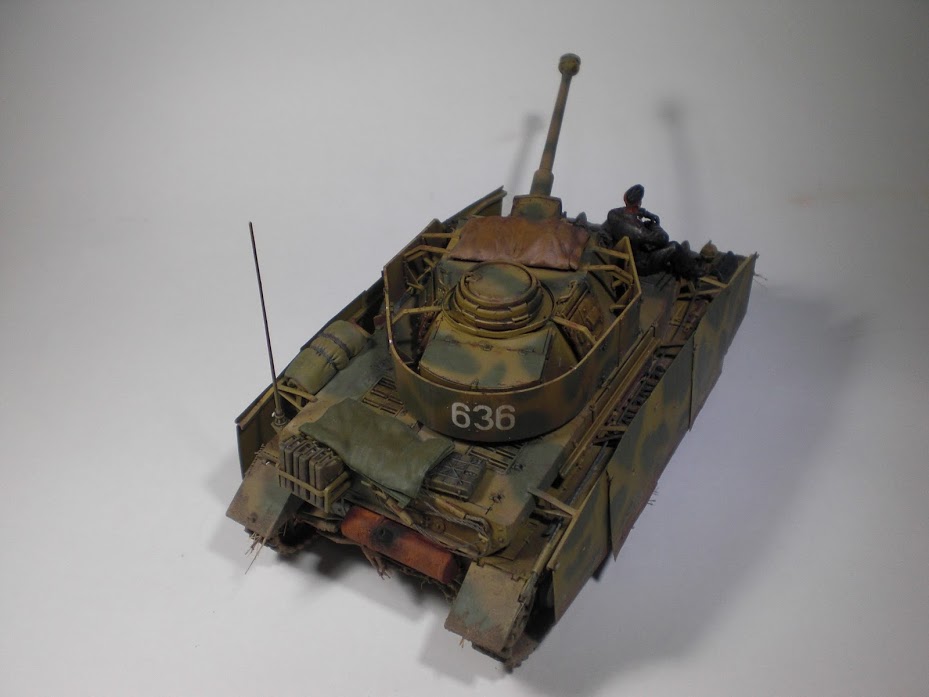
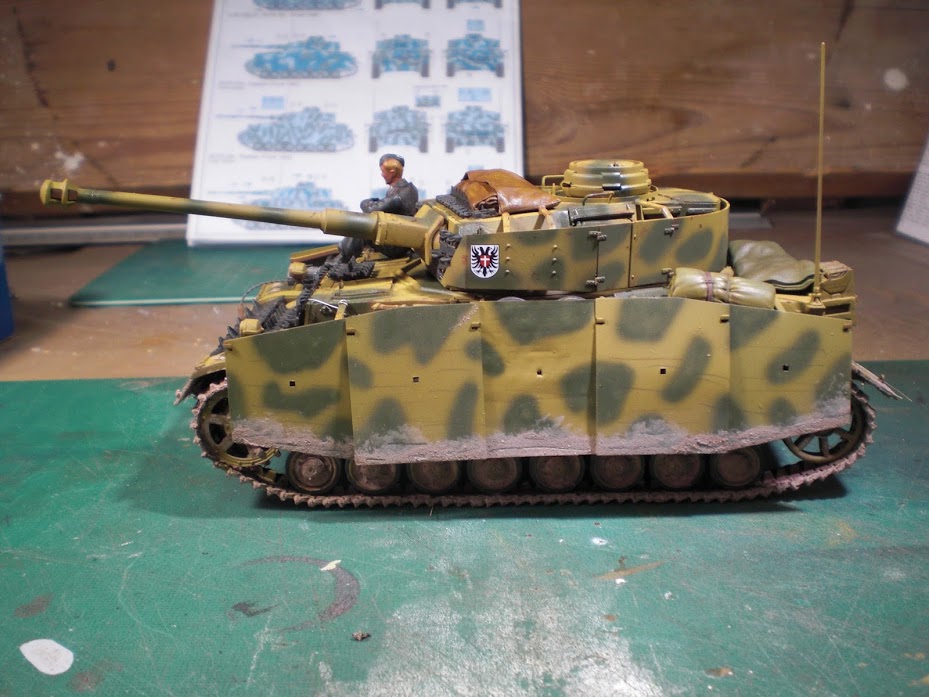
Posted: Saturday, July 18, 2015 - 12:21 AM UTC
It's high time I posted my latest progress!


Still a long way to go, but I am on the right track, getting there!
Let me know what you think
Thanks for watching
Christos
Sun is shinning
CA Armour Models on FB
Dodecanese, Greece / Ελλάδα
Joined: April 04, 2015
KitMaker: 195 posts
Armorama: 191 posts
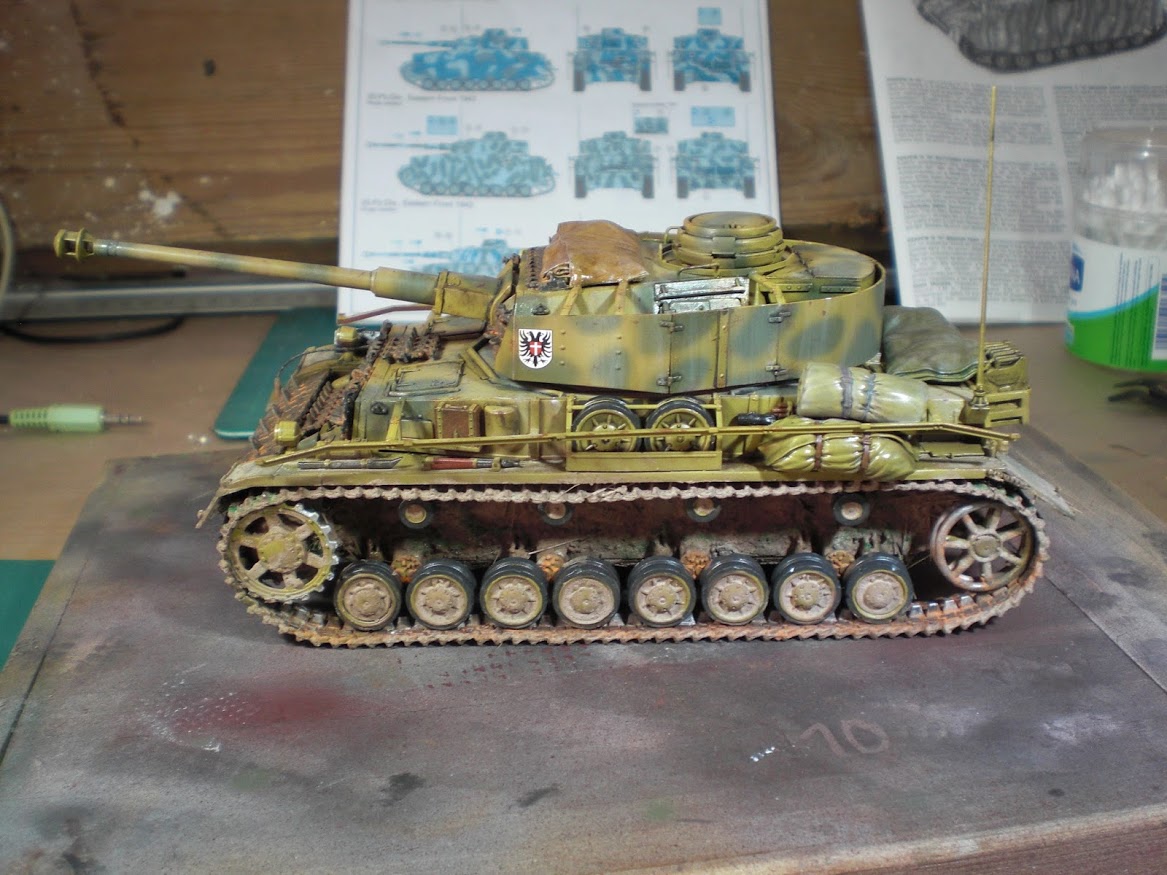
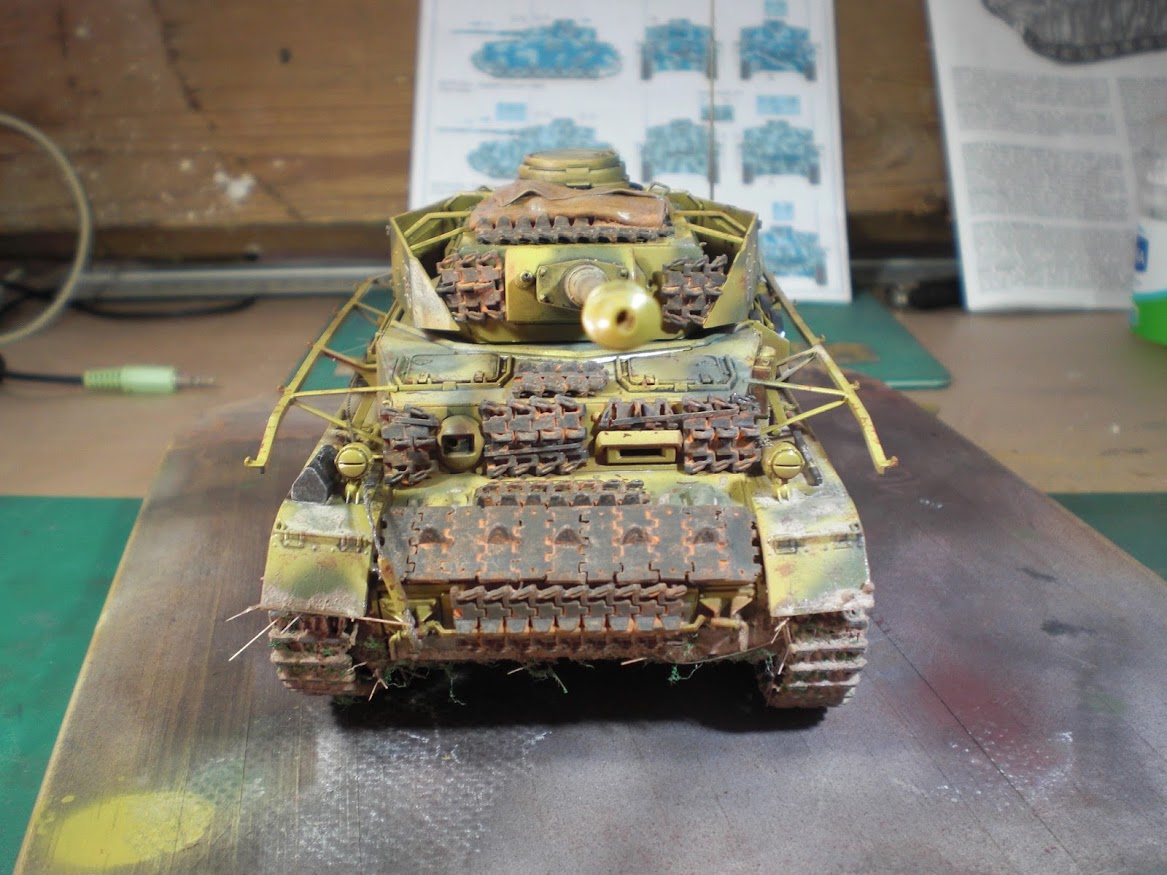
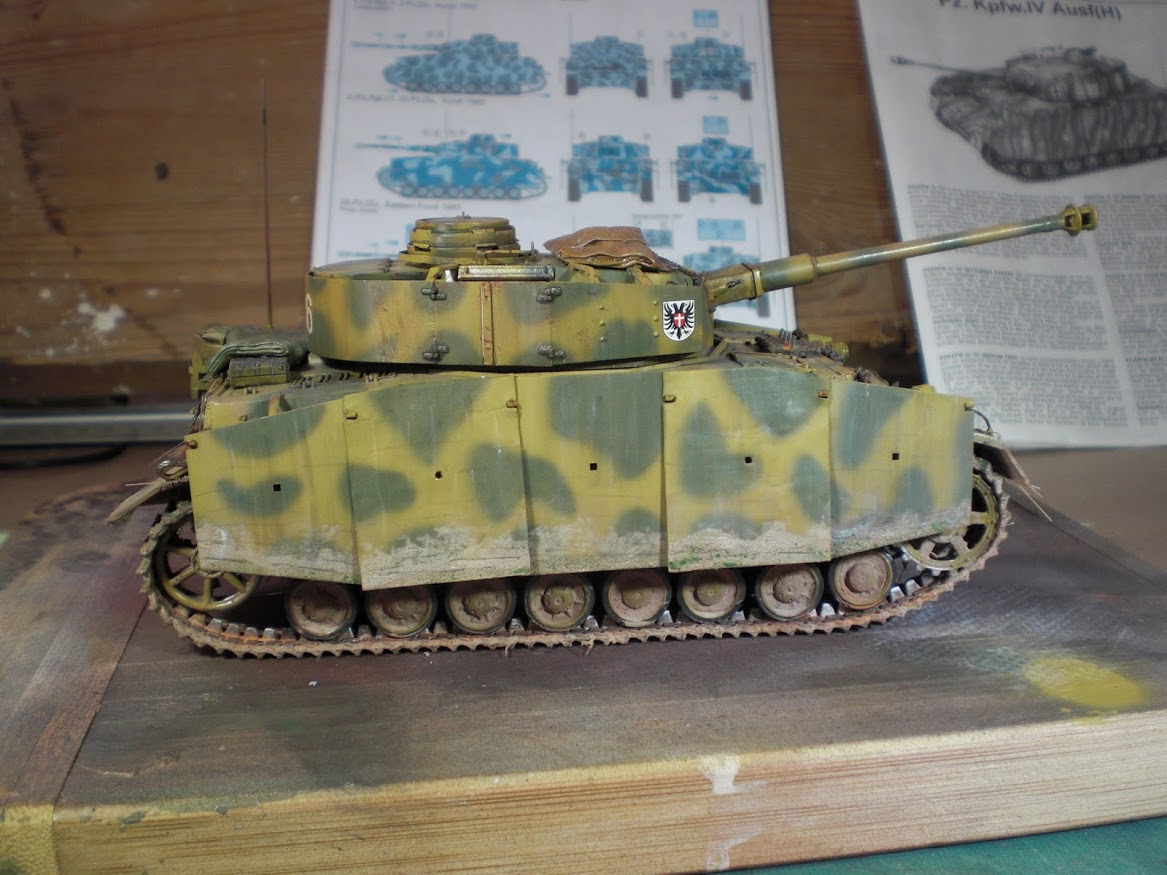
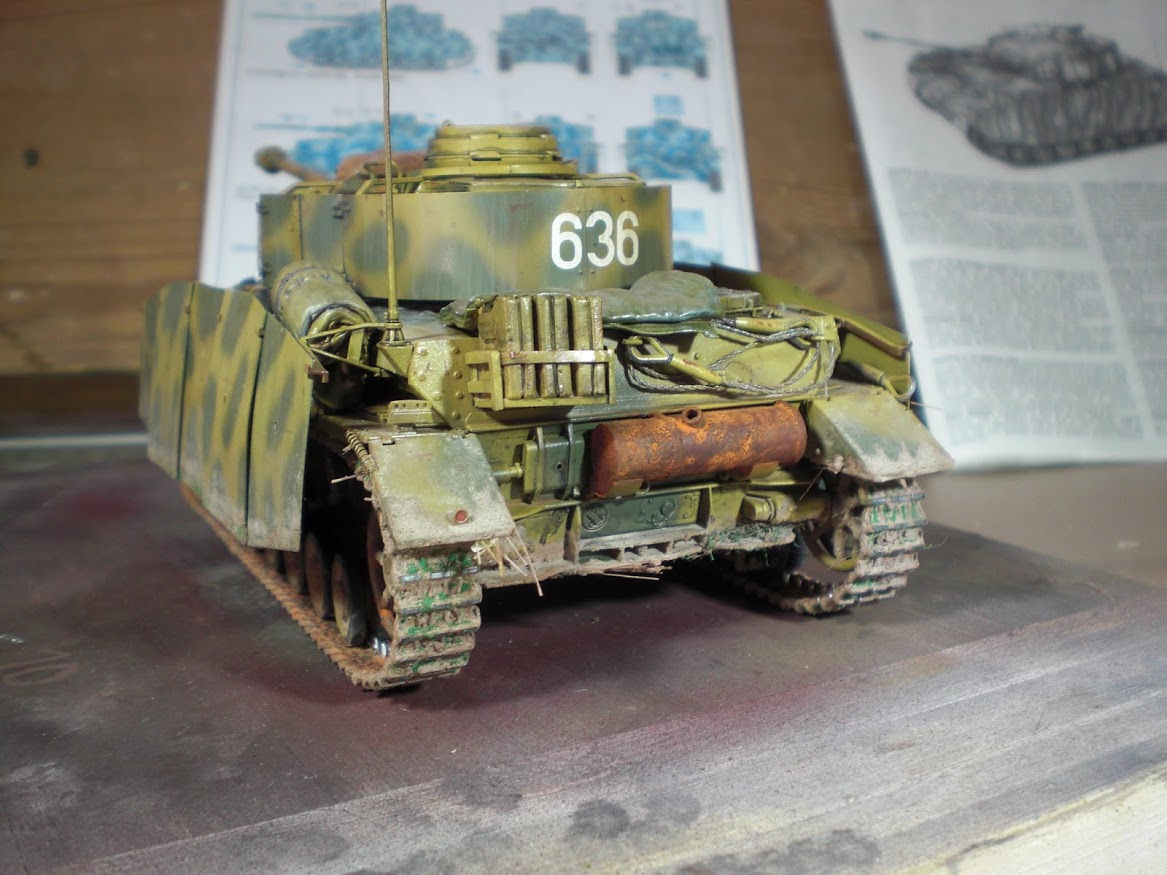
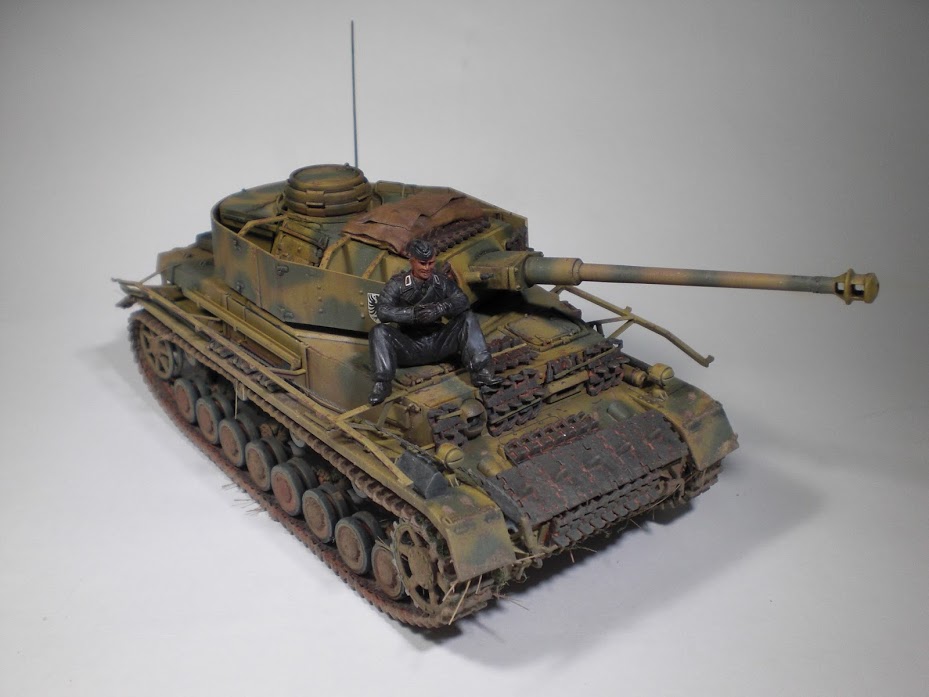
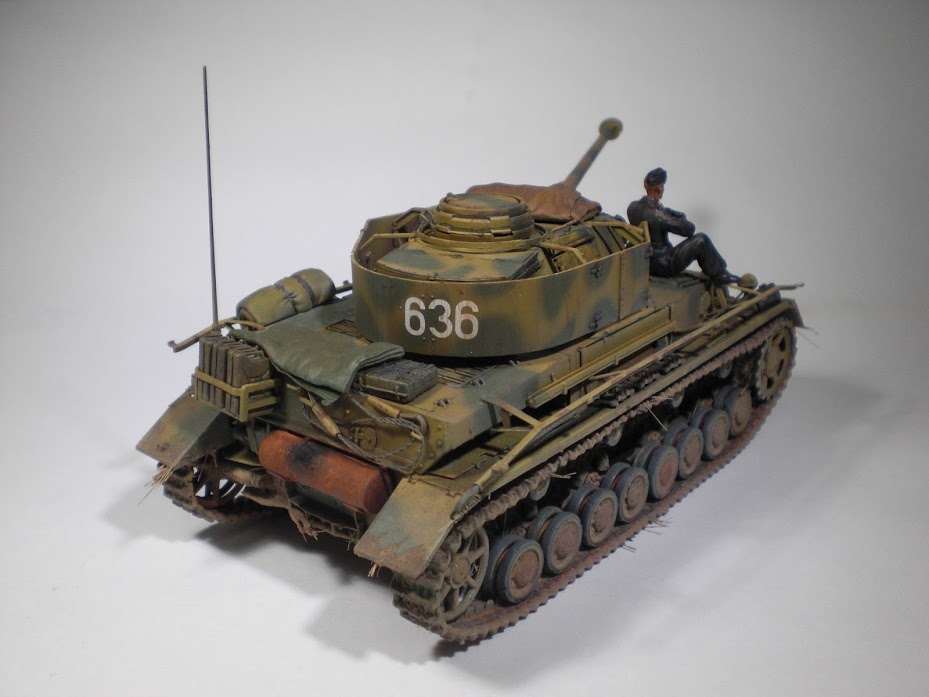
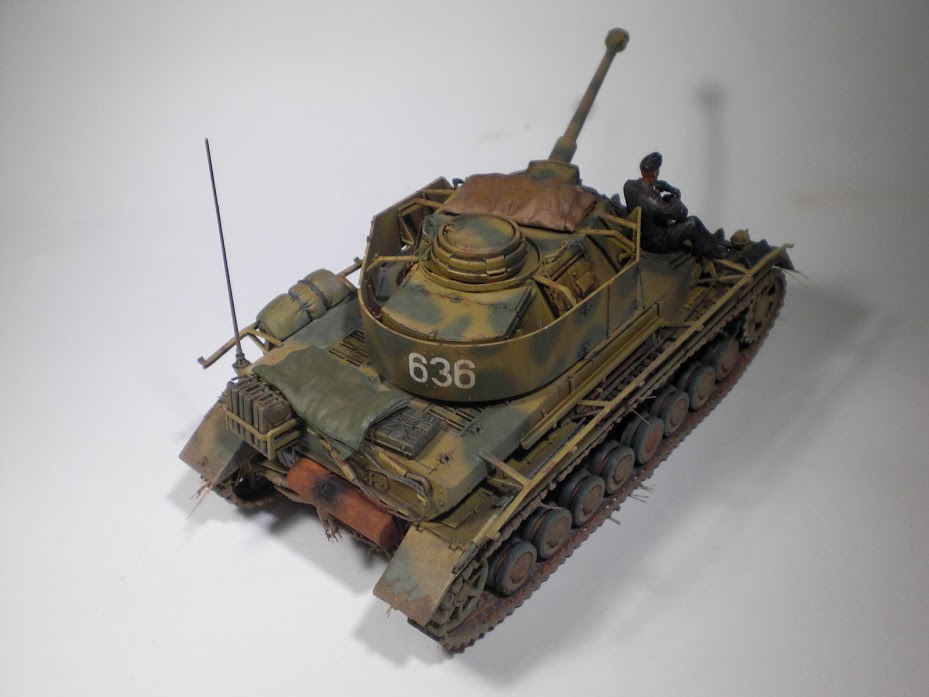
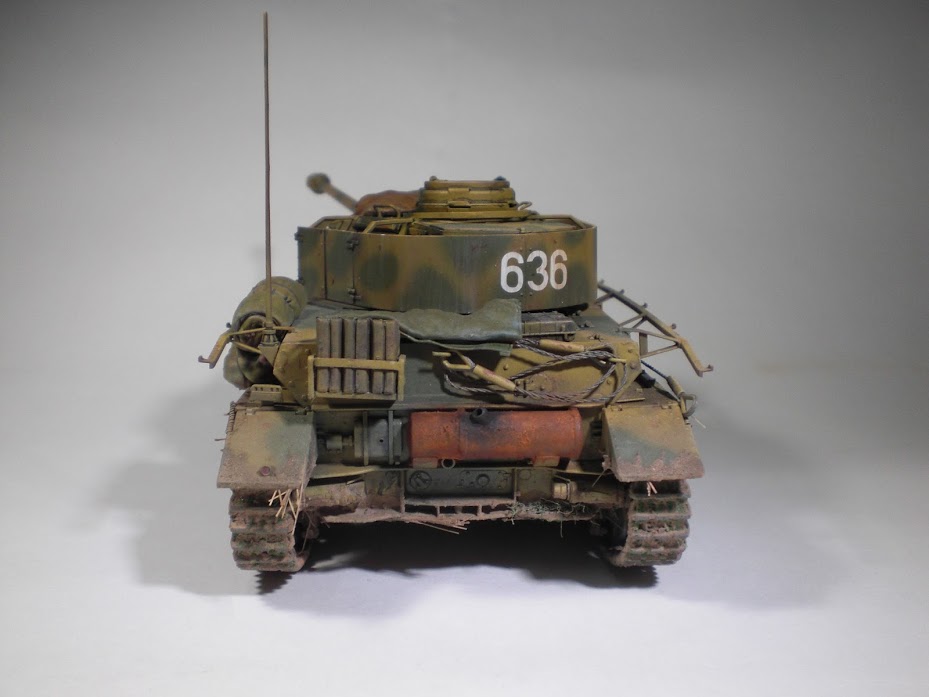
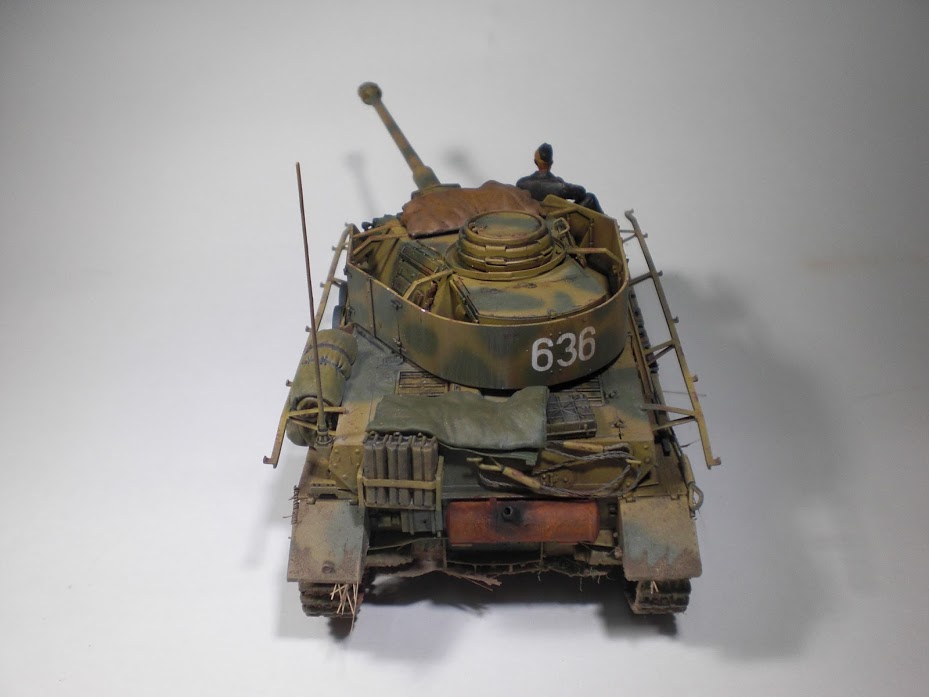
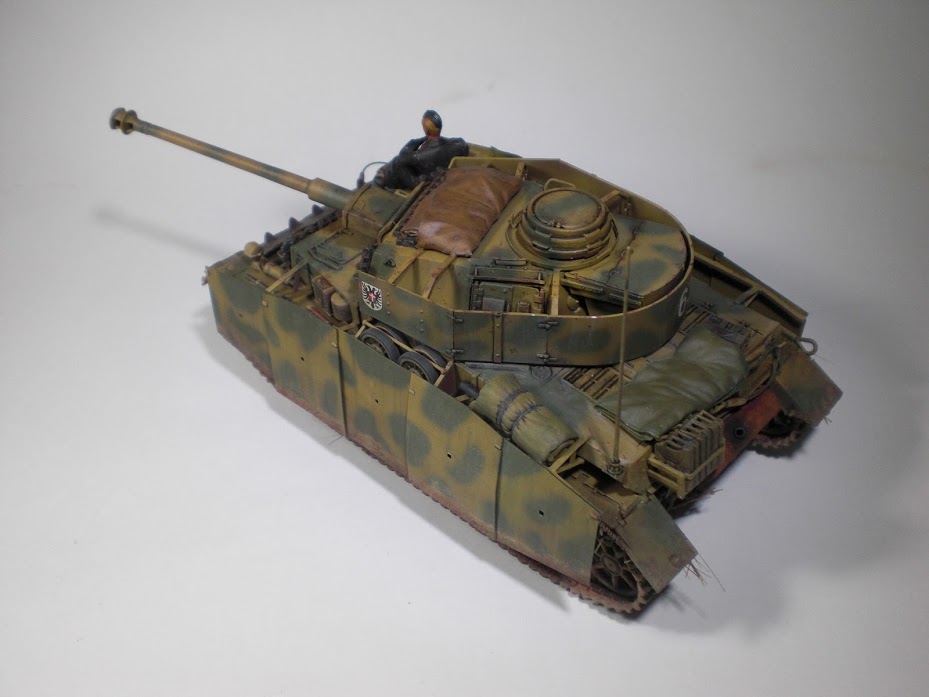
Posted: Friday, July 24, 2015 - 10:32 PM UTC
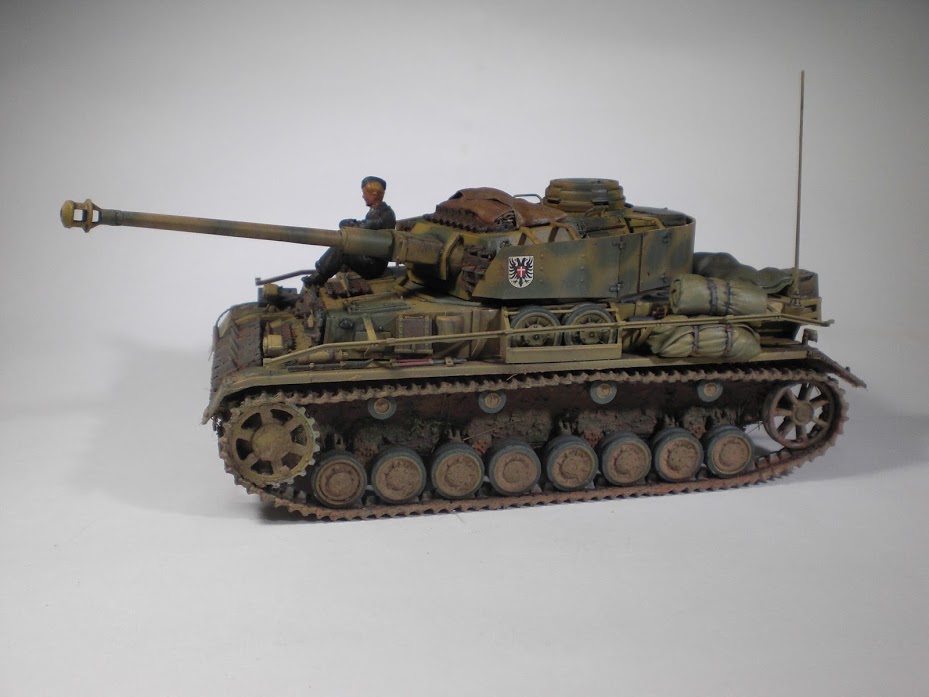
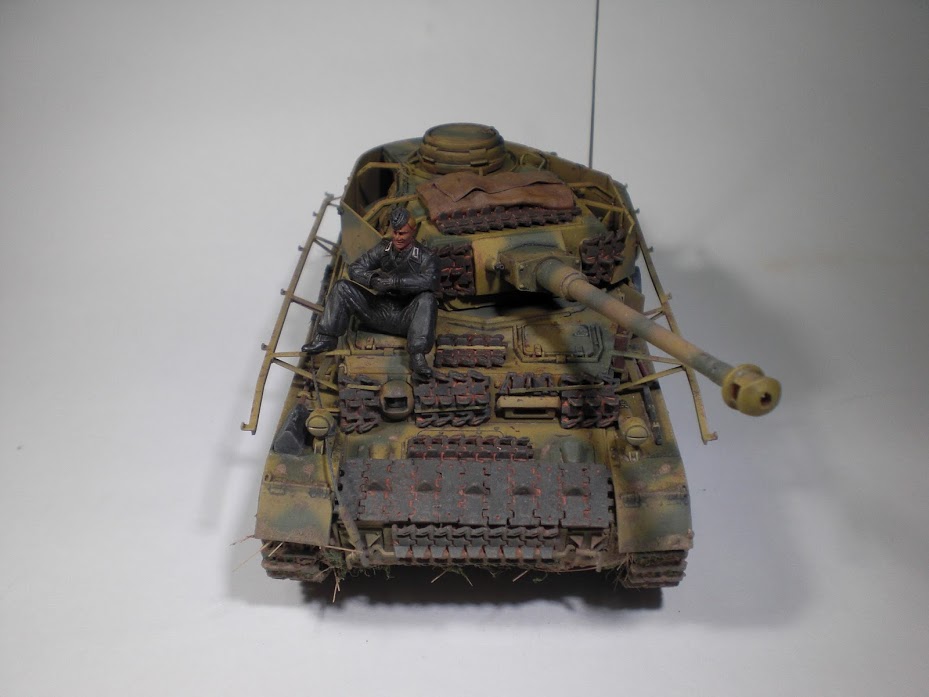
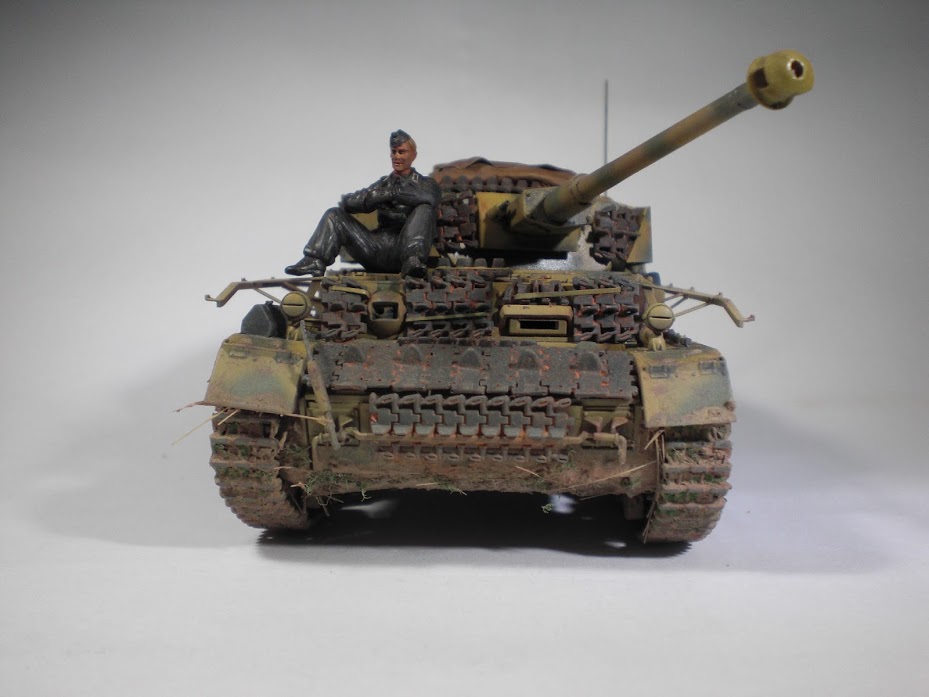
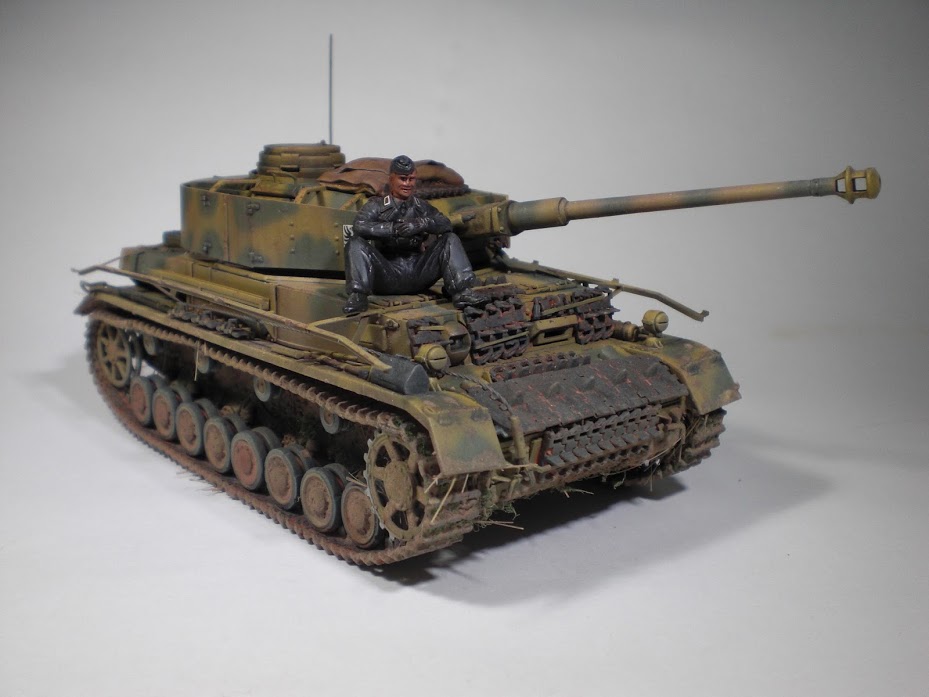
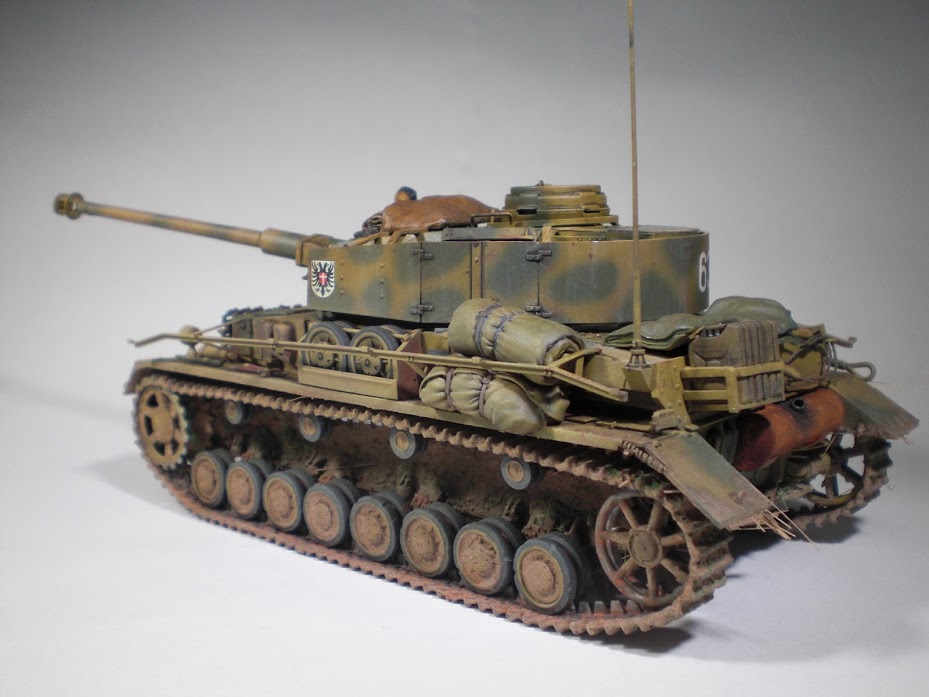
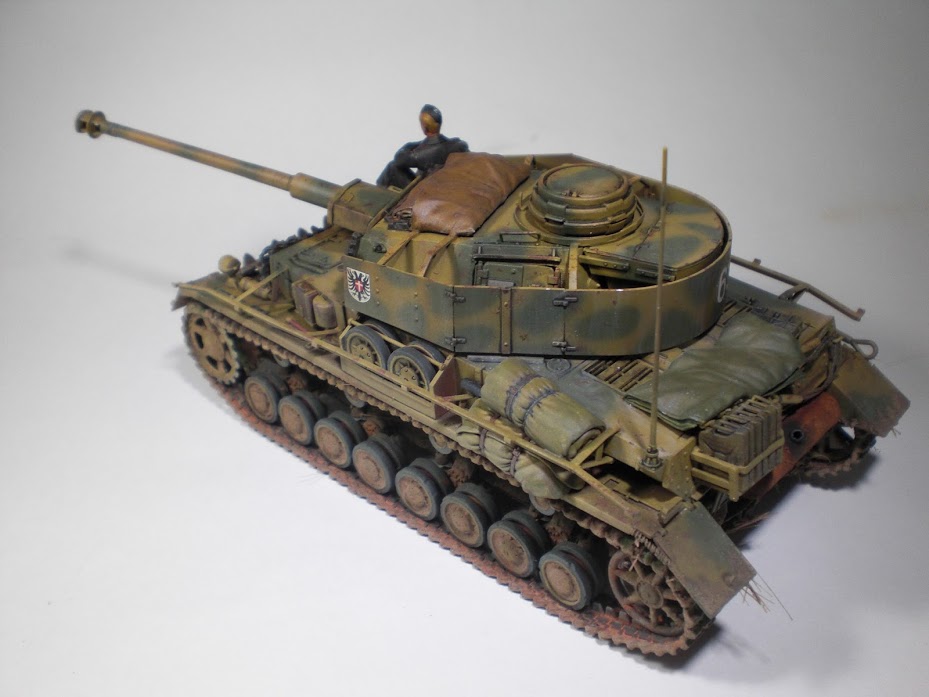
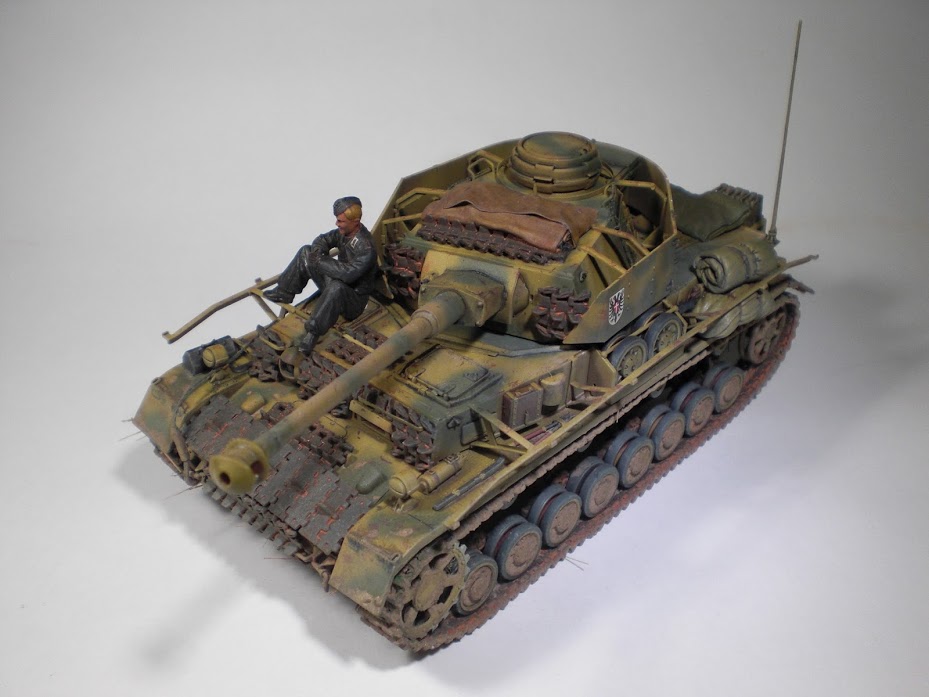
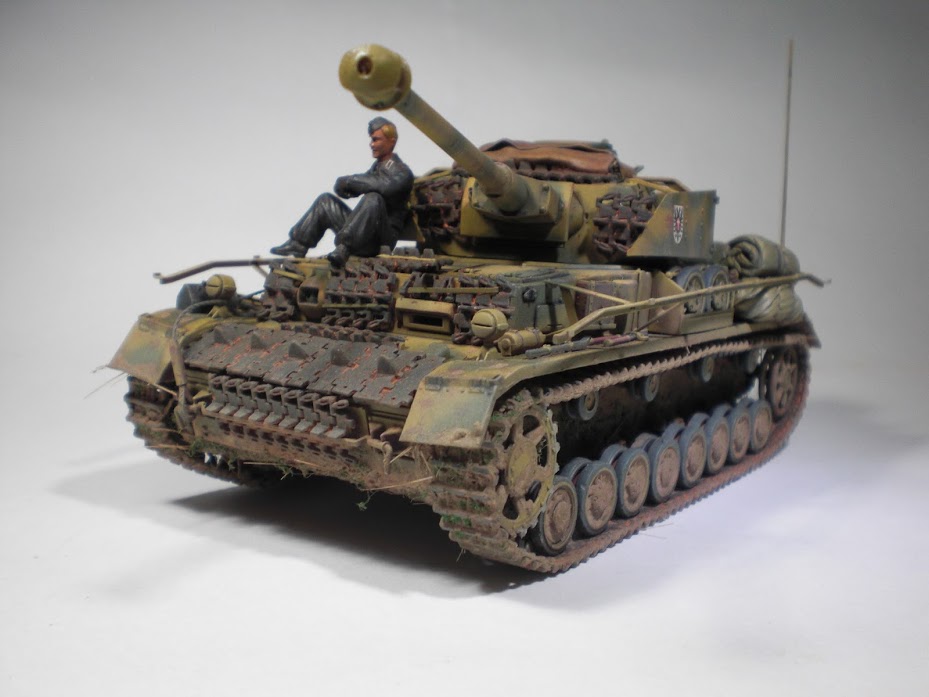
Been working on the Pz on and off for the last few days, so that's where I am at the moment!

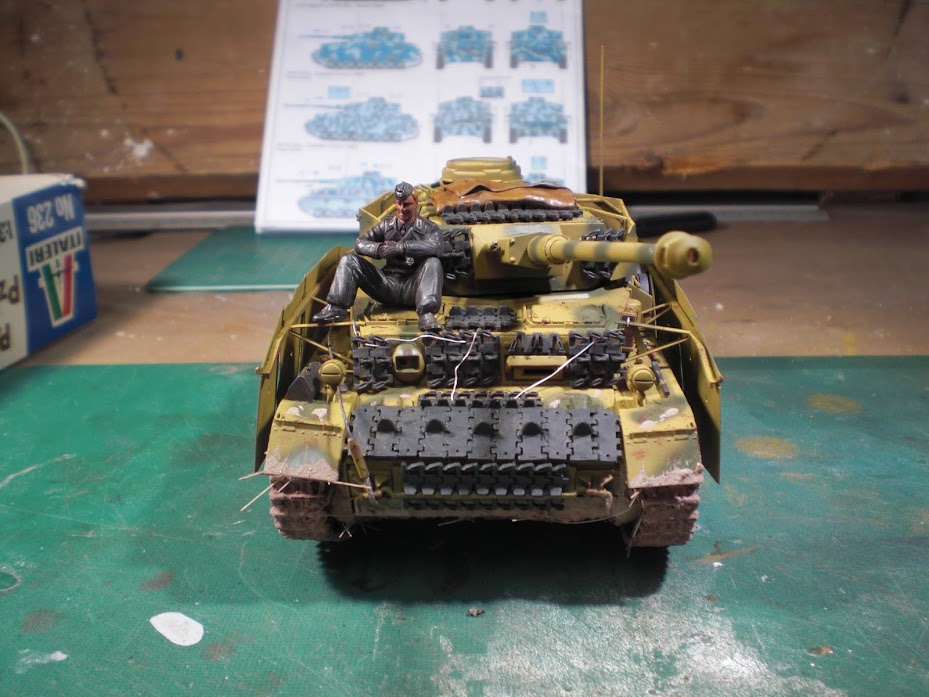
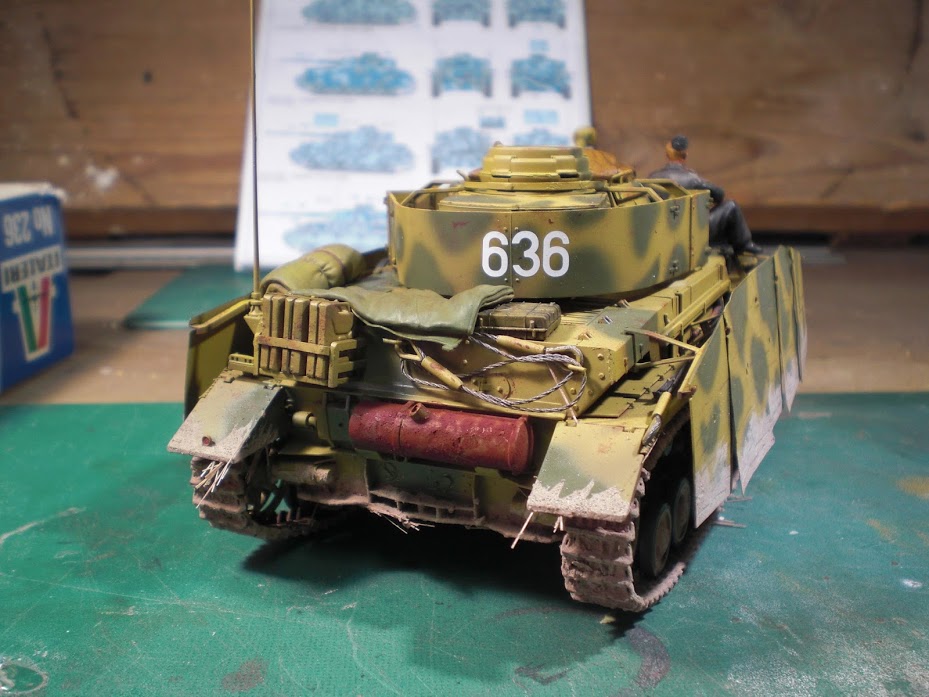

Added chips, scratches, some tie downs to the spare tracks and worked a bit on the stowage with oils. I also started working on the exhaust.
I will leave it to dry and tomorrow I will apply a gloss coat and then move to pin washes, streaks, colour fading and dusting.
Let me know what you think!
Thanks for watching
Christos
Sun is shinning
CA Armour Models on FB
Dodecanese, Greece / Ελλάδα
Joined: April 04, 2015
KitMaker: 195 posts
Armorama: 191 posts
Posted: Monday, July 27, 2015 - 03:39 PM UTC
Sun is shinning
CA Armour Models on FB
Dodecanese, Greece / Ελλάδα
Joined: April 04, 2015
KitMaker: 195 posts
Armorama: 191 posts
Posted: Tuesday, July 28, 2015 - 11:43 PM UTC
Sun is shinning
CA Armour Models on FB