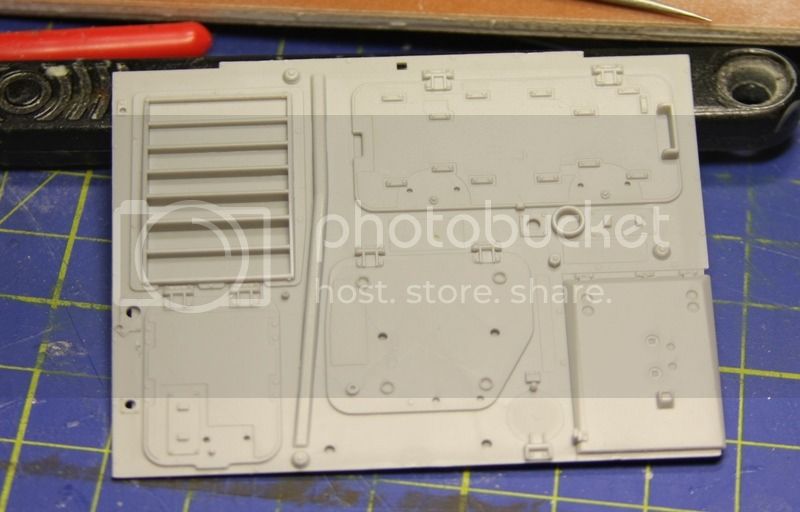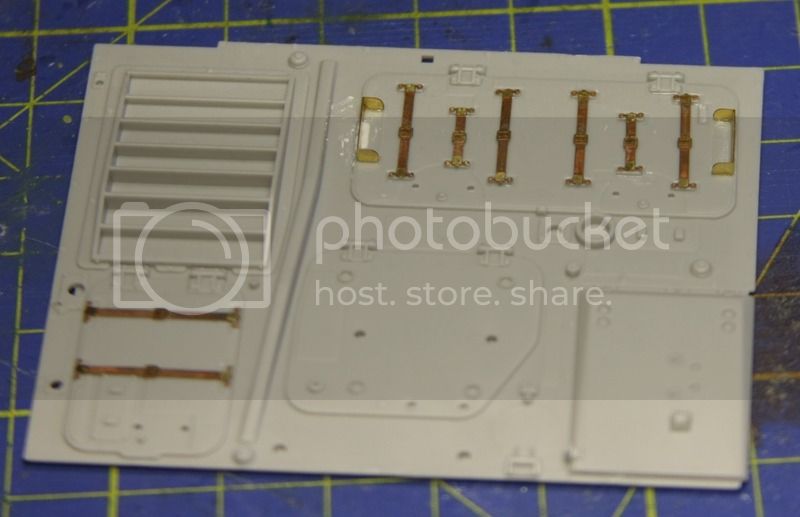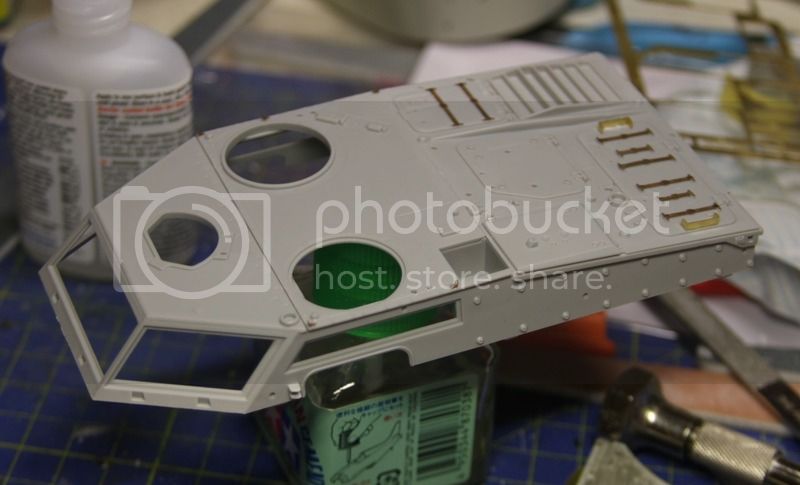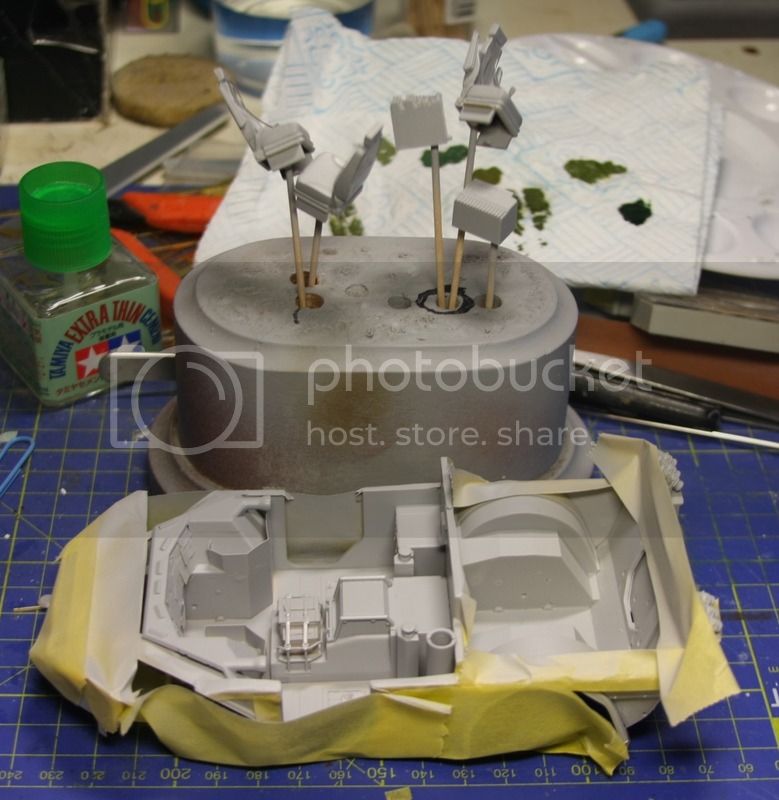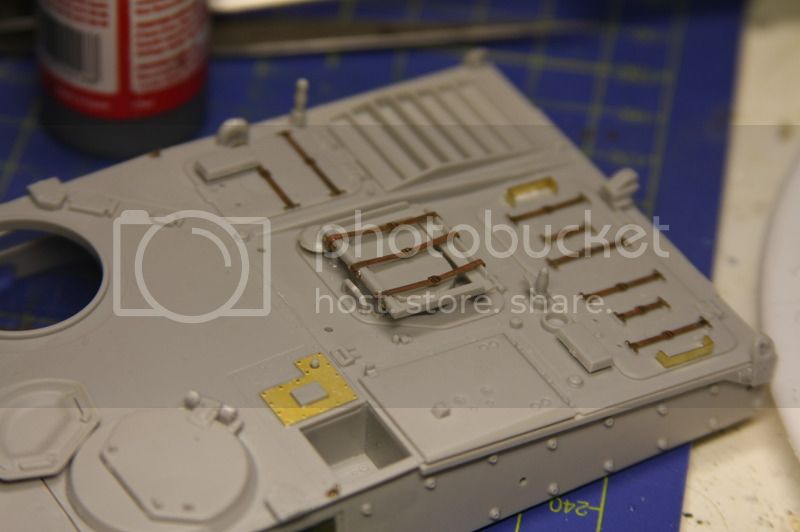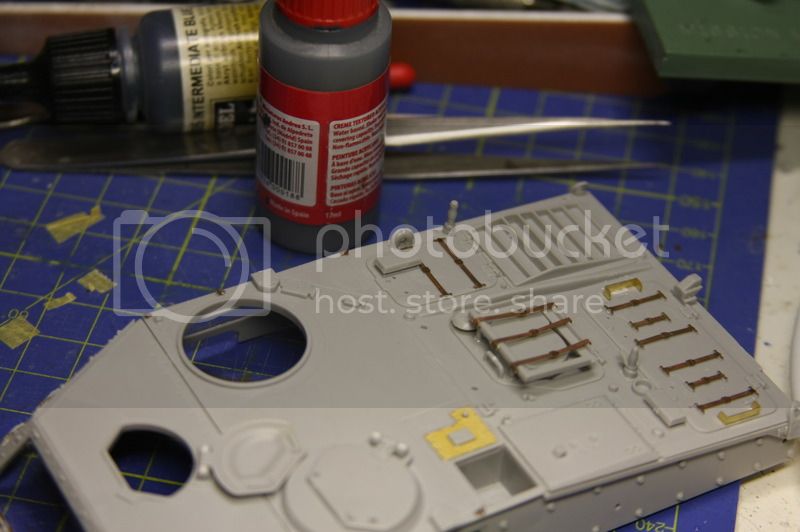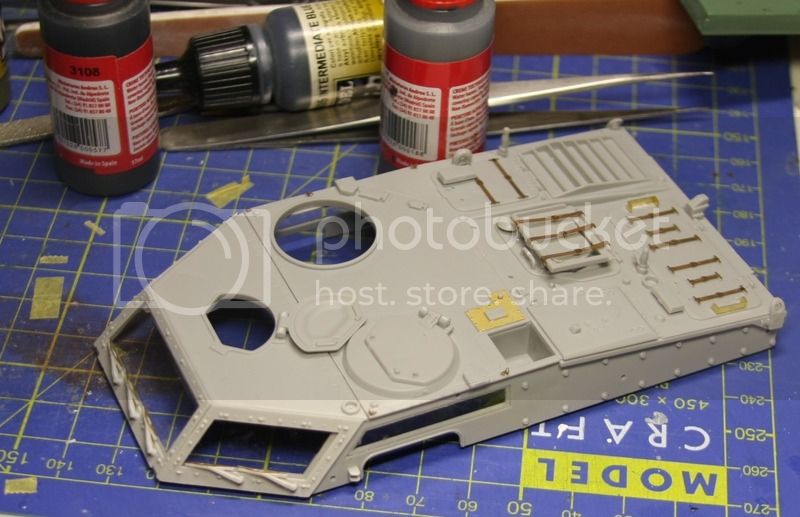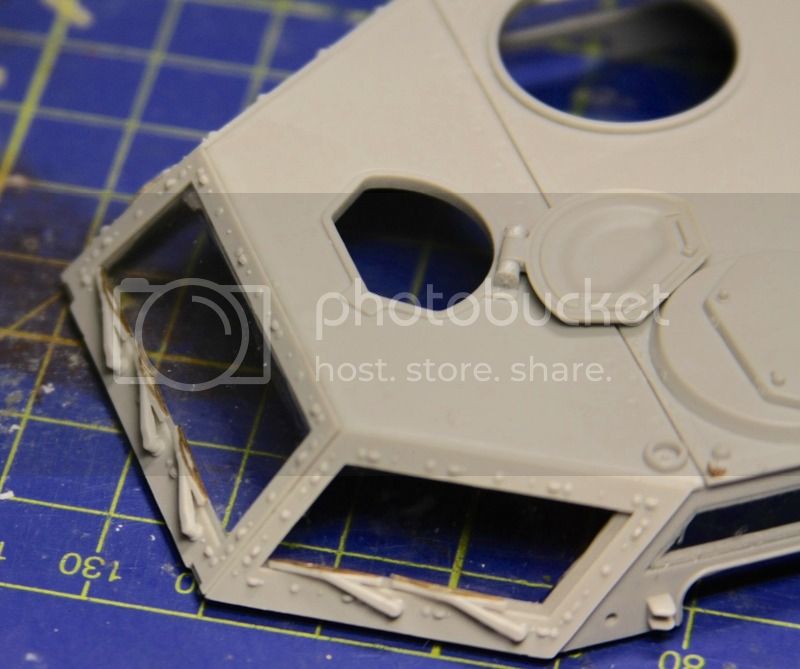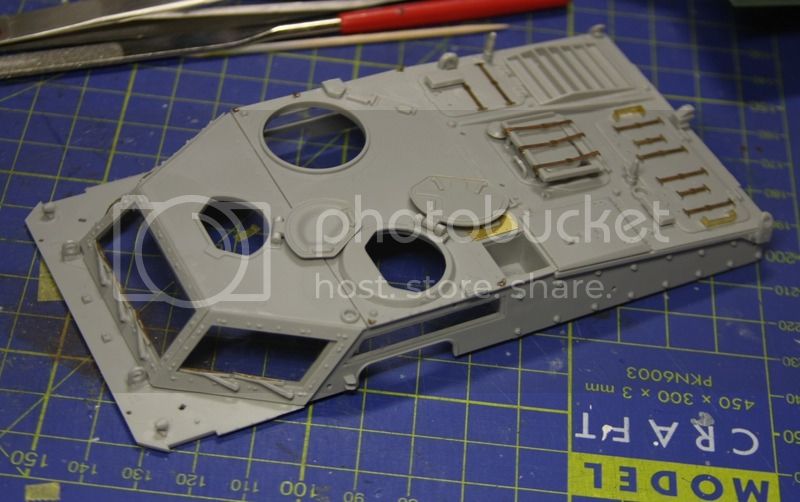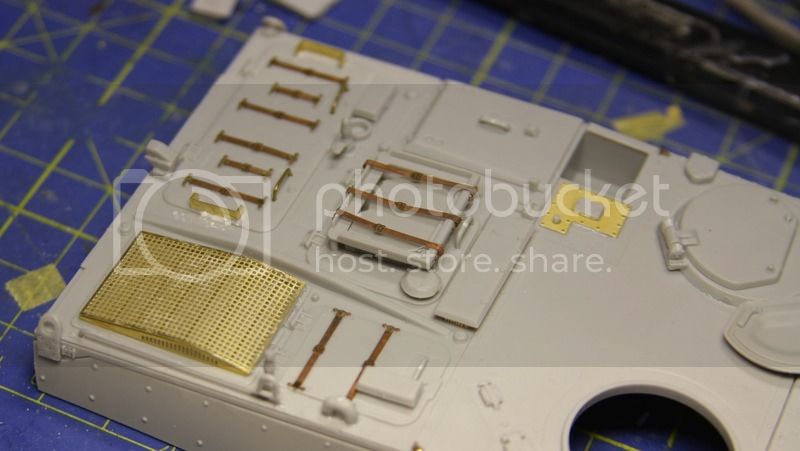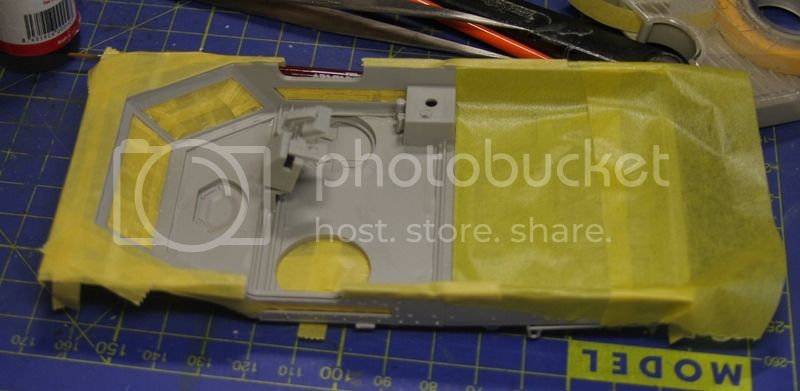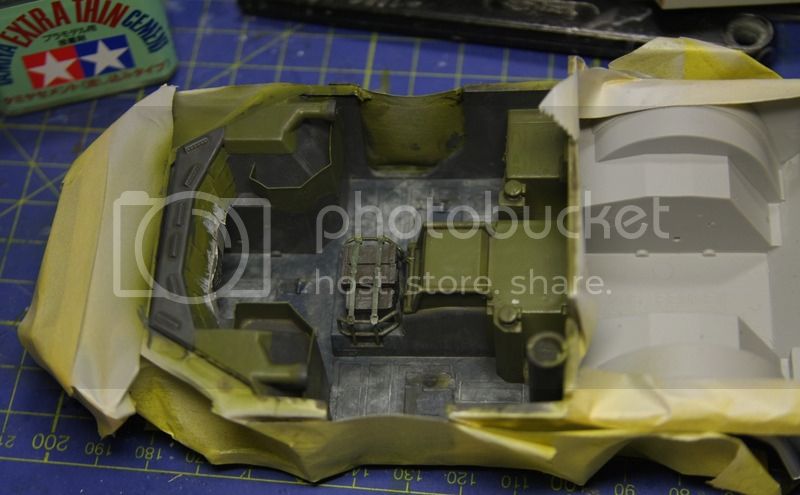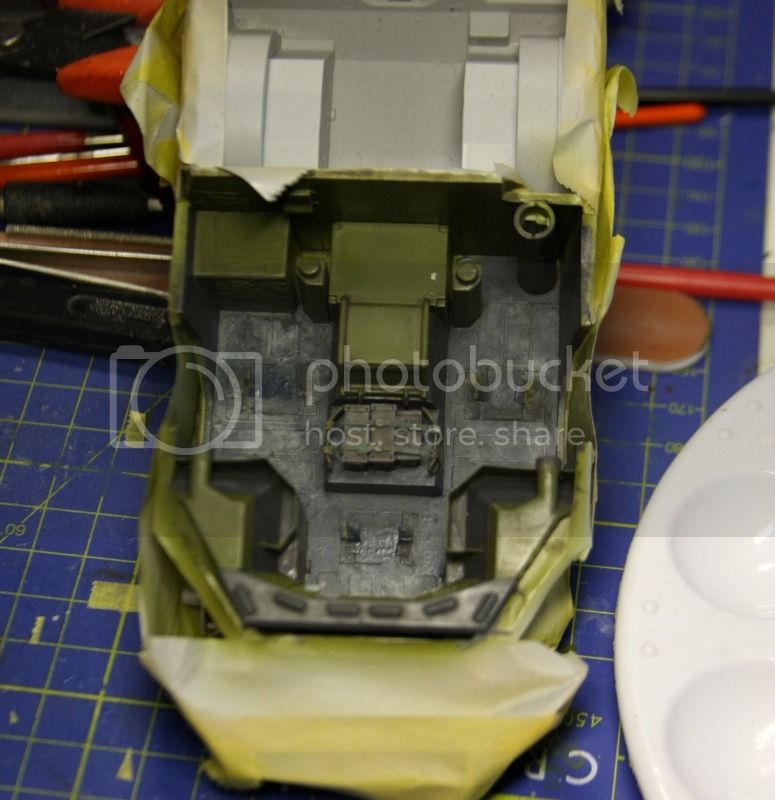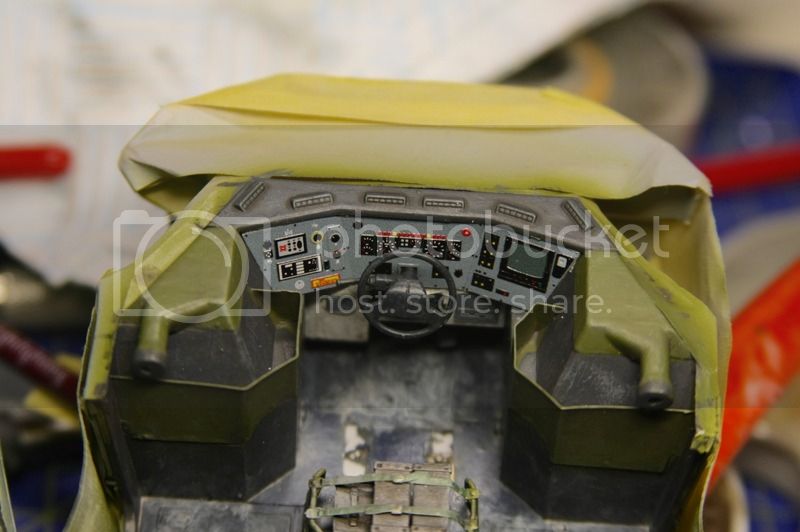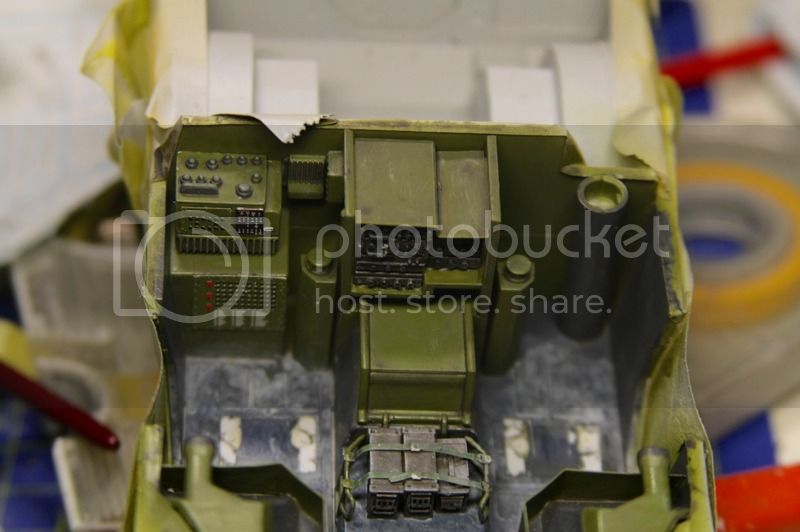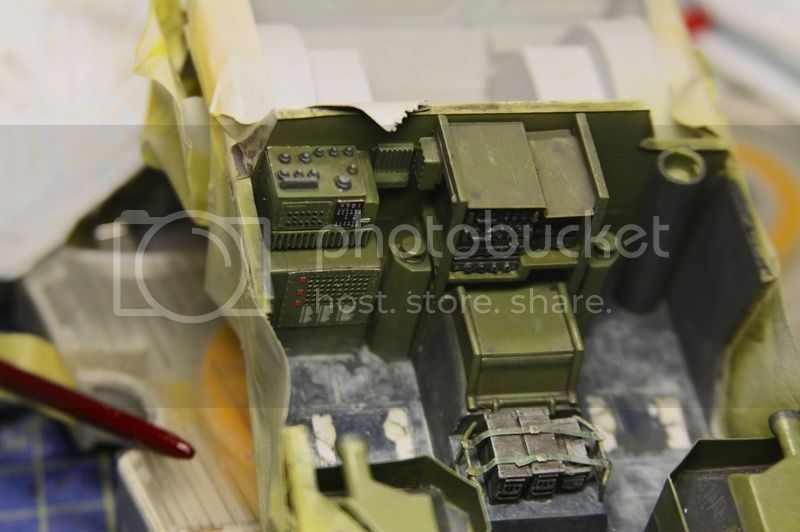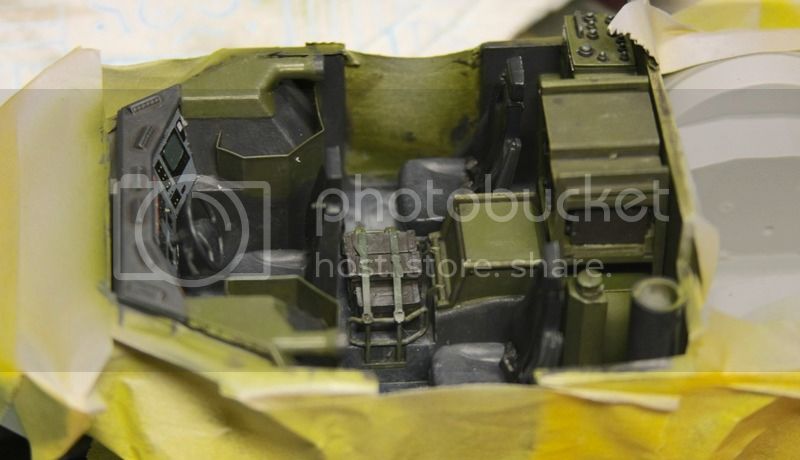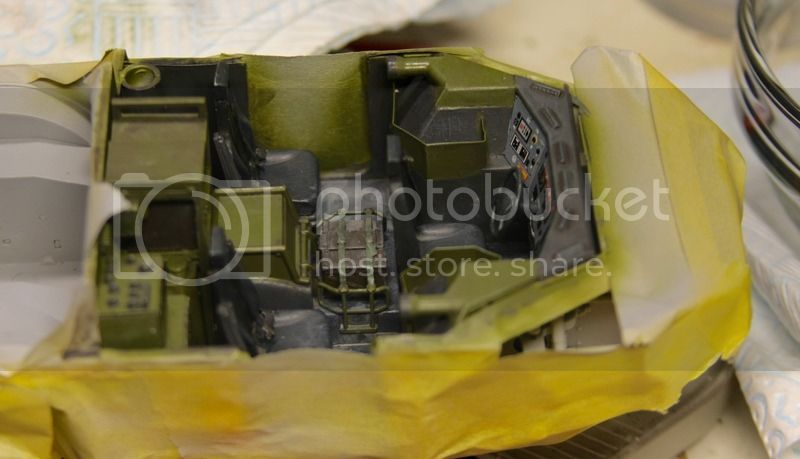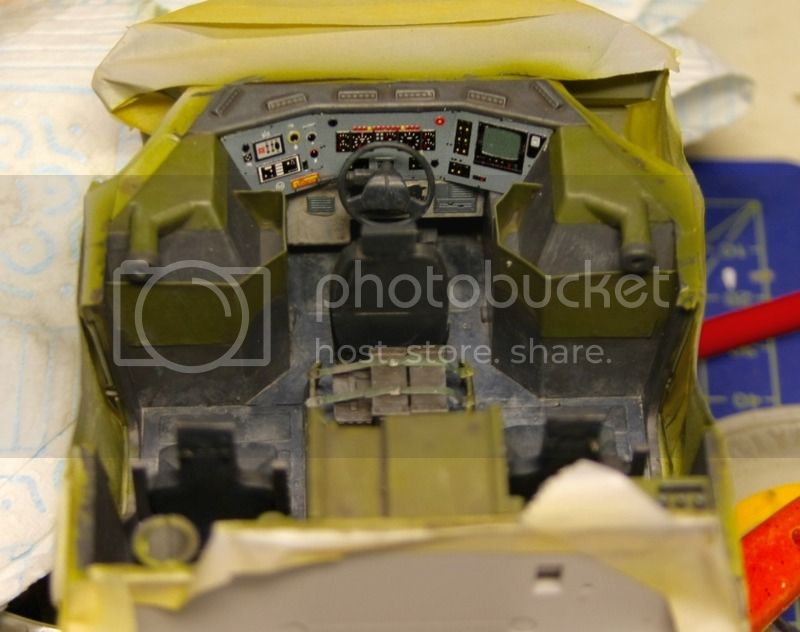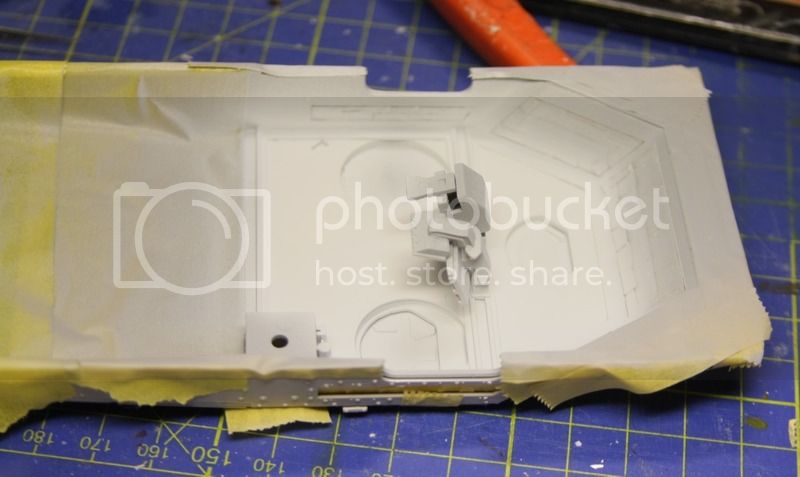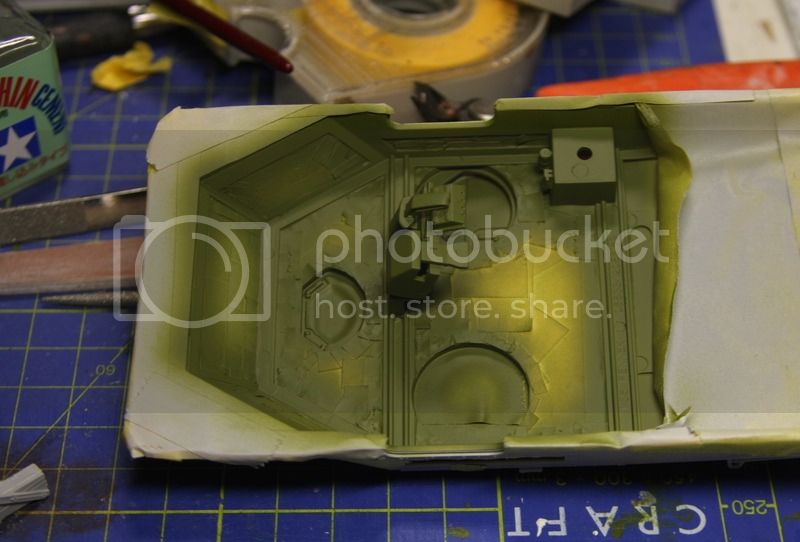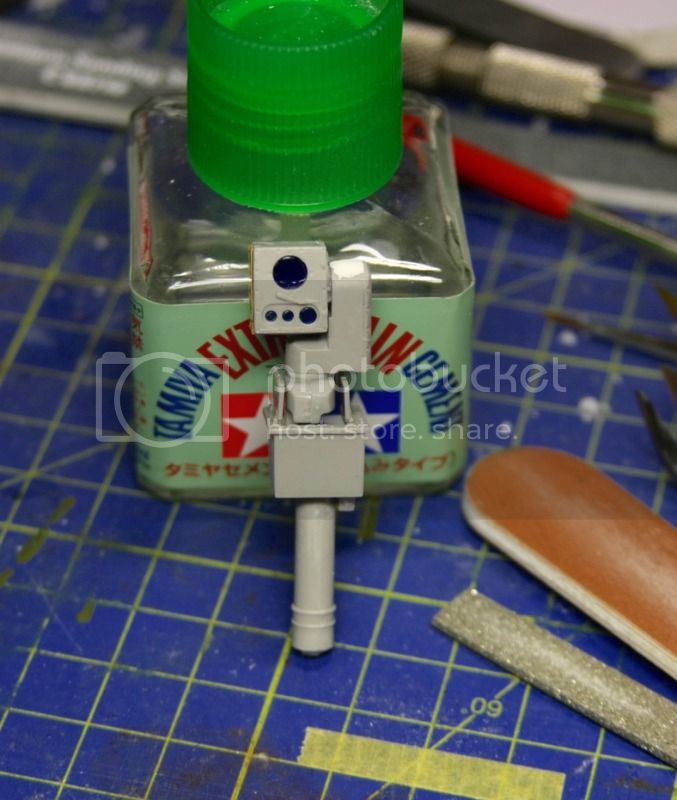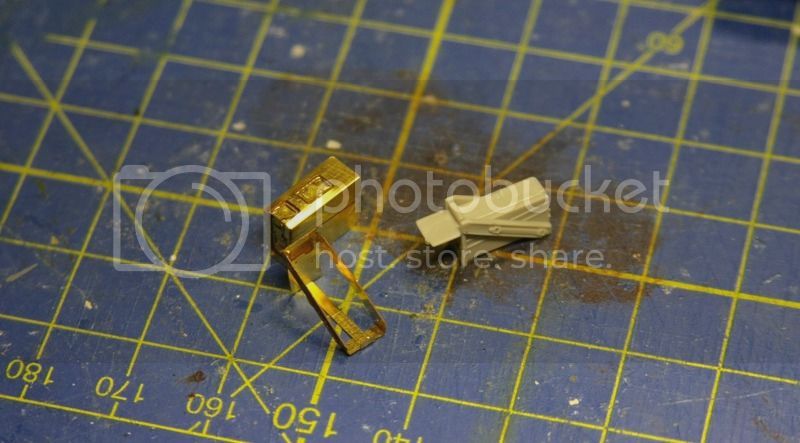
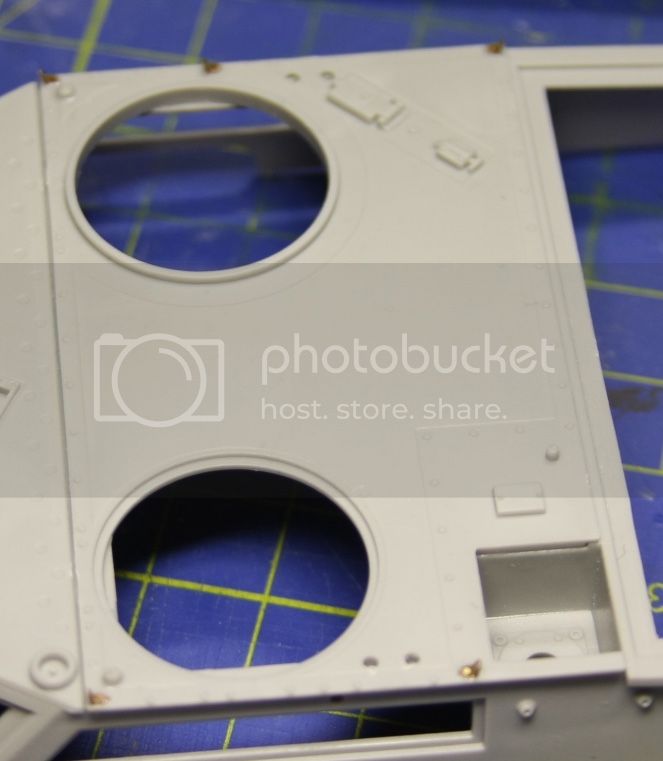
I have a small update based on some work I have got through on the upper hull. This is a particularly well detailed area and I really like the way Trumpeter have broken it done for assembly- it makes it a bit easier to add some of the bits and pieces from the Eduard set.
The first things were small lifting hooks around the middle section of the upper hull.
Then the Eduard set moved on to the rear of the hull- concerned mostly with adding tie downs to a couple of areas.
I have also got some parts masked off and primed- ready to start painting.
I will talk more about painting in the next update.
Dioramas
Do you love dioramas & vignettes? We sure do.
Hosted by Darren Baker, Mario Matijasic
ISAF Bundeswehr Fennek & UAV
Posted: Friday, July 17, 2015 - 09:41 PM UTC
jrutman
Pennsylvania, United States
Joined: April 10, 2011
KitMaker: 7,941 posts
Armorama: 7,934 posts
Joined: April 10, 2011
KitMaker: 7,941 posts
Armorama: 7,934 posts
Posted: Sunday, July 19, 2015 - 10:41 PM UTC
I always kind of hate to see all the prep work get painted over! LOL
Lookin good.
J
Lookin good.
J
Posted: Friday, July 24, 2015 - 09:36 PM UTC
Apologies for not updating as quickly as I had before. I tend to slow down in terms of the build when I start painting. The interior is coming along well and I will get pictures up soon.
As I've been painting the lower hull I've also been working on the upper hull. Its mostly adding relatively small bits and pieces like vents and grab handles etc. There's also a few additions from the Eduard PE set. The wipers were supposed to be replaced by very thin Eduard pieces altogether but it meant cutting the main wiper blades off the plastic parts and then putting the tiny PE part in place. The PE parts are, I think, too thin to really represent a wiper blade in 1/35- I've seen it done better in other PE sets- and secondly cutting the plastic wipers could risk wrecking the parts altogether. I ended up gluing the PE parts on to the top of the plastic wipers so they would have a little more definition.
I've also added the few bits that are required on the interior and I've also masked this area off ready for painting.
As always, thanks for reading !
Posted: Wednesday, July 29, 2015 - 09:59 PM UTC
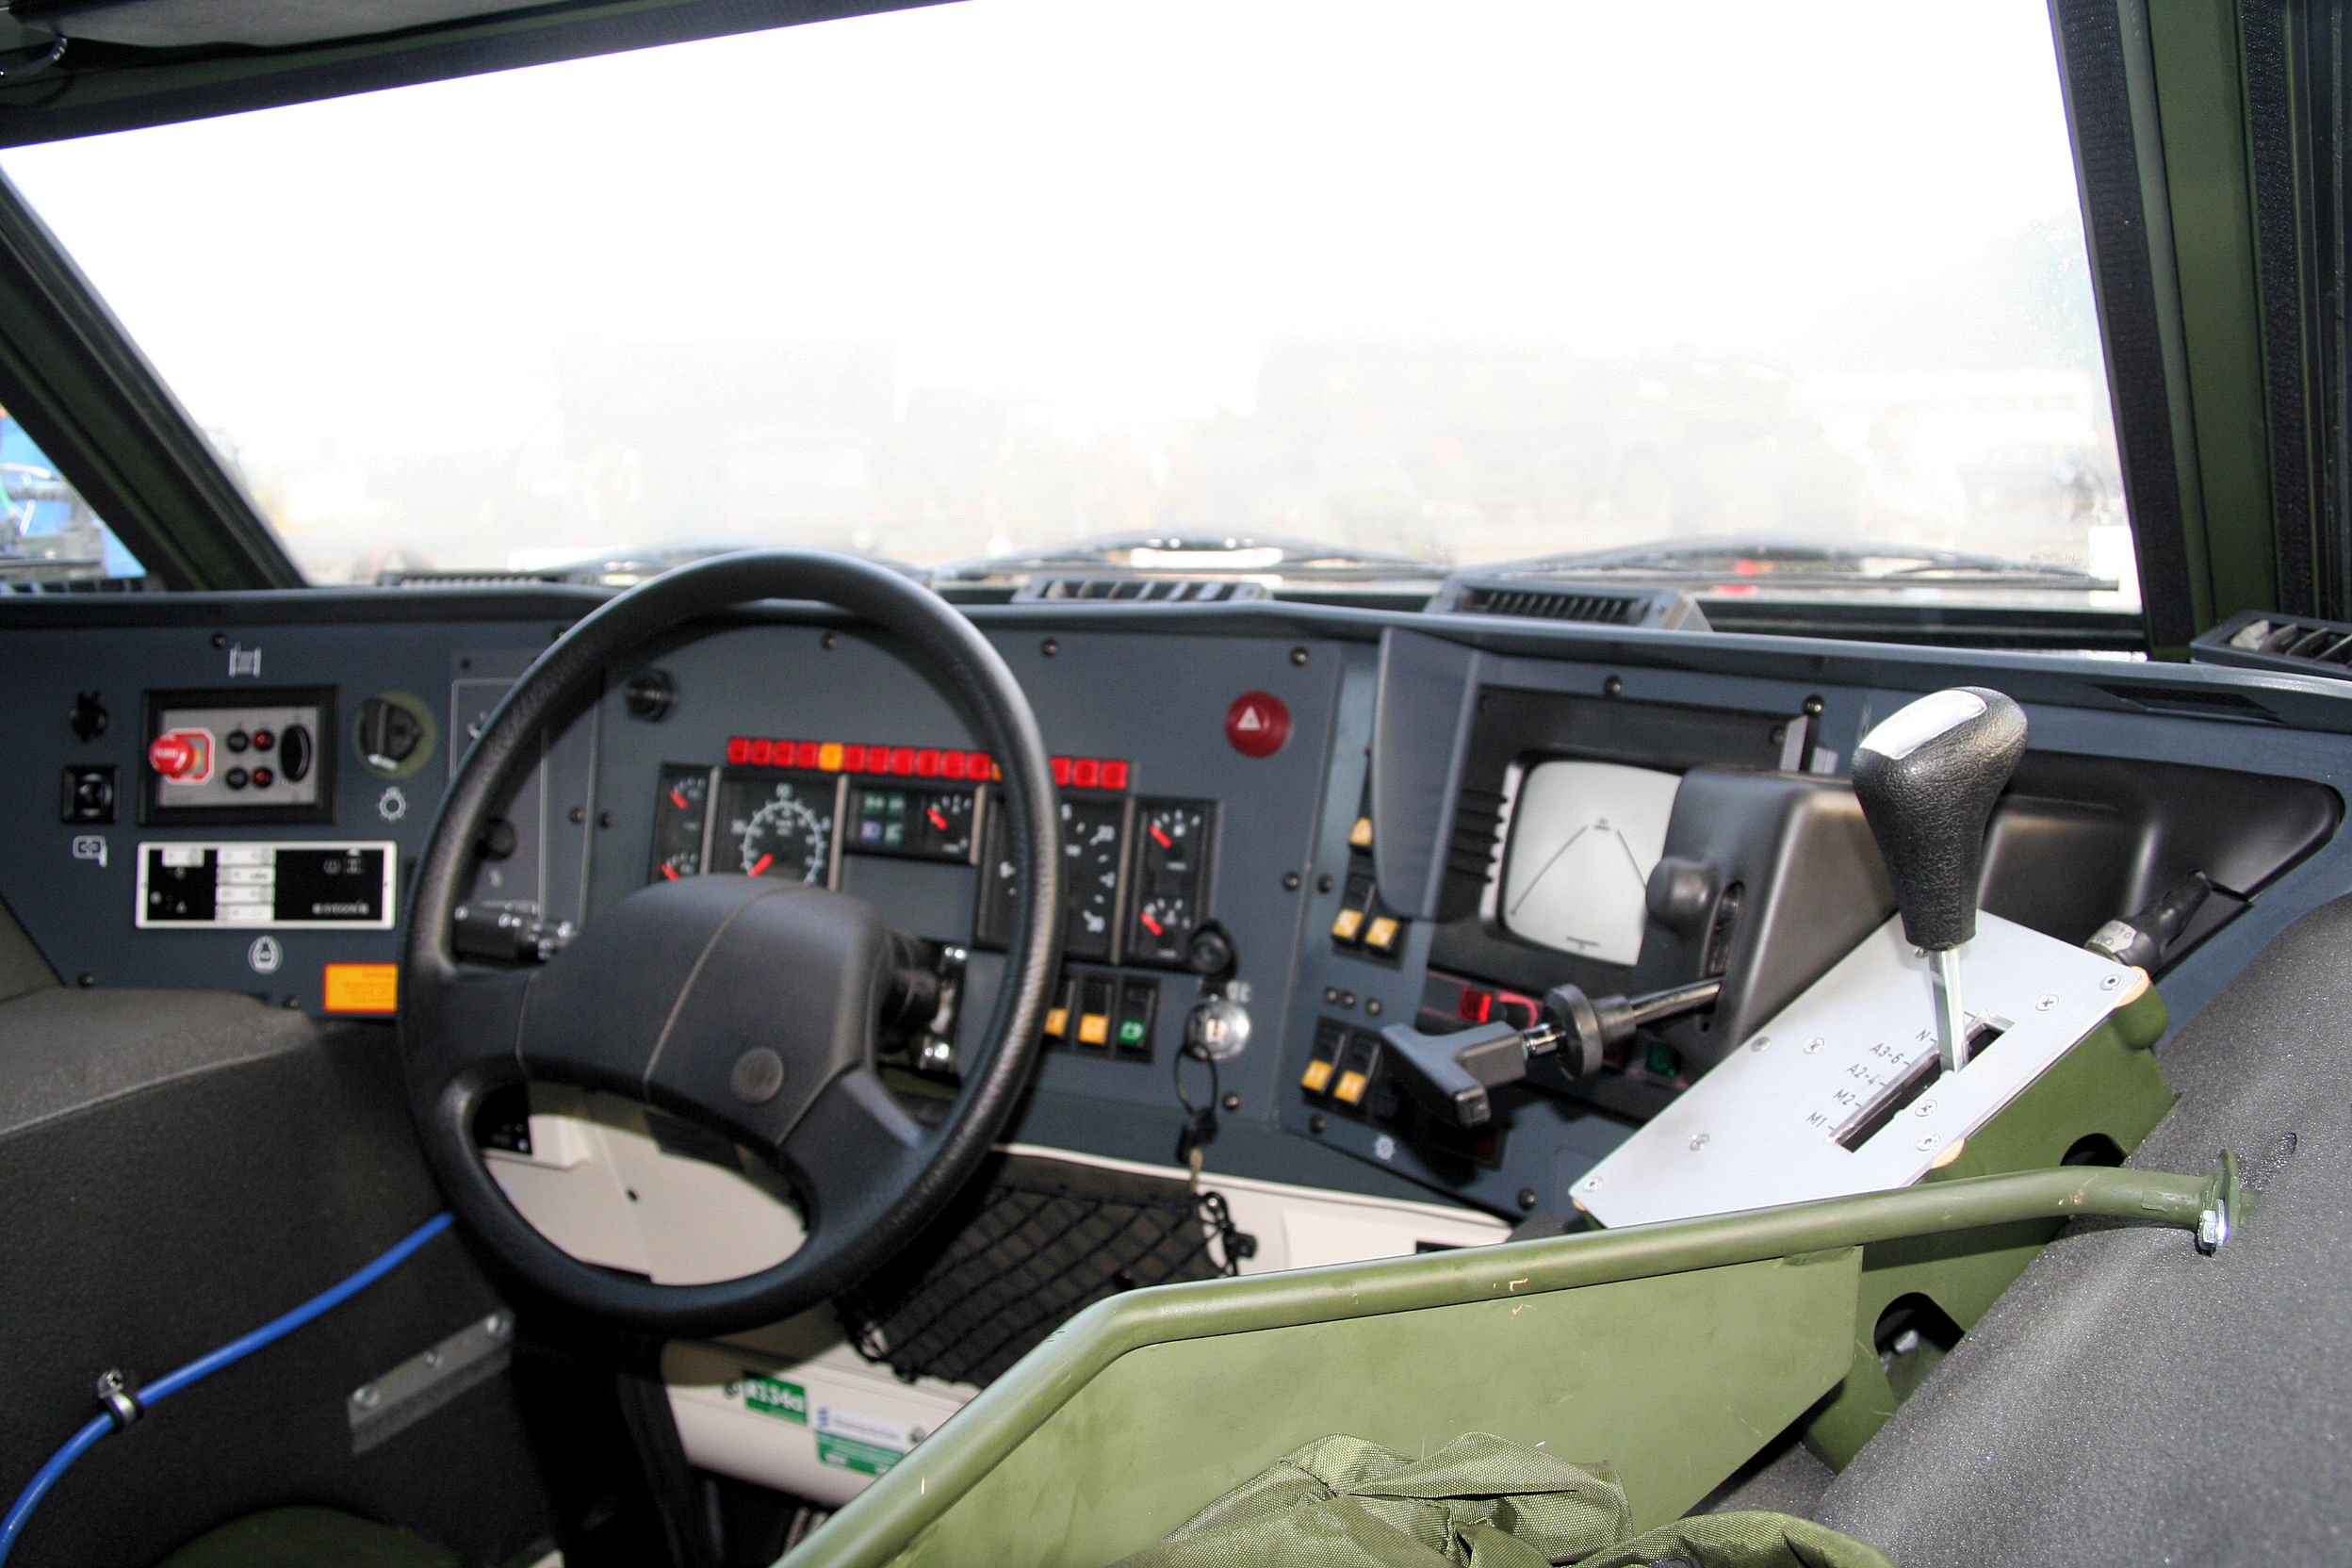
I'm sure you have seen the photos above of the inside of the Fennek, kindly provided by Hans-Hermann. As you can see there are quite a few different colors on the various surfaces. The overall green shade appears to be NATO Green and I got out my Tamiya tub of this only to find it wasn't a great match for the pre-painted green areas of the Eduard PE. A quick rustle through my paints and I found a better match in Vallejo Model Air Interior Green. This was used to basically coat everything prior to starting the detail painting.
A lot of the interior is covered with a grey foam so where appropriate I picked this out. The floor pan is two shades as far as I can see- a dark grey for the anti-slip ridges and a dark navy blue for the rest. The seats are dark grey and the top of the dashboard a lighter grey while the main radio in the middle appears to be an olive green.
For weathering I gave the surfaces a light dry-brush to suggest some wear and tear followed by a dark grey wash from Ammo- this is marketed for doing aircraft but it can work elsewhere, and I quite like grey washes so I gave it a whirl here. This was followed up by a fairly targeted use of Ammo Dust Effects- particularly around the floorpan and the areas closer to the floor. I will probably add in some pigments later, prior to mating the hull halves.
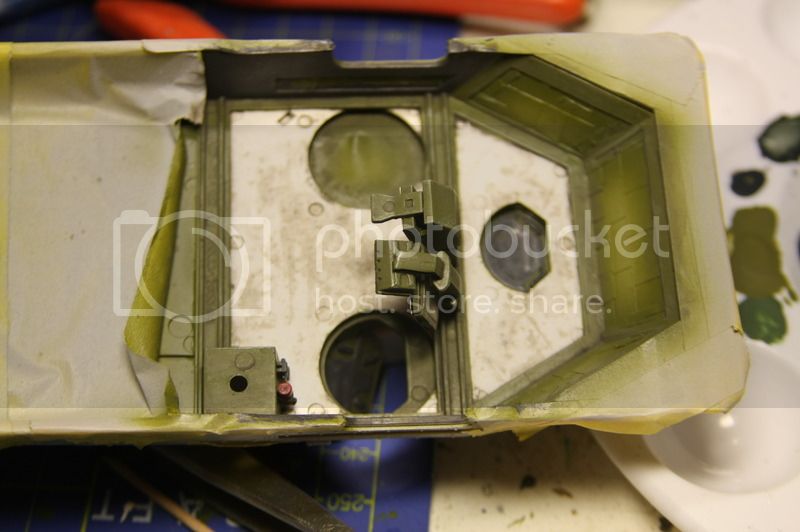
I'm currently working on the inside of the upper hull. This area is partly covered by a white mesh and so I've airbrushed that in before masking it to paint the green parts. Once thats done I'll paint the details and get the other few Eduard pieces in place and then I'll be able to mate the hull halves.
I also have the sensor array done and I'll get some pictures of that up in the next update alongside some pictures of the MG3 weapons station.
Thanks for reading.
jrutman
Pennsylvania, United States
Joined: April 10, 2011
KitMaker: 7,941 posts
Armorama: 7,934 posts
Joined: April 10, 2011
KitMaker: 7,941 posts
Armorama: 7,934 posts
Posted: Wednesday, July 29, 2015 - 11:56 PM UTC
That is some nice clean precise painting there buddy. I can never seem to get mechanical stuff to look that clean. I suppose I have a more "impressionistic" approach which is a polite way of saying I am a sloppy painter.
If you spent this much time on the top of the interior which can't be seen much I can't wait to see the treatment you give the bottom.
J
If you spent this much time on the top of the interior which can't be seen much I can't wait to see the treatment you give the bottom.
J
Posted: Thursday, August 06, 2015 - 09:41 PM UTC
Before I put up some pics of the weapons stations and the sensor array I will post another picture of the upper hull with its green coat of paint.
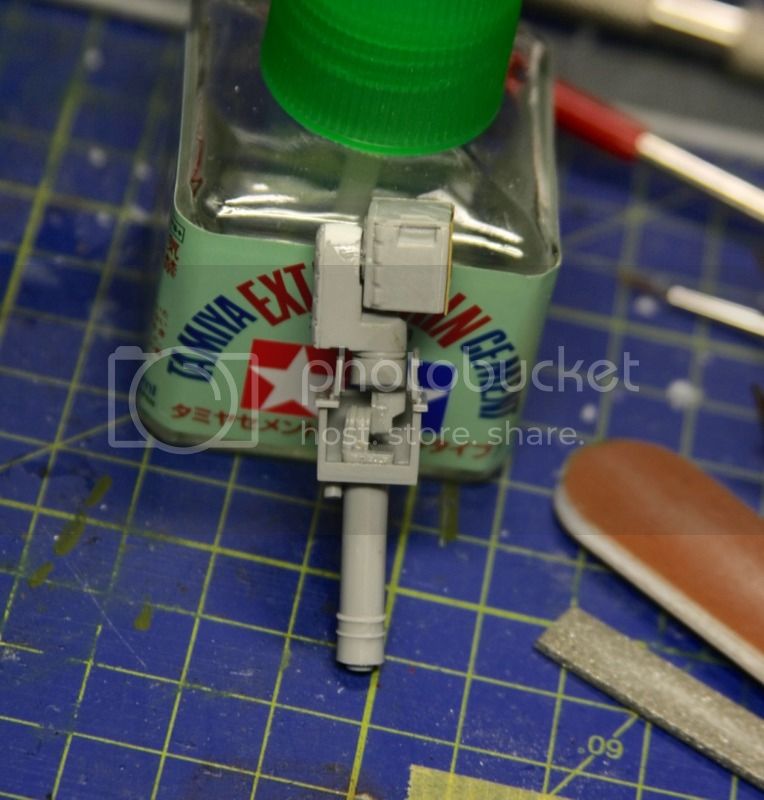
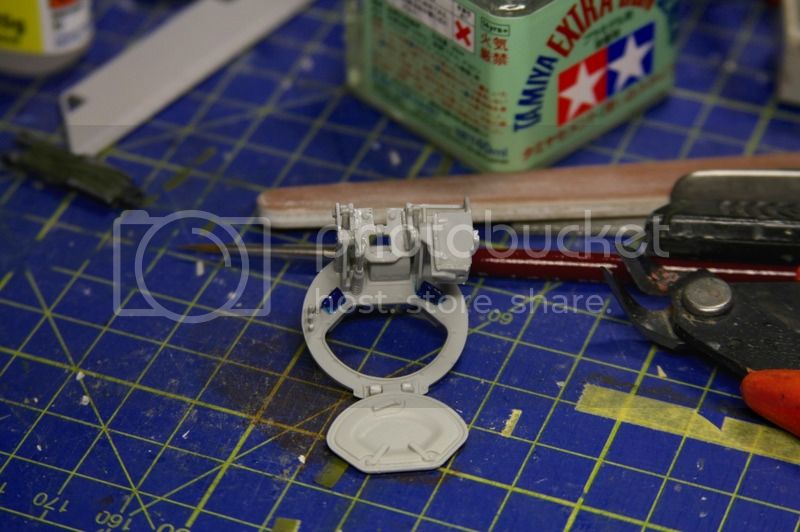
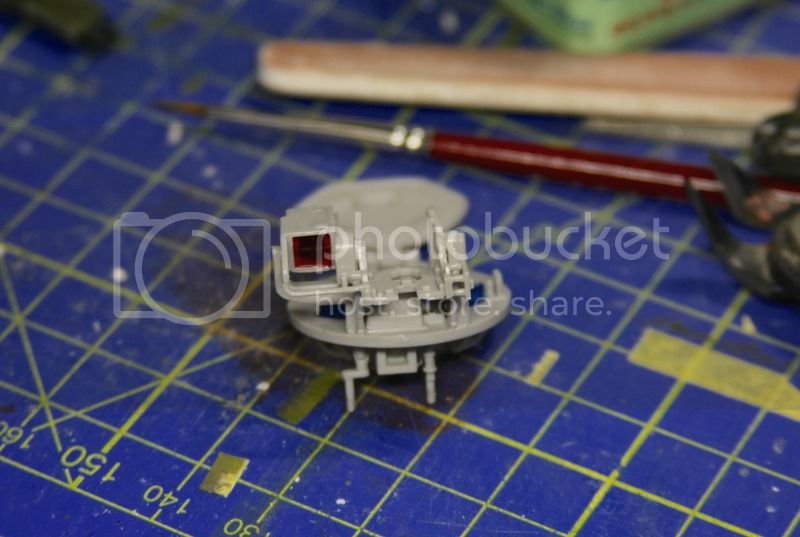
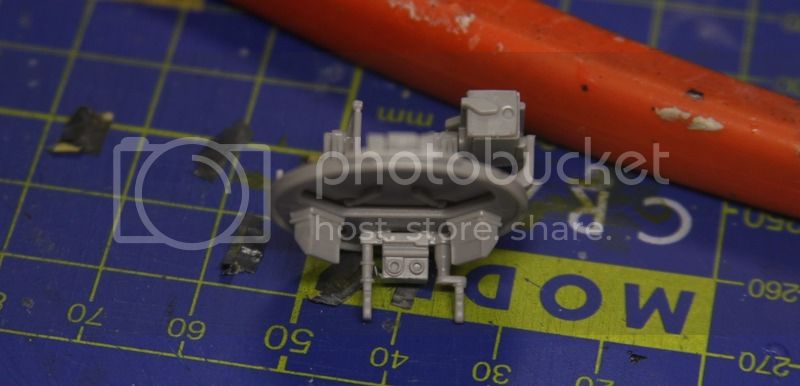
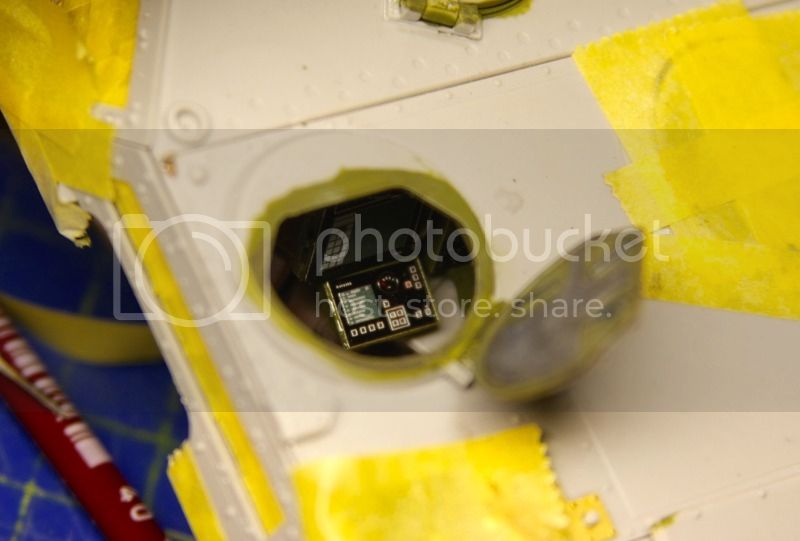
The sensor array is a particularly nice area of the kit- its made up of quite a few parts and can be positioned in three ways- one is with the hatch opening all closed (meaning you don't need to actually build the sensor) or it can be mounted partially deployed where just the top comes up out of the hatch or fully deployed where it is depicted raised out of its hatch. I opted to depict it fully deployed.
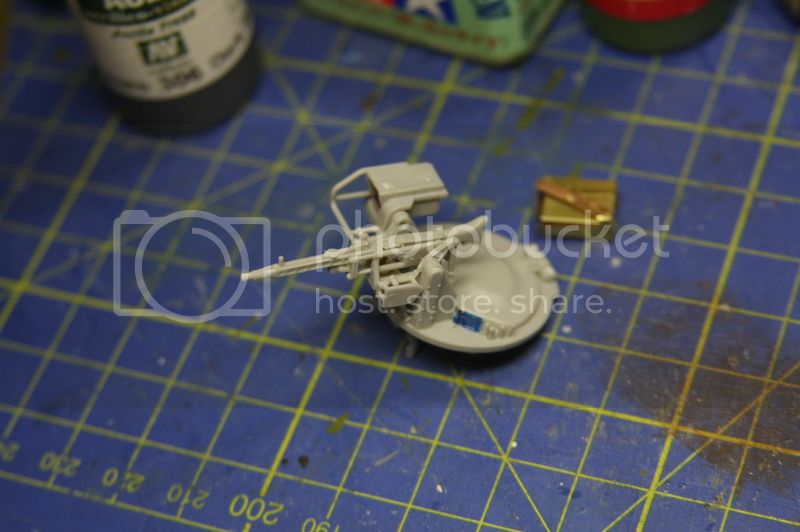
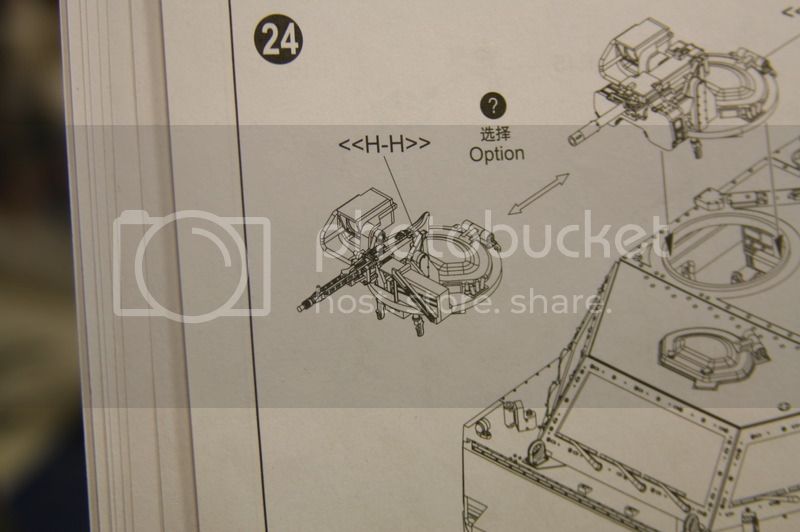
Next up was the hatch including the weapons mount- the choices in the box are either a grenade launcher or Machine gun- I went for the Machine Gun. Unfortunately this area of the kit didn't seem to go together as well as other parts- I found a lot of the moulded mounting holes didn't fit the mounts on the parts to be glued in- the periscopes and the weapons mount frame where the biggest problems- the mounting points were cut off and sanded down on these parts and they were glued over the areas they were supposed to be.
The fitment problems could, of course, just be me being careless!
The weapons searchlight was a better fit and the ammunition can went together well too and the fit seemed to be good for it- I decided to go with the Eduard etch set's ammo can though, as it was much more detailed than the plastic item.
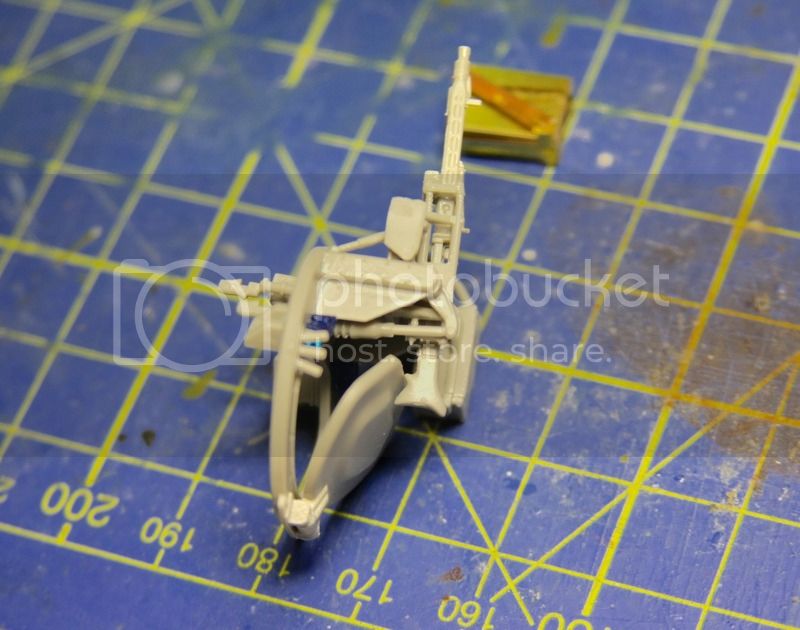
I then encountered another problem when fitting the MG-3. The frame it mounts on didn't seem to correspond to the mount attached to the hatch ring- so I had to shave some areas down to get it to fit right. Then when I mounted the actual gun I noticed another problem.
As you can see the butt stops the hatch opening- I'm stumped by this bit to be honest. I followed the instructions, despite them being a little vague in this area.
I only noticed this problem after the glue on the MG-3 had dried and trying to get it off again would only snap it- I'm not sure exactly where its supposed to be positioned because what I've done matches the position of the gun in the instructions and also matches up where the opening in the weapons mount allows the ammunition to be fed into the gun. Putting the MG-3 further forward on the mount would mean the feed tray is totally obstructed by part of the mount.
A bit of a head scratcher this one- at the minute I've cut off the butt stock and laid it aside so I can open and close the hatch. I haven't yet went to look for references of the real thing but I'm hoping they will shed some light on this area.
I'm also still working away on the upper hull painting and will get an update done for that soon.
Thanks for reading.
jrutman
Pennsylvania, United States
Joined: April 10, 2011
KitMaker: 7,941 posts
Armorama: 7,934 posts
Joined: April 10, 2011
KitMaker: 7,941 posts
Armorama: 7,934 posts
Posted: Thursday, August 06, 2015 - 10:20 PM UTC
Nice work Karl. I am really enjoying this.
J
J
HermannB
Bayern, Germany
Joined: October 14, 2008
KitMaker: 4,099 posts
Armorama: 4,067 posts
Joined: October 14, 2008
KitMaker: 4,099 posts
Armorama: 4,067 posts
Posted: Thursday, August 06, 2015 - 10:49 PM UTC
Hi Karl,
you did right shaving off the MG3 buttstock. The MG3 attached in the 1530 weapons station usually don`t have a buttstock.
Good job on the kit so far.
Cheers
Hans-Hermann
you did right shaving off the MG3 buttstock. The MG3 attached in the 1530 weapons station usually don`t have a buttstock.
Good job on the kit so far.
Cheers
Hans-Hermann
HermannB
Bayern, Germany
Joined: October 14, 2008
KitMaker: 4,099 posts
Armorama: 4,067 posts
Joined: October 14, 2008
KitMaker: 4,099 posts
Armorama: 4,067 posts
Posted: Thursday, August 06, 2015 - 11:06 PM UTC
From Bundeswehr YouTube Channel.
Fennek in training and in Afghanistan.
https://www.youtube.com/watch?v=q8pNDWrqfGw
https://www.youtube.com/watch?v=LrhdTvseOkI
H.-H.
Fennek in training and in Afghanistan.
https://www.youtube.com/watch?v=q8pNDWrqfGw
https://www.youtube.com/watch?v=LrhdTvseOkI
H.-H.
Posted: Saturday, August 08, 2015 - 03:21 PM UTC
Jerry- I'm really glad you are enjoying this mate!
Hans-Hermann- Thanks for the info on the MG-3. Part of my reasoning for cutting the butt-stock off was having seen it done on other weapons used in remote weapons stations so I thought I'd do it and then see- if I was wrong I could always glue it back on. Glad to see I was on the right track. Thanks so much for those videos too- they are awesome- nice to see the Aladin being launched too! I'll be starting work on that soon.
flugwuzzi
Lower Austria, Austria
Joined: November 02, 2007
KitMaker: 633 posts
Armorama: 599 posts
Joined: November 02, 2007
KitMaker: 633 posts
Armorama: 599 posts
Posted: Sunday, August 09, 2015 - 07:34 PM UTC
Phantastic build Karl!
Great information and excellent images makes following your bild very entertaining.
Keep on the good work.
Cheers
Walter
Great information and excellent images makes following your bild very entertaining.
Keep on the good work.
Cheers
Walter
Posted: Friday, August 14, 2015 - 09:50 PM UTC
Walter- thanks so much for checking the build out, much appreciated.
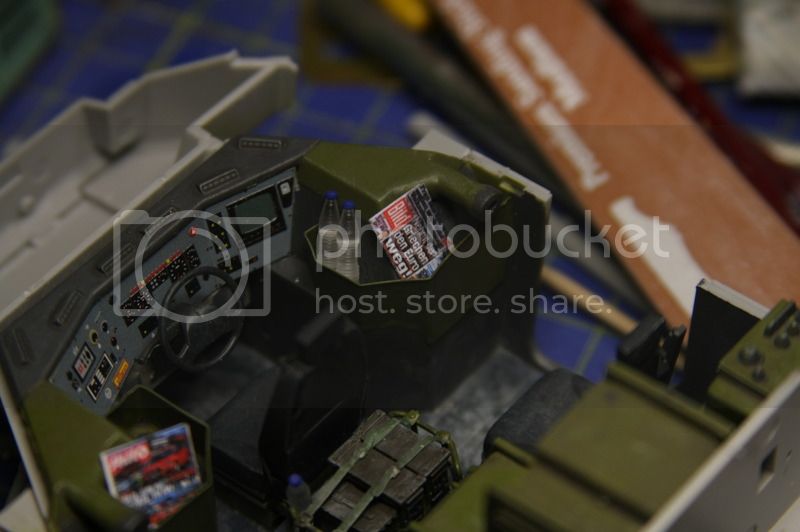
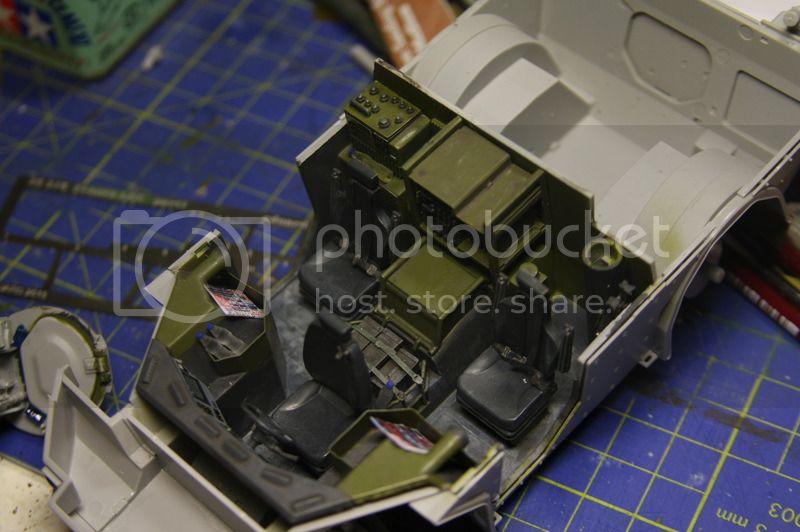
Before I closed up the interior I had a bit of weathering and some final little bits to add.
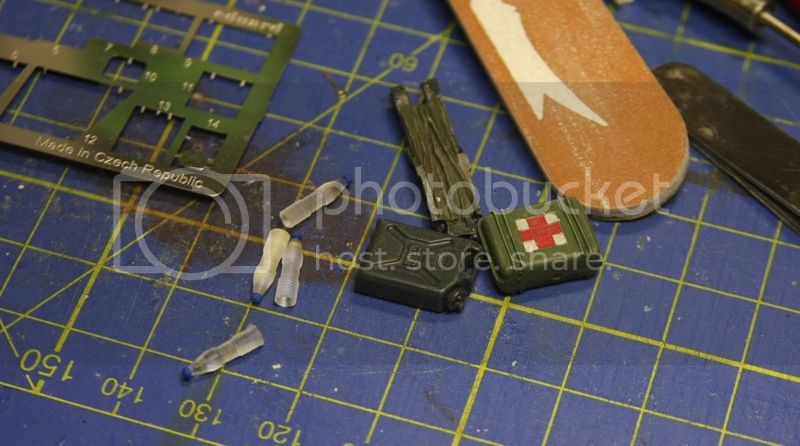
Here I have a water can, a folding stretcher (this might actually be a camp-style folding bed- its from the spares box- but it won't be easily seen once in place), a first aid kit case and some water bottles. The first aid kit and water can were not placed inside- but they will likely be placed outside near one of the doors on the groundwork.
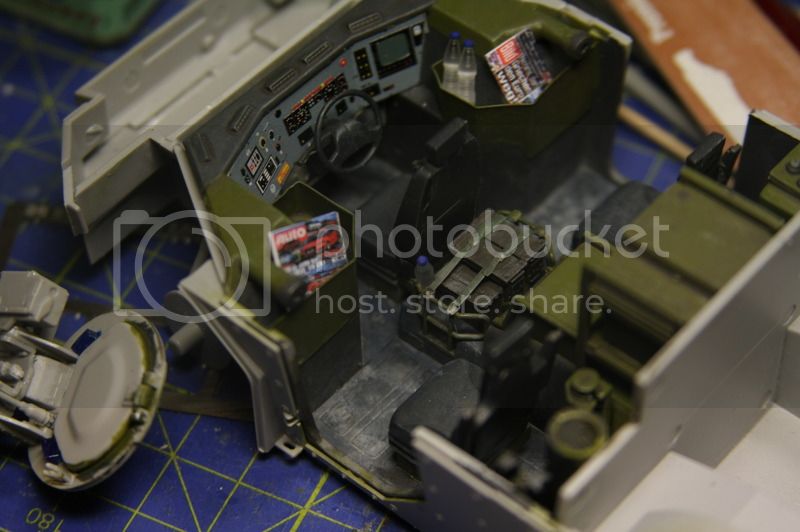
The inside of the upper hull was then given a wash of dark grey.
Then the remainder of the pre-colored Eduard set was used to represent three screens which hang down on stations from the roof.
I then added the water bottles, stretcher and a copy of German newspaper Bild and motoring magazine Auto-Zeitung- they were just found at random on google and printed off.
Some Sand pigment powder from Ammo was then brushed into the footwells and around the lower parts of the seats.
Since taking these I've mated the hull halves and I'm painting the inside of the two side doors which will likely be left open along with the hatches. I'll get an update for that work done soon.
As always, thanks for reading.
terminators
France
Joined: February 20, 2012
KitMaker: 1,932 posts
Armorama: 1,907 posts
Joined: February 20, 2012
KitMaker: 1,932 posts
Armorama: 1,907 posts
Posted: Saturday, August 15, 2015 - 12:04 AM UTC
Very nice. I Like the paint job and accessories.
The control lever for the RWS has been forgotten in the kit, and another black lever on the left.
I must thanks Hans Hermann for his pics very usefull.
http://data3.primeportal.net/apc/hans-hermann_buhling/fennek/images/fennek_117_of_149.jpg
The control lever for the RWS has been forgotten in the kit, and another black lever on the left.
I must thanks Hans Hermann for his pics very usefull.
http://data3.primeportal.net/apc/hans-hermann_buhling/fennek/images/fennek_117_of_149.jpg
jrutman
Pennsylvania, United States
Joined: April 10, 2011
KitMaker: 7,941 posts
Armorama: 7,934 posts
Joined: April 10, 2011
KitMaker: 7,941 posts
Armorama: 7,934 posts
Posted: Saturday, August 15, 2015 - 01:37 AM UTC
Nice final interior weathering and stuff. I love the magazines. That is definitely a folding cot.
J
J
HermannB
Bayern, Germany
Joined: October 14, 2008
KitMaker: 4,099 posts
Armorama: 4,067 posts
Joined: October 14, 2008
KitMaker: 4,099 posts
Armorama: 4,067 posts
Posted: Saturday, August 15, 2015 - 01:39 AM UTC
Hey Karl, good progress. One note only. The Bundeswehr uses some kind of plastic water can, but not the Canadian scepter- made ones. You can either use regular Benzinkanister with white painted caps or commercial water bottles.
@Alex there is no control lever for the RWS. The KMW OWS 1530 use two cranks for side and elevation movement.
terminators
France
Joined: February 20, 2012
KitMaker: 1,932 posts
Armorama: 1,907 posts
Joined: February 20, 2012
KitMaker: 1,932 posts
Armorama: 1,907 posts
Posted: Saturday, August 15, 2015 - 03:09 AM UTC
Quoted Text
Hey Karl, good progress. One note only. The Bundeswehr uses some kind of plastic water can, but not the Canadian scepter- made ones. You can either use regular Benzinkanister with white painted caps or commercial water bottles.
@Alex there is no control lever for the RWS. The KMW OWS 1530 use two cranks for side and elevation movement.
Ok, so what is the function of those two levers on this picture ?
HermannB
Bayern, Germany
Joined: October 14, 2008
KitMaker: 4,099 posts
Armorama: 4,067 posts
Joined: October 14, 2008
KitMaker: 4,099 posts
Armorama: 4,067 posts
Posted: Saturday, August 15, 2015 - 11:28 AM UTC
Salut Alex,
since it`s the drivers place, the right lever is for the automatic transmission while the left lever is the parking brake.
HTH
Hans-Hermann
since it`s the drivers place, the right lever is for the automatic transmission while the left lever is the parking brake.
HTH
Hans-Hermann
terminators
France
Joined: February 20, 2012
KitMaker: 1,932 posts
Armorama: 1,907 posts
Joined: February 20, 2012
KitMaker: 1,932 posts
Armorama: 1,907 posts
Posted: Saturday, August 15, 2015 - 01:15 PM UTC
Thank you Hans. I think I will add them on mine Fennek.
HermannB
Bayern, Germany
Joined: October 14, 2008
KitMaker: 4,099 posts
Armorama: 4,067 posts
Joined: October 14, 2008
KitMaker: 4,099 posts
Armorama: 4,067 posts
Posted: Wednesday, August 19, 2015 - 11:48 AM UTC
Hi Karl,
Bundeswehr.de just released thei video:
http://www.bundeswehr.de/portal/a/bwde/!ut/p/c4/NYyxCoNAEET_6NYzBDGdIoFYpkm0Cau36IJ3J8uqTT4-Z5EZeM1jBnpIDbjzhMox4AJv6Ea-DYcZDkfGb4uyJ8dodnYUUcaZdzMTiRmIVZAm-uSZvcLrvEqTMQbSk0pBOXES1ChmjaLLaTaRZAw76DLb1LbI_rHfsm_vl6oo8-ZRP2H1vvoBf6BkKA!!/
of the ALADIN UAV in action. It has a lot of details that you might find helpful for your project.
Armored76
Bayern, Germany
Joined: September 30, 2013
KitMaker: 1,615 posts
Armorama: 1,500 posts
Joined: September 30, 2013
KitMaker: 1,615 posts
Armorama: 1,500 posts
Posted: Wednesday, August 19, 2015 - 11:53 AM UTC
This is looking absolutely fantastic!!! Love the touch added by the magazines!
Posted: Monday, December 21, 2015 - 10:49 PM UTC
Damn its been a while since I updated this!
Ever get a really bad case of modelers block? Yeah thats what I got around the last time I updated this. Looking back on it I think it came about for several reasons. Just prior to starting this build I'd kind of binged on US Army 1/72 helicopters and built and painted seven in rapid succession. Then I noticed my relatively new Iwata Neo had a bent needle and was going to need a new one. On top of that I'd noticed that the Bundeswehr figures I was planning to use on this build would need a decent bit of modification- not to mention the Aladin UAV (more on these later). Not insurmountable problems, just annoying and coupled with the fact I was quite busy in general and that in the first place I had started this build to get away from a rather protracted build requiring a good bit of scratch building and modification.
So this build went on hiatus until about last week- I was still checking out Armorama as I reckon, even when you've got modelers block, its good to see the great things others are up to and you also hope one of the fine builds here might give you the kick up the ass you need to get back to the bench.
But enough of that. I'd like to say a thank you to Hans-Hermann who, despite me not making any progress in this build, continued to send me references on the Fennek and UAV that are proving extremely helpful as I pick this build up again. I'll be sharing the cool stuff he's sent me as I go along.
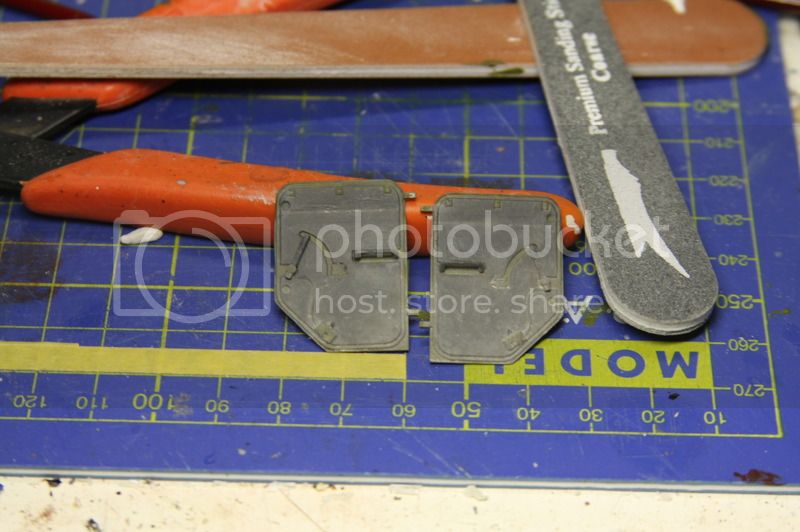
I left off the last time having just painted the inner side doors green and was going to brush paint the detail and then weather them, so here they are.
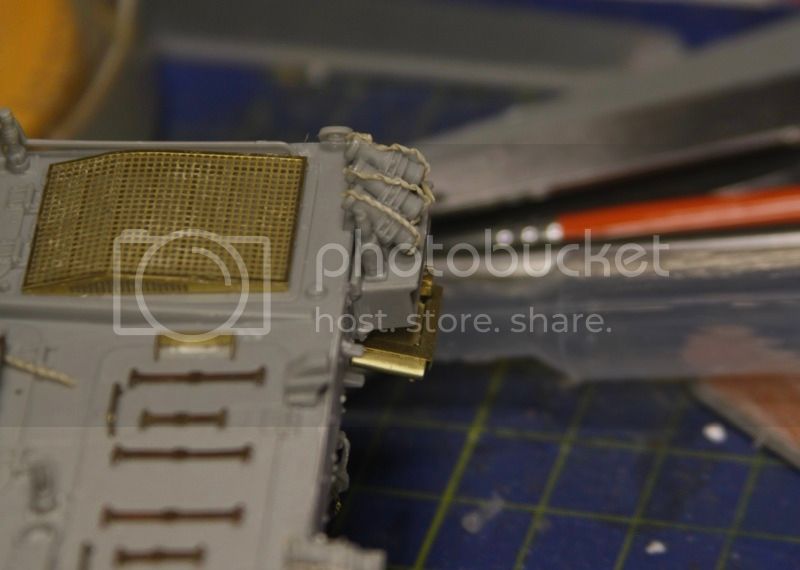
The last thing I wanted to tackle on the Fennek was the tie down wires or the smoke grenade launchers at the rear. I'd kind of given up of finding a flexible wire small enough for this- until I was creating chin loops for the boonie hats on two of my figures- I was using stretched and curled sprue shavings that come up in the grooves of my drill bit when I am drilling down into them.
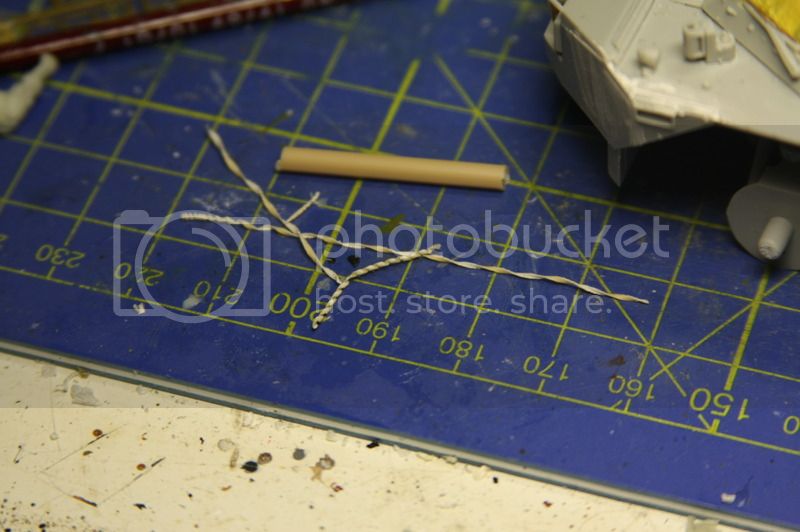
Once you stretch (gently) and twist (again, gently) these they get quite small and become like small wires- coiled yes but they look better than nothing.
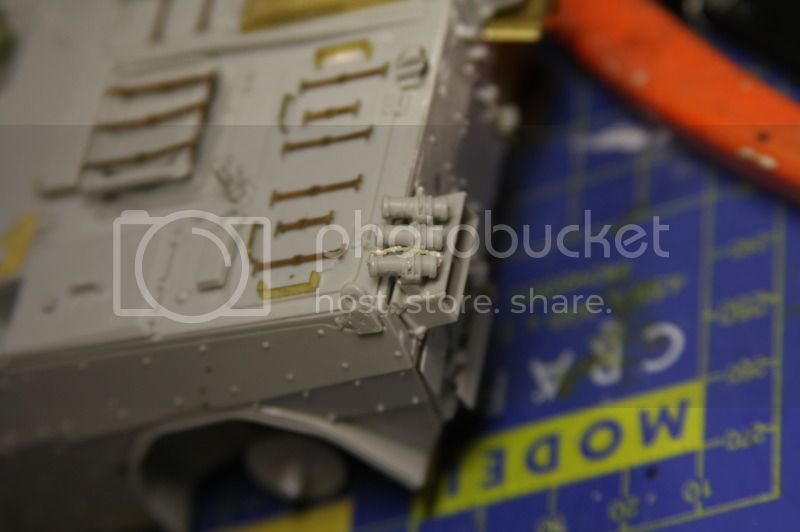
So that was the Fennek all sorted and ready to get some primer. I set that aside and began working on the Blackdog figures and Aladin UAV.
I find Blackdog an infuriating company sometimes- they make some great stuff but also some turkeys (CHRISTMAS REFERENCE!) as well. Unfortunately this release is a bit of a turkey. First of all it was easy to mix both figures up once the mould blocks were cut off- they are pretty much identical apart from a slightly more pronounced arch in the back of one. Then arm attachment points are terrible so it took me a while to work out which arms went to which torso when I did mix them up. (In the box art you see that the guy holding up the G36K has some knee pads- but there were none present on my example).
Happily the arms didn't want to bond with CA glue either. I tried cleaning, sanding and a LOT of swearing but only one of the little resin gits actually attached properly. The others I had to use Magic Sculpt on- I would have to have got this out anyway to clean up the shoulder areas where the arms attached.
The soldier launching the UAV was the easiest one to sort out.
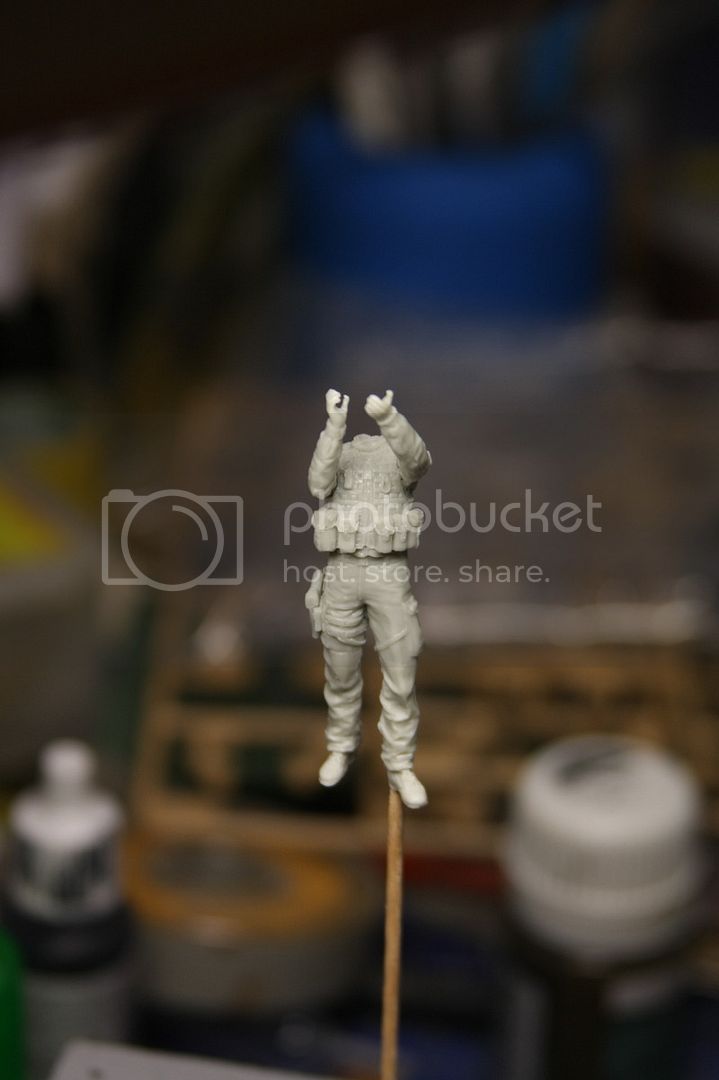
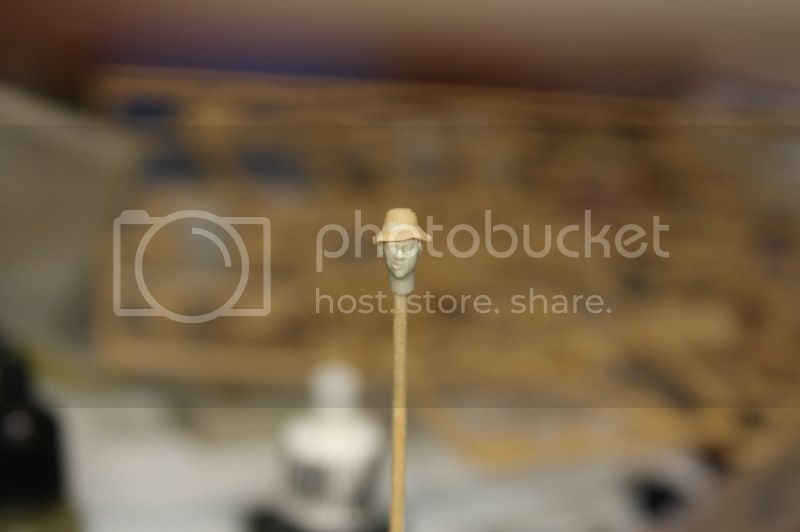
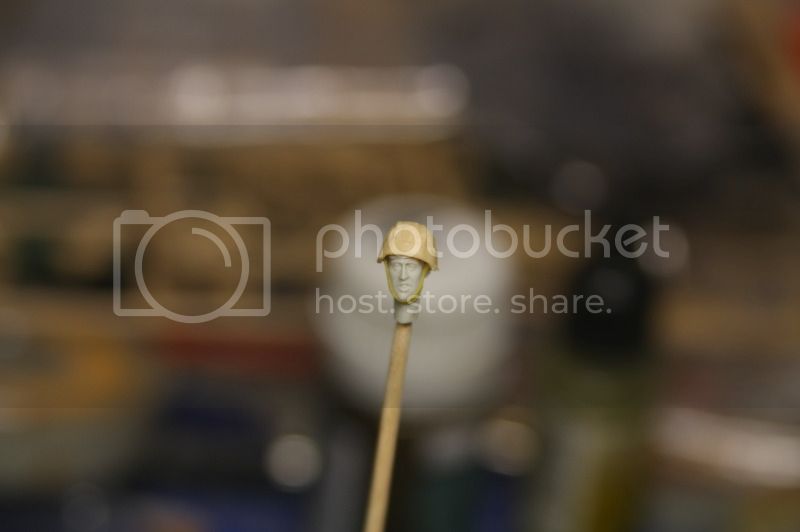
The head supplied was terrible so I replaced it with a Hornet one and a helmet from the Trumpeter Bundeswehr set.
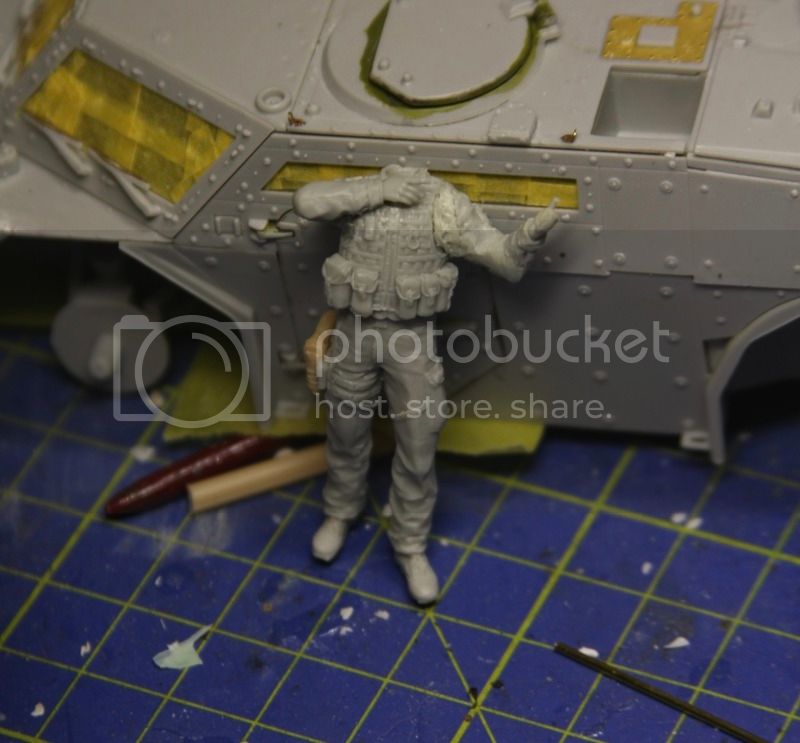
Setting that figure aside I went to tackle the guy holding the G36K- not a great pose to be honest and one I had great difficulty getting to work alongside a decent Hornet head that showed him aiming/looking down the sight. I had to cut the left arm in half, pin both halves at a new angle and re-sculpt the middle. He was also missing his side arm but luckily there are a few extra in the Trumpeter set so one went one of those. His boonie hat also came from the Trumpeter set.
So that will do for now. Next up I will talk about the third figure and the UAV.
As always, thanks so much for reading. I wish you all a Merry Christmas- hope you all enjoy the holiday season!
ComaBlack
Ontario, Canada
Joined: September 19, 2010
KitMaker: 194 posts
Armorama: 148 posts
Joined: September 19, 2010
KitMaker: 194 posts
Armorama: 148 posts
Posted: Tuesday, December 22, 2015 - 06:01 AM UTC
I noticed that you had CrossDelta decals for this project. If you still intend to use the uniform decals, skip the Academy ones and go straight to CrossDelta.
jasegreene
Florida, United States
Joined: October 21, 2013
KitMaker: 751 posts
Armorama: 751 posts
Joined: October 21, 2013
KitMaker: 751 posts
Armorama: 751 posts
Posted: Tuesday, December 22, 2015 - 06:57 AM UTC
I enjoy ISAF as a modeling subject since the beginning and am enjoying this but it has even a more special meaning after the attack and deaths of the American service members just the other day in Afghanistan days before Christmas.My thoughts and prayers does go out to them.
jrutman
Pennsylvania, United States
Joined: April 10, 2011
KitMaker: 7,941 posts
Armorama: 7,934 posts
Joined: April 10, 2011
KitMaker: 7,941 posts
Armorama: 7,934 posts
Posted: Tuesday, December 22, 2015 - 07:18 PM UTC
Happy to see that you returned to this one as it was really shaping up nicely. That was an awesome solution to the smoke grenade wires,BTW.
The figs are progressing very well. I think this is actually the first build log I have seen using Black Dog figures. Could be wrong of course.
I notice the standing shooting guy you modified has maybe a bit too much length on his left upper arm? If you follow his forearm down on a straight line the elbow sticks out. Maybe a bit of a sand back? A minor thing but I know what a good eye you have and this may drive you nuts if you notice it after painting?
J
HermannB
Bayern, Germany
Joined: October 14, 2008
KitMaker: 4,099 posts
Armorama: 4,067 posts
Joined: October 14, 2008
KitMaker: 4,099 posts
Armorama: 4,067 posts
Posted: Tuesday, December 22, 2015 - 08:04 PM UTC
Hi Karl,
take note that the chains on the SGL are mounted under the launch tube not above.
Cheers and Merry Christmas
Hans-Hermann
take note that the chains on the SGL are mounted under the launch tube not above.
Cheers and Merry Christmas
Hans-Hermann