_GOTOBOTTOM
Dioramas
Do you love dioramas & vignettes? We sure do.
ISAF Bundeswehr Fennek & UAV
Karl187
#284
Visit this Community
Northern Ireland, United Kingdom
Joined: October 04, 2006
KitMaker: 3,094 posts
Armorama: 2,942 posts
Posted: Monday, July 06, 2015 - 10:05 PM UTC
Hi Guys!

I'd like to share with you my build log of a small diorama. The main subject is going to be a Bundeswehr Fennek LGS along with some Bundeswehr figures- at least three but I may plan to add one or two more. Two of the figures will be from a Blackdog set that includes an Aladin UAV.

Before I start in with this I have to thank fellow modeler Sean Mullarkey (Callsign '35th-scale') for the inspiration for this dio after seeing his excellent Fennek build on the Irish IPMS forums.
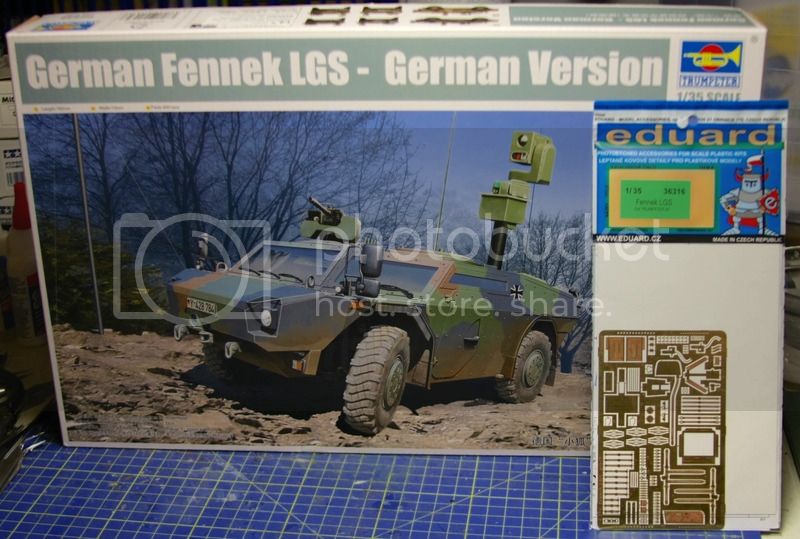


As you can see there I couldn't resist getting Eduard's PE detail set for the Fennek which includes color parts for the interior. Having said that, I know from Sean's build that the interior can be painted just as well (if not better) than the decals so I wouldn't say they are a necessary purchase- OOB details are excellent on this kit.
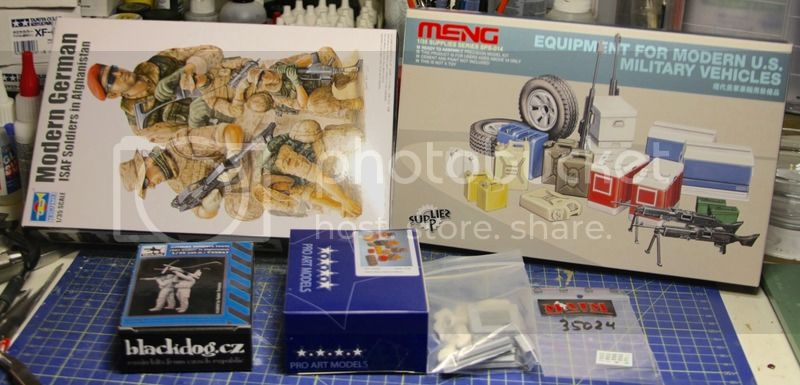


The extra bits and bobs are mostly to do with the figures but there is also some miscellaneous equipment, hard cases for the UAV, some MAIM figure decals (they are not in the picture but I got some CrossDelta decals for the Bundeswehr Steppentarn camo uniform- again this is not essential as the Trumpeter figure kit comes with uniform decals but I have heard good things about Crossdelta's stuff so I thought I'd see what they are like for myself) and there's also a small resin well there too for the dio.
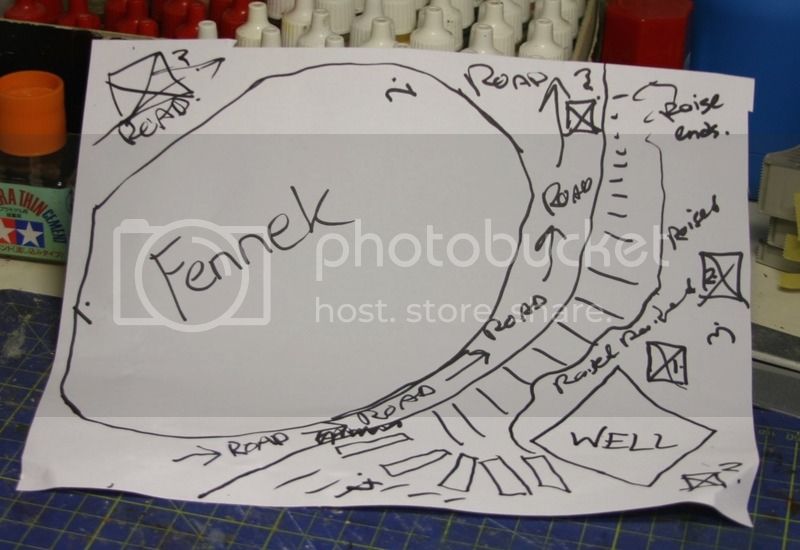


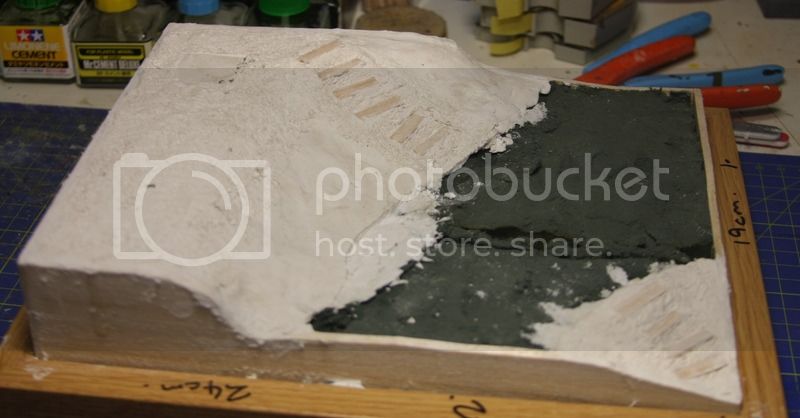
Please forgive my rather rough outline of a dip . I'm trying to keep it quite simple and make sure the focus is nearly all on the Fennek- the well will be up on some higher ground above a small roadway on which the Fennek is parked- the soldiers launching the UAV will be up near the well while another one (or maybe two) are down on the road somewhere.
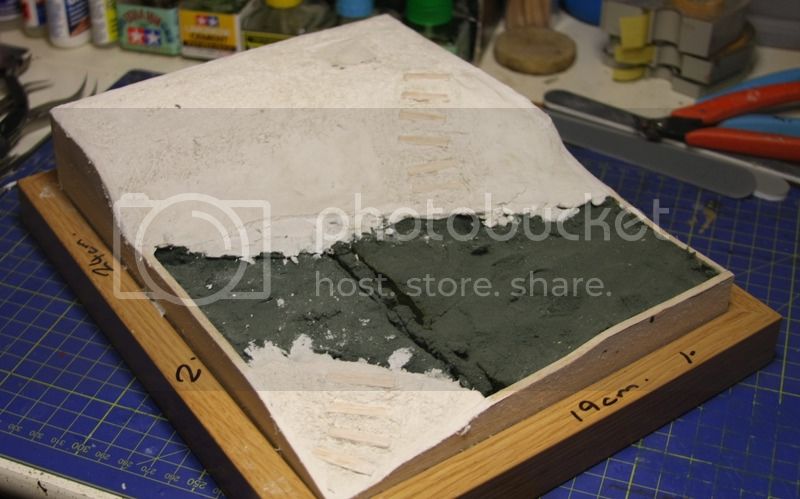


The base is a simple affair- a picture from with balsa wood sides cut to shape and height and filled with florists foam. A thin layer of wall filler was spread over the foam and then DAS clay was used to shape the groundwork. Its far from finished though- the roadway itself is yet to go down and there are a few other features I'm still pondering.

Construction of the kit has thus far been straightforward and as usual from Trumpeter the fit of the parts is excellent and the detail is fantastic.
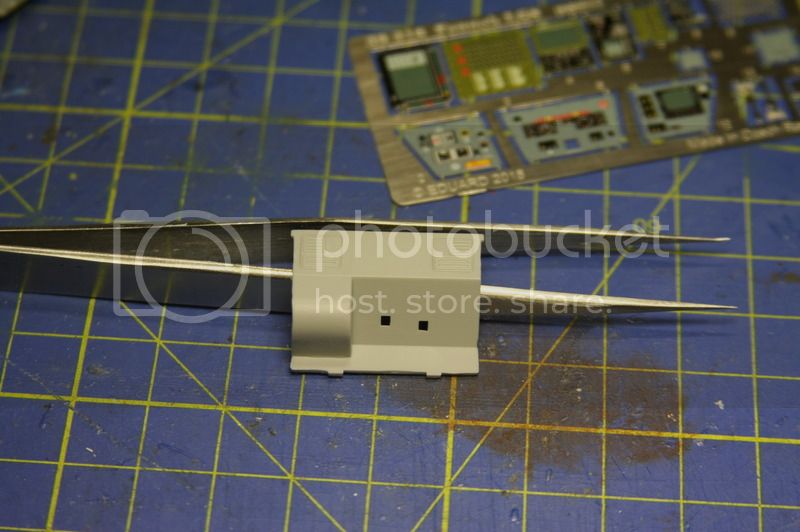
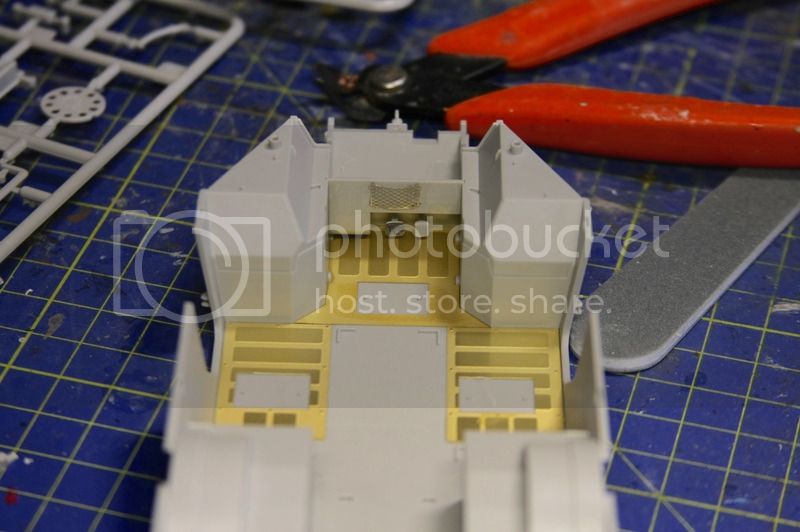
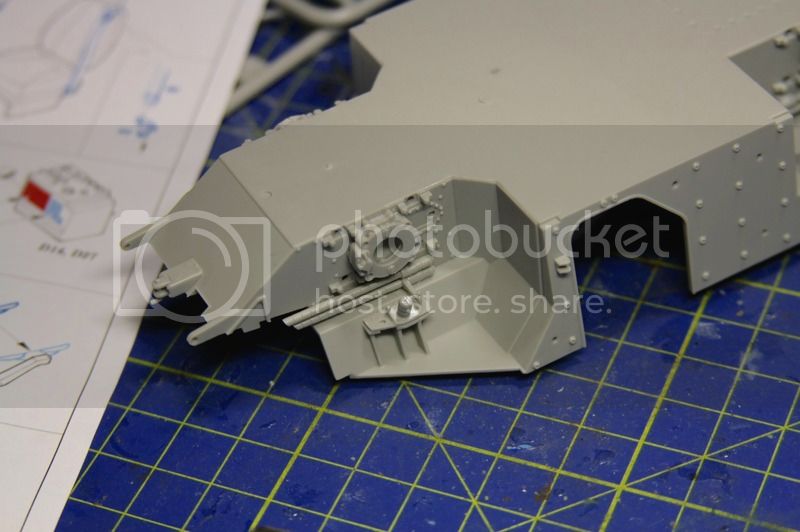
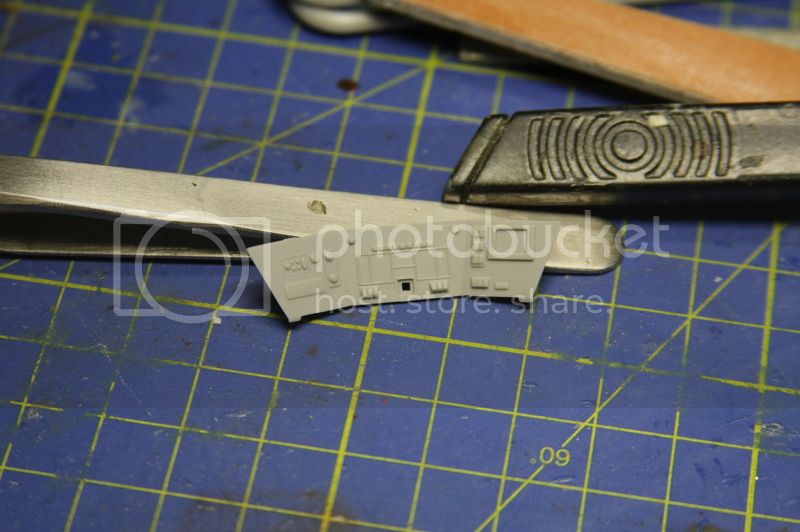
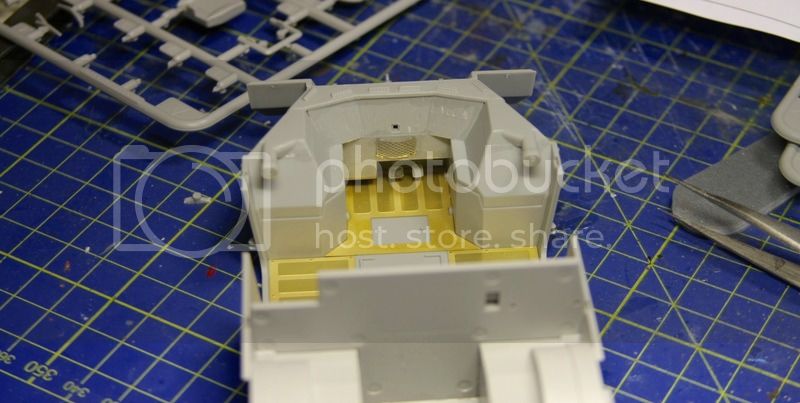


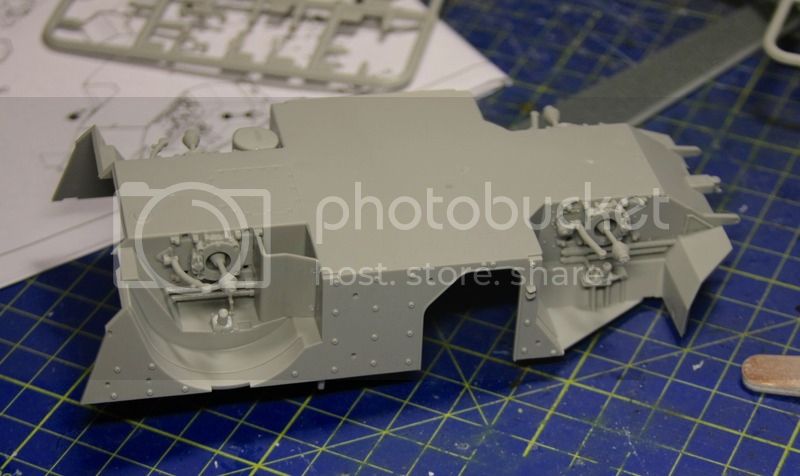
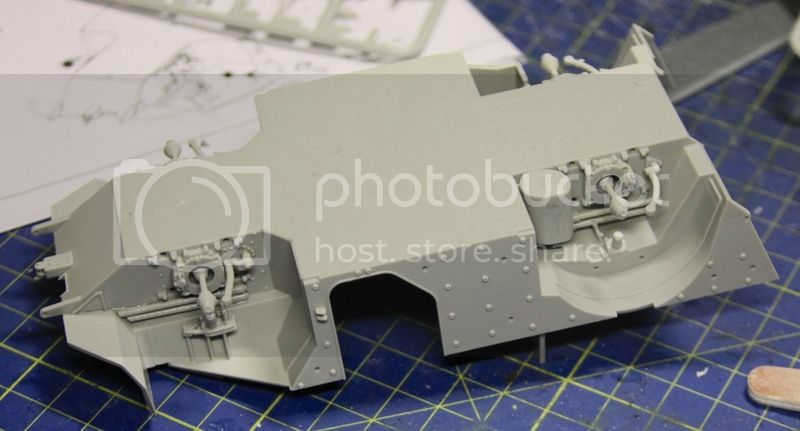
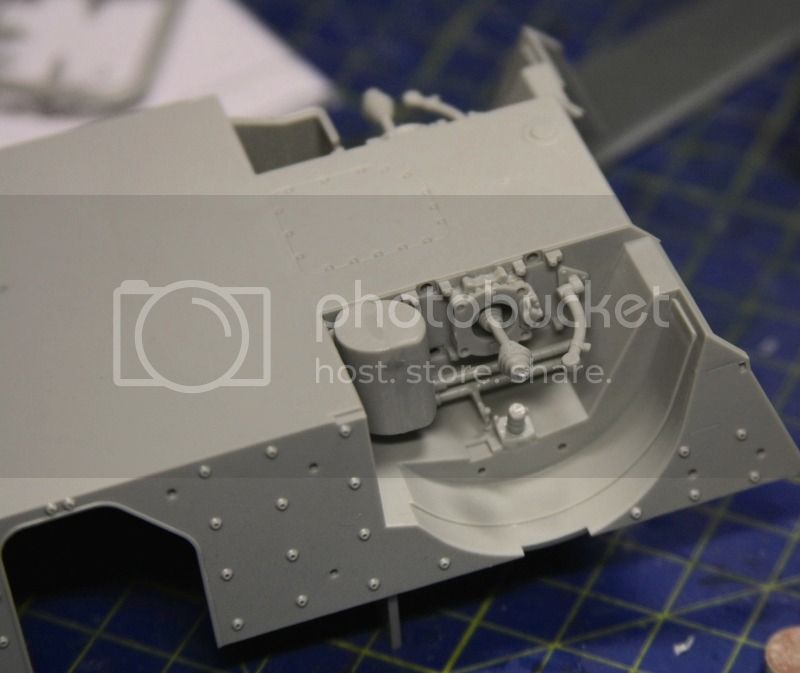
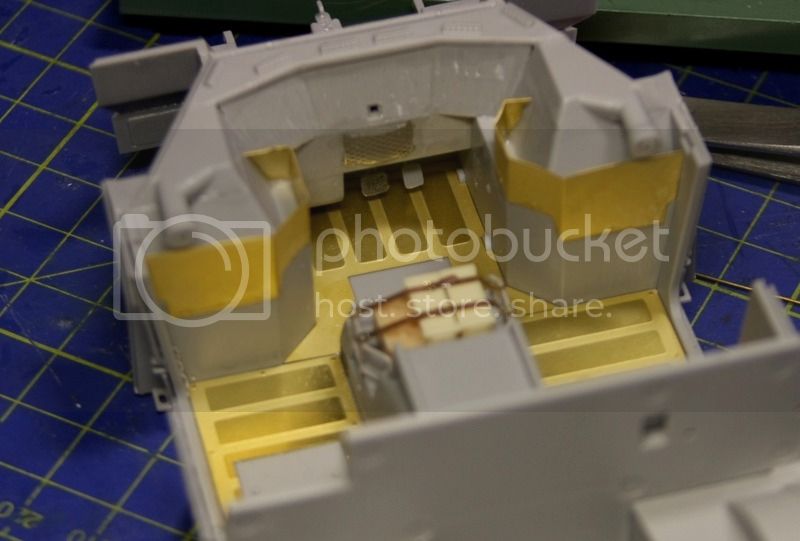
Most, if not all, of the pre-painted etch pieces won't go on until I paint the interior, hence for this part of the construction all that is required is to sand the particular surfaces flat.

More to come soon.

Thanks for reading!
mvaiano
Visit this Community
Sao Paulo, Brazil
Joined: January 24, 2012
KitMaker: 1,054 posts
Armorama: 1,050 posts
Posted: Monday, July 06, 2015 - 10:46 PM UTC
Hi Karl!

Following.

Cheers!

Marco
terminators
Visit this Community
France
Joined: February 20, 2012
KitMaker: 1,932 posts
Armorama: 1,907 posts
Posted: Tuesday, July 07, 2015 - 02:14 AM UTC
Hi, Interesting project the diorama drawing looks good. Can't wait to see the result.

I have a fennek in my stash too and problem to identify some colors on pics. Could you help me ?

what is the color of the inside face of the bodywork ?

jrutman
Visit this Community
Pennsylvania, United States
Joined: April 10, 2011
KitMaker: 7,941 posts
Armorama: 7,934 posts
Posted: Tuesday, July 07, 2015 - 02:48 AM UTC
Hey Karl!!
Nice to see you "in the game" again. Can't wait to follow along. Looks like some good PE work already started.
J
zorrolobo
Visit this Community
Distrito Federal, Mexico
Joined: May 31, 2013
KitMaker: 1,457 posts
Armorama: 1,440 posts
Posted: Tuesday, July 07, 2015 - 05:18 AM UTC
That is going to be my next model definitely!
panamadan
Visit this Community
Minnesota, United States
Joined: July 20, 2004
KitMaker: 1,513 posts
Armorama: 1,449 posts
Posted: Tuesday, July 07, 2015 - 05:25 AM UTC
Love the Fennek!
Dan
Karl187
#284
Visit this Community
Northern Ireland, United Kingdom
Joined: October 04, 2006
KitMaker: 3,094 posts
Armorama: 2,942 posts
Posted: Tuesday, July 07, 2015 - 09:49 PM UTC
Marco- thanks for checking out the thread- good to have you following along !

Jerry- its a pleasure to have you along for this one buddy- thanks!

Marcos- Definitely do get one if you are interested- its a brilliant kit and I'm only on the fourth page or so!

Dan- I'm with you mate- this is one of my favorite AFV's.

Alex- Thank's for checking out the thread. I was going to talk about the interior of the Fennek when I came to paint it myself but since you asked I thought I would talk about the interior now.

Just before I started the build I checked out Prime Portal to see if they had any walkarounds of the vehicle and they have quite a few. One of the best in terms of the interior pictures is by Hans-Hermann Buhling, who is a frequent visitor to Armorama (callsign 'HermannB'). Here's a link to the walk around:

http://www.primeportal.net/apc/hans-hermann_buhling/fennek/.

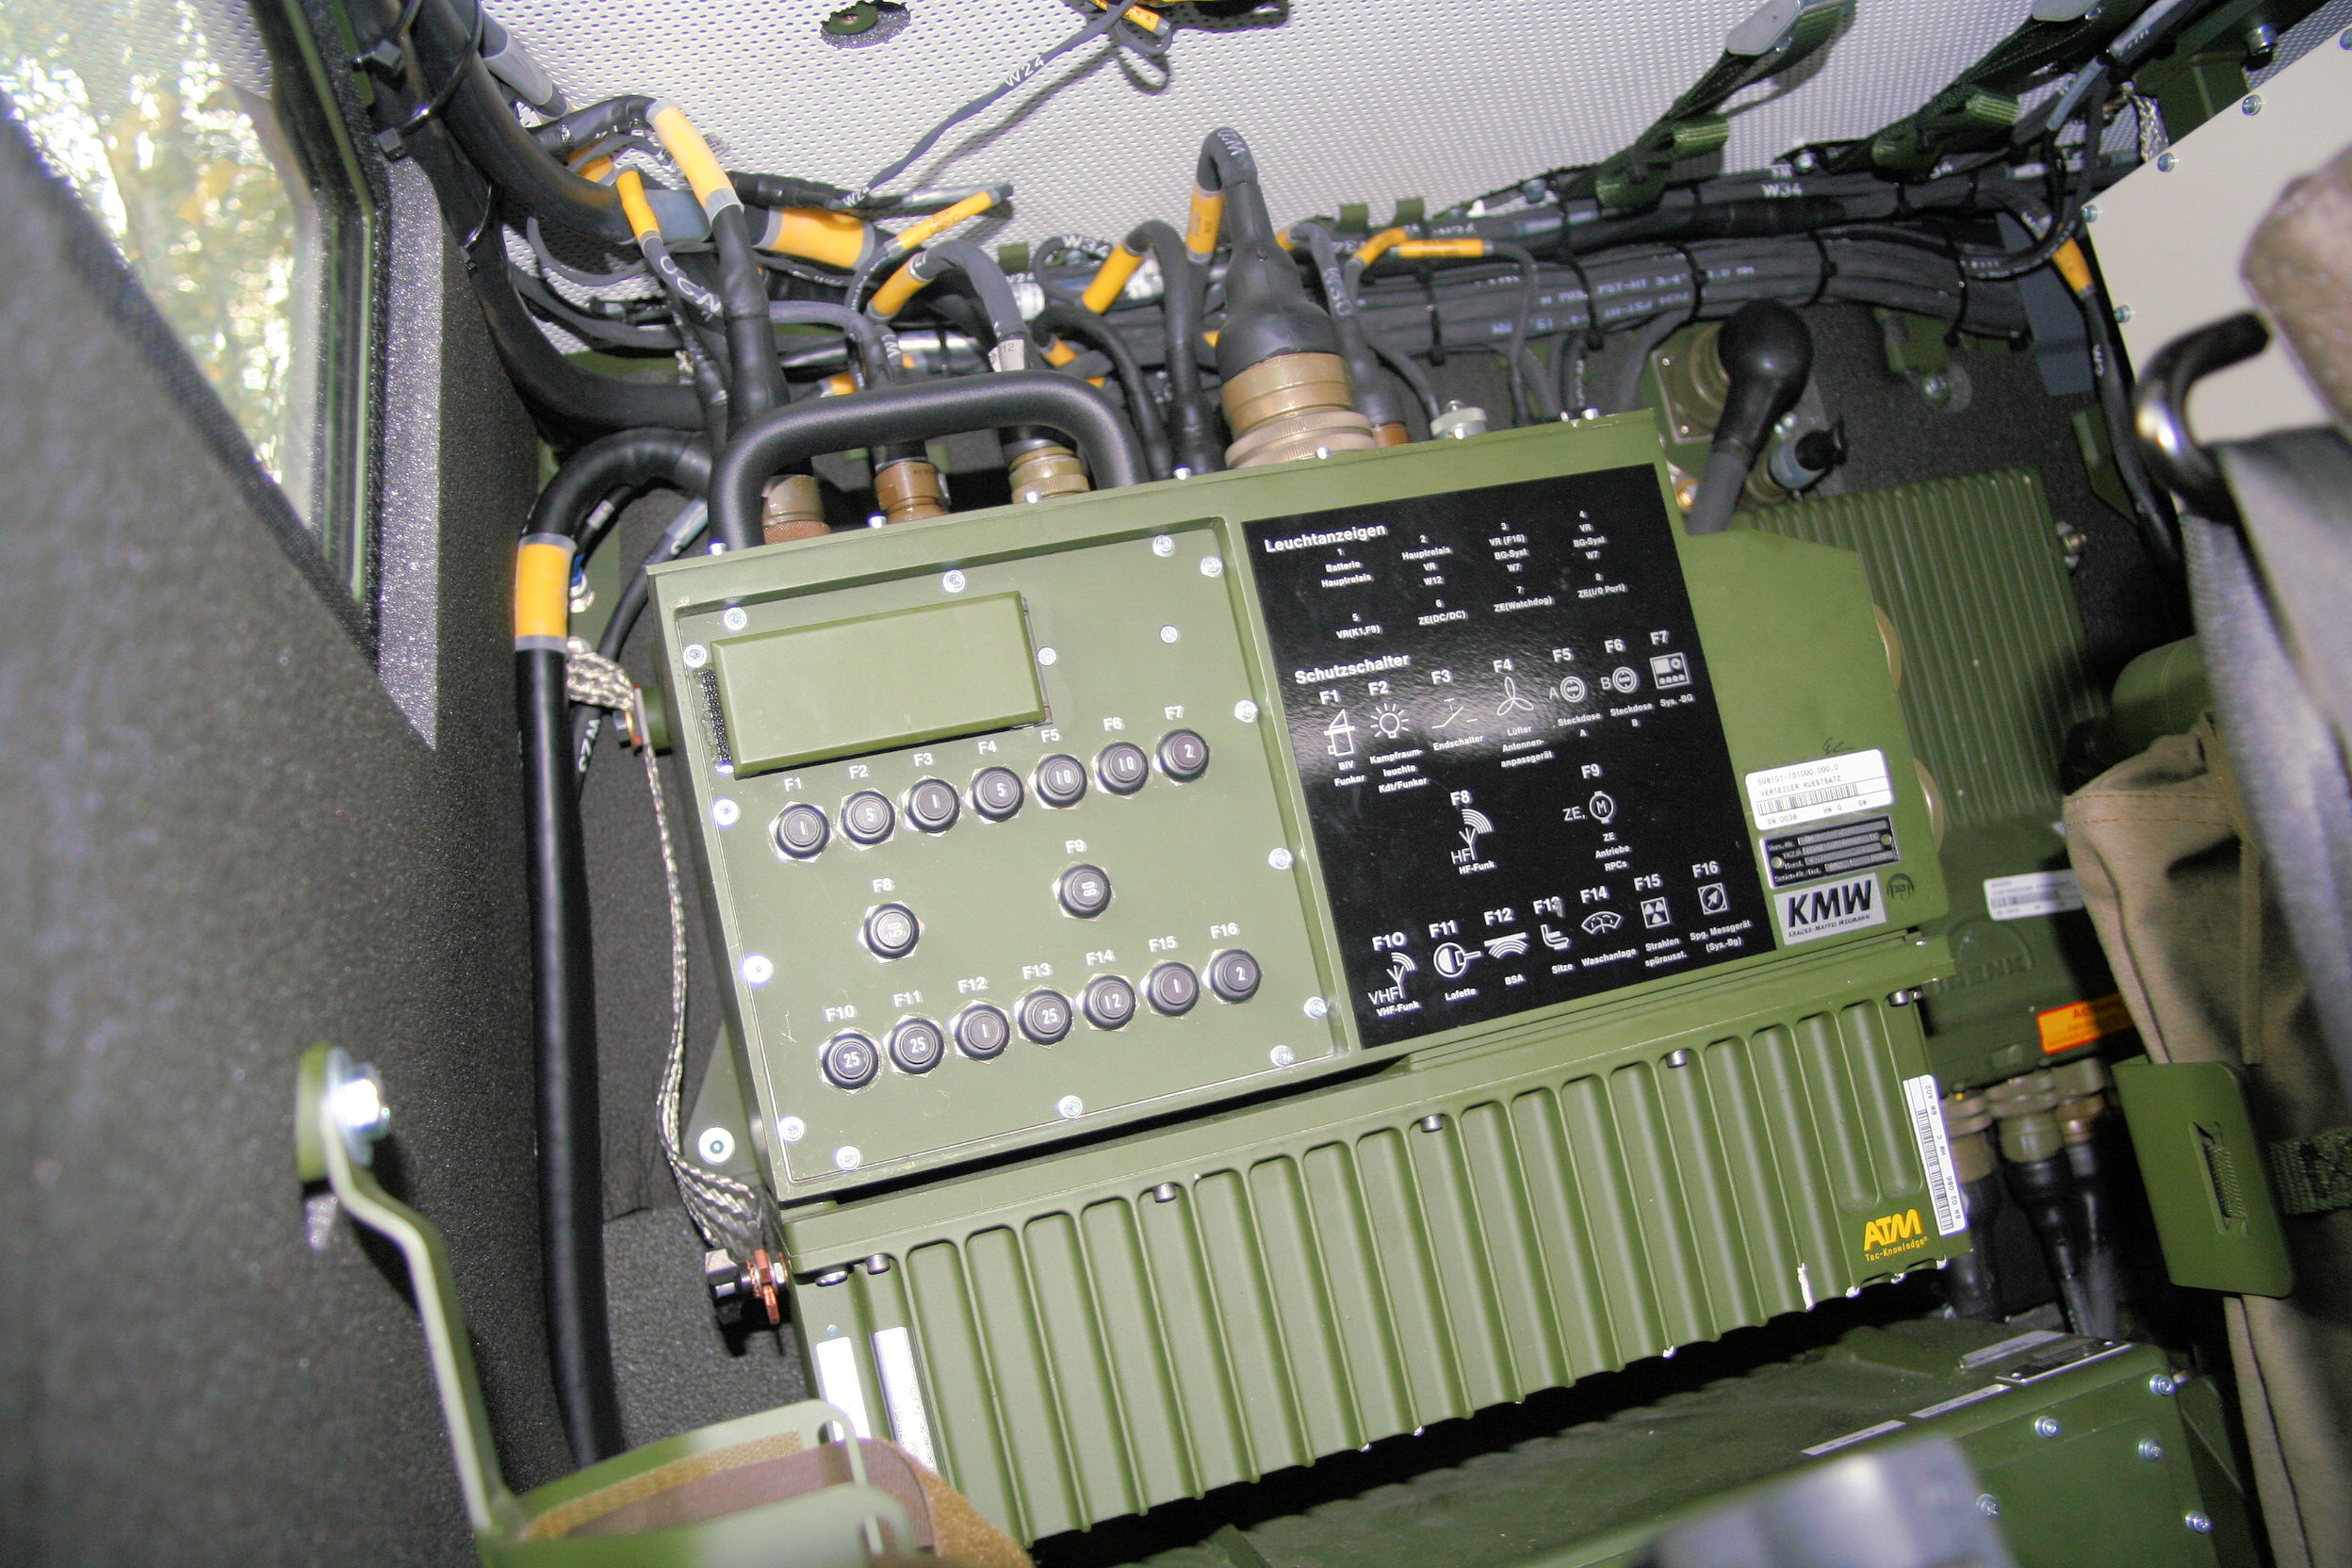
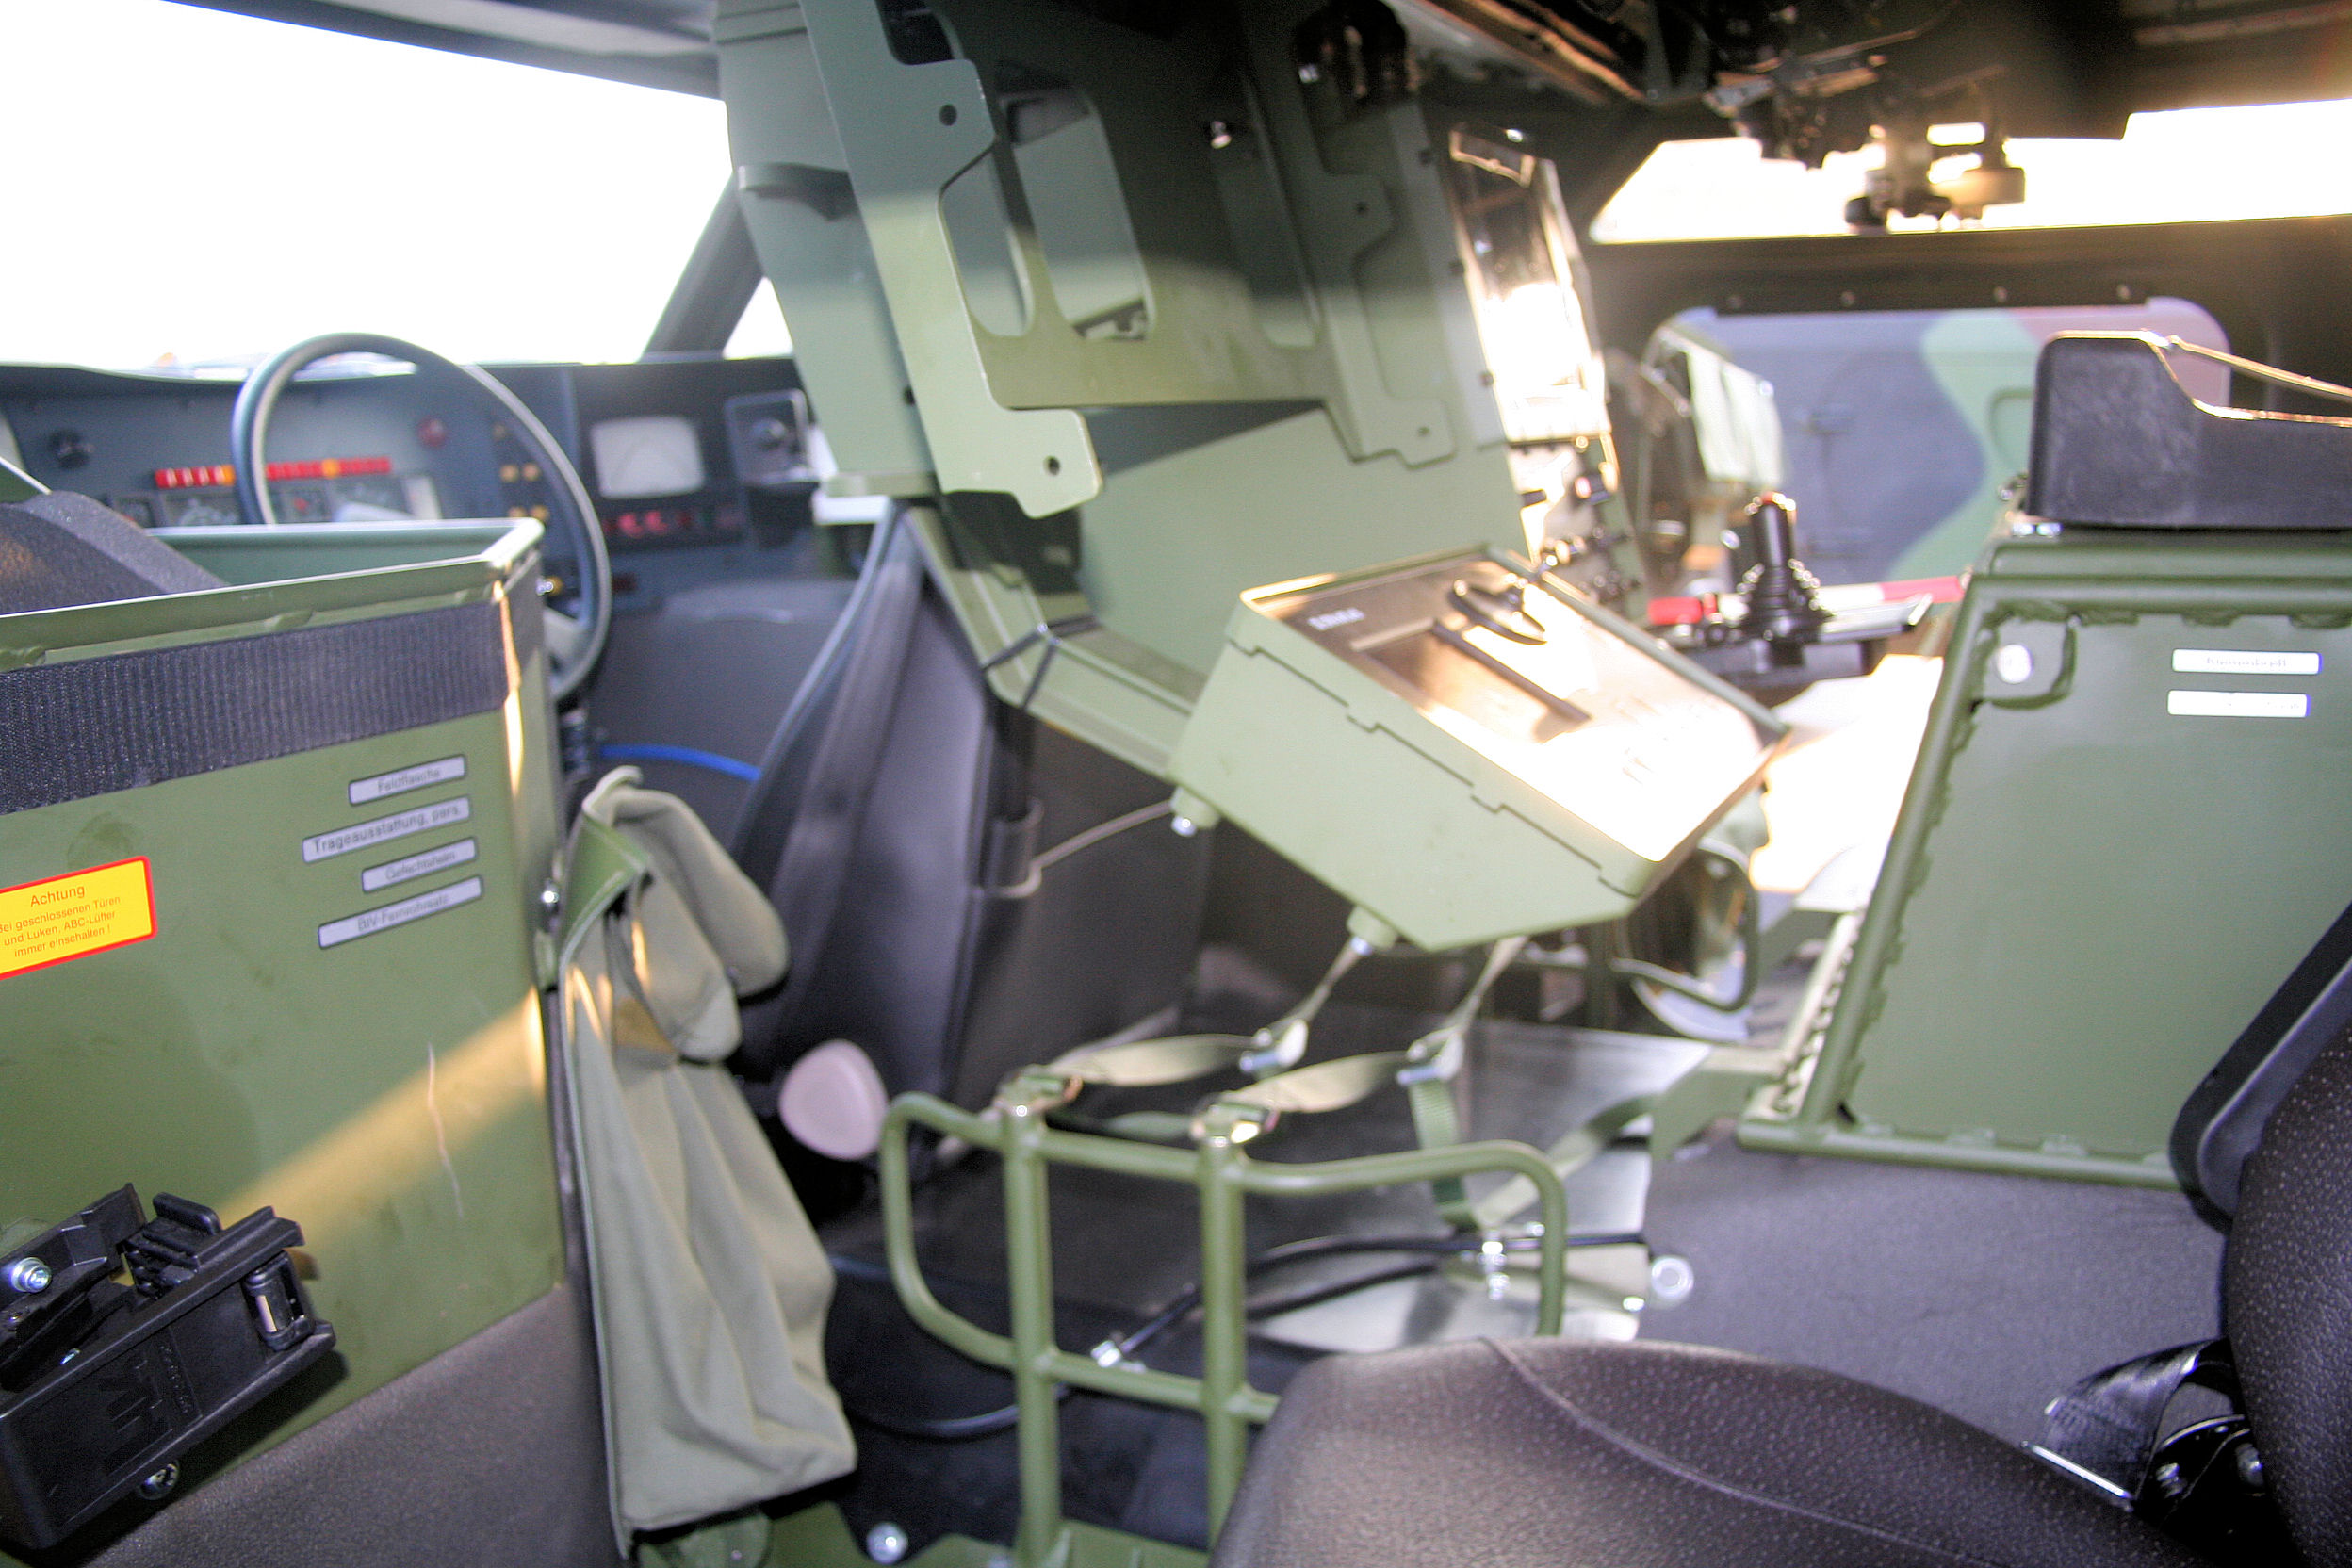
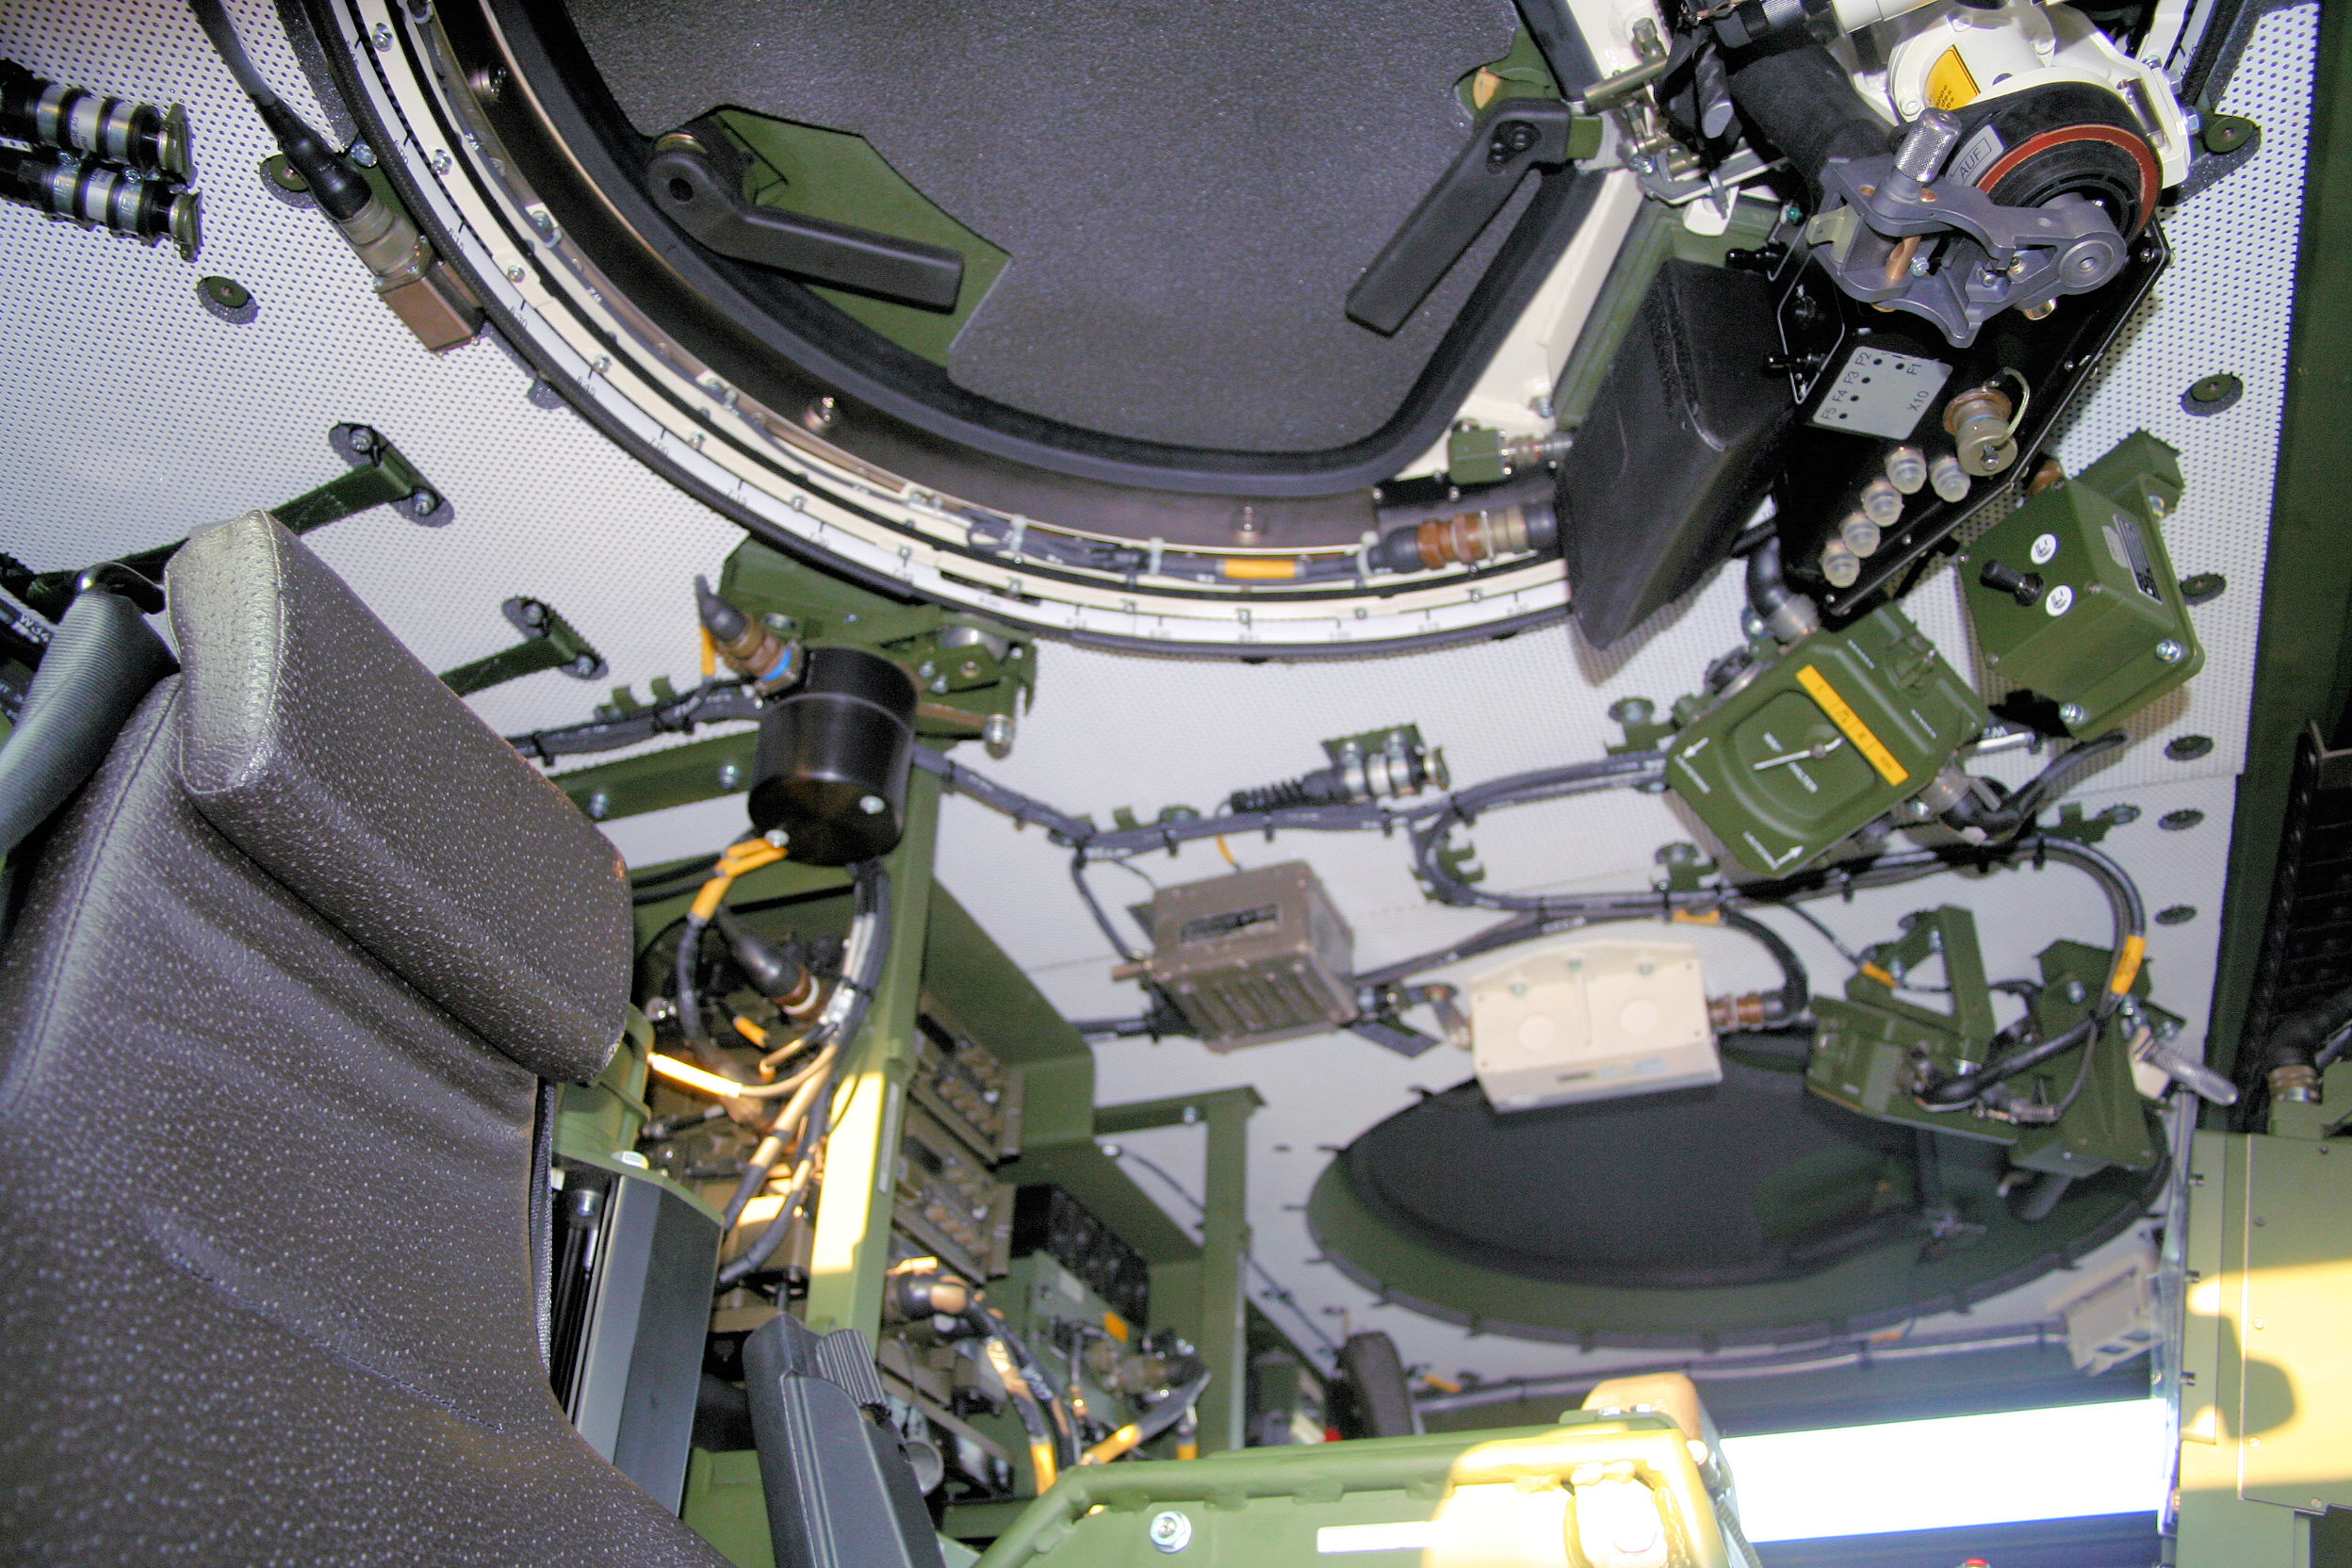
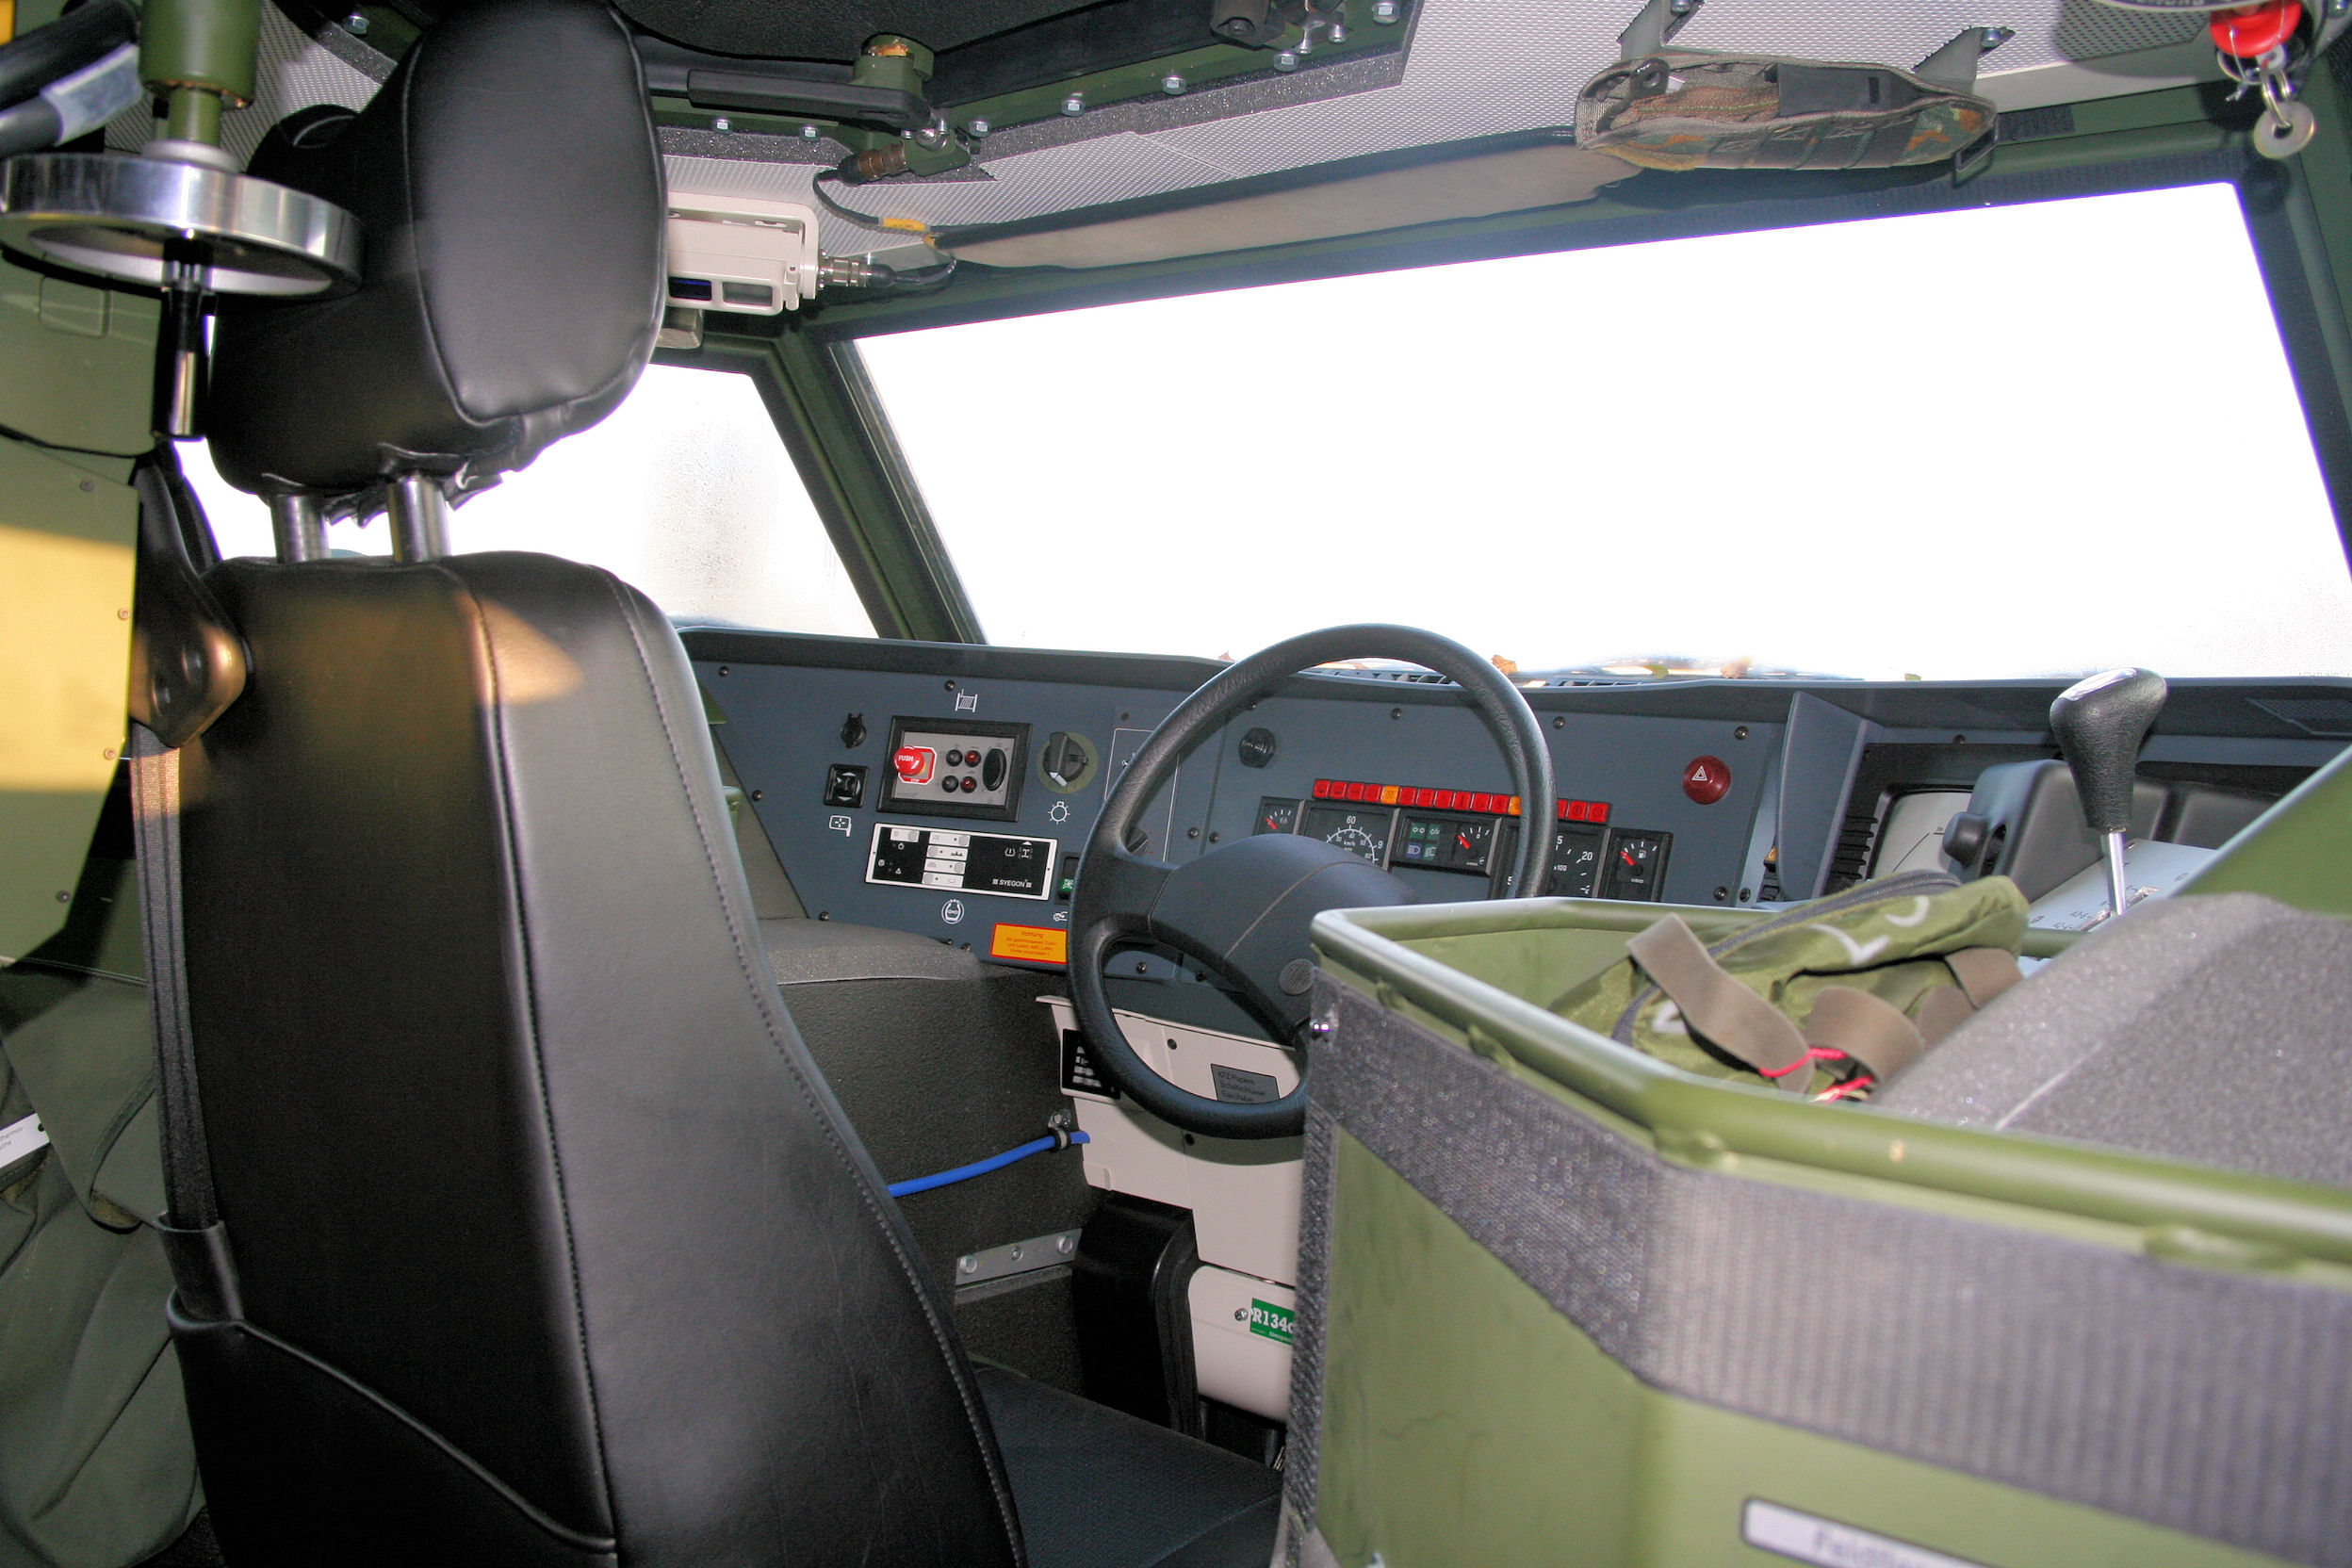
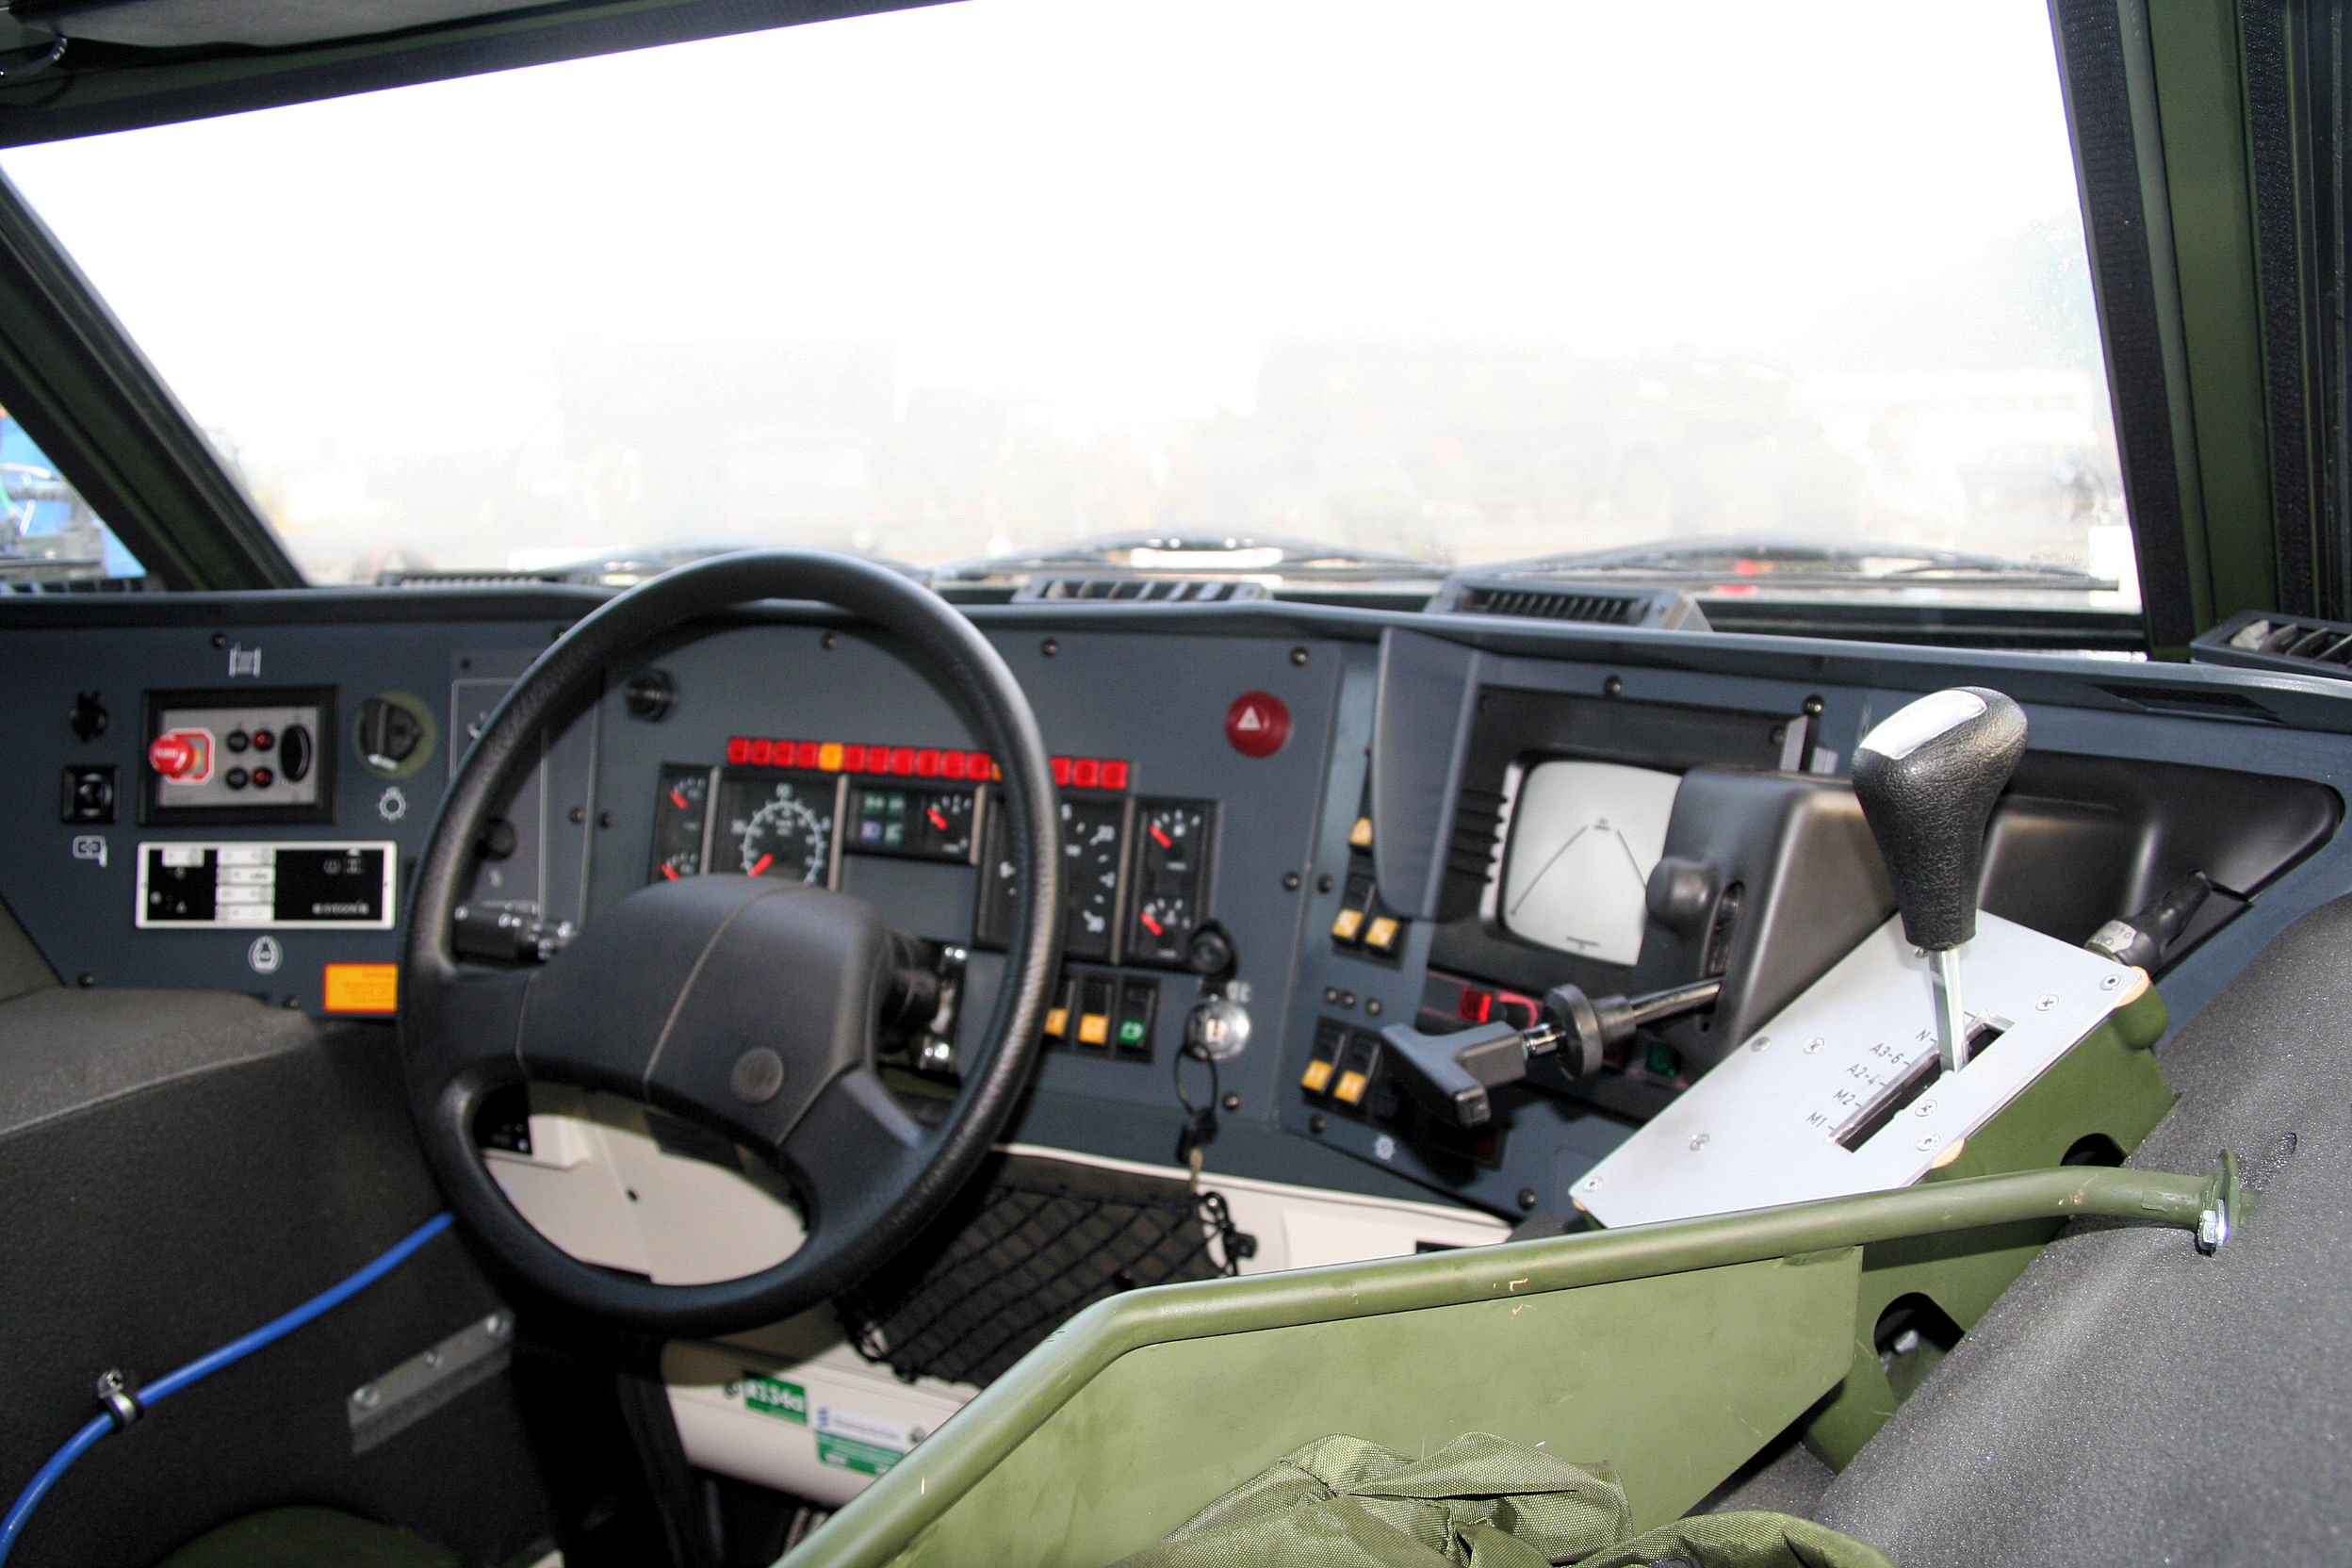
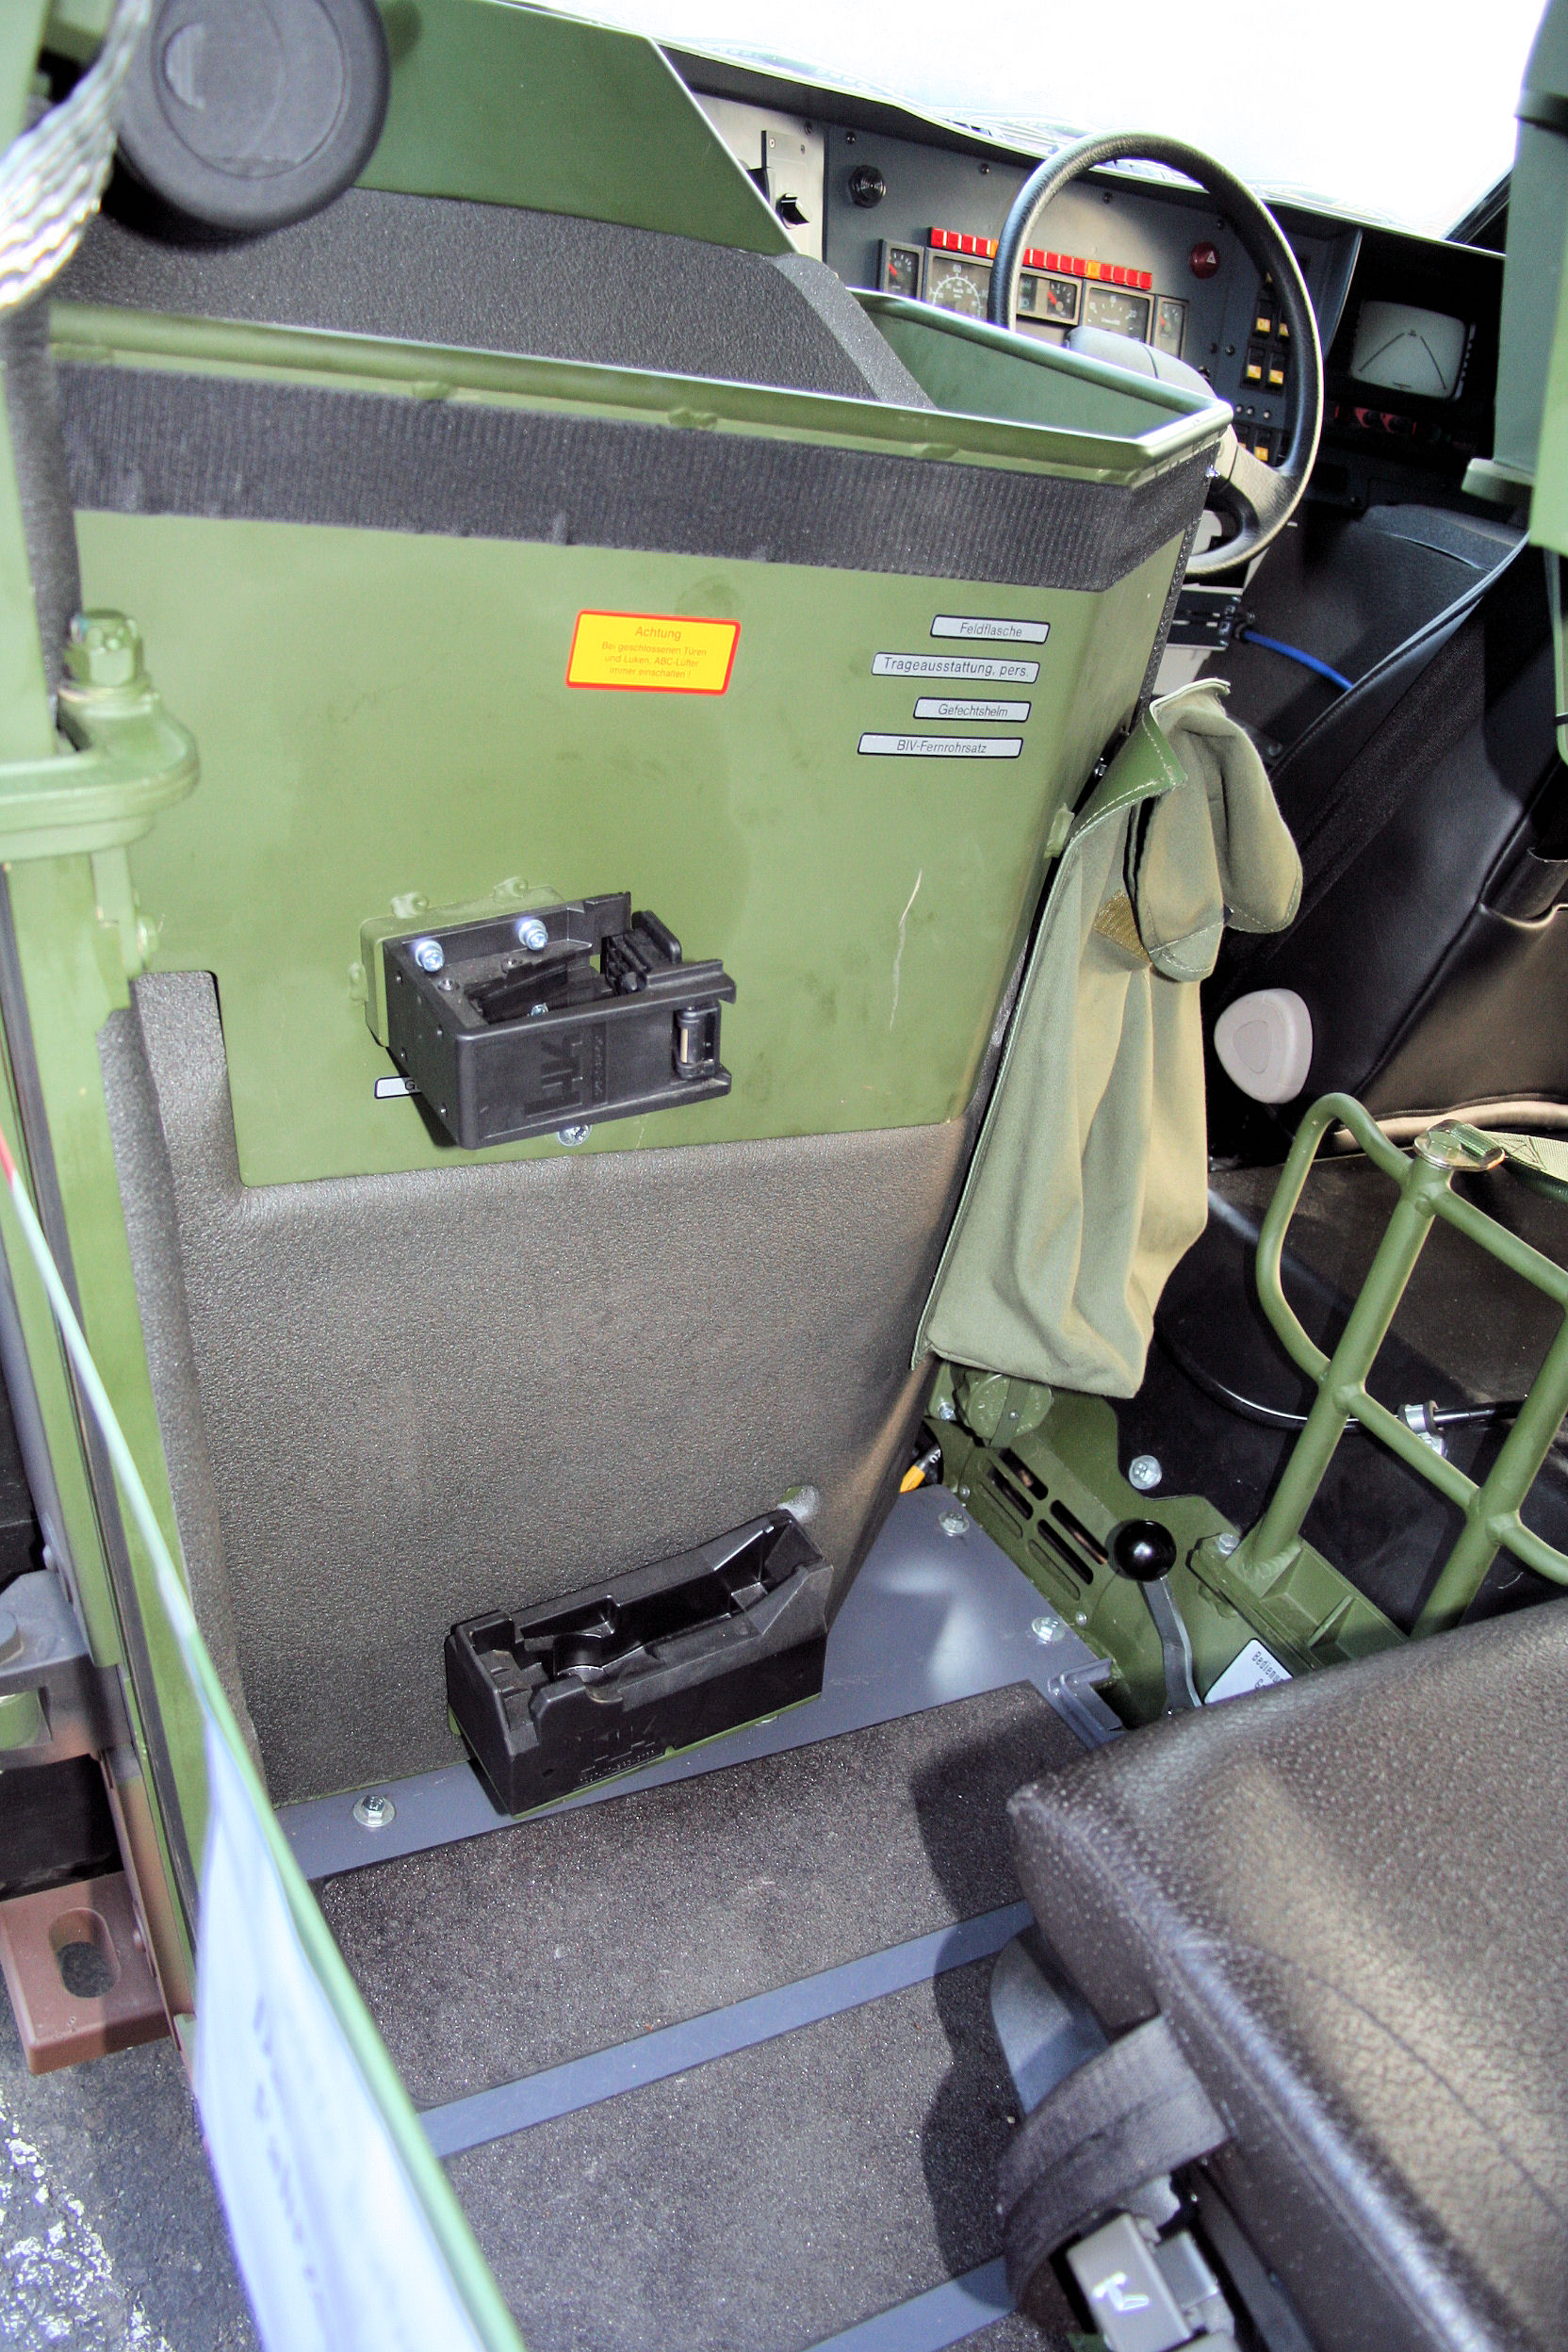
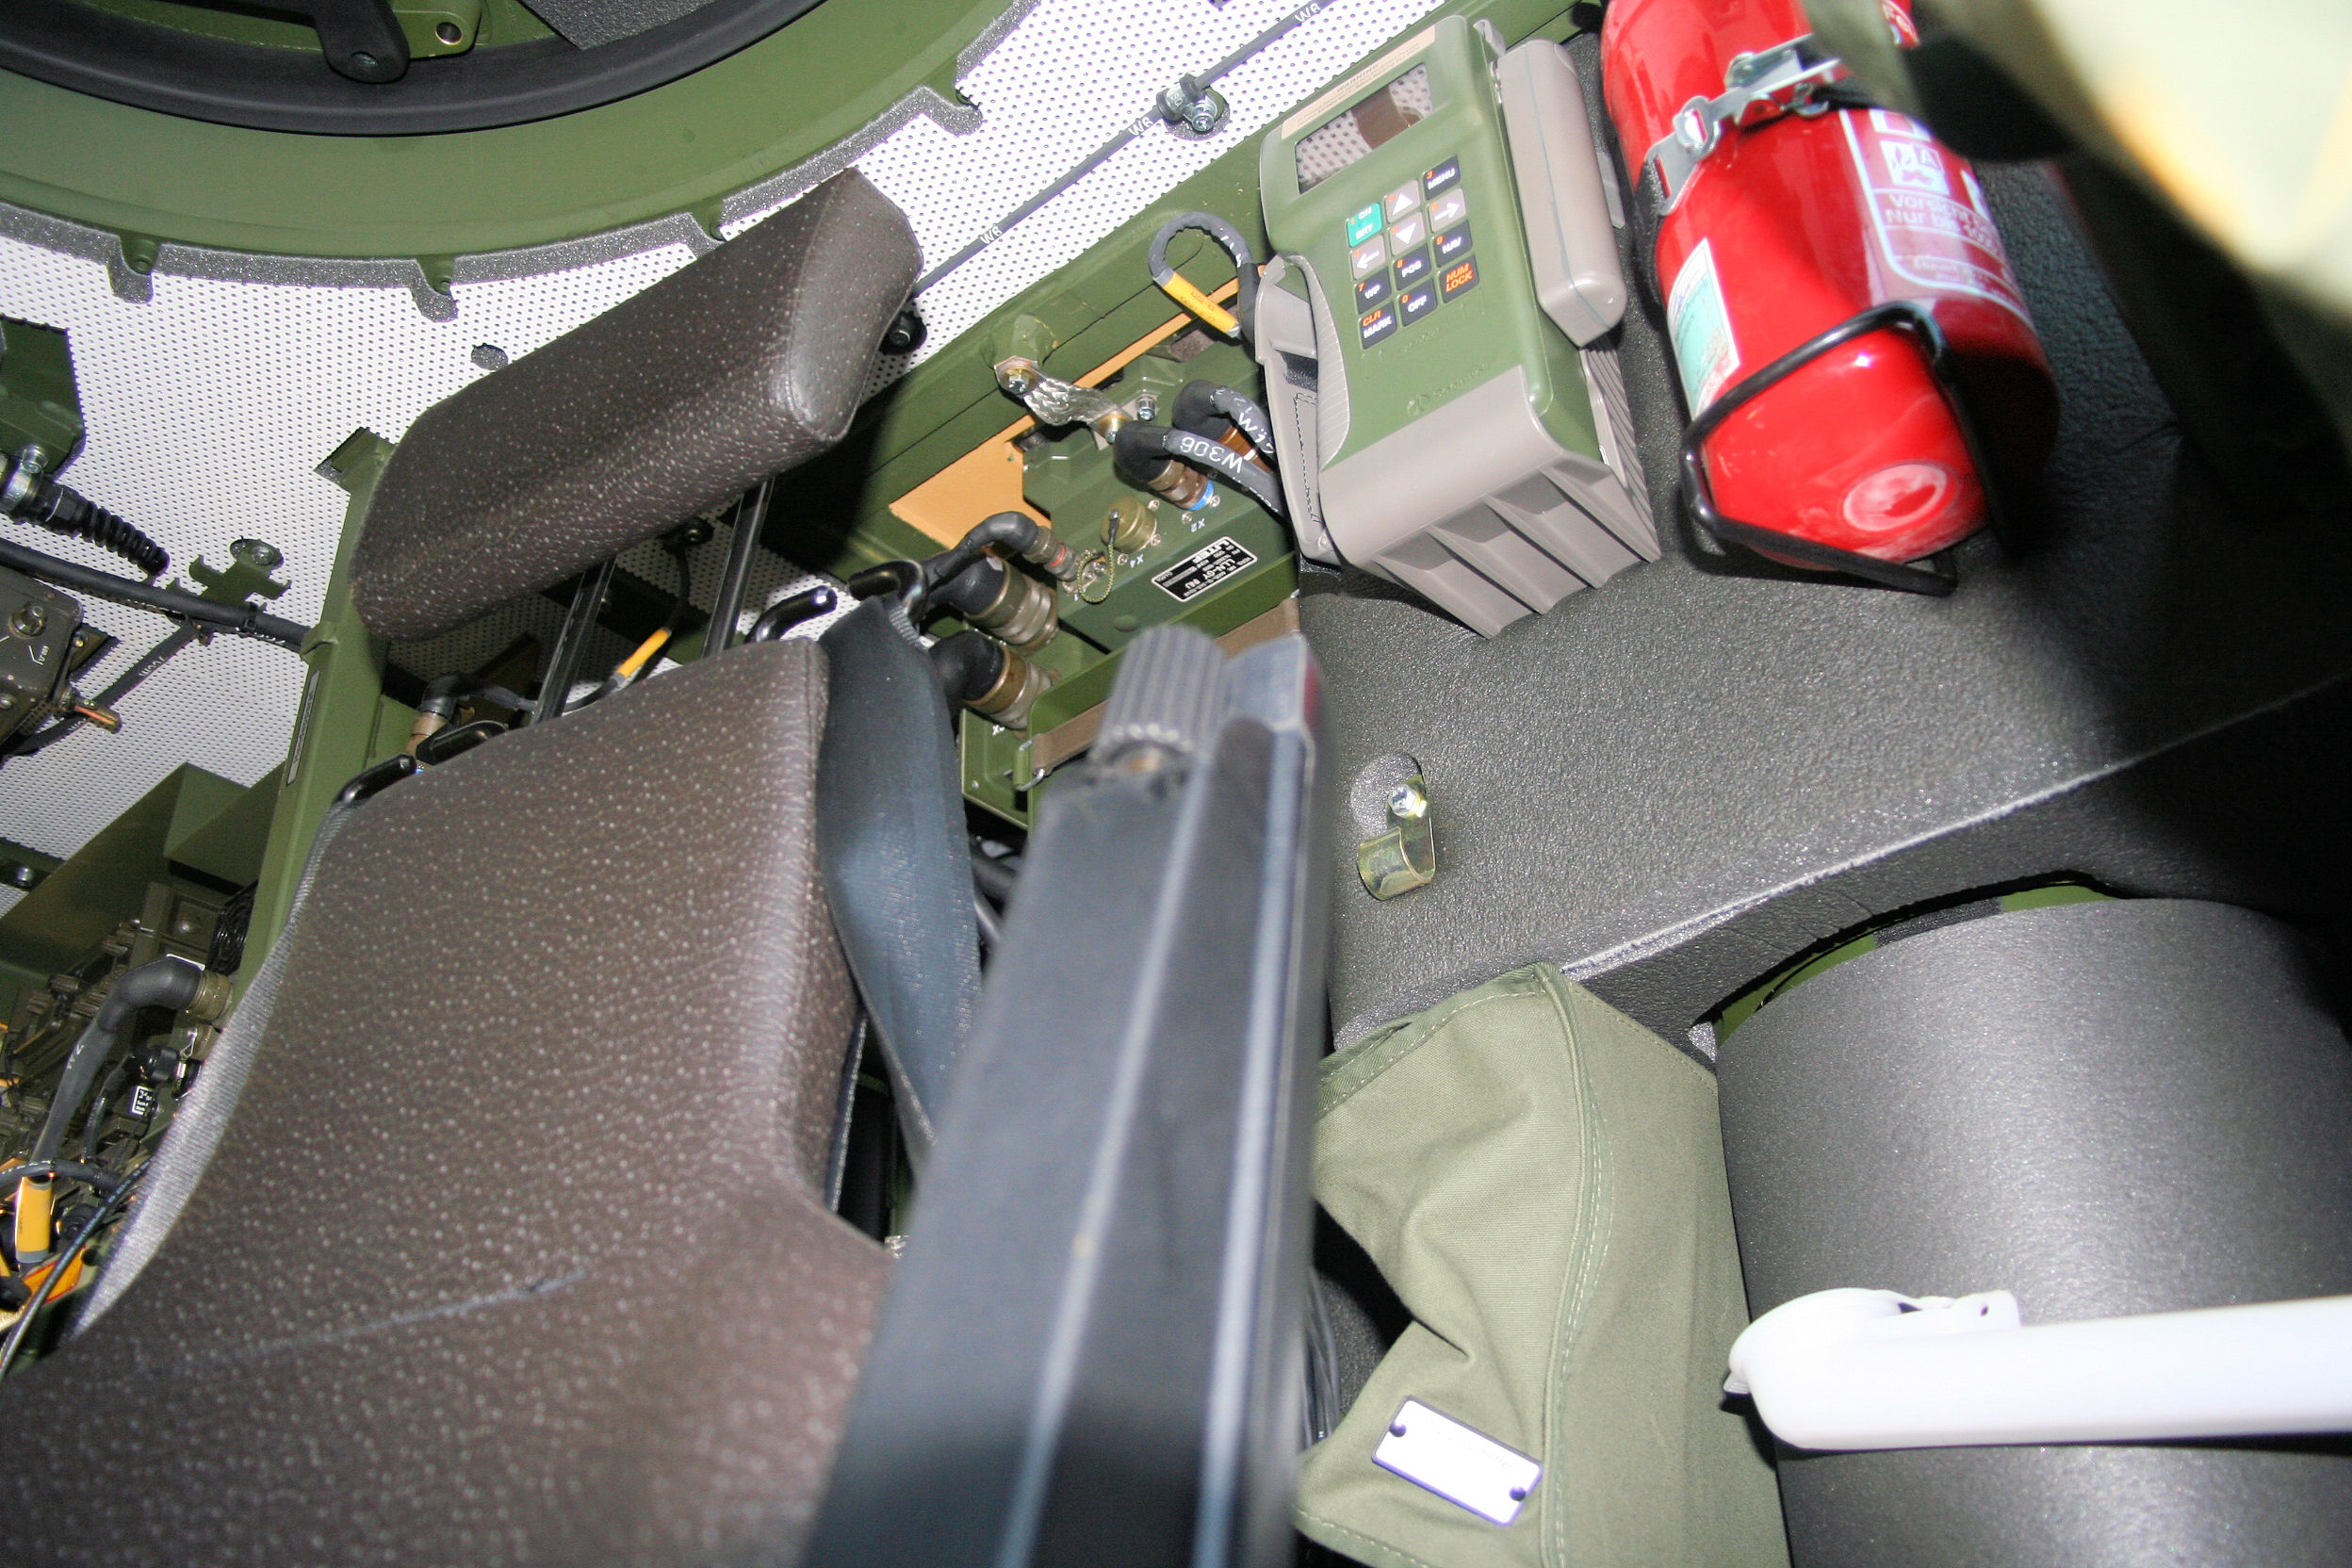
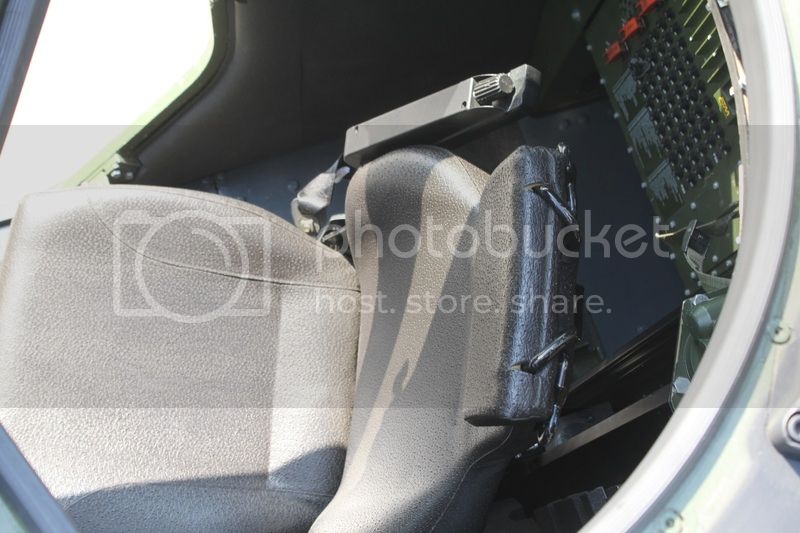
Some pictures of the interior from the aforementioned walk-around (do check out the link though as there are plenty more).


So as you can see there are quite a few different colors for the interior. I've had a glance at the Trumpeter color call-outs for the interior but I don't think they are correct. Basically it looks like the interior surfaces are all green, however on some areas there is a foam covering which is a black-grey as are the anti-slip strips on the floor. The floor pan appears a light navy color which is similar to the color of the drivers instrument panels. Beneath the driver the lower bulkhead (with the net on it) is white. The roof seems to have a perforated white panel bolted on top of the foam we see elsewhere.

Alex I hope these pictures and that walk around help you out- I'll be getting to the interior painting myself soon enough judging by the instructions.

I'm going to move onto the build itself now.


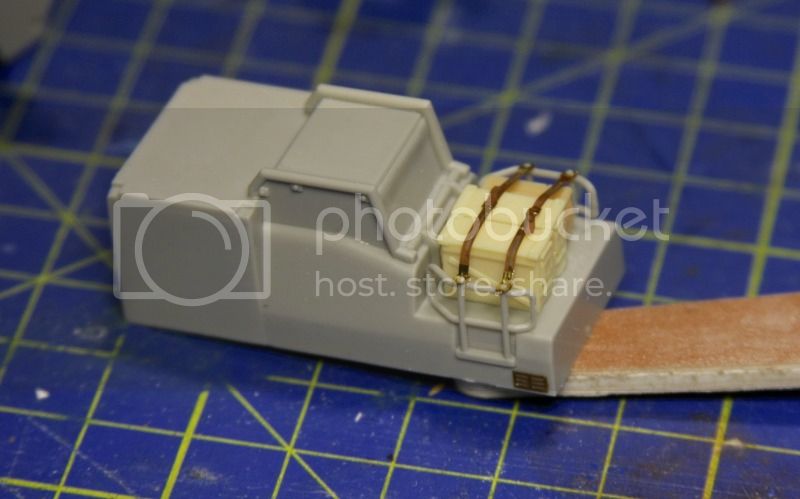
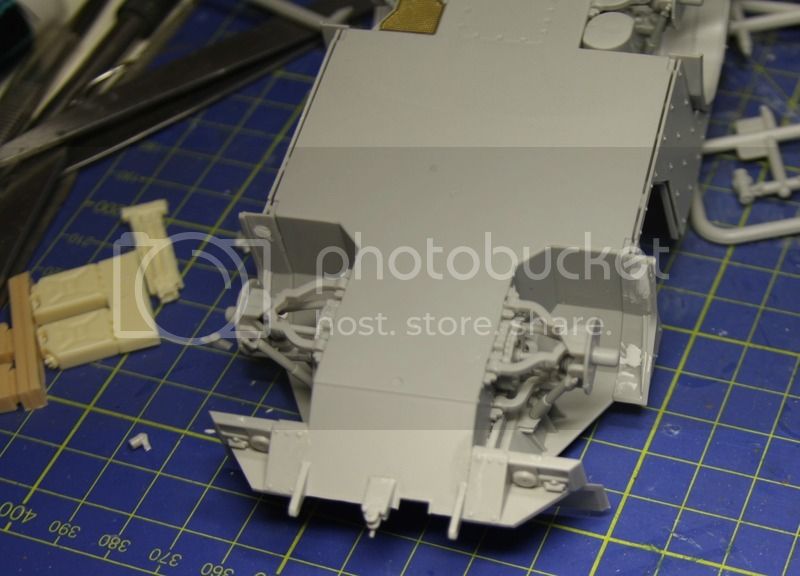
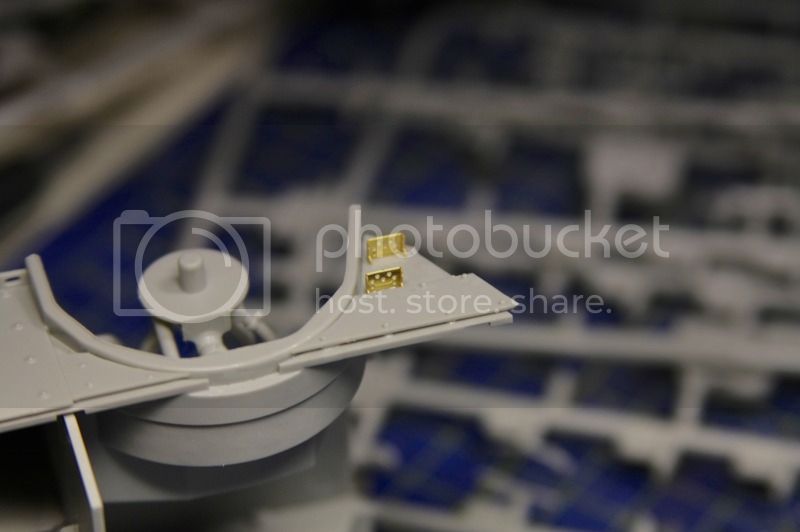
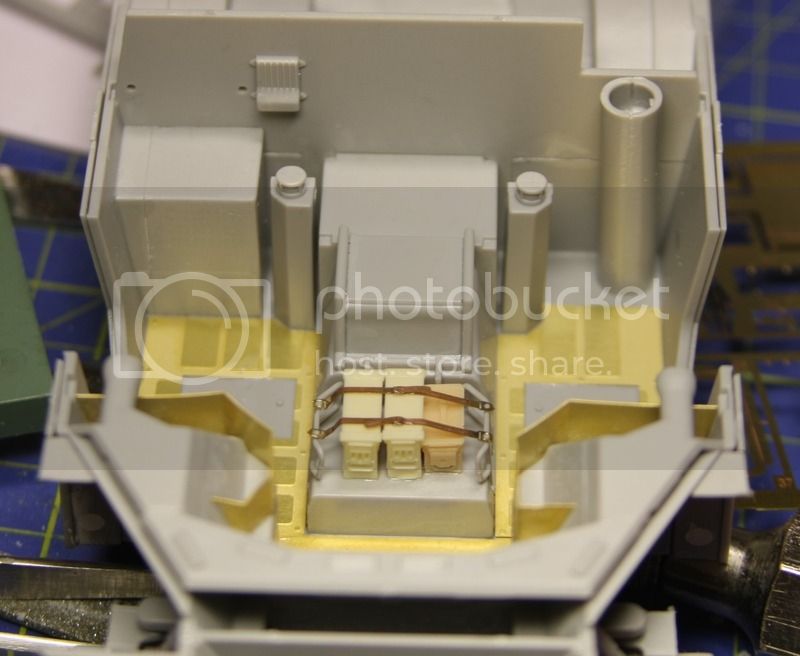
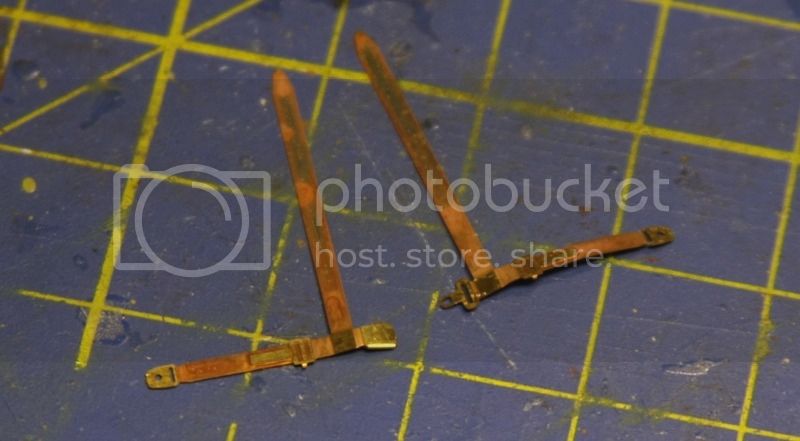
This central section for the interior had a few bits from the Eduard set to go on it- namely two little vents at the front sides and straps for the middle of the railed off section. I threw a couple of ammo cans in from the spares box and then glued the Eduard PE straps in place.

Next up was adding the axles and what I think is a kind of hydraulic line for each wheel area.


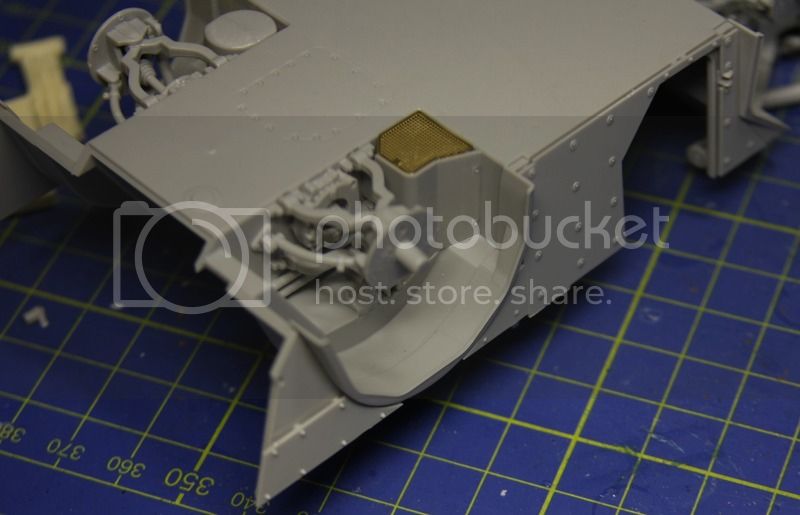
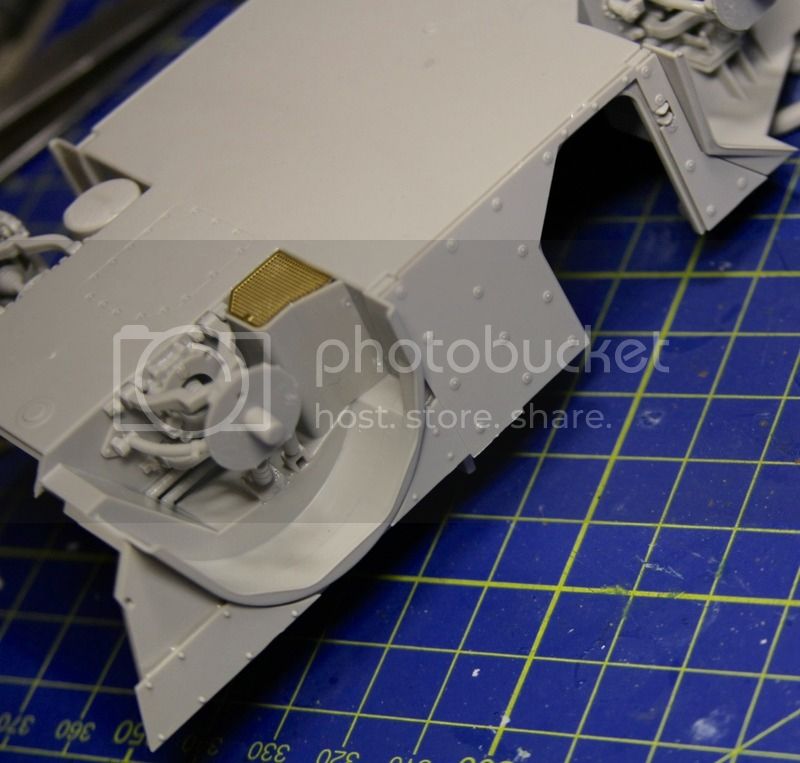
Once those were on the instructions required two wishbone shaped suspension arms to be glued in followed by a stabilizer arm and then the wheel mounting plate. Front and back construction is nearly identical with the only different being different shaped stabilizing arms. (Apologies if my description of the suspension components is wrong- I'm not a mechanic so I'm just guessing at what I think each part is!) Its a bit tricky and somewhat delicate but it is very nicely detailed- once you get the first one done the rest just follow pretty much the same steps.


If you are building this kit I would definitely advise a bit of caution at this stage- I did all the suspension arms in the steps above and then made up and mounted the wheels so I could make sure all four touched the ground- the glue was still drying on the suspension so if I had any wheels not sitting right I had some opportunity to fix them. Luckily all four were touching the ground fine so no adjustments were needed. The wheels themselves are nice- four parts in all- a polycap sandwiched between two halves of the wheel followed by a kind of cover for the nuts on the front of the wheel.


More to come soon.

Thanks for reading!
terminators
Visit this Community
France
Joined: February 20, 2012
KitMaker: 1,932 posts
Armorama: 1,907 posts
Posted: Tuesday, July 07, 2015 - 10:03 PM UTC
Karl, thank you to have spend time for this response.

Trumpeter instructions for interior painting are wrong.

HermannB
Visit this Community
Bayern, Germany
Joined: October 14, 2008
KitMaker: 4,099 posts
Armorama: 4,067 posts
Posted: Wednesday, July 08, 2015 - 01:31 AM UTC
Hi Gang,
thanks for using my references.
I can tell you it`s not easy taking pictures in the Fennek since its a "little bit" cramped.Trumpeter did an overall good job in the interior but missed the parking brake lever and the gear shift lever on the dashboard. The part on the center console between the seats is not correct, the part should be hollow underneat. Internal painting consists of various colors, e.g. Bronzegreen, Black, Medium grey and White roof.
HTH
Hans-Hermann
HermannB
Visit this Community
Bayern, Germany
Joined: October 14, 2008
KitMaker: 4,099 posts
Armorama: 4,067 posts
Posted: Wednesday, July 08, 2015 - 01:36 PM UTC
Hi Karl,
take note that the ALADIN UAV needs a control unit. The third crewmwmber might put the control unit to the vehicles bonnet and monitors the flight.
http://www.emt-penzberg.de/uploads/media/ALADIN_en.pdf
Armored76
Visit this Community
Bayern, Germany
Joined: September 30, 2013
KitMaker: 1,615 posts
Armorama: 1,500 posts
Posted: Wednesday, July 08, 2015 - 04:24 PM UTC
This look really nice so far! Looking forward to more, specially for the dio base.

Cheers,
Cristian
jrutman
Visit this Community
Pennsylvania, United States
Joined: April 10, 2011
KitMaker: 7,941 posts
Armorama: 7,934 posts
Posted: Wednesday, July 08, 2015 - 06:54 PM UTC
Nice progress here and so nice that you have such brilliant ref pics!! I hardly ever seem to get so lucky.
J
HermannB
Visit this Community
Bayern, Germany
Joined: October 14, 2008
KitMaker: 4,099 posts
Armorama: 4,067 posts
Posted: Thursday, July 09, 2015 - 01:52 AM UTC
BTW, the UAV name ALADIN translates
Abbildende
Luftgestützte
Aufklärungs
Drohne
Im
Nächstbereich
Hell, I love my German language.
Karl187
#284
Visit this Community
Northern Ireland, United Kingdom
Joined: October 04, 2006
KitMaker: 3,094 posts
Armorama: 2,942 posts
Posted: Thursday, July 09, 2015 - 09:52 PM UTC
Alex- Yes you are right- Trumpeter's painting instructions for the interior are wrong.

Christian- Thanks for taking the time to check out the thread.

Jerry- Thanks mate- the reference pictures are fantastic for this vehicle, all courtesy of Hans-Hermann.

Hans-Hermann- I could tell from your reference pictures that it was cramped inside the vehicle, much more so than I expected. The exterior makes it seem like it has a much larger crew compartment but you can see how tight it is inside from your photos. Thanks for the info on the Aladin too- including the full name!

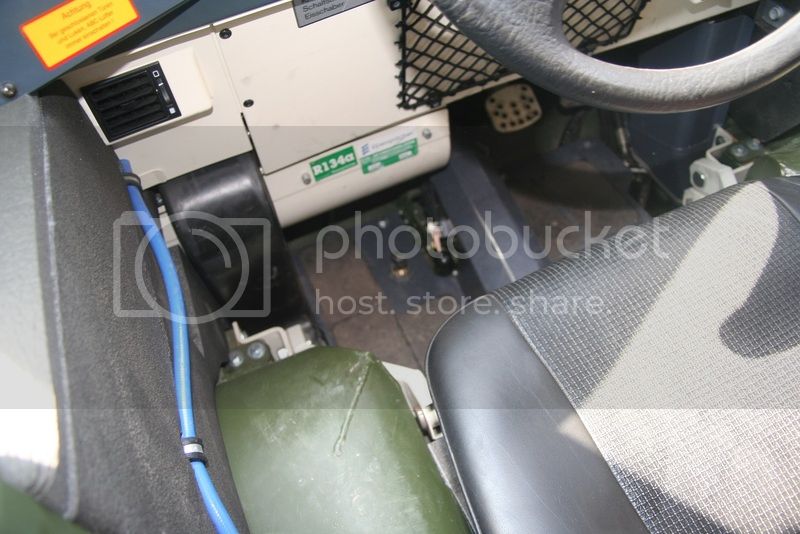
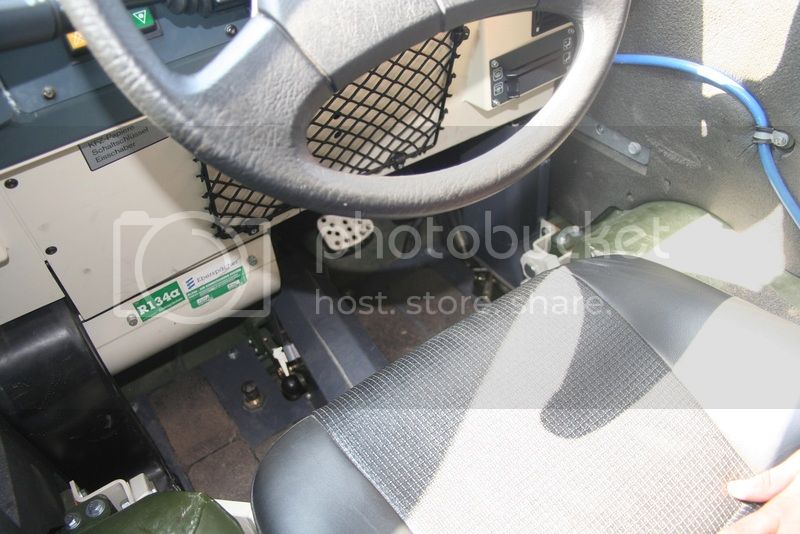
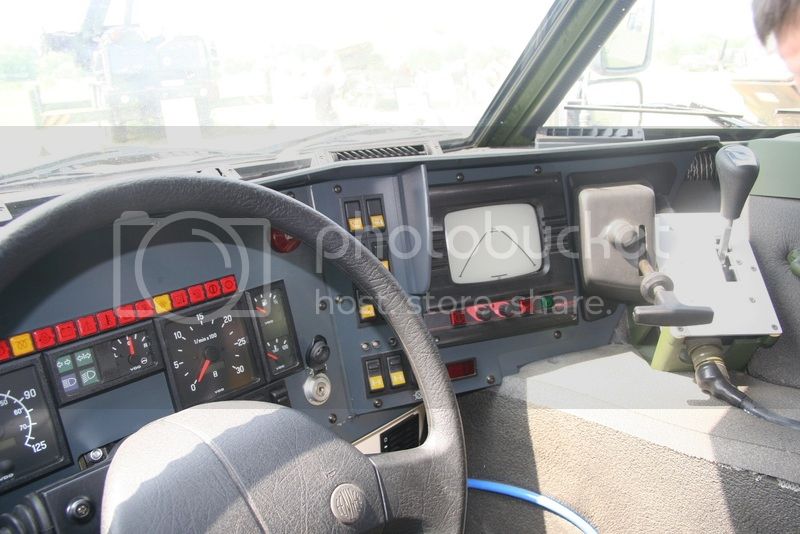
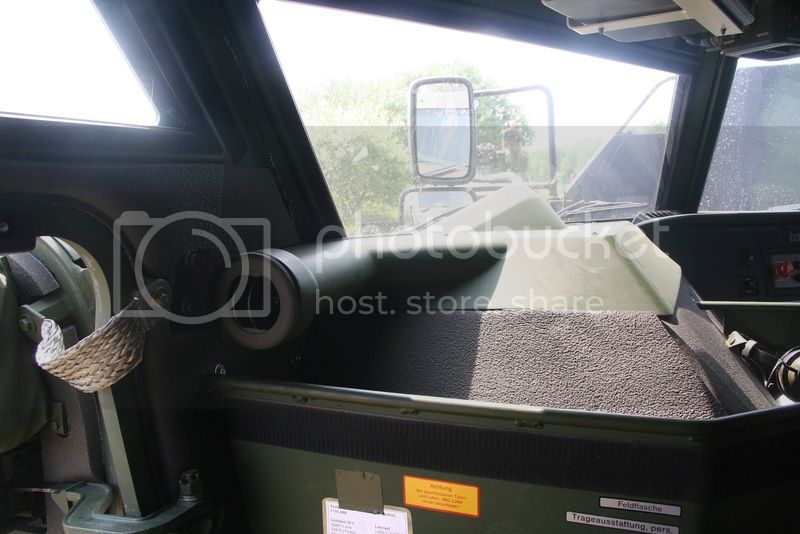
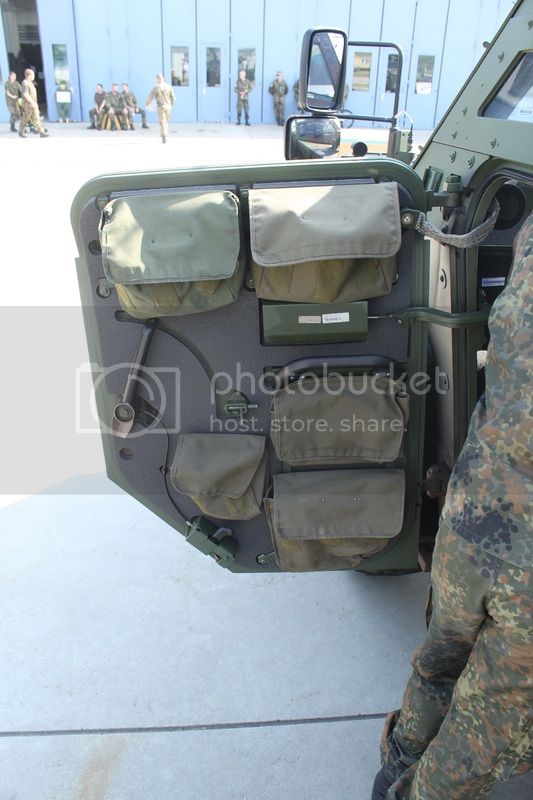
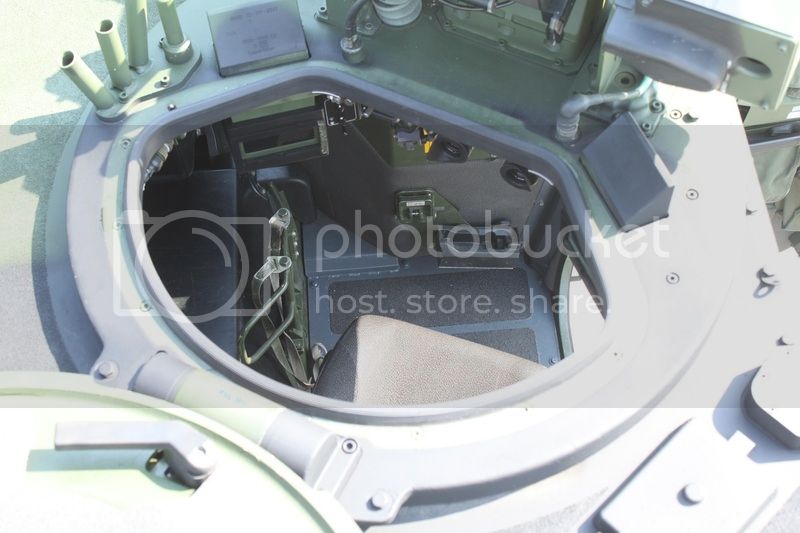
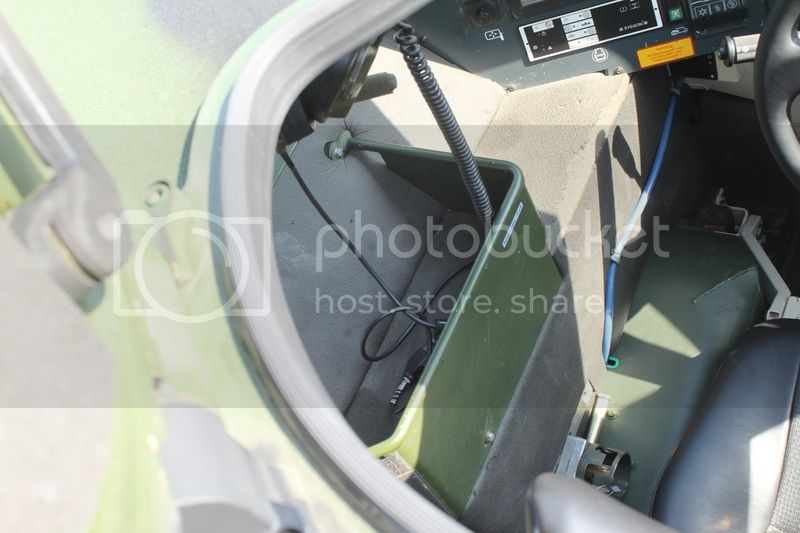
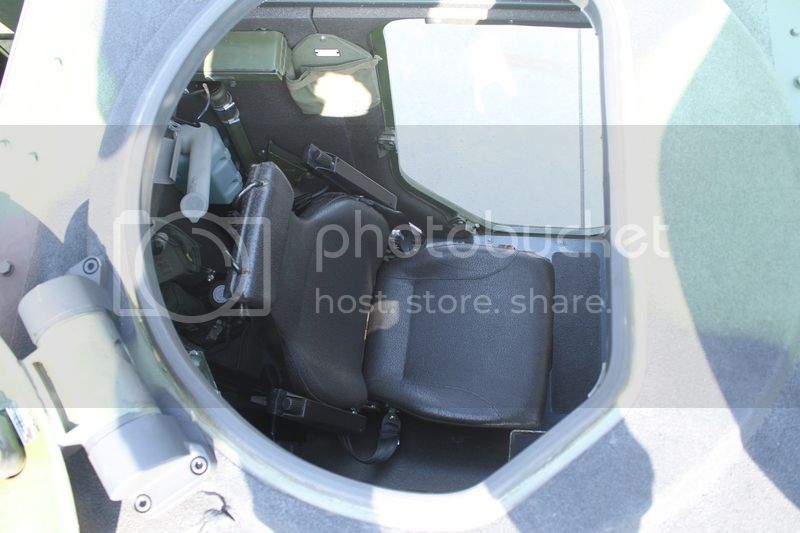
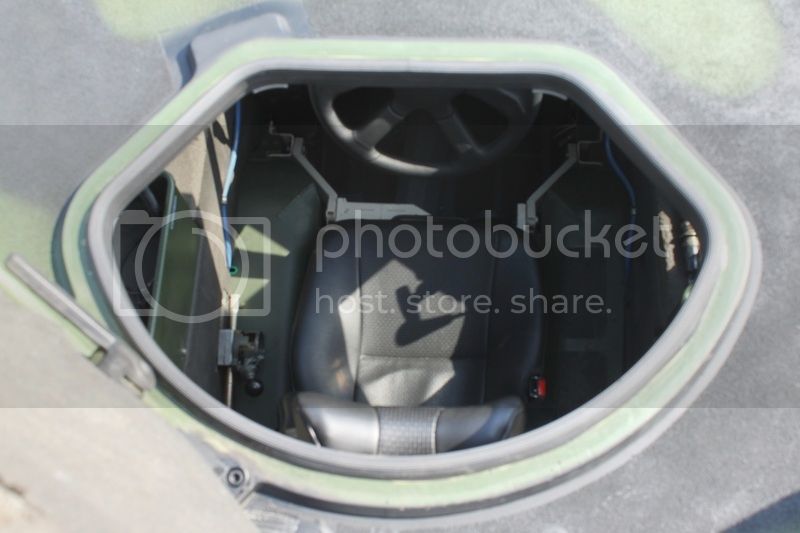
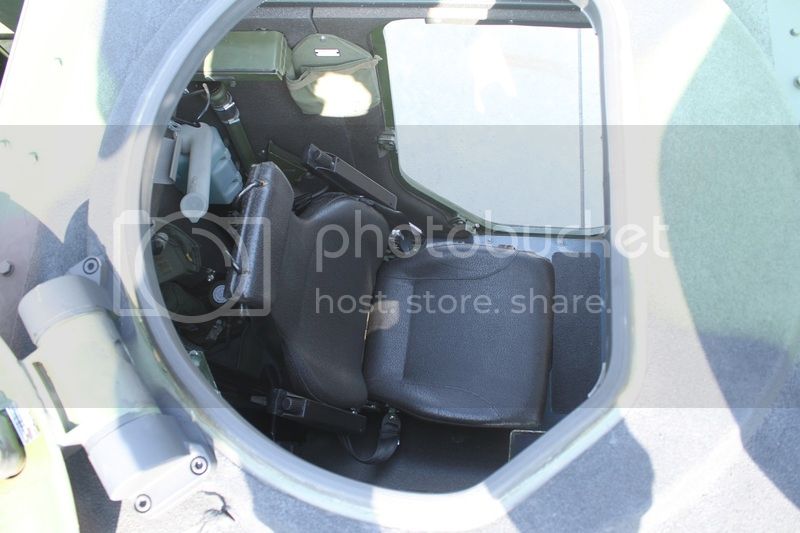
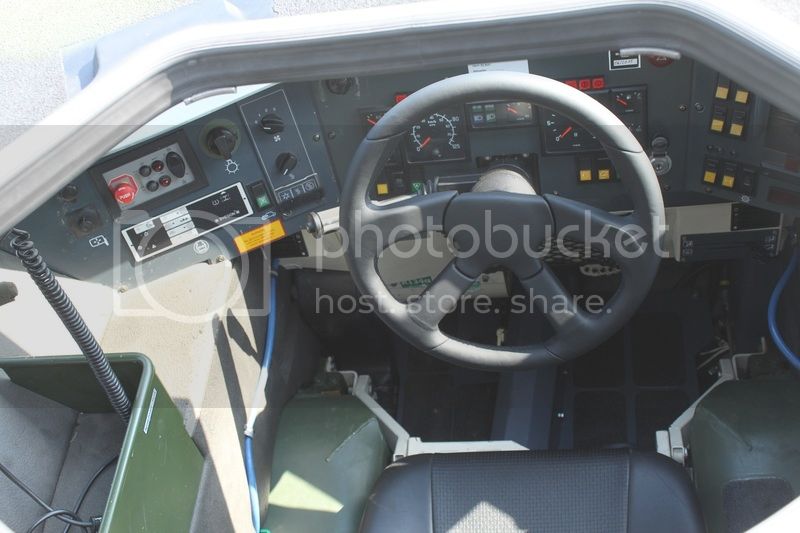
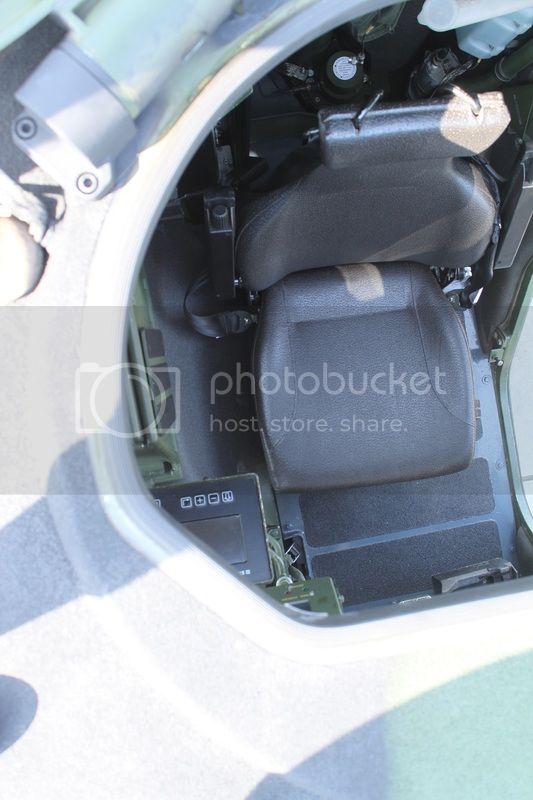
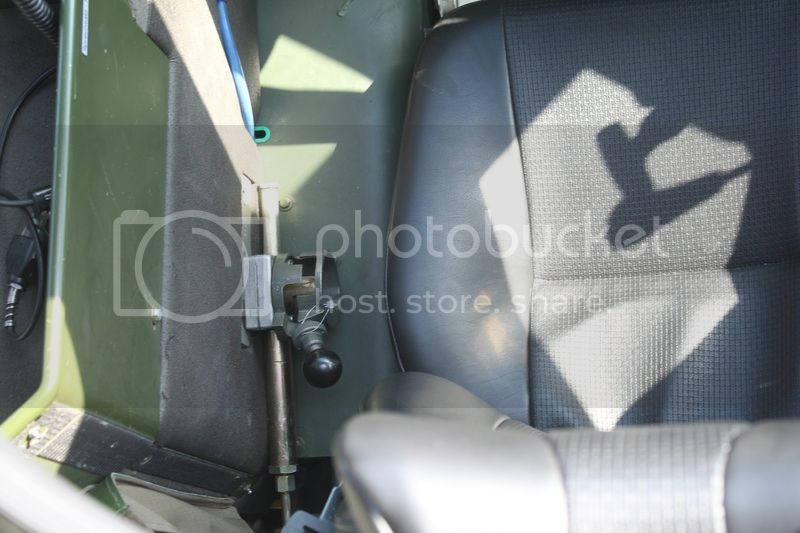
Hans-Hermann has also very kindly been sending me some more pictures of the inside of the Fennek and he's allowed me to post them here.

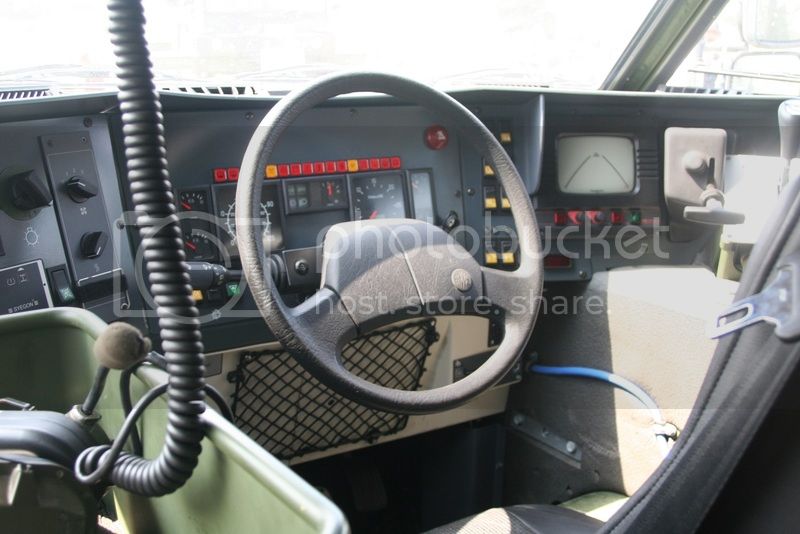
The following pictures show the drivers position inside the Fennek.


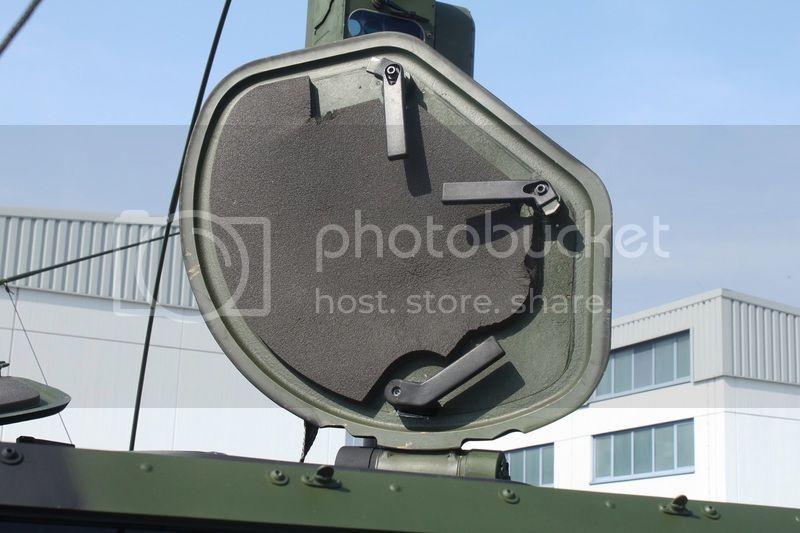
These pictures show the details on the inside of the crew hatches.


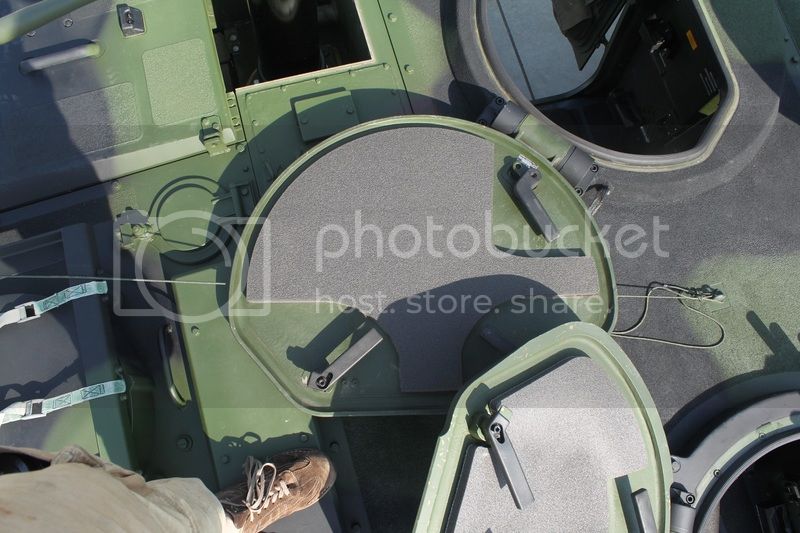
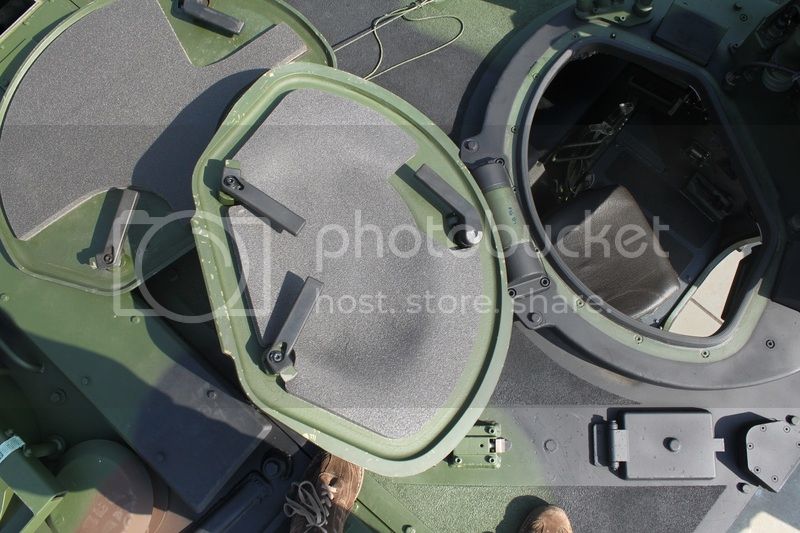
These next pictures show details around and inside the hatches.


Hans-Hermann- thanks again for these awesome reference pictures!


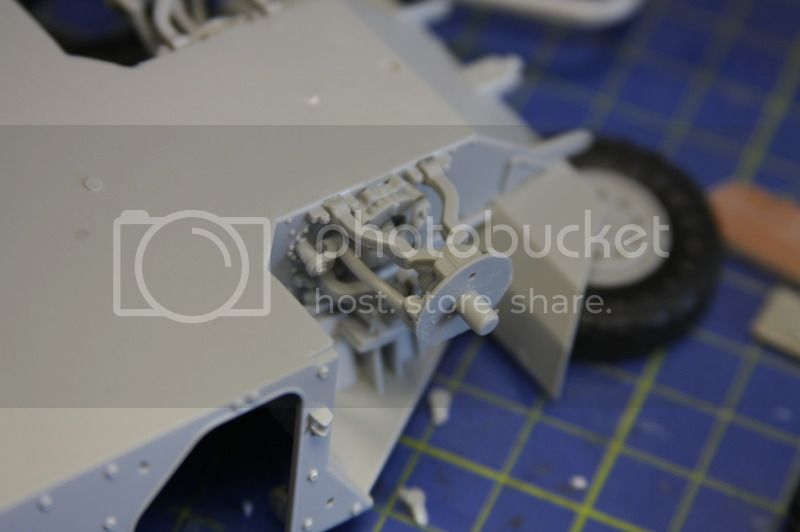
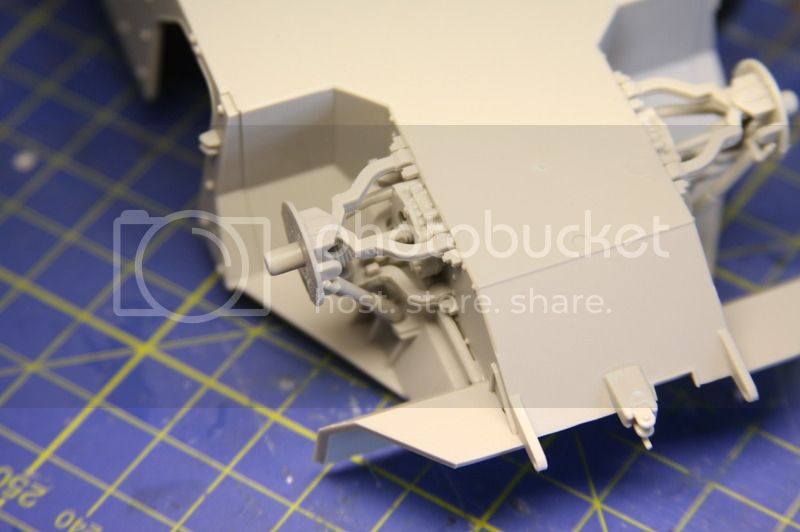
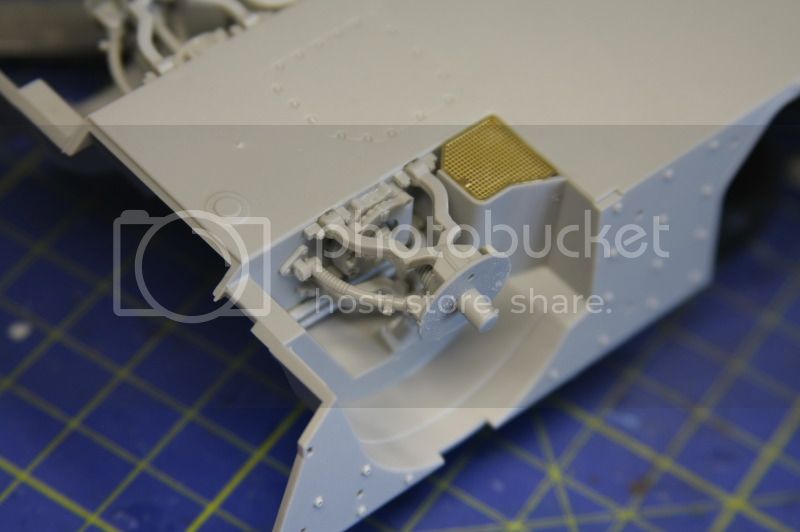
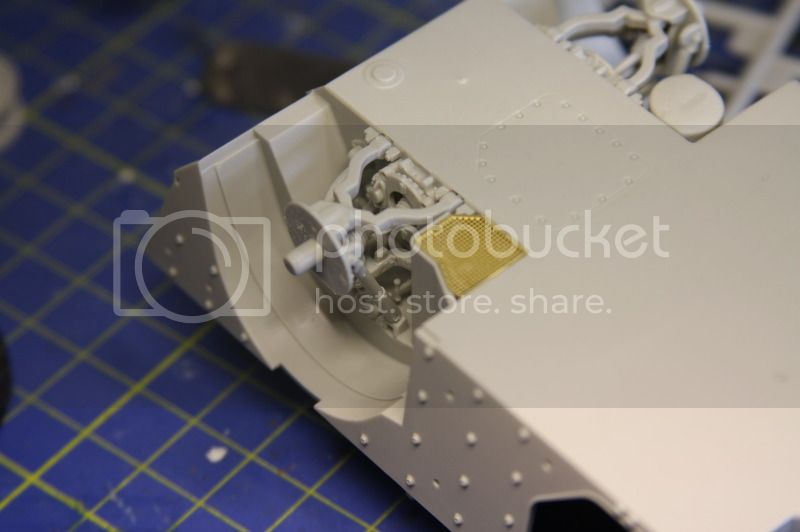
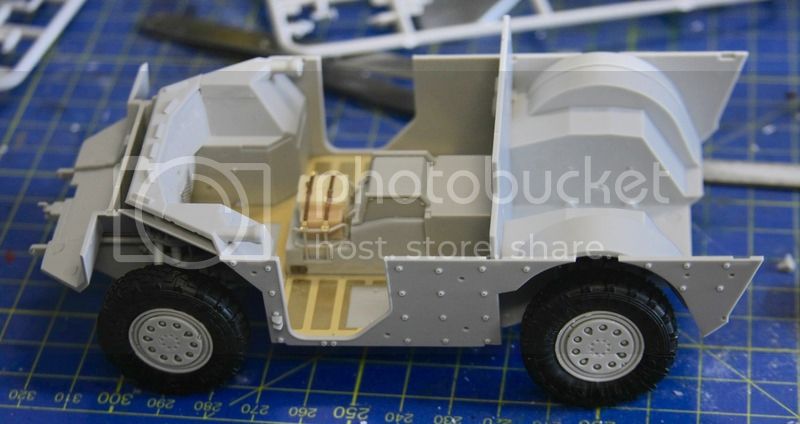
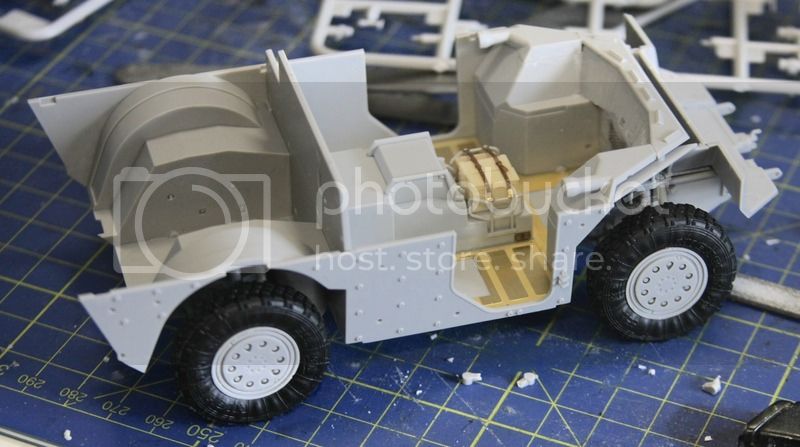
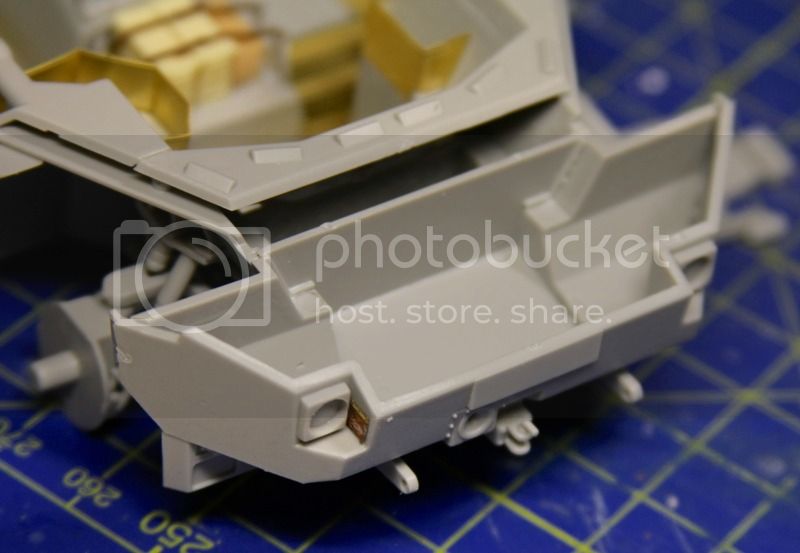
Progress on the vehicle continued by adding wheel wells to the front and rear and also a lower light panel for the front. The wheel well parts for the rear front wheel well have some ejector pin marks that need filled because they will likely be visible when the kit is built up.


Armor for the sides has also been applied.


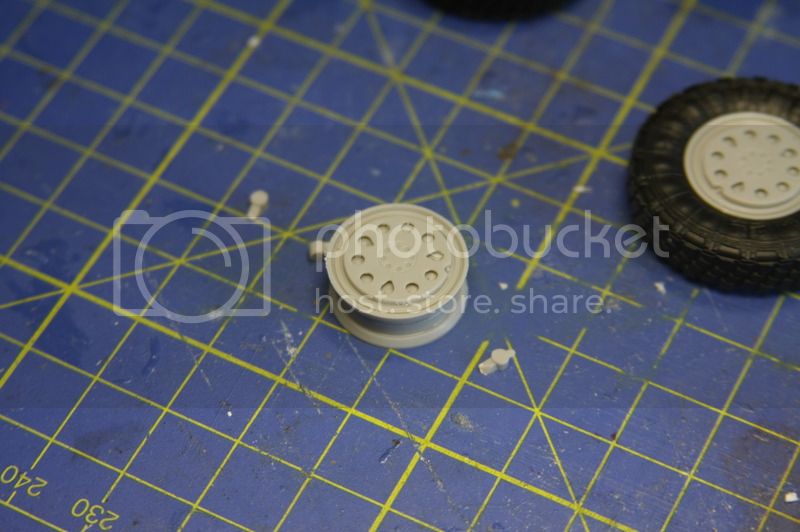
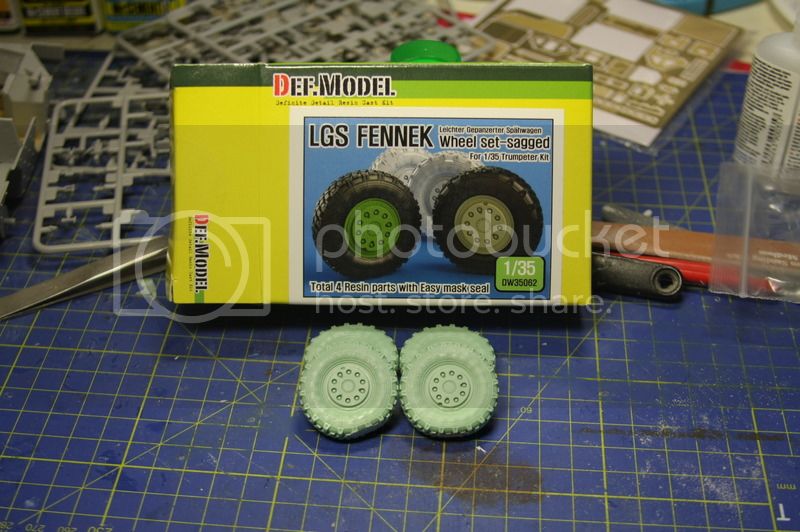
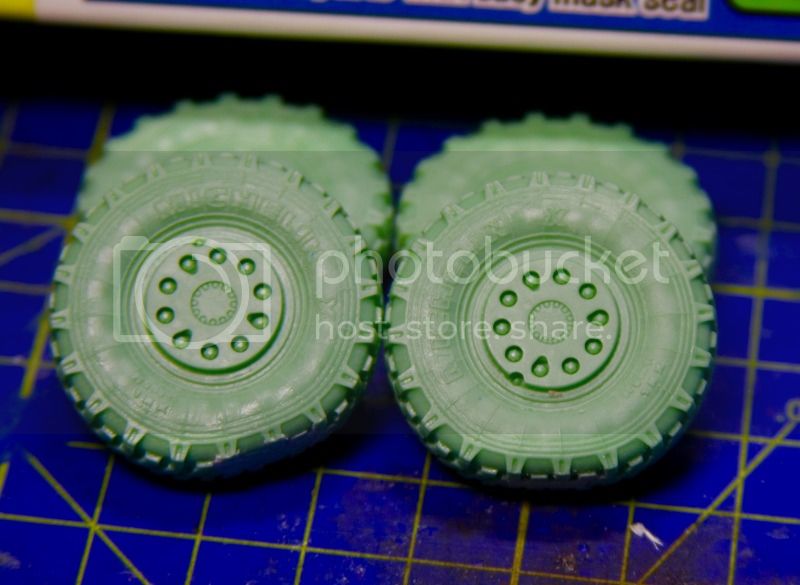
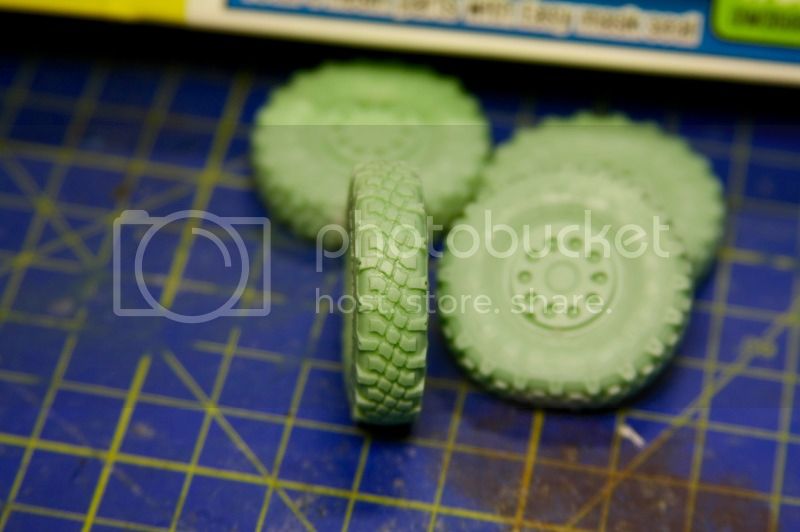
I've also got some DEF Model wheels for the Fennek and as you can see they are very nicely detailed and look suitably weighted.


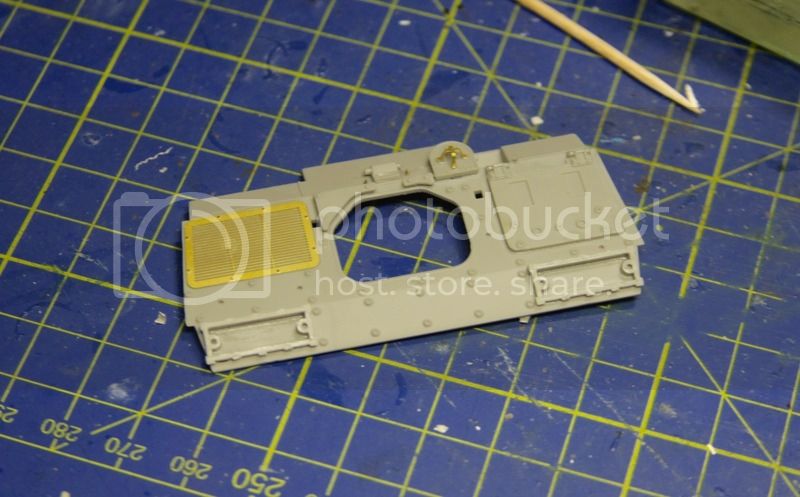
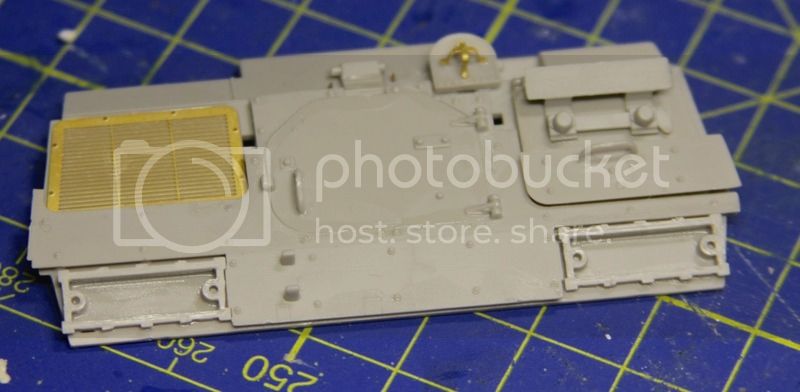
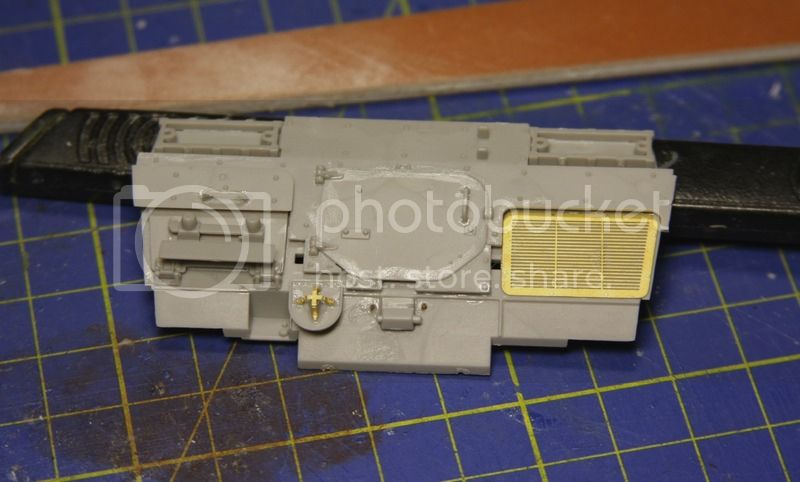
The instructions then move on to the rear panel of the vehicle and for what is a fairly small area there is a lot of detail packed in to it.


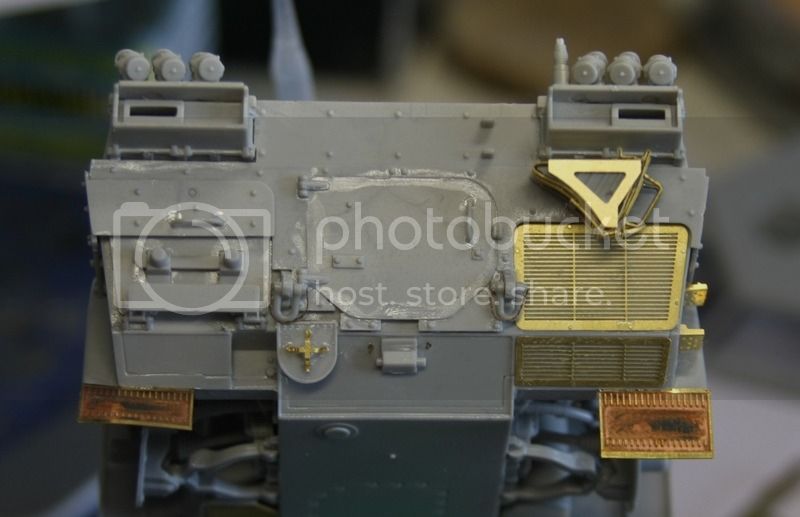
The etched grille and the PE on the small shield shaped convoy marker (at least I think thats what it is) are all from the kit. There is also an option to make the license plate hanger from PE but the plastic part is just as good so I went with that.

There is still more to be done on this rear area and I will cover that in the next update.

Many thanks for reading and checking out the thread!
jrutman
Visit this Community
Pennsylvania, United States
Joined: April 10, 2011
KitMaker: 7,941 posts
Armorama: 7,934 posts
Posted: Thursday, July 09, 2015 - 10:59 PM UTC
Really really clean work there brother. I am much messier I have to say. Where can I get Def products?? Common item??
J
Karl187
#284
Visit this Community
Northern Ireland, United Kingdom
Joined: October 04, 2006
KitMaker: 3,094 posts
Armorama: 2,942 posts
Posted: Friday, July 10, 2015 - 03:44 PM UTC

Quoted Text

Really really clean work there brother. I am much messier I have to say. Where can I get Def products?? Common item??
J


DEF models stuff should be easily available online- I got my from Inside The Armor in England but I would say there are plenty of US retailers that stock them. They are great products- you even get masks for painting the wheels.
Karl187
#284
Visit this Community
Northern Ireland, United Kingdom
Joined: October 04, 2006
KitMaker: 3,094 posts
Armorama: 2,942 posts
Posted: Sunday, July 12, 2015 - 09:19 PM UTC
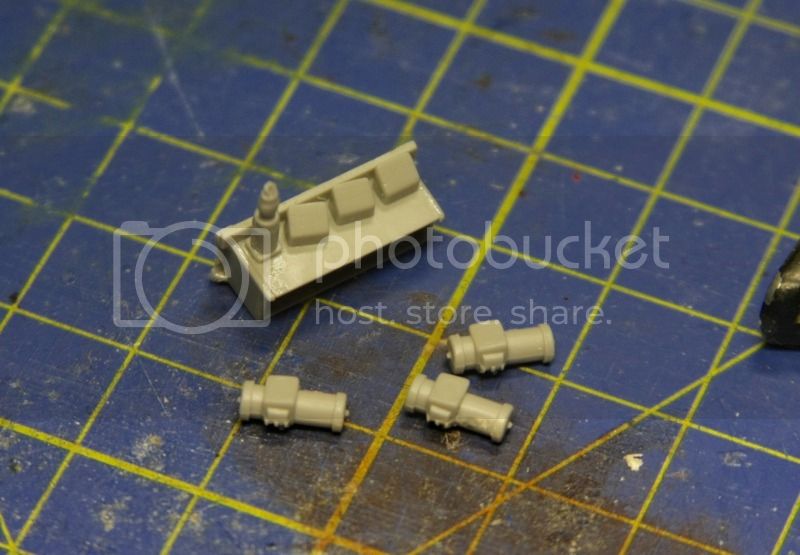
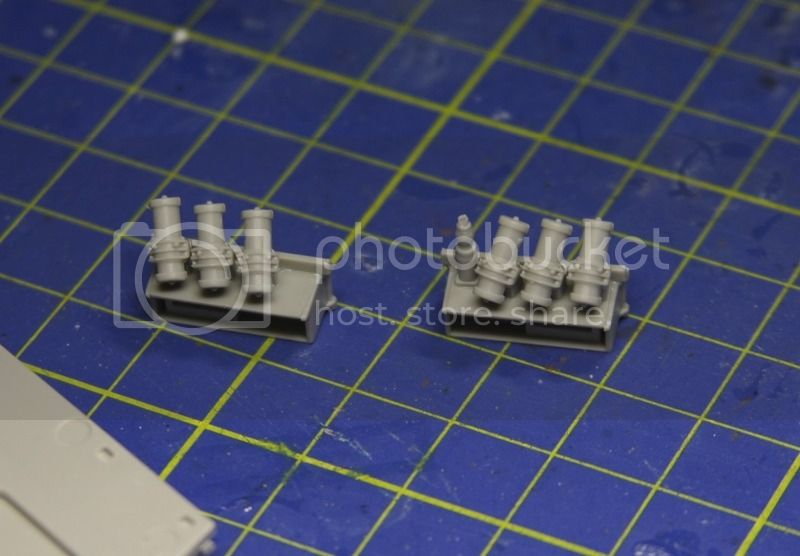
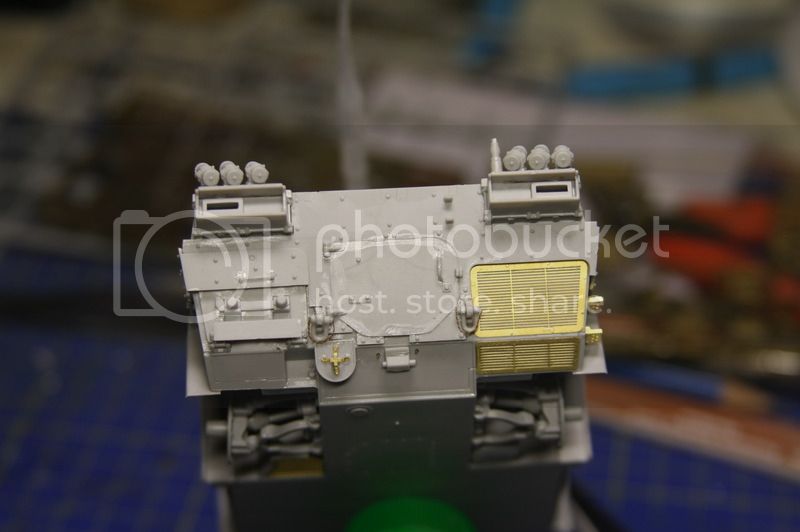
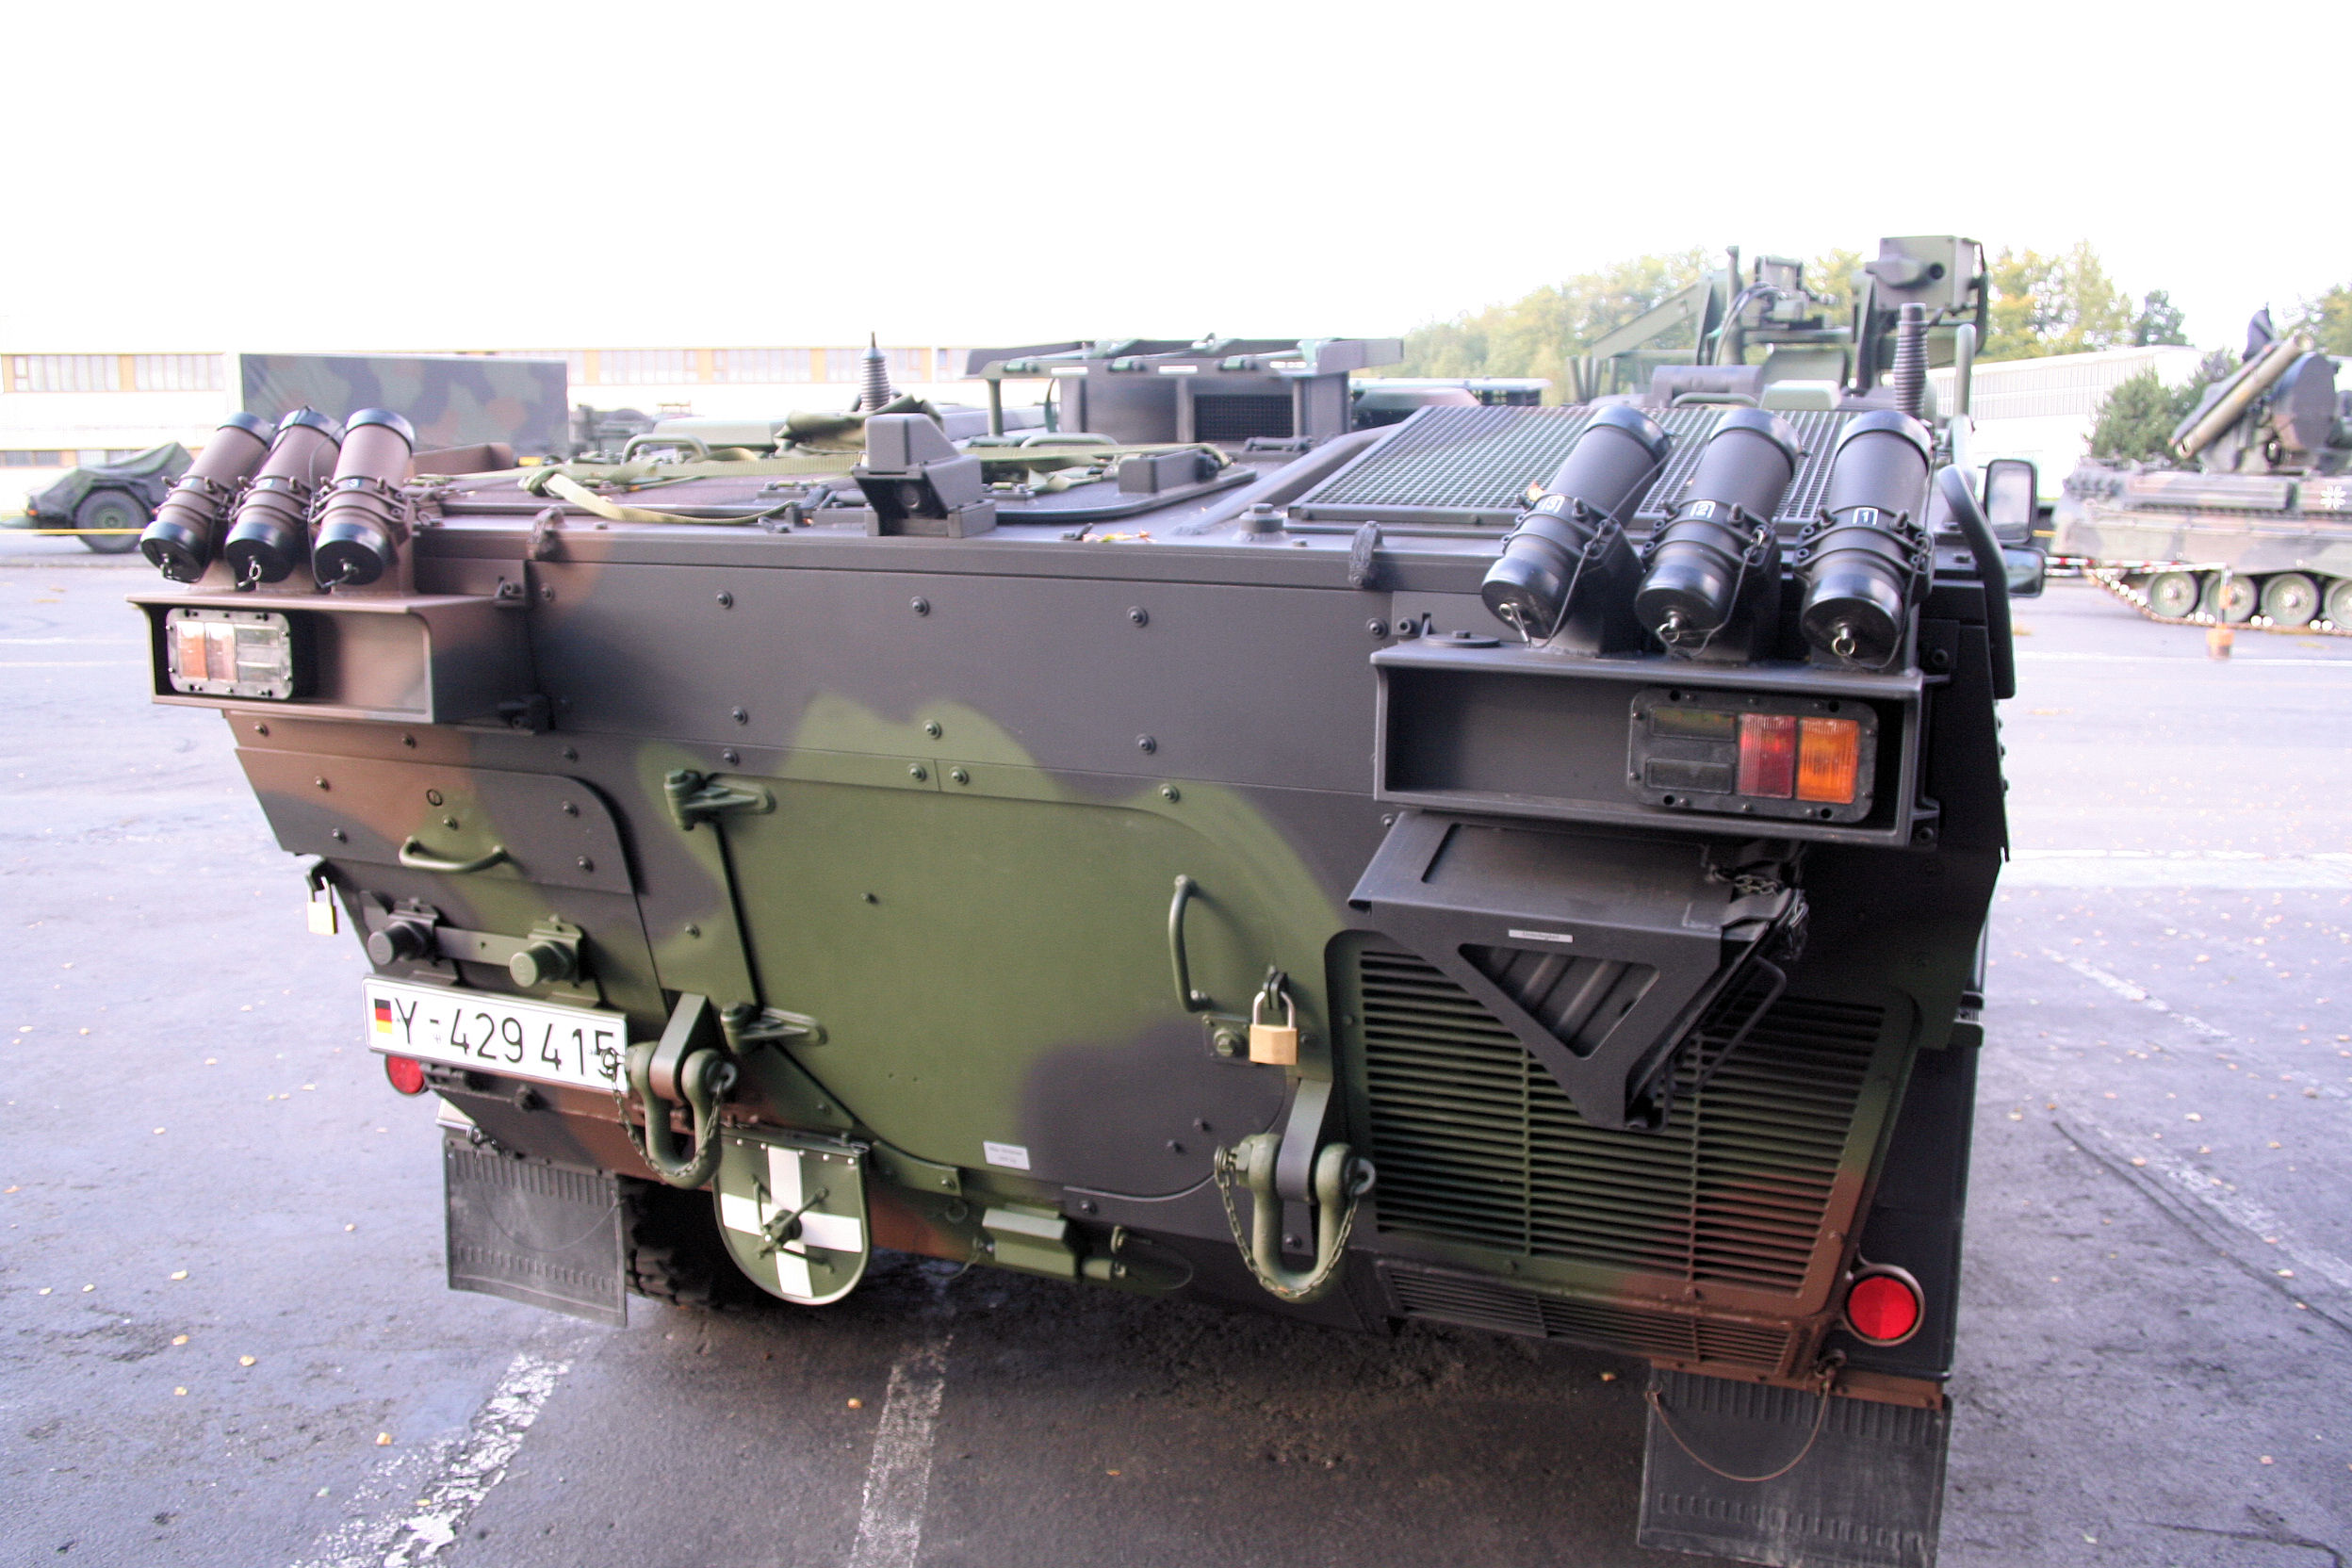
Finishing up the back of the Fennek requires sorting out the smoke launchers which sit on top of the rear light housing boxes.


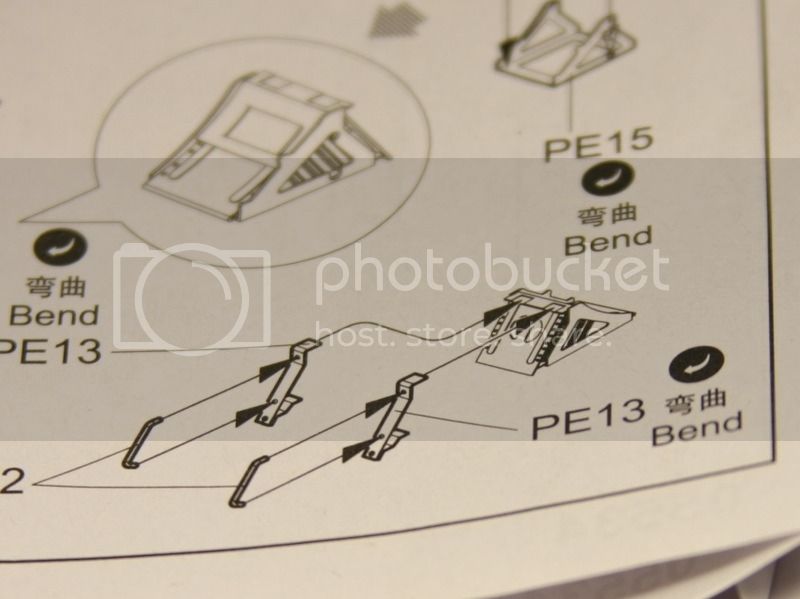
Once thats done we move on to a slightly tricky piece of etch. First I want to say I have no idea what this part is- I was hoping somebody could tell me as I'm curious having built it up? Its the part just below the right side light.


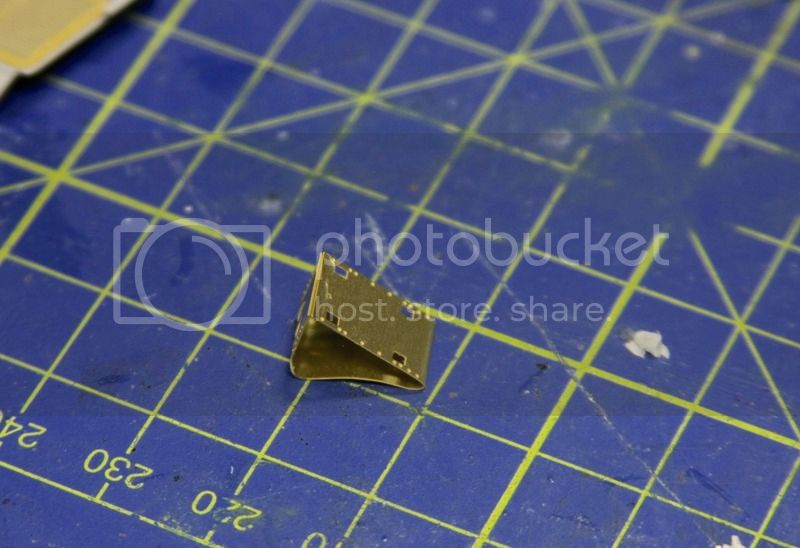
I was thinking it could be an infantry phone to the crew compartment, storage for spare smoke grenades, some kind of tool-kit or something like that! If anyone knows what it is- do let me know!

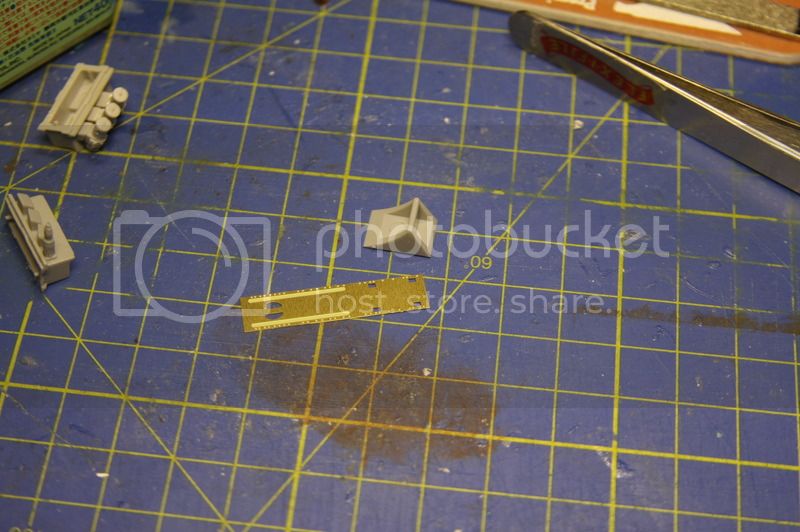
Anyway- the part is made up from etch and plastic. To me this is annoying- it should just be all etch or no etch- not a mix-up of the two because there's no point in it really- the plastic parts included could easily have been supplied as etch.

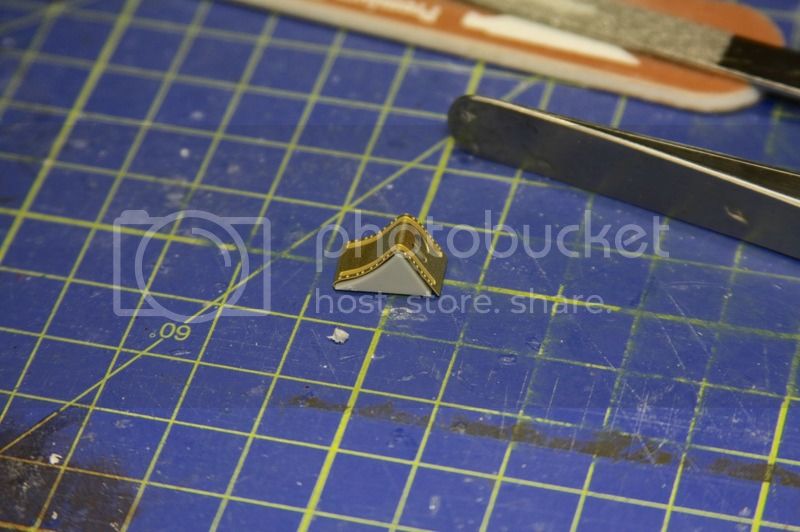
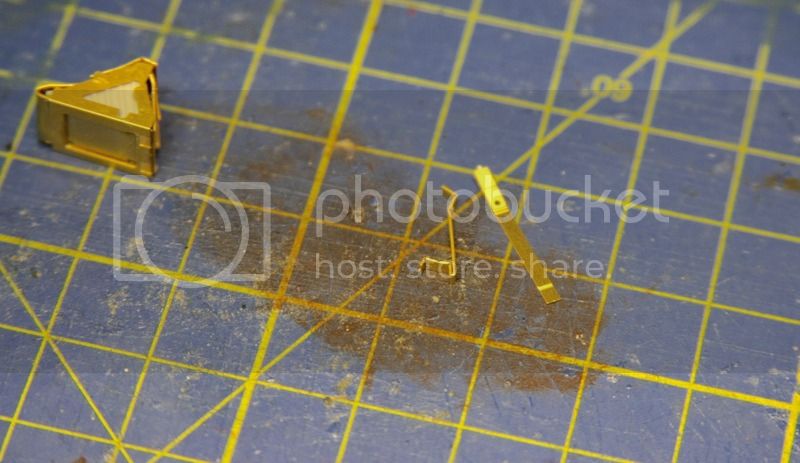
Construction begins by placing the first etch piece in a bending shaper provided in the kit.


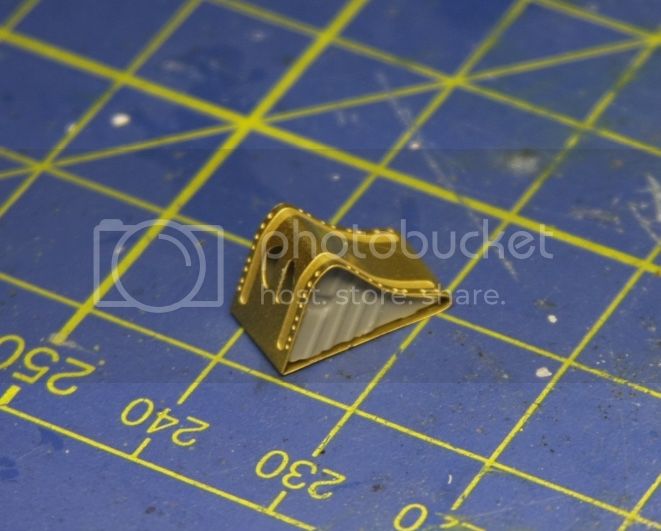
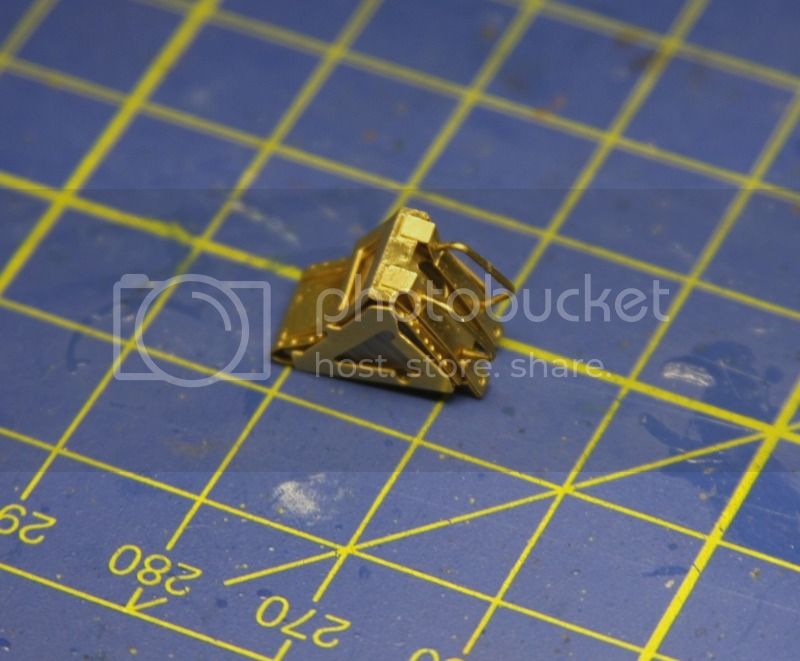
Then two plastic end pieces are glued into each side.


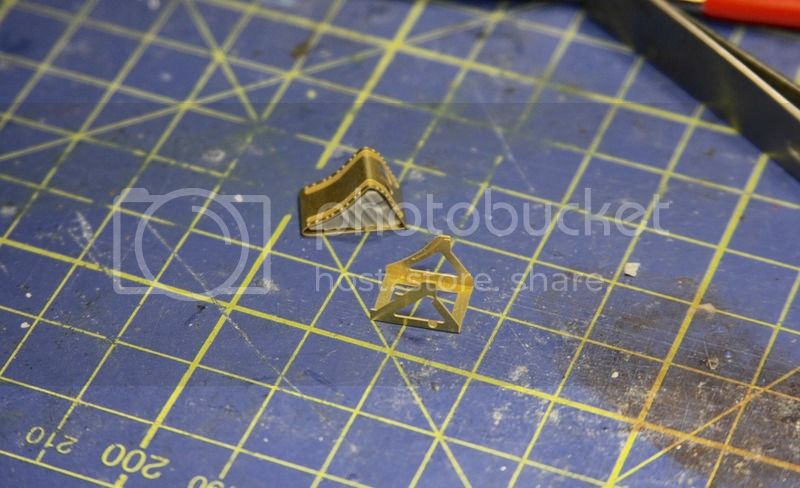
Next up is a frame in which the main body sits and that attaches to the back of the Fennek.


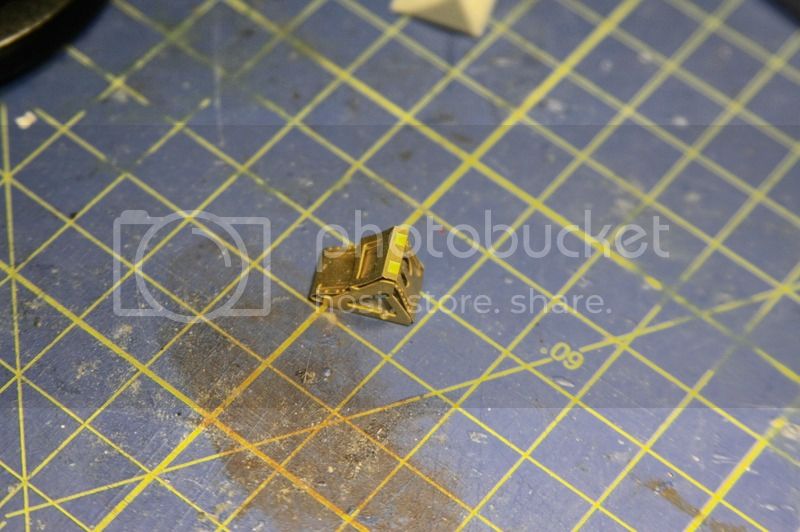
Another frame piece is added over the top side to use as a mount for two handles.


The handles come in two parts- the mounts and the handles themselves. The bends needed for the mounts are not shown and the shape is not really shown clearly by the instructions.


As far as I can tell the one on the left is (I think) the shape they should be, or close to it.


Looking at the real thing it would seem these handle mounts don't actually have the bends that Trumpeter has- it looks like they are just folded over the edges and welded/secured to the frame.

The last two parts are supposed to be two tiny little grab handles but the rather thick sprue attachment points meant I managed to pretty much wreck them taking them off the sprue and cleaning them up. I was contemplating doing my own handles anyway so my decision was made easier having wrecked the plastic parts!


The frame then attaches to the back of the Fennek.

Back with the hull tub and two little etch side-steps need to be mounted.


Then we go back into the crew compartment with more etch- this time for the each side of the drivers compartment.


So thats it for now. Currently I'm working on the seats in the crew compartment and I will update soon.

mvaiano
Visit this Community
Sao Paulo, Brazil
Joined: January 24, 2012
KitMaker: 1,054 posts
Armorama: 1,050 posts
Posted: Sunday, July 12, 2015 - 09:50 PM UTC
Hi Karl!

I don't know how to say it in english, but this piece is a block that prevents the vehicle roll out. You need to put it next to one tire.

I hope it can help you.

Cheers!

Marco
mvaiano
Visit this Community
Sao Paulo, Brazil
Joined: January 24, 2012
KitMaker: 1,054 posts
Armorama: 1,050 posts
Posted: Sunday, July 12, 2015 - 10:00 PM UTC
I almost forgot: Wow, this is a realy nice and clean build.

Cheers!

Marco
HermannB
Visit this Community
Bayern, Germany
Joined: October 14, 2008
KitMaker: 4,099 posts
Armorama: 4,067 posts
Posted: Sunday, July 12, 2015 - 10:54 PM UTC
Hi Karl,
Marco is right, thats an ordinary wheel chock. I would have liked if Trumpeter had a simpler solutiom for thje wheel chock, with today technologies it would be quite easy to make.
H.-H.
mvaiano
Visit this Community
Sao Paulo, Brazil
Joined: January 24, 2012
KitMaker: 1,054 posts
Armorama: 1,050 posts
Posted: Sunday, July 12, 2015 - 11:56 PM UTC
Wheel chock!

Thanks H.H. I learned another English term.

Cheers!

Marco
Karl187
#284
Visit this Community
Northern Ireland, United Kingdom
Joined: October 04, 2006
KitMaker: 3,094 posts
Armorama: 2,942 posts
Posted: Monday, July 13, 2015 - 03:37 PM UTC
Marco & Hans-Hermann- thanks for letting me know what that item was- the strange shape makes sense now! They definitely could have done it better though as you say Hans-Hermann.
jrutman
Visit this Community
Pennsylvania, United States
Joined: April 10, 2011
KitMaker: 7,941 posts
Armorama: 7,934 posts
Posted: Monday, July 13, 2015 - 07:14 PM UTC
Nice to learn you found out what that thing was but whatever it was you sure did a great job on that complicated bit!
This is a nice kit I think.
J
terminators
Visit this Community
France
Joined: February 20, 2012
KitMaker: 1,932 posts
Armorama: 1,907 posts
Posted: Monday, July 13, 2015 - 09:30 PM UTC

Quoted Text

Finishing up the back of the Fennek requires sorting out the smoke launchers which sit on top of the rear light housing boxes.


Once thats done we move on to a slightly tricky piece of etch. First I want to say I have no idea what this part is- I was hoping somebody could tell me as I'm curious having built it up? Its the part just below the right side light.


I was thinking it could be an infantry phone to the crew compartment, storage for spare smoke grenades, some kind of tool-kit or something like that! If anyone knows what it is- do let me know!

Anyway- the part is made up from etch and plastic. To me this is annoying- it should just be all etch or no etch- not a mix-up of the two because there's no point in it really- the plastic parts included could easily have been supplied as etch.

Construction begins by placing the first etch piece in a bending shaper provided in the kit.


Then two plastic end pieces are glued into each side.


Next up is a frame in which the main body sits and that attaches to the back of the Fennek.


Another frame piece is added over the top side to use as a mount for two handles.


The handles come in two parts- the mounts and the handles themselves. The bends needed for the mounts are not shown and the shape is not really shown clearly by the instructions.


As far as I can tell the one on the left is (I think) the shape they should be, or close to it.

Looking at the real thing it would seem these handle mounts don't actually have the bends that Trumpeter has- it looks like they are just folded over the edges and welded/secured to the frame.

The last two parts are supposed to be two tiny little grab handles but the rather thick sprue attachment points meant I managed to pretty much wreck them taking them off the sprue and cleaning them up. I was contemplating doing my own handles anyway so my decision was made easier having wrecked the plastic parts!


The frame then attaches to the back of the Fennek.

Back with the hull tub and two little etch side-steps need to be mounted.


So thats it for now. Currently I'm working on the seats in the crew compartment and I will update soon.


This part is a nightmare to built and I think it is constitued in too much pieces for an element who is not really significant.

Trumpeter instructions are vague for the position of the different parts and their folding.
Karl187
#284
Visit this Community
Northern Ireland, United Kingdom
Joined: October 04, 2006
KitMaker: 3,094 posts
Armorama: 2,942 posts
Posted: Tuesday, July 14, 2015 - 09:39 PM UTC
Jerry- Yeap it sure is a nice kit buddy, the detailed interior really makes these kits great because you can leave the hatches open without worrying about there being nothing in there!

Alex- You got it totally right, it isn't the first time I've come across a construction like that in a Trumpeter kit though.

With that rather fiddly chock-carrier all sorted the rear of the vehicle was nearly done. It just needed to be added to the rear under the right light followed by adding the mud flaps. The kit pieces are quite thin but the parts in the Eduard set are great too and fit very nicely so I went with them.


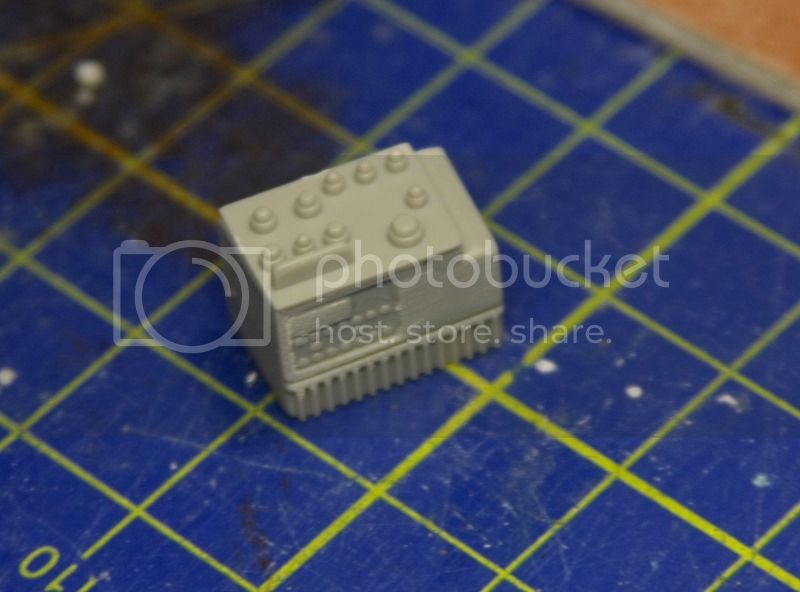
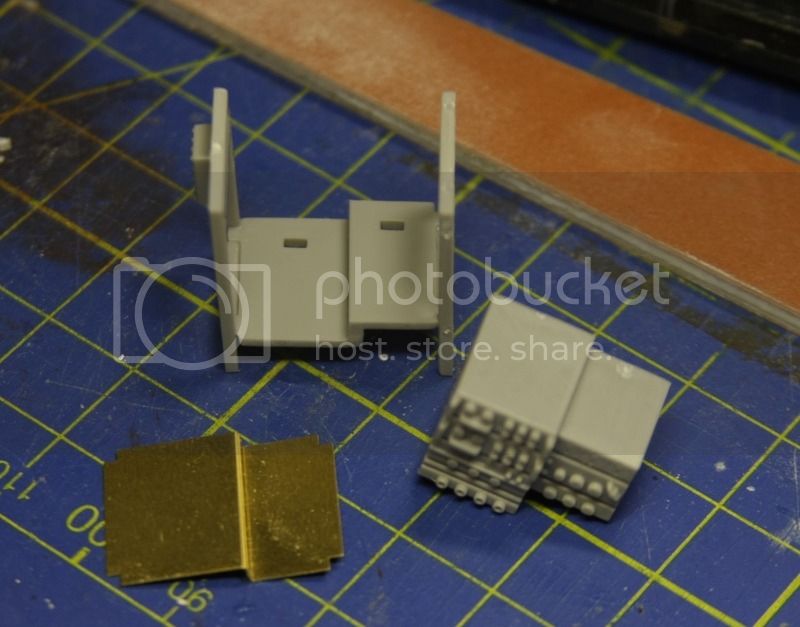
Next things were back in the interior tub and it needed some upright pieces - one on either side of the centre rack and a tubular piece in the corner followed by a piece of equipment on the other side. The Eduard set provide a colored front for this so the moulded on parts were sanded off.


The front light assembly then also needs to go on.


Then I sorted a few more parts out for the interior.


I'll be leaving these pieces off the interior so I can paint it up easier.

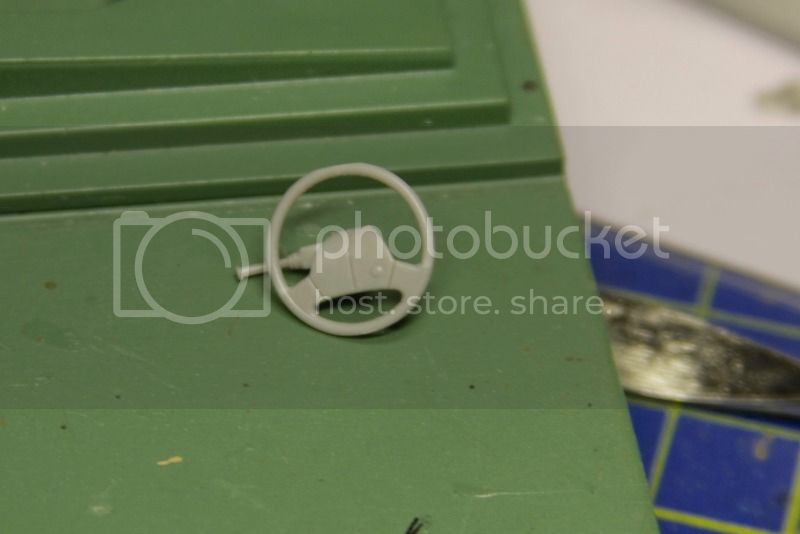
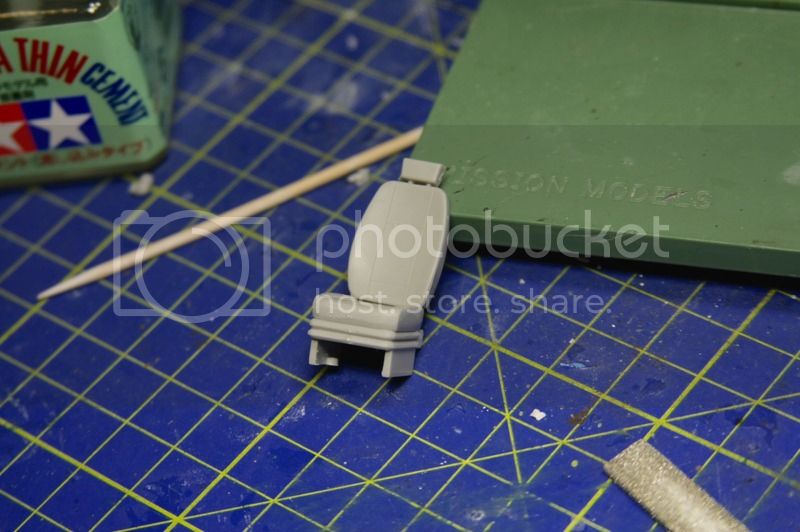
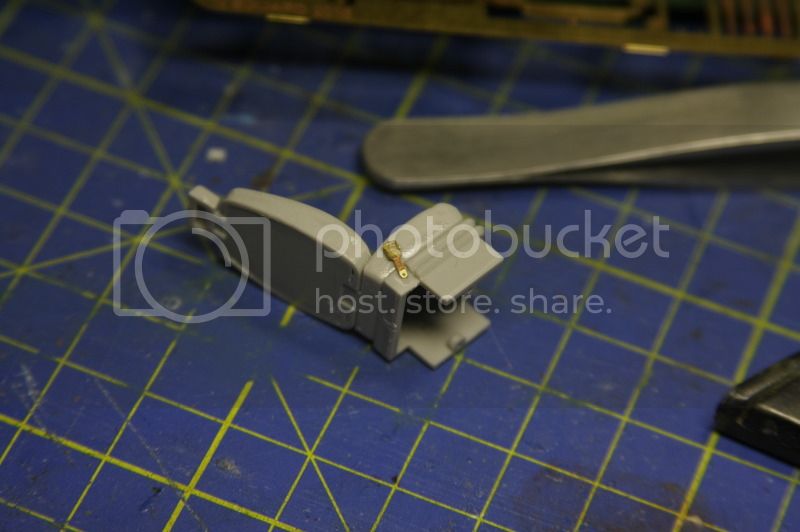
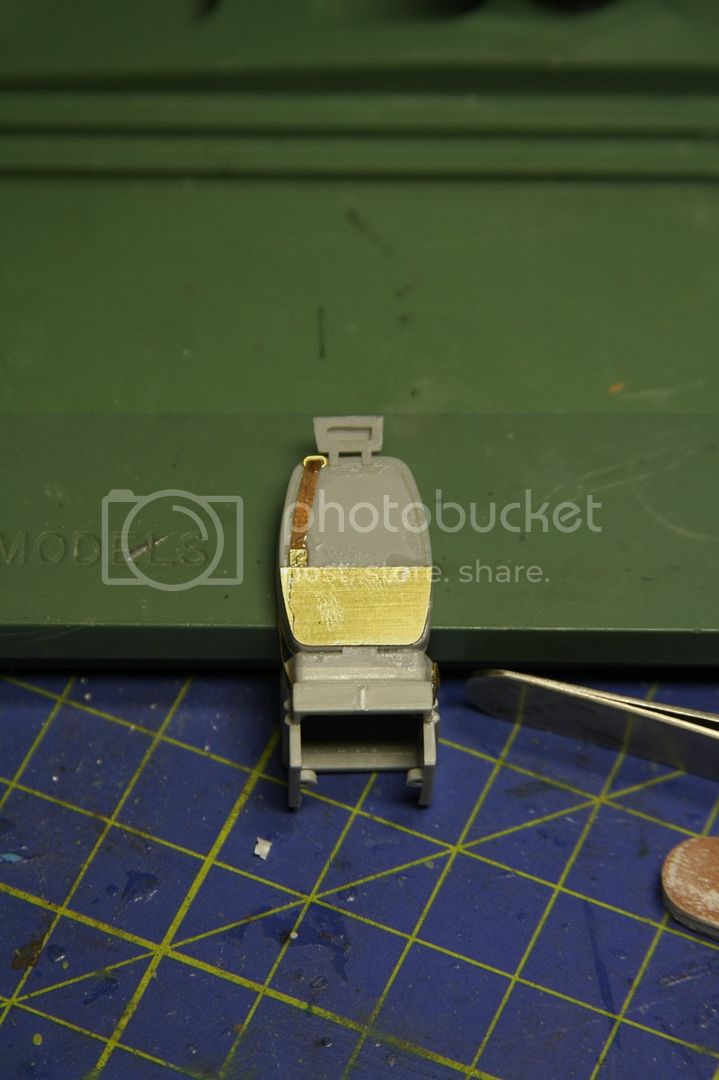
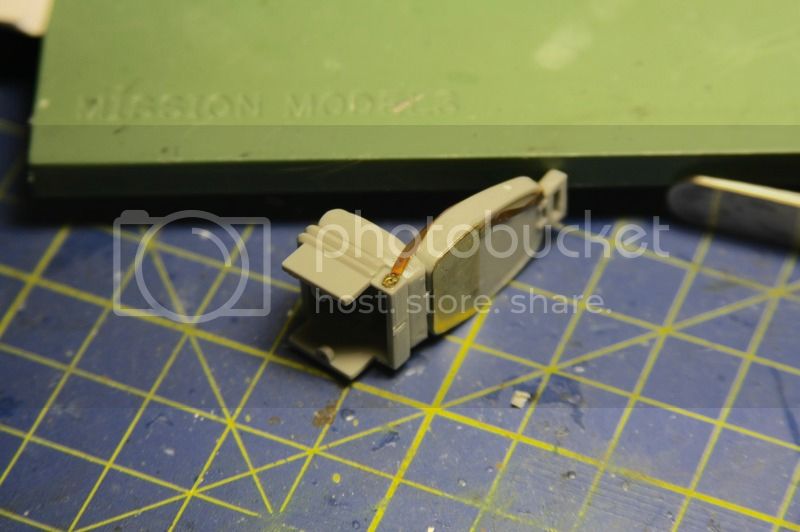
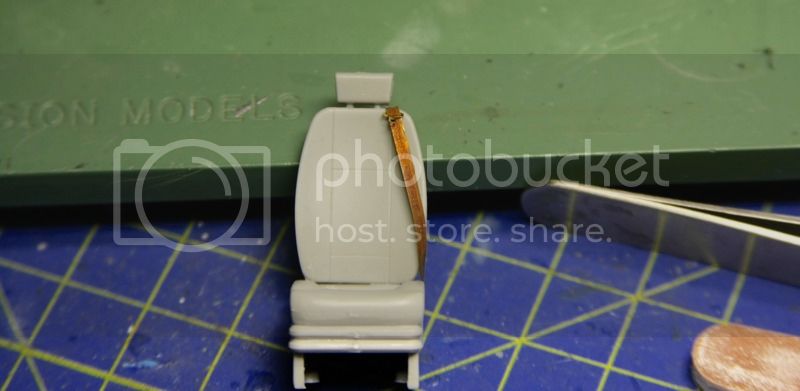
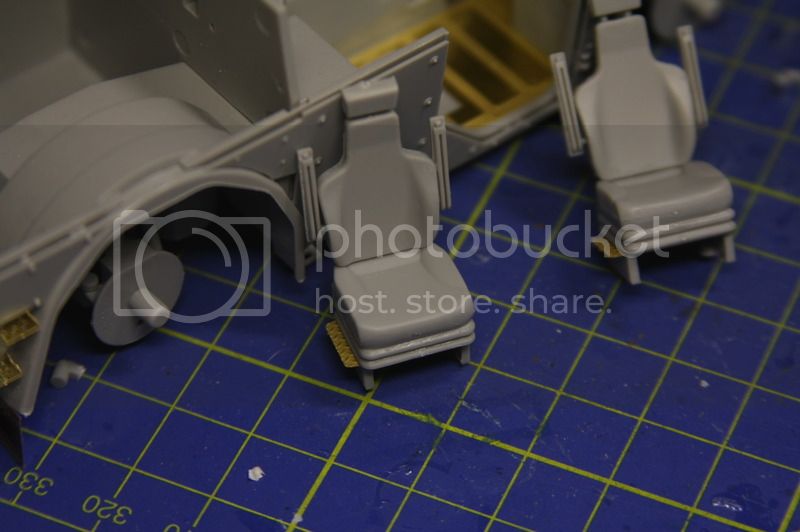
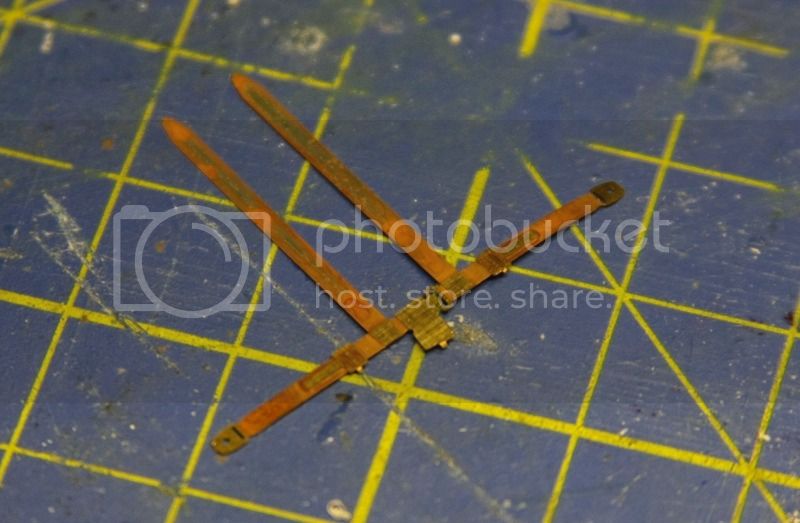
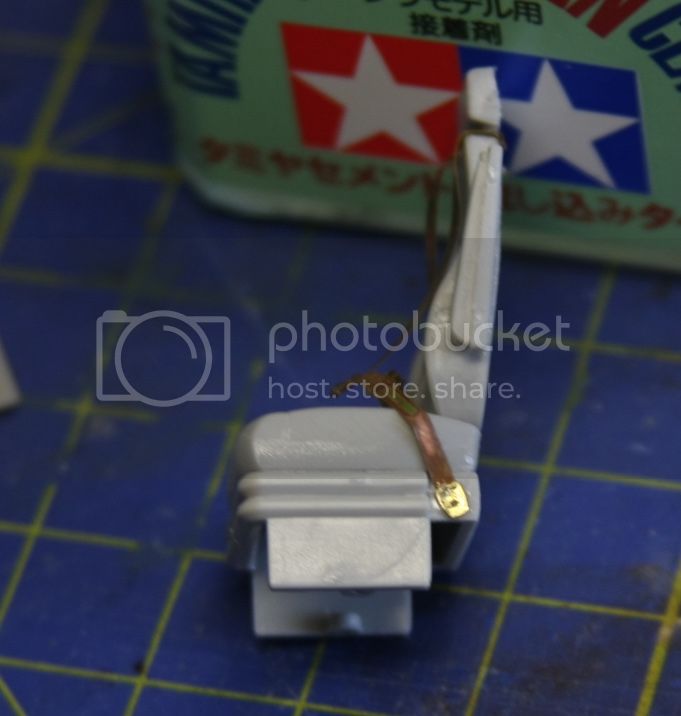
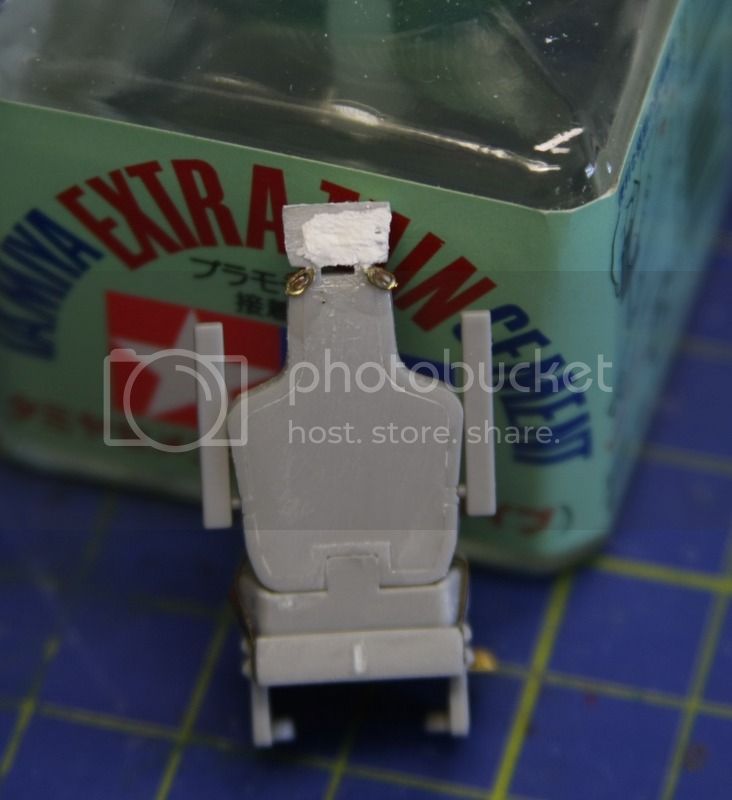
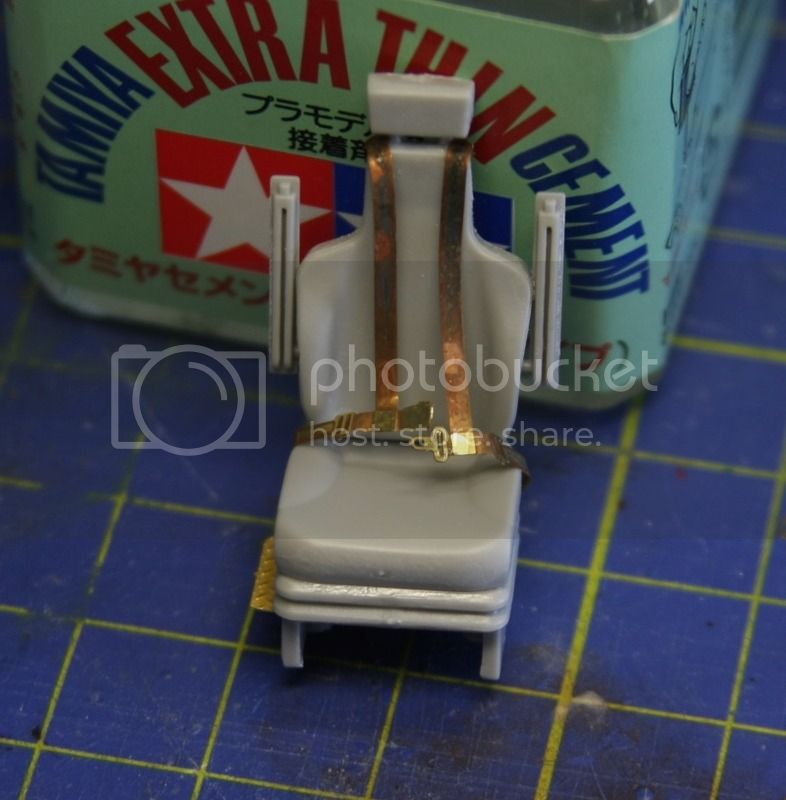
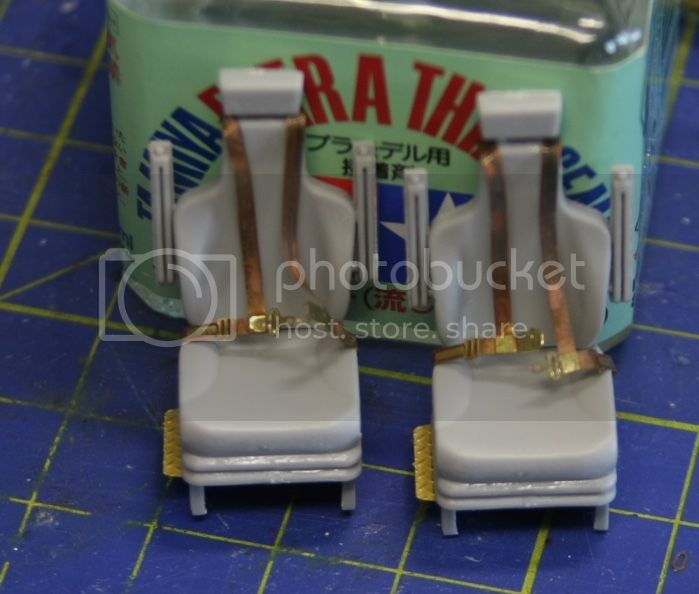
Staying with the interior, the three chairs also needed to be built up and they are great multi-part pieces with good moulding and they fit together nicely for a sturdy overall piece. The only thing they are lacking is solid head-rests (the head rests have a hole moulded in the back which needs filled as on the real vehicle the head rests appear solid) and seat belts. These are provided in the Eduard kit.

The drivers chair is up first.


Then the other two chairs which are slightly different to the Drivers in that they have a slightly different shape, have armrests and also include a step part for their bases which is included in the Trumpeter kit. The seat belts are also different in that they are harnesses- for some reason Eduard make the parts locked in but they include two extra buckle clips so you can cut at the middle and separate the two sides of the harnesses which is what I did.


Thats pretty much all the parts of the interior of the lower hull sorted. I'll be masking it soon and then will get some paint on it. Meanwhile I'll be working on the upper hull and I'll get an update for that done soon.

Thanks for reading.
 _GOTOTOP