_GOTOBOTTOM
Constructive Feedback
For in-progress or completed build photos. Give and get contructive feedback!
Tamiya M48. My second build
Chaman911
Visit this Community
United States
Joined: August 28, 2015
KitMaker: 319 posts
Armorama: 308 posts
Posted: Sunday, October 18, 2015 - 07:38 AM UTC
So just about done with my second AFV. I got this kit for 12$ from a local shop that was getting rid of modeling stuff in favor of RC. I didn't do any of the mods to make the tank more scale, this was more of a practice tank to learn how to use an airbrush. I also tried a couple new techniques such as oil paint for rain streaks and pastels for dust. I didn't care for the figures that came with the kit and don't yet have the skills for the beautiful resin crews I can find online... so no crew. Please take a look tell me what I can do better, or what I could try on the next kit. Thanks for looking!


Cookiescool2
Visit this Community
Georgia, United States
Joined: May 09, 2014
KitMaker: 273 posts
Armorama: 270 posts
Posted: Sunday, October 18, 2015 - 07:51 AM UTC
This looks absolutely incredible for a second build! The Tamiya suspension makes the kits ride a little high, so if the M48 looks a little weird, that's why. I can't wait to see what else you do with the kit!
HeavyArty
Visit this Community
Florida, United States
Joined: May 16, 2002
KitMaker: 17,694 posts
Armorama: 13,742 posts
Posted: Sunday, October 18, 2015 - 05:07 PM UTC
It looks pretty good for a straight OOB Tamiya build. Good finish and weathering. Keep it up.
LeoCmdr
Visit this Community
Alberta, Canada
Joined: January 19, 2005
KitMaker: 4,085 posts
Armorama: 3,917 posts
Posted: Sunday, October 18, 2015 - 05:51 PM UTC
For your second AFV you've done an excellent job that looks better than lots of the self proclaimed "experienced" modellers.

Concentrate on small details now that you've got the basic build and painting down pat such as a searchlight cable, headlight painting, and using straight stretched sprue or thin metal wire to create straight antennas.

Well done!
qcarr1
Visit this Community
Vermont, United States
Joined: March 16, 2015
KitMaker: 67 posts
Armorama: 67 posts
Posted: Sunday, October 18, 2015 - 06:52 PM UTC
Wow, very nice build and you'd never know it's only your second time out! I really like the overall paint job and the weathering.

I recently completed the Academy M48A5 as a US Army tank and was pretty pleased with it, but yours came out much better. Thanks for sharing!
rfbaer
Visit this Community
Texas, United States
Joined: June 12, 2007
KitMaker: 1,866 posts
Armorama: 1,696 posts
Posted: Sunday, October 18, 2015 - 09:36 PM UTC
I agree with what's been posted so far, excellent build, and very nice finishing too.
Chaman911
Visit this Community
United States
Joined: August 28, 2015
KitMaker: 319 posts
Armorama: 308 posts
Posted: Sunday, October 18, 2015 - 09:58 PM UTC
The headlights!! How did I miss that!
Thank you all for the comments. LeoCmdr thank you for your suggestions. I think adding a cord to the spot light is a great idea. I am a little nervous about adding it at this point because I dont want to mess anything up, but there is only one way to learn. I checked out how to stretch spru and it dosent look too difficult. I swept the antena back to give the impression of movement. Is that accurate or do the antenas stay pretty much straight while moving? Anyone know how long they should be? I will add some of the suggested items and a pic with the additions over the next few days. Thanks again for your suggestions and comments! Keep them coming.
Bryan
HeavyArty
Visit this Community
Florida, United States
Joined: May 16, 2002
KitMaker: 17,694 posts
Armorama: 13,742 posts
Posted: Sunday, October 18, 2015 - 10:41 PM UTC
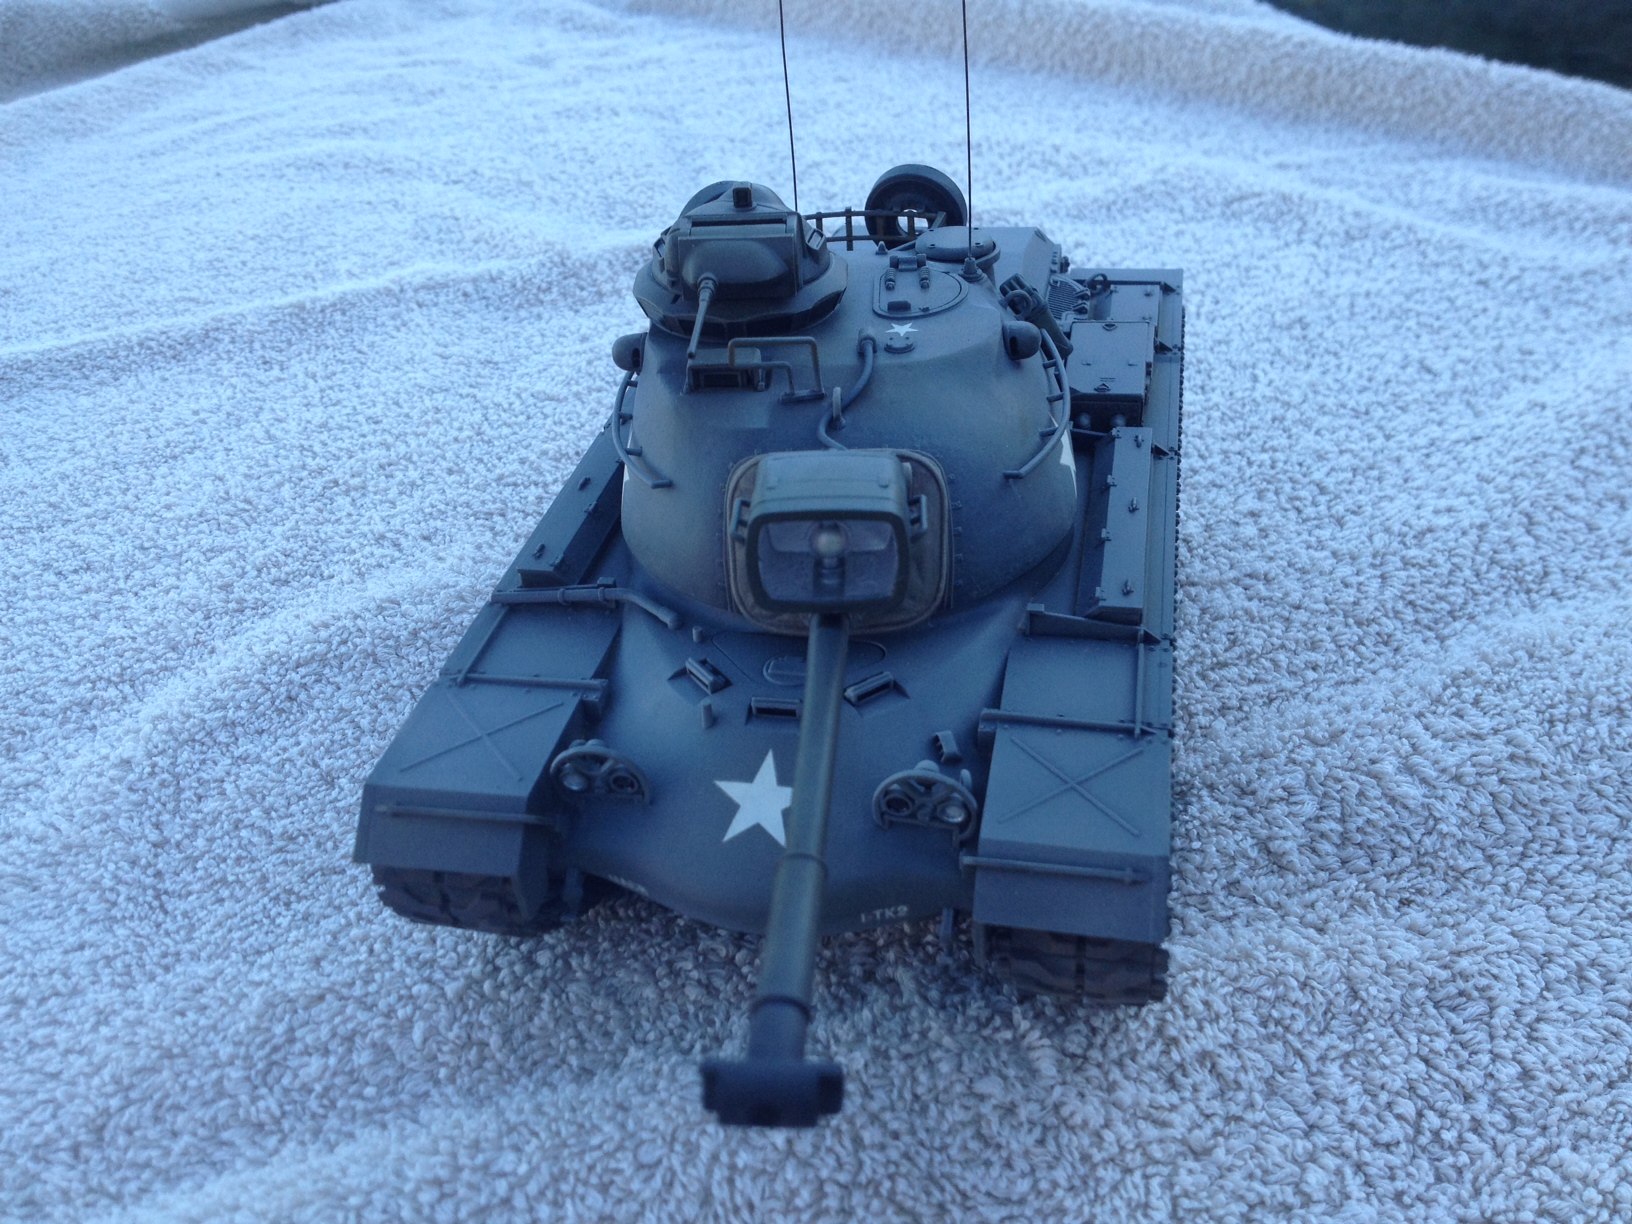
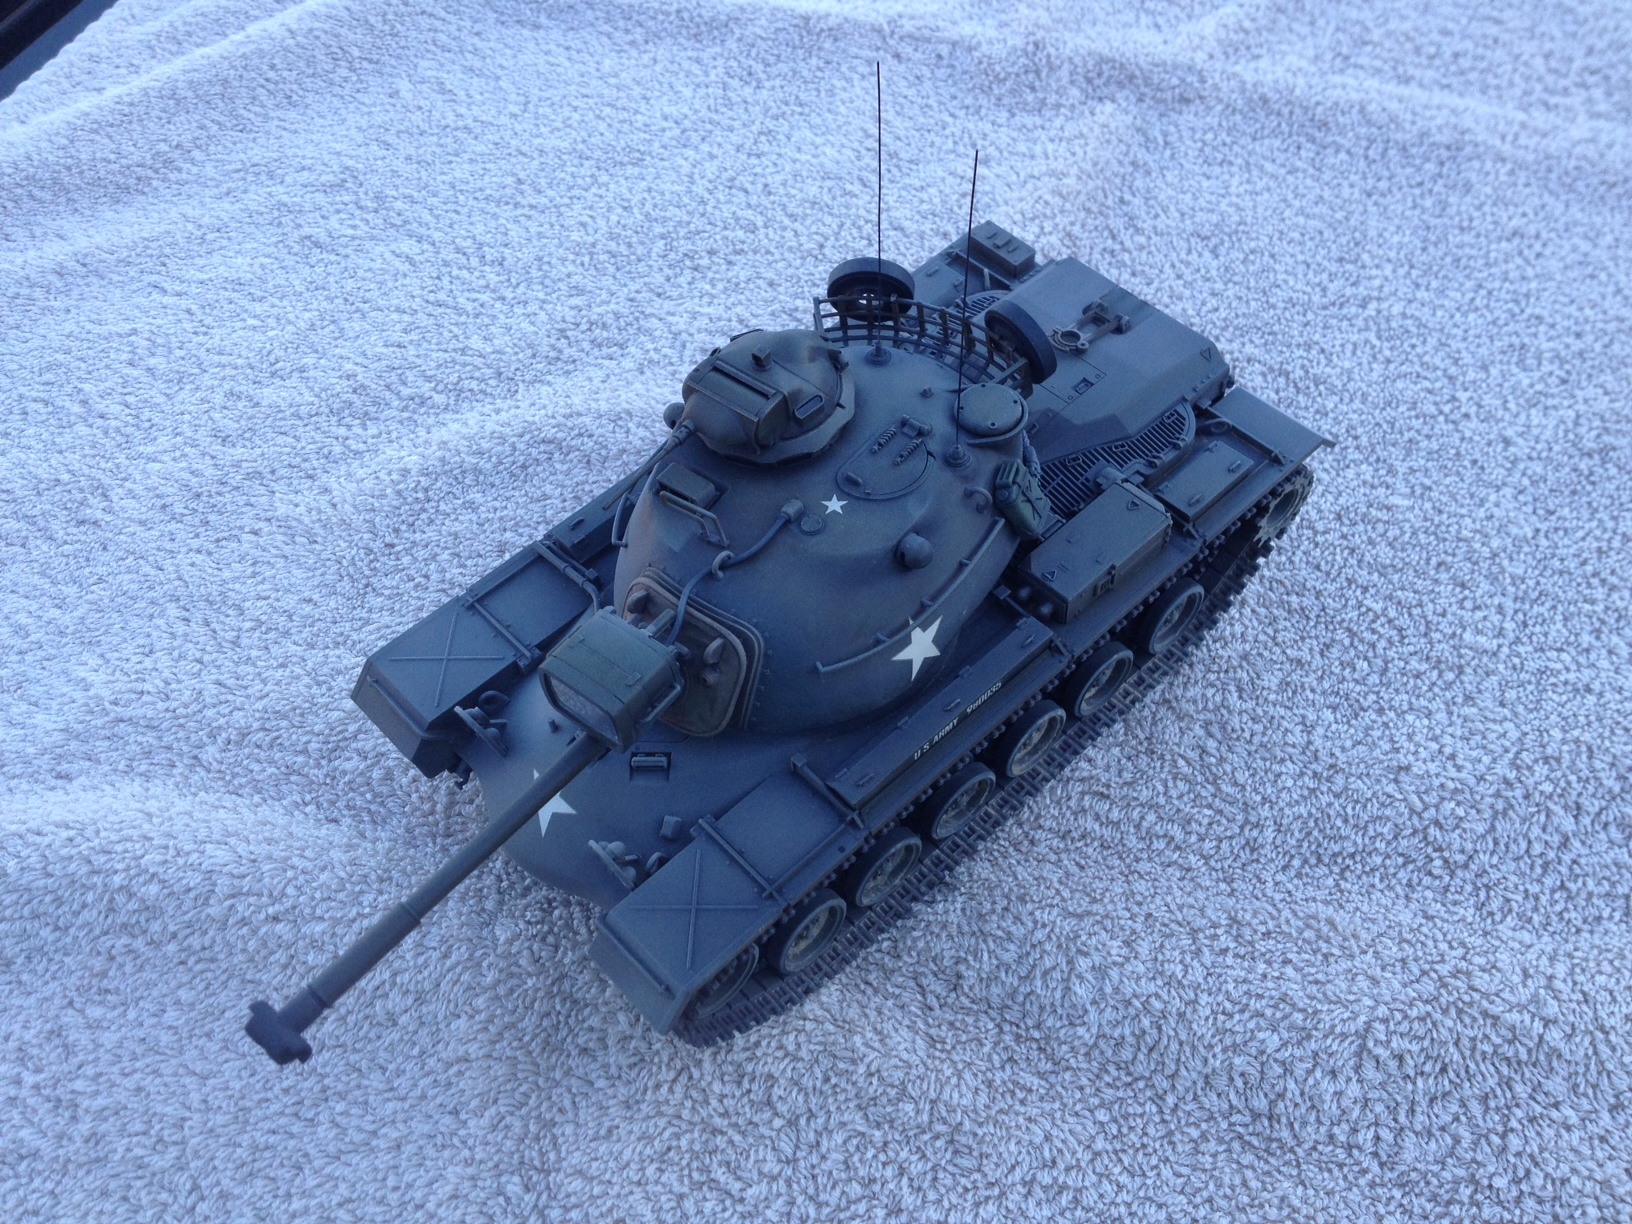
The antennas stay basically rigid and straight up when moving as well.


To replicate them, I prefer 0.020 plastic rod over stretched sprue. Also, the actual antennas are about 8' long; 2 3/4 inches in 1/35.

Also, I can't see them, but don't forget the tail lights as well. Only the left upper oval should be red. The slits on the bottom left and both on the right should be gloss black.

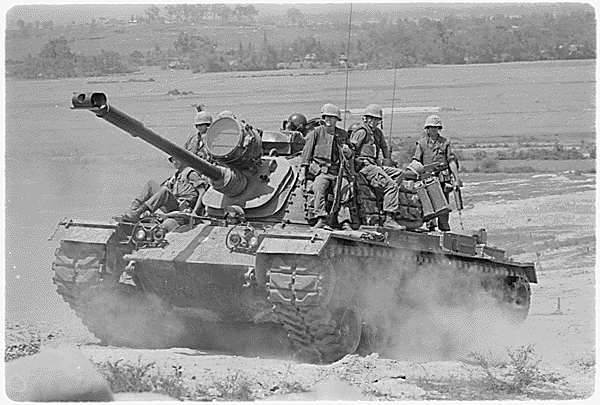
M60, but same on an M48A3.
Chaman911
Visit this Community
United States
Joined: August 28, 2015
KitMaker: 319 posts
Armorama: 308 posts
Posted: Monday, October 19, 2015 - 12:25 AM UTC
Thank you! I would never have realized the top left rear light is red. Thank you for antena dimentions too. I have .20 piano wire so will use that. Now all I need is some time. Between work, kids, and trying to sleep i'm not left with much...at all. How about the dust effects? I wanted the tank to look really dusty. The pic of that M48 with the troops on it demonstrates how dusty it can be during dry season. My iphone is my only digital cam and it is not too sharp. Maby my neigbhor can loan me his camera for some better pics. Thanks again
Bryan
andromeda673
Visit this Community
Wisconsin, United States
Joined: July 30, 2013
KitMaker: 584 posts
Armorama: 525 posts
Posted: Tuesday, October 20, 2015 - 06:15 AM UTC
nice job, I'll echo what some others have said, I use rod styrene as well, however I use .10 and or even guitar strings, since I play guitar I have a endless supply of left over strings.

Nice job though, and it turned out really good.
Chaman911
Visit this Community
United States
Joined: August 28, 2015
KitMaker: 319 posts
Armorama: 308 posts
Posted: Thursday, October 22, 2015 - 10:03 PM UTC
Per your suggestions I have made some changes and additions. I added the spotlight cable using some wire insulation primed black and misted with diluted buff to match rest of vehicle. I straightened out the antennas and cut them to proper length and painted the head lamps. I have not done tail lights yet. I also have made some progress on a simple base. I think what it's missing is some chipping on edges and surfaces that receive a lot of wear. i think it is too late to add now so unless anyone has anymore suggestions I'm going to call this pretty much done. I will post final pics when stand is complete. I also need to figure out better light lighting for final pics as the current setup is really making the tank not look green! Thanks again for all your comments and suggestions!
Chaman911
Visit this Community
United States
Joined: August 28, 2015
KitMaker: 319 posts
Armorama: 308 posts
Posted: Thursday, October 22, 2015 - 10:04 PM UTC


Namabiiru
Staff MemberAssociate Editor
MODEL SHIPWRIGHTS
#399
Visit this Community
Rhode Island, United States
Joined: March 05, 2014
KitMaker: 2,888 posts
Armorama: 1,920 posts
Posted: Thursday, October 22, 2015 - 10:37 PM UTC
I'm having a tough time believing that's only your second AFV build! I've built plenty, and they don't look that good. Well done.

WRT the antennas, I like to use guitar strings. They stay nice and straight and don't succumb to bending and breaking as easily as stretched sprue or other kinds of wire. And if you simply drill a hole in your antenna mount you don't even need to glue the antenna down, which makes it easy to remove for packing or transporting. I also like to leave just a bit of the wound wire cladding on the bottom of the guitar string to simulate the spring at the base of many antennas. Not completely accurate, but I like the way it looks.

Chaman911
Visit this Community
United States
Joined: August 28, 2015
KitMaker: 319 posts
Armorama: 308 posts
Posted: Friday, October 23, 2015 - 12:27 AM UTC
Lol, well I guess thats a compliment. Not sure how I would prove it, guess you just have to take my word that this is my second kit since I was a teenager. You can check out my first build. Its in this forum, Tamiya T-55, turned out really well. I like your idea about guitar strings for antenas and leaving some of the wrap on to resemble the spring. There is a Guitar Center in the same shopping center as the grocery store I usually go to. I will check it out. Again, still open to suggestions and comments!
Chaman911
Visit this Community
United States
Joined: August 28, 2015
KitMaker: 319 posts
Armorama: 308 posts
Posted: Saturday, October 24, 2015 - 04:35 AM UTC
Done!


retiredyank
Visit this Community
Arkansas, United States
Joined: June 29, 2009
KitMaker: 11,610 posts
Armorama: 7,843 posts
Posted: Monday, November 23, 2015 - 04:05 AM UTC
A spectacular finish, at that!
tankglasgow
Visit this Community
Scotland, United Kingdom
Joined: October 04, 2010
KitMaker: 275 posts
Armorama: 260 posts
Posted: Monday, November 23, 2015 - 04:47 AM UTC
That looks pretty good for a second build, post some more pictures using the same set up as your last one, it looks like natural daylight.
qcarr1
Visit this Community
Vermont, United States
Joined: March 16, 2015
KitMaker: 67 posts
Armorama: 67 posts
Posted: Tuesday, November 24, 2015 - 10:02 PM UTC
That came out really nice! Again, great job and thanks for sharing with us!
 _GOTOTOP