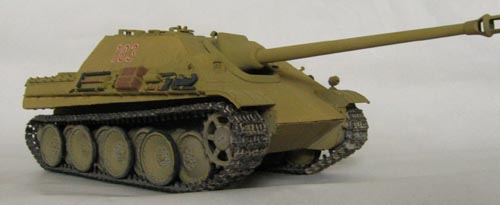
DML Early Jagdpanther in progress
Metro Manila, Philippines
Joined: July 29, 2002
KitMaker: 1,460 posts
Armorama: 1,080 posts
Posted: Wednesday, February 25, 2004 - 04:36 PM UTC
Jeep: I just completed painting and weathering the indy-tracks yesterday. I still have lots of things to do before I complete the damn thing, such as putting gloss topcoat to the wheels prior to weathering, re-trouching some of the paints after I stenciled the numbers ( I did not use the decals that came with the kit as well as the schurzen -- I made my own using the aluminum used for the leche flan). I
am currently thinking of what to use as cover the engine grill/mesh - I do not want to buy the after market mesh too costly. I already destroyed one brand new strainer used for cooking as mesh for the grill....I think my gallery is currently updated if you are interested in the results...


Philippines
Joined: July 22, 2002
KitMaker: 1,538 posts
Armorama: 0 posts
Posted: Wednesday, February 25, 2004 - 04:55 PM UTC
I might try airbrushing all markings too. Methinks decals won't look realistic when applied over zimm. I'm keeping my eyes peeled for mesh materials. Mosquito screens are too big I think.
Keep me updated on your panther! I'm learning a lot from your build

- It's not how you begin, but how you finish what you began. -
John Mendoza
Moderator, Filipino Phorum
IPMS Philippines - Bert Anido Chapter
Metro Manila, Philippines
Joined: July 29, 2002
KitMaker: 1,460 posts
Armorama: 1,080 posts
Posted: Wednesday, February 25, 2004 - 05:03 PM UTC
Jeep: here are my three options for the mesh; a) nylon stockings from the wife b) mesh used for making tea c) smaller grid mesh strainer that I found in SM (but it costs P149)...I'll keep you posted....
Warszawa, Poland
Joined: October 10, 2002
KitMaker: 312 posts
Armorama: 0 posts
Posted: Wednesday, February 25, 2004 - 10:28 PM UTC
Hello My Lurker Master ,
Very nice Panther Paznzer , I really admire Your Zim Job - You use some sofisticated putty ? About zimm - Jeep I had a local company which make resin zimm for german panzers but I don't remember for what type of tanks . If You want some for try I could send You .
Regards

Best Regards
Artur " TOMCAT "Szopa
"Absolute Tomcat , 299 % Proof !!! "
COMCARAIRWING
PIG#35
Vatican City
Joined: May 13, 2002
KitMaker: 3,271 posts
Armorama: 2,388 posts
Posted: Wednesday, February 25, 2004 - 10:49 PM UTC
Hi Jeep,
I don't know what's with the kit you are building, because I did the DML Jagdpanther as well, there should be no gap. here is the pic, mate.
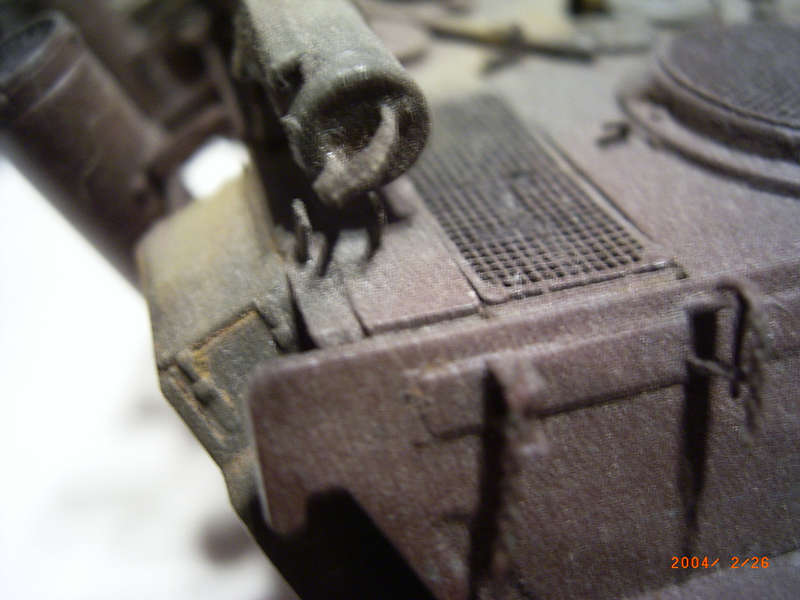
sorry about the dust, it was overweathered.

Dave O'Mally aka Davidus ArwenIsMineus Pig No. 2, Da Jackel
A servant to the Sty - Liaison Officer for Z-Team to the Sty
Commandant U-Boot Waffe der Pigsmarine, OD is Extremely Asexual
Minister of OD Paint Removal
Order of Wisconsin 2 Parts Grenade
S
Philippines
Joined: July 22, 2002
KitMaker: 1,538 posts
Armorama: 0 posts
Posted: Thursday, February 26, 2004 - 11:55 AM UTC
Thanks for the offer Artur! Maybe when I get around to doing a waffle-patterned Stug

I used superfine Milliput on this one.
I think that's the late Jagdpanther Dave. The barrel cleaning tube is over the engine deck. The early version had it installed on the left side of the hull. Maybe DML forgot about this particular area. Easy enough to patch though. Thanks for taking the time Dave! (++)
- It's not how you begin, but how you finish what you began. -
John Mendoza
Moderator, Filipino Phorum
IPMS Philippines - Bert Anido Chapter
Metro Manila, Philippines
Joined: July 29, 2002
KitMaker: 1,460 posts
Armorama: 1,080 posts
Posted: Thursday, February 26, 2004 - 01:06 PM UTC
Hey Jeep,
Forgot to tell you that I saw PE mesh grill for Jagdpanther in Lil's makati and it costs around P180. It is found in the glass case at the rigt side of the entrance by the first shelf. They actually have different aftermarket kits....
Philippines
Joined: July 22, 2002
KitMaker: 1,538 posts
Armorama: 0 posts
Posted: Thursday, February 26, 2004 - 01:29 PM UTC
No kidding! That only costs Php 180? Good thing you asked. I didn't bother to ask them because I though I couldn't afford it anyway. You're not getting it? Will check if the PE is correct for the early jagdpanther.
Thanks a lot man!
- It's not how you begin, but how you finish what you began. -
John Mendoza
Moderator, Filipino Phorum
IPMS Philippines - Bert Anido Chapter
Ontario, Canada
Joined: May 15, 2003
KitMaker: 502 posts
Armorama: 55 posts
Posted: Thursday, February 26, 2004 - 04:26 PM UTC
Hey Jeep, the beast is looking good, same here the zimmerit is fine. Can't wait to see it finish, Just make sure to "chip" the edgesand corners.
Metro Manila, Philippines
Joined: July 29, 2002
KitMaker: 1,460 posts
Armorama: 1,080 posts
Posted: Friday, February 27, 2004 - 03:40 AM UTC
Jeep: Yup, even I was surprised at the price...I got to know the price coz I asked the saleslady. Initially I never bothered to ask myself. I found a new mesh source substitute and its even cheaper. I saw my wife's purse, it was made of plastic mesh of about 1 to 2mm square per grid--good enough to use a mesh. She told me she got it for only P13.00 and she even has a spare. I also saw the same material as a tote bag used by my sister, its about 1x1 ft. my wife said she saw that bag in SM and it costs only P100. Gee, by that size I could have a lifetime supply of mesh....
Philippines
Joined: July 22, 2002
KitMaker: 1,538 posts
Armorama: 0 posts
Posted: Sunday, February 29, 2004 - 01:20 PM UTC
Wilco blitz! More chips to follow

For some reason my wife has been hiding her purse from me lately

She also has this plastic woven purse but the weave is bigger at around a millimeter per box. Will look for the finer variety and hope the sales ladies don't look at me strangely hehe

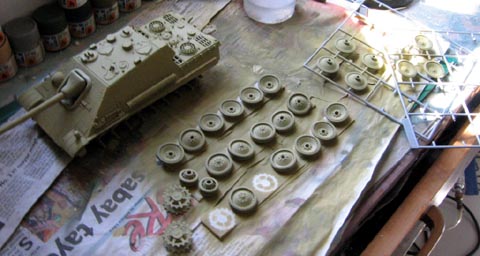
More in progress photos:
All small parts and tools on and ready for paint:
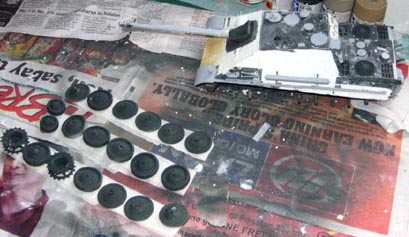
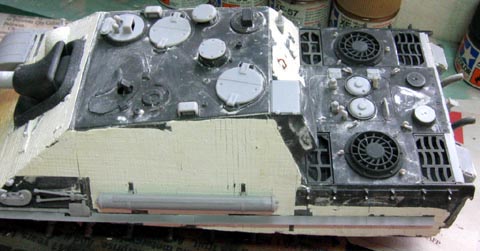
The aftermath: Everything including the kitchen sink is now a nice shade of Tamiya Dunkelgelb.
- It's not how you begin, but how you finish what you began. -
John Mendoza
Moderator, Filipino Phorum
IPMS Philippines - Bert Anido Chapter
Metro Manila, Philippines
Joined: February 20, 2003
KitMaker: 5,762 posts
Armorama: 2,283 posts
Posted: Wednesday, March 03, 2004 - 03:34 AM UTC
Whoa! I think I missed this post a long time! Nice progress shots my friend! Good thing that the fit of the tracks are excellent, cosidering they are indy tracks. Pewwww
--==Shonen Red==--
-=Filipino Modeler=-
Philippines
Joined: July 22, 2002
KitMaker: 1,538 posts
Armorama: 0 posts
Posted: Sunday, March 07, 2004 - 02:59 PM UTC
- It's not how you begin, but how you finish what you began. -
John Mendoza
Moderator, Filipino Phorum
IPMS Philippines - Bert Anido Chapter
Michigan, United States
Joined: December 11, 2003
KitMaker: 5,409 posts
Armorama: 3,777 posts
Posted: Sunday, March 07, 2004 - 03:39 PM UTC
That's one helluva build from the thick ugly zimmerit pics. I may have lissed it but how did you fix the gap at the rear?
You don't support the troops if you don't support the mission!
Philippines
Joined: July 22, 2002
KitMaker: 1,538 posts
Armorama: 0 posts
Posted: Sunday, March 07, 2004 - 03:46 PM UTC
I cut some strips from the sprue nameplates and sanded them to fit. The fit is still a bit loose in the back but I still haven't glued the upper and lower hulls together so I can still work on it.
- It's not how you begin, but how you finish what you began. -
John Mendoza
Moderator, Filipino Phorum
IPMS Philippines - Bert Anido Chapter
Metro Manila, Philippines
Joined: December 02, 2003
KitMaker: 277 posts
Armorama: 88 posts
Posted: Sunday, March 07, 2004 - 08:25 PM UTC
Hi Jeep,
Your build is geting on nicely! The initial paintwork is good. Did you hand paint the custom vehicle numbers because they are well done?
I guess that you will still weather the beast. If so, don't forget the following:
Try to bring out the zimmerit patterny(you worked hard on) with a nice dark wash and highlights.
Don't forget to fill the gap in the lower front glacis plate.
Also, aren't the tracks suppose to sag?
Hope to see your finished beastie soon,
Wanze
PROUD TO BE A MEMBER OF IPMS-PHIL-BERT ANIDO CHAPTER
England - East Anglia, United Kingdom
Joined: August 29, 2002
KitMaker: 202 posts
Armorama: 178 posts
Posted: Monday, March 08, 2004 - 01:04 AM UTC
Jeepney.........
Vey nice, though the tracks look a little tight.
There's more than one way to skin a cat!
Philippines
Joined: July 22, 2002
KitMaker: 1,538 posts
Armorama: 0 posts
Posted: Monday, March 08, 2004 - 11:57 AM UTC
Wanze: I used the kit decals. They behaved after 2 baths of Microsol. They are very thin and they came off the backing paper after I dipped them for only 15 seconds. DML might have given me the wrong decal sheet though because the numbers for the stowage box are too big and the balkenkreuz (sp) only have white borders without the black centers. Will wash the zimm next.
Cromwell: I did not want the tracks to sag too much. I've seen some pics of Panthers with their tracks this tight. Maybe this occurs when the track tensioner has just been adjusted.
Thanks for the comments guys!
- It's not how you begin, but how you finish what you began. -
John Mendoza
Moderator, Filipino Phorum
IPMS Philippines - Bert Anido Chapter
Metro Manila, Philippines
Joined: July 29, 2002
KitMaker: 1,460 posts
Armorama: 1,080 posts
Posted: Monday, March 08, 2004 - 12:59 PM UTC
Jeep: Nice build...looking very good...you did a swell job on the zimmerit I like it
Vatican City
Joined: May 13, 2002
KitMaker: 3,271 posts
Armorama: 2,388 posts
Posted: Wednesday, March 10, 2004 - 04:36 PM UTC
Looked very good Muncher.
Now all you need to do some weathering, I like them light, a little wash here and there. then take a stretched sprue, and dip it in undercoat color, I think in your case would be the original zimmerit color which looked a bit graynish, me think, and randomly drag along the JP, and make it looked like scratches.
And blacken the gun tube a bit, I always like a blackened gun tube.
Very good stuff you got there. Jeep.
Dave O'Mally aka Davidus ArwenIsMineus Pig No. 2, Da Jackel
A servant to the Sty - Liaison Officer for Z-Team to the Sty
Commandant U-Boot Waffe der Pigsmarine, OD is Extremely Asexual
Minister of OD Paint Removal
Order of Wisconsin 2 Parts Grenade
S
Philippines
Joined: July 22, 2002
KitMaker: 1,538 posts
Armorama: 0 posts
Posted: Sunday, March 28, 2004 - 05:59 PM UTC
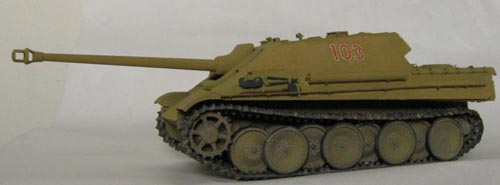
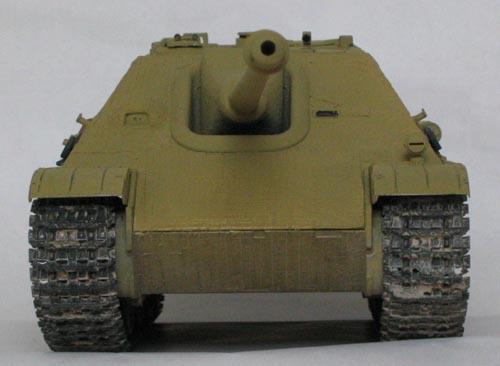
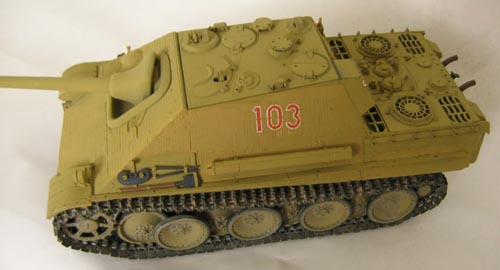
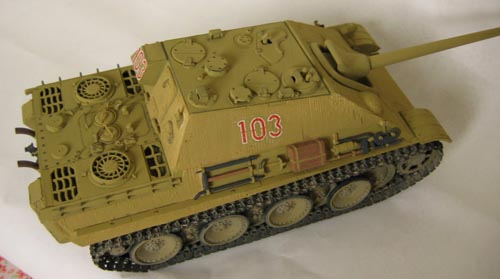
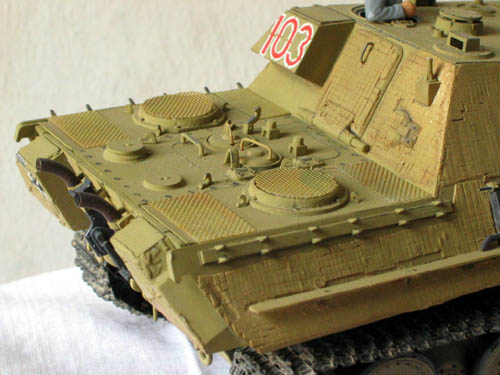
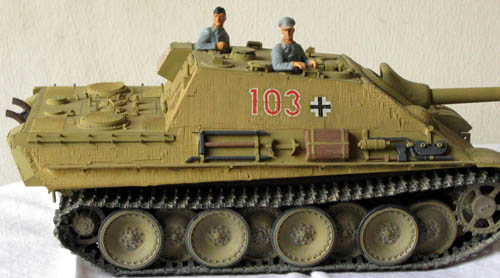
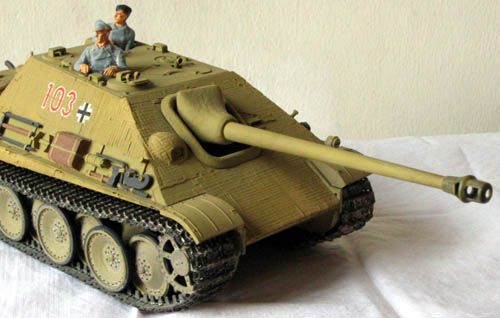
Some more improvements based on comments. I've washed the zimm a bit to make the lines clearer. The tracks are sagged as far as they can possibly go. I found that the guide teeth got caught between the road wheels and made them float. The screens are from a 25-cent purse (thanks for the tip
warthog!) . I've also blackened the muzzle a bit. The figures are from Tristar and I've just started painting them. I'll be getting DML's "Achtung Jabo" set later to get the PE comms equipment (thanks for the tip
fritz!).
- It's not how you begin, but how you finish what you began. -
John Mendoza
Moderator, Filipino Phorum
IPMS Philippines - Bert Anido Chapter
Wisconsin, United States
Joined: April 17, 2002
KitMaker: 2,314 posts
Armorama: 1,905 posts
Posted: Sunday, March 28, 2004 - 11:56 PM UTC
Lord Muncher
Very solid work here. The last set of pics incorporating the earlier comments have knocked this one up another notch. This is a keeper sir! Congrats.
Signed
Uncle Esteban
Metro Manila, Philippines
Joined: February 20, 2003
KitMaker: 5,762 posts
Armorama: 2,283 posts
Posted: Monday, March 29, 2004 - 12:22 AM UTC
Nice work Jeep! Are the figures bugging you around? Standing by for the finished tank!

--==Shonen Red==--
-=Filipino Modeler=-
Metro Manila, Philippines
Joined: July 29, 2002
KitMaker: 1,460 posts
Armorama: 1,080 posts
Posted: Monday, March 29, 2004 - 12:54 PM UTC
Jeep: Nice one...I still have to get myself a Jadgpanther....


