

Constructive Feedback
For in-progress or completed build photos. Give and get contructive feedback!
For in-progress or completed build photos. Give and get contructive feedback!
Hosted by Darren Baker, Dave O'Meara
Friulmodel bulldozer tracks

Pdxglide

Joined: November 20, 2015
KitMaker: 9 posts
Armorama: 6 posts
Posted: Wednesday, December 23, 2015 - 09:38 AM UTC
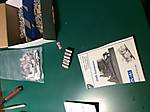
I ordered some friulmodel d9r aftermarket tracks and just received them. (From Poland of all places) Just wondering if anyone else has had experience with aftermarket tracks and if you have any tips for me as far as assembling them and painting them, by all means please throw up a post


sdk10159
Joined: December 08, 2005
KitMaker: 556 posts
Armorama: 433 posts

Posted: Wednesday, December 23, 2015 - 12:57 PM UTC
Hi Patrick,
DOn't be too surprised about getting them from Poland - that's where they're made.
Fruil tracks are great. My advice for assembly is to drill out the hole on all the tracks with a .5 mm drill. Then, measure and cut all the track pins from the wire. This will make assembly much easier.
Painting them is easy. I paint the tracks a steel color. Enamel or Acrylic paint will do. Then, I use an oil wash of black or really dark brown to accent the crevices. Once that is done, use whatever method you like to weather them. Paint, pigments, whichever - I"ve used both.
Steve

Vodnik

Joined: March 26, 2003
KitMaker: 4,342 posts
Armorama: 3,938 posts
Posted: Wednesday, December 23, 2015 - 01:57 PM UTC
Quoted Text
DOn't be too surprised about getting them from Poland - that's where they're made.
Actually, they are made in Hungary, not Poland


easyco69

Joined: November 03, 2012
KitMaker: 2,275 posts
Armorama: 2,233 posts
Posted: Wednesday, December 23, 2015 - 03:41 PM UTC
The cheapest place to get them is on ebay from guys that are from Poland mostly...with FREE SHIPPING.
Wash them in a bowl with dish detergent & warm water then dry them off .Buy a pin vise , it will come with a .50 drill bit. Put this drill bit in a regular drill or dremel tool...drill "all" the holes out.Use a good pair of hobby wire cutters. Use "thin" CA glue for the tacking of the wires.Wear rubber gloves as your working with lead. Wash your hands off before you leave your work area or before snacking, eating etc...Safety goggles while drilling.There maybe an argument as to how much lead is actually in these tracks but "don't take a chance". Use common sense. Wash your hands.
Buy a HAZMAT suit & take the lead filings to your local "dangerous goods" waste disposal. Wear large rubber boots, large rubber gloves..oxygen tank...ok..ok..lol just kidding.
I usually use a self etching automotive enamel primer, adhere's better then acrylic. Top coat them with acrylic, wash them with enamel..use pigments then dull cote.A final pigment thrashing of various shades & pencil for worked areas. This same final pigment will also be on the lower part of the vehicle.
Do not hit them with open flame or the white metal "will" melt. Do not bend the center teeth or they "will" break off.
Make several smaller runs instead of one big run. When you think you have enough, start gluing the runs together .Don't work too far ahead with your run, keep checking your lengths with any "sags" you may want.Throw your final run on the vehicle, make sure the 2 track lengths "meet" under a lower running wheel & not in an open space.This will make it easier when putting the final wire into place .Glue down your top sags & use thick CA glue to glue them in place.( use any means to keep the sags in place ie- extra pieces of box paper folded, kleenex tissue. I usually take old model boxes & cut them in strips..bending them, shoving them in between the fender & top track to make my sags.) & get an accurate length or you will be left with a nasty "over length" bulge & will have to take a section apart which can be a pain. After you have your sags glued in & you have a accurate length..dab glue around the sprockets , idler wheels, dab glue onto the bottom of the wheels ..wrap the track around , now set your model down laying flat on the workbench so the gle will have contact with the track & lower wheels.Tack glue the 2 lengths together , use tweezers to pinch the 2 tracks together, work in your final wire.
However, some guys prefer "not" to glue their tracks down yet but prefer to get the 2 lengths on the vehicle first..then glue down the tracks. Some guys don't bother to glue down the tracks at all. So you have some choices.
My technique is right for me, it is complicated but it prevents the heavy track from moving around while your working on the model...the "weight" of the track will rip wheels off or disconnect wheels, idlers, sprockets etc..
Paint them first..before putting them on your vehicle. Or put them on before the last few weathering steps for tracks.
My .95 cents.
sdk10159
Joined: December 08, 2005
KitMaker: 556 posts
Armorama: 433 posts
Posted: Wednesday, December 23, 2015 - 07:39 PM UTC
Quoted Text
Quoted TextDOn't be too surprised about getting them from Poland - that's where they're made.
Actually, they are made in Hungary, not Poland
Dang! I thought it was Poland. Thanks for the correction.
Steve
Pdxglide
Joined: November 20, 2015
KitMaker: 9 posts
Armorama: 6 posts
Posted: Thursday, December 24, 2015 - 05:40 AM UTC
Thanks everyone appreciate the info

MAD_DUCK
Joined: March 05, 2002
KitMaker: 434 posts
Armorama: 406 posts
Posted: Thursday, December 24, 2015 - 06:47 AM UTC
Another tip, I used a set for my Bradley. Insted of just painting them, I went to the gun store and bought some metal blackening fluid, it comes out a dark metal color.

I put two extra links untreated so you can see the contrast.

I put two extra links untreated so you can see the contrast.
 |

WEB HOSTING BY


Copyright ©2021 Armorama and Kitmaker Network, a subsidiary of Silver Star Enterprises
All Rights Reserved. Please read our Conditions of Use and Privacy Policy.
All Rights Reserved. Please read our Conditions of Use and Privacy Policy.