

Hi there,
I'm back with a new scratchbuilt job. An Italian 4x25mm AA named SIDAM. SIDAM means "Sistema Integrato di Difesa Antiaerea Mobile" or self-propelled anti-aircraft gun based on the famous M113 hull. The project started back in the mid '80s for the Italian Army. Only very few hundreds pieces have been built. The idea was great (a sort of M163 Vulcan) but due to the hight costs of the sensors and radars with the loss of "agility" due to his weight and high turret, the SIDAM didn't see any improvement or export. It worked only on flat terrains and very good weather conditions. The model kit is already done so this WIP will not be let incomplete.
Constructive Feedback
For in-progress or completed build photos. Give and get contructive feedback!
For in-progress or completed build photos. Give and get contructive feedback!
Hosted by Darren Baker, Dave O'Meara
1/35 SIDAM Scratchbuilt WIP

flight_shark

Joined: July 16, 2010
KitMaker: 186 posts
Armorama: 186 posts
Posted: Sunday, December 27, 2015 - 06:17 PM UTC
flight_shark
Joined: July 16, 2010
KitMaker: 186 posts
Armorama: 186 posts
Posted: Sunday, December 27, 2015 - 06:21 PM UTC
The starting kit is the famous Academy M-113A2 in 1/35 scale and I would represend the entire kit open and clean (not covered by any sort of dust or mud). The only one resin conversion available was the "Historica" one, not more available. It was very expensive with several mistakes.
flight_shark
Joined: July 16, 2010
KitMaker: 186 posts
Armorama: 186 posts
Posted: Sunday, December 27, 2015 - 06:27 PM UTC
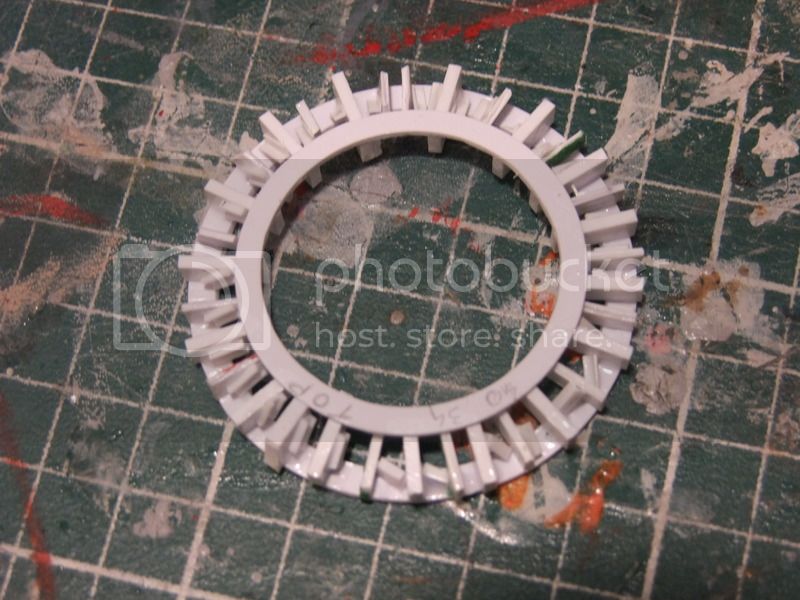
The main element is the turret. Its gives you all the info about dimensions of the central ring, lenght of the guns, and so on.
First of all I made some drawings on paper and then on the plasticard sheet.

First of all I made some drawings on paper and then on the plasticard sheet.
flight_shark
Joined: July 16, 2010
KitMaker: 186 posts
Armorama: 186 posts
Posted: Monday, December 28, 2015 - 01:28 PM UTC
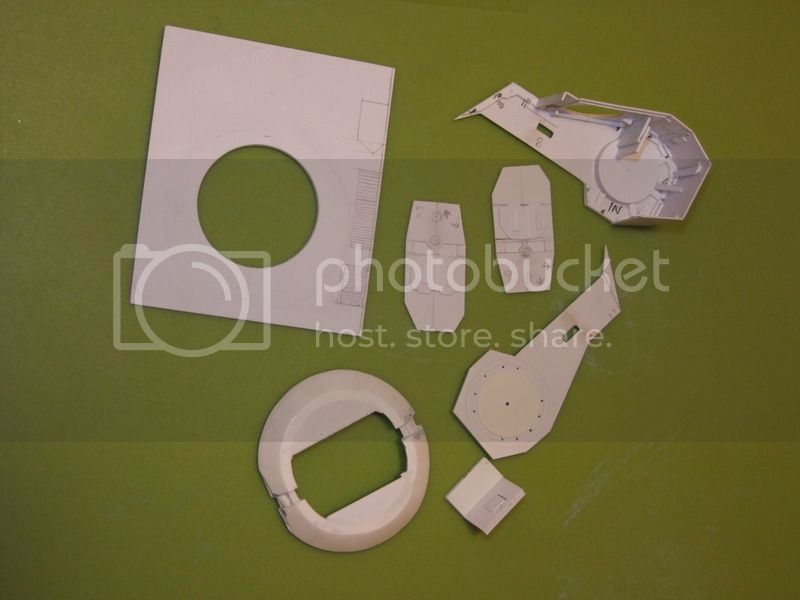
Turret interiors.

Starting the turret collar/base
Starting the turret collar/base

pod3105

Joined: August 08, 2010
KitMaker: 466 posts
Armorama: 444 posts
Posted: Monday, December 28, 2015 - 02:12 PM UTC
Oh this looks rather interesting. Looking forward to seeing this develop.
p
p
flight_shark
Joined: July 16, 2010
KitMaker: 186 posts
Armorama: 186 posts
Posted: Monday, December 28, 2015 - 08:12 PM UTC
Thanks Pod!
THis is the real thing.


THis is the real thing.
flight_shark
Joined: July 16, 2010
KitMaker: 186 posts
Armorama: 186 posts
Posted: Monday, December 28, 2015 - 08:14 PM UTC

Pics played by myself.

Cookiescool2

Joined: May 09, 2014
KitMaker: 273 posts
Armorama: 270 posts
Posted: Monday, December 28, 2015 - 09:02 PM UTC
Looks like a good start to an impressive project, your scratch building skill is incredible, I'm looking forward to the next update!

Namabiiru

#399
Joined: March 05, 2014
KitMaker: 2,888 posts
Armorama: 1,920 posts

Posted: Monday, December 28, 2015 - 10:25 PM UTC
Maurizio,
I love to watch your WIP blogs. Do you think you will finish this project by 04-30-16? If so, you a very welcome to join our flak campaign!

I love to watch your WIP blogs. Do you think you will finish this project by 04-30-16? If so, you a very welcome to join our flak campaign!
flight_shark
Joined: July 16, 2010
KitMaker: 186 posts
Armorama: 186 posts
Posted: Tuesday, December 29, 2015 - 02:34 PM UTC
Dear Mark,
the SIDAM is already done. Can I partecipate with a finished model kit?
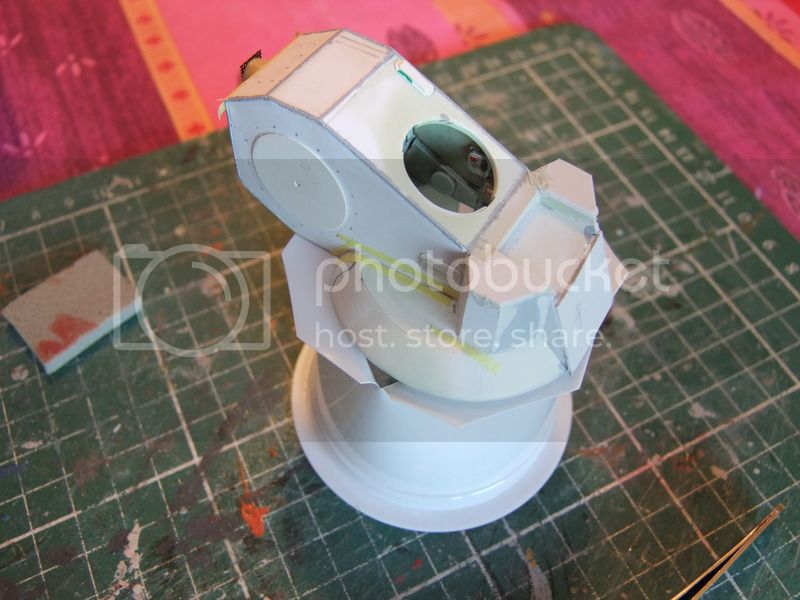
First dry fitting. The turret collar have been covered with with Squadron putty and given the correct shape with a carefully sandpapering job.

the SIDAM is already done. Can I partecipate with a finished model kit?
First dry fitting. The turret collar have been covered with with Squadron putty and given the correct shape with a carefully sandpapering job.
Namabiiru
#399
Joined: March 05, 2014
KitMaker: 2,888 posts
Armorama: 1,920 posts
Posted: Tuesday, December 29, 2015 - 05:19 PM UTC
Quoted Text
Dear Mark,
the SIDAM is already done. Can I partecipate with a finished model kit?
If it was started and finished with in the campaign timelines then I think it would be fine to join. But I guess I'm confused; I thought this thread was about a current work in progress.
flight_shark
Joined: July 16, 2010
KitMaker: 186 posts
Armorama: 186 posts
Posted: Tuesday, December 29, 2015 - 07:27 PM UTC
Dear Mark,
I think I'm not able to partecipate. The model kit was already finished last April...
I think I'm not able to partecipate. The model kit was already finished last April...
flight_shark
Joined: July 16, 2010
KitMaker: 186 posts
Armorama: 186 posts
Posted: Wednesday, December 30, 2015 - 12:41 PM UTC
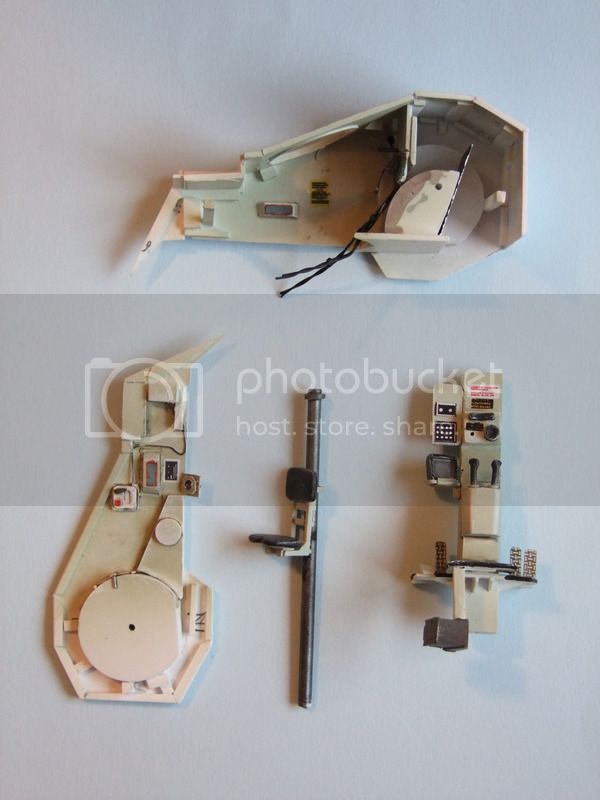
Proceeding with the interiors of the turret.

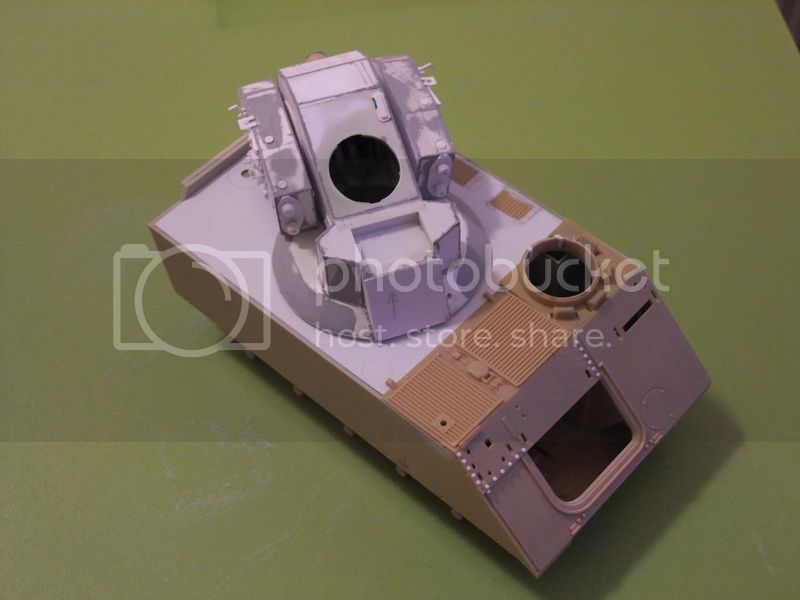
Scribing the panel covering the electrical power supply located to the outside of the hull. It is a panel in reality so I made a plasticard template.
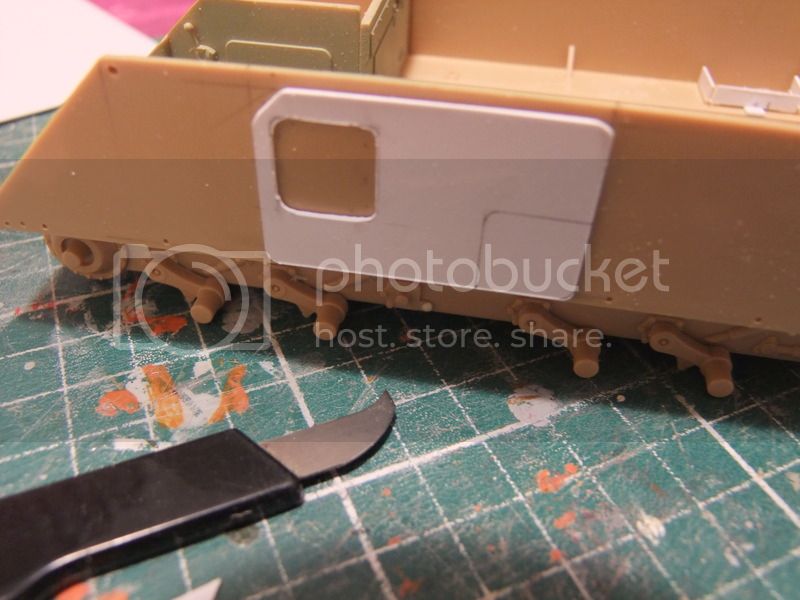
Scribing the panel covering the electrical power supply located to the outside of the hull. It is a panel in reality so I made a plasticard template.
flight_shark
Joined: July 16, 2010
KitMaker: 186 posts
Armorama: 186 posts
Posted: Sunday, January 10, 2016 - 07:22 PM UTC
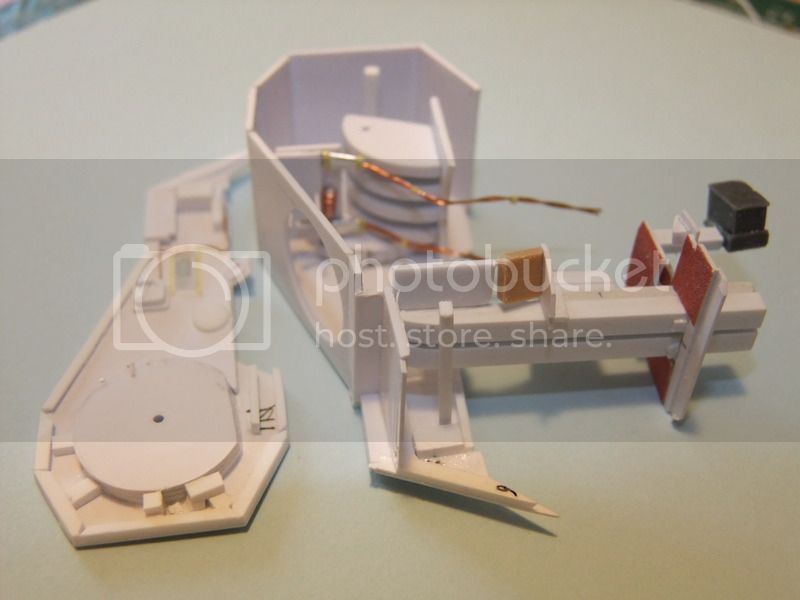
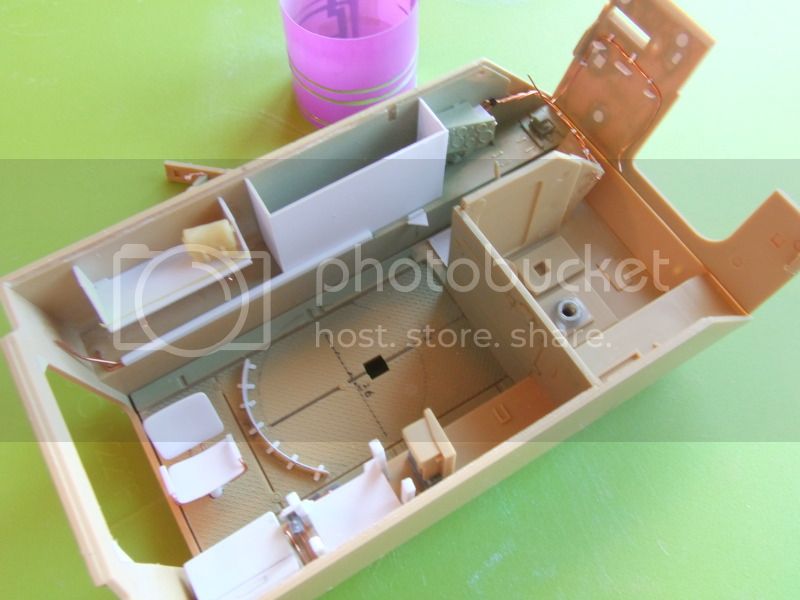
Interiors of the turret. I've used pieces of plasticard, copper wires and spare pieces for scratchbuiding the interiors.


flight_shark
Joined: July 16, 2010
KitMaker: 186 posts
Armorama: 186 posts
Posted: Monday, January 11, 2016 - 05:47 PM UTC
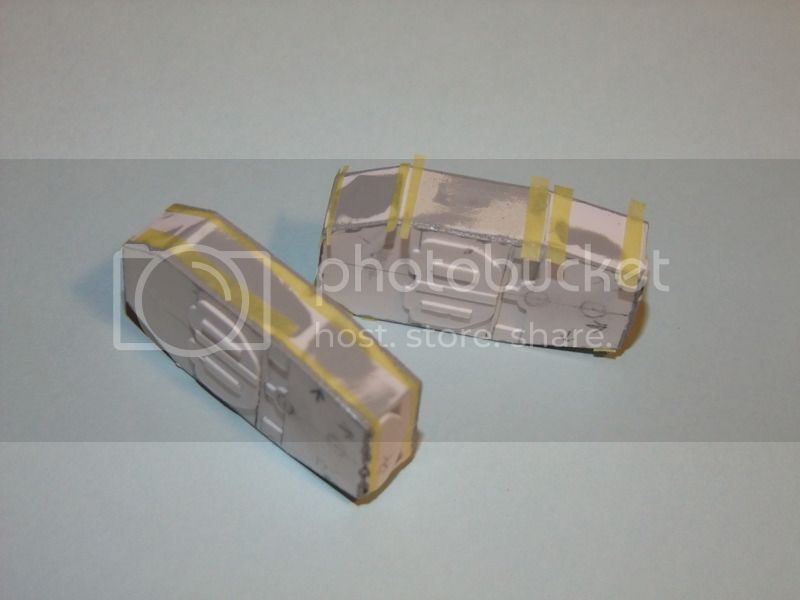
Making the side pods. I've used the paper tape, the XActo blade and the liquid putty for welding seams.
flight_shark
Joined: July 16, 2010
KitMaker: 186 posts
Armorama: 186 posts
Posted: Tuesday, January 12, 2016 - 08:28 PM UTC
Interiors:


flight_shark
Joined: July 16, 2010
KitMaker: 186 posts
Armorama: 186 posts
Posted: Thursday, January 14, 2016 - 07:57 PM UTC
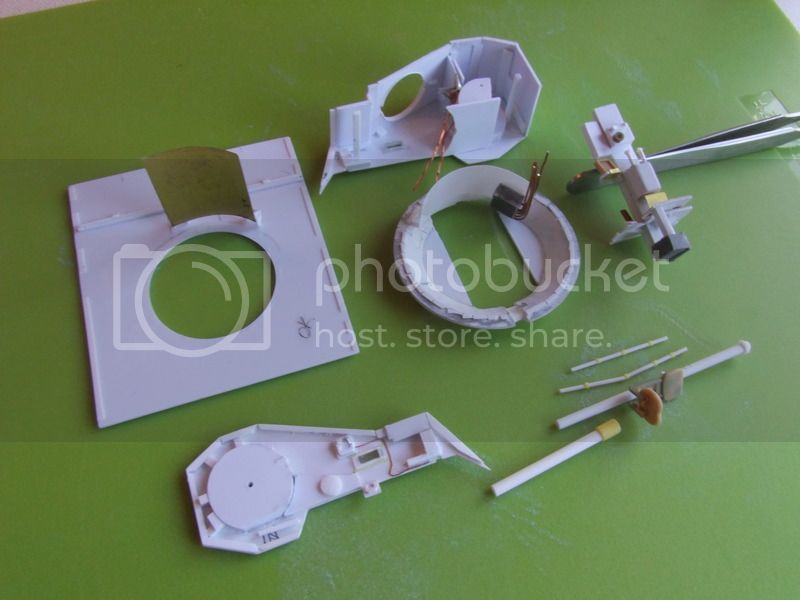
All the pieces are done. Next step: painting!
flight_shark
Joined: July 16, 2010
KitMaker: 186 posts
Armorama: 186 posts
Posted: Wednesday, January 20, 2016 - 08:52 PM UTC
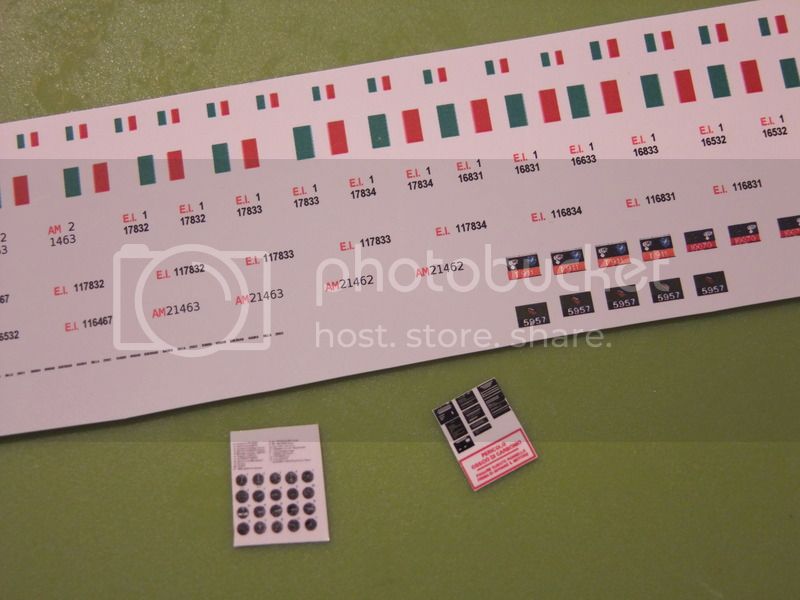
Painted interiors.

Homemade decals
Homemade decals
flight_shark
Joined: July 16, 2010
KitMaker: 186 posts
Armorama: 186 posts
Posted: Sunday, January 24, 2016 - 01:16 PM UTC
Turret interiors Painted with the Humbrol interior green. Side Windows are clear pieces of stirene sheet. Details Painted with Italeri acrilics. Homemade decals and details.
Turret closed.

Turret closed.

bison126

Joined: June 10, 2004
KitMaker: 5,329 posts
Armorama: 5,204 posts
Posted: Sunday, January 24, 2016 - 03:41 PM UTC
Excellent scratchbuilding project Maurizio !
Did you work from factory blueprints or from your own measurements?
Olivier
Did you work from factory blueprints or from your own measurements?
Olivier


C_JACQUEMONT
Joined: October 09, 2004
KitMaker: 2,433 posts
Armorama: 2,325 posts

Posted: Sunday, January 24, 2016 - 06:50 PM UTC
Very nice!
I've got the now long oout of production Historica resin conversion allowing to build the SIDAM and its ammo supply vehicle, also some turned barrels and aftermarket decals for the SIDAM so I'm good to go, but no interior.
Cheers,
Christophe
I've got the now long oout of production Historica resin conversion allowing to build the SIDAM and its ammo supply vehicle, also some turned barrels and aftermarket decals for the SIDAM so I'm good to go, but no interior.
Cheers,
Christophe
flight_shark
Joined: July 16, 2010
KitMaker: 186 posts
Armorama: 186 posts
Posted: Sunday, January 24, 2016 - 07:50 PM UTC
To Olivier: I've got no blueprints nor drawings, just a perfect match between the kit hull dimensions and real pictures. The only two techn. drawings coming from a model club magazine were not in 1/35 scale and not corresponding to the kit dimensions/shape.
To Christope: please note the Historica had some mistakes. Please compare mine with the Historica one. I know the resin kit (historica) had no interiors. My goal was to scratchbuild the external and interiors, too.
cheers
Maurizio
To Christope: please note the Historica had some mistakes. Please compare mine with the Historica one. I know the resin kit (historica) had no interiors. My goal was to scratchbuild the external and interiors, too.
cheers
Maurizio
flight_shark
Joined: July 16, 2010
KitMaker: 186 posts
Armorama: 186 posts
Posted: Monday, January 25, 2016 - 01:06 PM UTC
The frontal side of the turret is also done as well as the welding seams and some particulars. Also note the temporary turret stand made of an empty yoghurt cup.

guido
Joined: August 26, 2005
KitMaker: 437 posts
Armorama: 437 posts
Posted: Monday, January 25, 2016 - 02:35 PM UTC
Gran lavoro!!!! Veramente notevole !!! 
flight_shark
Joined: July 16, 2010
KitMaker: 186 posts
Armorama: 186 posts
Posted: Tuesday, January 26, 2016 - 01:53 PM UTC
Thanks Guido!
This is one of the several dry fittings.
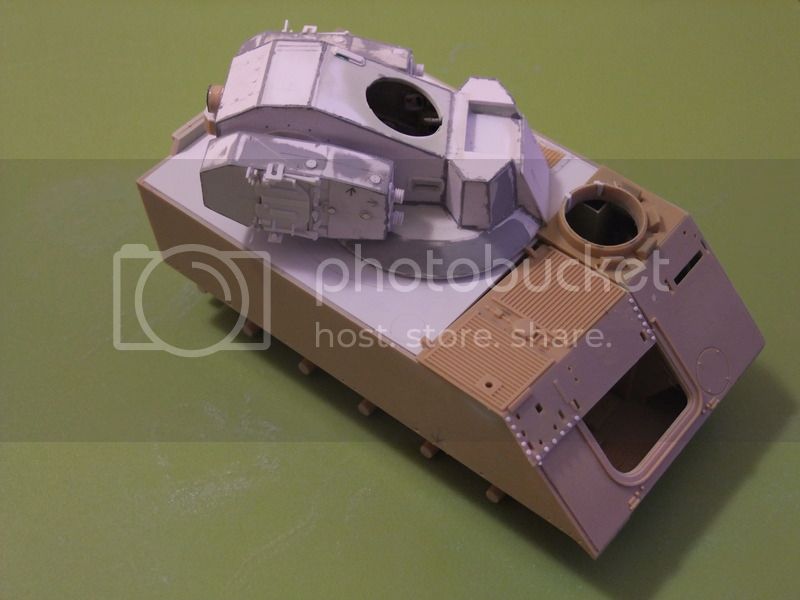
This is one of the several dry fittings.
 |

WEB HOSTING BY


Copyright ©2021 Armorama and Kitmaker Network, a subsidiary of Silver Star Enterprises
All Rights Reserved. Please read our Conditions of Use and Privacy Policy.
All Rights Reserved. Please read our Conditions of Use and Privacy Policy.