Quoted Text
Quoted Text
Quoted Text
Hi all Sirs,
it seems that after a lot of random and incomplete pieces made for videos, i'll have time to (finally ! ) finish off a model.
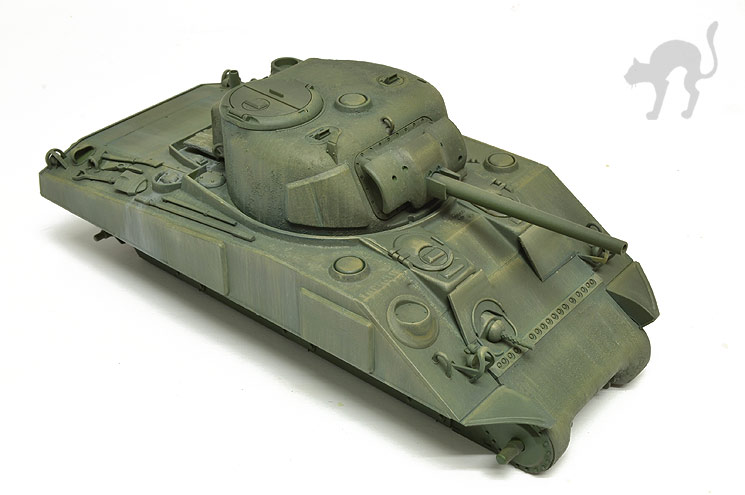
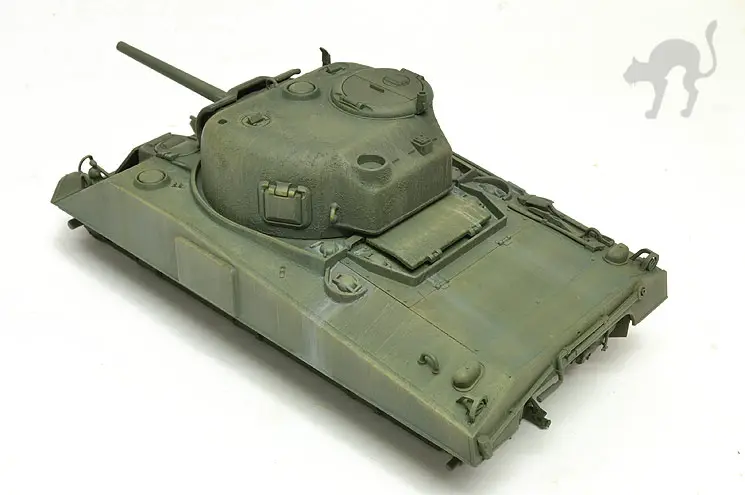
Subject for this topic is the tamiya m4. I'll not post anything about building, since tamiya kits are straighforward building and well known.
The only addition is a forex plate to close the lower hull gap.
And now we go directly to the decorative and weathering procedure.
In my opinion, even though dated and these Tamiya kits can still be built up nicely and made to look good with careful painting and weathering. what you have done so far I think reinforces my point.
A lot of people still buy and build these kits, wrong underside, hollow wheels, and missing sponson fillers aside. But the biggest issue was and still is the front glacis. Tamiya used the glacis set up from an M4A4. For a long time this M4 was the only game in town. We now have some excellent choices for straight M4s DML makes three really nice ones, the M4 DV, the Normandy M4, and the late M4 (47 degree glacis)kit. Also, I haven't seen one yet but hope to get my hands on the new Asuka M4 soon.
Filling up the sponsons, adding raised weld beads, using spare DML wheels and idlers and adding sandbags in the front is one way to upgrade this kit to the point where it still looks really nice. If you aren't over concerned about the accuracy it still looks like a nice representation of the M4 
HI! AGREE WITH ALL ABOVE! For the usual going price of the TAMIYA M4 kits, the addition of aftermarket parts such as "corrected" resin Road-wheels, Sprockets, Idlers, and whatever other aftermarket parts, PE, and Updates you want to spend extra money on, will "even out" the overall amount of (retail) money spent on an ASUKA M4 WITHOUT extras. I've built several of the ANCIENT TAMIYA M4s, (with "extras", of course) and they rival ANY DRAGON, or even TASCA/ASUKA M4 kit...
Re: The ASUKA M4 "Fay"- Try on ebay or at LUCKY MODELS; quite a few can be found elsewhere, besides... Good Luck!
Re: The DRAGON (DML) M4 DV, "Normandy" M4, and the M4A3 ETO (47-degree glacis) and their M4A1 DV, also- ALL FOUR are excellent kits AND buys, since prices of older DRAGON kits have seen a downward pricing trend. IMO, the DRAGON M4/M4A1/M4A3 kits are very comparable to ASUKA's M4 kits, although there will be other modellers who will dispute my opinions on that subject. It's ALL been discussed before.
Depending on your source of model kits, the DRAGON kits are easily found on various websites, generally for quite a bit less money than the TASCA/ASUKA kits...


