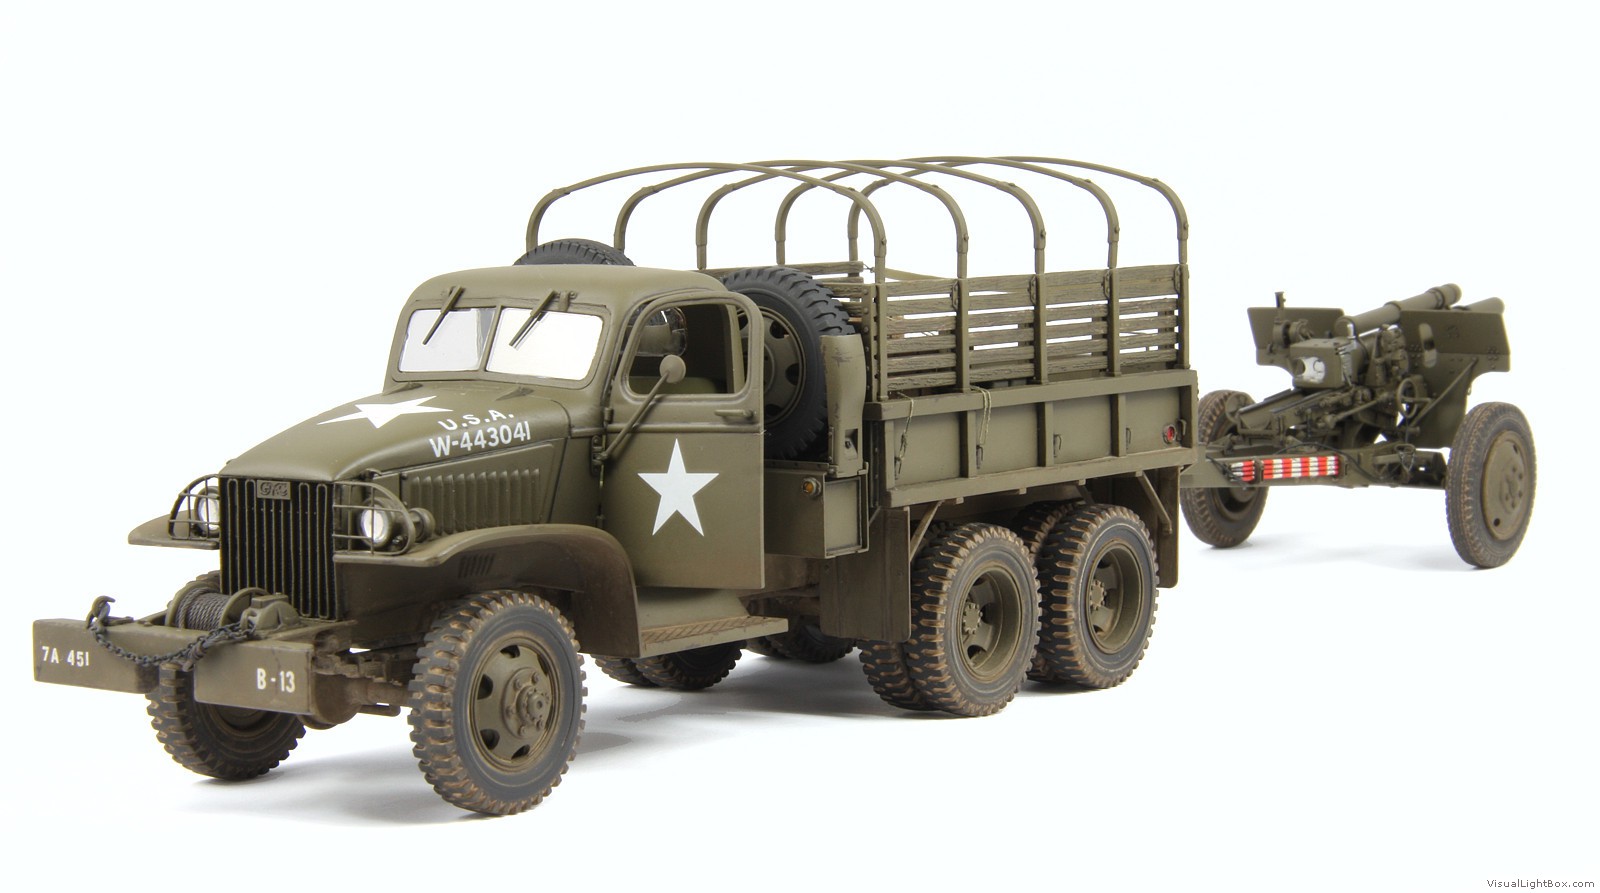
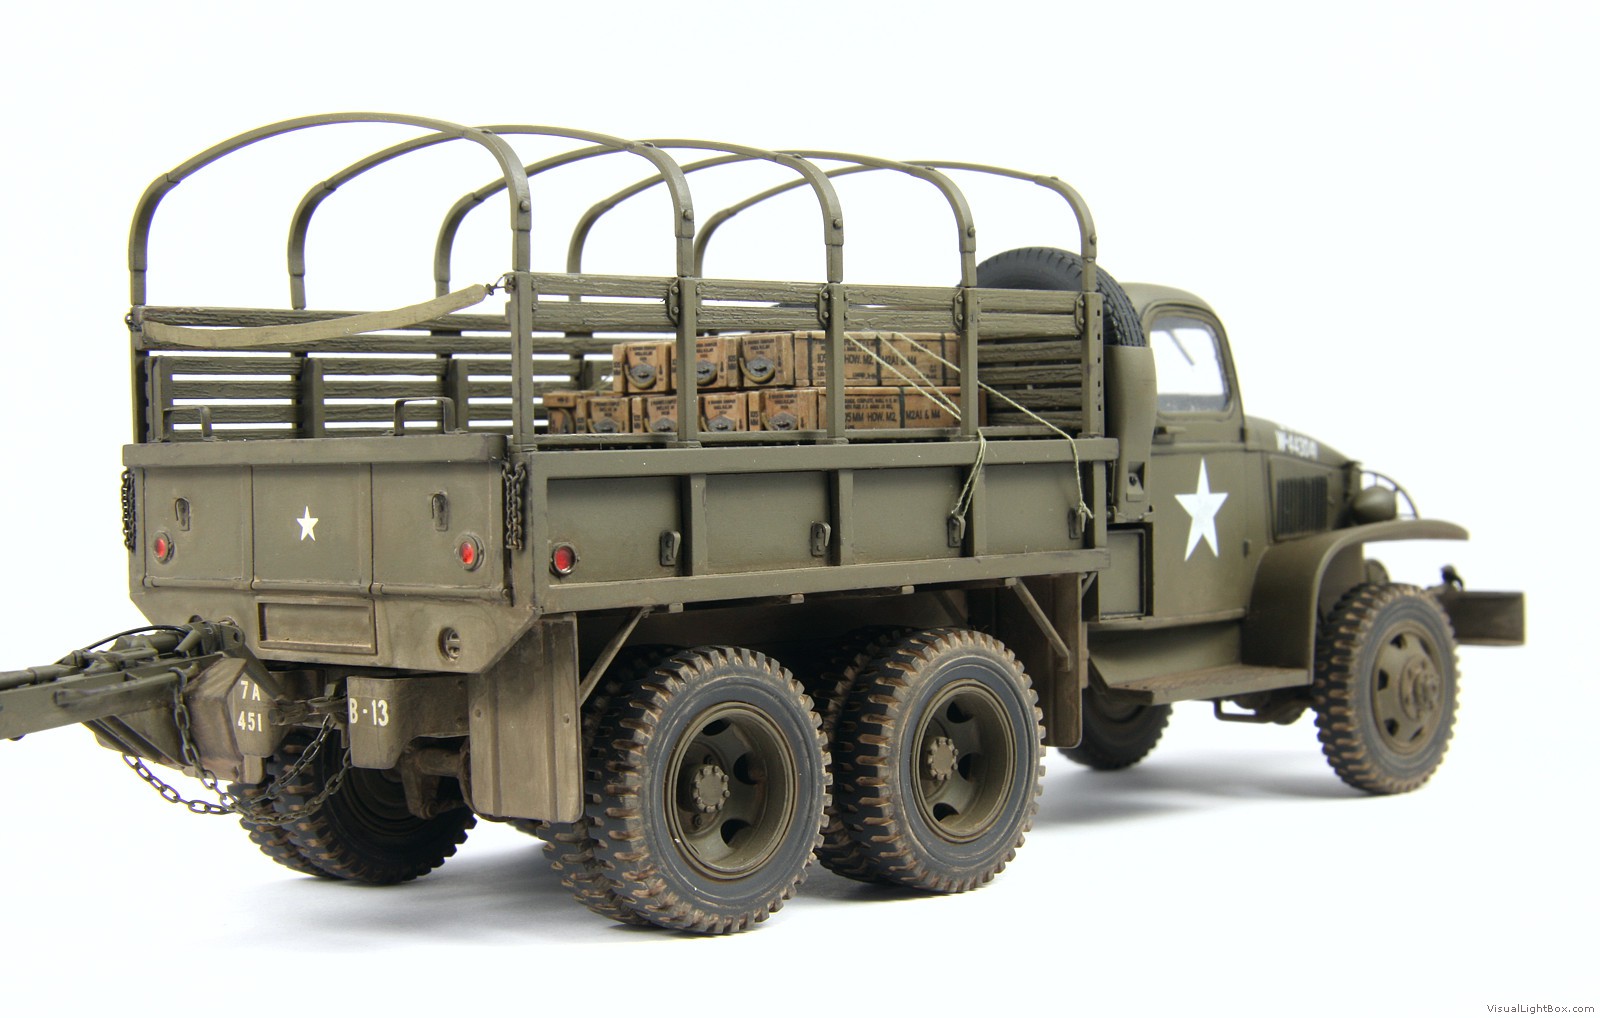
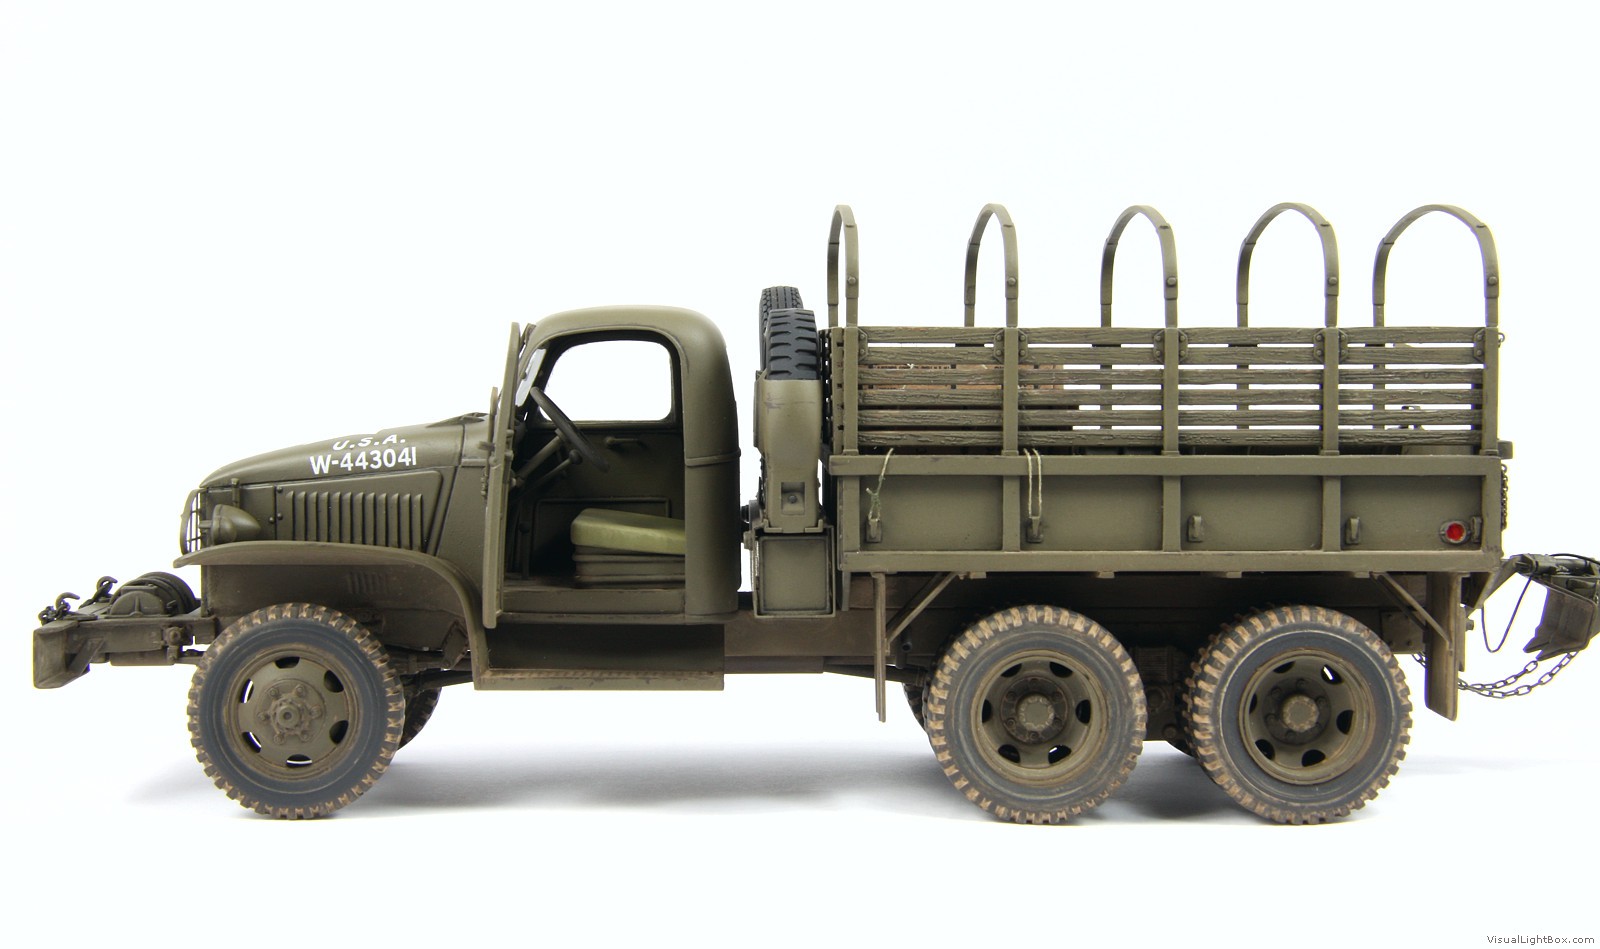
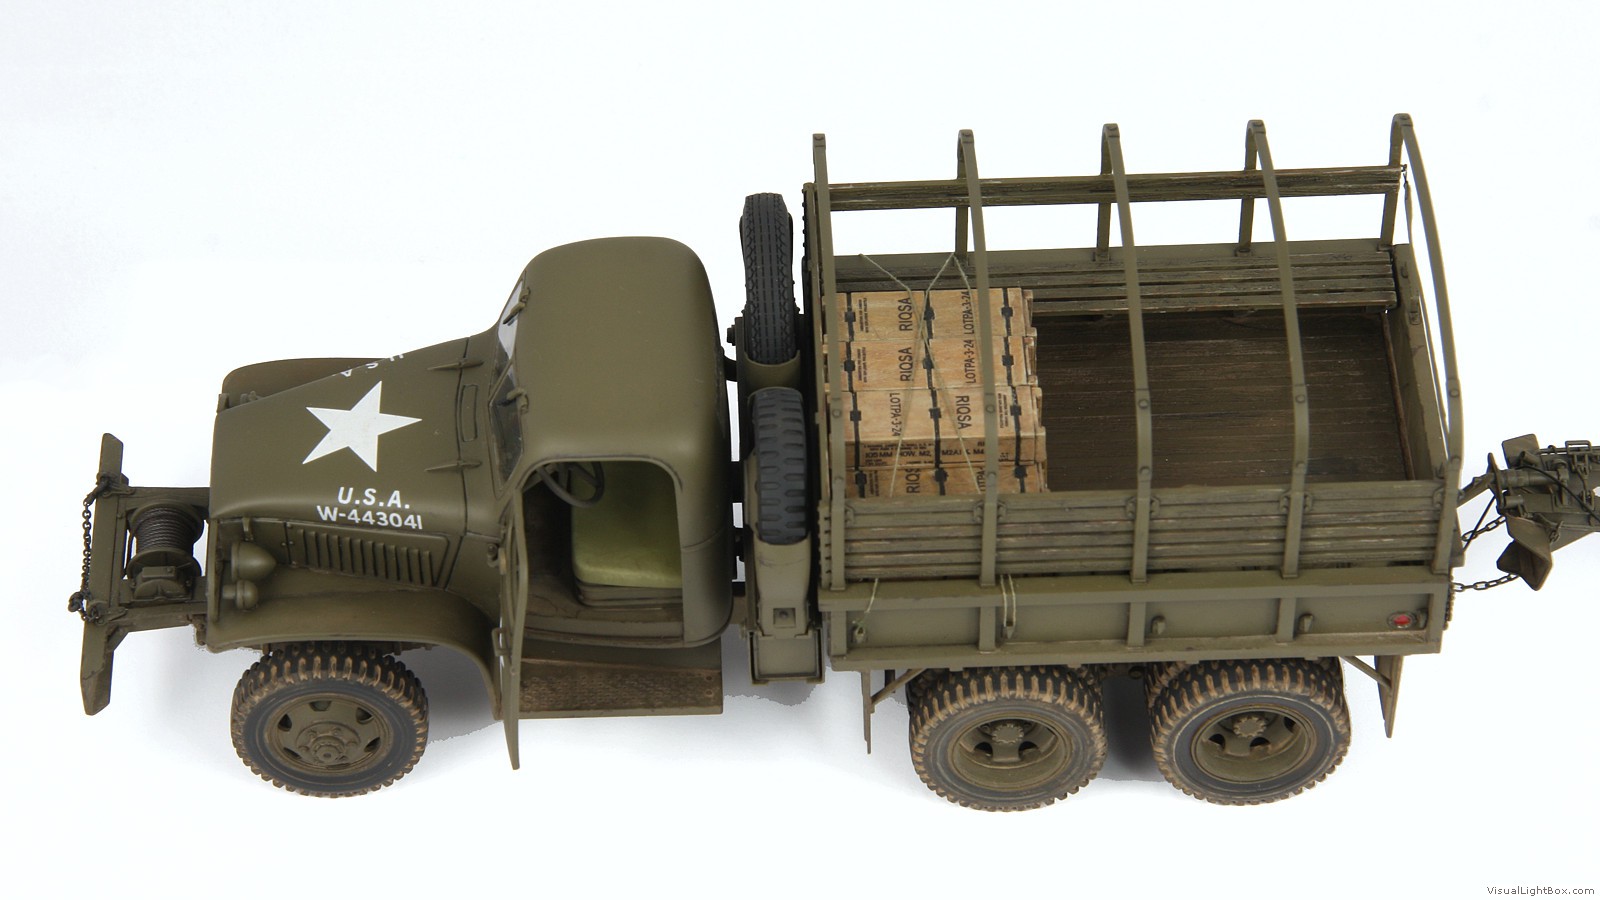
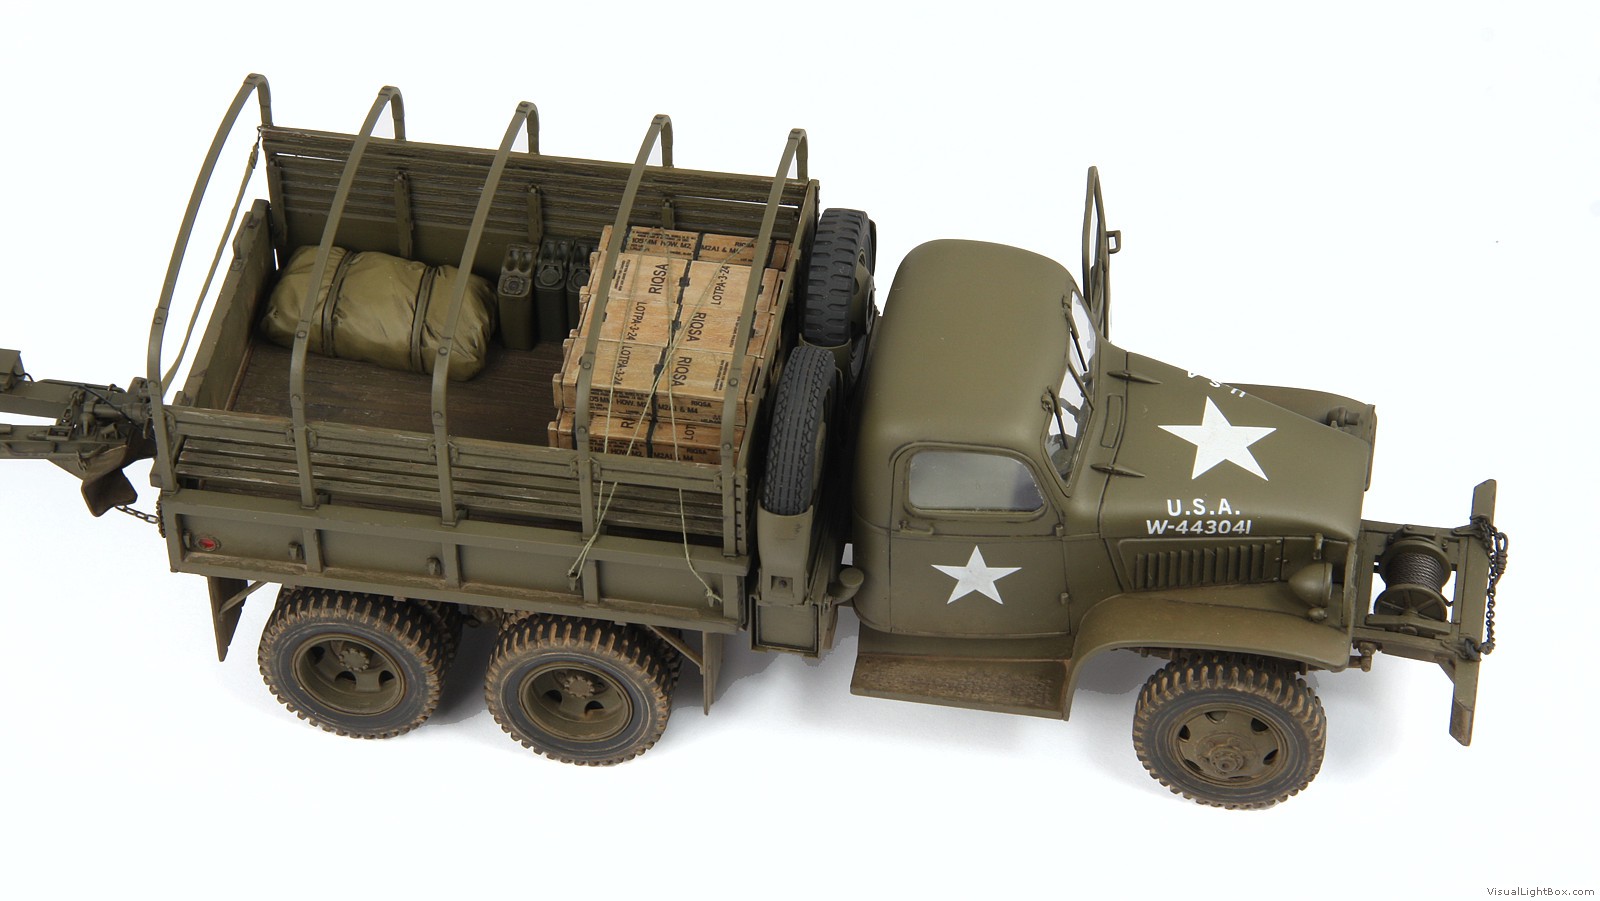
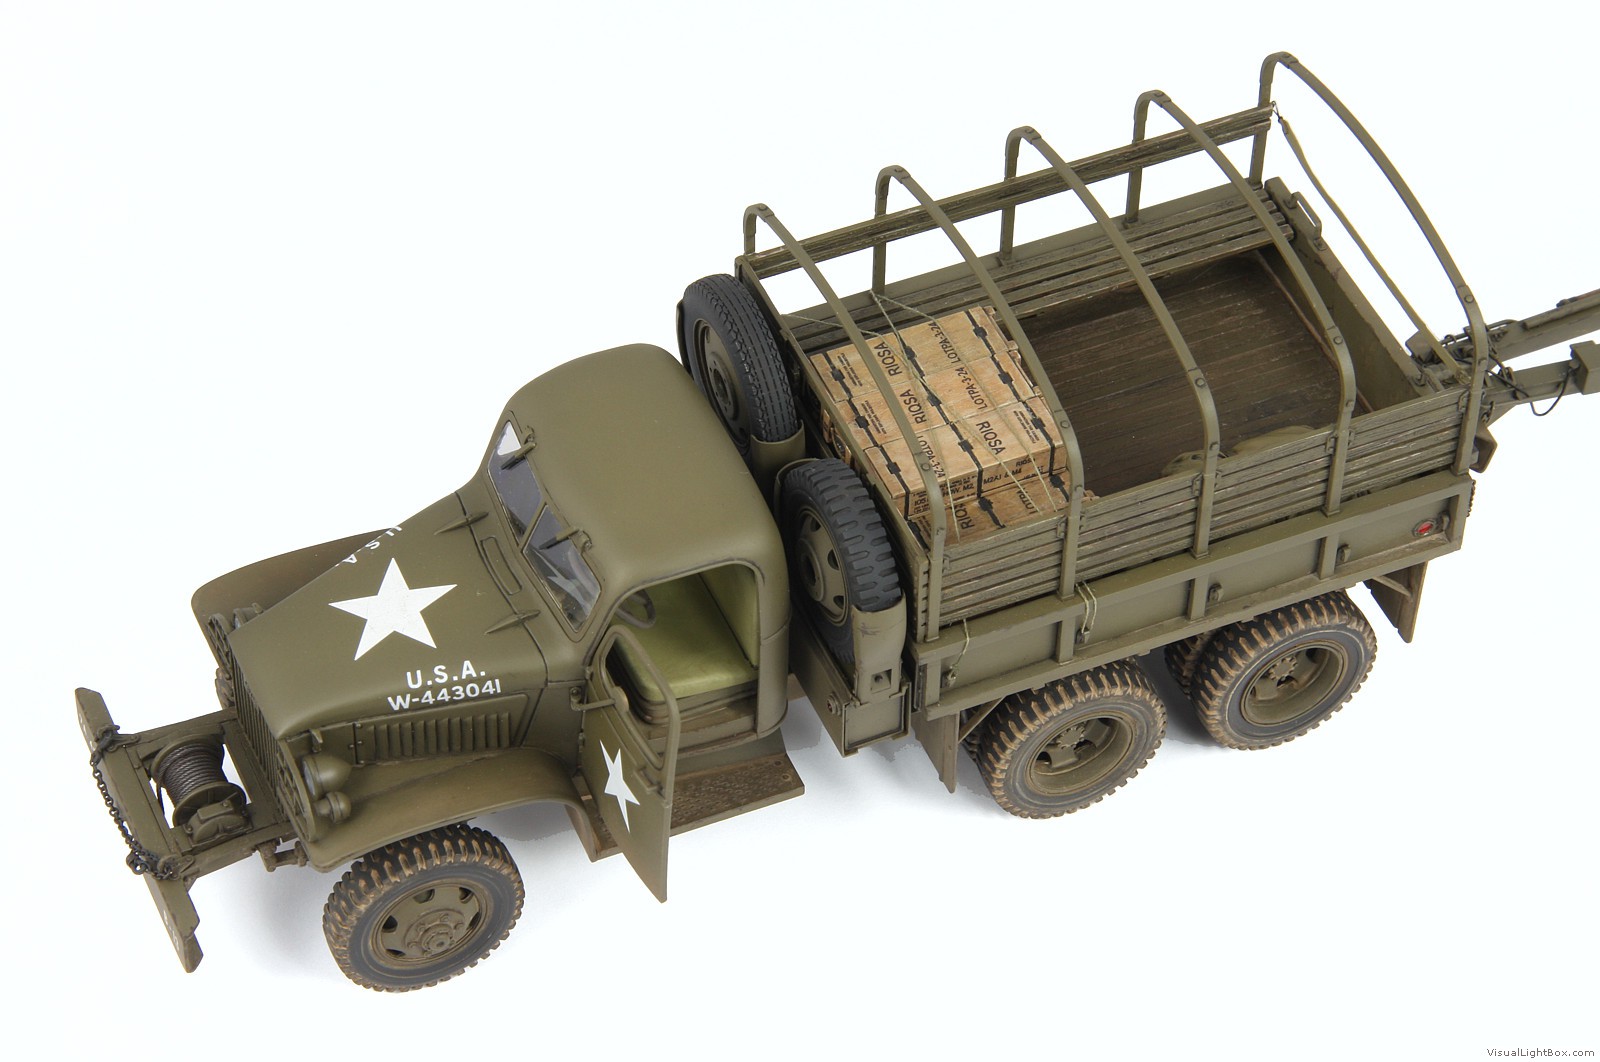
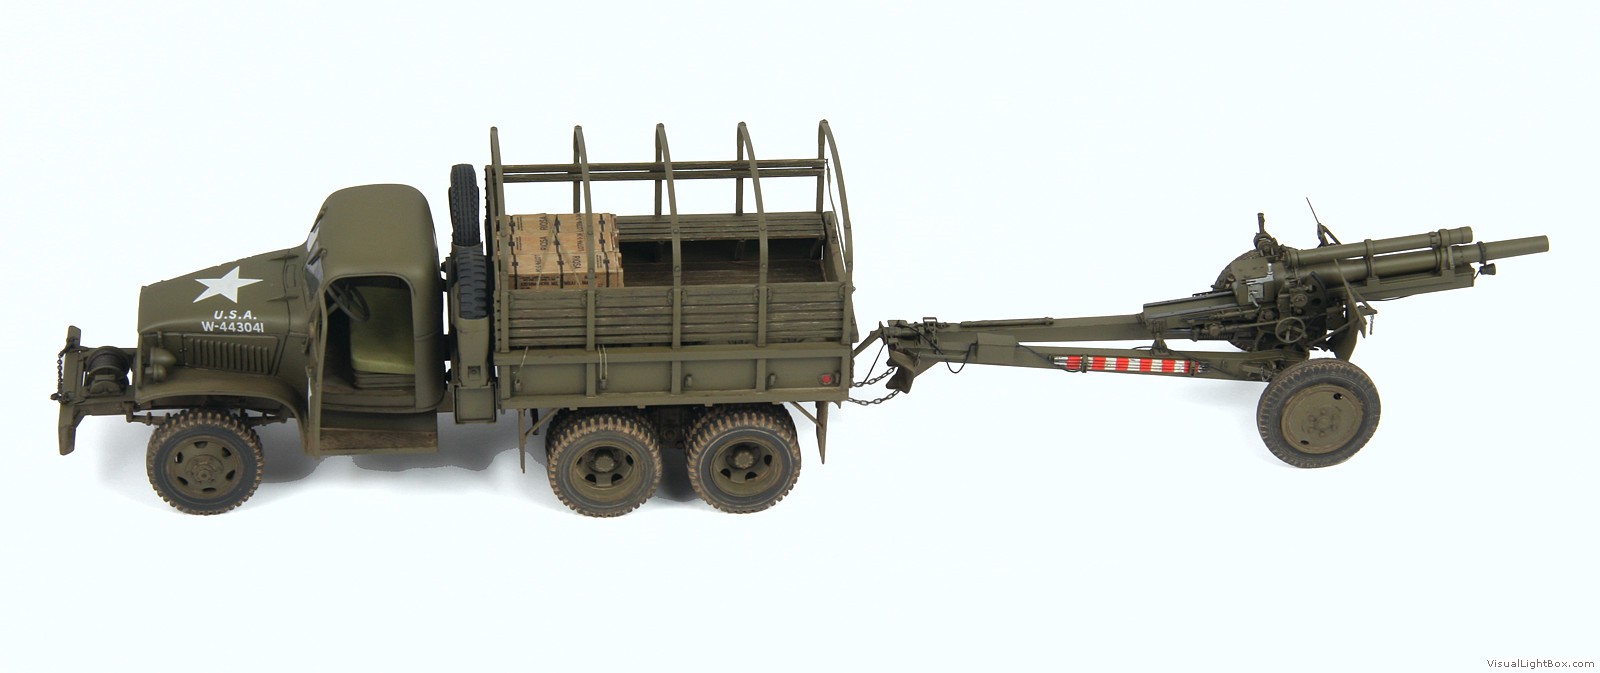
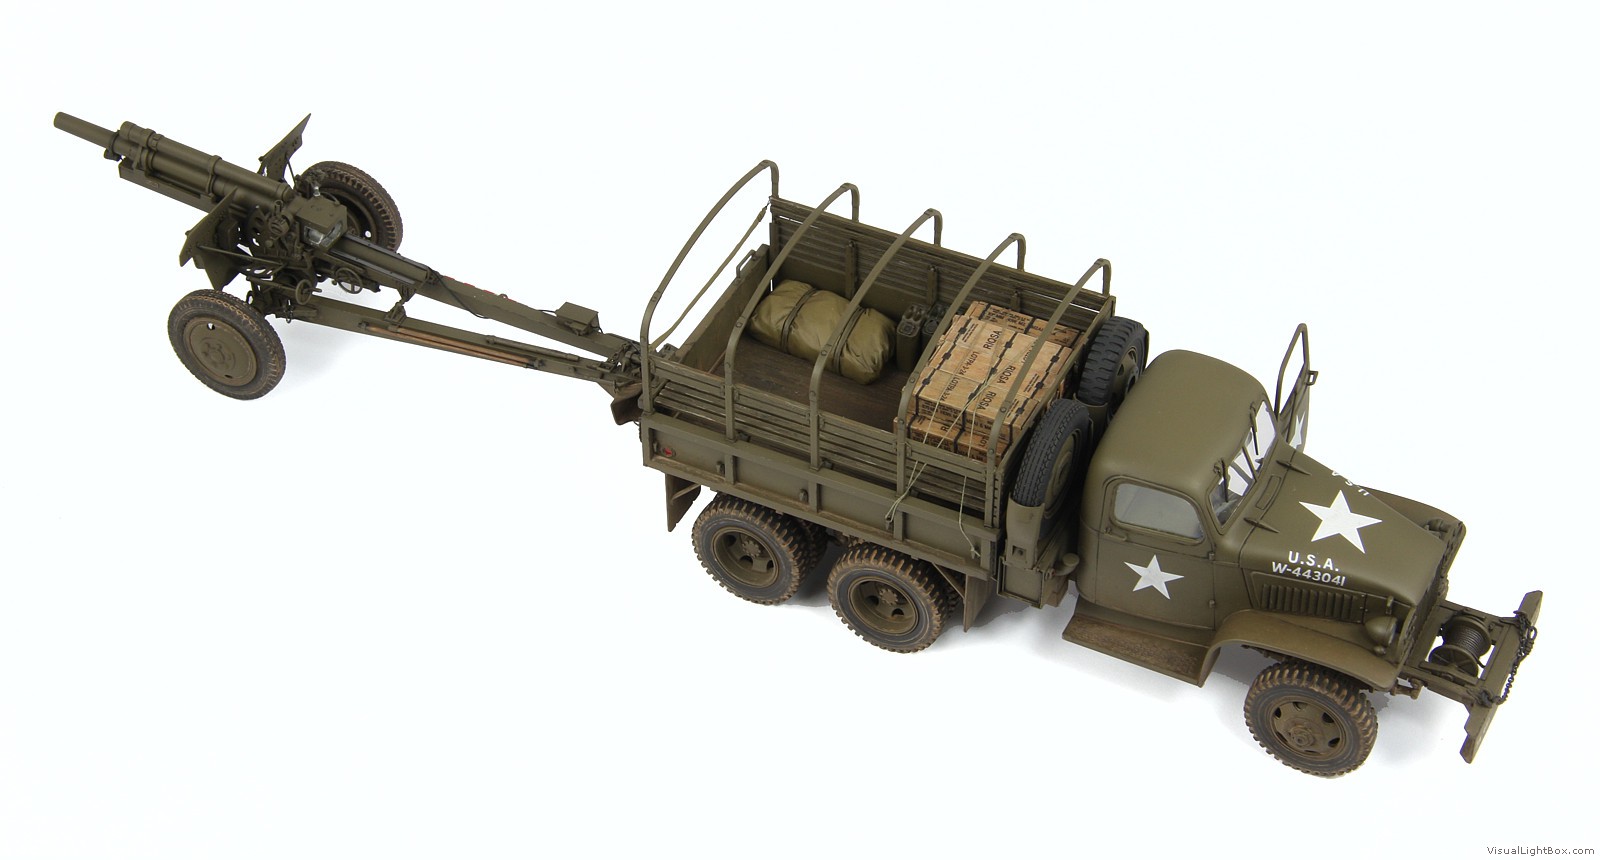
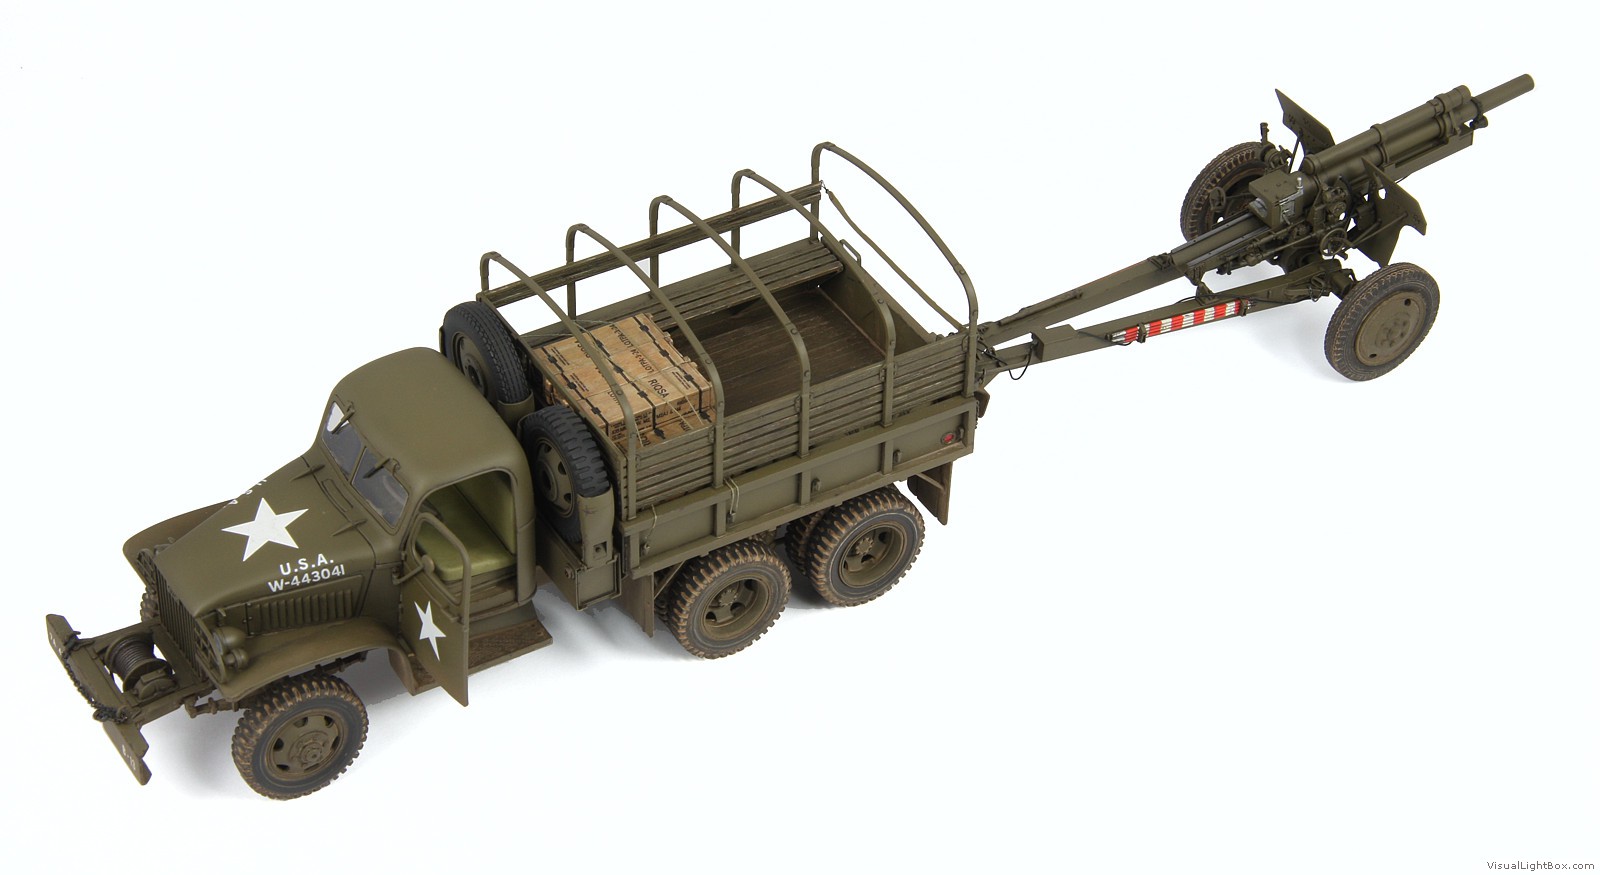
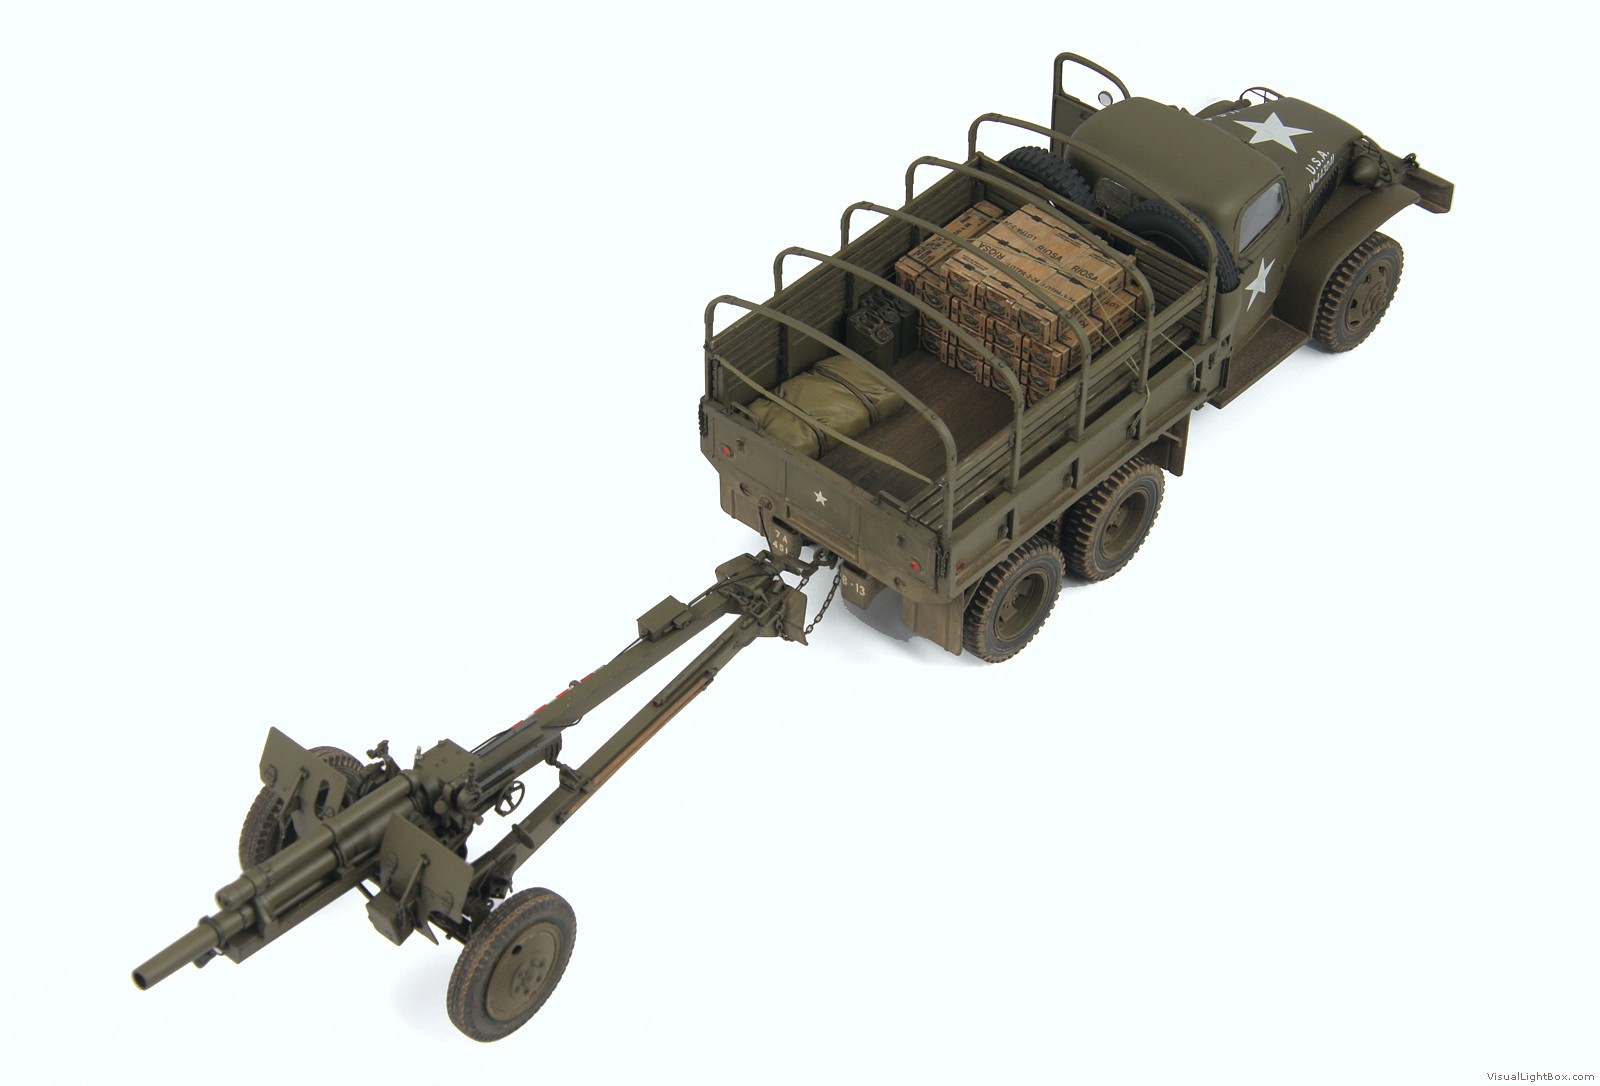
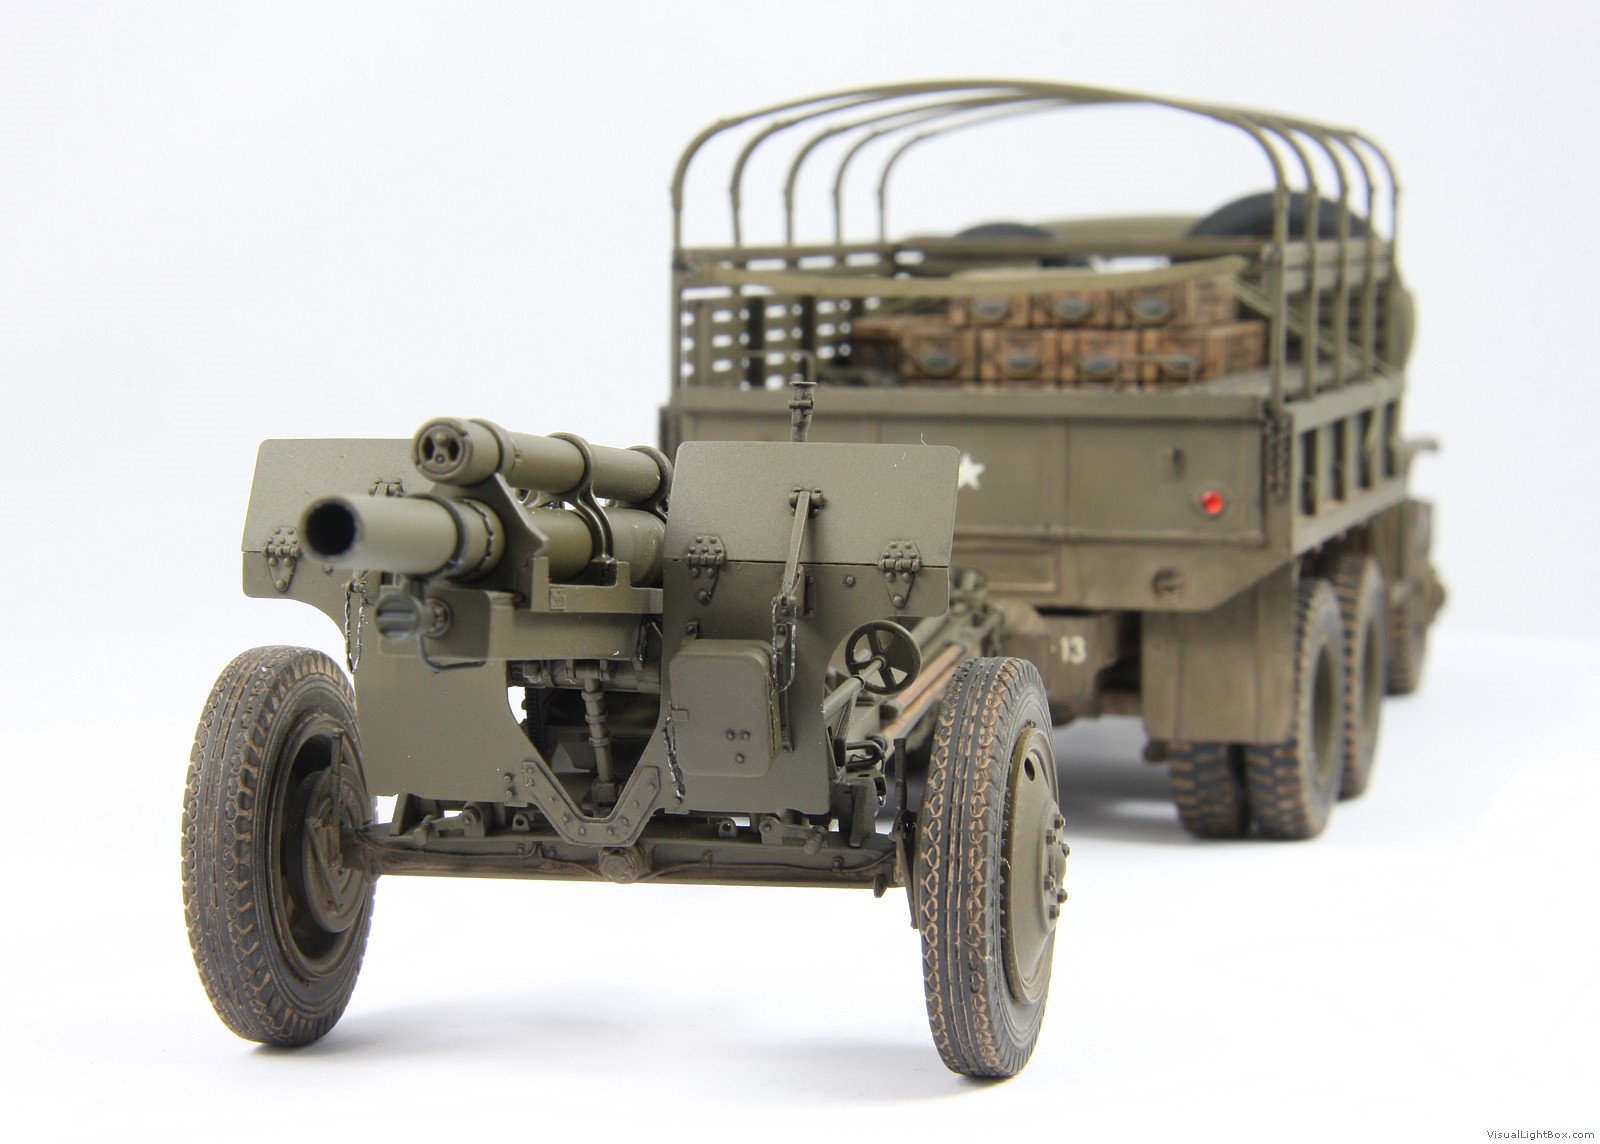
CCKW 352 - Hobby Boss with Italeri cab
Warszawa, Poland
Joined: March 26, 2003
KitMaker: 4,342 posts
Armorama: 3,938 posts
Posted: Saturday, April 16, 2016 - 05:30 AM UTC
Pawel "Vodnik" Krupowicz
Professional Certified Rivet Counter.
Oklahoma, United States
Joined: September 30, 2015
KitMaker: 2,493 posts
Armorama: 2,344 posts
Posted: Saturday, April 16, 2016 - 07:28 AM UTC
That's so nice. I need to do something similar.
"Only the dead have seen the end of war." - Plato
New York, United States
Joined: May 27, 2013
KitMaker: 2,210 posts
Armorama: 1,712 posts
Posted: Saturday, April 16, 2016 - 07:31 AM UTC
This looks really, really nice. Just because I don't know and haven't looked into it, what's wrong with the Hobbyboss cab?
I do some 3D design work. Message me for more info on what I'm doing or have done. Inquire about a product catalog.
Rhode Island, United States
Joined: December 08, 2002
KitMaker: 833 posts
Armorama: 601 posts
Posted: Saturday, April 16, 2016 - 08:29 AM UTC
Wow. That is great. Looks like the real thing!
----Nothing is "idiot proof" because they will always build a better idiot.------
----Never try to teach a pig to whistle. It wastes your time and it annoys the pig.----
Pennsylvania, United States
Joined: October 14, 2013
KitMaker: 318 posts
Armorama: 313 posts
Posted: Saturday, April 16, 2016 - 08:53 AM UTC
Quoted Text
This looks really, really nice. Just because I don't know and haven't looked into it, what's wrong with the Hobbyboss cab?
The doors are too small.
https://armorama.kitmaker.net/forums/225302

#450
California, United States
Joined: July 19, 2015
KitMaker: 672 posts
Armorama: 668 posts
Posted: Saturday, April 16, 2016 - 09:56 AM UTC
Pawel, that is really beautiful. I like your subtle weathering technique. It is so effective. Your models really highlight the work you put into the build. I have read elsewhere that this is a needed fix if you want an accurate CCKW. Thanks for posting it. I am also happy to see you updating your own site again.
Regards,
Eric
"Pray for peace but prepare for violence"
- Me
"The only thing necessary for the triumph of evil is for good men to do nothing"
- Edmund Burke
Warszawa, Poland
Joined: March 26, 2003
KitMaker: 4,342 posts
Armorama: 3,938 posts
Posted: Saturday, April 16, 2016 - 11:01 AM UTC
Quoted Text
Quoted Text
This looks really, really nice. Just because I don't know and haven't looked into it, what's wrong with the Hobbyboss cab?
The doors are too small.
That's right, but it's not just that: the overall length of the cab is correct, but the driver's compartment is too short, while engine compartment is too long. The proportions are significantly off because of that - for me it is very visible.
Pawel "Vodnik" Krupowicz
Professional Certified Rivet Counter.
Joined: March 26, 2007
KitMaker: 314 posts
Armorama: 296 posts
Posted: Saturday, April 16, 2016 - 12:17 PM UTC
Actually if I am not mistaken the Italeri hard top cab owes it's lineage to the old Peerless Max kit. Nearly 40 years old. Quite a testament for the original.
England - East Anglia, United Kingdom
Joined: June 09, 2009
KitMaker: 670 posts
Armorama: 410 posts
Posted: Saturday, April 16, 2016 - 12:35 PM UTC
Hi gang, I don't know if anyone is interested but I did the same thing with a Tamiya kitbash.
Anything Will Fit If You Use A Big Enough Hammer !!
If you produce it in Injection Moulded Plastic SOMEONE is bound to buy it !
If you want it 100% accurate - SCRATCHBUILD IT !!
Baden-Württemberg, Germany
Joined: July 22, 2015
KitMaker: 36 posts
Armorama: 24 posts
Posted: Saturday, April 16, 2016 - 12:51 PM UTC
Hi Pawel,
Great adaption! Congrats!
I remember from a comparison to a drawing in the tankograd TM, using the door length as a known references, the HB cabin was was ok as you say in one of your replies, but then the praised italeri cabin could be around 2 to 3 mm too short. Did it cause you any problem? Did you actually notice it at all?
Nacho
Warszawa, Poland
Joined: March 26, 2003
KitMaker: 4,342 posts
Armorama: 3,938 posts
Posted: Saturday, April 16, 2016 - 02:03 PM UTC
Quoted Text
Hi Pawel,
Great adaption! Congrats!
I remember from a comparison to a drawing in the tankograd TM, using the door length as a known references, the HB cabin was was ok as you say in one of your replies, but then the praised italeri cabin could be around 2 to 3 mm too short. Did it cause you any problem? Did you actually notice it at all?
Nacho
I didn't notice this problem. But there was enough problems to make the Italeri cab fit the HB frame, that 2mm overall length difference was easy to miss. And I usually start measuring things when they don't look right to me (which is quite often actually...) and the Italeri cab looks right. Correct proportions are more important than absolute size - as eye always identifies shape problems sooner than size problems.
But I just realized that I made one more modification to Italeri cab - I lowered boarding steps about 2 - 3 mms. I think they are too close to the door bottom in the Italeri cab, or at least they seemed to be placed too high when I test fitted parts on my model. I think it looks right now.
Pawel "Vodnik" Krupowicz
Professional Certified Rivet Counter.
Warszawa, Poland
Joined: March 26, 2003
KitMaker: 4,342 posts
Armorama: 3,938 posts
Posted: Saturday, April 16, 2016 - 02:04 PM UTC
Quoted Text
Hi gang, I don't know if anyone is interested but I did the same thing with a Tamiya kitbash.
Sure, show us! I considered it, but prefer the closed cab.
Pawel "Vodnik" Krupowicz
Professional Certified Rivet Counter.
#521
Kentucky, United States
Joined: April 13, 2011
KitMaker: 9,465 posts
Armorama: 8,695 posts
Posted: Saturday, April 16, 2016 - 07:27 PM UTC
Great job! Cheers, here, here!
I am waiting for the SWB with gun ring to get to the US and to come down in price a bite before I start mine. (Do not want to put any more money in HB's pocket than I have to for their messed up cab!) Will also be using the Italeri cab to finish off mine.
Canelones, Uruguay
Joined: December 27, 2006
KitMaker: 773 posts
Armorama: 765 posts
Posted: Saturday, April 16, 2016 - 07:51 PM UTC
Great work Pawell. I like the subtle weathering and the job.
I have an Italeri one and waiting for the HB to do the same.
Thanks for sharing.
Regards from the south
Alvaro
#521
Kentucky, United States
Joined: April 13, 2011
KitMaker: 9,465 posts
Armorama: 8,695 posts
Posted: Saturday, April 16, 2016 - 08:36 PM UTC
#521
Kentucky, United States
Joined: April 13, 2011
KitMaker: 9,465 posts
Armorama: 8,695 posts
Posted: Saturday, April 16, 2016 - 09:07 PM UTC
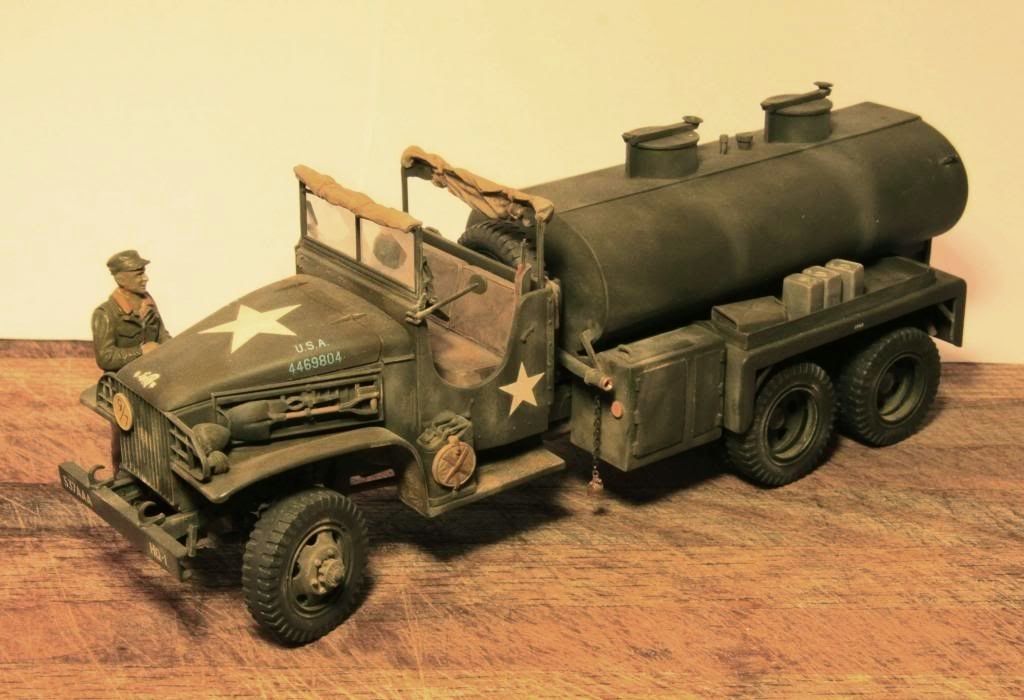
And the cab swap works in the opposite direction as well; Tamiya open cab placed on the Italeri water truck.
Warszawa, Poland
Joined: March 26, 2003
KitMaker: 4,342 posts
Armorama: 3,938 posts
Posted: Saturday, April 16, 2016 - 11:53 PM UTC
It has been pointed out that front facing reflectors should be amber, not red. I repainted them to correct color on my model already, but to save myself some work I altered my photos digitally - but the color on the photos still matches the actual corrected color on my model, so no cheating here

Pawel "Vodnik" Krupowicz
Professional Certified Rivet Counter.
#521
Kentucky, United States
Joined: April 13, 2011
KitMaker: 9,465 posts
Armorama: 8,695 posts
Posted: Monday, April 18, 2016 - 06:26 PM UTC
Excellent, excellent build! Kudos.
Michigan, United States
Joined: September 14, 2007
KitMaker: 185 posts
Armorama: 130 posts
Posted: Monday, April 18, 2016 - 06:53 PM UTC
Looks great...time for you to bring it to market, I'd buy one.

#521
Kentucky, United States
Joined: April 13, 2011
KitMaker: 9,465 posts
Armorama: 8,695 posts
Posted: Monday, May 02, 2016 - 01:40 AM UTC
Pawel, if you don't mind me asking, where did the ammo boxes come from? Also nicely done!
#521
Kentucky, United States
Joined: April 13, 2011
KitMaker: 9,465 posts
Armorama: 8,695 posts
Posted: Sunday, May 15, 2016 - 05:44 PM UTC
Would you please give me any advice/tips you can offer on bending that large piece of etch for the gas tank shield?
New York, United States
Joined: May 02, 2013
KitMaker: 4,403 posts
Armorama: 4,078 posts
Posted: Sunday, May 15, 2016 - 06:14 PM UTC
AN ADMIRABLE JOB!!!
I've done numerous ITALERI/TAMIYA CCKW353 kit-bash projects, using different components of each, plus a lot of aftermarket stuff; I really like the ABER PE sets- hard to find, but not impossible. I also really like the DEF CCKW "sagged" Tire/Wheelsets. I've seen enough real CCKW 352s and 353s to see that even when the Tires are pumped up to the correct air pressure, there is still some "bulge & sag" to them...
I MIGHT try an HB/ITALERI cross-breed, after seeing this...
Michigan, United States
Joined: September 14, 2007
KitMaker: 185 posts
Armorama: 130 posts
Posted: Thursday, June 29, 2017 - 09:43 PM UTC
What technique did you use to modify the Italeri doors to make them less "flat"?
Connecticut, United States
Joined: April 02, 2005
KitMaker: 3,608 posts
Armorama: 3,092 posts
Posted: Thursday, June 29, 2017 - 10:57 PM UTC
Pawel, really excellent build and outstanding finish! Great model.
Best,
Matt
SSG, INF, USA (Ret.)
"I am waiting for the tanks, and the Americans."
General Philippe Petain, September 1917
Warszawa, Poland
Joined: March 26, 2003
KitMaker: 4,342 posts
Armorama: 3,938 posts
Posted: Friday, June 30, 2017 - 12:08 AM UTC
Quoted Text
What technique did you use to modify the Italeri doors to make them less "flat"?
The doors were easy - I just carefully bent the upper frame - actually it broke in half in one door in the process and I had to repair it. I made a new glass for the right side door matching the new frame shape (there's no glass in the left side one).
More difficult was the shape of the door opening. I first drilled a row of holes above the door opening and connected them to create a single long hole. It allowed me to push the upper door opening "frame" upwards to give it more curved shape. Once I reached the desired shape, I filled the opening with CA glue and hit it with accelerator. Then I restored the smooth roof shape with putty.
Pawel "Vodnik" Krupowicz
Professional Certified Rivet Counter.