_GOTOBOTTOM
Constructive Feedback
For in-progress or completed build photos. Give and get contructive feedback!
trumpeter PT-76
metooshelah
#011
Visit this Community
Jerusalem, Israel
Joined: February 06, 2009
KitMaker: 1,507 posts
Armorama: 1,304 posts
Posted: Saturday, April 23, 2016 - 11:47 PM UTC
hey guys, this is 1 of 2 builds I'm gonna do for Best of Both Worlds campaign
sign up here!

going to use this build to clean some rust too.

so let us begin

DSC_0136 by Nathan Ram, on Flickr

inside the box there isn't much, you get the upper & lower hull, 2Xwheels and suspension sprues, 1 turret sprue, and 1 sprue with the cannon and various parts. the tracks are rubber and i am planning to replace them with master club tracks. you get a small fret of PE , a string rope and 2 decal options (which arrived bent ) (not in picture).

DSC_0141 by Nathan Ram, on Flickr
MLD
Visit this Community
Vermont, United States
Joined: July 21, 2002
KitMaker: 3,569 posts
Armorama: 2,070 posts
Posted: Sunday, April 24, 2016 - 07:19 PM UTC
They are pretty nice kits, I've got one one in-progress (cough cough 5 yrs 'in-progress')
I stalled with Fruil tracks.. the bane of my kit completing existence.

The Toadmans Tank page has good wiring references for lights and turret lights
http://toadmanstankpictures.com/pt76.htm

And the walkaround on Prime Portal shows upper hull details as well.
http://www.primeportal.net/apc/dave_connolly/russian_pt-76/

I think the PMMS review mentioned that the upper hull handles on the short ends of the air intake are too tall (short?) but the prime portal pics show them well.
http://data3.primeportal.net/apc/dave_connolly/russian_pt-76/images/russian_pt-76_01_of_65.jpg

Looking forward to the build, it is not a kit you see built up very often. Other than the headlight cages being too flat when made of Photoetch, it's a nice kit.
Mike
Kilo_Uniform
Visit this Community
Gauteng, South Africa
Joined: July 03, 2015
KitMaker: 280 posts
Armorama: 135 posts
Posted: Sunday, April 24, 2016 - 07:44 PM UTC
Hi Nathan,

Got one of these in the stash - will follow along and learn as much as I can.

Looking forward to the next update.

Regards,
Kobus
metooshelah
#011
Visit this Community
Jerusalem, Israel
Joined: February 06, 2009
KitMaker: 1,507 posts
Armorama: 1,304 posts
Posted: Saturday, May 07, 2016 - 10:04 PM UTC
build continues, with the help of my trusty assistance, Pirate Carl:

DSC_0186 by Nathan Ram, on Flickr

we start with steps 1-3, road wheels and suspension:

IMG_1357 by Nathan Ram, on Flickr

which requires tackling of 2Xsprue A:

DSC_0182 by Nathan Ram, on Flickr

details on front of the wheels are pretty good, except the shallow bits where some are less pronounced than others, which is a shame:

DSC_0188 by Nathan Ram, on Flickr

DSC_0191 by Nathan Ram, on Flickr

back side isn't all that excitful, pretty much the same as the fronts:

DSC_0199 by Nathan Ram, on Flickr

when attaching them to the front, notice there is no notch to align them. this isn't much of a big deal, because it will be pretty much hidden - unless you want to do some damage/repair diorama, and in that case you will have to place the back into the fronts, rotate them to alignment and then use some Tamiya extra thin

DSC_0206 by Nathan Ram, on Flickr

put together they look like this. please note - the line in the middle supposed to be there, its a result of casting the rubber. unfortunately, its also where it attaches to the sprue, so damaging it will be unavoidable

DSC_0209 by Nathan Ram, on Flickr

repeat 12 times, and move on to the hull, which is very nicely detailed and you can see the weld marks:

DSC_0214 by Nathan Ram, on Flickr

DSC_0215 by Nathan Ram, on Flickr

attach parts A2 and A24, which is straight-forward, but as you will see theres a hole on top of A2 which will need filling

DSC_0246 by Nathan Ram, on Flickr

DSC_0248 by Nathan Ram, on Flickr

and last for today, the idler wheel

DSC_0217 by Nathan Ram, on Flickr

next up - putting in into higher gear and getting more progress.
metooshelah
#011
Visit this Community
Jerusalem, Israel
Joined: February 06, 2009
KitMaker: 1,507 posts
Armorama: 1,304 posts
Posted: Monday, May 23, 2016 - 10:57 PM UTC
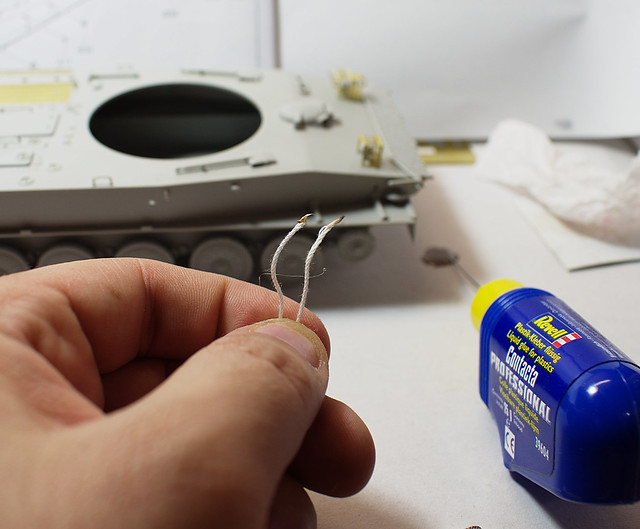
work continues with the rope-tie things, which have a seam line running all over. you will need to sand it prior to gluing:

DSC_0265 by Nathan Ram, on Flickr

next, its time to mount the road wheels and idlers. the sprockets would wait until i start with the tracks, so they can fit together. the torsion arms' ends are not even so some wheels mount with ease, some require a bit of pressure and some would not sit tight at all. i put some glue, gave it couple of seconds so it just holds the wheels, set the hull on the desk and tried to align them as best as i could:

DSC_0268 by Nathan Ram, on Flickr

next page is very straight forward, with only couple of parts added to the hull:

DSC_0269 by Nathan Ram, on Flickr

i started with the pipes, and the brighter folks would notice a problem that i missed:

DSC_0271 by Nathan Ram, on Flickr

one pipe and the panel that it would attach too. since the panel holds the pipe and in turn needs to be glued to the hull, i started with just one pipe, let it set and then installed the 2nd one. oh, and can you notice the problem yet?

DSC_0278 by Nathan Ram, on Flickr

sad PT-76 is sad:

DSC_0280 by Nathan, on Flickr

still can't see it?

DSC_0282 by Nathan Ram, on Flickr

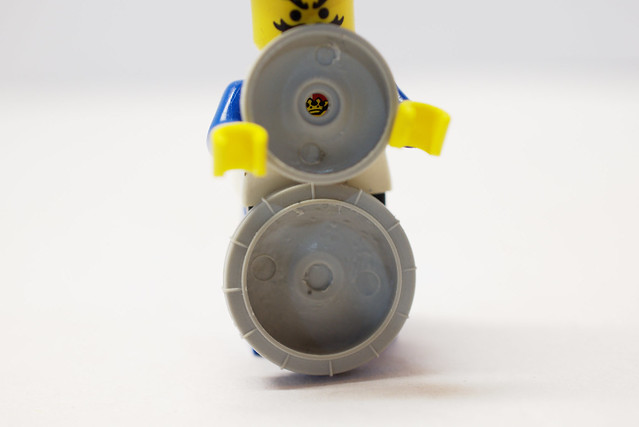
ok, ok i will let you in. the locating pins on the two halves of the pipes are on the inside, and are very very visible.

DSC_0285 by Nathan Ram, on Flickr

if you wanted to display the vehicle with open exhaust hatches you should've sanded them prior to gluing them. i tried to sand it after the fact, but the result was poor, so i covered the hatches.

IMG_1380 by Nathan Ram, on Flickr

after that i got part A20 which had a sink mark. i filled it with some cement and let it dry.
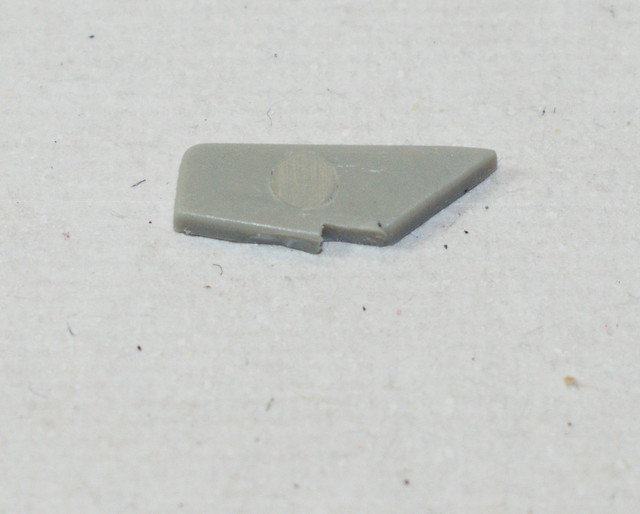
DSC_0293 by Nathan Ram, on Flickr

we now turn to the next page and begin with the upper hull:

DSC_0298 by NathaRam, on Flickr

the upper hull is nicely detailed (though some of these details would have been better off as actual parts and not part of the mould).

DSC_0306 by Nathan Ram, on Flickr

DSC_0307 by Nathan Ram, on Flickr

DSC_0308 by Nathan Ram, on Flickr

we start with deck covers:

DSC_0309 by Nathan Ram, on Flickr

you need to put A18x2 on it, but its a thin bar which suffers from the worst condition of them all - a very thick attachment to the sprue! this means that you can easily break it just trying to manipulate it off the sprue:

DSC_0314 by Nathan Ram, on Flickr

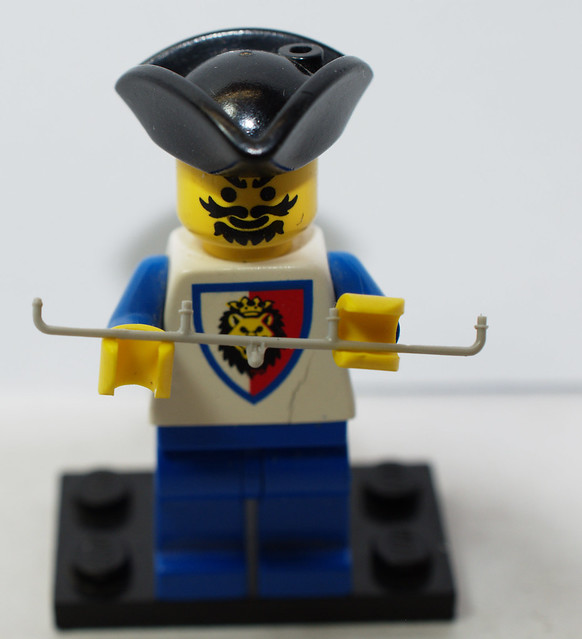
luckily i have this useful tool i keep to tackle such problems:

DSC_0330 by Nathan Ram, on Flickr

it allows you to cut very very close to the part itself without damaging it, and so with really minor sanding:

DSC_0321 by Nathan Ram, on Flickr

end result:

DSC_0322 by Nathan Ram, on Flickr

same goes for part A25x4:

DSC_0324 by Nathan Ram, on Flickr

hull with decks glued:

DSC_0352 by Nathan Ram, on Flickr

now its time for PE. the kit is just as low on PE as it is on styrene:

DSC_0361 by Nathan Ram, on Flickr

getting the grills out was nothing to get excited over, and so was placing it in place:

DSC_0363 by Nathan Ram, on Flickr

DSC_0365 by Nathan Ram, on Flickr

after that you place what little details the kit supplies you with, starting with fuel tanks. these are made of two halves: a detailed have and a non-detail half

DSC_0368 by Nathan Ram, on Flickr

and also the shovels, which have a seam running over them:

DSC_0373 by Nathan Ram, on Flickr
metooshelah
#011
Visit this Community
Jerusalem, Israel
Joined: February 06, 2009
KitMaker: 1,507 posts
Armorama: 1,304 posts
Posted: Sunday, June 19, 2016 - 10:40 PM UTC
i resume the model with the bits that are left for the hull. as i mentioned, the pipes will be modelled closed:

IMG_1380 by Nathan Ram, on Flickr

now, some PE for the lights' guards and side skirts.

DSC_0375 by Nathan Ram, on Flickr

the kit provides you with a bending "tool" to form the guards, but they are not necessary at all. the PE is easy to bend, and is pre-grooved where its folded

DSC_0382 by Nathan Ram, on Flickr

everything went just fine, but alas, my water bottle slipped from my hand and smashed the guards and several other parts

DSC_0383 by Nathan Ram, on Flickr

DSC_0385 by Nathan Ram, on Flickr

DSC_0386 by Nathan Ram, on Flickr

now its time to tackle the nylon rope that is provided with the kit. the end strands have already began to separate, so what i do is to hold the rope near the end with tweezer, and move it briefly in the fire. this causes the ends to melt, and with my fingers i can mesh the ends together. the key is to do it fast.

DSC_0395 by Nathan Ram, on Flickr

you can see the terrible state of the strands:

DSC_0396 by Nathan Ram, on Flickr

hold it with tweezers:

DSC_0398 by Nathan Ram, on Flickr

this is the end result. its not pretty, but don't worry about it - those end parts will be glued to the plastic shackles, and will not be seen anyway:

DSC_0402 by Nathan Ram, on Flickr

DSC_0404 by Nathan Ram, on Flickr

i decided to build the sprockets anyway, and use the supplied tracks to align them. the sprockets are made of two halves with an alignment pin - but guess what, the pin makes the sprocket halves to be misaligned, and the teeth are not parallel. this adds to my list of disappointments from this kit, which is a shame.

DSC_0406 by Nathan Ram, on Flickr

I have already began work on the turret, but I'm gonna hold posting the pictures until the glue sets. you need to pass a copper wire on some sort of hinges and i don't want them to fall or anything like that.
metooshelah
#011
Visit this Community
Jerusalem, Israel
Joined: February 06, 2009
KitMaker: 1,507 posts
Armorama: 1,304 posts
Posted: Thursday, June 23, 2016 - 12:44 AM UTC
work begins on the turret. not really interesting, so i did it all in one go:

IMG_1393 by Nathan Ram, on Flickr

pretty nice detailing:

DSC_0405 by Nathan Ram, on Flickr

DSC_0407 by Nathan Ram, on Flickr

DSC_0408 by Nathan Ram, on Flickr

theres no interior, so i dont know why trumpeter added a breach. i didn't built it, just placed the holders for the gun on the lower ring, and didn't care for the sink mark:

DSC_0411 by Nathan Ram, on Flickr

and then prepared the gun. man, i do hate 2 halved guns

DSC_0410 by Nathan Ram, on Flickr

DSC_0412 by Nathan Ram, on Flickr

i then added the circumference hold ring which is supplied as a copper wire (that you have to make it contour to the turret...) :

DSC_0409 by Nathan Ram, on Flickr

last step was to mount the turret on the gun, and voila!

DSC_0413 by Nathan Ram, on Flickr

DSC_0414 by Nathan Ram, on Flickr

DSC_0416 by Nathan Ram, on Flickr
metooshelah
#011
Visit this Community
Jerusalem, Israel
Joined: February 06, 2009
KitMaker: 1,507 posts
Armorama: 1,304 posts
Posted: Thursday, June 23, 2016 - 12:52 AM UTC
before i continued i wanted to say a few words about this kit. on first impressions it looks great, and if id reviewed it as such, i would've probably give it 85-90/100. but when i look at the things that matter, it all adds up - and lowers the total score:

why no clear parts for periscopes? or for that matter, why not any parts at all? they just look like holes in the hull (and i will relate to that when i begin painting process).
all the seam lines were just terrible and annoying to clean, and much - too much - present for a kit, especially these days.
why copper wire for the circumference holding ring? why not PE, or even styrene for that matter, which would be more easy to handle?
two halved gun - really? really?!?!? really?!?!?!?!?!
the pipes, and they why there are molded.

this kit was such a mixed bag from my point of view. after building it, my score is 75/100.
oh, and those last 10 points? only because its the only offering for this subject.

 _GOTOTOP