_GOTOBOTTOM
Constructive Feedback
For in-progress or completed build photos. Give and get contructive feedback!
1/35 Tamiya Sherman M1 (IDF)
SHarjacek
Visit this Community
Croatia Hrvatska
Joined: January 29, 2011
KitMaker: 977 posts
Armorama: 553 posts
Posted: Tuesday, May 31, 2016 - 08:23 PM UTC
Hello, frustrated with the boredom of studying for finals I decided to start a project after a while. The kit I will be using is the 2011 Tamiya M1 Sherman. The model itself is a hybrid of new parts and parts from what seems to be ancient Tamiya Sherman offerings. I tried and equip myself with references as much as possible, regarding the aftermarket I purchased extra decals, a metal barrel and some smaller bits and pieces, from what it looks I will have to purchase or find better detailed suspension/wheels and get replacement tracks as I don’t fancy the rubber ones. I assume the updates will be quite irregular due to the finals.

Anyways, I started off with the turret, I quite like the texture Tamiya did, unfortunately some of the details are either off or too big. After joining the two main parts of the turret, I discovered seams all around the turret, with the back corners being by far the worst;


[/quote]

Kind regards, Sven.
Removed by original poster on 05/13/19 - 22:51:57 (GMT).
SHarjacek
Visit this Community
Croatia Hrvatska
Joined: January 29, 2011
KitMaker: 977 posts
Armorama: 553 posts
Posted: Saturday, April 15, 2017 - 02:13 PM UTC
After a while, I decided to update this build log. I've been working on it very slowly as I've been quite busy with my studies. I was very unsatisfied with the quality of the suspension and track, so my first mission was to find replacement for those. I was able to get an Academy replacement suspension (grey plastic) from a friend which is a nice improvement over the ancient Tamiya parts (green plastic). I'm still searching for some more different wheels to add variation to the suspension as many IDF Shemans had a mix of various wheels. I have not yet begun a search for another pair of tracks as I'm far away from that stage.

The turret also turned out to be quite challenging. It's what I'm currently working on but it's going slow because I only have a couple pictures of the actual tank I'm building so it's hard to figure out what features/devices that tank had and which it didn't. The seams along the joints were also more challenging than I hoped they would be but I managed to smoothen that all out with help of Mr. Surfacer. I also used some Tamiya polyester putty to round the area where the turret and mantlet meet as the angle was very sharp on the model. I know that it looks like there's very little done but all these small corrections take a lot of time. I'm currently working on figuring out how to integrate an M3 smoke mortar and to add further detail to the search light.


Kind regards, Sven.
Martinvidas
Visit this Community
Noord-Brabant, Netherlands
Joined: February 13, 2011
KitMaker: 322 posts
Armorama: 300 posts
Posted: Saturday, April 15, 2017 - 02:30 PM UTC
Hey
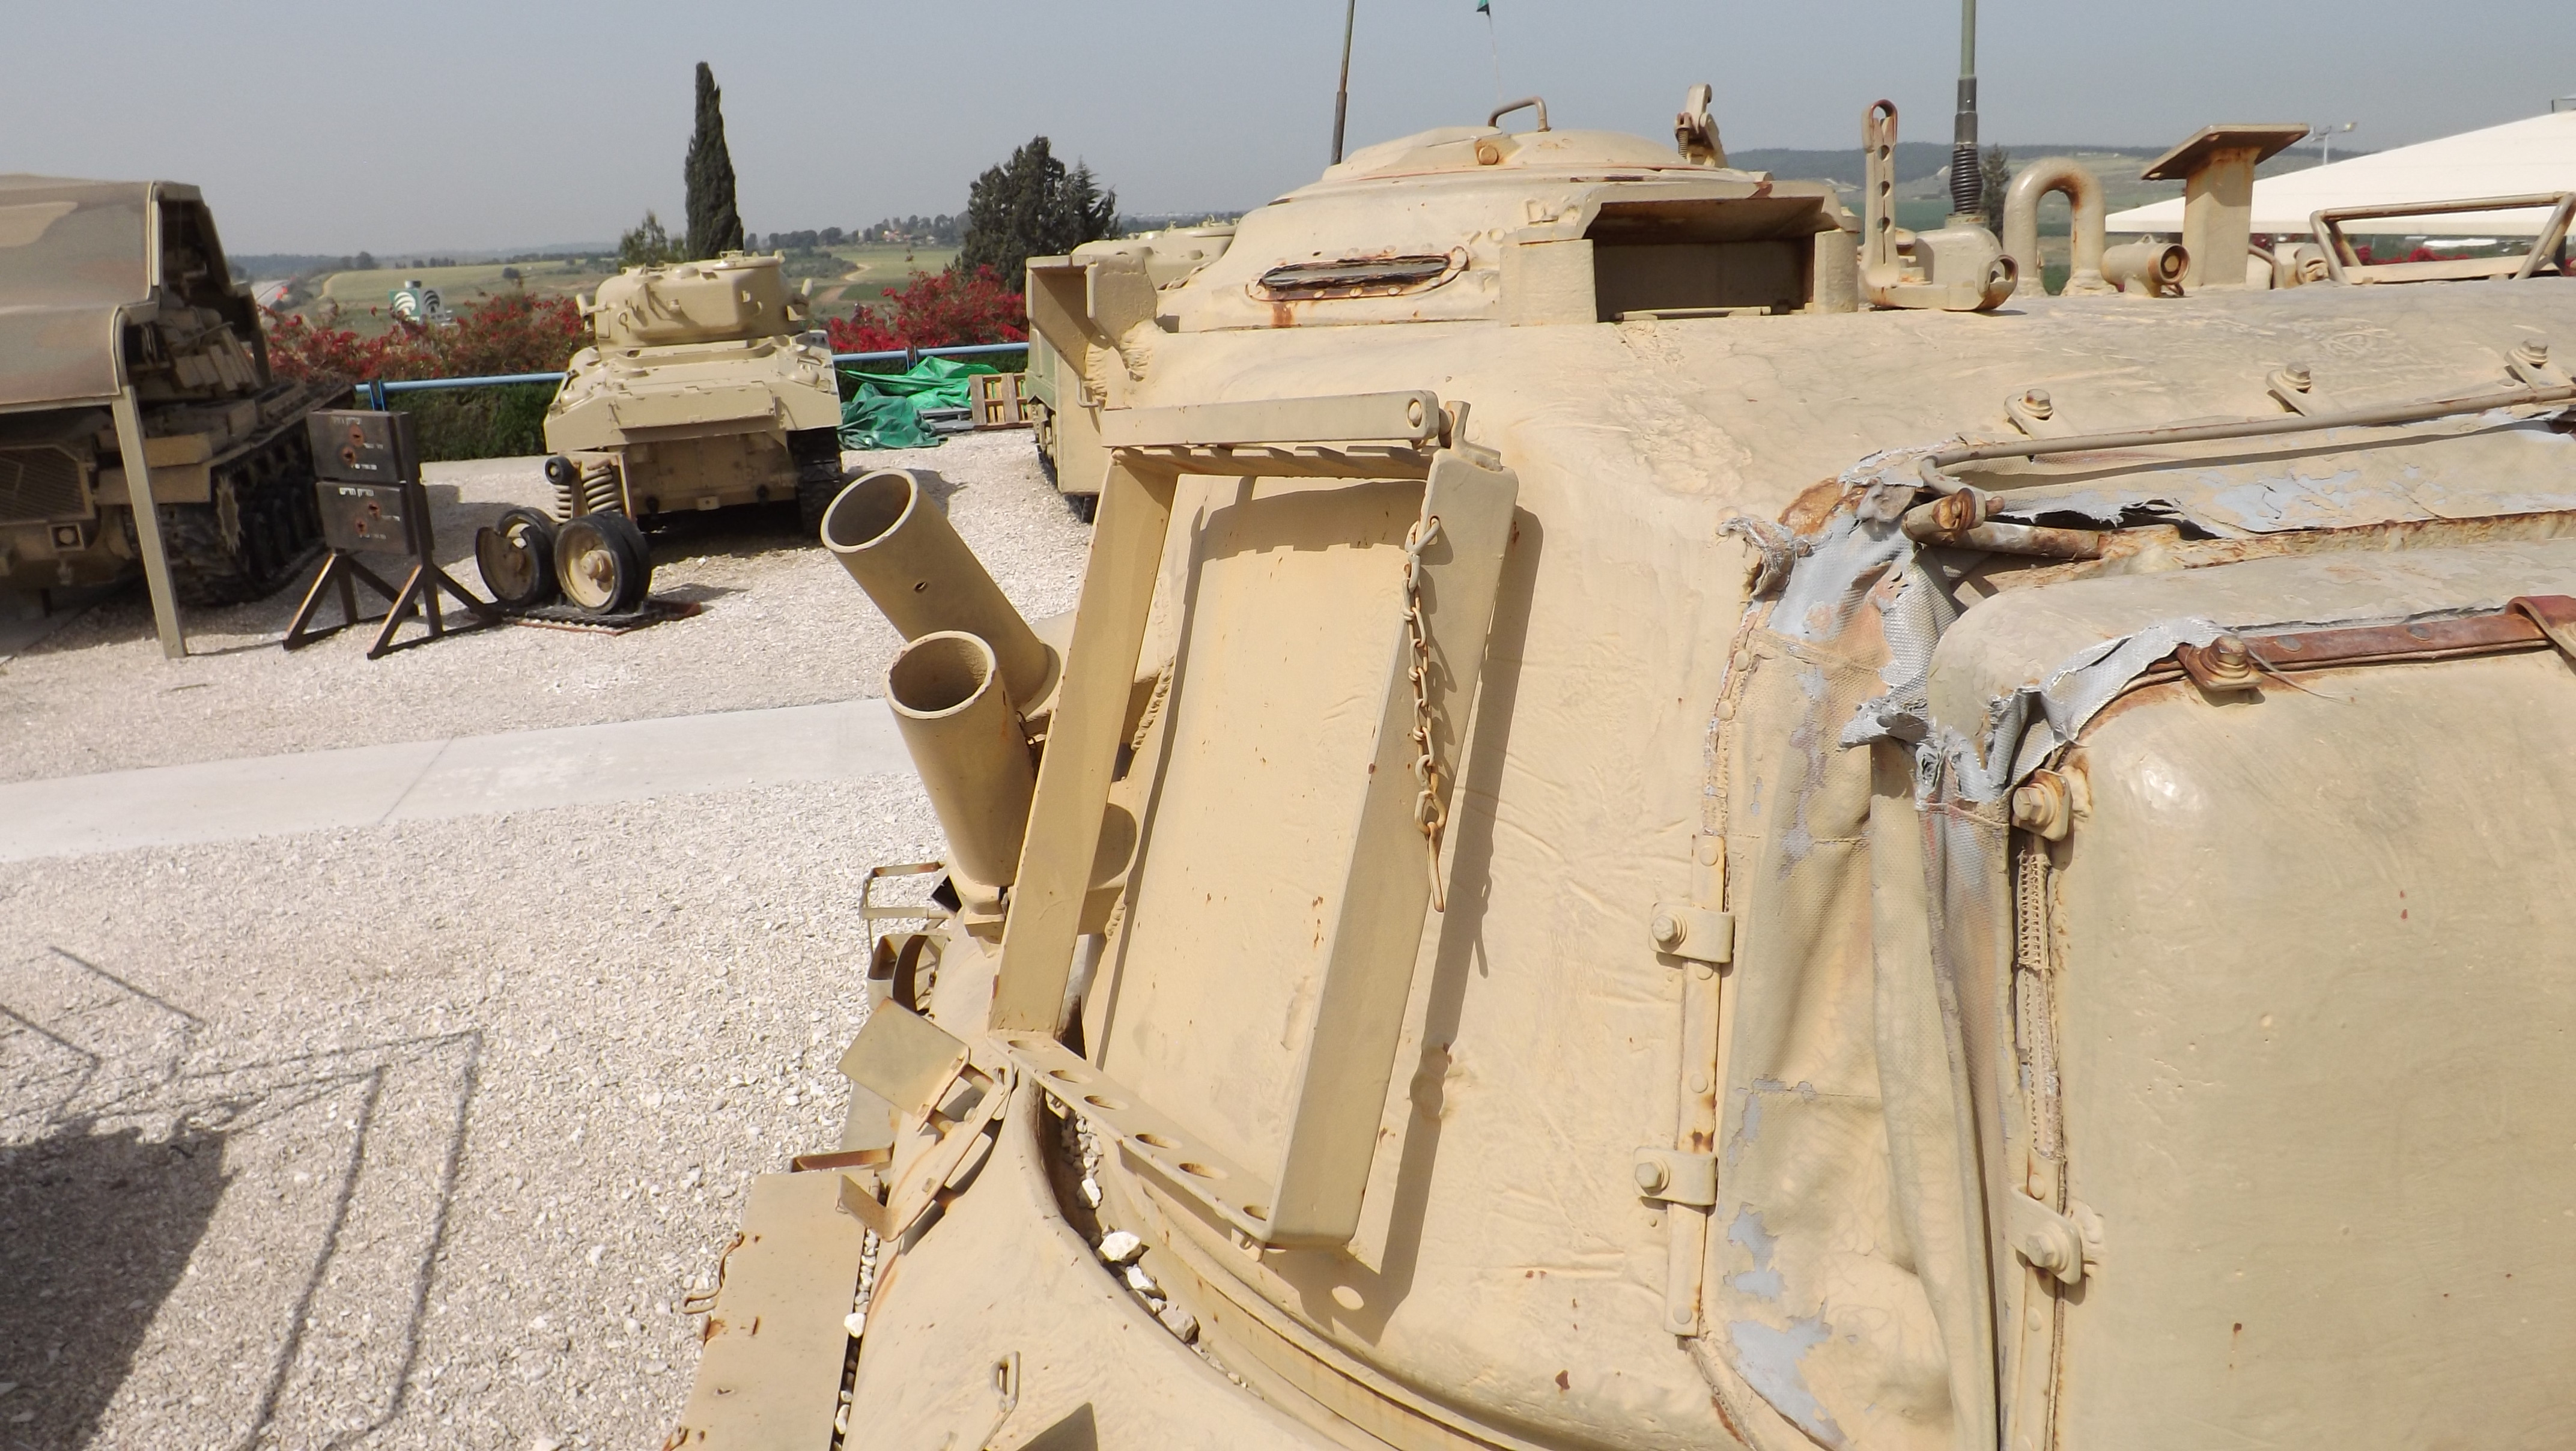
If You need some more pics - I have some walk around from the IDF Armory corps Memorial and I'll upload them
SHarjacek
Visit this Community
Croatia Hrvatska
Joined: January 29, 2011
KitMaker: 977 posts
Armorama: 553 posts
Posted: Saturday, April 15, 2017 - 02:42 PM UTC
Martin, that would be greatly appreciated. Especially if you have pictures of the turret top, as I only have a few.

Kind regards, Sven.
Martinvidas
Visit this Community
Noord-Brabant, Netherlands
Joined: February 13, 2011
KitMaker: 322 posts
Armorama: 300 posts
Posted: Monday, April 17, 2017 - 09:00 PM UTC
So here we go:


If You need the full size pics I'll upload them to some drive and send a link to You:)
SHarjacek
Visit this Community
Croatia Hrvatska
Joined: January 29, 2011
KitMaker: 977 posts
Armorama: 553 posts
Posted: Friday, April 21, 2017 - 02:34 AM UTC
Martin - these will work perfectly, thanks a lot for the assistance!

Anyways, I had some time to work on the model so I decided to scratch build the smoke mortar that's present on the tank I'm trying to depict but Tamiya hadn't provided an option for this. I used some spare plastic, aluminium foil, wire and leftover photo-etch. I hardly have any time to work on the model so the updates will be small and slow. Next on are other parts of the turret.


Kind regards, Sven.
SHarjacek
Visit this Community
Croatia Hrvatska
Joined: January 29, 2011
KitMaker: 977 posts
Armorama: 553 posts
Posted: Monday, May 01, 2017 - 08:35 PM UTC
Further work on the turret;


Kind regards.
hazzardm
Visit this Community
England - South West, United Kingdom
Joined: May 13, 2010
KitMaker: 53 posts
Armorama: 52 posts
Posted: Monday, May 01, 2017 - 10:56 PM UTC
Careful with those pictures, nice though they are;

they are of the late model M51, not the M1 at Latrun.

I don't believe that the M1 ever had the roof mounted mortar, the antenna bases are probably not correct for the M1 as is the drivers hatch periscope.

BTW there are (were?) at least 1 M1 at the collection houses and another one on ammunition hill in Jerusalem

MJH

SHarjacek
Visit this Community
Croatia Hrvatska
Joined: January 29, 2011
KitMaker: 977 posts
Armorama: 553 posts
Posted: Monday, May 01, 2017 - 11:16 PM UTC

Quoted Text

Careful with those pictures, nice though they are;

they are of the late model M51, not the M1 at Latrun.

I don't believe that the M1 ever had the roof mounted mortar, the antenna bases are probably not correct for the M1 as is the drivers hatch periscope.

BTW there are (were?) at least 1 M1 at the collection houses and another one on ammunition hill in Jerusalem

MJH


Mark, thanks for the comment.

I used pictures from Martin just to see some detail on particular devices on the turret I couldn't find pictures of. I'm basing my turret on great pictures of the particular tank i'm building provided in Dr.Manasherobs book "Lioness and Lion of the line" Vol.12.


Kind regards, Sven.
 _GOTOTOP