

Hosted by Darren Baker
Tamiya 1/35 M5 Stuart and mortar team

LiquidShovel

Joined: June 08, 2016
KitMaker: 13 posts
Armorama: 13 posts
Posted: Tuesday, June 07, 2016 - 04:40 PM UTC
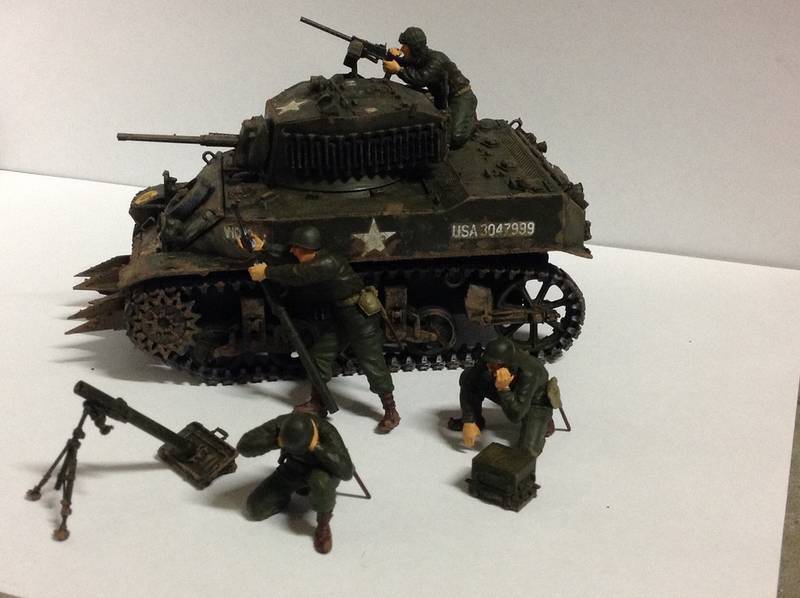
I got the m5 recently and finished it today what do you guys think? I'm quite new to modelling and have only made 5-7 models and this was my first with weathering
LiquidShovel
Joined: June 08, 2016
KitMaker: 13 posts
Armorama: 13 posts
Posted: Tuesday, June 07, 2016 - 04:43 PM UTC
Welp. I don't know how to add picture any help would be great.

retiredyank

Joined: June 29, 2009
KitMaker: 11,610 posts
Armorama: 7,843 posts
Posted: Tuesday, June 07, 2016 - 04:45 PM UTC
What photo service site are you using?

Removed by original poster on 06/08/16 - 12:17:32 (GMT).
Removed by original poster on 06/08/16 - 12:17:18 (GMT).
Removed by original poster on 06/08/16 - 12:11:57 (GMT).

tatbaqui

#040

Joined: May 06, 2007
KitMaker: 2,713 posts
Armorama: 2,451 posts

Posted: Tuesday, June 07, 2016 - 05:24 PM UTC
Quoted Text
Welp. I don't know how to add picture any help would be great.
Teague,
Welcome to Armorama! Check User Support
You'll see a couple of sticky threads that may guide you.
Cheers,
Tat
LiquidShovel
Joined: June 08, 2016
KitMaker: 13 posts
Armorama: 13 posts
Posted: Tuesday, June 07, 2016 - 05:25 PM UTC
 hopefully this picture works. Thanks for trying to help.
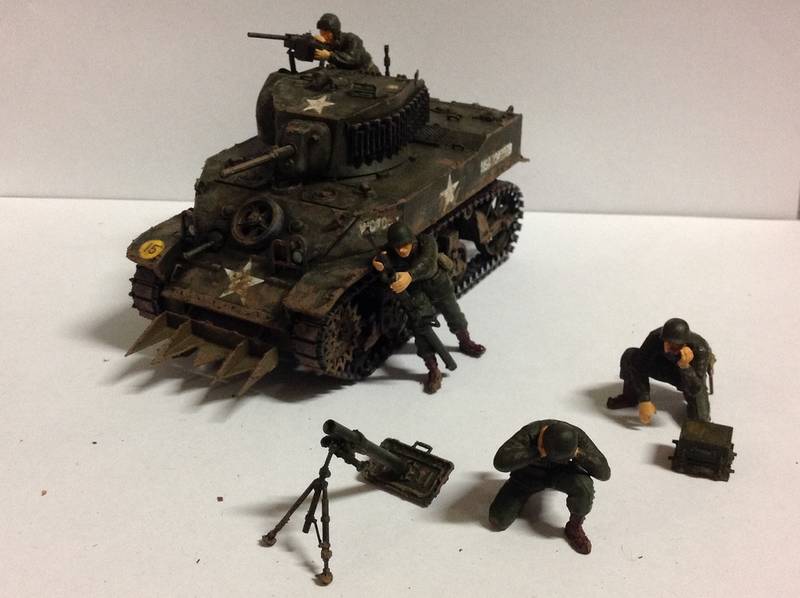
This is the model I made the Tamiya 1/35 M5 Stuart with mortar team
Removed by original poster on 06/08/16 - 12:31:59 (GMT).
LiquidShovel
Joined: June 08, 2016
KitMaker: 13 posts
Armorama: 13 posts
Posted: Tuesday, June 07, 2016 - 05:42 PM UTC
LiquidShovel
Joined: June 08, 2016
KitMaker: 13 posts
Armorama: 13 posts
Posted: Tuesday, June 07, 2016 - 05:50 PM UTC
LiquidShovel
Joined: June 08, 2016
KitMaker: 13 posts
Armorama: 13 posts
Posted: Tuesday, June 07, 2016 - 05:52 PM UTC
i hope you like them. any suggestions on how to improve my models is greatly appreciated! i have more photos ill upload later
retiredyank
Joined: June 29, 2009
KitMaker: 11,610 posts
Armorama: 7,843 posts
Posted: Tuesday, June 07, 2016 - 06:11 PM UTC
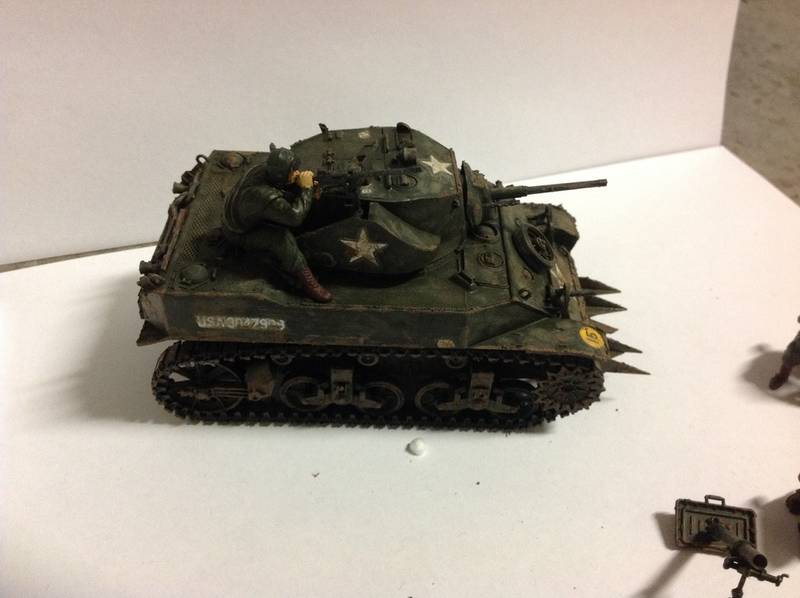
The weathering of the Stuart stands out. Well done! To remove the "silver" from your decals should be tackled, next. Before weathering, apply a gloss coat to the areas where decals are placed. Allow it to dry, thoroughly. Apply the decals, with decal solvent. I let these dry for at least an hour. Apply a second gloss coat, over the decals. Apply a flat, matte or satin coat over the decals.
LiquidShovel
Joined: June 08, 2016
KitMaker: 13 posts
Armorama: 13 posts
Posted: Tuesday, June 07, 2016 - 06:20 PM UTC
ok thanks! ill give that a try

ericadeane
Joined: October 28, 2002
KitMaker: 4,021 posts
Armorama: 3,947 posts
Posted: Tuesday, June 07, 2016 - 08:32 PM UTC
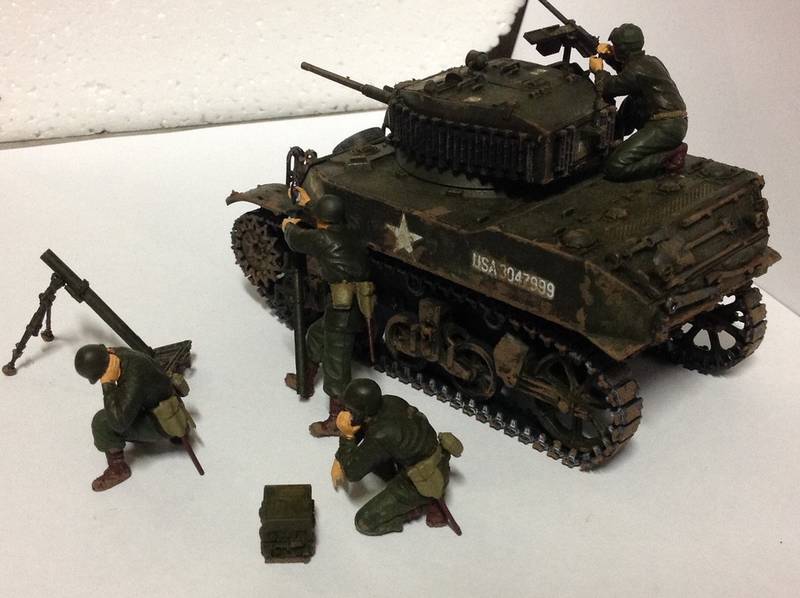
Thanks for posting Teague. The man loading the mortar round -- what's that cylinder he's loading? He should be dropping the mortar round into the 81mm mortar on the bipod you have, tailfins first. Mortars were muzzle loaded

easyco69

Joined: November 03, 2012
KitMaker: 2,275 posts
Armorama: 2,233 posts
Posted: Tuesday, June 07, 2016 - 09:08 PM UTC
good job, nice & dusty , dirty...
The guy is holding a boozoka tube, in his hand is a bazooka rocket. lol. You must of mixed up the kit some how.
In the kit there should be a couple mortar rounds...glue that round to that guys hand..he'll be dropping the round down the mortar tube ..fins first. The mortar is the tube with the legs & metal ground plate.
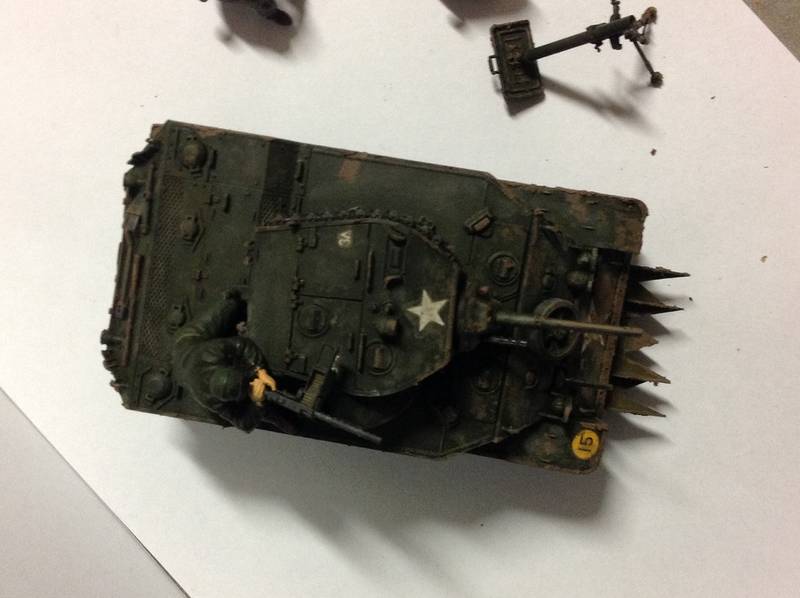
Other then that..good start. Maybe cut some copper wire & drop it around the top of the turret where the guy is firing the .30 cal machine gun..to simulate spent round casings.
PS- glue some thin wire or string & connect the hand held phone to that radio ( box on the ground). Burn some sprue & stretch it, glue that to the radio to simulate an antennae. Same with the tank, it will need an antennae ..just used heated , stretched sprue. Maybe add some "round" damage to the tank ..use a heated pin ..make some ricochets ..some dents...use a pencil to simulate bare steel from the hit.
Have fun!
The guy is holding a boozoka tube, in his hand is a bazooka rocket. lol. You must of mixed up the kit some how.
In the kit there should be a couple mortar rounds...glue that round to that guys hand..he'll be dropping the round down the mortar tube ..fins first. The mortar is the tube with the legs & metal ground plate.
Other then that..good start. Maybe cut some copper wire & drop it around the top of the turret where the guy is firing the .30 cal machine gun..to simulate spent round casings.
PS- glue some thin wire or string & connect the hand held phone to that radio ( box on the ground). Burn some sprue & stretch it, glue that to the radio to simulate an antennae. Same with the tank, it will need an antennae ..just used heated , stretched sprue. Maybe add some "round" damage to the tank ..use a heated pin ..make some ricochets ..some dents...use a pencil to simulate bare steel from the hit.
Have fun!
LiquidShovel
Joined: June 08, 2016
KitMaker: 13 posts
Armorama: 13 posts
Posted: Wednesday, June 08, 2016 - 02:03 PM UTC
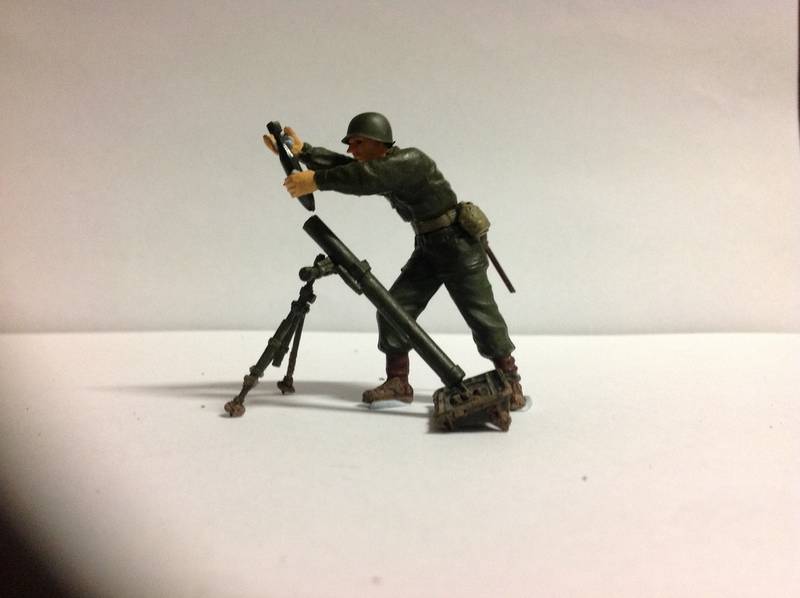
to the people asking about the the bazooka he is him load the mortar... with the shell the wrong way
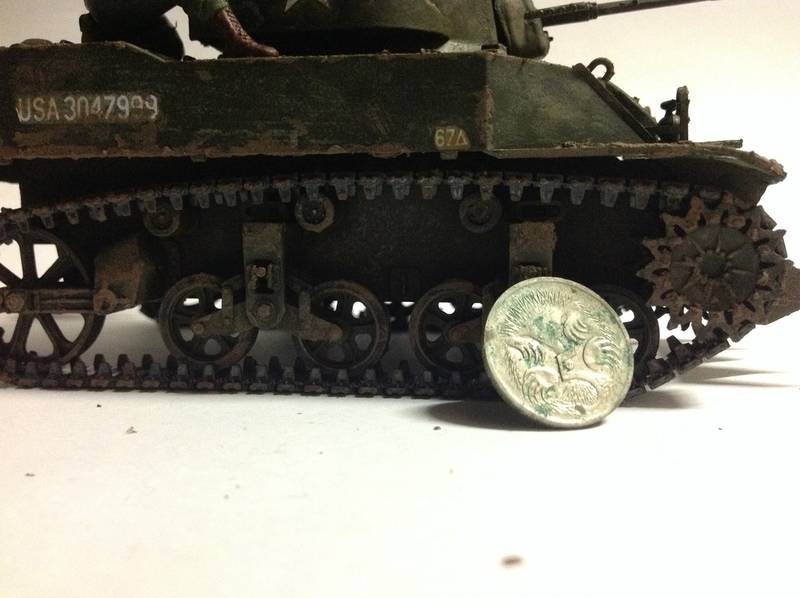
he are some pictures scaled with a Australian 5 cent coin
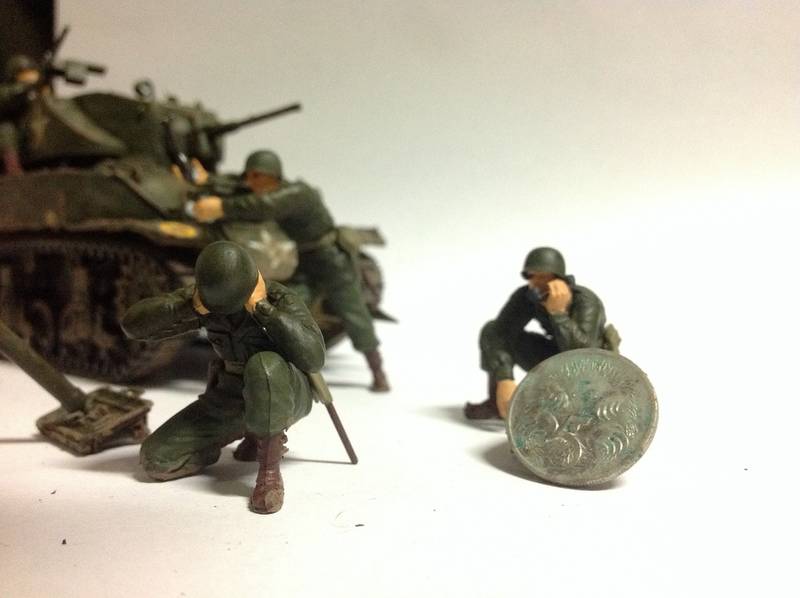
im am in the process of making a small diorama for this model and i will be using your ideas to help make it better.
thanks again for the feed back!
ericadeane
Joined: October 28, 2002
KitMaker: 4,021 posts
Armorama: 3,947 posts
Posted: Wednesday, June 08, 2016 - 03:55 PM UTC
A good primer for AFV builders is Kalmbach Publishing's "Modeling Realistic Tanks and Artillery" by Mike Ashey. There, you'll find good info about basic tools and techniques such as removing molding seams, applying decals, etc.
You absolutely need to pry off the round from mortar loader's hands. If he puts it in the mortar tube like that, he's dead. It's the equivalent of showing someone firing a pistol but with the barrel pointed at his own head.
An aspect of AFV modeling has to be a level of realism so you don't want something patently crazy looking (like the 81mm round about to be dropped in backwards) to be on your models. You'll see people plastering "sand bags" the scale size of mattresses over their models -- forgetting that sand bags are VERY heavy. People will glue on tarps, bags, bedrolls magically to the sides of tanks without any regard to how actual items were stowed.
The more you model, the more you'll develop your "eye". I think the Ashey book will be of great assistance. Good luck
LiquidShovel
Joined: June 08, 2016
KitMaker: 13 posts
Armorama: 13 posts
Posted: Wednesday, June 08, 2016 - 04:04 PM UTC
haha! thanks for the info ill make sure to check it out and i've already fixed the mortar round i just have a problem with over looking things.
ericadeane
Joined: October 28, 2002
KitMaker: 4,021 posts
Armorama: 3,947 posts
Posted: Wednesday, June 08, 2016 - 04:22 PM UTC
Cool. A good thing about forums like Armorama is you can post pictures of works in progress for advice and tips along the way. Also, lots of us can point you to online galleries of how the equipment really looked or and was operated to further your knowledge.
Keep 'em coming!
Keep 'em coming!
M4A1Sherman
Joined: May 02, 2013
KitMaker: 4,403 posts
Armorama: 4,078 posts
Posted: Wednesday, June 08, 2016 - 04:34 PM UTC
Quoted Text
I got the m5 recently and finished it today what do you guys think? I'm quite new to modelling and have only made 5-7 models and this was my first with weathering
WELCOME! Very nice effort on your part. If you stick with it, you'll find that there are a great many more diversified subjects that you may want to try your hand at.
Once you gain a little bit more experience, you might want to try the 1/35 AFV CLUB M5A1 kits- These are two different and more advanced kits, and they are much more accurate than the old 1980s-vintage TAMIYA kit. The AFV CLUB M5A1s come in an "Early" version and a "Late" version, and they are reasonably-priced for the amount of accuracy, detail, and number of parts that are included.
Anyway, I want to wish you luck, and hours of enjoyment!

easyco69
Joined: November 03, 2012
KitMaker: 2,275 posts
Armorama: 2,233 posts
Posted: Wednesday, June 08, 2016 - 05:04 PM UTC
Quoted Text
haha! thanks for the info ill make sure to check it out and i've already fixed the mortar round i just have a problem with over looking things.
The mortar round is still backwards lol
LiquidShovel
Joined: June 08, 2016
KitMaker: 13 posts
Armorama: 13 posts
Posted: Thursday, June 09, 2016 - 05:50 PM UTC
seeing as when i was looking around google for information on this model and i couldn't find much i thought i would say a few things
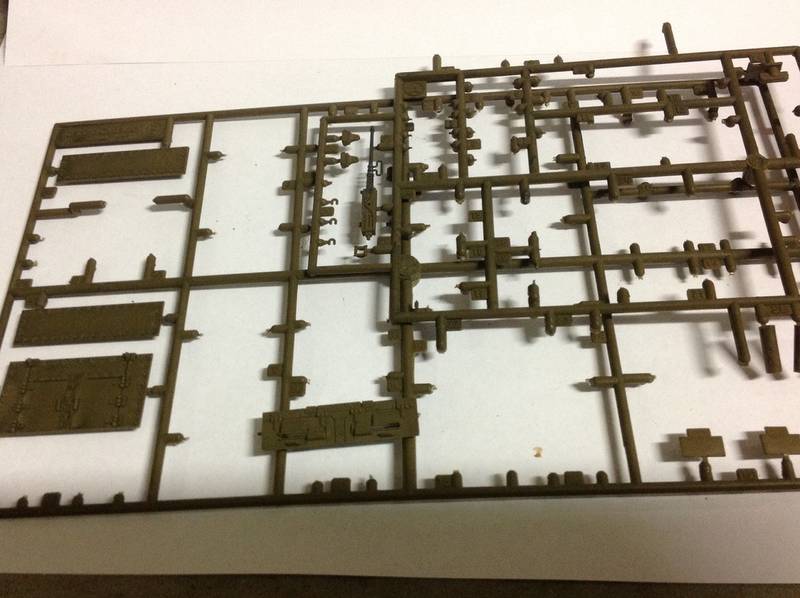
the set comes with a 50. cal machine gun but i decided to use the much smaller 30. cal, the set also comes with the m3 stuart viewing ports and 2 other riveted panels which are also from the m3. There are a few other pieces which i am sorry to say i have no clue what they are for. the set assembles well but my front armour piece wouldn't stick down properly. my horrible painting skills botched the small amount of not olive drab tank so i covered it up with excessive weathering.
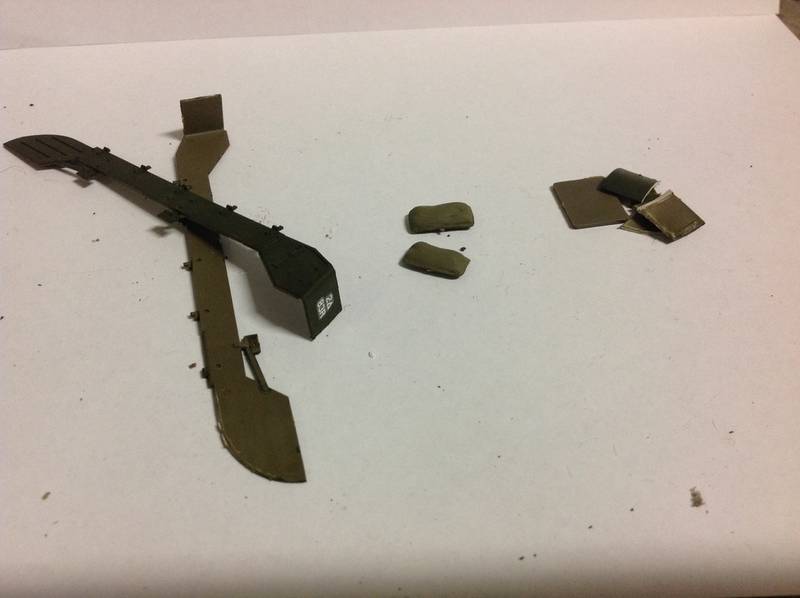
i also modified the tank by cutting off the extended fenders and some panels at the back instead of using the side skirts. the set also comes with 2 sand bags which i'm probably going to lose.
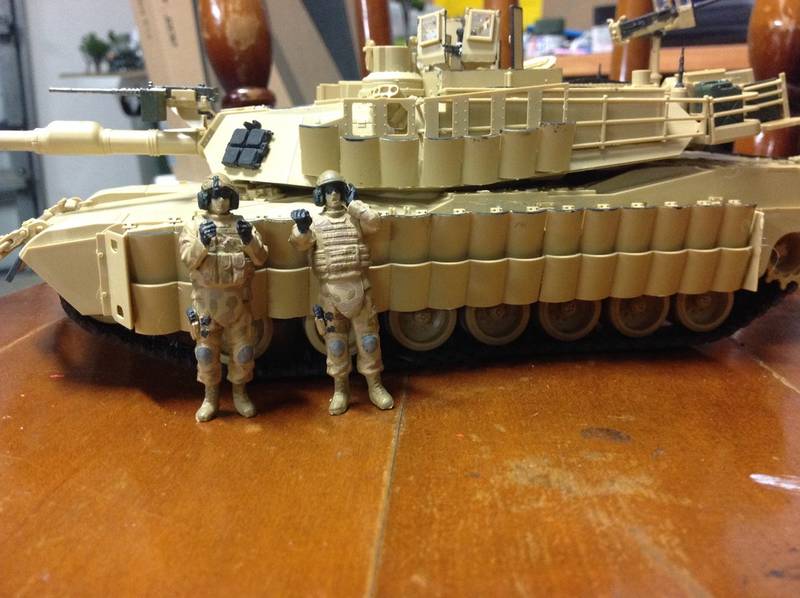
one thing i ask of you guys is give me tips on how to paint figures as mine are horrible. i think the 2 modern us tankers i made that came with my Abrams are much better.
thanks for any feed back and im going to be going through the steps of a small diorama that i'm making for the tank tomorrow.
the set comes with a 50. cal machine gun but i decided to use the much smaller 30. cal, the set also comes with the m3 stuart viewing ports and 2 other riveted panels which are also from the m3. There are a few other pieces which i am sorry to say i have no clue what they are for. the set assembles well but my front armour piece wouldn't stick down properly. my horrible painting skills botched the small amount of not olive drab tank so i covered it up with excessive weathering.
i also modified the tank by cutting off the extended fenders and some panels at the back instead of using the side skirts. the set also comes with 2 sand bags which i'm probably going to lose.
one thing i ask of you guys is give me tips on how to paint figures as mine are horrible. i think the 2 modern us tankers i made that came with my Abrams are much better.
thanks for any feed back and im going to be going through the steps of a small diorama that i'm making for the tank tomorrow.
M4A1Sherman
Joined: May 02, 2013
KitMaker: 4,403 posts
Armorama: 4,078 posts
Posted: Saturday, June 11, 2016 - 03:33 PM UTC
Quoted Text
seeing as when i was looking around google for information on this model and i couldn't find much i thought i would say a few things
the set comes with a 50. cal machine gun but i decided to use the much smaller 30. cal, the set also comes with the m3 stuart viewing ports and 2 other riveted panels which are also from the m3. There are a few other pieces which i am sorry to say i have no clue what they are for. the set assembles well but my front armour piece wouldn't stick down properly. my horrible painting skills botched the small amount of not olive drab tank so i covered it up with excessive weathering.
i also modified the tank by cutting off the extended fenders and some panels at the back instead of using the side skirts. the set also comes with 2 sand bags which i'm probably going to lose.
one thing i ask of you guys is give me tips on how to paint figures as mine are horrible. i think the 2 modern us tankers i made that came with my Abrams are much better.
thanks for any feed back and im going to be going through the steps of a small diorama that i'm making for the tank tomorrow.
Hi! Seeing that you are also interested in creating Figures and improving your skills, there are a veritable multitude of reference and "improvement" books that you can buy. Checking online articles and "how to" videos can also be an invaluable aid to you in your modelling eforts- Try "youtube"; you'd be surprised at all the modelling that is going on out there...

LiquidShovel
Joined: June 08, 2016
KitMaker: 13 posts
Armorama: 13 posts
Posted: Wednesday, September 14, 2016 - 03:01 PM UTC
i broke my promise, i said i would post this tomorrow but i guess i meant several months any onto business.
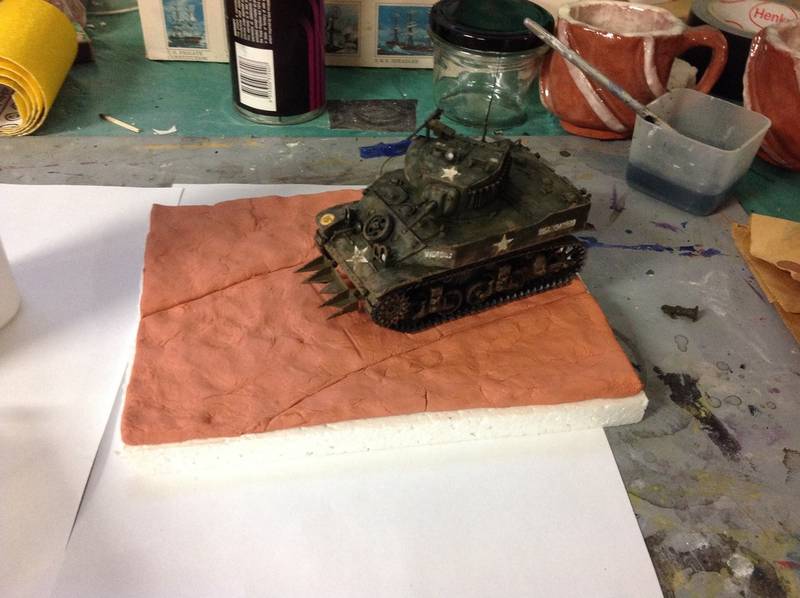
i'm making a small diorama for my m5 stuart.
i started by buying some air drying clay, moulding it to preference and letting it set
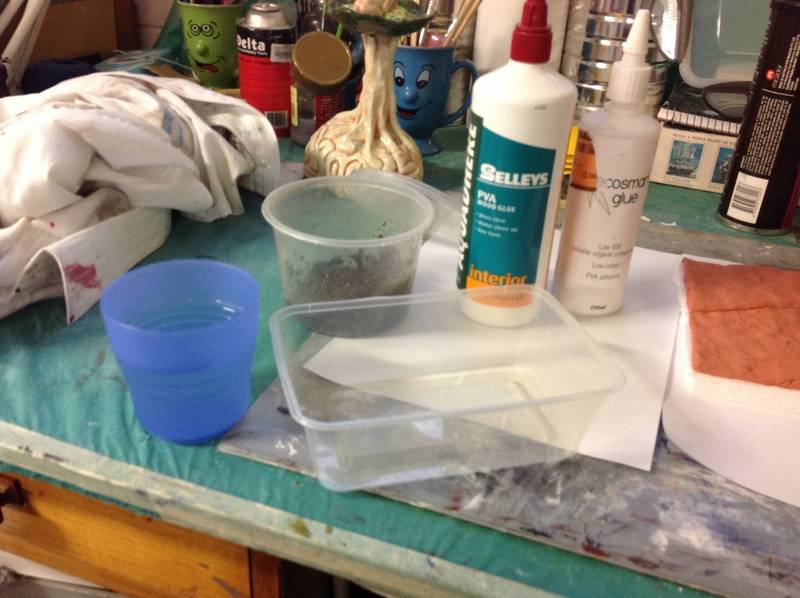
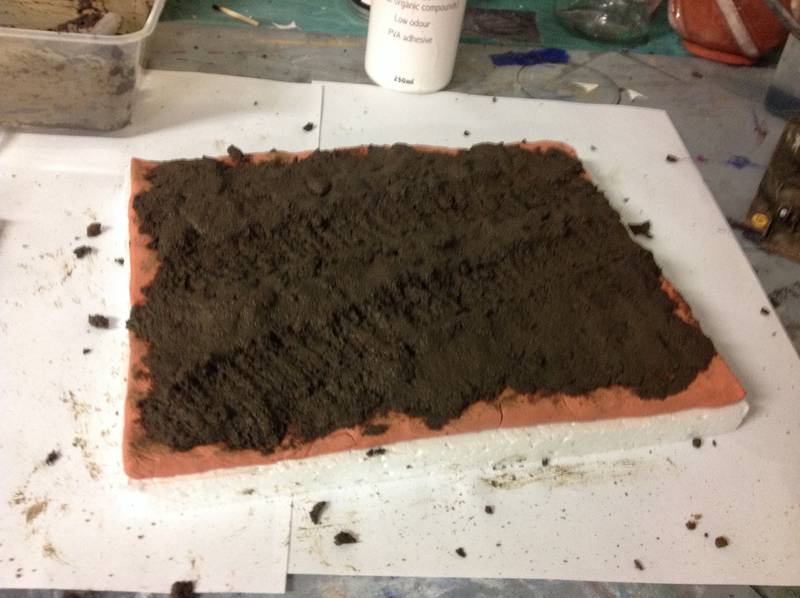
once that is dry i then used a mixture of water, white glue and common dirt the amount of each varies but i think i should have used more water. i then used a spoon to make tracks in the wet soil mix.
i then added some rocks, because why not?
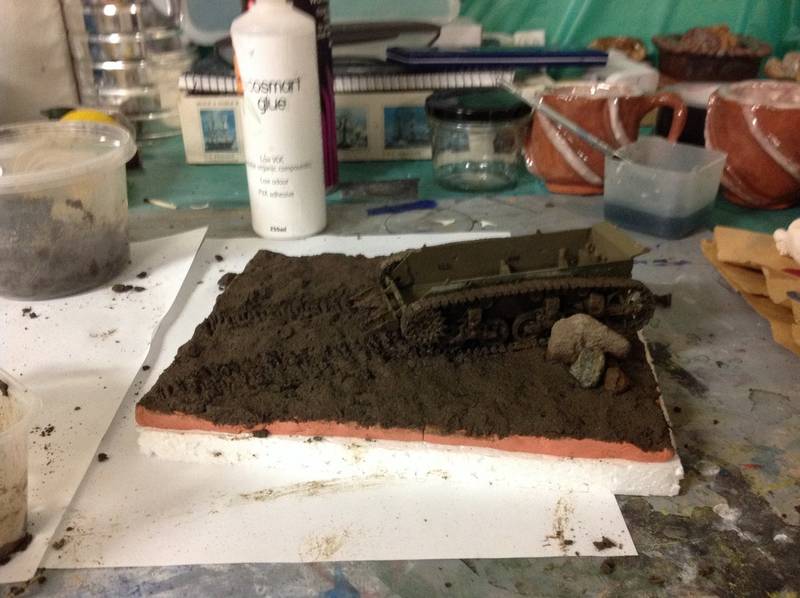
i will try to continue this tomorrow.
i'm making a small diorama for my m5 stuart.
i started by buying some air drying clay, moulding it to preference and letting it set
once that is dry i then used a mixture of water, white glue and common dirt the amount of each varies but i think i should have used more water. i then used a spoon to make tracks in the wet soil mix.
i then added some rocks, because why not?
i will try to continue this tomorrow.
 |

WEB HOSTING BY


Copyright ©2021 Armorama and Kitmaker Network, a subsidiary of Silver Star Enterprises
All Rights Reserved. Please read our Conditions of Use and Privacy Policy.
All Rights Reserved. Please read our Conditions of Use and Privacy Policy.