

Hi Guys,
Been lurking the forums too long not to contribute something back!
I've been on and off model making since I was a kid and I've finally got the bug back to pick up a pair of snips and paintbrush again.
Since its been roughly 5 years since I touched a kit I've taken an old Tamiya 88mm kit found assembled in the loft and decided to make a diorama scene to practice techniques and get back into the groove of things. The model was built when I was around 12 years old, so frustratingly its inaccurate and not a build I'd be proud of however id rather practice on this than a new model and make a mess of it!
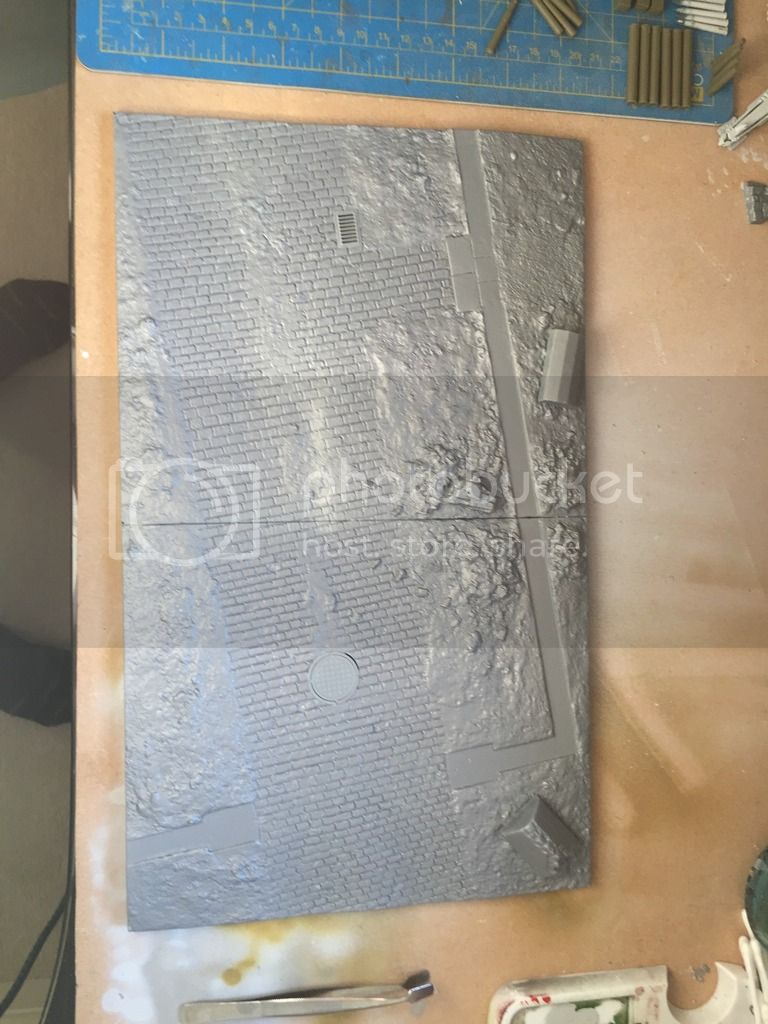
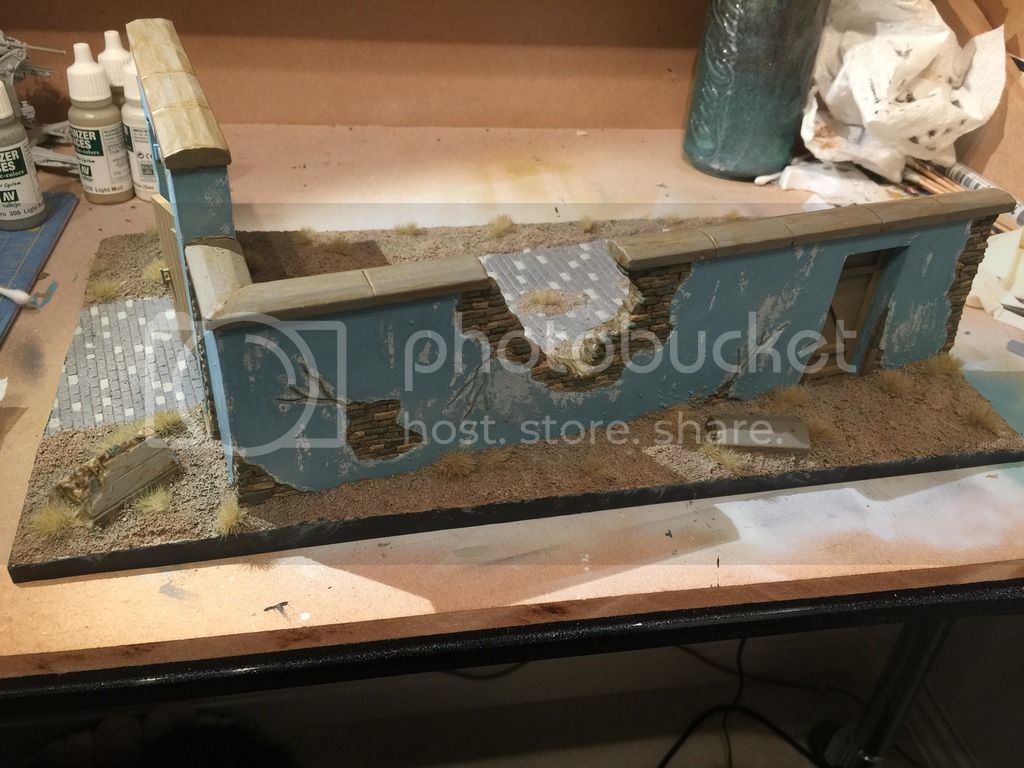
Here are a few pictures of the base I'm working on. Its a Mini Art # 36033 farm wall diorama, which I have to admit was an interesting if not slightly frustrating build.
The groundwork is nearly finished, apart from pigments and details such as the drains.
I still need to add grime and weathering to the flaked plaster walls and the wooden doors. I am going to be re-painting the wall coping stones as I'm not happy with them.
Cheers
Dan
Constructive Feedback
For in-progress or completed build photos. Give and get contructive feedback!
For in-progress or completed build photos. Give and get contructive feedback!
Hosted by Darren Baker, Dave O'Meara
WIP German 88mm Diorama

Dan393

Joined: July 07, 2016
KitMaker: 7 posts
Armorama: 7 posts
Posted: Wednesday, July 06, 2016 - 02:18 PM UTC
Bonaparte84

Joined: July 17, 2013
KitMaker: 338 posts
Armorama: 331 posts
Posted: Wednesday, July 06, 2016 - 02:26 PM UTC
Hey Dan,
good choice you made to pick up the hobby again!
It seems you forgot to add a link to the pictures, though.
Cheers
good choice you made to pick up the hobby again!
It seems you forgot to add a link to the pictures, though.
Cheers
Dan393
Joined: July 07, 2016
KitMaker: 7 posts
Armorama: 7 posts
Posted: Wednesday, July 06, 2016 - 02:28 PM UTC
Currently fighting minor technical issues.... 
Pics will be up shortly!
Pics will be up shortly!
Dan393
Joined: July 07, 2016
KitMaker: 7 posts
Armorama: 7 posts
Posted: Wednesday, July 06, 2016 - 03:20 PM UTC
Pics added after technical issues!
Assembly stages:
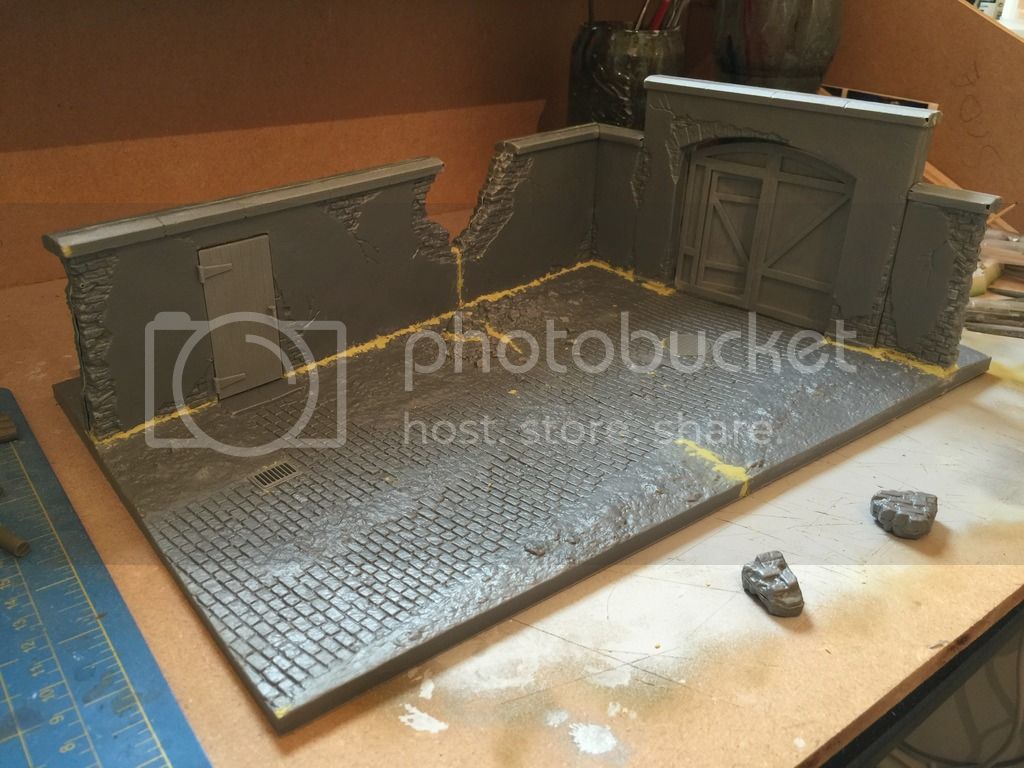

Primed, shaded, base colour for brickwork added, plaster and chipped paint added:

Groundwork painting started, tufts of grass added, washes and colour variations added to the brickwork

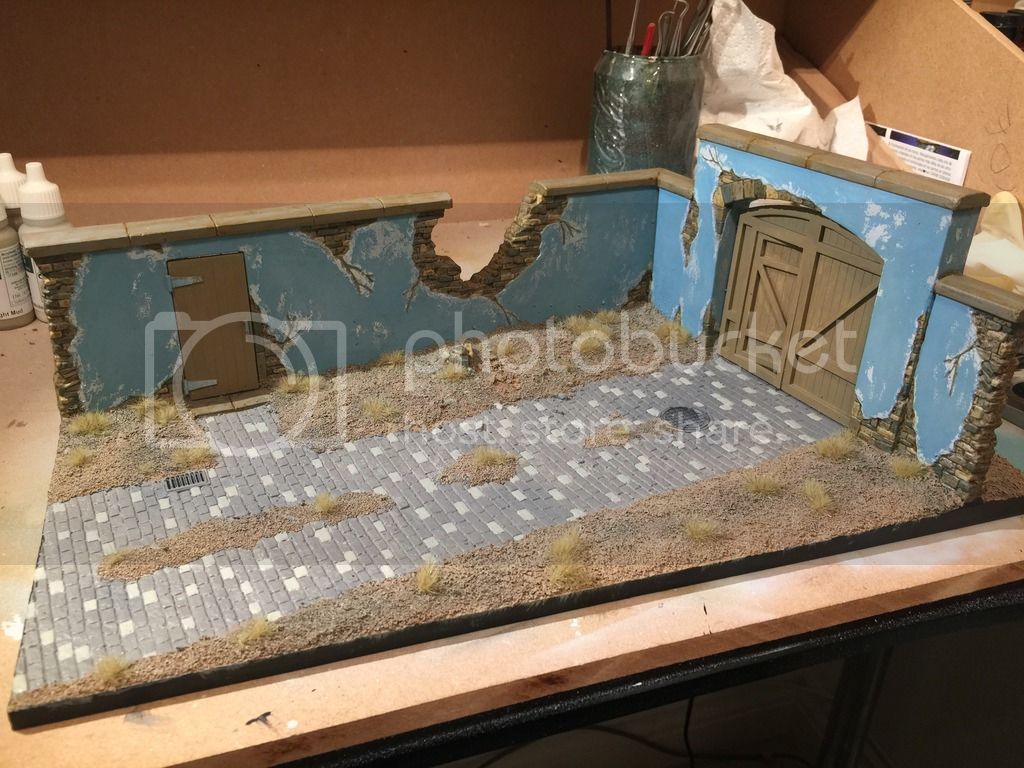
Colour variations on cobbles added, washes and drybrushing started on groundwork, some of the details have had base colours added:

Assembly stages:


Primed, shaded, base colour for brickwork added, plaster and chipped paint added:


Groundwork painting started, tufts of grass added, washes and colour variations added to the brickwork


Colour variations on cobbles added, washes and drybrushing started on groundwork, some of the details have had base colours added:


Thirian24

Joined: September 30, 2015
KitMaker: 2,493 posts
Armorama: 2,344 posts
Posted: Wednesday, July 06, 2016 - 06:46 PM UTC
Wow that turned out really nice!

KuKLiNsKi

Joined: April 18, 2010
KitMaker: 106 posts
Armorama: 103 posts
Posted: Monday, July 11, 2016 - 01:08 AM UTC
dear lord are those individual bricks on tape waiting to be flipped and painted from another side? 
Dan393
Joined: July 07, 2016
KitMaker: 7 posts
Armorama: 7 posts
Posted: Wednesday, July 13, 2016 - 12:00 PM UTC
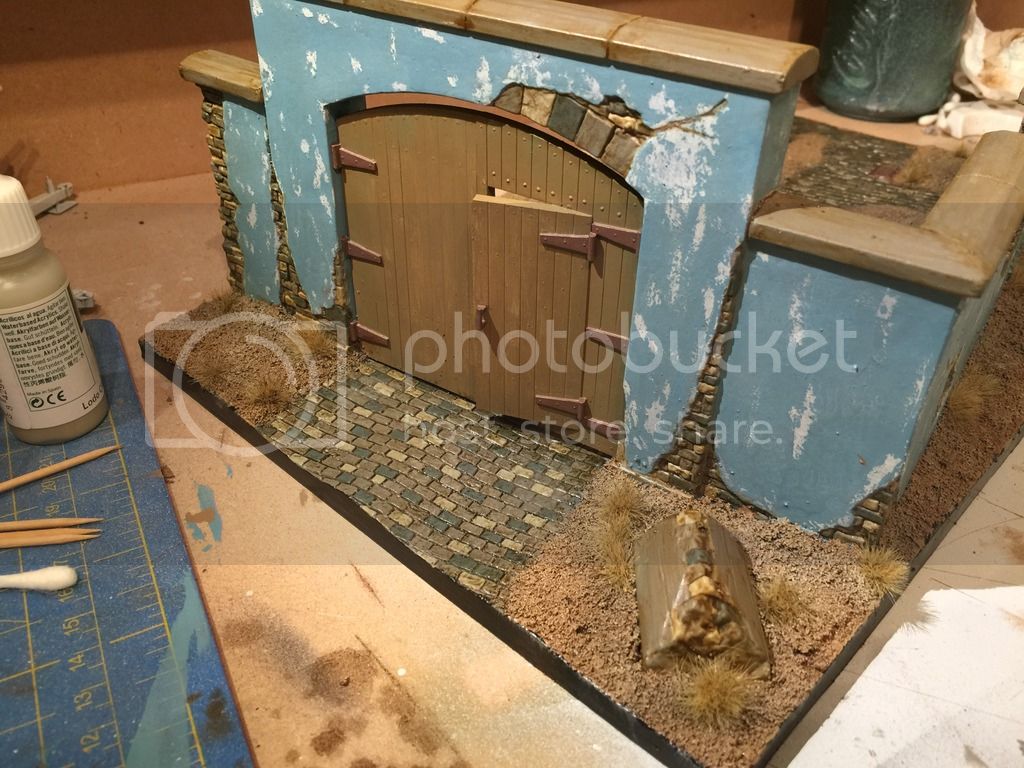
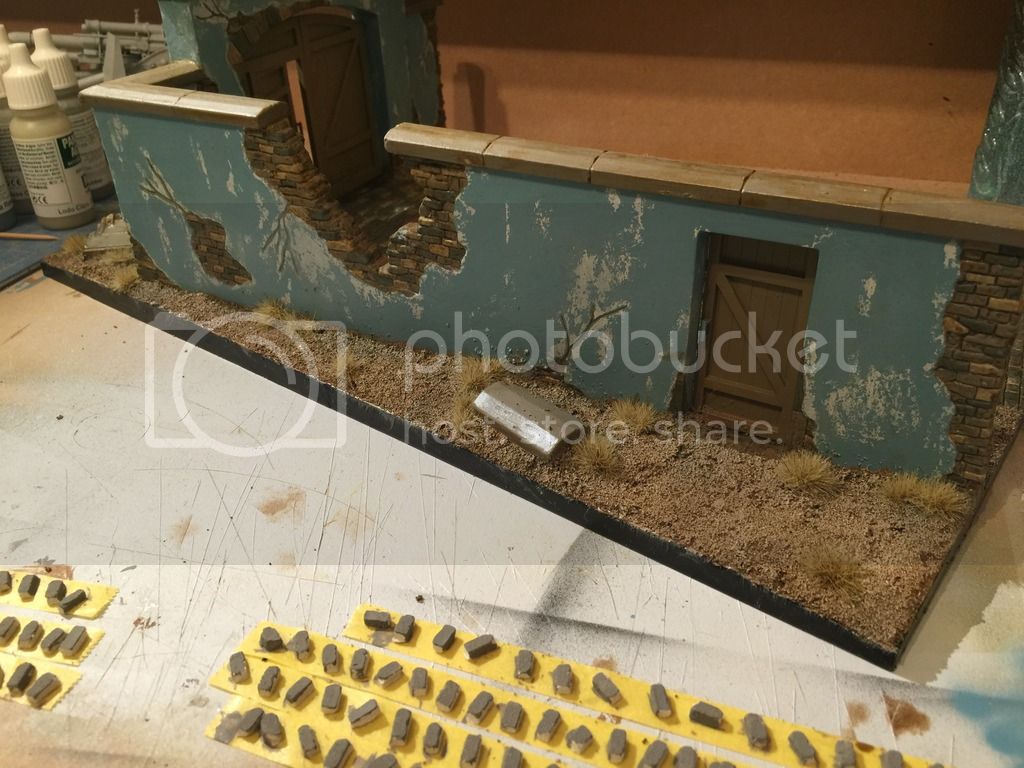
Indeed they are, those bricks are being pre-painted before I use them to create a rubble pile beneath the gap in the wall.
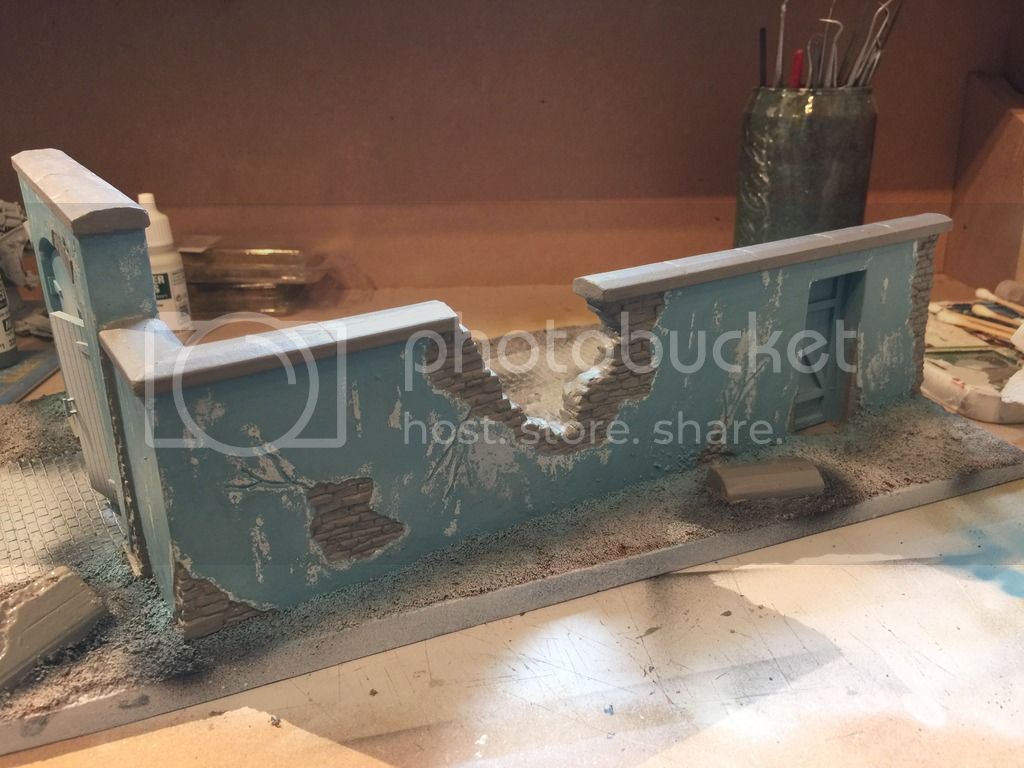
Here's some progress on making the scene a little more worn and weathered. Its the first time Ive been experimenting with enamels to weather so I think Ive gone a bit overboard but I enjoy working with them. A few of the streaks arent quite vertical which bugs me but want to at least move onto the next stage otherwise Ill never get finished!


Here's some progress on making the scene a little more worn and weathered. Its the first time Ive been experimenting with enamels to weather so I think Ive gone a bit overboard but I enjoy working with them. A few of the streaks arent quite vertical which bugs me but want to at least move onto the next stage otherwise Ill never get finished!


GazzaS

#424

Joined: April 23, 2015
KitMaker: 4,648 posts
Armorama: 2,248 posts

Posted: Wednesday, July 13, 2016 - 02:43 PM UTC
That is some sweet looking diorama base!
Gaz
Gaz
Dan393
Joined: July 07, 2016
KitMaker: 7 posts
Armorama: 7 posts
Posted: Wednesday, July 13, 2016 - 03:21 PM UTC
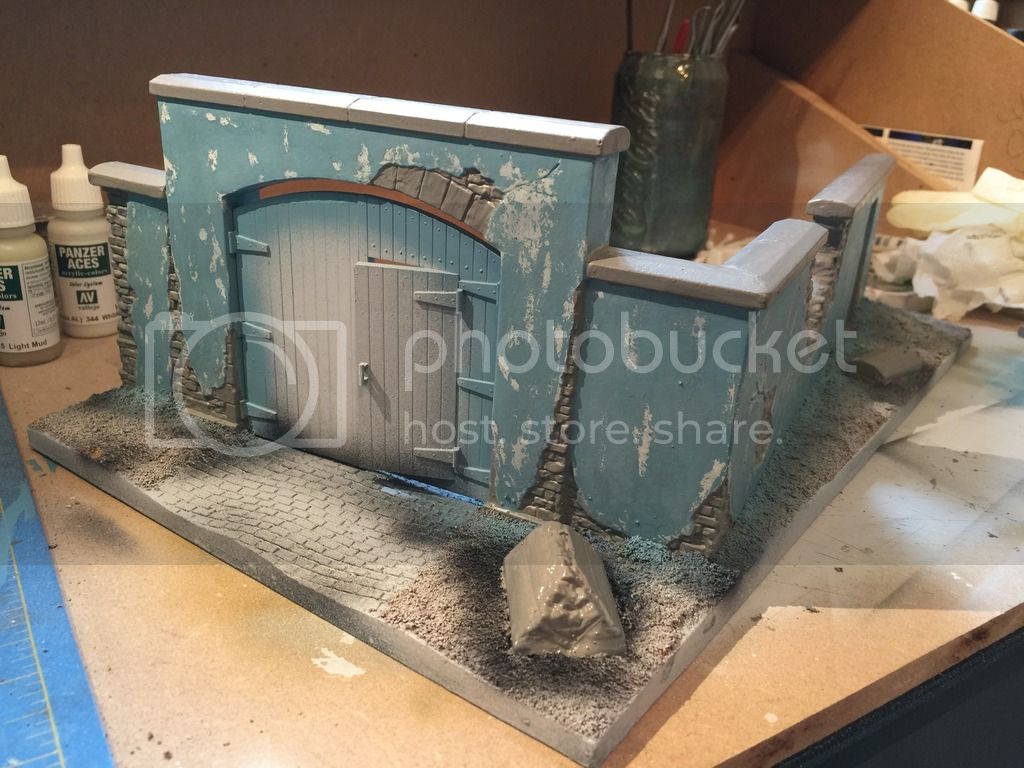
Thanks Gaz,
I've still got a bit of work to do on it
- create the rubble pile beside the wall and weather it
- paint and weather the wooden doors
- finish painting and rusting the drains
- drybrush the cobbles
- put pigments and dust around the whole thing to blend it together
Then I can finally work on the 88! I have the 88, the transport bogeys, fuel drum, jerry cans, plenty of ammo boxes and ammo plus spent ammo casings to try make it look a bit more of a scene.
In my mind im going for an Italy '44 setting, hence the dry scrub grass and sandy appearance. Havent decided if I go for full Desert colour scheme on the 88 or go a mix of sand/green, I haven't done enough research to know if there are any known colour schemes identified in Italy service.

easyco69

Joined: November 03, 2012
KitMaker: 2,275 posts
Armorama: 2,233 posts
Posted: Wednesday, July 13, 2016 - 04:23 PM UTC
nice job on the Miniart dio.
KuKLiNsKi
Joined: April 18, 2010
KitMaker: 106 posts
Armorama: 103 posts
Posted: Wednesday, July 13, 2016 - 10:50 PM UTC
damn that looks realistic, it makes me wanna hire some workers to redo those walls 

erichvon

Joined: January 17, 2006
KitMaker: 1,694 posts
Armorama: 1,584 posts

Posted: Thursday, July 14, 2016 - 12:18 AM UTC
Dan, that looks fantastic. Love how you've done it. I've got quite a few Miniart kits to build as I've picked them up when they've been at a good price. Even though I hate building them as they're a real ballache,they're quite nice kits when they're finished. I'd seen this one a few times and never bothered picking it up as it looked a bit boring with just two walls, but seeing what you've done with it I'm going to pick one up next time I see one cheap. You've taken a rather mundane kit and made it look really interesting. Rather than just being the background for the main model this stands out on it's own! It's that good it will probably distract from the main subject lol. Top work mate.
erichvon
Joined: January 17, 2006
KitMaker: 1,694 posts
Armorama: 1,584 posts
Posted: Thursday, July 14, 2016 - 12:25 AM UTC
Dan, what did you use for the sand or is it actually sand? I was told once that sawdust's a good substitute so just wondered. Re the colour scheme for the 88. If you're going for Italy it'll be a dunkel gelb spray job all over from 1943 so you can leave it one colour or go for a dunkel grun overspray pattern. I have to admit I do like the green over sand colour as a paint job. From photos I've seen it seems that was more common in Italy rather than the three colour camouflage
Dan393
Joined: July 07, 2016
KitMaker: 7 posts
Armorama: 7 posts
Posted: Thursday, July 14, 2016 - 03:03 AM UTC
Thanks mate  went with this mini art base mainly because it gives quite a lot of area to work with, its surprising how much room the 88 takes up with the transport bogeys and ammo without makign the scene look incredibly crowded and crammed in. I have to admit i hated building it but im happy with how its turning out. the drains are actually spares from mini arts 'park wall' kit (have that in mind for a Marder III M kit i have stashed). The bricks are pegasus resin and quite good, i want to use them to make the damage to the wall more natural rather than looking like its been neatly tidied away.
The ground work is actually sifted builders sand as i had it to hand. For future im going to use actual dirt sifted and dried for a bit of a finer finish.
Im leaning towards dunkel gelb with green camo as it will look a bit more interesting and give me chance to experiment with my airbrush more than doing a solid paint job.
went with this mini art base mainly because it gives quite a lot of area to work with, its surprising how much room the 88 takes up with the transport bogeys and ammo without makign the scene look incredibly crowded and crammed in. I have to admit i hated building it but im happy with how its turning out. the drains are actually spares from mini arts 'park wall' kit (have that in mind for a Marder III M kit i have stashed). The bricks are pegasus resin and quite good, i want to use them to make the damage to the wall more natural rather than looking like its been neatly tidied away.The ground work is actually sifted builders sand as i had it to hand. For future im going to use actual dirt sifted and dried for a bit of a finer finish.
Im leaning towards dunkel gelb with green camo as it will look a bit more interesting and give me chance to experiment with my airbrush more than doing a solid paint job.
Dan393
Joined: July 07, 2016
KitMaker: 7 posts
Armorama: 7 posts
Posted: Saturday, July 16, 2016 - 02:03 AM UTC
Been working on the rubble surrounding the wall, only thing to do now is pigments across the whole of the groundwork once I've finished the detailing the rest of the base (wood doors and minor rusting on the drains).
Also included the models I intend to have in the scene, it's surprising how easily the space gets filled!!!


The 88 was built when I was a teen, when I didn't put historical accuracy high up on my priorities (so I know there are... many, errors) however it's cleaned up sufficient enough to practice on and make a reasonable model
As always, any feedback welcome, even if it's negative lol! I'd rather learn from my mistakes haha.
Dan
brekinapez
Joined: July 26, 2013
KitMaker: 2,272 posts
Armorama: 1,860 posts
Posted: Saturday, July 16, 2016 - 03:53 AM UTC
Looking really good so far.
spartan01
Joined: December 25, 2011
KitMaker: 314 posts
Armorama: 244 posts
Posted: Saturday, July 16, 2016 - 05:19 AM UTC
looks great I would aim the gun out through the wall damage personally

HEINE-07
Joined: February 28, 2007
KitMaker: 392 posts
Armorama: 198 posts

Posted: Saturday, October 22, 2016 - 10:53 AM UTC
Impeccable stone work. Magnificent!
Modelrob
Joined: October 20, 2015
KitMaker: 304 posts
Armorama: 293 posts
Posted: Saturday, October 22, 2016 - 03:37 PM UTC
The base is coming out great, I really like what you have done with the walls.
Robert
Robert

varanusk


Joined: July 04, 2013
KitMaker: 1,288 posts
Armorama: 942 posts
Posted: Saturday, October 22, 2016 - 04:13 PM UTC
Great work on the base Dan, it looks excellent!

simonn
Joined: October 15, 2016
KitMaker: 62 posts
Armorama: 18 posts
Posted: Friday, October 28, 2016 - 05:39 AM UTC
Dan
Great choice to put the 88 together with that base. Lots of potential there to develop it into a first class diorama
Simon
Great choice to put the 88 together with that base. Lots of potential there to develop it into a first class diorama
Simon
ryally
Joined: July 29, 2005
KitMaker: 879 posts
Armorama: 330 posts
Posted: Thursday, November 10, 2016 - 05:35 PM UTC
I like this one, coming along nicely
erichvon
Joined: January 17, 2006
KitMaker: 1,694 posts
Armorama: 1,584 posts
Posted: Thursday, November 10, 2016 - 07:42 PM UTC
Dan, this is coming on nicely. My only suggestion would be to have the 88 using the hole in the wall in an armour ambush situation as it would be hidden by the wall and the first time anyone knew it was there would be when a tank was hit. It just seems a bit odd pointing at something inside the farmyard/compound. You'd still get a bit of traverse on it even with the wall there. Just an idea. I like the way this is coming together. Have you decided what figures you're using for it?
 |

WEB HOSTING BY


Copyright ©2021 Armorama and Kitmaker Network, a subsidiary of Silver Star Enterprises
All Rights Reserved. Please read our Conditions of Use and Privacy Policy.
All Rights Reserved. Please read our Conditions of Use and Privacy Policy.